Creating a Streaming Internet Radio
In This Chapter

- Handy music apps to use with your Raspberry Pi
- Streaming Pandora, Google Music, and more
- Making a remote control
- Selecting and setting up a USB sound card
It seems like just about all of our electronic devices can play music these days, but it can be annoying to have to leave your phone plugged in to your stereo or a speaker just to play music around the house. With a Raspberry Pi, you can build an entire music streaming system that connects right to your stereo so you can use it as part of your home audio setup without dealing with any extra cables and wires, or lack of portability with your phone.
When you have your Raspberry Pi streaming radio set up, you can control your device from your smartphone or computer—no wires required. You’ll do this using two pieces of software: Pianobar, a command line music player that uses Pandora, and Pi MusicBox, a bit of software that enables you to stream from services like Spotify, SoundCloud, and Google Music. You’ll even be able to stream music from your phone to your Raspberry Pi if you want.
Once you get your software up and running, you’ll also be able to connect a USB sound card for improved audio. The Raspberry Pi’s audio output isn’t that great, so adding in a sound card can really improve the quality. And when everything is working, nobody will be able to tell you’re running such high-quality sound out of an inexpensive little computer you built yourself.
In this chapter, you learn the setup process for both music players, connect everything to your home audio setup, and start playing music right away.
What Can a Pi-Powered Internet Radio Do?
Your Raspberry Pi–powered internet radio system can stream audio from many different online audio sources. You’ll also be able to stream music from your other devices to your Raspberry Pi. You can control it from your computer, smartphone, or tablet.
The best part is that this is actually one of the easier-to-use Raspberry Pi projects. Just about anyone will be able to use it, regardless of their technical skill (except for navigating Pandora, which requires the command line).
Internet Radio in Home Theater Setups
The big appeal here is the ease with which you can connect your home theater to internet streaming services. Typically, you’d need to buy expensive accessories or plug your device directly into your stereo to do this. With the Raspberry Pi, however, you can control everything wirelessly, so you don’t need to worry about buying a bunch of cables.
All you need to connect your Raspberry Pi to your home stereo is a single cable and a good set of speakers. From there, you’ll be playing music wirelessly right away.
Support for Pandora, Spotify, Google Music, and Others
In this chapter, you’re going to build a Raspberry Pi internet radio that supports many different services and features. Here’s a breakdown of what you get:
- Spotify support
- Google Music support
- SoundCloud support
- Pandora support
- Subsonic support
- AirTunes/AirPlay support for playing music from your phone or tablet
- Last.fm scrobbling
- Podcast player
- MP3/OGG/FLAC/AAC player

PI POINTER
If you haven’t already, now’s a good time to sign up for any or all of the preceding services. Most are free and only require an email address to sign up.
For this project, you’ll need to have accounts set up for Pandora, Spotify, Google Music, SoundCloud, and Last.fm. With Spotify, you’ll need a premium account ($9.99/month) before it will work on your Raspberry Pi, but free accounts on all the other services are just fine. Just be sure you have your usernames and passwords ready because, you’ll need those during the setup process.
Installing Pi MusicBox
To build your Raspberry Pi music streaming device, you need two bits of software—
Pi MusicBox and Pianobar. First, you’ll set up Pi MusicBox.
Pi MusicBox is a Raspberry Pi operating system based on Raspbian. Like Raspbian, it works right out of the box so you shouldn’t need to do much setup for your Wi-Fi adapter, USB sound card, or anything else. You’ll just burn the image and start using it.
Pi MusicBox turns your Raspberry Pi into a server you can access from your phone, computer, or tablet. In fact, you don’t even need to plug Pi MusicBox into a monitor or TV at any point. All you need to do is connect it to a set of speakers and start playing music.
Preparing Your SD Card for a Pi MusicBox Image
You’ll install Pi MusicBox on your SD card, the same way you installed Raspbian and Raspbmc. Here’s how:
Downloading Pi MusicBox from this link.
- Download the Pi MusicBox image from woutervanwijk.nl/pimusicbox/index.html.
- Burn the image onto an SD card using the same method you used to burn Raspbian in Chapter 8. Just substitute the Pi MusicBox image in for the Raspbian one.
Now you have the image on your SD card, but you’re not quite done yet. Keep the SD card in your computer because you’re going to edit some settings.

Changing Your Pi MusicBox Settings
Pi MusicBox works a bit differently from Raspbian in how you change the settings. Instead of working with the command line to get everything set up, you use a text editor on your computer to add some login information so you can use Pi MusicBox easily. This actually makes things a lot easier to get set up.
Here’s what to do:
- When Pi MusicBox is on your SD card, double-click your card (it’s now called Pi MusicBox) to open it in Explorer on your Windows PC or in Finder on your Mac.
- Double-click the Config folder.
- Find the settings.ini file, and double-click it to open it in your text editor. This is the settings file for Pi MusicBox, and you’ll edit this text file to connect to your Wi-Fi network, enter passwords, and more.
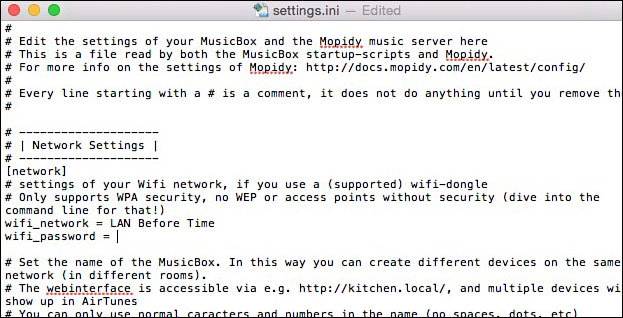
You can configure Pi MusicBox’s settings in the settings.ini file.
- The line that reads
[network]is where you add your Wi-Fi network name and password. After wifi_network =, type in your network name, surrounded by apostrophes, and after wifi_password =, type in your network password, also surrounded by apostrophes. For example, wifi_network = ‘My Network’ and wifi_password = ‘Password’. You’ll need to use the apostrophes any time you enter a password. Also, this section is case sensitive, so be sure your network name and password are correct. - Find the line that reads
name =, and type whatever name you want your Pi MusicBox to be called. - Find the line that reads
enable_ssh = false. You want SSH on so you can install Pianobar later, so change this to read# enable_ssh = true. - Now enter in your username and password for any of the services you want to use. Find the Spotify, Last.fm, SoundCloud, Google Music, Dirble, Subsonic, TuneIn Radio, Internet Archive, and SomaFM sections, and add your username and password for the appropriate services. For example, in the Spotify section, put your username after
username =and your password afterpassword =. Be sure you put your responses between apostrophes like you did in step 4. And change theenabled = falsesection under each service toenabled = true. - Podcasts are set up a bit differently. You need to manually enter any podcast feeds you want to subscribe to. You can find these feeds on a podcast’s website under the RSS or Subscribe section. They usually look something like this: http://www.npr.org/rss/podcast.php?id=510019. Just put each URL followed by a comma after the
feeds =line in the Podcast section. For example,http://www.npr.org/rss/podcast.php?id=510019, http://www.npr.org/rss/podcast.php?id=510253. You can enter as many podcast feeds as you want. - Find the line that reads
resize_once = false, and change it toresize_once = true. This resizes your SD card so the file system takes up the entire card. - When you’re finished, save the document and exit. Then eject your SD card.
With that, Pi MusicBox is all set up. Now it’s time to plug it in to your Raspberry Pi and begin listening to some tunes.

PI POINTER
Don’t worry if you don’t have all this stuff set up right now. Pi MusicBox has a Settings panel you can come back to and make changes. I show you how to find it a little later in this chapter.
Connecting to External Audio
The one thing that’s a little different with Pi MusicBox is that because it’s all about music, you need to connect it to a set of speakers. You can do this with a 3.5mm to RCA cable. Just plug the 3.5mm jack into your Raspberry Pi and the RCA cables into your stereo. If your stereo system is more high tech, you can use an HDMI cable as an audio output.
When you’re all set up for audio, plug your SD card into your Raspberry Pi and power it up.
Pi MusicBox doesn’t actually require you to plug your Raspberry Pi into a monitor or TV to work, but it’s helpful on the first boot just so you can see what’s happening.
The first time you start Pi MusicBox can take a little while. It needs to set itself up, connect to your network, and expand the file system. So grab a cup of coffee, settle in, and watch it do its thing, addressing any problems that might come up. (Such as if you entered the wrong password for your Wi-Fi network. If this happened, you’ll see that Pi MusicBox can’t connect.)
Eventually, you’ll see a login screen. You don’t need to log in here.

PI POINTER
You can run Pi MusicBox as a headless machine, which just means it’s not connected to a monitor. Everything you need to do in Pi MusicBox is controlled through the web interface or SSH, so once it’s set up, you can just plug in your Raspberry Pi and it’ll be ready to use.
Using Pi MusicBox
When Pi MusicBox finishes its installation process, you can start using it right away. From here on out, you won’t actually touch your Raspberry Pi. Rather, you’ll do everything from your computer or smartphone’s browser.
To log in to Pi MusicBox, you need to be on the same network as your Raspberry Pi. Then, point your computer or smartphone browser to musicbox.local. When you’re greeted by the Pi MusicBox window, you’re up and running.
The Pi MusicBox page is pretty self-explanatory, but let’s go through the left-side sidebar so you know what everything means:
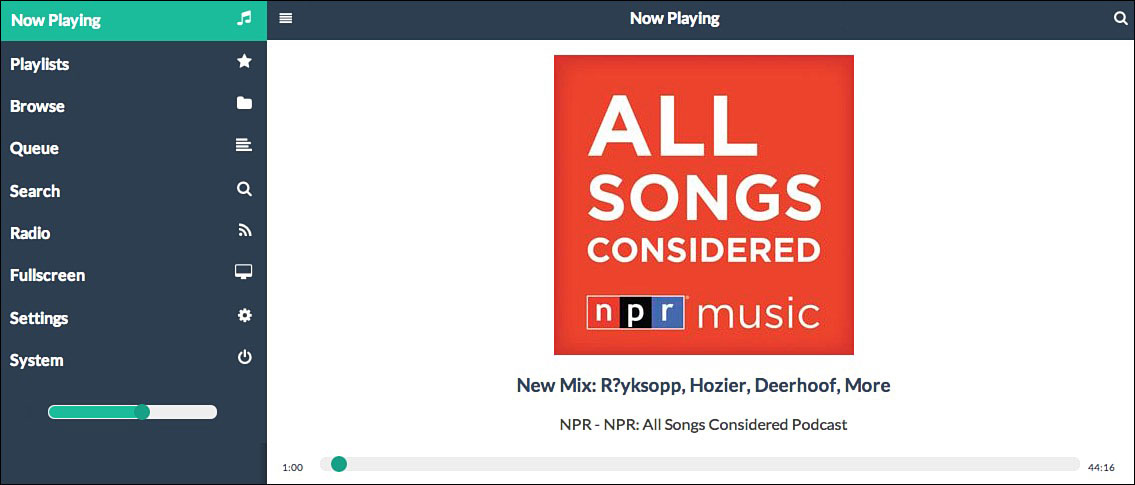
Setting up Pi MusicBox from the web interface is simple.
Now Playing: This takes you to the song or podcast that’s currently playing.
Playlists: This leads you to any playlists you’ve created on any of the services you signed in with.
Browse: Here you can look through your music library by the services you’ve set up. Just click the service name, and you’re taken to a page for that service, where you can get any songs you want.
Queue: This is your song queue. You can always play full albums, but if you want to queue up certain songs, click the three dots to the right of the track to get a menu where you can add it to your queue.
Search: You can search for any songs in your library here.
Radio: This is the radio function. You can load any radio stations you want by tracking down a URL of the station’s stream and adding it here.
Fullscreen: This loads Pi MusicBox in full-screen mode.
Settings: This is your Settings panel. You can add new services here, change login information, and more. You also can toggle services on and off, change network information, or configure anything else you didn’t do in the original settings.ini file. You also can add new URLs for podcasts here instead of editing the INI file. This makes things a lot easier when you want to extend your new Pi MusicBox a little.
System: You can shut down or reboot the system here.
Now it’s time to start playing music. Find the track you want to play, click it, and you should hear it playing from your home audio’s stereo.
Playing Music Remotely from Your Smartphone or Computer
In addition to being able to play music from a wide variety of online outlets, your Raspberry Pi can receive music from your smartphone or computer. This means you can select your Raspberry Pi as a speaker and play whatever music you have stored on your smartphone or computer as long as that device supports AirPlay.
This process varies depending on what music-playing software you’re using, but as long as your device and your Raspberry Pi are on the same Wi-Fi network, you’ll see an option for Pi MusicBox under the AirPlay icon. (The AirPlay icon is a square with a small triangle in the middle.) In iTunes, you’ll find AirPlay next to the volume bar. On iOS, you can access it by pulling up the Control Center and selecting Pi MusicBox from the AirPlay area.
Once you’re connected to your Raspberry Pi, all you need to do is select a song on your device and it’ll start playing on your Raspberry Pi. You can change tracks, pick new songs, and even control the volume, all from your device.
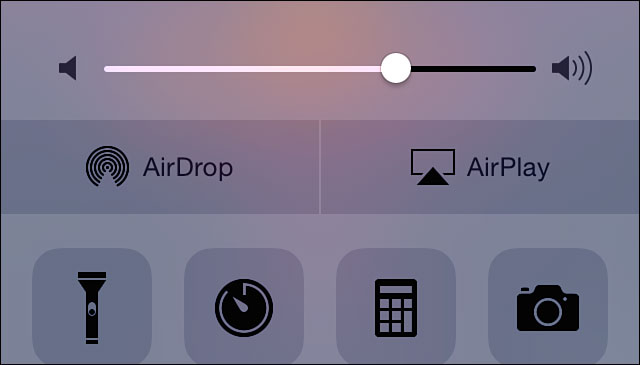
Access AirPlay on your iPhone via the Control Center.

SOFTWARE SOLUTION
You can install AirPlay separately on any Raspberry Pi operating system with software called Shairport (lightweightdream.com). The nice thing about Pi MusicBox is that it’s all set up from the start, so you don’t have to do anything special to get it to work.
Installing Pianobar for Pandora
Pi MusicBox doesn’t natively support the music-streaming service Pandora, but you can add it using software called Pianobar. Pianobar (6xq.net/projects/pianobar) is a command line–based music player. With it you don’t get the fancy web interface Pi MusicBox has, but it works just as well.
You actually don’t need Pi MusicBox to install Pianobar. If you only care about Pandora, you can install Pianobar on your Raspbian SD card if you want. In these instructions, however, I use Pi MusicBox.
The installation process can be tricky because Pianobar often has a bit of initial trouble on Raspbian for some reason. So you’re going to download it directly from the source, compile the program on your own, and establish your own configuration settings. Don’t be intimidated at the thought of this. I walk you through it, and you only need to run through this process once.
Downloading Pianobar to Your Pi
Because of Pianobar’s initial hang-ups on the Raspberry Pi, you need to manually install it, alongside a few other bits of software, to get it working correctly. This is a little time-consuming, but it doesn’t take that much actual effort.
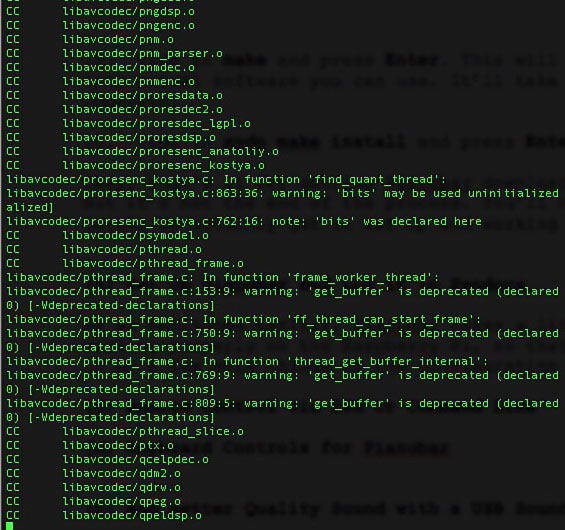
Installing Pianobar to your Raspberry Pi takes a bit of command line work.
Here’s what to do:
- From the Terminal, log in to Pi Musicbox. The username is
root, and the password ismusicbox(unless you changed these). - In Terminal, type in
sudo apt-get update, and press Enter. - Type in the following, and press Enter:
sudo apt-get install git libao-dev libgcrypt11-dev libgnutls-dev
libfaad-dev libmad0-dev libjson0-dev make pkg-config
Type
Ywhen prompted. - When that’s finished, type in the following and press Enter:
git clone https://github.com/FFmpeg/FFmpeg.gitThen wait for FFmpeg to download. (FFmpeg is streaming software for your Raspberry Pi.)
- Type in
apt-get install build-essential, and press Enter. Again, wait for all this stuff to download. - Type in
cd FFmpeg, and press Enter. - Type in
./configure, and press Enter. This builds a configuration file for FFmpeg. - Type in
make clean, and press Enter. - Type in
make, and press Enter. This builds the FFmpeg file. It might take an upward of a couple hours to complete this, so feel free to walk away from your Raspberry Pi for a while. - When that’s finished, type in
sudo make install, and press Enter. - Follow that with
cd ..to go back to the original root directory. - Now to download the newest version of Pianobar from GitHub, type in
git clone https://github.com/PromyLOPh/pianobar.git, and press Enter. - When that’s finished, type in
cd pianobar, and press Enter. - Type in
make clean, and press Enter. - Type in
make, and press Enter. This compiles Pianobar into actual software you can use. It’ll take a little while to complete. - Finally, type in
sudo make install, and press Enter.
That’s it for getting Pianobar downloaded and installed, but it’s not quite the end of the process. You still need to make a few adjustments to get Pianobar set up and working properly.

PI POINTER
Pianobar isn’t required, but it’s certainly nice to have if you’re a fan of Pandora. The installation process takes a chunk of time, so be sure you set aside a whole afternoon for it. It’s not complicated at all, just time-consuming.
Setting Up Pianobar and Logging in to Pandora
As mentioned earlier, Pianobar takes a little effort to get working properly on the Raspberry Pi, and you need to make a few more adjustments in the configuration settings.
From the command line, here’s what to do:
- Type in
pianobar, and press Enter. - Enter your Pandora username and password. If you don’t have an account, point your computer’s browser to pandora.com and create one.
- Select the radio station you want to play from the list, and press Enter.
Pandora should start playing from your Raspberry Pi.
Remote Control via SSH or the Command Line
To control Pianobar remotely, you need to SSH into it from your computer. Remember setting up SSH on your home computer in Chapter 13? It works pretty much the same here, but changing Pi MusicBox’s SSH setting is a little different:
- When you’re on the same network as your Raspberry Pi, point your computer’s browser to musicbox.local.
- Select the Settings option.
- Scroll down to Network, and click it.
- Toggle the Enable SSH box to On.
- Click Update Settings.
This reboots your Raspberry Pi with SSH turned on. When it restarts, you’ll be able to log in to your Raspberry Pi from a local computer. Now to set up SSH on your computer.
 Setting Up a Static IP Address and SSH
To effectively use SSH to log in to your Raspberry Pi, you need a static, or fixed, IP address so you can access your Raspberry Pi at the same address every time you turn it on. If you don’t set up a static address, you’ll have to hunt for its new IP address every single time.
Navigate to the Pi MusicBox command line on your Raspberry Pi, and be sure your Raspberry Pi is connected to the internet. Here’s what to do:
- Type
ifconfig, and press Enter. - Look for the section titled eth0 if you’re connected to Ethernet or wlan0 if you’re connected to Wi-Fi.
- Write down the numbers listed after inet addr (you’ll use this for the “address” section in step 8), Bcast (for the broadcast section in step 8), and Mask (for the netmask section in step 8).
- Type in
netstat -nr, and press Enter. - Write down the numbers listed under Gateway Address (for the gateway section in step 8) and Destination Address (for the network section in step 8).
- Type in
sudo nano /etc/network/interfaces, and press Enter. - Look for the line that reads iface eth0 inet dhcp, and edit it to
iface eth0inet static. - Right below that line, type in the following, substituting the numbers you wrote down in steps 3 and 5 for the x’s:
address xxx.xxx.x.xxnetmask xxx.xxx.xxx.xnetwork xxx.xxx.x.xxbroadcast xxx.xxx.x.xxgateway xxx.xxx.x.xx - Press Ctrl+X to exit and save your changes.
- Reboot your network settings. Type in
sudo /etc/init.d/networking restart, and press Enter.
Now your Raspberry Pi has a static IP address and will always be accessible at the same place.

PI POINTER
The set-up process for a static IP address is the same across all operating systems, so once you get the hang of it, you’ll be able to do it for others easily. It’s handy when you need to access your Raspberry Pi remotely.
Setting Up SSH
Your next step is to set up SSH on your computer. (Or you can use an SSH program on your smartphone or tablet.)
Windows:
On a Windows PC, you need to download some software before you can SSH into your Raspberry Pi. Here’s how:
- Head to www.chiark.greenend.org.uk/~sgtatham/putty/download.html and download PuTTY.
- When it’s downloaded, open putty.exe.
- Enter your Raspberry Pi’s IP address under Host Name.
- Tap Enter to open a command line.
- Enter your Raspberry Pi’s username and password.
Now, you’re connected to your Raspberry Pi on Windows, and you can control your Raspberry Pi just like you would if you were in front of it. This also means you can wirelessly control Pianobar.
If you own a Mac, you already have SSH built in to your computer and you can access your Raspberry Pi using the Terminal app. Here’s how:
- Launch Terminal on your Mac from Applications > Utilities > Terminal.
- Type in
ssh pi@yourIPaddress, replacing yourIPaddress with the static address you established earlier. For example,ssh pi@192.168.1.105. - When prompted for your Raspberry Pi’s password, type in your password and press Enter.
That’s it. You can now control your Raspberry Pi from Terminal on your Mac just like you would from the command line on the Raspberry Pi itself and navigate Pianobar wirelessly.
Keyboard Controls for Pianobar
Using Pianobar to play Pandora radio isn’t the most intuitive thing in the world, but you have lots of keyboard shortcuts to work with. With Pianobar running, you can do whatever you need by pressing these keys:
+: Thumbs up the current song.
–: Thumbs down the current song.
n: Skips to the next song.
e: Explains why the current song is playing.
g: Adds a genre station.
c: Creates a new station.
r: Renames the current station.
p: Pauses the radio.
d: Deletes the current station.
q: Quits Pianobar.

Controlling Pianobar from the command line is easier than it sounds.

Adding Better-Quality Sound with a USB Sound Card
The Raspberry Pi’s sound output is okay, but you can improve it significantly with a USB sound card. A USB sound card works just like a USB Wi-Fi adapter, but instead of connecting your Raspberry Pi to a wireless network, it processes audio and sends out a high-quality signal to your speaker.
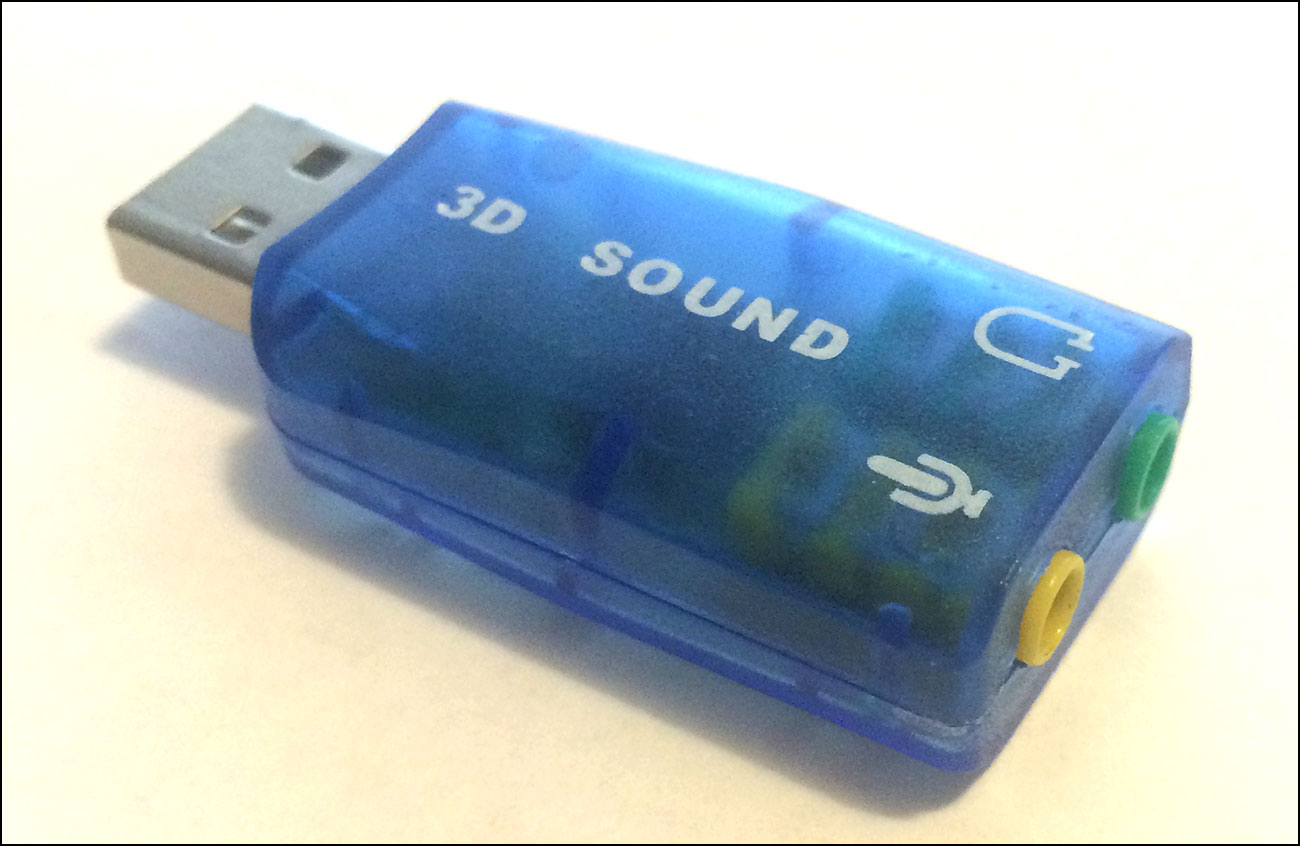
A USB sound card improves the quality of your Raspberry Pi’s sound output.
It’s best to go through the preceding tutorials, listen to your music, and then decide if you’re happy with it or not. Music quality is a little different for everyone, so it’s totally possible that you’ll be fine with the quality of music you hear from your Raspberry Pi.
If you want something better to listen to, get a USB sound card.
Choosing the Right USB Sound Card
Nearly any USB sound card should work with Pi MusicBox. Remember, it’s based on Raspbian so it also comes with Raspbian’s accessory support and already contains the software needed to use the USB sound card.
Sound cards range in price from about $10 to $50, but even the inexpensive models will improve the audio quality quite a bit.
For an up-to-date list of compatible sound cards, head to elinux.org/RPi_VerifiedPeripherals#USB_Sound_Cards.
Setting Up and Installing a USB Sound Card
This will be easy. All you need to do to install your USB sound card is plug it into your Raspberry Pi’s USB port. Then plug in a 3.5mm audio cable to the sound card and into your home stereo. When that’s hooked up, turn on your Raspberry Pi. The USB sound card automatically does the rest, and you should notice a pleasant increase in the sound quality.
The Least You Need to Know
- Turning your Raspberry Pi into a specialized music streaming device requires an operating system called Pi Musicbox.
- You can stream music from a variety of online services, including Pandora, Spotify, Google Music, and more.
- Pandora setup requires an extra bit of work, but after that, you’ll be able to play any Pandora station you want.
- Transforming your Raspberry Pi into a streaming radio enables you to wirelessly control your Raspberry Pi from your computer, smartphone, or tablet.