16.4 Sales Order Processing
Master data forms the basis for sales work. Now bring your attention to the processes that occur in daily sales work that include the creation of a sales order, delivery, and invoice (Figure 16.6).
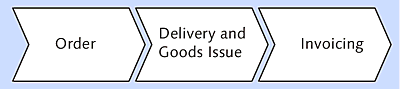
Figure 16.6 Basic Sales Process
The following section discusses the actual sales process and the most important steps of sales order, delivery, and invoice. The presales process often includes the customer inquiry and the quotation (Transactions VA11 and VA21, respectively). After a customer agrees to a quotation, you’ll reference this document when you create the standard order.
16.4.1 Entering Sales Orders
This section gives you an example to show how you can enter a sales (standard) order in the SAP system. A customer calls and wants to order 10 pieces of material ZXMAT01. For this, the condition master record will propose the condition €200 per piece. Follow these steps:
- To enter the standard order, start Transaction VA01 via the command field or via the Logistics • Sales and Distribution • Sales • Order • Create path in the SAP Easy Access menu.
-
In the initial screen, specify Order Type “DL” (standard order), Sales Organization “1000”, Distribution Channel “12”, and Division “00” (Figure 16.7). Press (Enter) or choose the Continue
 button to open the screen that creates the purchase order.
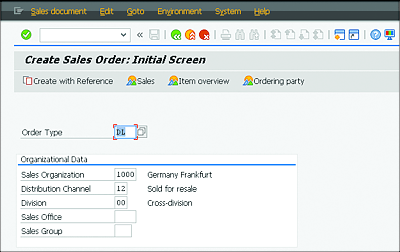
Figure 16.7 Creating a Sales Order
-
Subsequently, in the standard order screen, enter the Sold-To Party and any PO Number in the header, for instance, “DEMO[current date]”. For the requested delivery date (Req. deliv. date), enter the current date plus 10 days. Specify the Material number and the Order Quantity (10 pieces) of the items (Figure 16.8). Press (Enter) to transfer the €200 per piece condition from the condition record to the standard order.
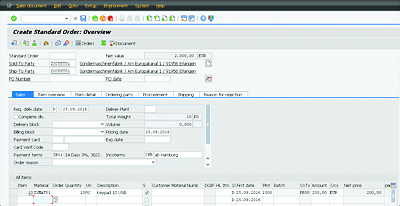
Figure 16.8 Maintaining Standard Order Information
-
After you’ve entered the order, save it by clicking the Save
 button or by pressing (Ctrl)+(S).
The order entry is now complete. The SAP system provides internal documents for the next steps in the process.
16.4.2 Creating Deliveries
In the next step, you create a delivery in the SAP system by following these steps:
-
Call Transaction VL01N via the command field or via the SAP Easy Access menu path: Logistics • Sales and Distribution • Shipping and Transportation • Outbound Delivery • Create • Single Document • With Reference to Sales Order. For this example, enter “1000” in the Shipping point field as the date that is 10 days in the future in the Selection date field (in this case, “25.09.2016”), and enter the document number of the sales order in the Order field (Figure 16.9).
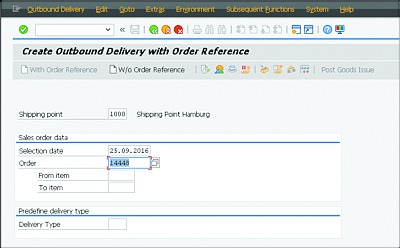
Figure 16.9 Creating Deilveries
-
Save your delivery in the subsequent Delivery Create: Overview screen (Figure 16.10). Don’t post a goods issue yet because the delivery hasn’t been created in the SAP system yet.
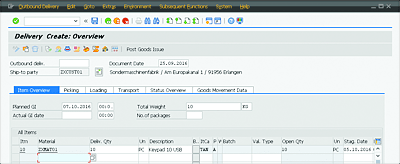
Figure 16.10 Delivery Overview Screen
- Write down the document number of the delivery. To post the goods issue, start Transaction VL02N via the command field or use the SAP Easy Access menu path: Logistics • Sales and Distribution • Shipping and Transportation • Outbound Delivery • Change • Single Document.
-
The system proposes the delivery’s document number. Click Post Goods Issue (Figure 16.11).
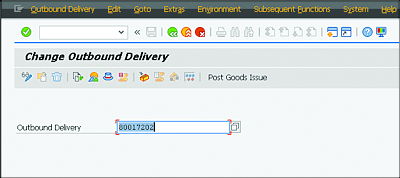
Figure 16.11 Setting Outbound Delivery
The stock of the material is reduced accordingly. You can check the stock using Transaction MMBE.
16.4.3 Invoicing
After the goods have been delivered, you can invoice the delivery to the customer. This step is mapped in the SAP system as follows:
-
Call Transaction VF01 by entering the transaction code in the command field or by choosing Logistics • Sales and Distribution • Billing • Billing Document • Create in the SAP Easy Access menu. The SAP system automatically proposes the document number of the preceding delivery (Figure 16.12).
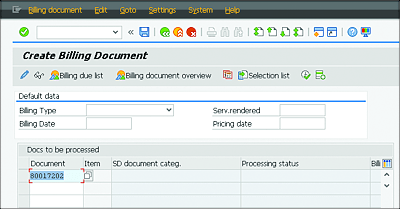
Figure 16.12 Creating a Billing Document
-
Save the invoice via the Save
 button ((Ctrl)+(S)).
View the print preview of the invoice using Transaction VF03 by following these steps:
- Select Billing Document • Output in the menu bar, or enter Transaction VF03 in the command field.
-
Select the message and click the Show Invoice button
 to generate the print preview.
The customer account, which is determined based on the unique customer number the SAP system, is thus debited (see Chapter 17). You can output the invoice, as shown in Figure 16.13, with Transaction VF31 or via the Logistics • Sales and Operation • Billing • Output menu path.
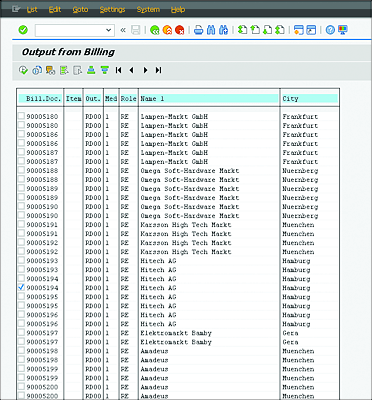
Figure 16.13 Output from Billing
The basic sales process is complete with the invoice.
As you saw in Section 16.1, the SAP system lets you do an availability check, which we’ll cover next.