“The real voyage of discovery consists not in seeking new lands but in seeing with new eyes.” —Marcel Proust
Photographs shot from the same perspective and using the same technique all the time are boring. Get creative.
Use the Terrain to Your Advantage
The Serengeti ecosystem in East Africa is the focus of my recent conservation work. The major threat here has been a proposed high-speed commercial highway that would slice across Serengeti National Park. Biologists and other researchers fear that this road could have huge impact on the greatest land mammal migration on earth, perhaps even wiping it out and causing a precipitous decline in animal life all along the food chain.
Each year, more than two million animals—wildebeests, zebras, and other herbivores—migrate from the Masai Mara in Kenya into Serengeti in search of water and fresh grasses. Following the seasonal rains, the herds make a 300 mile annual circuit, returning eventually to the Masai Mara. The big challenge photographically is to capture the magnitude of this migration. Aerial photography in the past has given a sense of the animal population, but at the same time the noise of aircraft or helicopter spooks the herds and causes them to scatter. A drone? Maybe, but again these are not without noise.
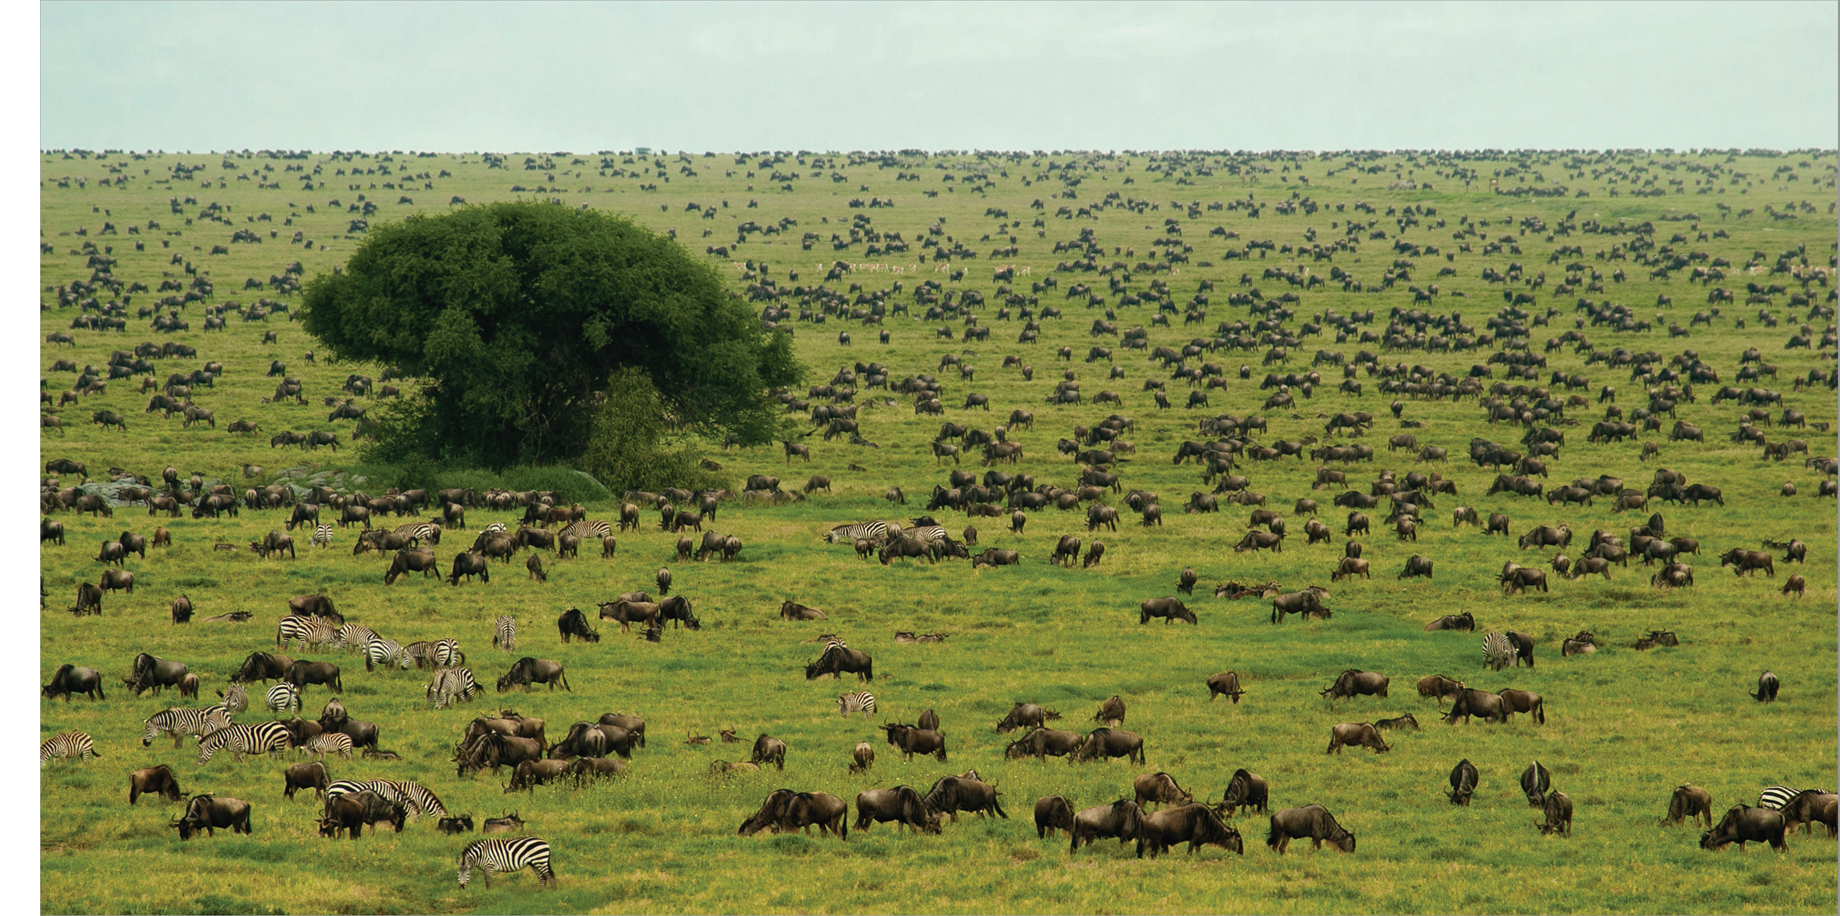
The land here sloped down slightly and then upward, as the herds of wildebeest and zebras moved slowly across.
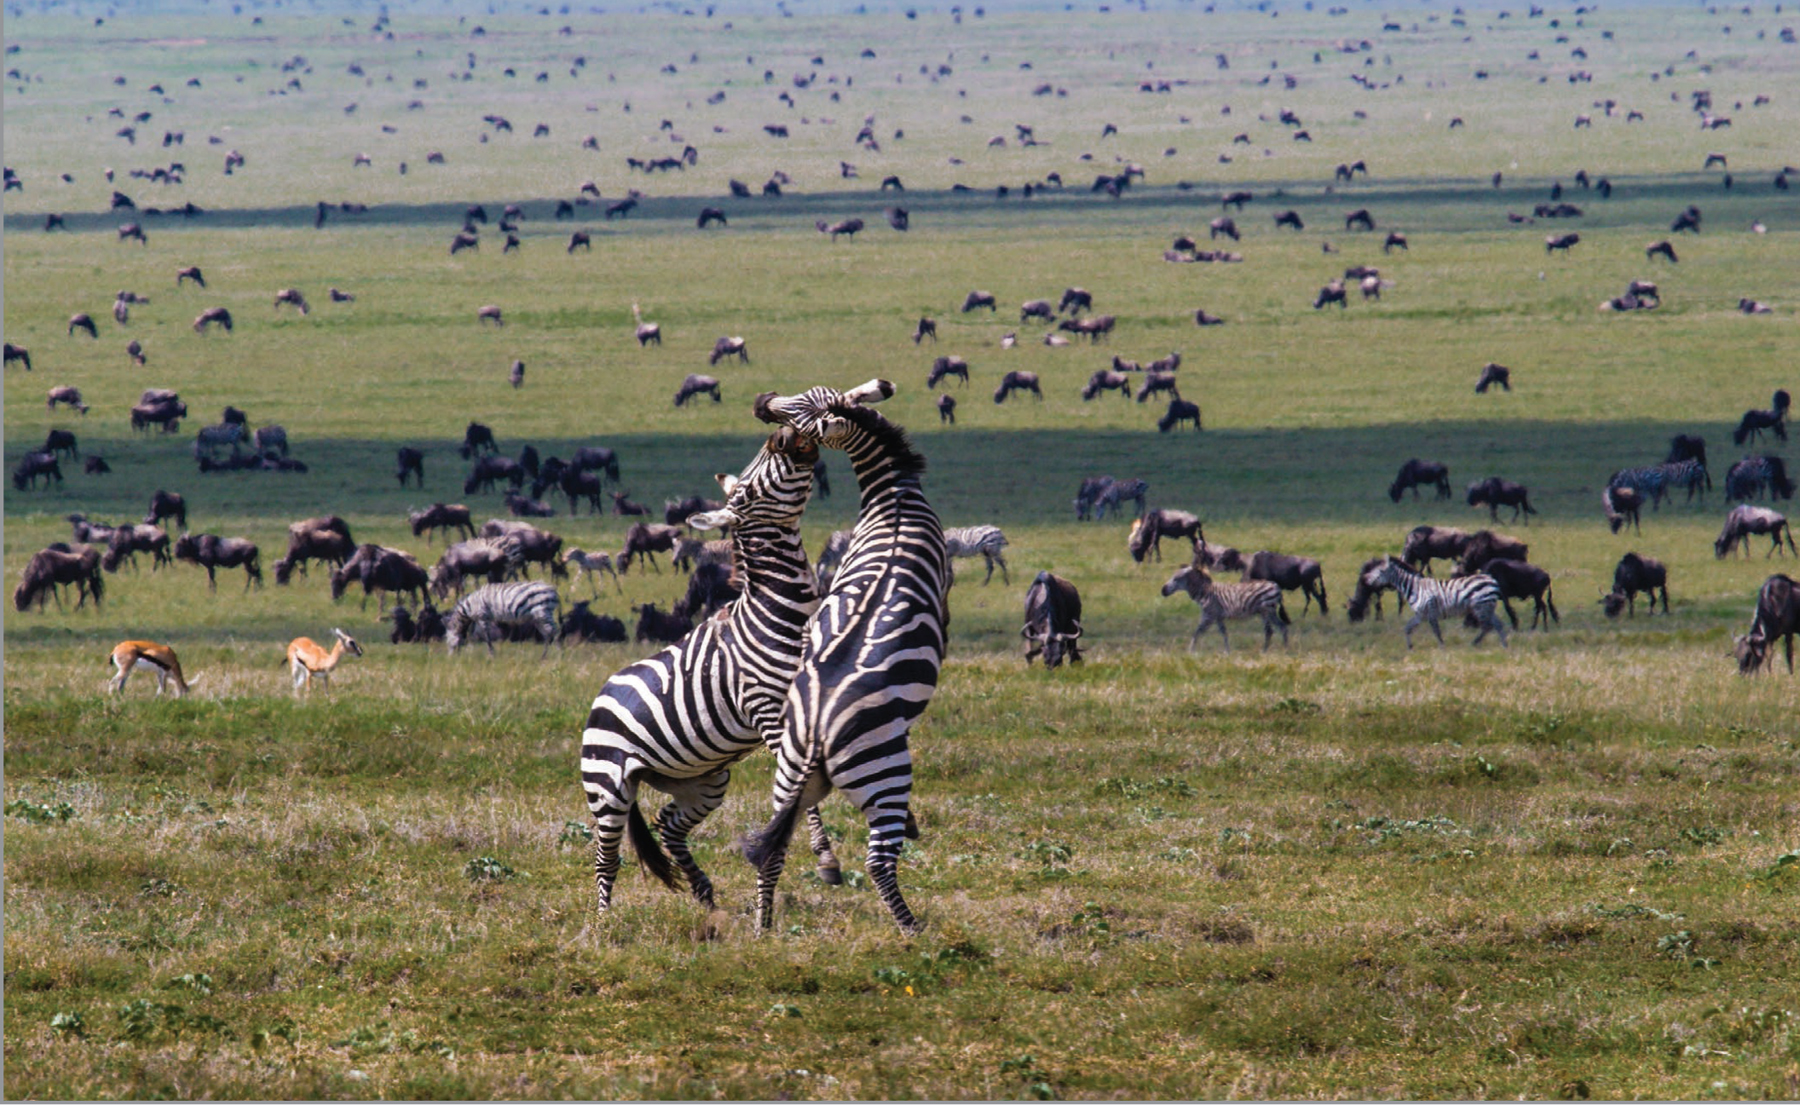
From a slight rise in elevation, looking down and out across the expanse of land, I used a 100-400mm zoom lens at 400mm to capture two zebra stallions fighting—as well as the amazing number of animals in the background, spread across the plains.
Being on the ground is perhaps the greatest challenge, for you have to find the right terrain at the right time to get shots that give an idea of the animal density here. Straight-on shots at the same level don’t do it. A place with a slight rise of land looking down and out into the distance works best.
The animals in this great migration are always on the move. The wildebeest in particular are often running. To capture this, I often use a blur pan technique. This entails using a long focal length (300mm or 400mm) and shooting at slow shutter speed of around 
![]() second while panning. This creates a streaked and blurred background, but sometimes a part of the animal remains relatively sharp because you are moving the camera with the animal’s direction of movement. Shoot lots of frames; it’s a very imprecise technique.
second while panning. This creates a streaked and blurred background, but sometimes a part of the animal remains relatively sharp because you are moving the camera with the animal’s direction of movement. Shoot lots of frames; it’s a very imprecise technique.

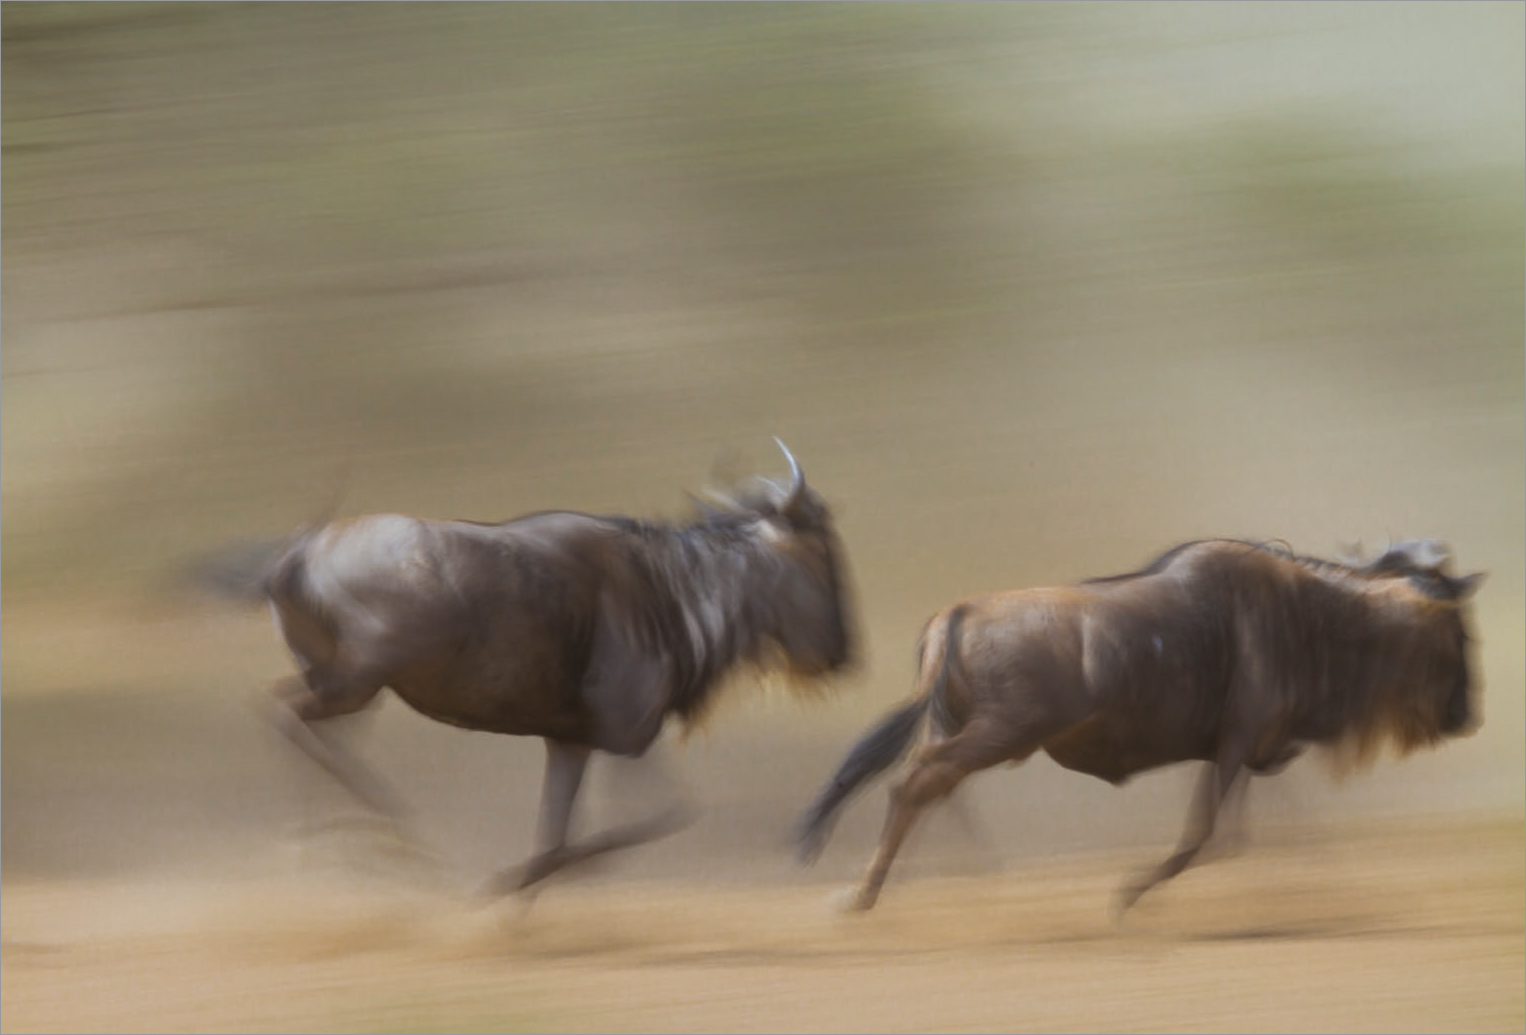
Panning blurs and streaks the background to give a sense of movement and speed, conveying the sense of action in a running herd of wildebeests. With luck (and continuous mode shooting), a portion of one of the images may be relatively sharp.
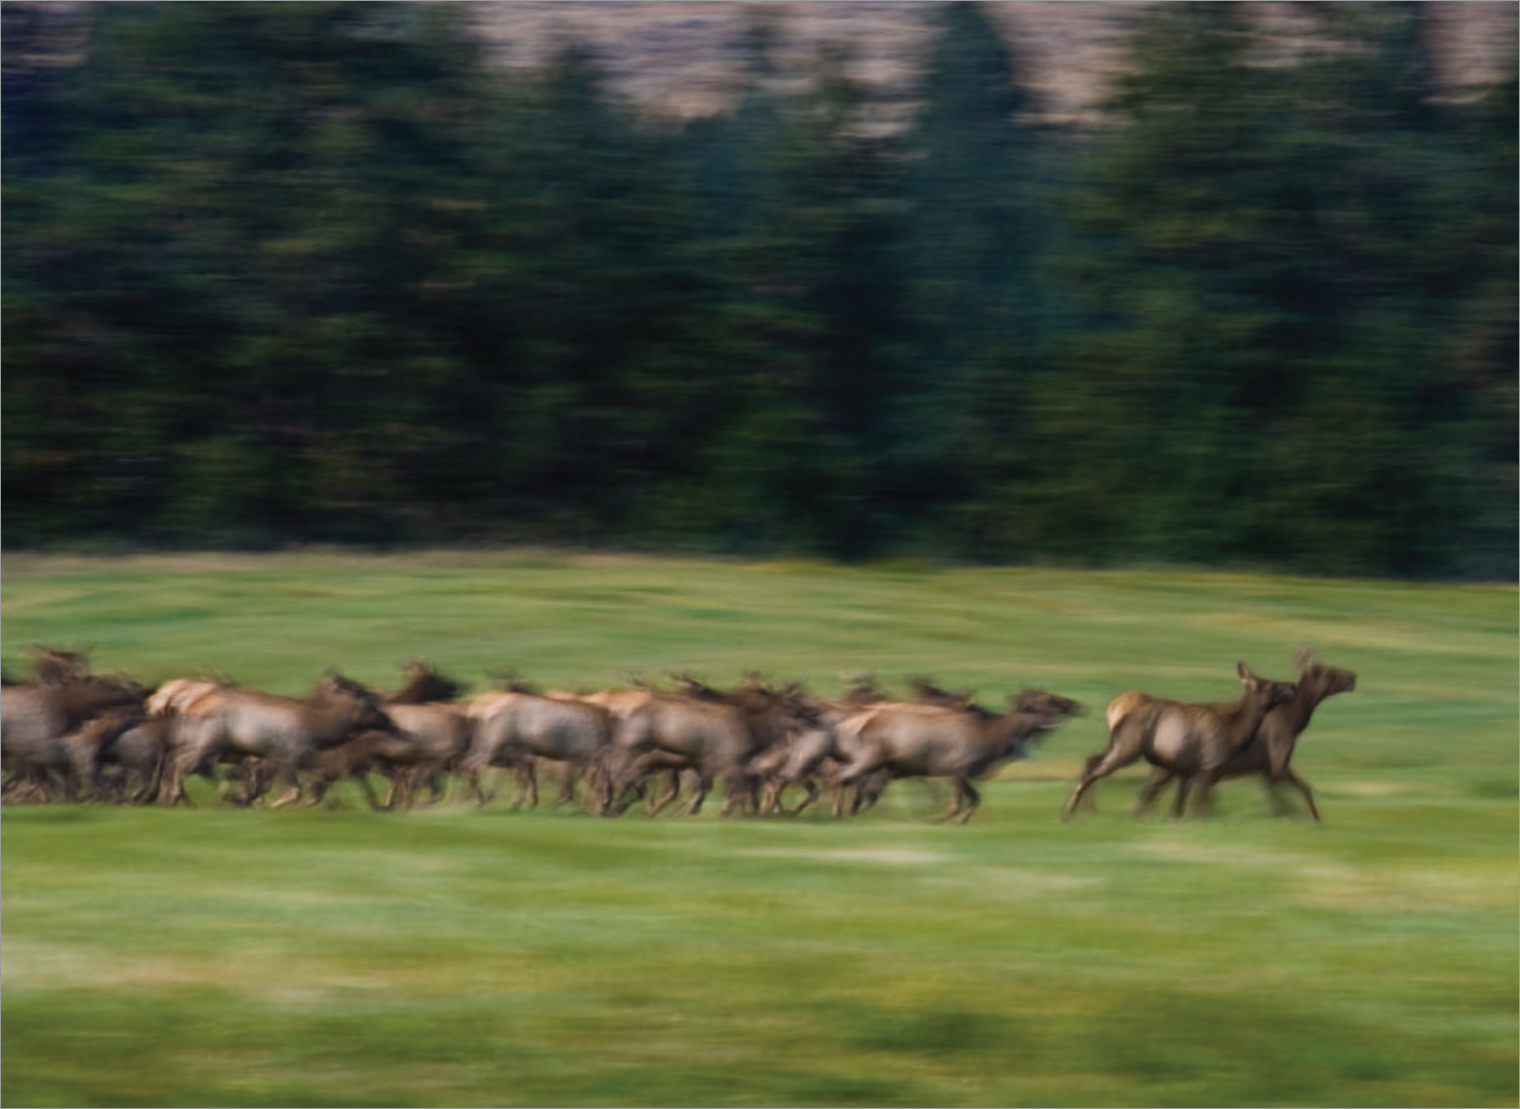
The elk herd began running at my approach, so used the pan blur technique to give the picture a sense of movement.
You don’t have to travel to Africa to use this technique. I found an elk herd (bottom left) in the Blackfoot River Valley of Montana. This is a region where elk are hunted in the fall, so they are shy and avoid human contact (unlike the elk in Yellowstone or Rocky Mountain National Park that don’t associate humans with danger). This herd began running at my approach, so I zoomed to 400mm and panned with the action, using a shutter speed of about ![]() second.
second.
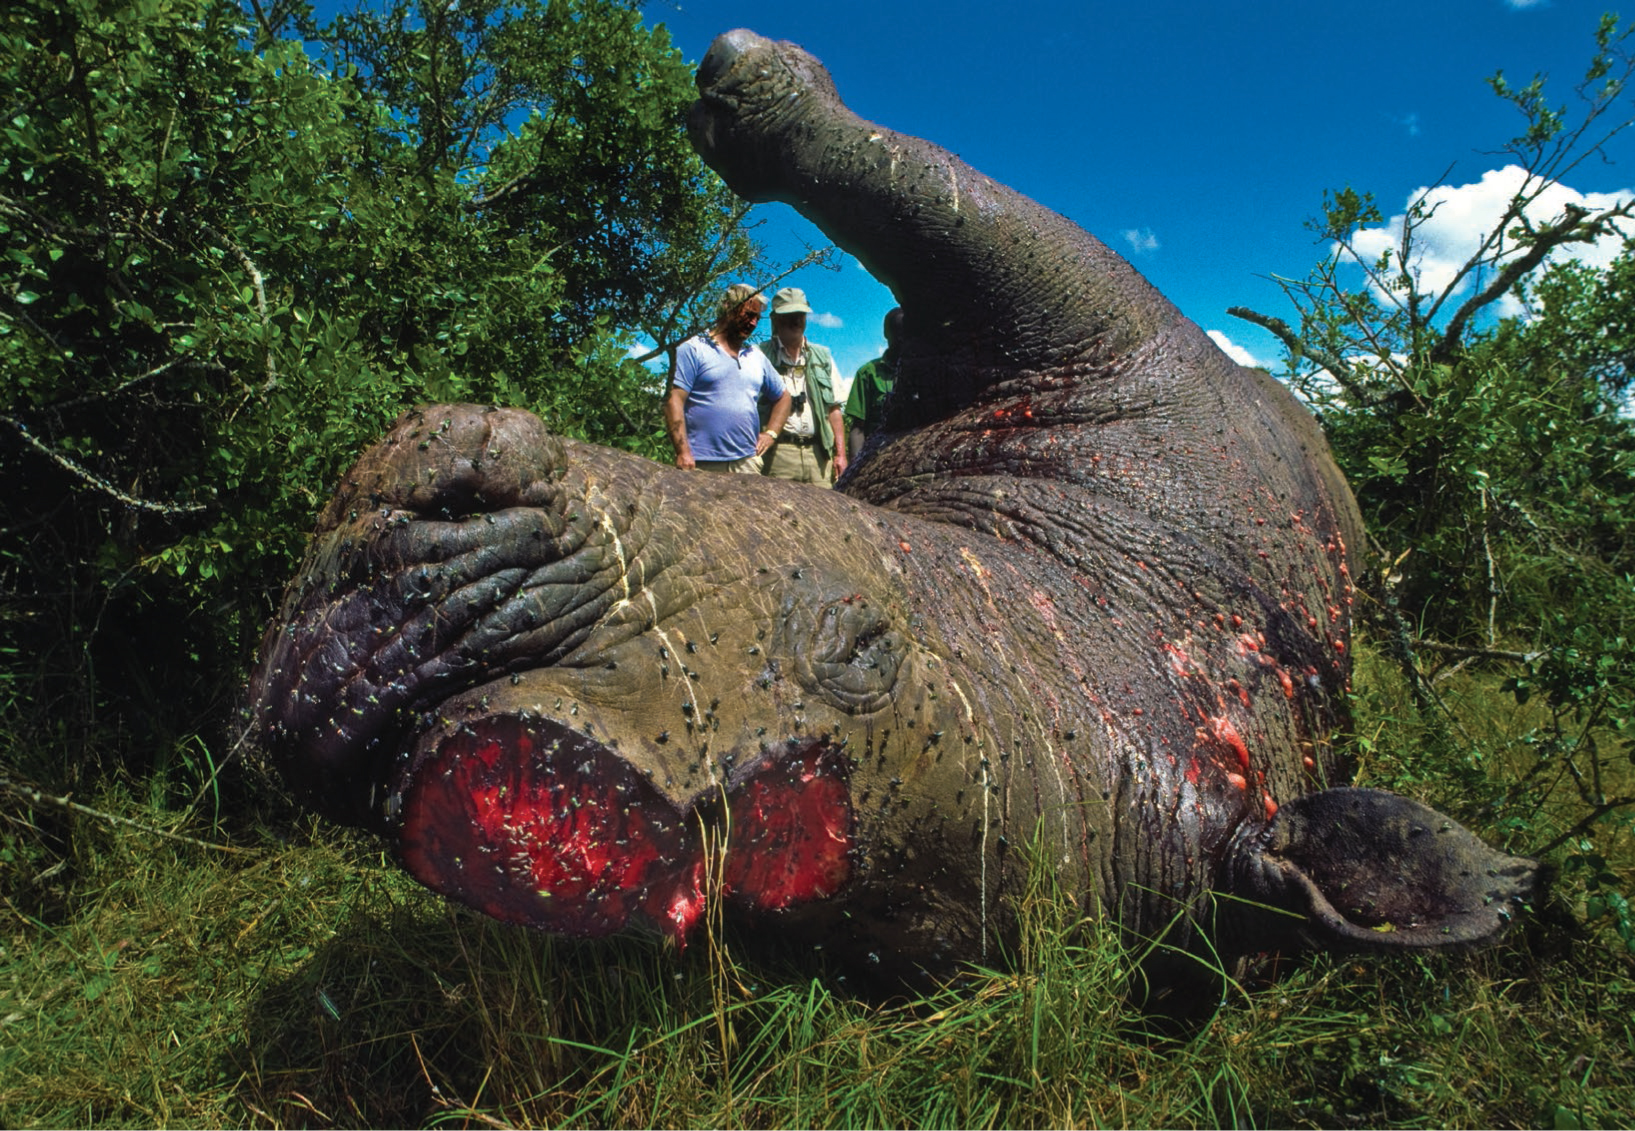
Sometimes it’s necessary to show the worst and create a photo with great impact—even shock value. In 1990, Audubon magazine sent me on a two-month assignment to document rhino and elephant poaching in East Africa. It wasn’t fun, but it was necessary to show the carnage taking place. In central Kenya, I stumbled upon a freshly killed rhino with its horns cut off. I wanted to shock people into understanding that a magnificent animal was killed for some mythical medicinal usage of the horns, so I moved in close for the photo. I used a 20mm ultra-wide lens at f/22 for great depth of field and to include some companions who were with me (top).
On that same assignment I visited Anna Merz at her Ngare Sergoi Rhino Sanctuary in central Kenya. Anna had raised a black rhino calf that was orphaned by poachers, and I got this shot with her and the then fully grown black rhino (bottom). Black rhinos have a reputation of belligerence and aggressiveness, but this one showed genuine affection for Anna. However, I had to keep my distance because the rhino behaved like a guard dog and charged me if I got too close.
Sickening? Yes. But in-your-face photography is sometimes necessary to convey a serious and tragic message.
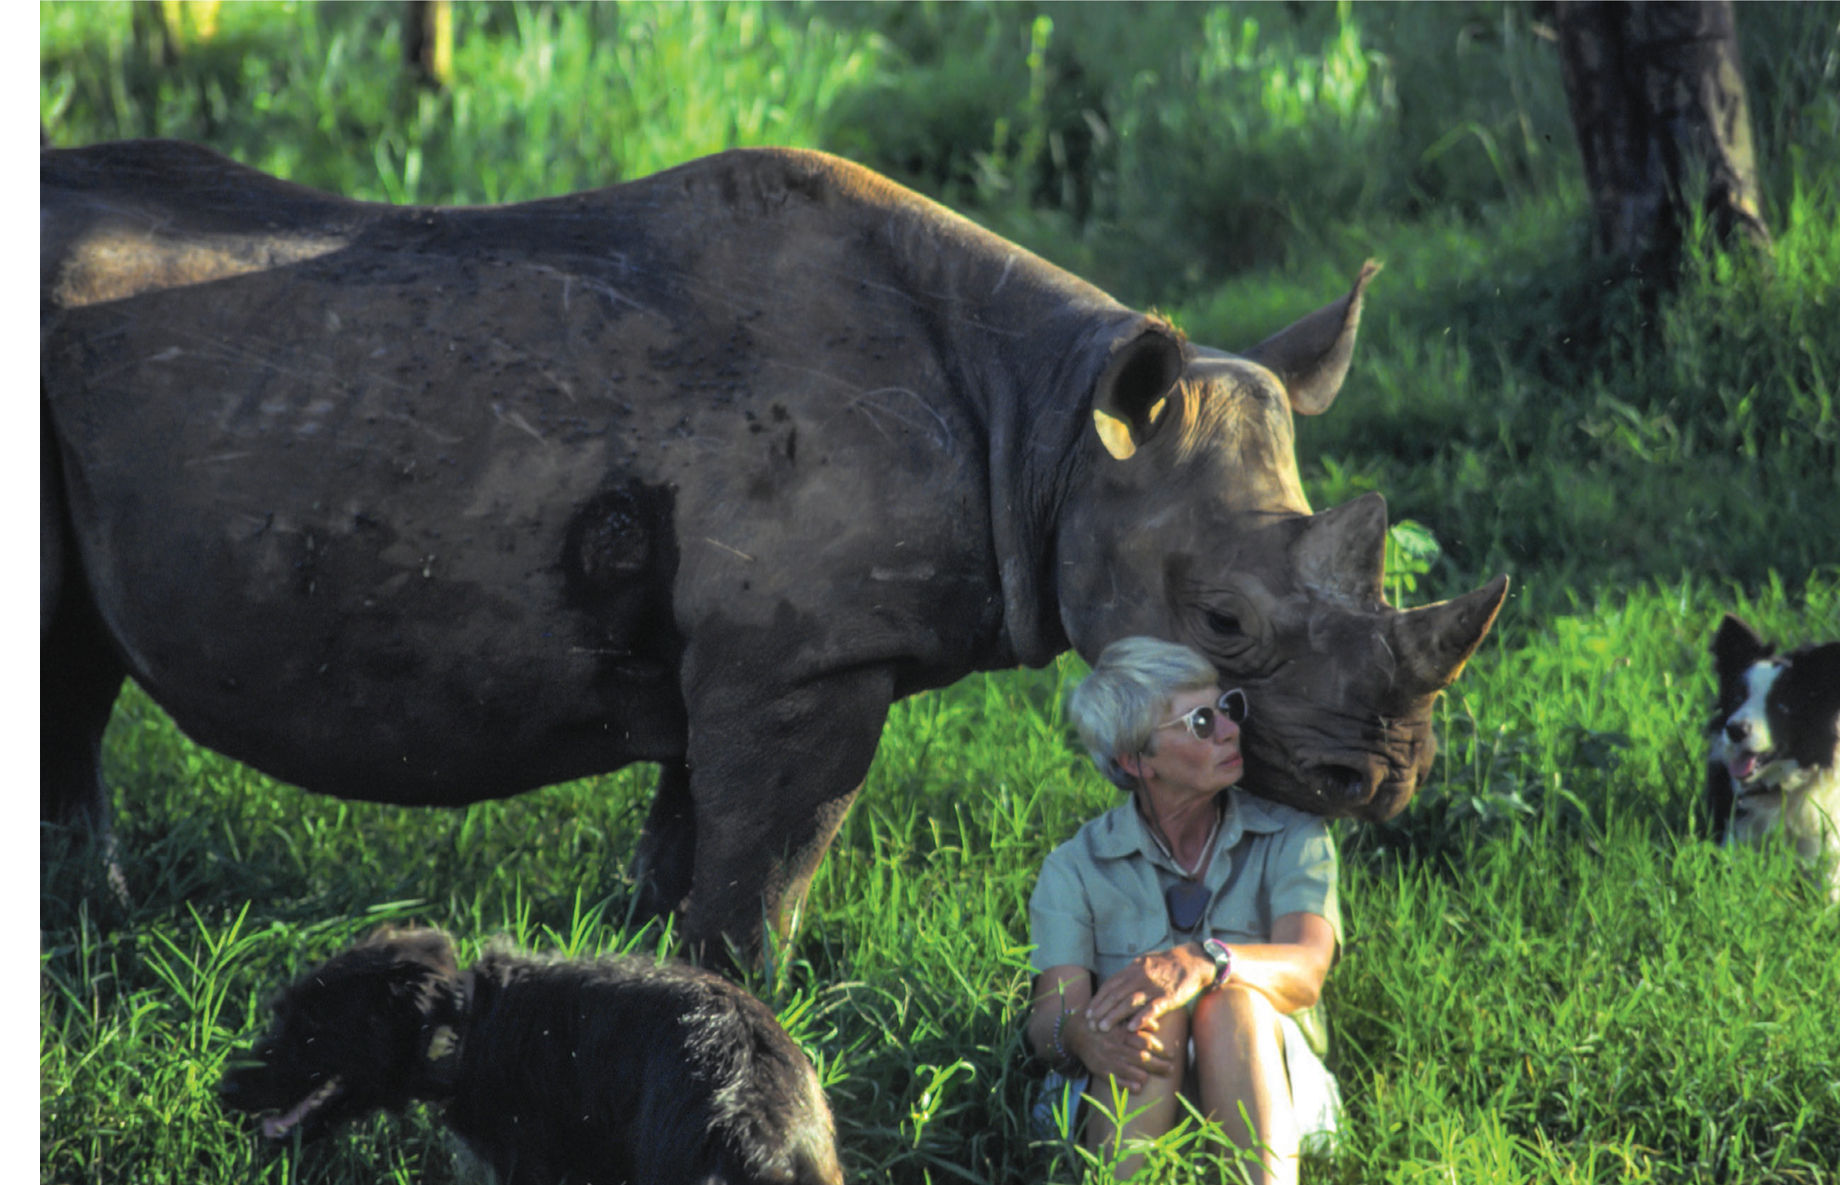
I wanted to contrast the horror of that dead rhino with one very much alive. This black rhino, Samia, showed genuine affection for Anna Merz.
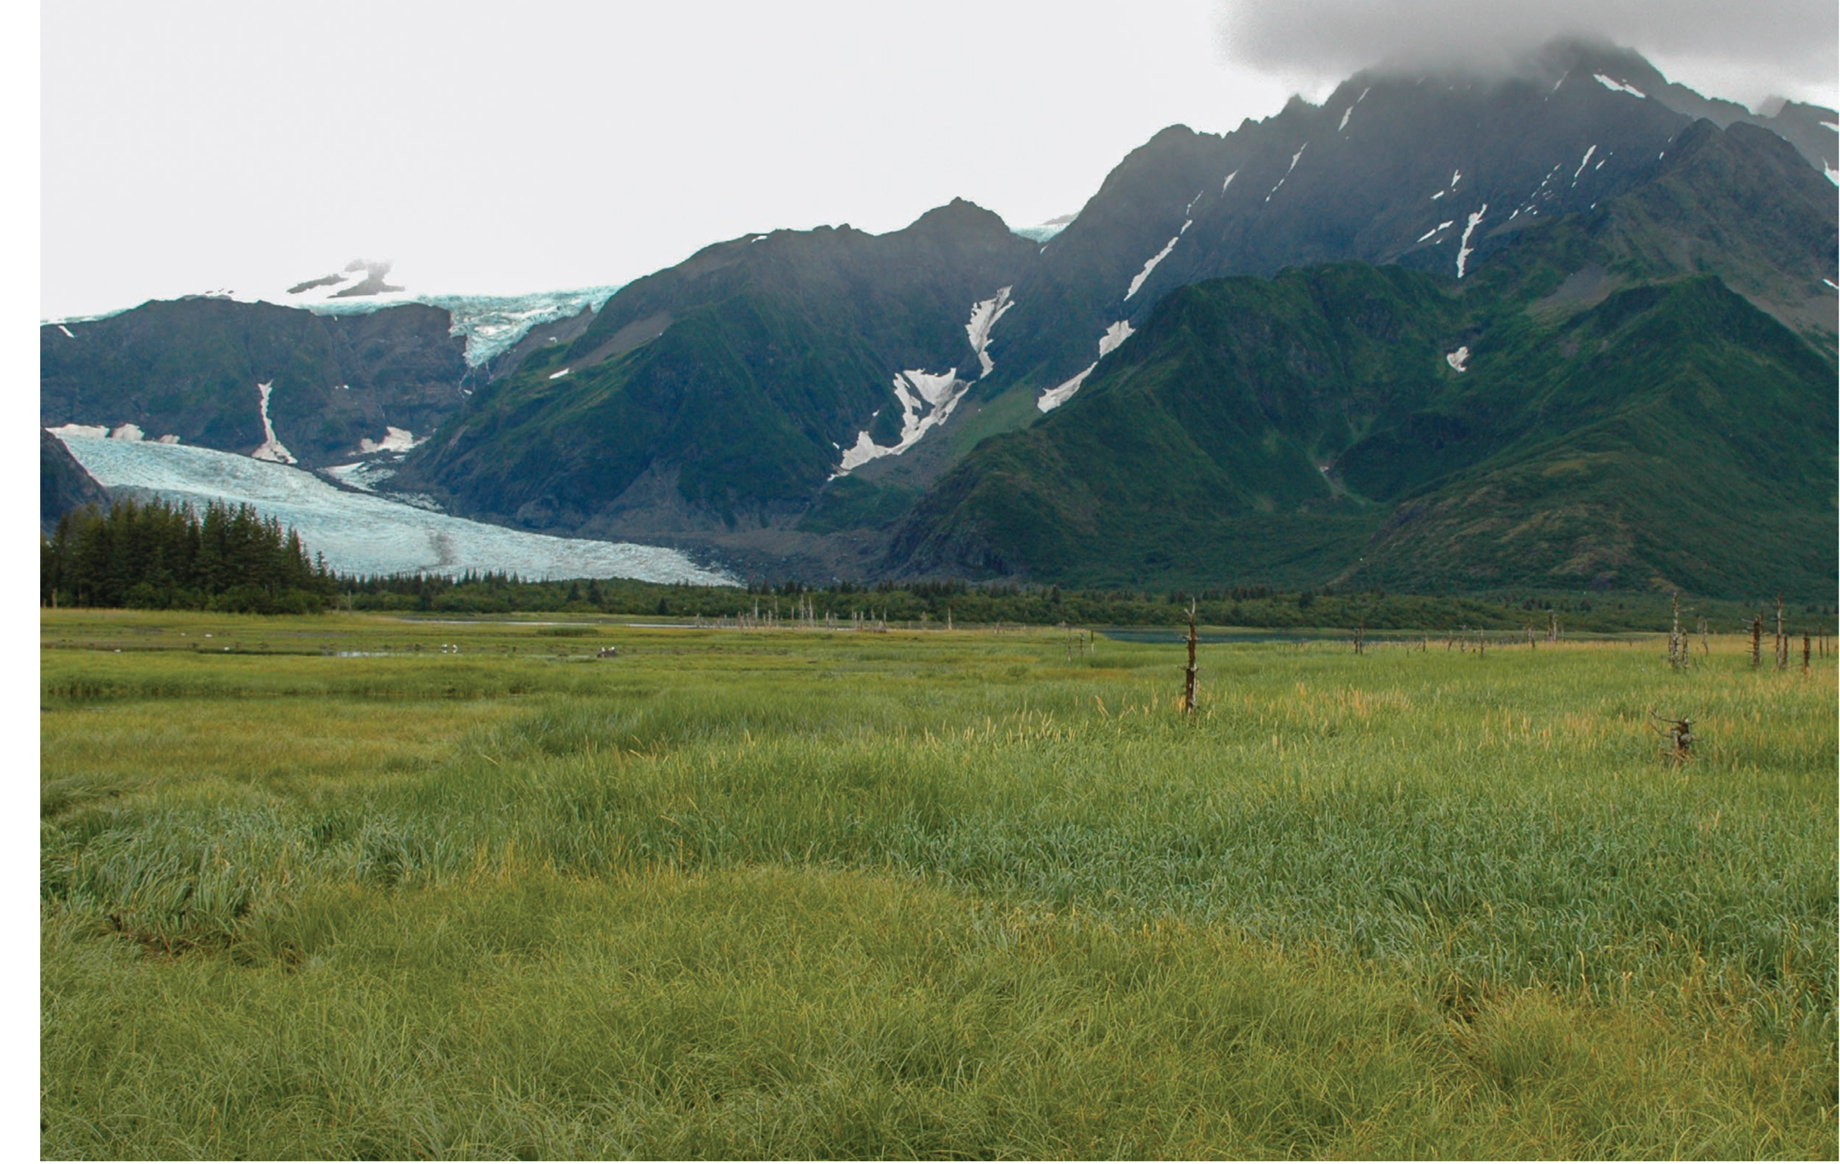
Pederson Glacier in what is now the Kenai Fjords National Park in Alaska. This photo was made in 1977. Notice where the glacier ends near the water.
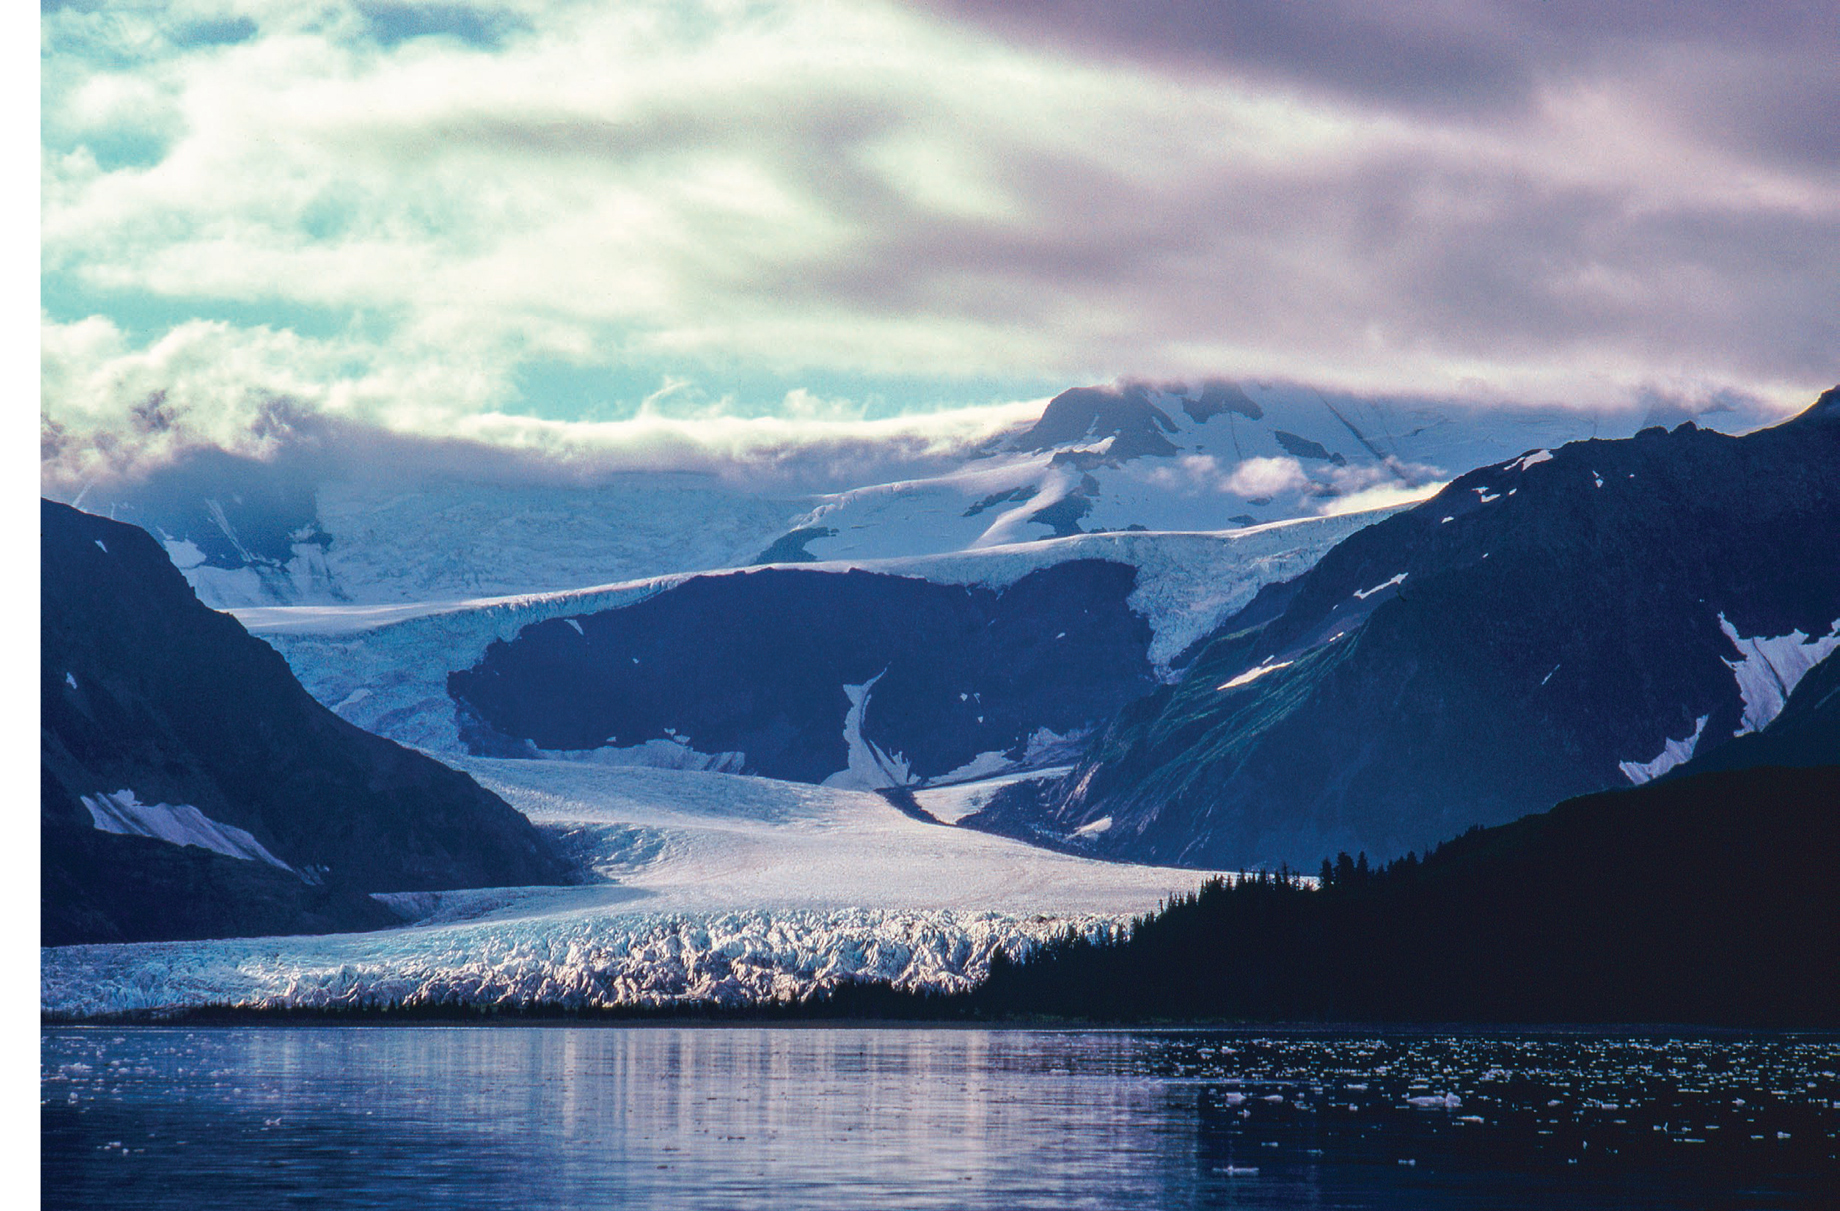
Pederson Glacier in 2005. This photo was made near where the edge of the glacier was located 28 years earlier. The glacier had retreated back up that valley in the background. Photo credit: Bruce Molnia. Glacier Photograph Collection. Boulder, Colorado USA: National Snow and Ice Data Center/World Data Center for Glaciology. Digital media. Public domain photo.
On an Audubon magazine assignment in 1977, I was to document a couple of the proposed new national parks in the Alaska National Interest Lands and Conservation Act (ANILCA). One of the areas I covered was the Kenai Fjords. The top image on the facing page, showing the Pederson Glacier in one of the fjords, is one of many photos I made for the article. This photo is now of historical significance because of global warming. Compare it with the bottom image, shot in 2005 by Bruce Molnia, for the National Snow and Ice Data Center/World Data Center for Glaciology.
Climate change is a hot topic today (no pun intended). No matter where you live, chances are there may be some impact in your area from changes in climate and weather patterns. It’s vital that you record these things as they occur. I don’t mean you have to go chasing killer tornadoes, but there can be other things. We in the Rocky Mountain West are seeing increasing temperatures and droughts, both of which have led to serious wildfires. There have also been floods from greater than normal precipitation from unusually severe storms when the rains finally came.
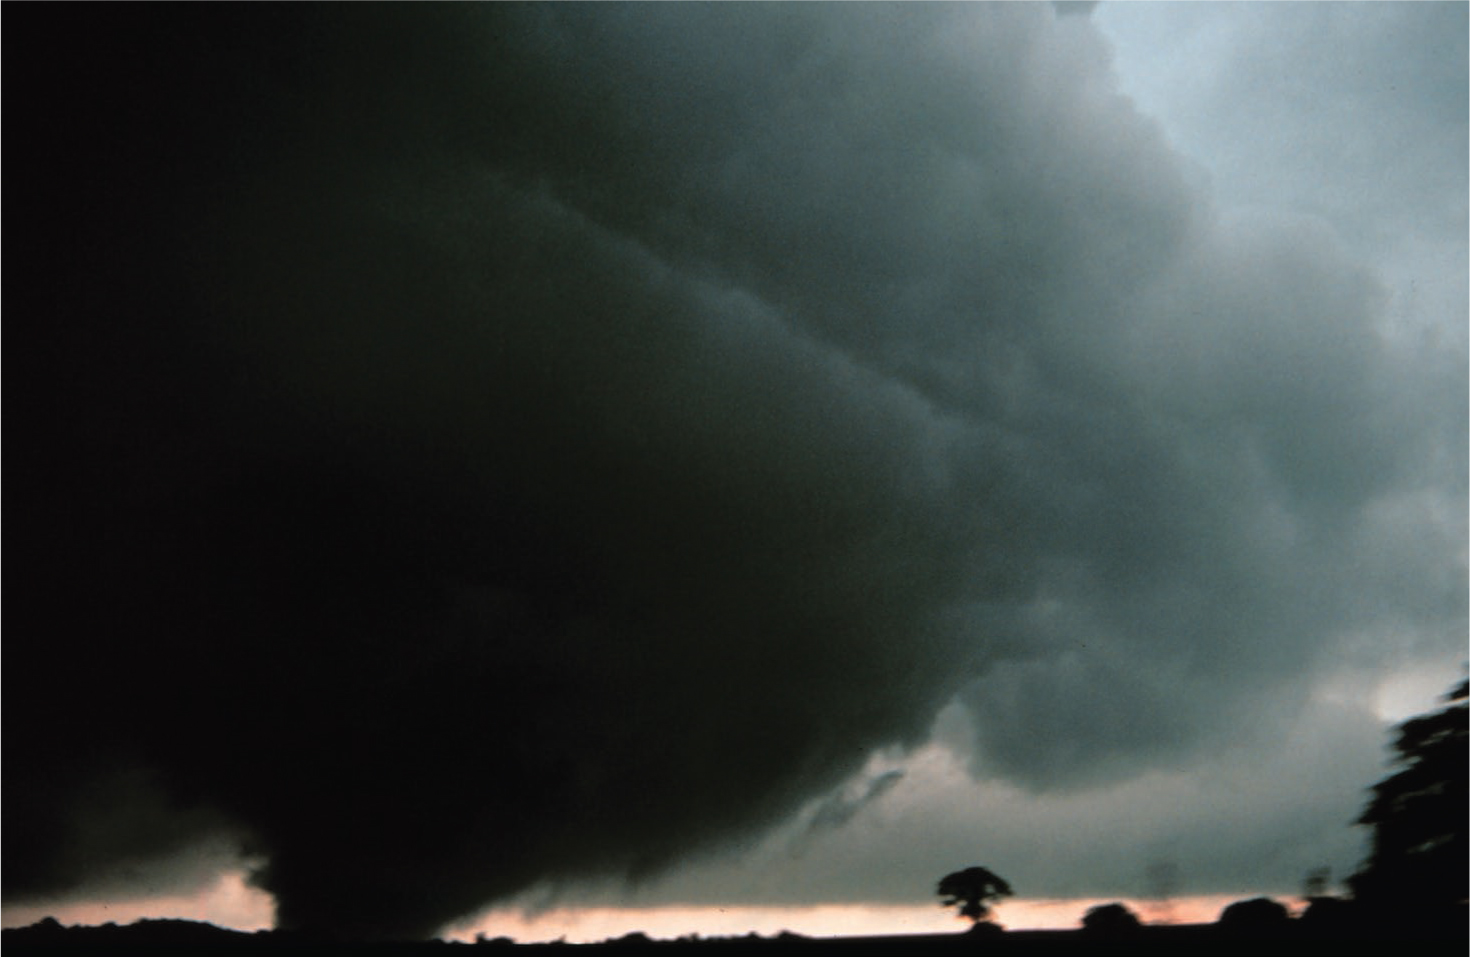
Photos like this can illustrate concerns about climate change. Photo Credit: NOAA Photo Library, NOAA Central Library; OAR/ERL/National Severe Storms Laboratory (NSSL). Public domain photo.
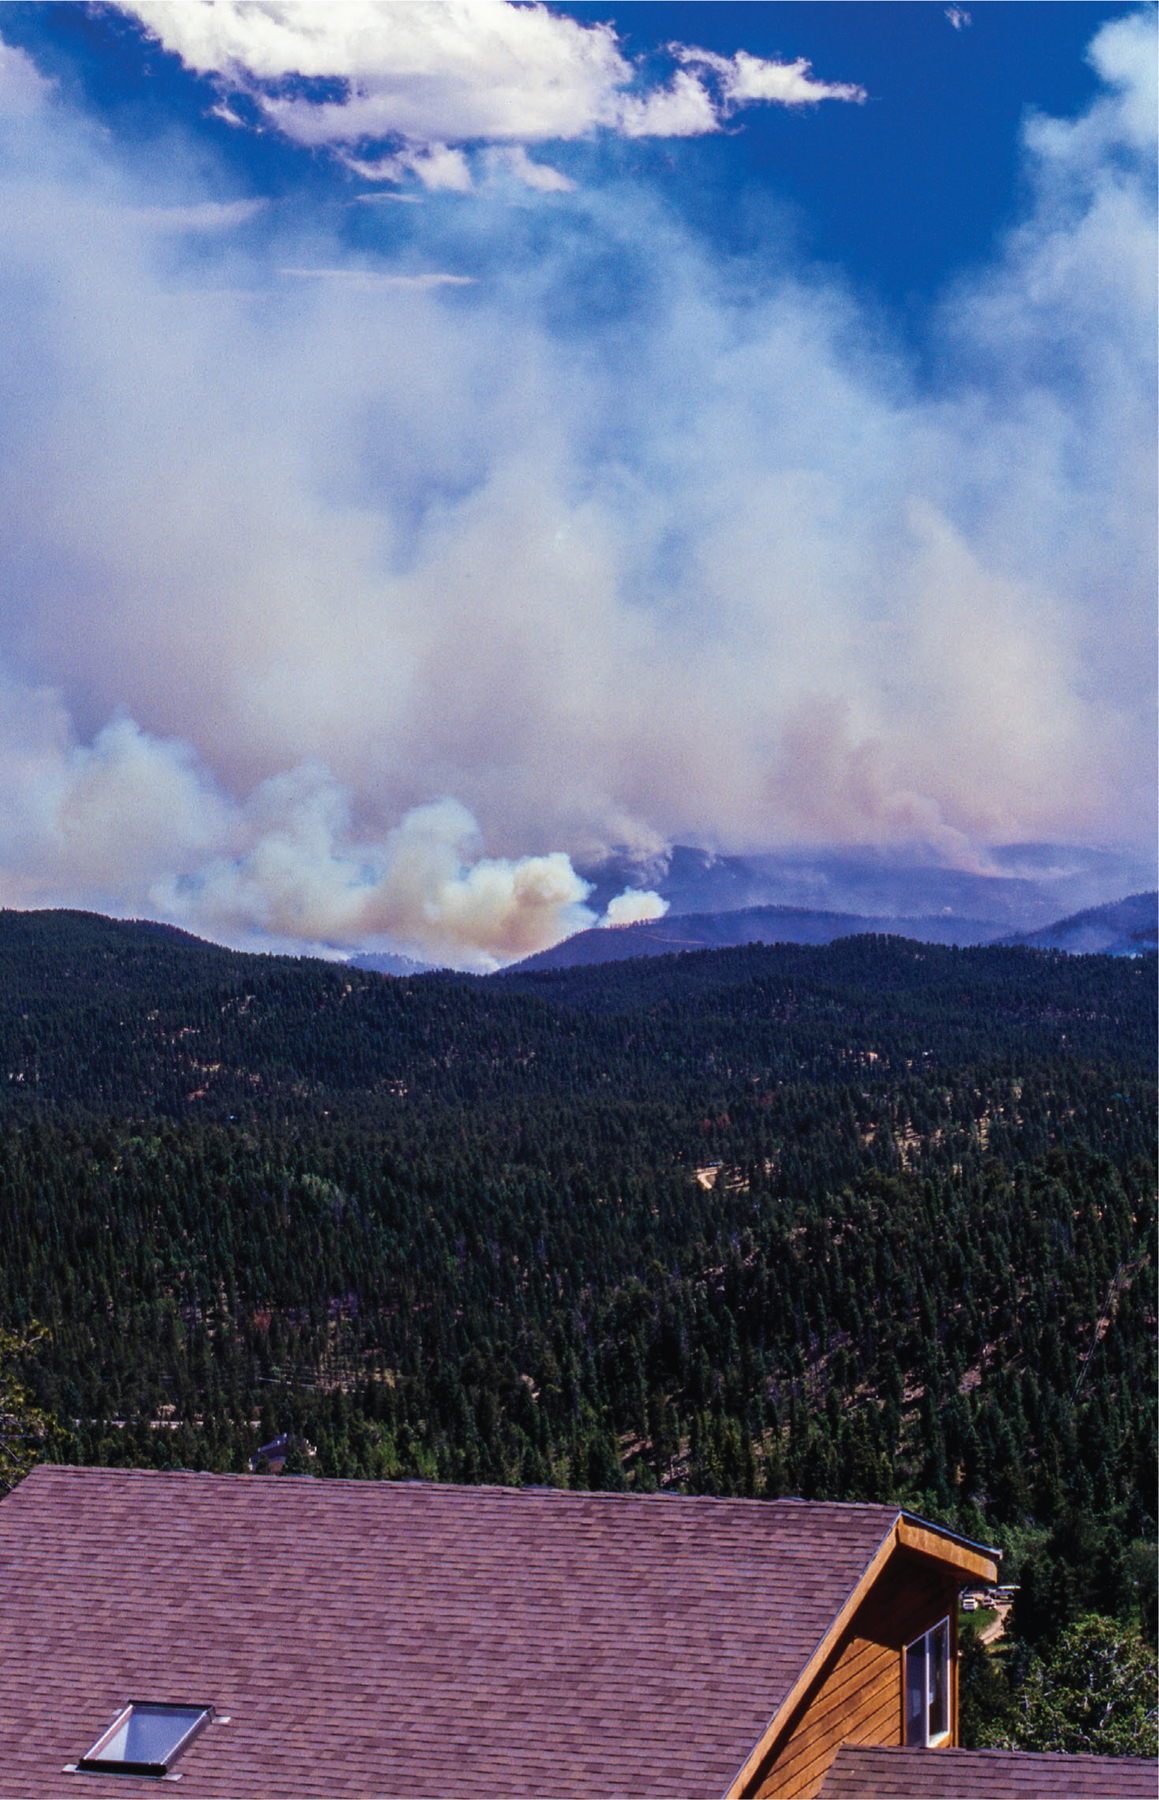
Record numbers of wildfires have been observed in the Rocky Mountain West in recent years and may be indicative of climate change.
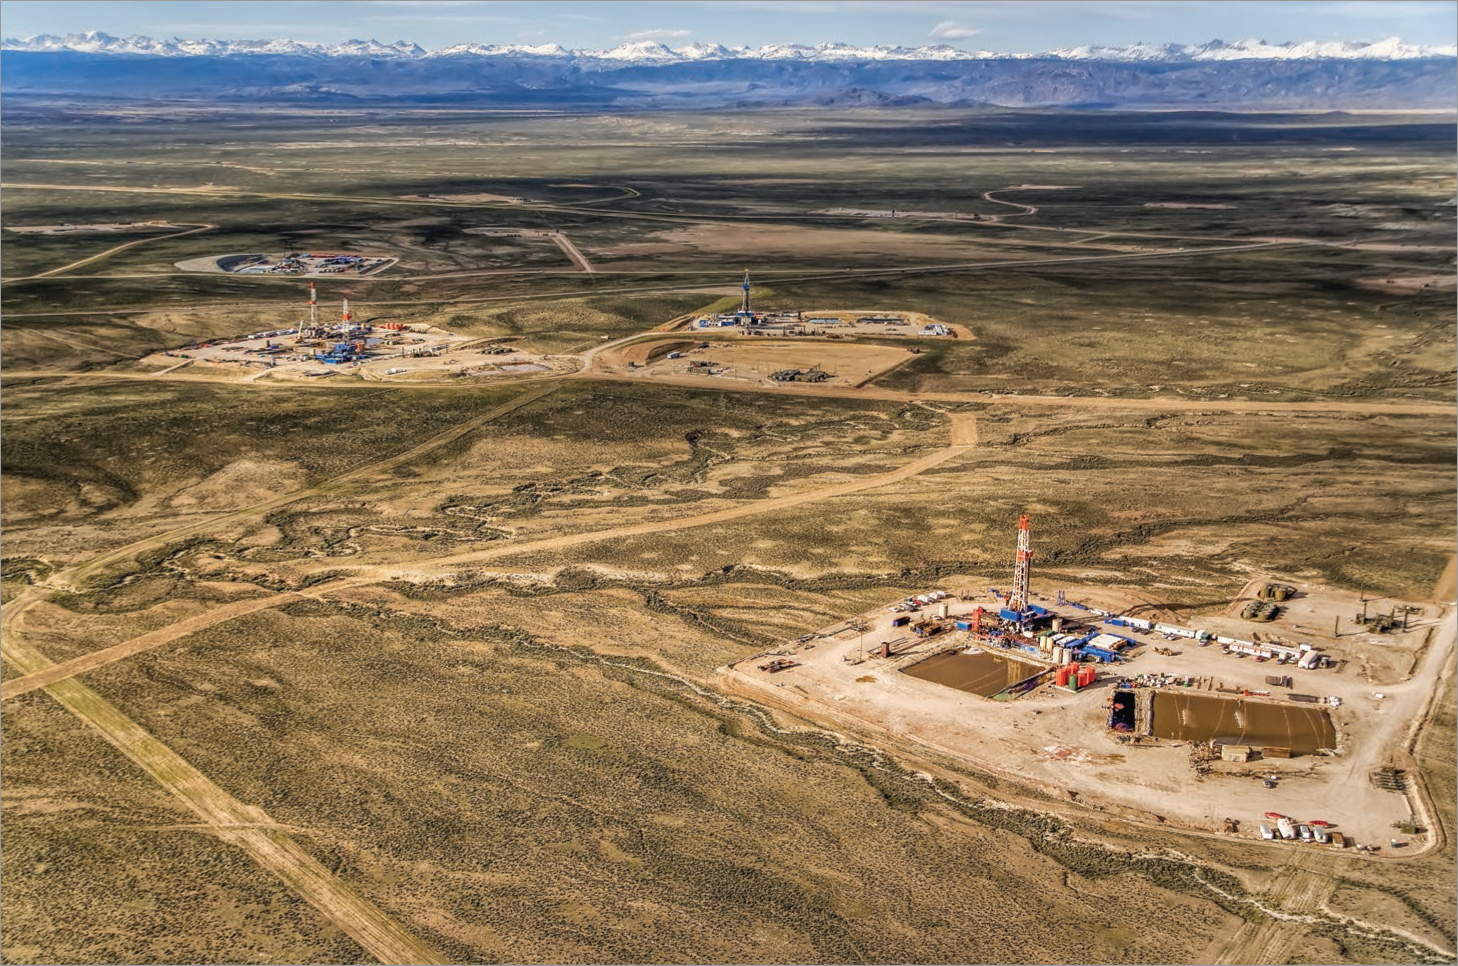
Wendy Shattil is a well-known conservation photographer who has done a great job of documenting the detrimental effects of oil and gas drilling in the Rocky Mountain West. This aerial photo shows the extent of such operations in the Red Desert region of southwest Wyoming. From a distance, this treeless region may look barren and devoid of life, but it is an important habitat for many species. It is particularly important winter habitat for deer, elk, and the largest migratory herd of pronghorn antelope. Road building and drilling operations have a big impact on wildlife. Photo credit: Wendy Shattil.
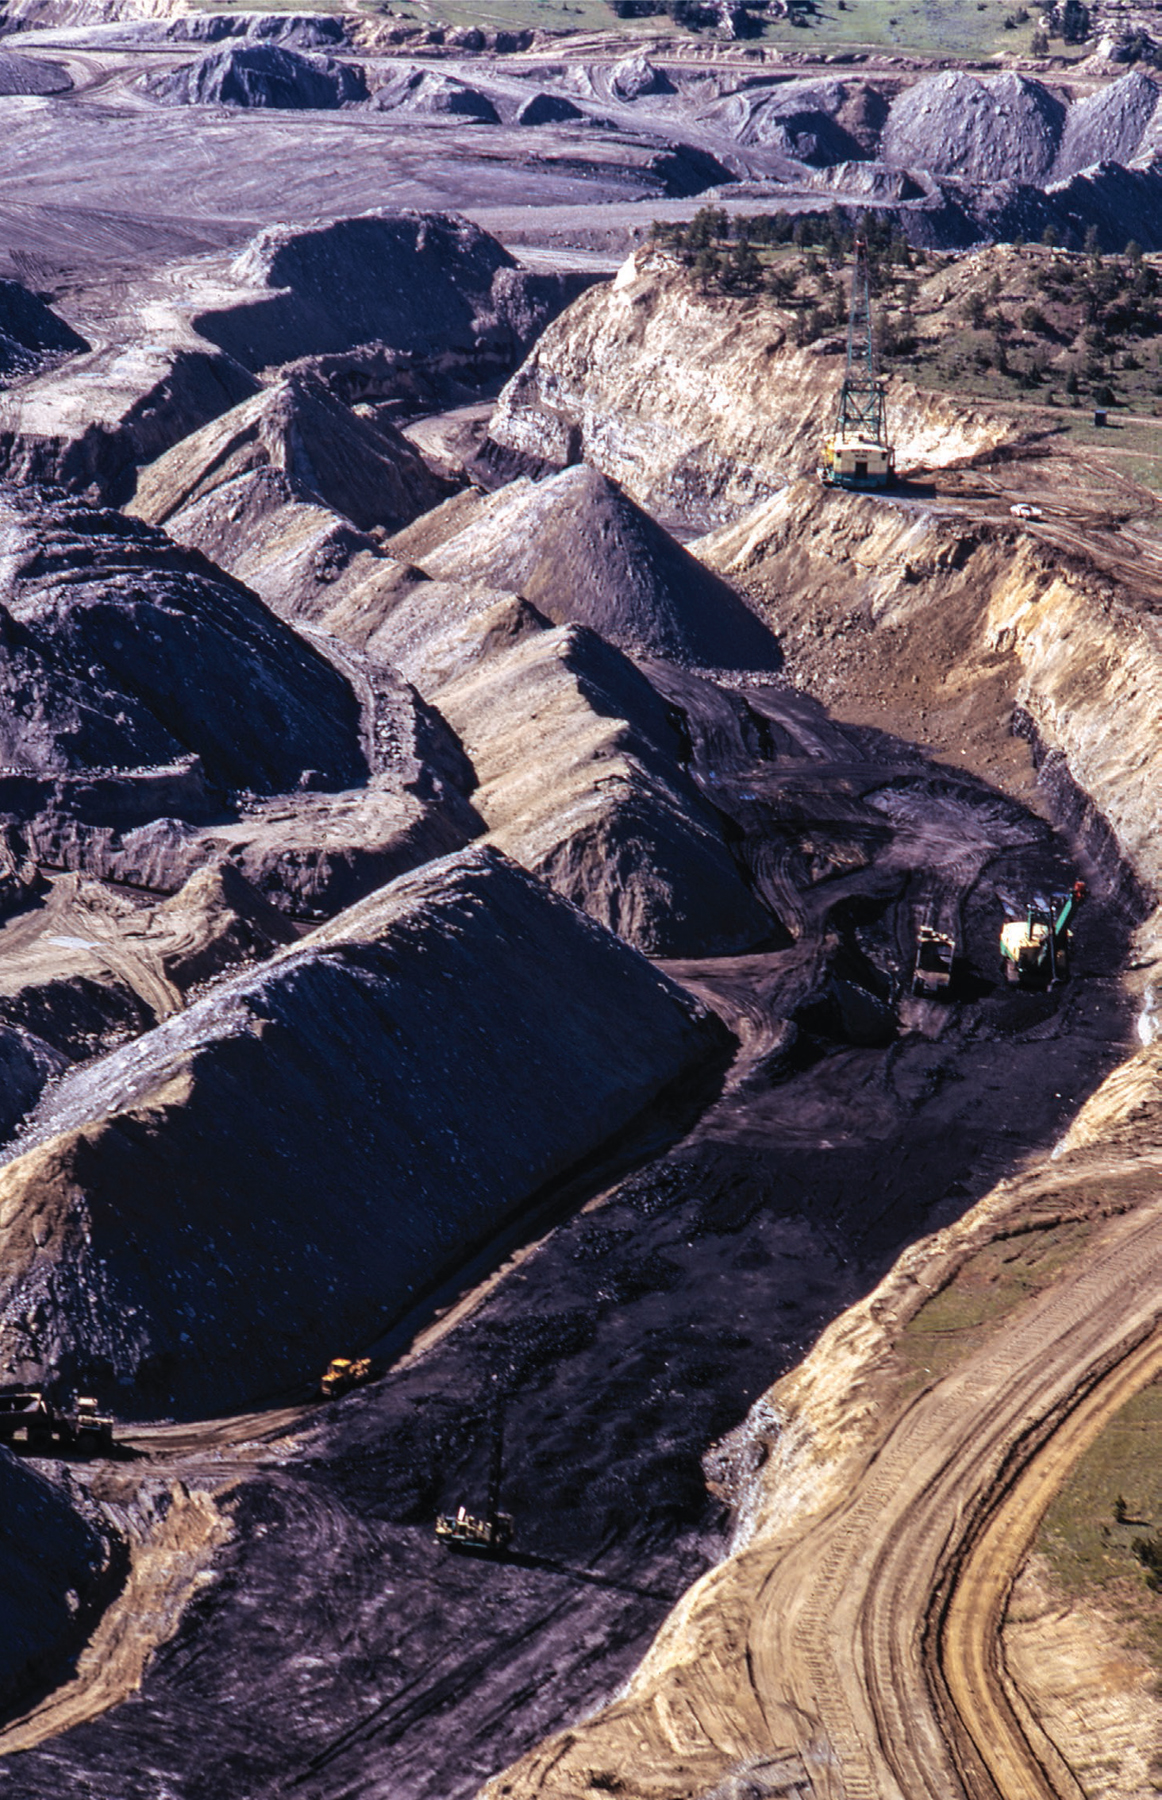
This aerial photo of strip mining in northern Montana was made on one of my assignments for Project DOCUMERICA.
Haze is caused by tiny particles of water or smoke or dust in the air, and the effect is amplified by sunlight reflecting off those particles. Polarizers cut that glare and diminish the appearance of haze. As a conservation photographer, you may want to keep that haze showing in the photo to make a point about diminishing air quality—so take off the polarizer.
Shooting on the ground can make it difficult to capture the magnitude of destruction taking place, so some of your conservation photography may best be done from the air. Aerial photos help give the big picture of what is happening. During some of my work for DOCUMERICA, I used aerial photography, particularly to show the destruction to ranchlands by strip mining.
Use Black & White for Emphasis
Today, we are used to seeing most imagery in color. As a result, a black & white image tends to stand out and draw attention. I’ve used this black & white image of a lion (bottom right) in many presentations to make a point: the African lion, which we used to think of as a secure species, is on the verge of being classified as endangered. In the 1980s there were an estimated 200,000 lions across the African continent. Today, they number only 20,000 and the population is declining due to loss of habitat.
Your work can have historical value and serve as a benchmark to compare changes, good and bad, in the years or decades to come. Be sure to record as much information as possible in the metadata of the digital photos: the date and time of the photo, place names, keywords, and, if possible, the GPS coordinates (see chapter 3). In addition, shoot a lot and use various compositional arrangements in the photos. You never know how it may look years or decades later.

Coastal mangroves provide vital habitat for numerous marine species and birds. Young shrimp, sharks, and sea turtles find refuge from predators among the tangled roots. Numerous birds nest in the branches above.

A black & white image often attracts attention because so many photographs we see today are in color. You can convert color images to black & white very effectively using Lightroom and Photoshop.