Monocot plants have one cotyledon and parallel veining.
CHAPTER FOUR
FOCUS ON LEAVES
Every plant has leaves, so learning to draw them is crucial to botanical drawing. There are many variations of leaves, and drawing them well is a lifelong pursuit. A description of a leaf’s vein characteristics is an important part of botanical drawing as well as plant identification. Drawing subtle veining takes some practice and requires recognition of basic leaf-veining patterns. Plants fall into one of two leaf categories: monocot, a seed-bearing plant that has one cotyledon (the first leaf that appears on a seedling), and dicot, a seed-bearing plant that has two leaves that emerge first. It is helpful to know these two botany definitions that describe the two kinds of plants and their leaves.
Monocot leaves have parallel veining. They are usually long, strappy leaves that bend over, creating twists and turns. Parallel veining can be seen in grasses, tulips, irises, orchids, palms, corn, and bamboo. Dicot leaves have net veining, also known as branching veins. Roses, hibiscus, magnolias, and oaks have dicot leaves. Leaf drawing requires close-up examination of leaf veining, so a magnifying glass will be helpful. Because leaves are not very thick, we tend to think of them as being flat, but there are complex ways that light and shadow vary on leaves that can be used to make them look extremely dynamic and dimensional.
Monocot plants have one cotyledon and parallel veining.

Dicot plants have two cotyledons and net veining.
Parallel Veining and Overlapping Leaf
Plants in the monocot family usually have parallel veining. These kinds of leaves all have similar characteristics, and drawing them offers a great way to practice the beginning concept of overlaps. An overlap is created when a leaf folds over, covering part of itself so that we don’t see all of it. We can practice using shading to create contrast that contributes to a dynamic, dramatic, and dimensional drawing. Who doesn’t get excited by the idea of showing a rolling and overlapping leaf with convincing drawing and toning! This lesson will take the mystery out of this process, but it will require practice to really understand the concept. Minor adjustments in a drawing will make a huge difference in your result, so be sure to draw lightly.
We’ll also use a picture plane in this lesson, which is an imaginary perpendicular window right up against your subject. Taking measurements on this allows us to measure in perspective (see this page).
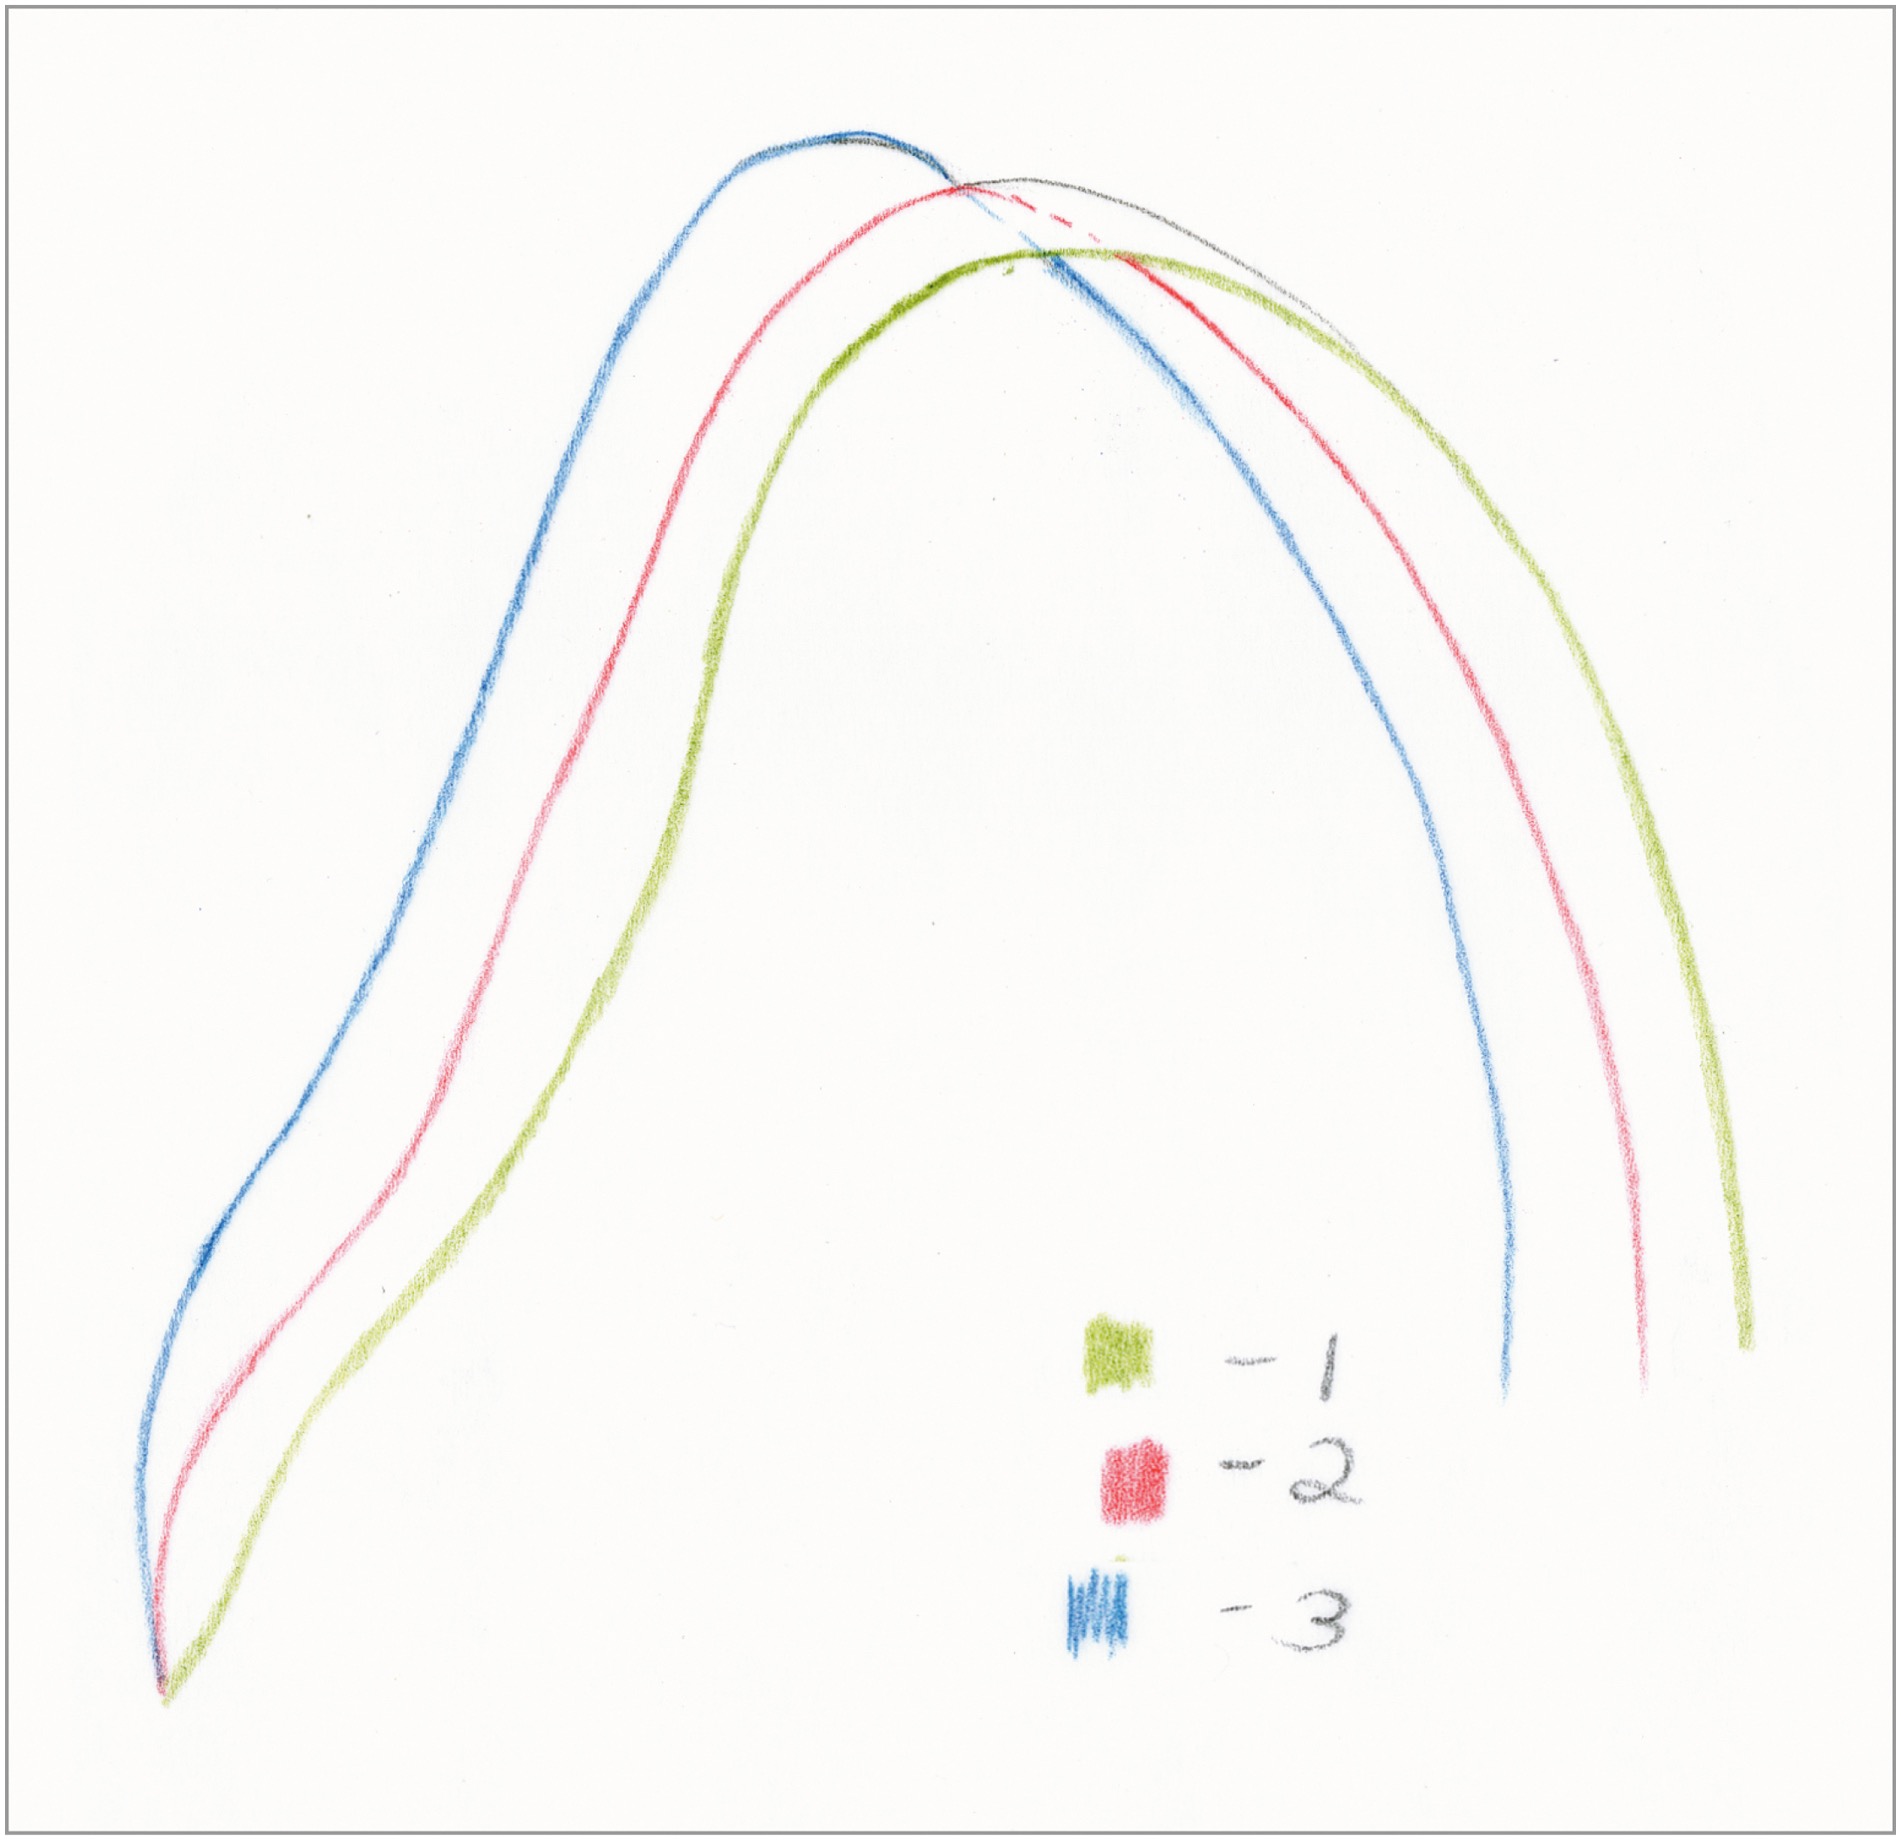
As you work, observe and reference this drawing in which the closest edge is green, the center vein is red, and the outer edge is blue. It’s important to keep track of all three lines; as when the leaf overlaps, an edge will disappear behind the rest of the leaf. We still want to visually continue all lines, even when we can’t see them, so that they appear to connect. Repeat this lesson as many times as you like with different leaves that have parallel veining. Look at real leaves on plants to see how they twist and turn, and try to draw them realistically. You can also practice these overlapping techniques by cutting your own leaves out of paper and using tape to hold them in place.
SUBJECT
Leaf with parallel veining, such as from a tulip, daylily, iris, grass, corn, or any other monocot plant
ADDITIONAL MATERIALS
• Chrome Oxide Green colored pencil #278
• Permanent Green Olive watercolor pencil #167
• Watercolor brush #2 or #6
• Permanent Green Olive colored pencil #167
• Other colored pencils to match the local color of your leaf
COLORED PENCILS
#278
#167
WATERCOLOR PENCILS
#167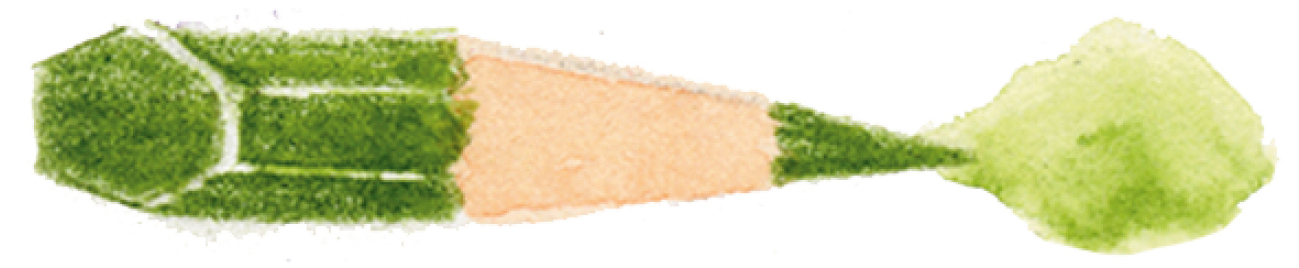

Set up your leaf with a pleasing curve and overlap. You can tape your leaf down on paper to hold it in place, but keep the curve graceful.
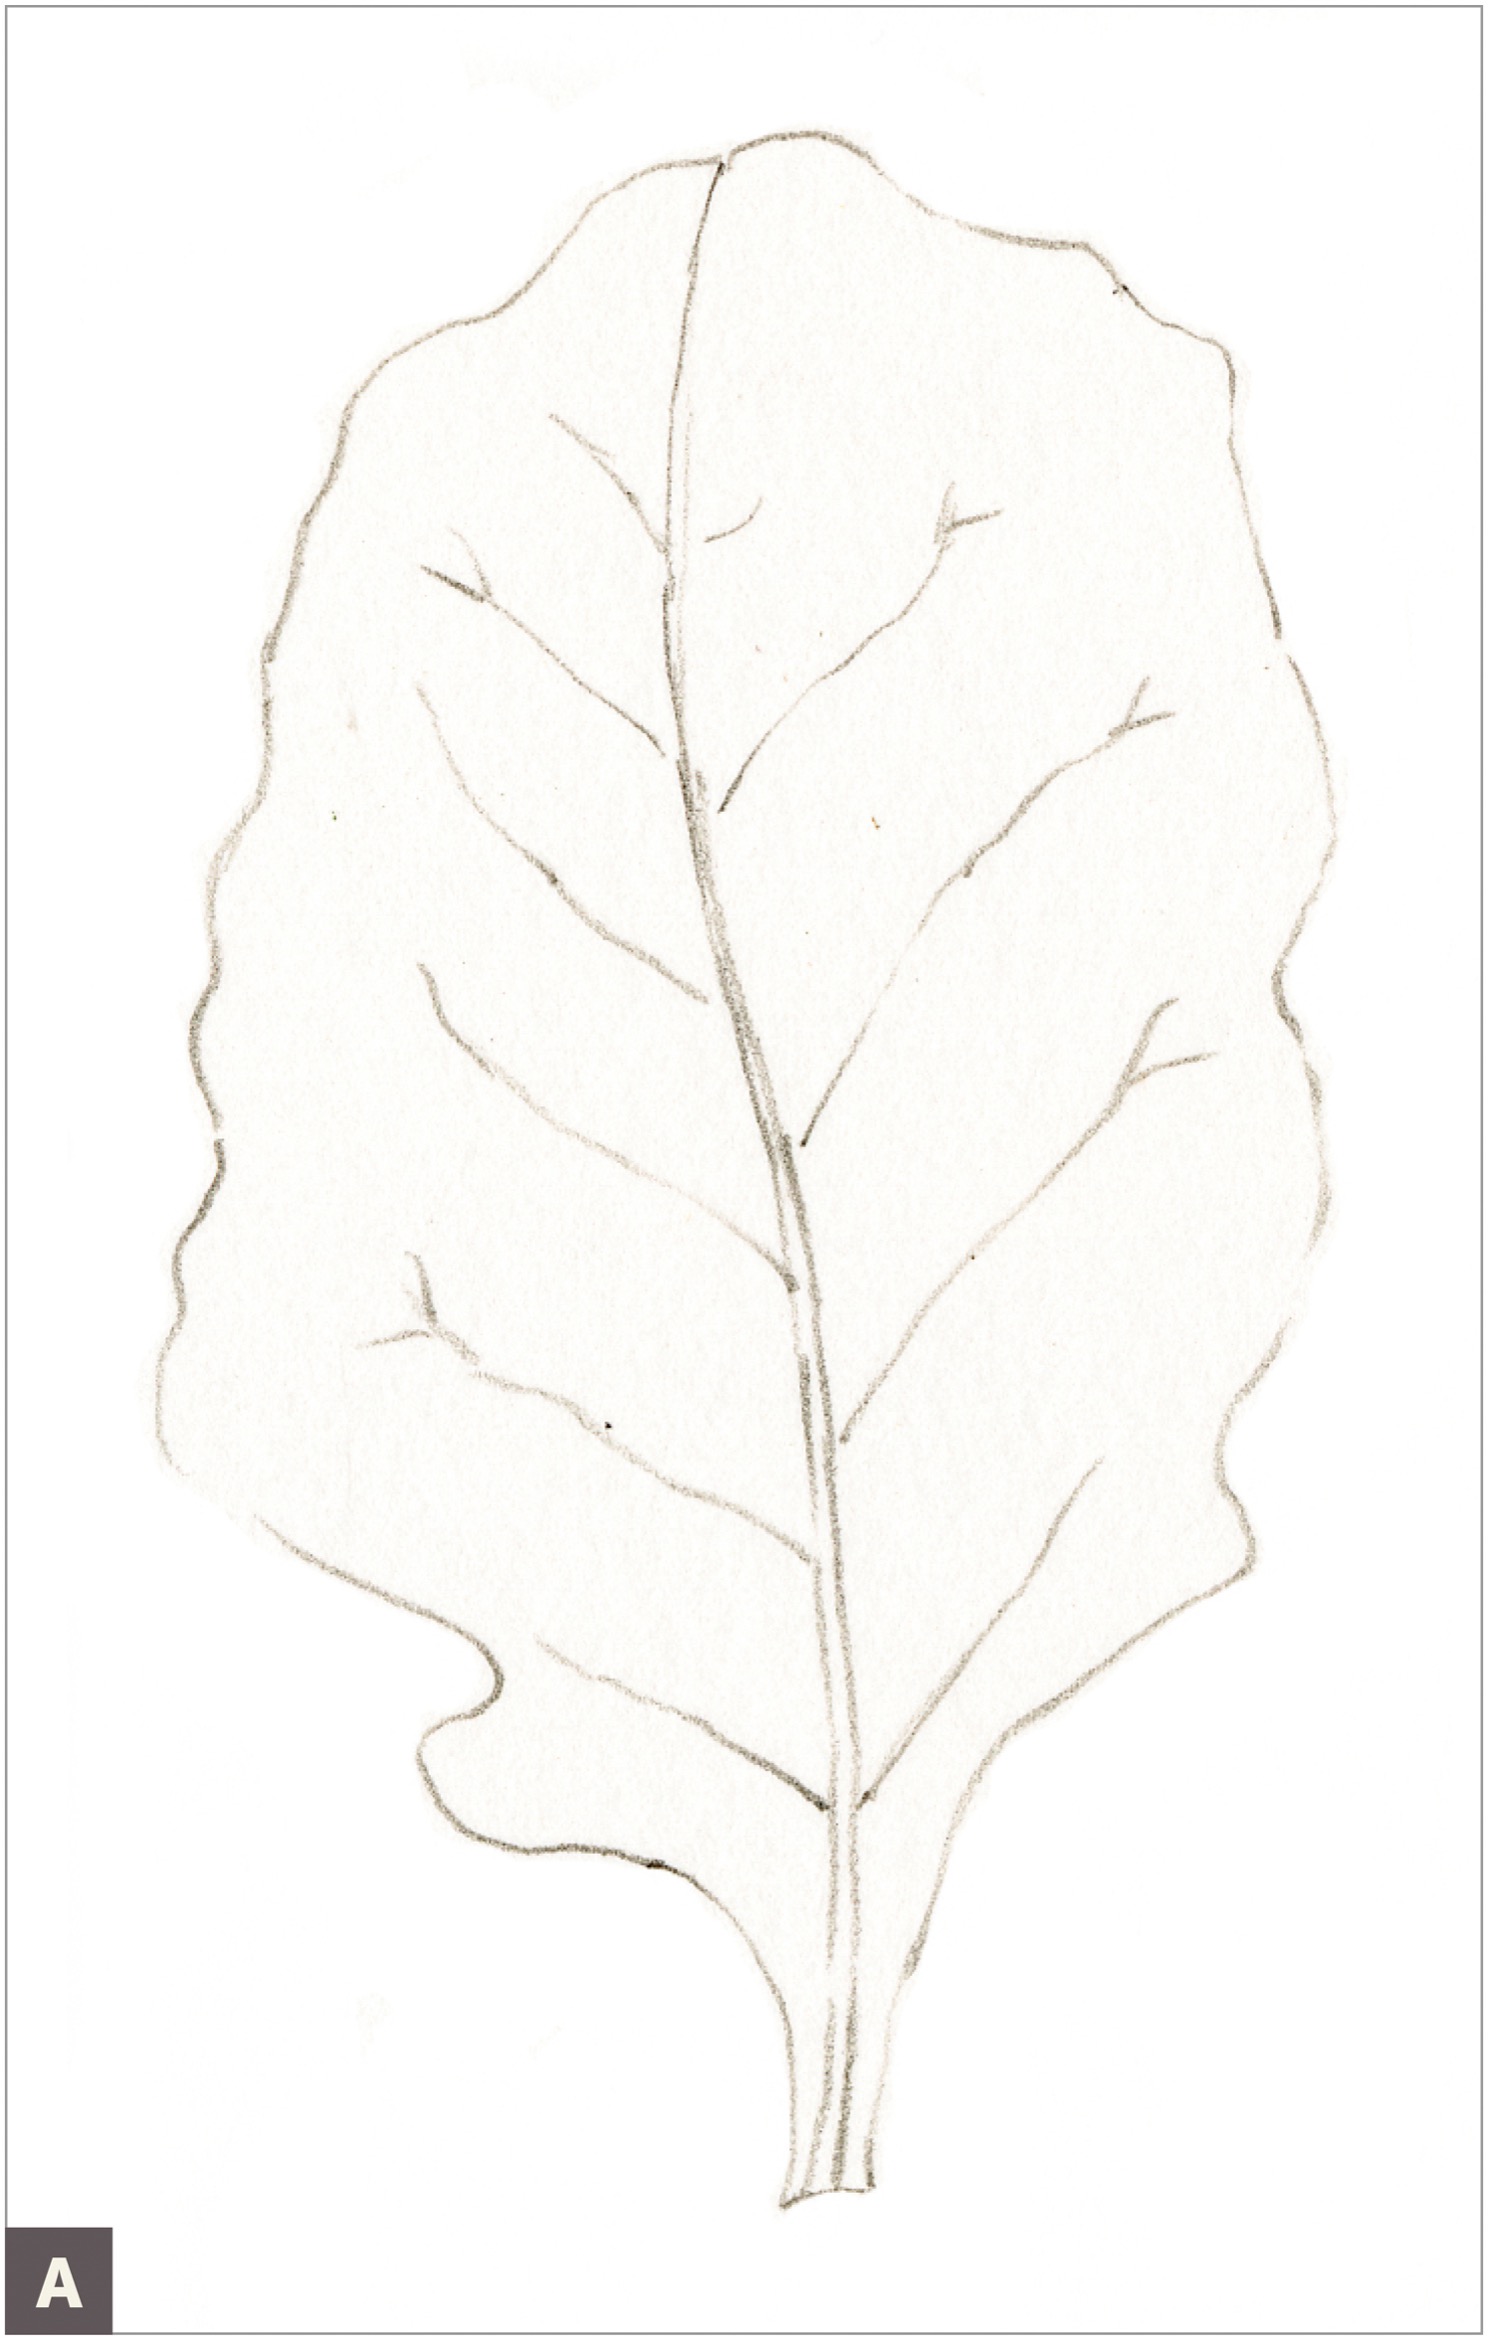
Measure and draw the nearest edge of the leaf that you see, the edge right up to the picture plane. Make sure to draw a curving line that’s graceful and not too angular. (A)

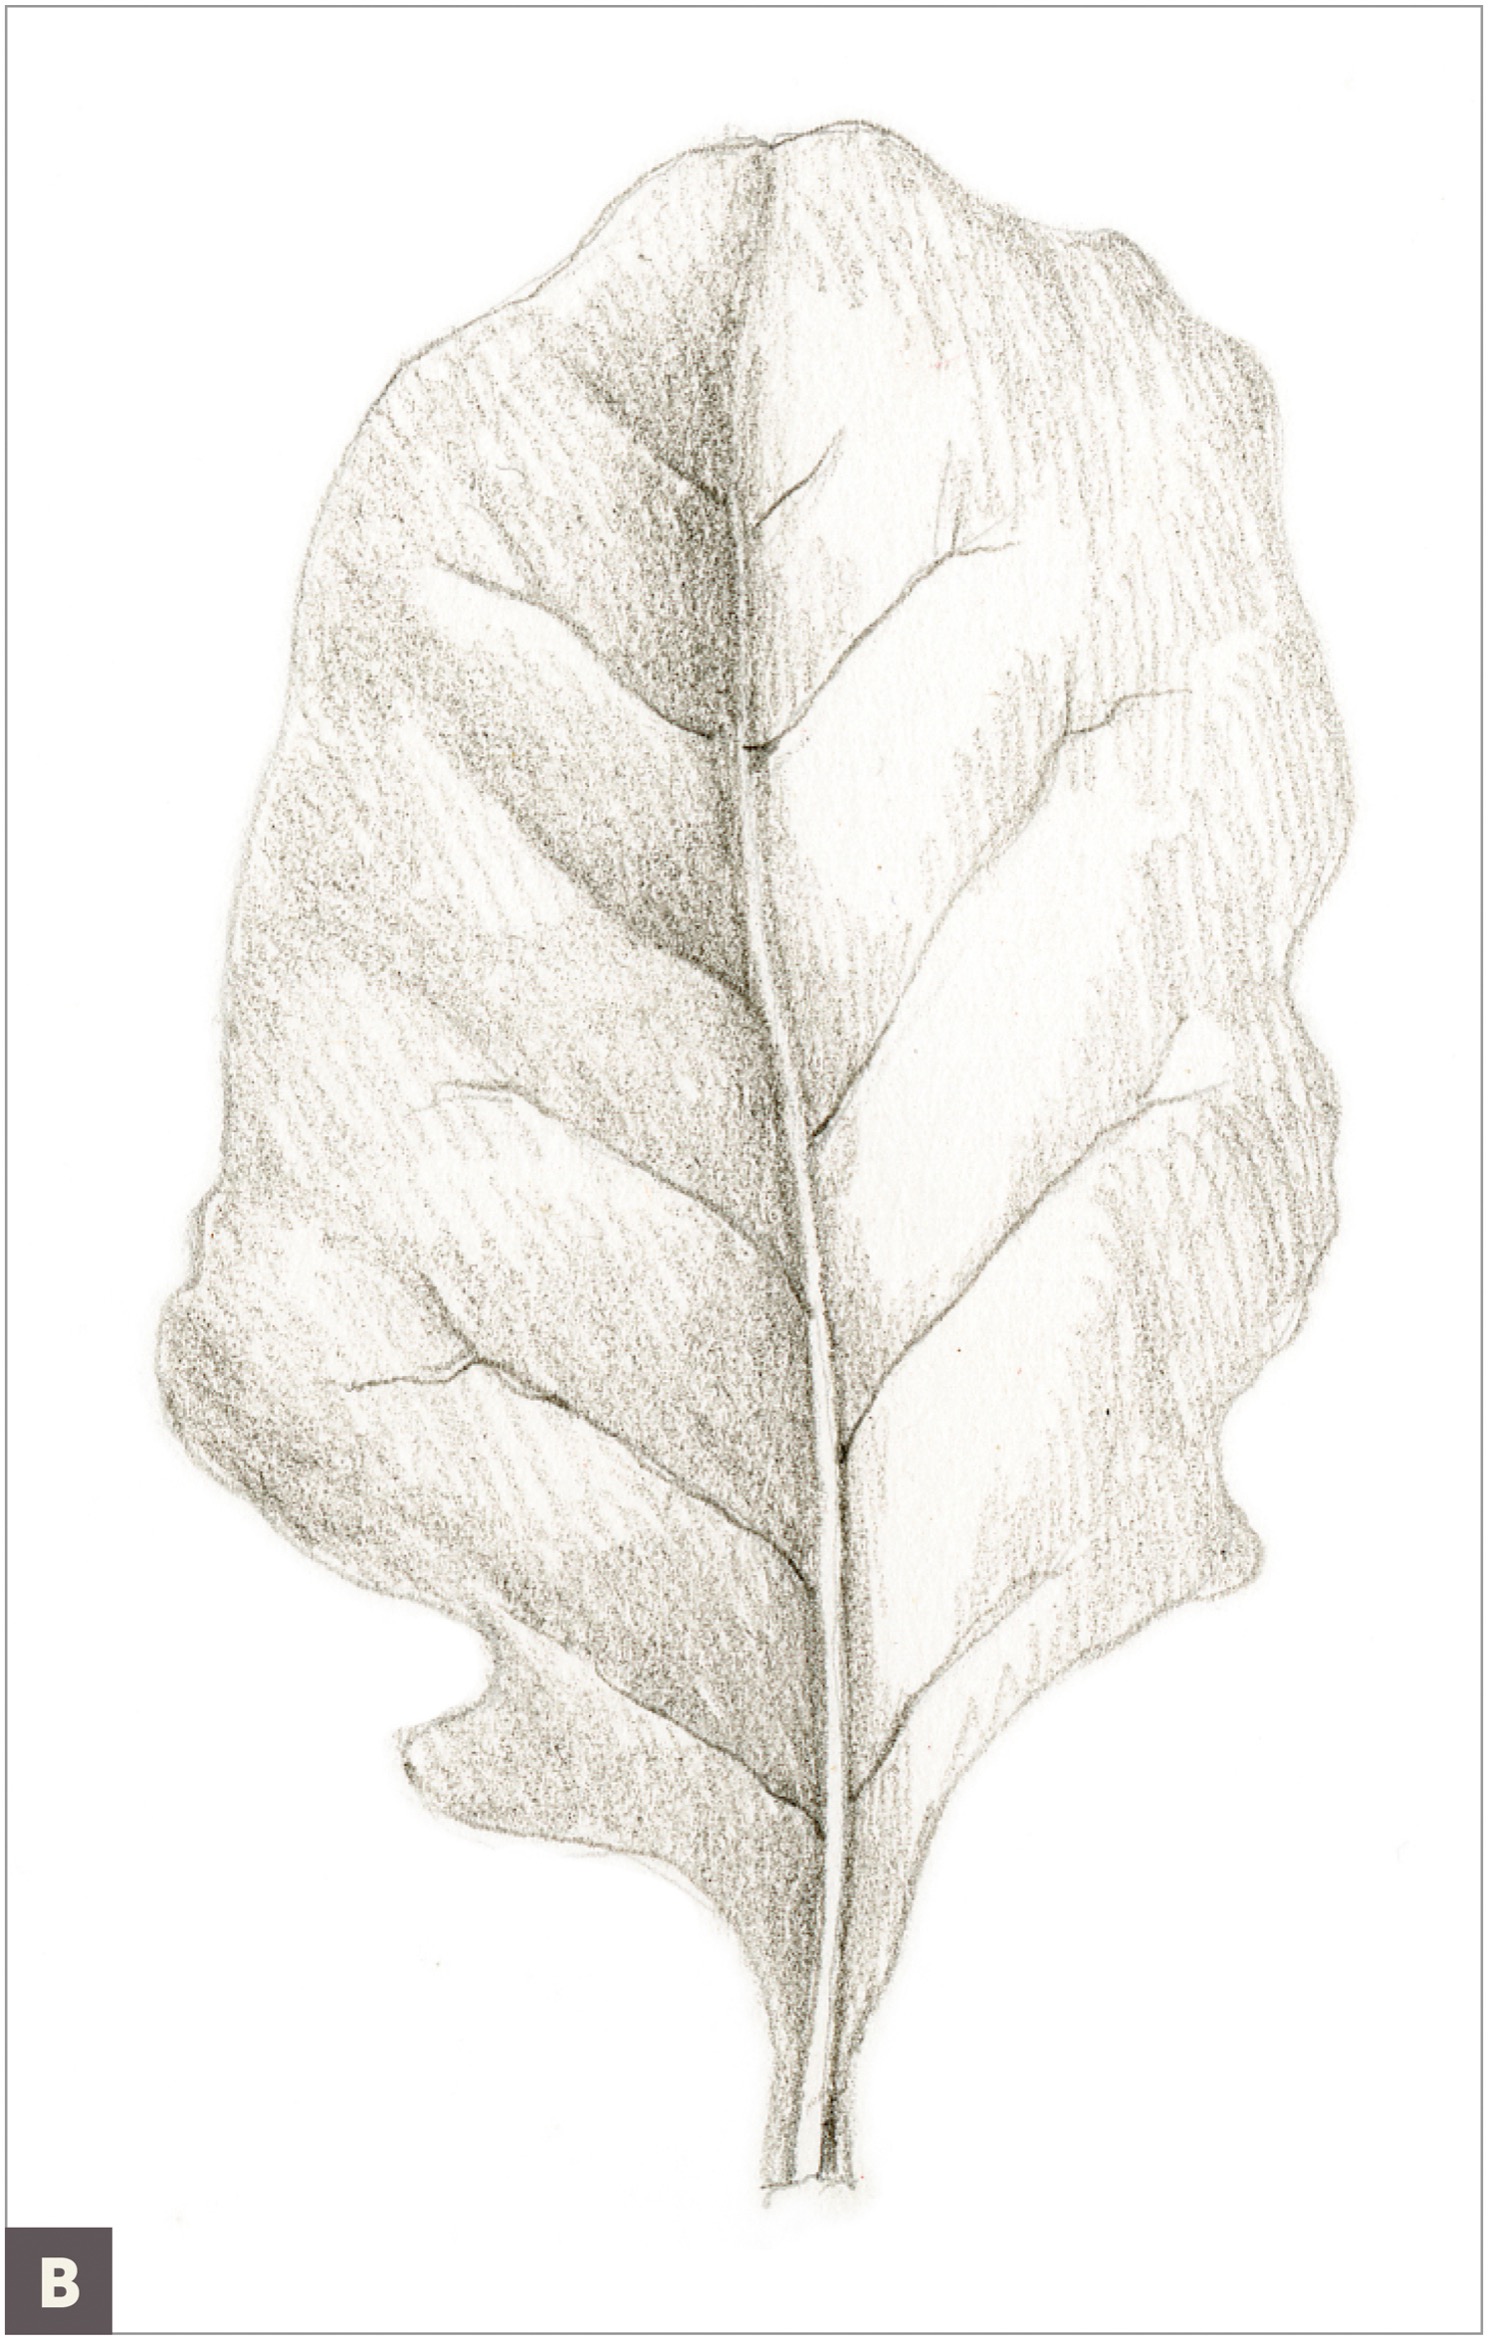
Next, draw the entire center curve of the leaf, describing the midvein in one continuous curve, even though part of the center will be obscured when the leaf rolls over. Draw the outside edge of the leaf; again, it will not be visible when it rolls over, but draw it lightly anyway, all the way through. (B)

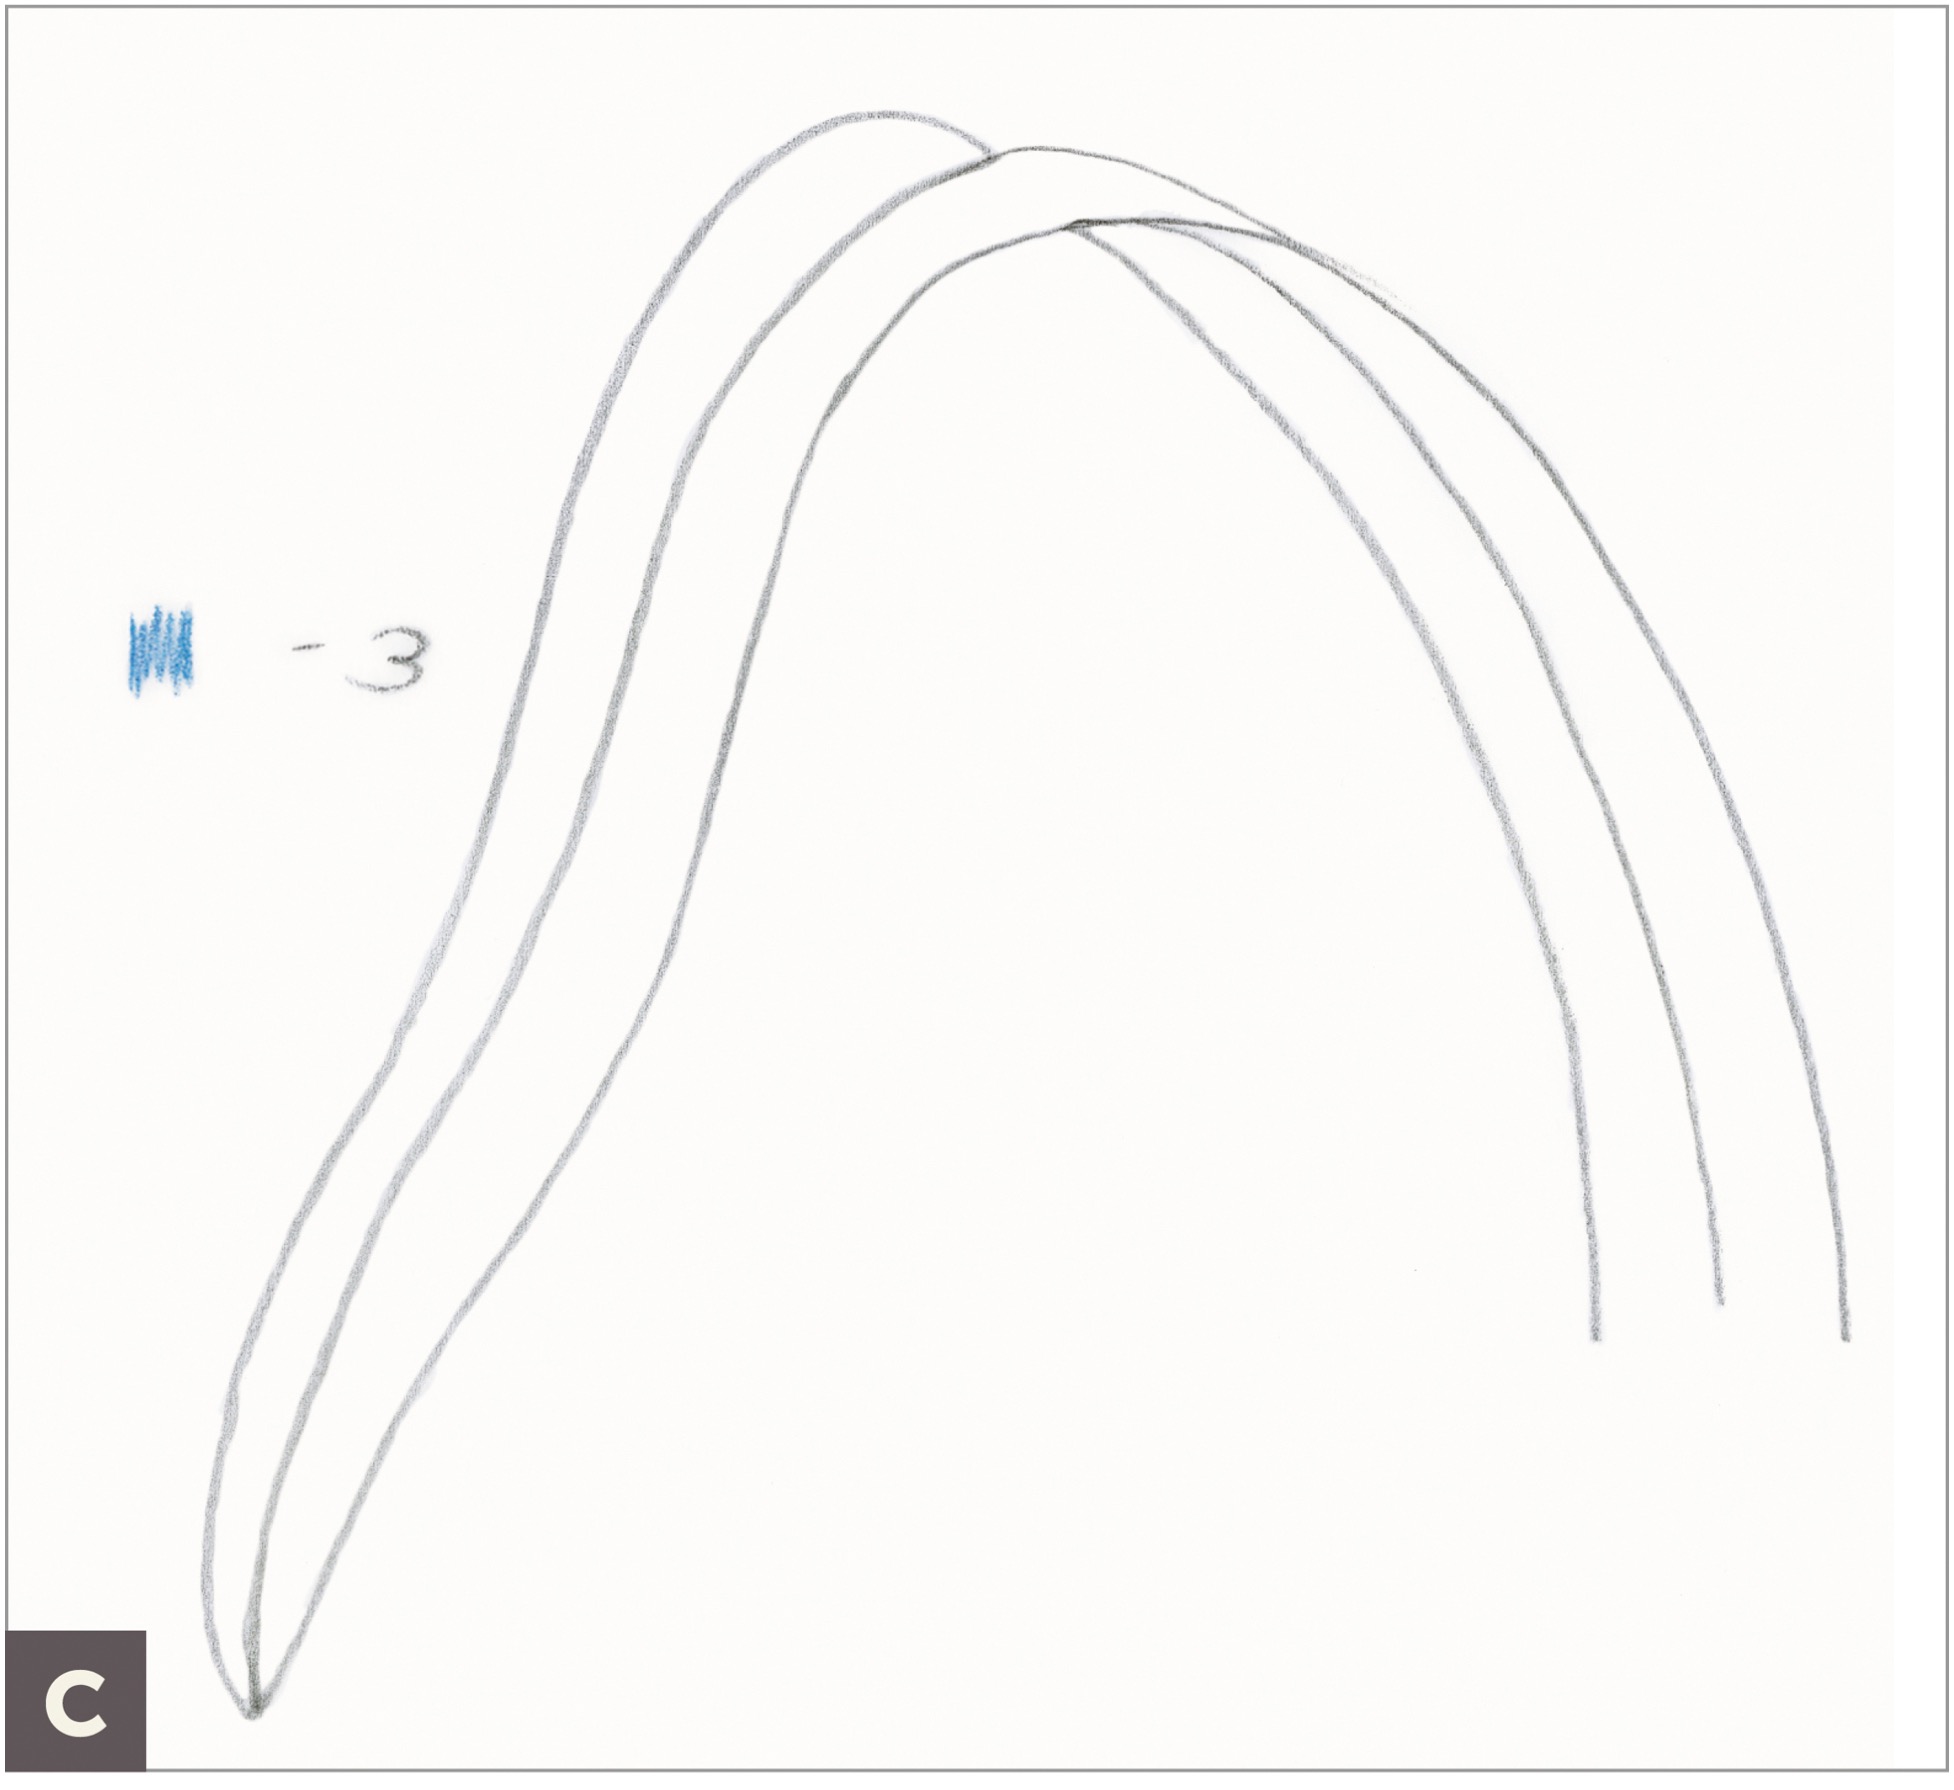
Draw the width of the leaf as it is at the top, rolling over the side. Erase the lines that aren’t visible. The secret to drawing a convincing rolling leaf is to have all the edges appear connected. (C)
Look at your leaf under a light source, or use your head light, and tone the overlapping area with a shadow color such as Chrome Oxide Green colored pencil to create a convincing bend with a good highlight on the top of the leaf. (D)

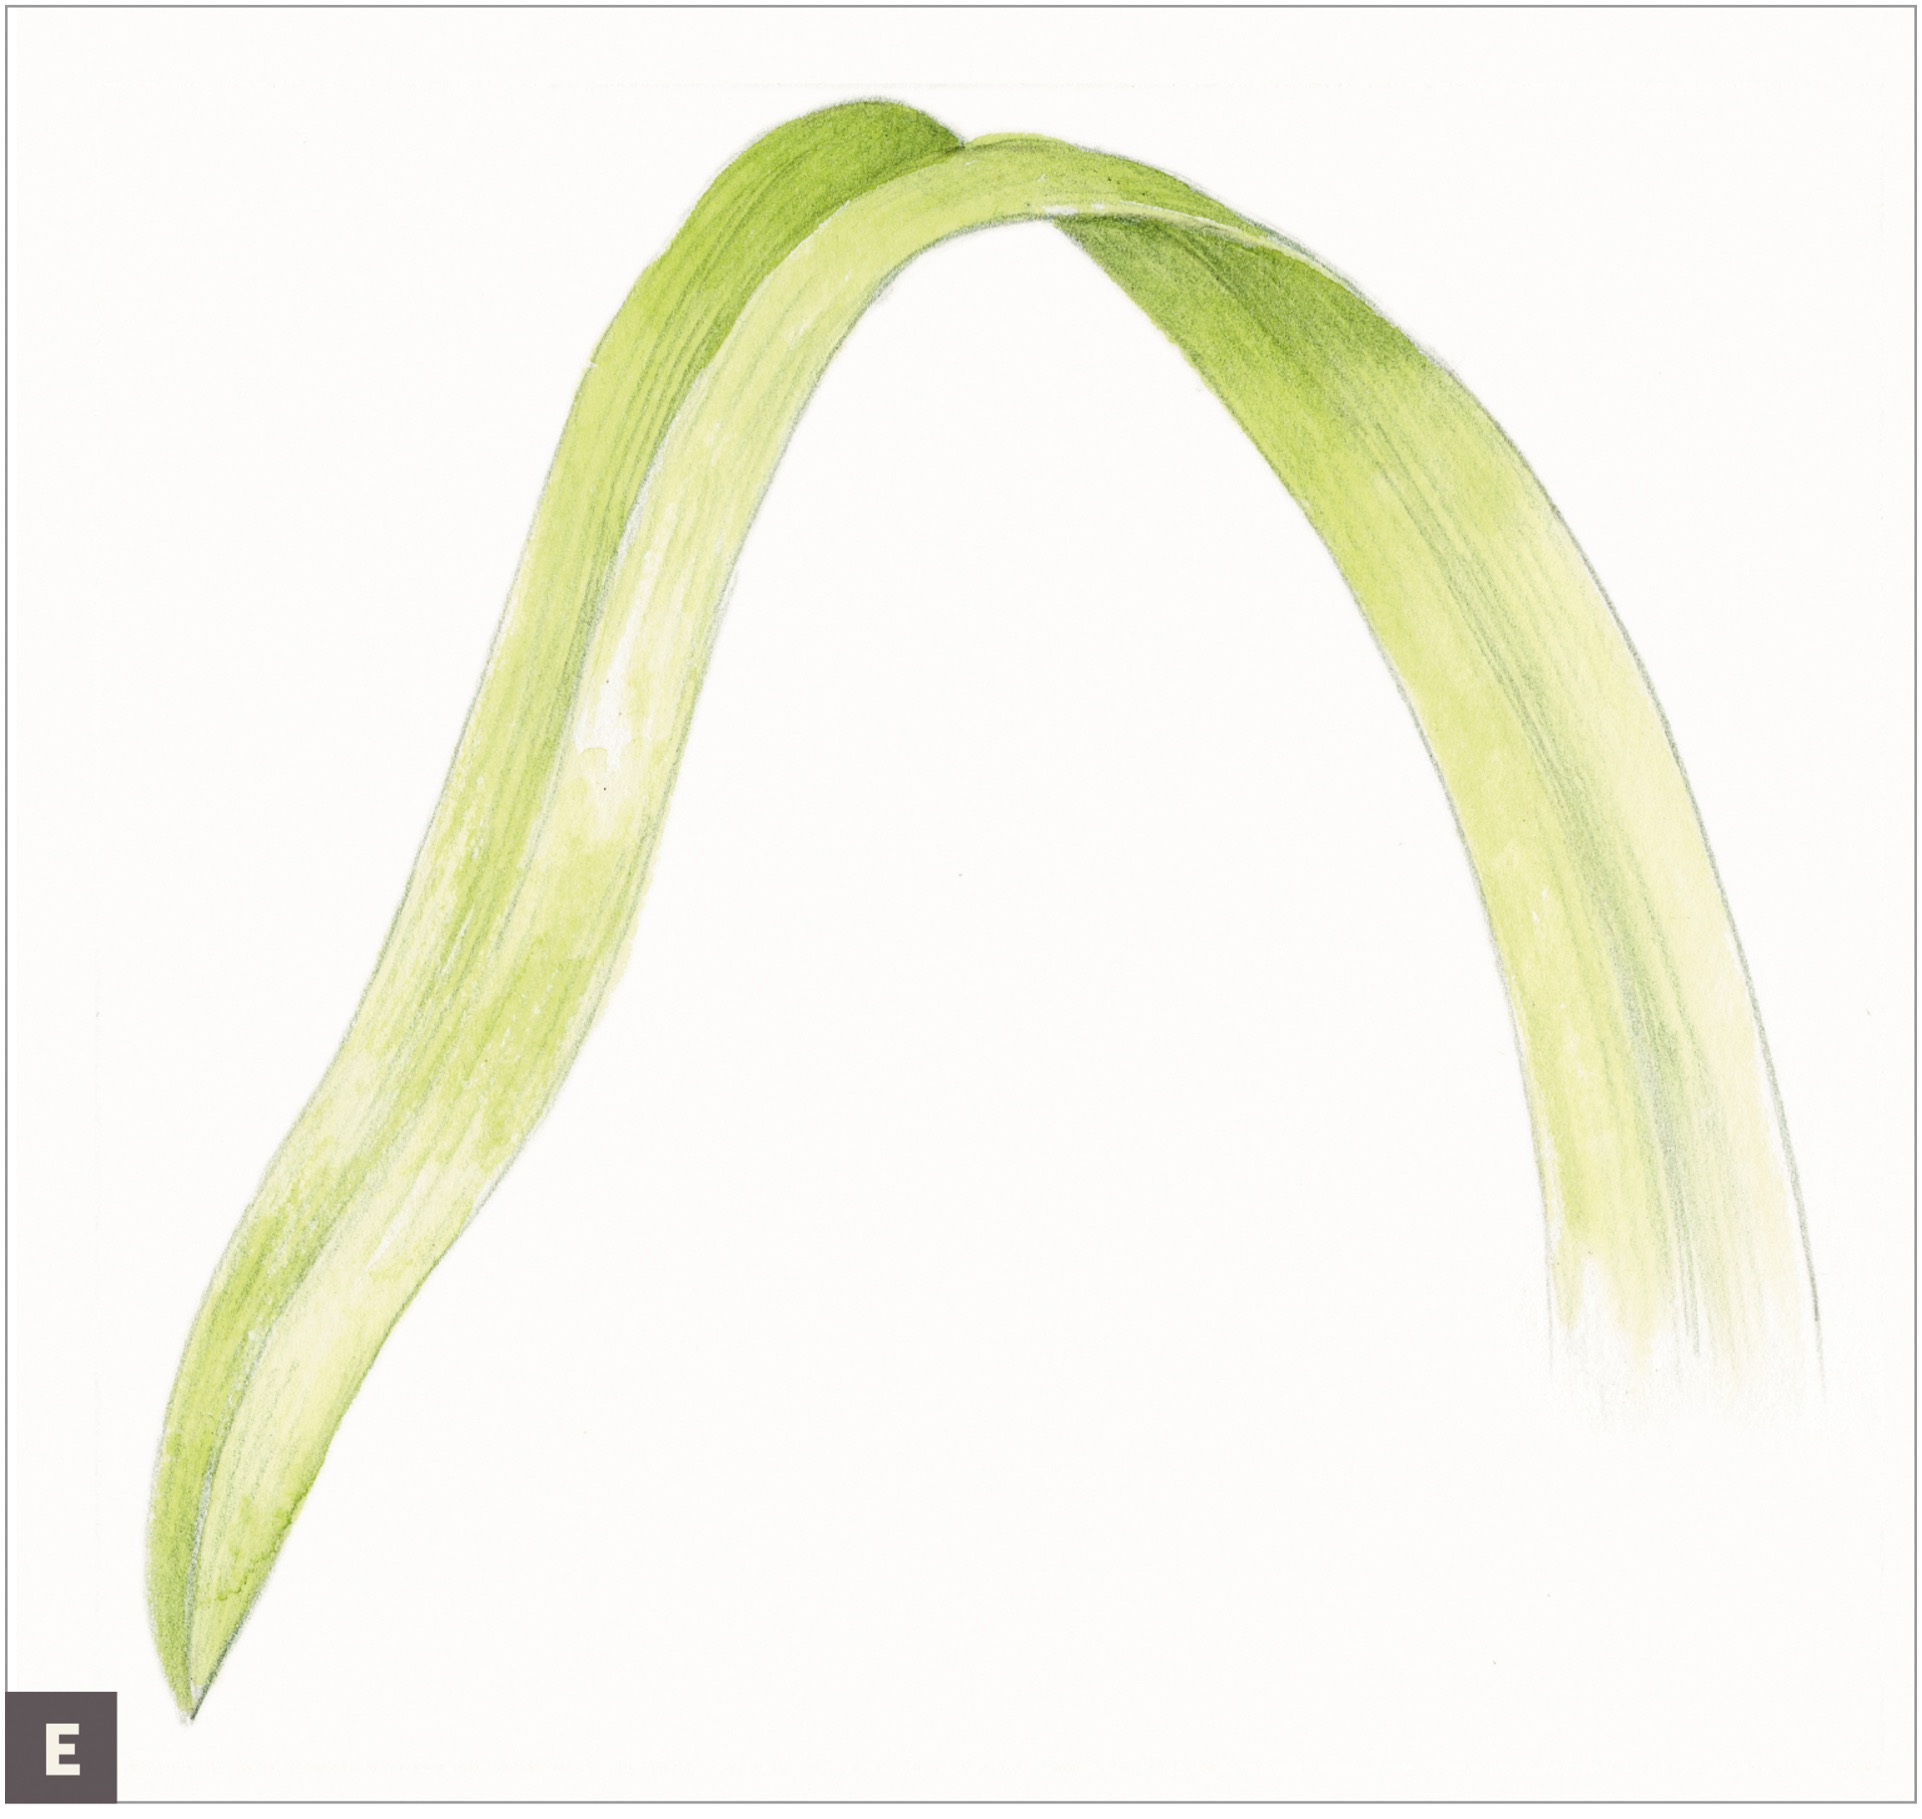
Using a #2 or #6 brush, add a layer of Permanent Green Olive watercolor that’s darkest in the shadow area of the overlap and lightest at the highlight. (E)
Continue to add layers of colored pencil with Permanent Green Olive and other colors to match the local color of your subject, filling in details you see on your leaf, such as suggestions of the veining. (F)


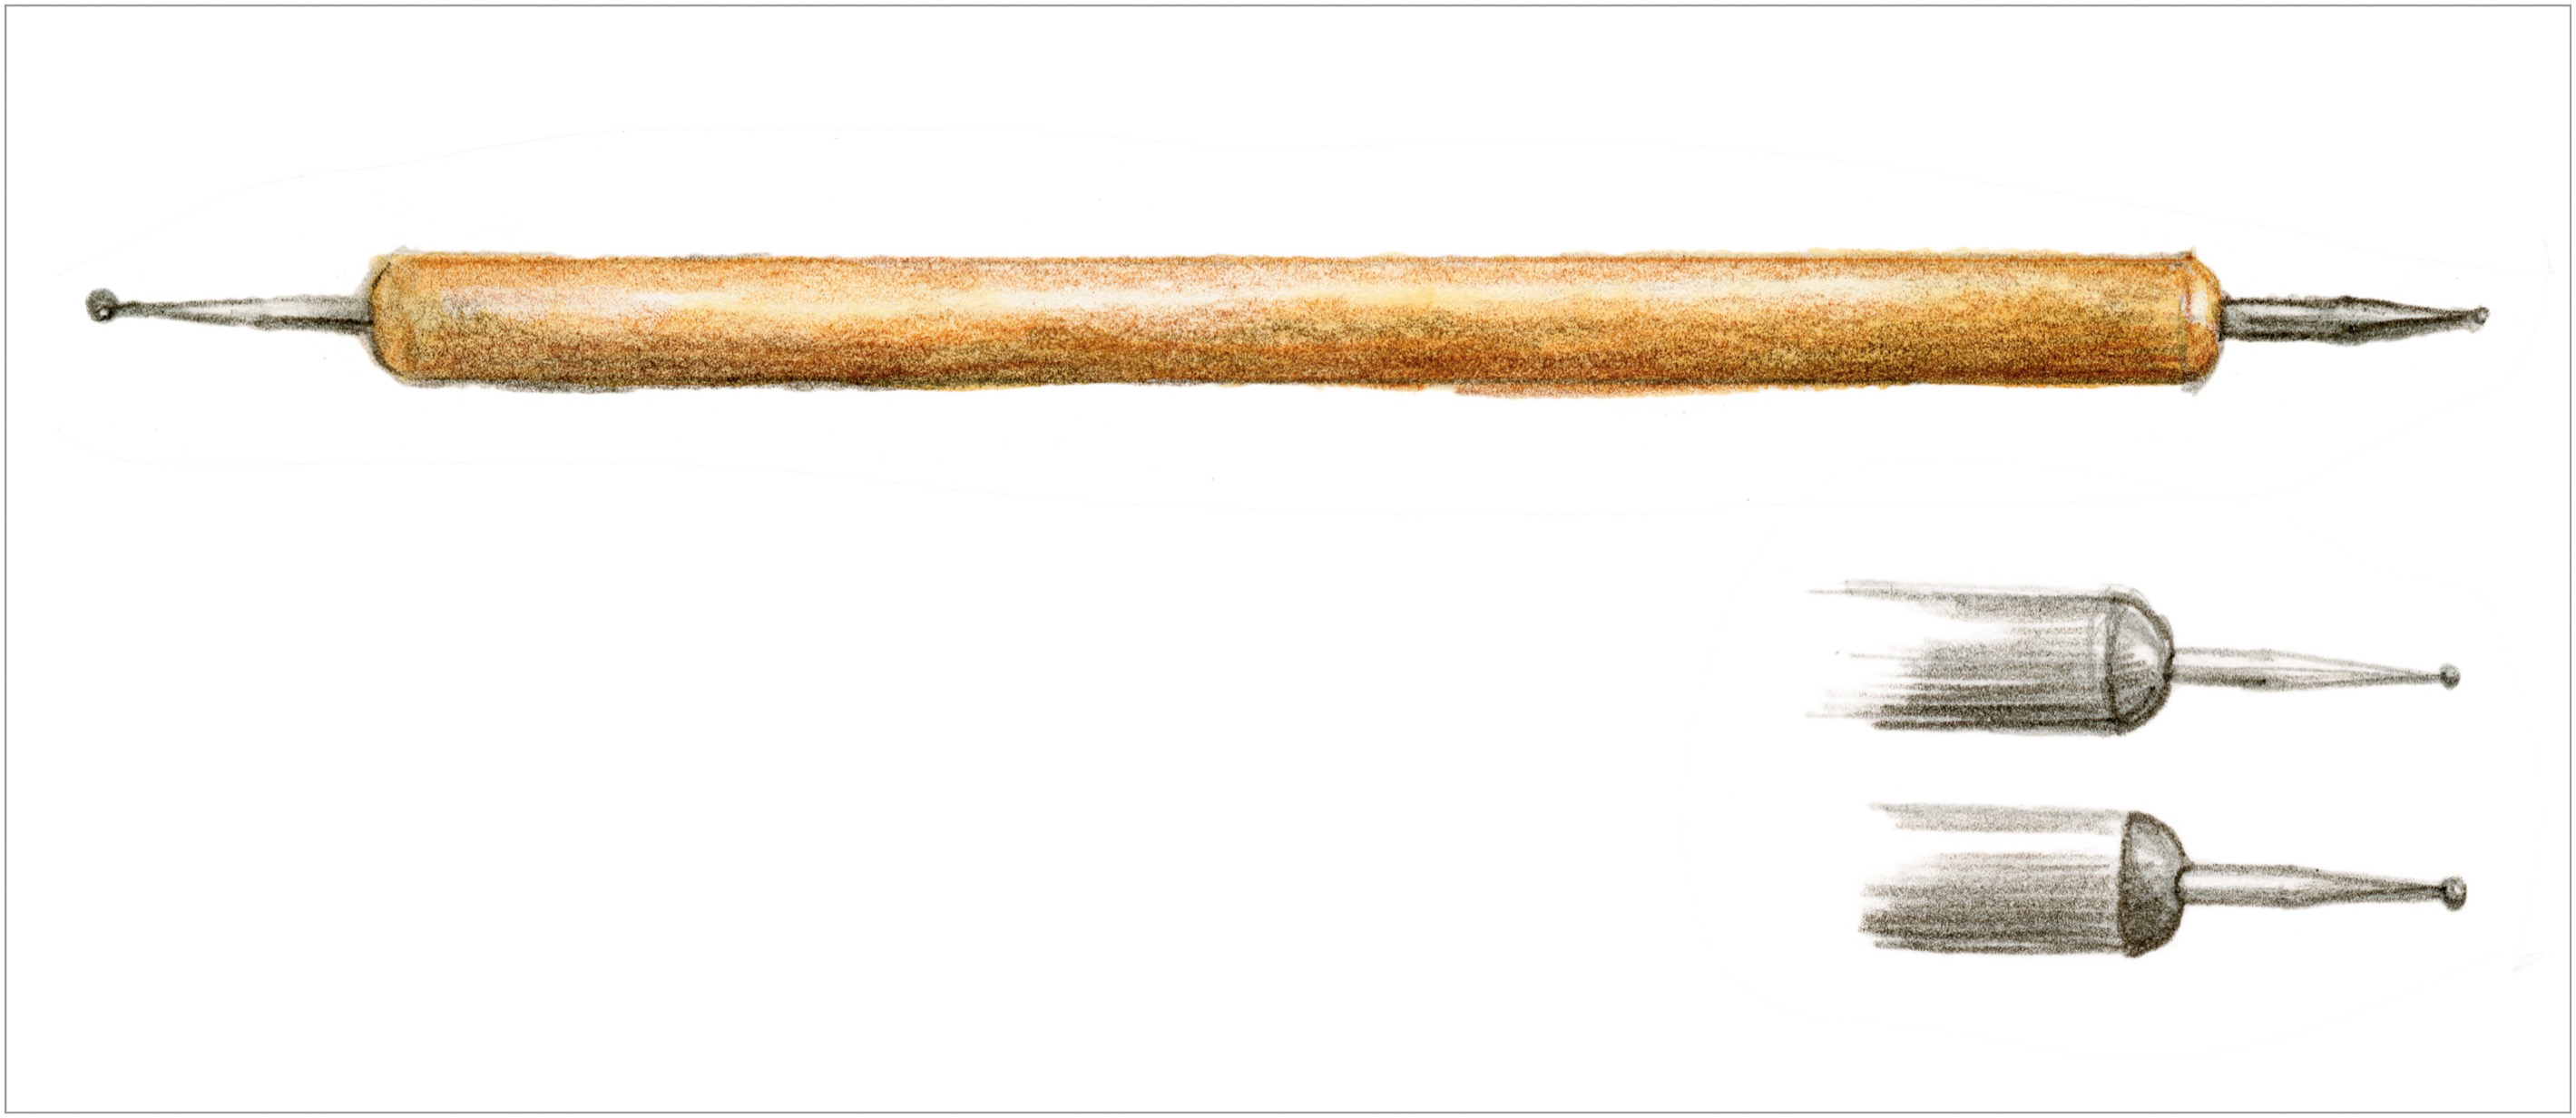
EMBOSSING TECHNIQUE PRACTICE
When your botanical subjects have light, skinny areas, this is a good time to use an embossing tool. Thin roots, hairs, veins, or stamens are all potential subjects for embossing. Embossing tools are used in various crafts to create a recessed or indented pattern on a surface. On paper, they work to press fine lines into the paper surface. When you draw over an embossed area with a colored pencil, the embossed area stays light while the pencil tones cover the paper around the embossed area. If you paint over the embossed area with watercolor, the paper will be tinted, so keep this in mind when combining embossing techniques with watercolor. The trick to this technique is to mix embossing with regular drawing so that the embossing doesn’t look too obvious. Practice keeping your embossing subtle and varied so that the lines are not stiff and regimented.
Take a moment to study your leaf subject. Be sure to use a magnifying glass so that you can see the pattern of the veins clearly.
To practice with the embossing tool, on a small section of your paper use a tool with a medium-size point to draw some veins. Draw with the tool as if it were a pencil, pressing it into the paper. Apply strong pressure at first, then ease up on the pressure, making the line thinner and thinner until it disappears. Practice this on your page to try different ways of using this tool. Draw over the embossed area with a light layer of Dark Sepia to see how the embossed lines remain the color of the paper and will show up once some toning is added around them. This is a great way to preserve thin, light areas on a drawing, such as veins of leaves. (A)

To practice tinting your veins, paint a small area of a green watercolor wash. (B)

Once dry, draw with the embossing tool over the watercolor and then apply Permanent Green Olive and Dark Sepia colored pencil, on top. Observe how the embossed areas are now tinted green, rather than the white of the paper. Veins are rarely as light as the paper, so tinting with a watercolor helps the veins look subtle. (C)


Basic Leaf-Veining Practice
This lesson explores the pattern of a leaf’s net veining. This is any pattern with a strong center midvein and branching secondary and tertiary veins. You’ll revisit leaves over and over again, and understanding their repeated patterns will be incredibly helpful.
Although you’ve probably looked at leaves thousands of times, as you work on this lesson really look closely at the leaf as if you are seeing it for the first time, and pay special attention to the veining. Veining is complicated because you’re not only drawing the veins but also what appears around the veins on a leaf. Veins create recessed areas on the leaf’s surface, which can create shadows and highlighted areas that are almost like pillows. I think of leaf veins as stitching on a quilt to understand their surface contour. If the veins are stitching, then what color do you use to draw them? Is it a light yellowish-green, or do you focus on the shadow created by the recessed area of the vein? It helps to think of the vein color as various shades of a color. Light and shadow make for variation in the veining, and your veins will look more realistic if you draw them this way. Sometimes veins are light, and sometimes they are dark. I constantly ask myself, “Am I drawing the vein, or the shadow created by the vein?” The answer is, I draw them both, sometimes on the same vein, and often I let my veins disappear as they approach the leaf margin. The veining looks different on the front and back of the leaf as well.
The key to realistic leaf veining is subtlety. Notice if the veins branch off before they reach the outer edges of the leaf. Make sure the veins aren’t too straight or curving too much but have appropriate zigzagging to look realistic. Observe and include the proper width variation and tapering at the tips and edges. For good toning on the surface contour of a leaf, remember how the light source reveals the distinct planes of the leaf. As you draw your leaf, keep in mind that the midvein is often the widest and lightest in color. The secondary veins will be thinner and slightly darker in color, closer to the color of the body of the leaf, and the tertiary veins will be even skinnier and closer in color to the body of the leaf. Observe these veins under magnification to see what I’m describing.
To enlarge the leaf pattern from your subject and exaggerate the veining, simply measure the width of your midvein and multiply it by 2, making it twice as wide (roughly ⅛ inch wide). But note that it will taper and get thinner as it moves toward the top of the leaf.
SUBJECT
Leaf with net veining, such as from baby kale, a rose, or a hibiscus
ADDITIONAL MATERIALS
• Dark Sepia colored pencil #175
• Watercolor brush #6
• Permanent Green Olive watercolor pencil #167
• Permanent Green Olive colored pencil #167
• Embossing tools in several sizes
• Wax paper (optional)
• Other green colored pencils to match your leaf’s local color
• Black Verithin pencil (optional)
COLORED PENCILS
#175
#167
WATERCOLOR PENCILS
#167
Lightly, with graphite pencil, draw a small enlarged section of the midvein and secondary veining on a baby kale leaf. Draw it slightly wiggling or irregular, as it is neither straight nor curved. It most closely resembles a series of straight lines that keep moving slightly in different directions. Lightly indicate where the secondary veins will appear, making them irregular as well.
Use a Dark Sepia colored pencil to add a light layer of tone next to the midvein on the left and right side. Add a second layer of tone on the left plane of the leaf next to the midvein and also right above each secondary vein. (A)

Using a #6 brush, paint a light layer of Permanent Green Olive watercolor on top of the leaf. You can graduate the watercolor a bit by starting darker on the left side of the leaf closest to the midvein and getting lighter toward the outer left side of the leaf edge. On the right side of the leaf, graduate the watercolor from a little darker at the leaf edge and lighter toward the midvein. This reinforces the idea that the two sides of a leaf receive light differently because they are two separate planes, similar to an open book (see this page).
With a Permanent Green Olive colored pencil, grisaille tone over the watercolor, starting on the left side of the midvein. Begin at the edge of a secondary vein and tone toward the next secondary vein, but stop toning just before you reach the next vein, creating a slightly lighter skinny line or secondary vein. Add grisaille toning next to each secondary vein and toward the center of each area, leaving it slightly lighter in the center, to create a slight pillowing effect between the secondary veins. You can sometimes observe this pillowy look on leaves in nature. (B)

Add tone on the right side of the leaf, but this time tone darker at the right edge and leave bigger highlights in each section. Also tone a bit next to the center midvein.
Create some tertiary veins very subtly with the embossing tool; either do this directly on top of your drawing or try putting down a piece of wax paper and embossing over it, which will remove a bit of the pencil. Remove the wax paper and tone over the area with colored pencil—the vein will show up more but will be subtler than the more prominent veins. (C)

Finish with more Dark Sepia and green colored pencils. If your veins are too light, darken them a bit so that they’re subtler. You can darken inside an embossed area with watercolor or with a very sharp pencil (Verithin pencils work well for this purpose).
Turn over your leaf and study the pattern on the back; notice that the veins are raised, making them appear more prominent. The midvein can be toned like a cylinder with a cast shadow to make it appear to sit on top of the leaf surface. Draw a section of the midvein on the back of the leaf with Dark Sepia to practice this concept. (D)

A Basic Leaf with Net Veining
Leaves with net veining have a center midrib or vein creating two distinct planes that are affected differently by light. Think of the planes of a leaf as two sides of an open book. When light hits these two planes, one side receives more light and the other side more shadow. If you tone your leaf using this concept, it will look dimensional even though a leaf has very little thickness.
Once you understand the veining pattern, you can draw veins as a suggestion and not make them too prominent. Leaf tones in a finished drawing will be close in value, and veins will be subtle. It is a delicate balance to tone a leaf correctly. In the end, the veining should be close in value to the rest of the leaf so as not to have veins that are stiff and overpowering.

SUBJECT
Leaf with net veining, such as a baby kale leaf (or any leaf that has a strong center midvein with branching secondary and tertiary veins)
ADDITIONAL MATERIALS
• Dark Sepia colored pencil #175
• Permanent Green Olive watercolor pencil #167
• Watercolor brush #2 or #6
• Permanent Green Olive
• colored pencil #167
• Embossing tool (small)
COLORED PENCILS
#175
#167
WATERCOLOR PENCILS
#167
With a graphite pencil, lightly draw your leaf life-size. Begin your drawing with the center vein and then draw the outside edges of the leaf. With a Dark Sepia colored pencil, use tones to depict the leaf planes, then slowly add more and more detail indicating the secondary veins. Tone a light layer of Dark Sepia to get the leaf started, but don’t make it too dark at the beginning. (A)
Tone the left side of the leaf darker. Shade from dark to light, starting at the midvein and toning lighter toward the left edge of the leaf. Add a little bit of tone next to the midvein on the right side of the leaf by leaving a light vein and then toning a bit toward the right side of the leaf.
Add tone to the right leaf edge, and tone lightly toward the center of the leaf along each secondary vein. This side of the leaf should not be as dark as the left side. Veins are thicker or wider at the base and always get thinner toward the tip of the leaf. Because secondary veins usually branch out and appear to disappear before the outside edges, be sure to make them smaller and less defined. (B)
Using Permanent Green Olive watercolor pencil and a #2 or #6 brush, add a layer of watercolor wash over the Dark Sepia pencil, gradating the wash to indicate the two sides of the leaf and making the left side darker. Paint a very light layer of green wash over the center vein as well. (C)

To add subtle veining and the slight pillowing between the veins, layer colored pencils in Permanent Green Olive and more Dark Sepia. Remember to keep the veining subtle, irregular, and not too straight. Add a bit of embossing for the secondary veins. Remember that veins of this kind don’t usually go all the way out to the leaf edges. They tend to branch off before the edges and get thinner and thinner until they disappear. (D)

Look at your leaf and decide if you’ve gotten too literal with your veining. This happens often in the beginning. If you feel your veins look kind of like fish bones rather than subtle veins, don’t feel discouraged. Narrow the veins a bit, and make the color values closer in value by adding more watercolor on the veins. Draw another leaf, and try not to focus on the veins at all but keep them really, really subtle. (E)

Colorful Leaf with Watercolor
This lesson uses watercolor washes in a loose style, working with the wet-on-wet technique to create vibrant colors, which is so much fun. After your watercolor dries, the details of the leaf veining are created with colored pencil. Collect some colorful fall leaves to use as your models. These instructions show my process, but rather than copying my leaf, use your own leaves for this lesson. When I suggest a specific color to use, keep in mind it will most likely be a different color for your leaf, but the process remains the same.

SUBJECT
Colorful leaf
ADDITIONAL MATERIALS
• Watercolor brush #6
• Watercolor and colored pencils to match the colors of your leaf
• Embossing tool (optional)
• Warm Grey IV watercolor pencil #273 (optional)
• Cool Grey 70% Verithin pencil (optional)
• Black Verithin pencil (optional)
WATERCOLOR PENCILS
#273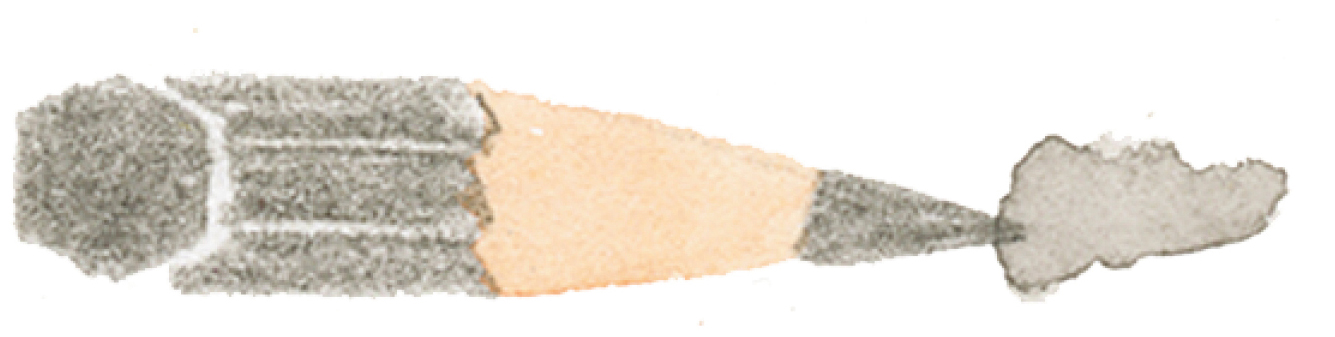
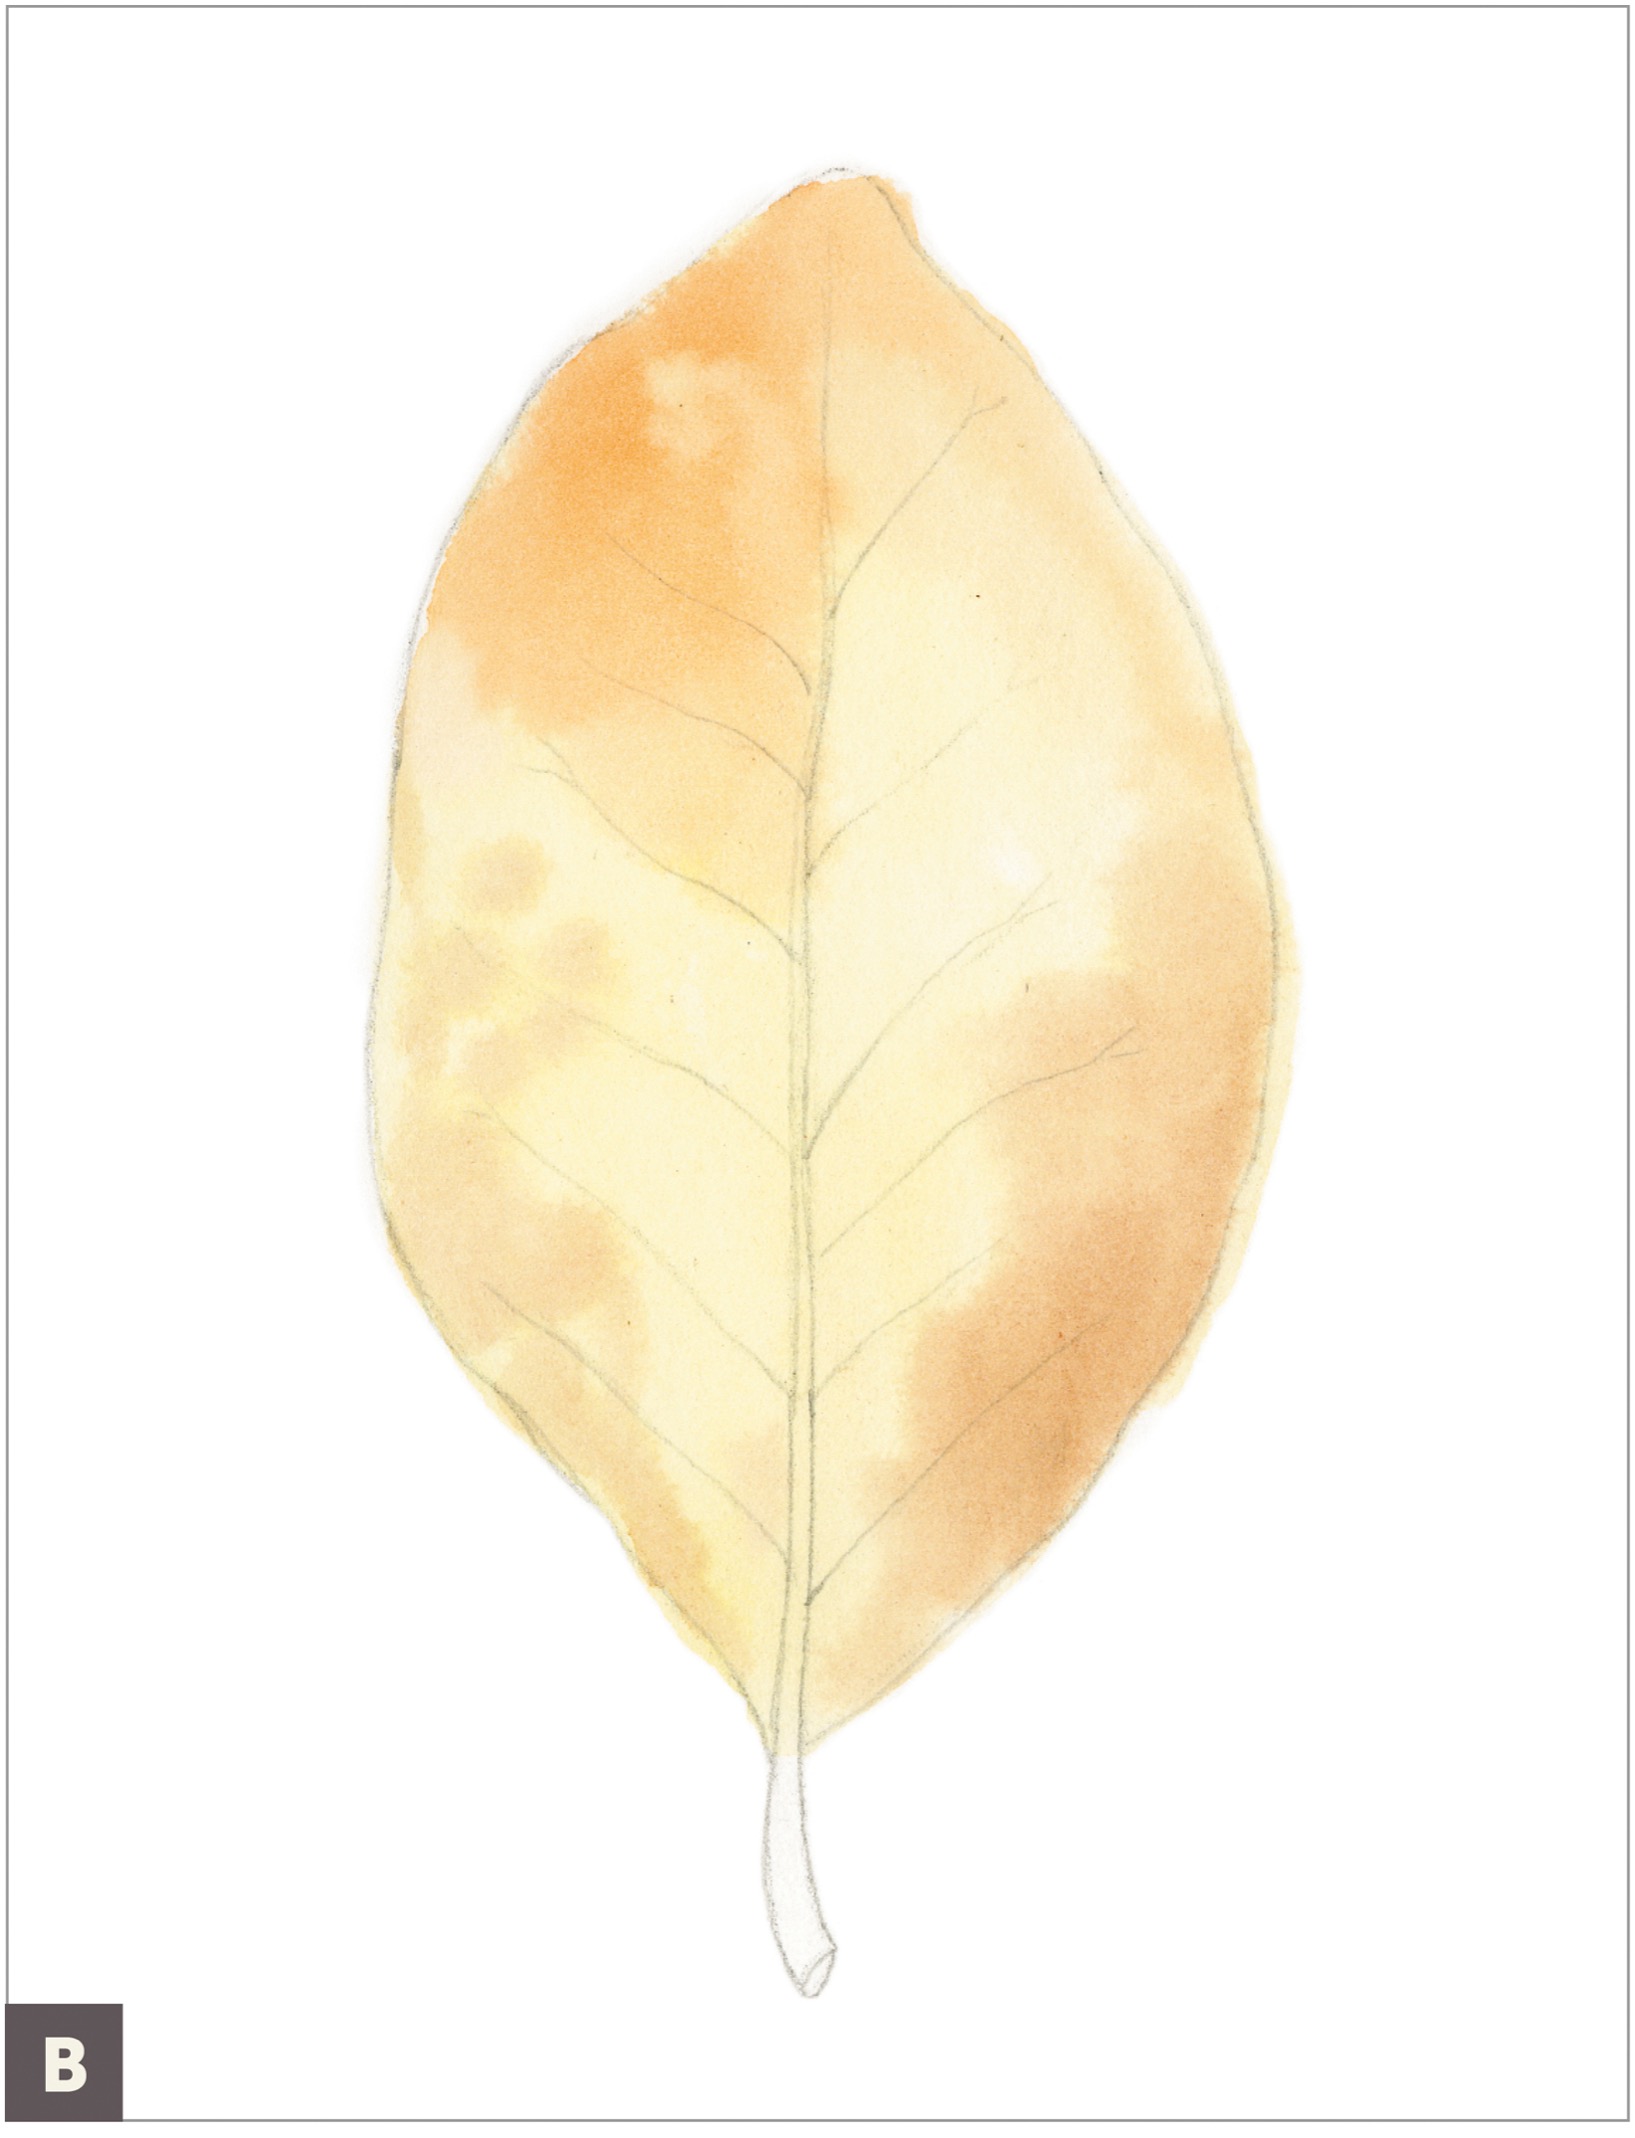
Draw a light outline of your leaf with graphite pencil. (A)

Wet the paper inside your leaf drawing with a large brush. Add a layer of yellow watercolor and then, while the paper is still wet, add some orange watercolor at the top edge and some brown watercolor where it appears on the leaf, allowing the colors to bleed into each other. (B)
Once that layer is dry, add subtle veining with colored pencils. Use some subtle embossing on veins if you think it works on your leaf, but always look at your leaf for a guide.
Add more watercolor if needed, wetting the paper again if it has dried so that the watercolor spreads rather than creating flat edges when applied. (C)

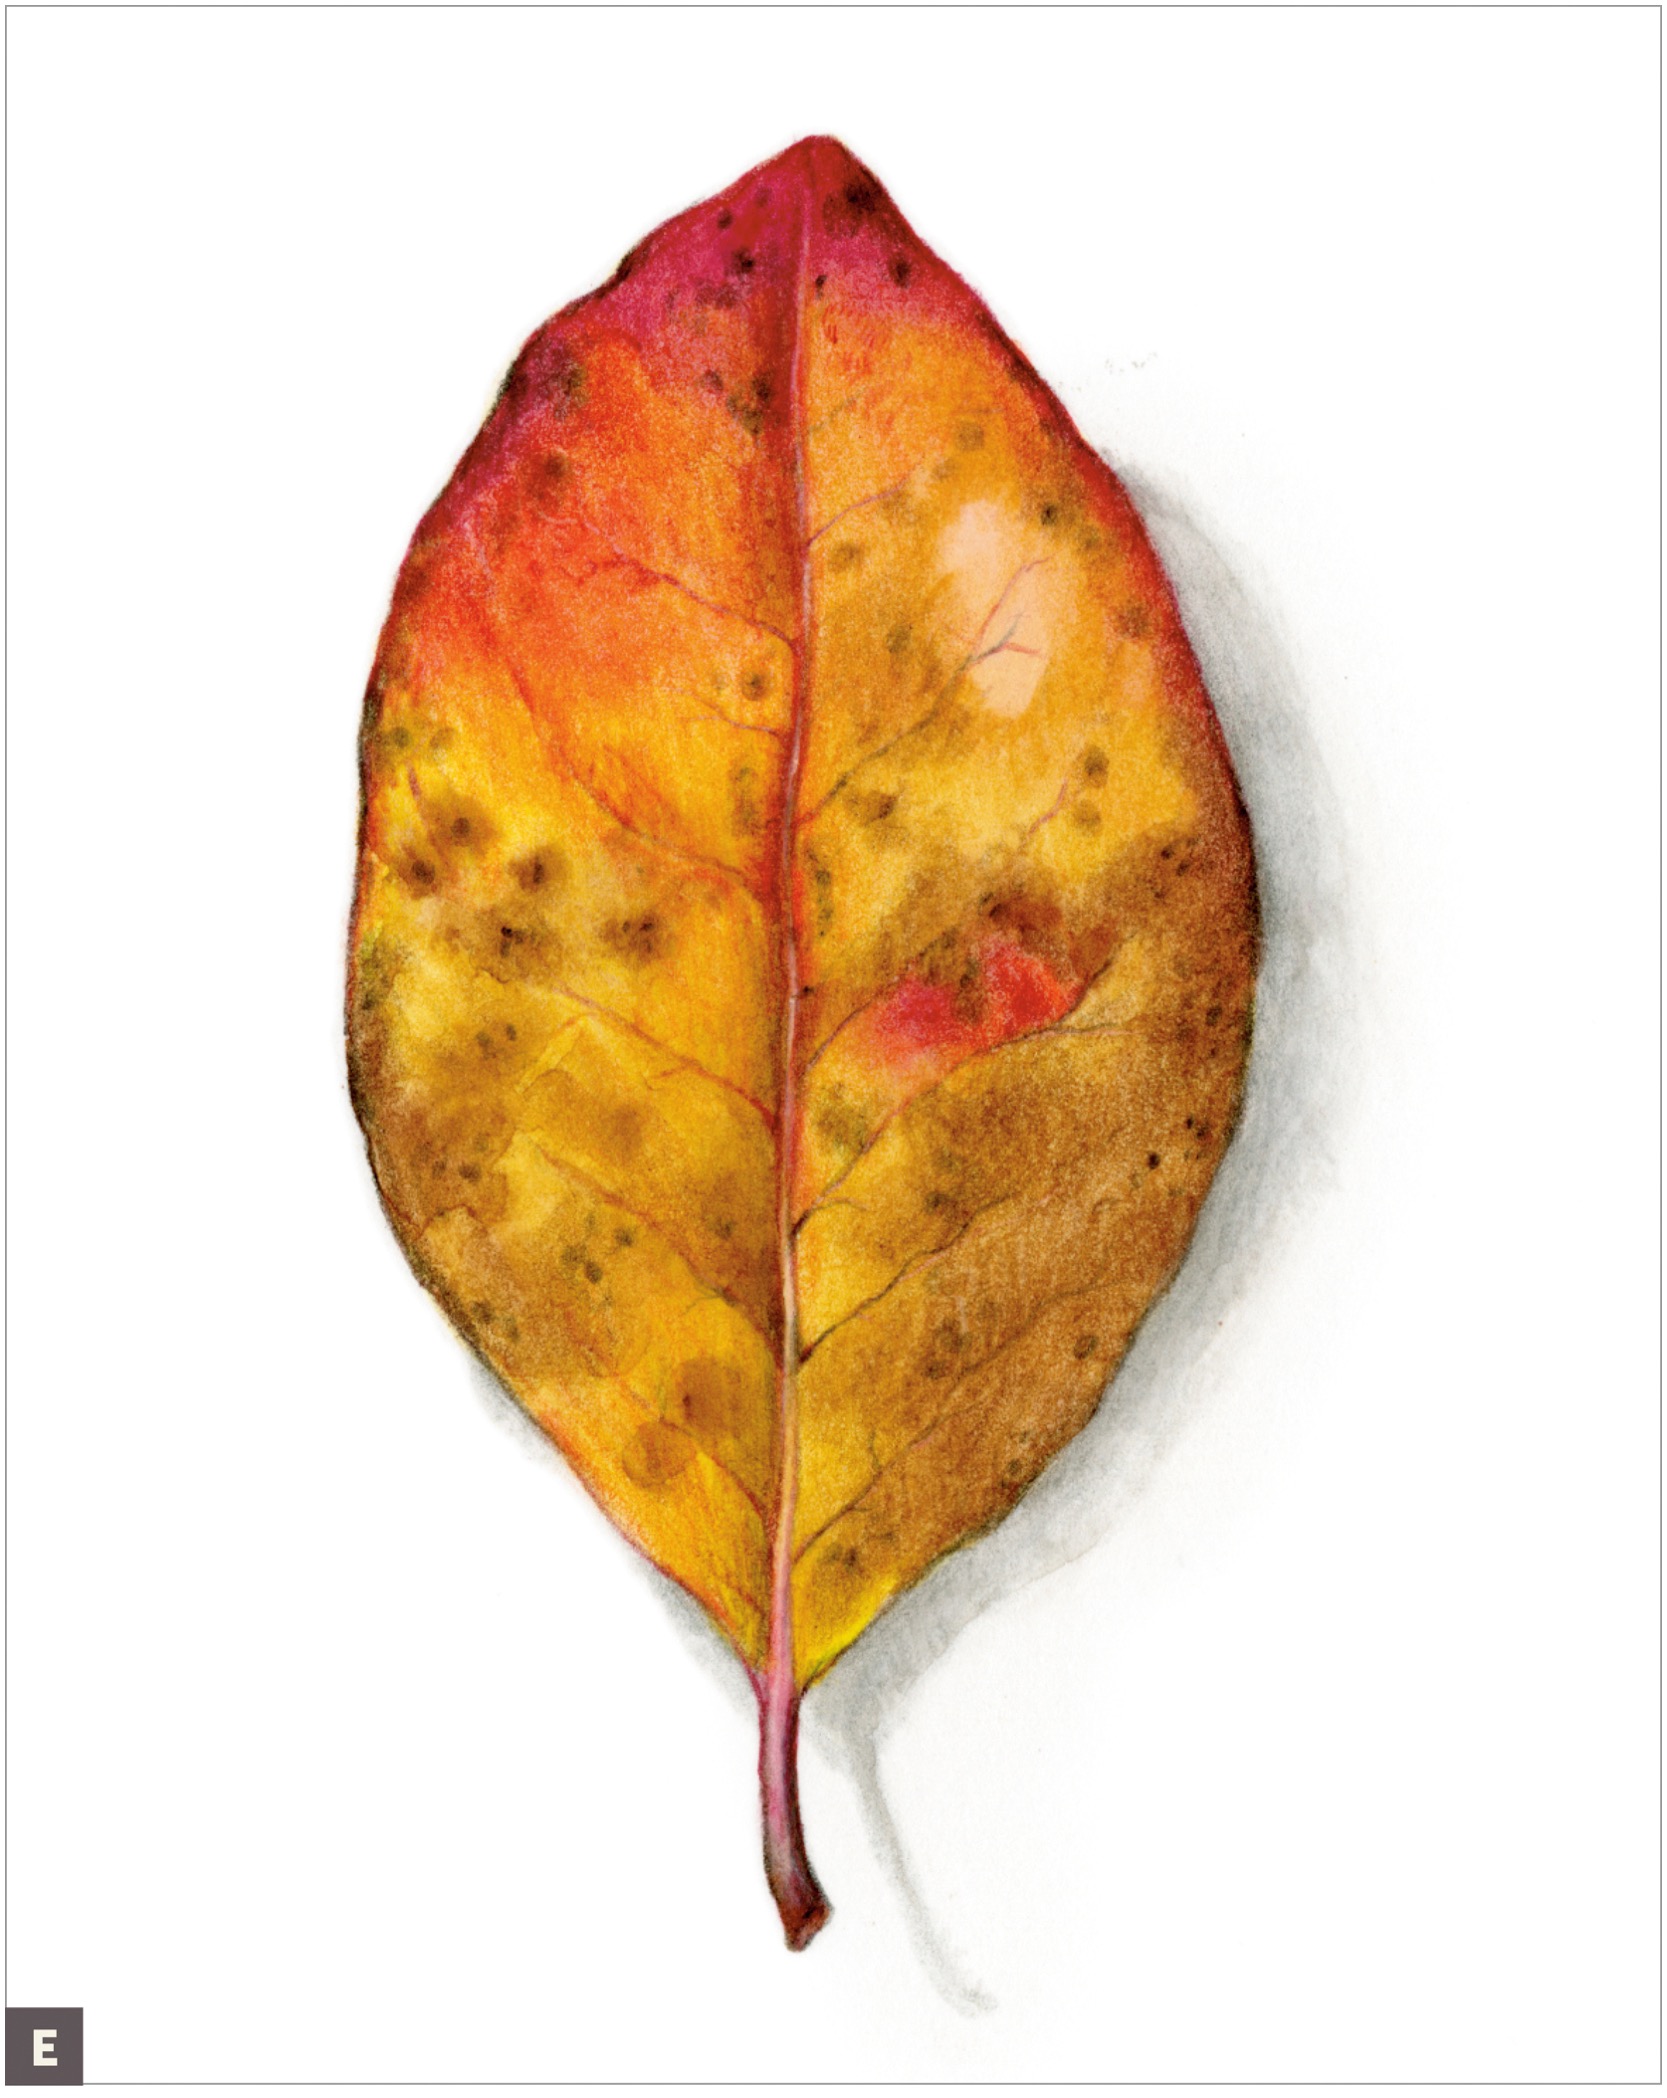
When dry, apply grisaille toning layers of colored pencil to saturate the colors—look at your real leaf as a guide. Emphasize veining and details, but keep them subtle. Make one side of the leaf slightly darker to show that it’s under a good light source that creates two distinct planes. (D)

If desired, add in a cast shadow. Start with a light layer of Warm Grey IV watercolor, and keep the outer edge of the shadow gradually fading into the background. When the watercolor is dry, layer Cool Grey 70% Verithin pencil and Black Verithin right where the shadow touches the leaf edge. (E)
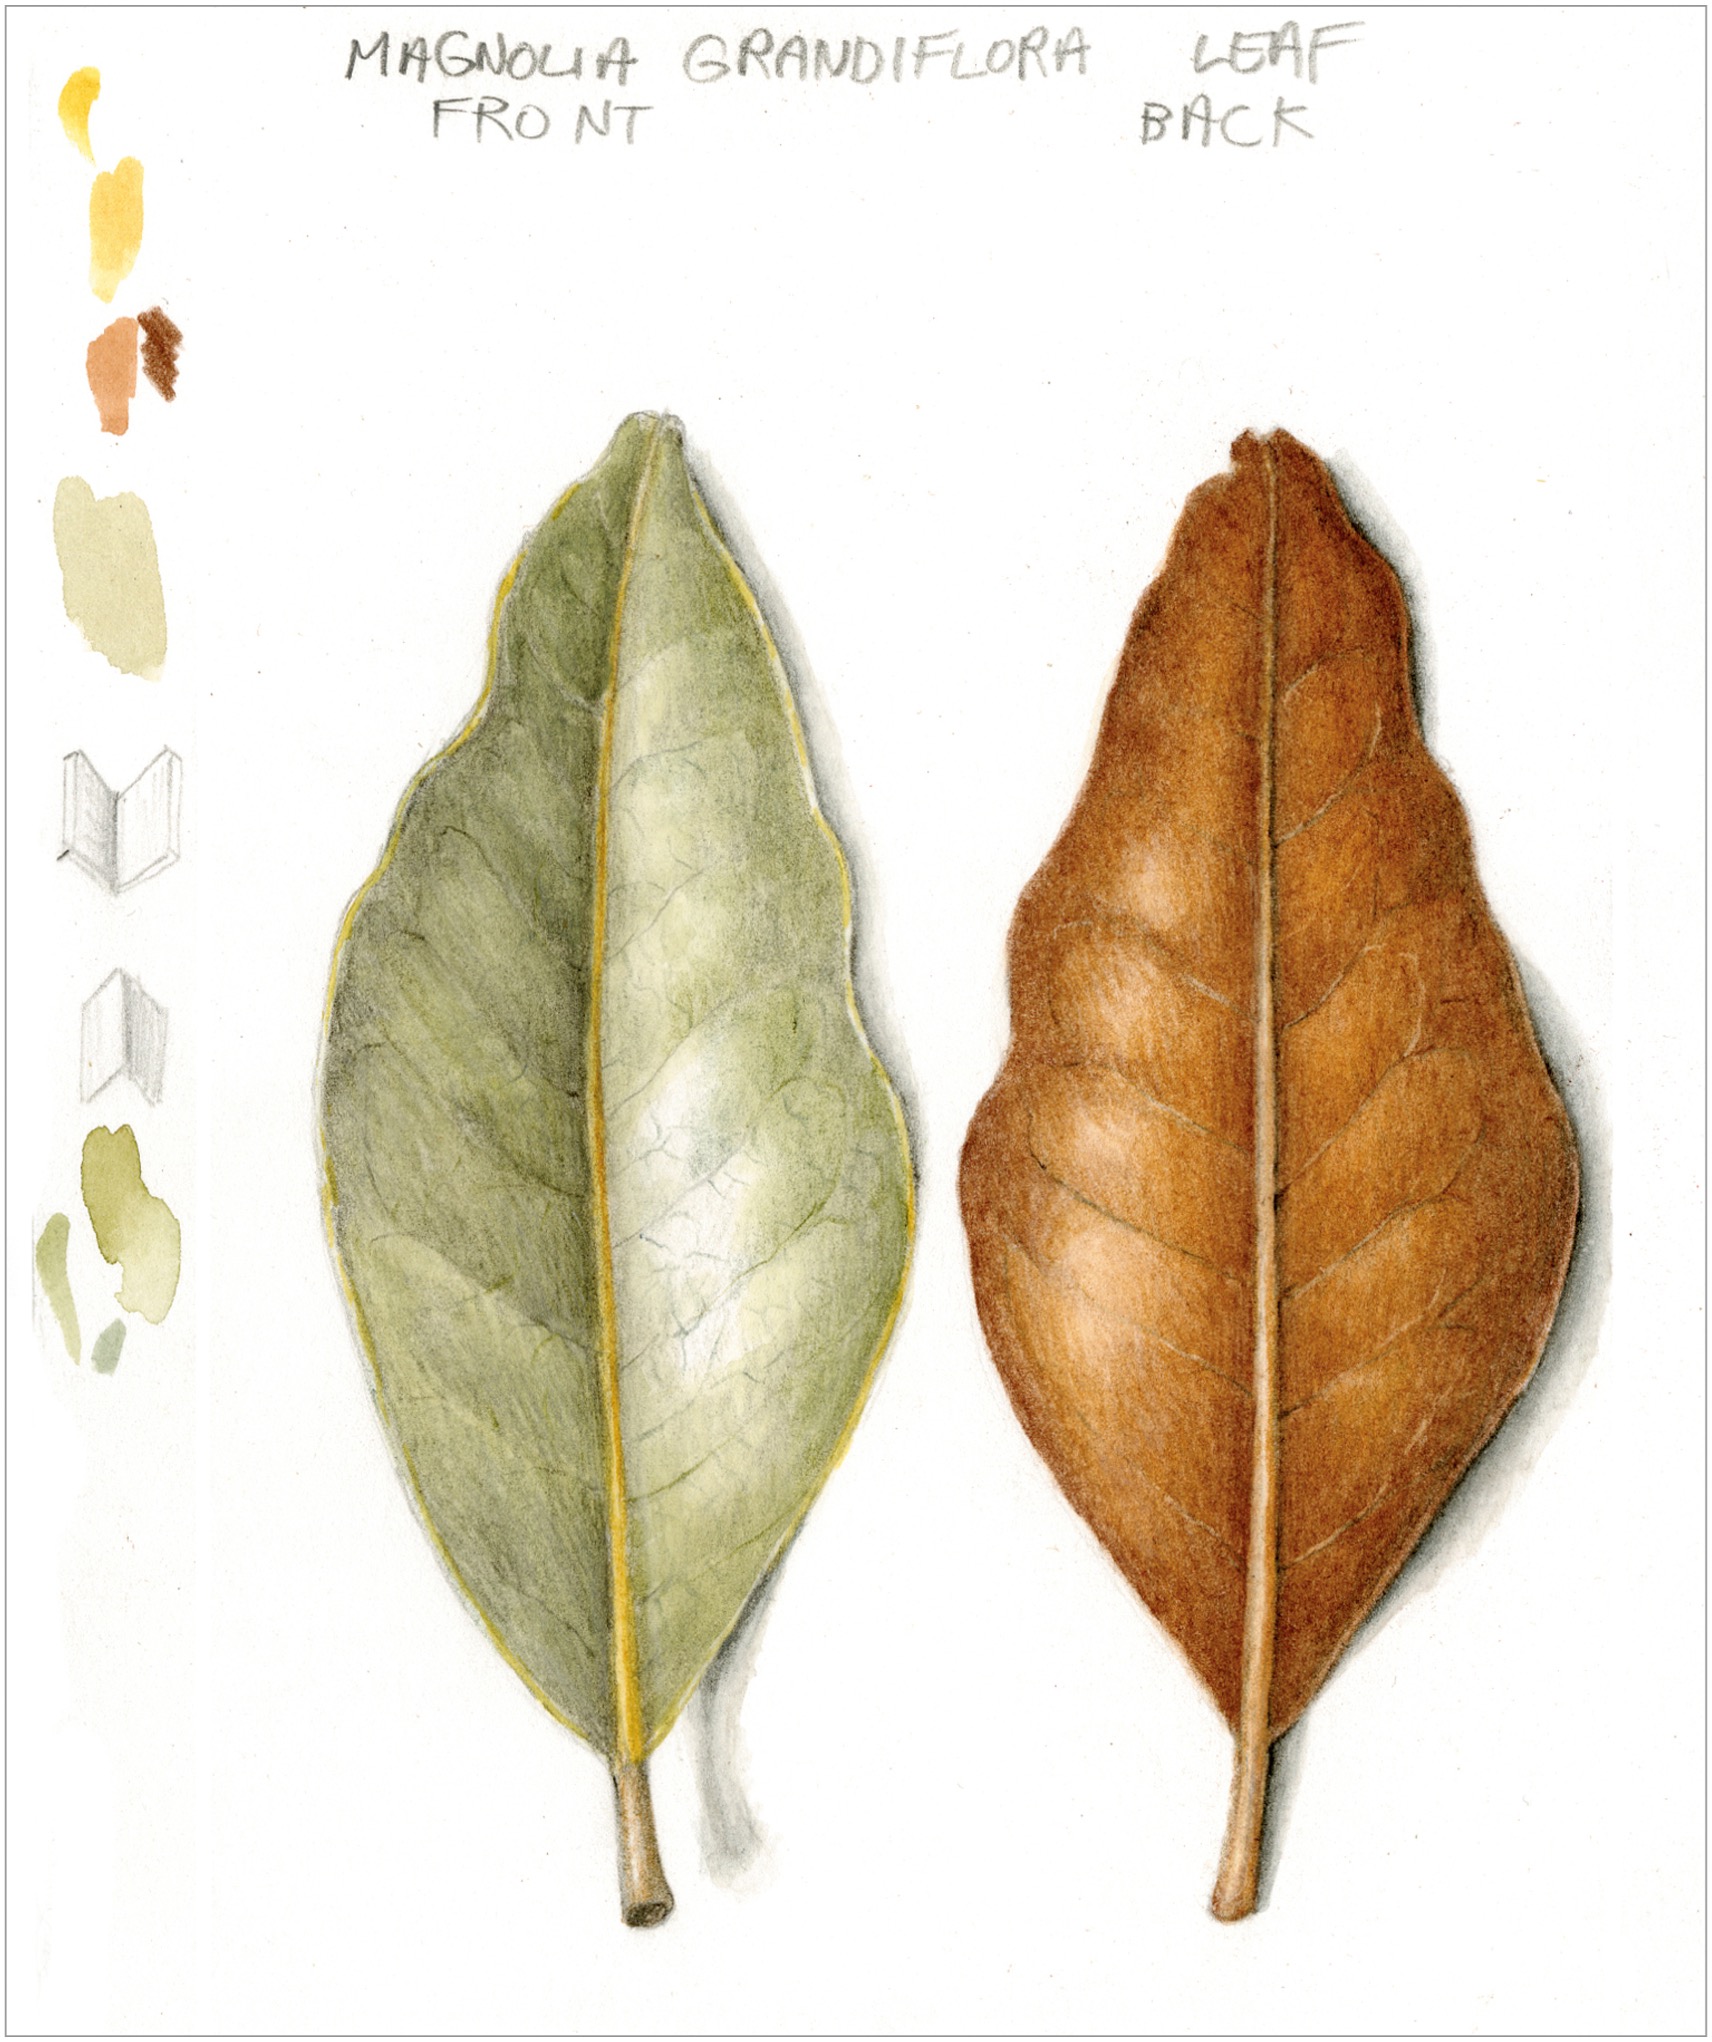
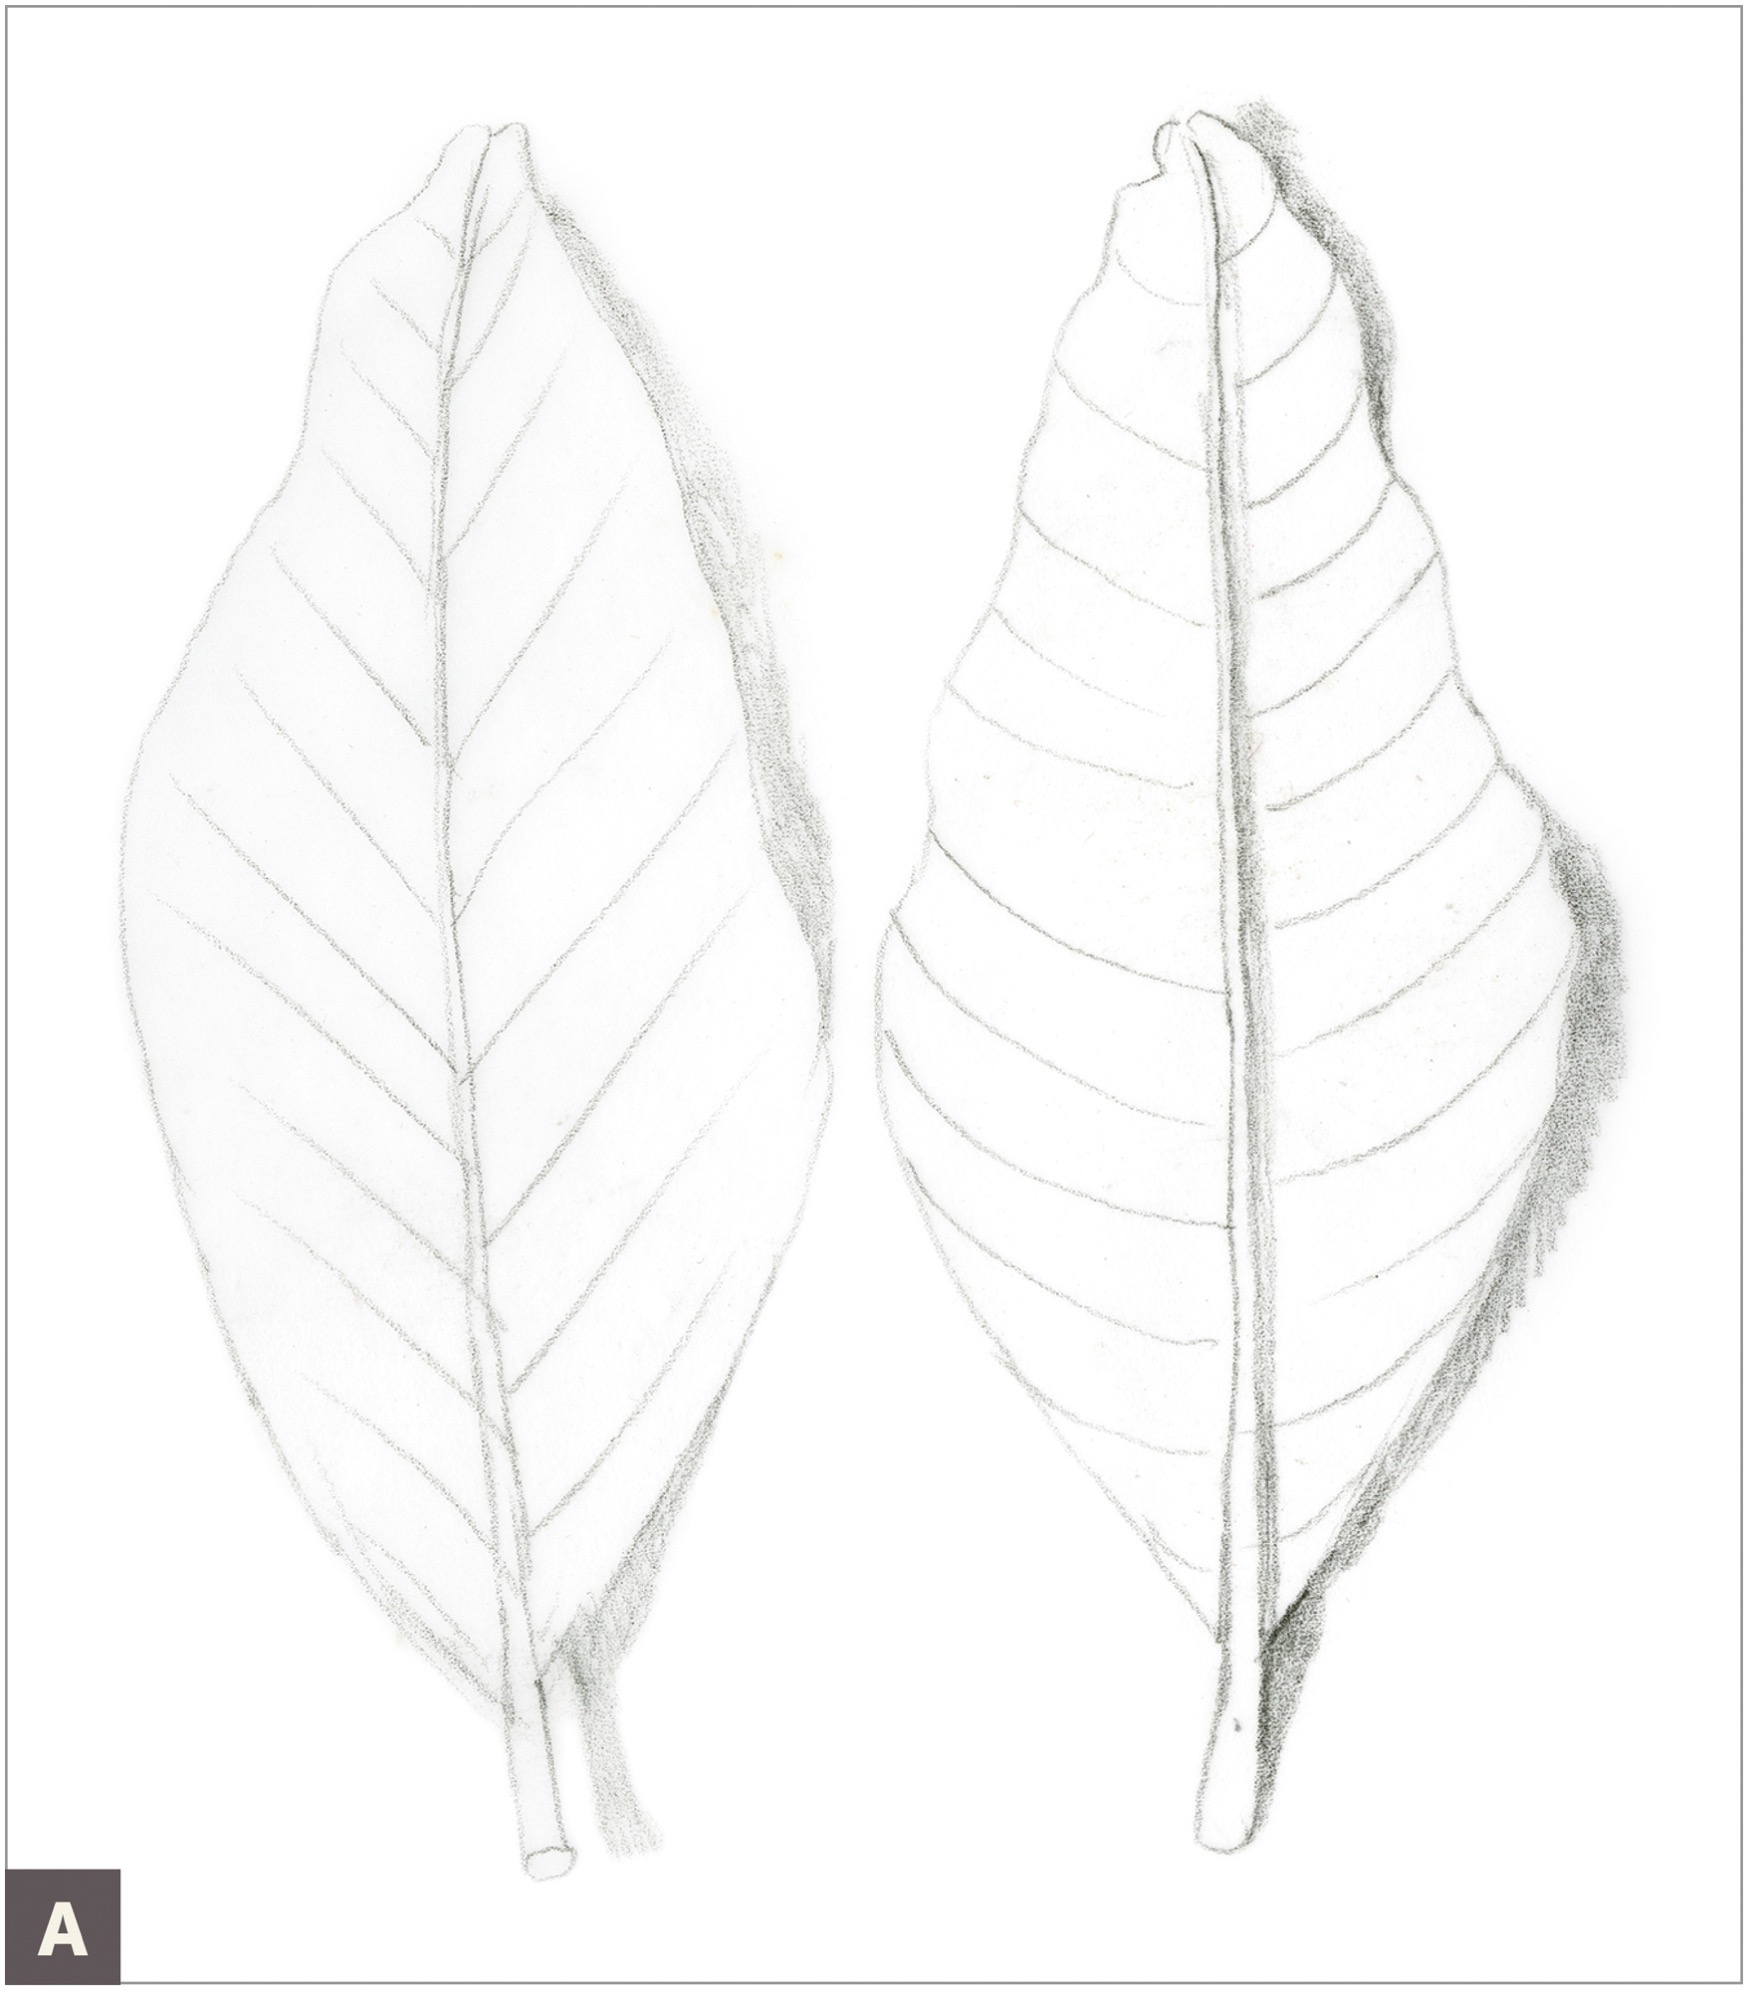
Leaf Front and Back
Choose a leaf with net veining. I chose a Magnolia grandiflora leaf, as they are thick and leathery, and keep their shape for a long time. The planes of this leaf are very distinct, and the front and back are quite different in color. Draw both sides of the leaf next to each other. It’s fun to see both sides of the leaf for comparison.
Study the back of the leaf. The midvein is more pronounced and can be likened to a cylinder on top of the leaf. As such, it can be toned like a cylinder. Right next to this prominent midvein will be a slight cast shadow, which will help raise the midvein on the leaf’s surface. Compare it to the front of the leaf, where the veins are sitting inside the leaf and are recessed. The other difference between front and back is that the back of the leaf is like the outside of a book, so it will receive light differently than the front of the leaf.
SUBJECT
Leaf with net veining, preferably one with a distinct front and back
ADDITIONAL MATERIALS
• Dark Sepia colored pencil #175
• Watercolor brush #2 or #6
• Watercolor pencils to match the local color of your leaf
• Earth Green colored pencil #172
• Burnt Sienna colored pencil #283
COLORED PENCILS
#175
#172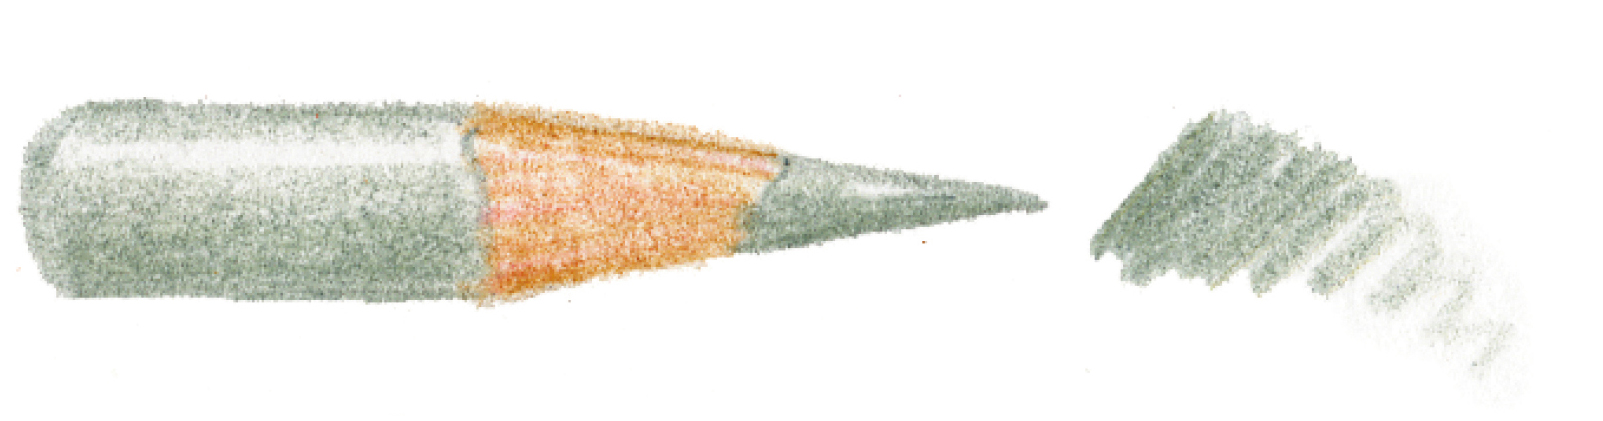
#283
With a graphite pencil, draw a light outline of the front of the leaf, and lightly indicate the center vein and secondary veining. Notice the angle of the secondary veins as they attach to the midvein and that these veins don’t usually continue to the edge of the leaf. Turn the leaf over and draw the back. (A)
Apply Dark Sepia toning to the front of the leaf, using the same light source and grisaille toning as the lesson on the basic leaf with net veining (see this page).
Repeat the Dark Sepia toning on the back. In addition to the obvious color difference between the front and back of this leaf, there are other characteristics that help distinguish the front from back: the back of the leaf will be toned in almost the opposite manner of the front. Plus, it is darker on the right side of, and has a stronger shadow cast by, the prominent midvein. Try to describe these characteristics with your Dark Sepia pencil grisaille toning. (B)

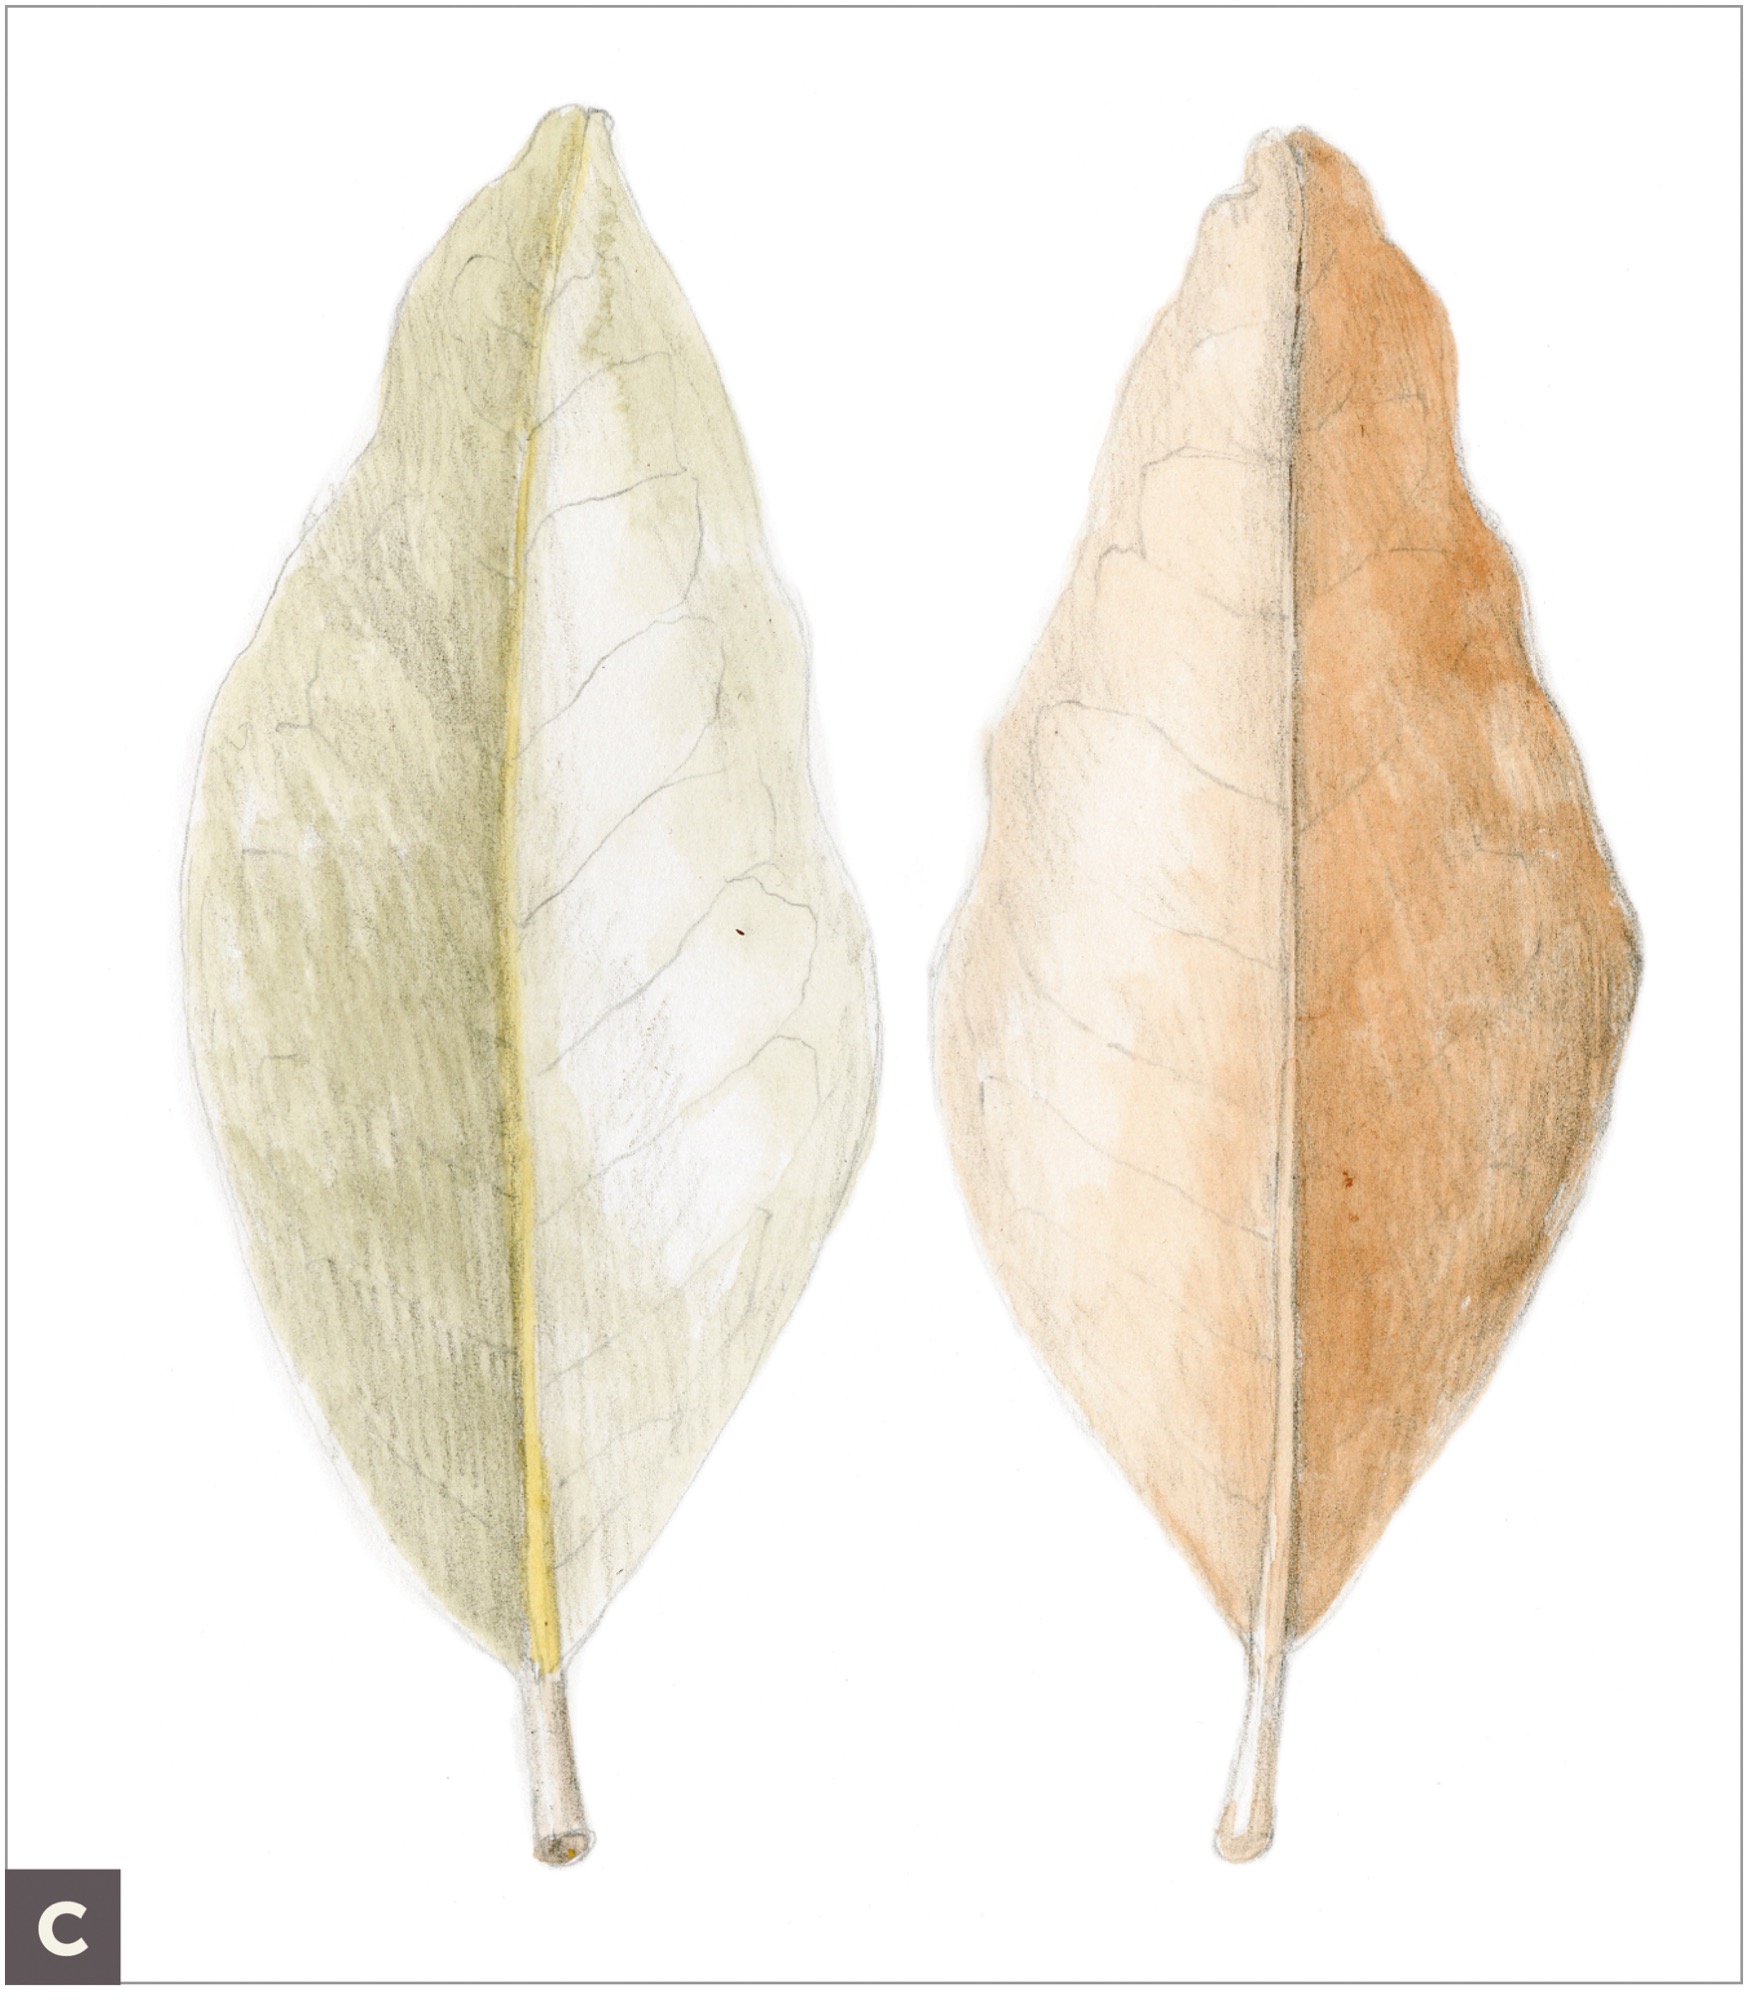
Using a #2 or #6 brush, add a layer of graduated watercolor to each leaf drawing in the appropriate base colors. (C)
Start to indicate more color and veining with Dark Sepia, Earth Green, and Burnt Sienna colored pencils. (D)

Continue to layer colored pencils, and try to keep the veining subtle and the light source well described on the two distinct sides of the leaf.
Add in subtle tertiary veins and a cast shadow on each leaf, which will help describe the ways the front and back of the leaf sit on a surface. (E)