Semi-hard Cheese
Semi-hard Cheese
In this chapter we are moving on to semi-hard cheese, which will challenge the cheesemaking skills you have picked up so far. Here you will learn the art of ‘affinage’ – ageing your cheese – which is very important when making this style of cheese.
‘Affinage’ simply means ‘to refine’, whether it is washing, piercing and turning the cheese, making sure it is not too dry, and not too wet, that it has enough air, but not too much air. It really is an art, and it all depends on the style of the cheese. It is a great skill to learn and build on.
What happens to the cheese in this maturing stage is loss of moisture, the breaking down of proteins and fats, and the development of rind, texture and flavour. Your cheese is like a living thing and should be treated as such: think of it as a smelly pet that needs care and attention.
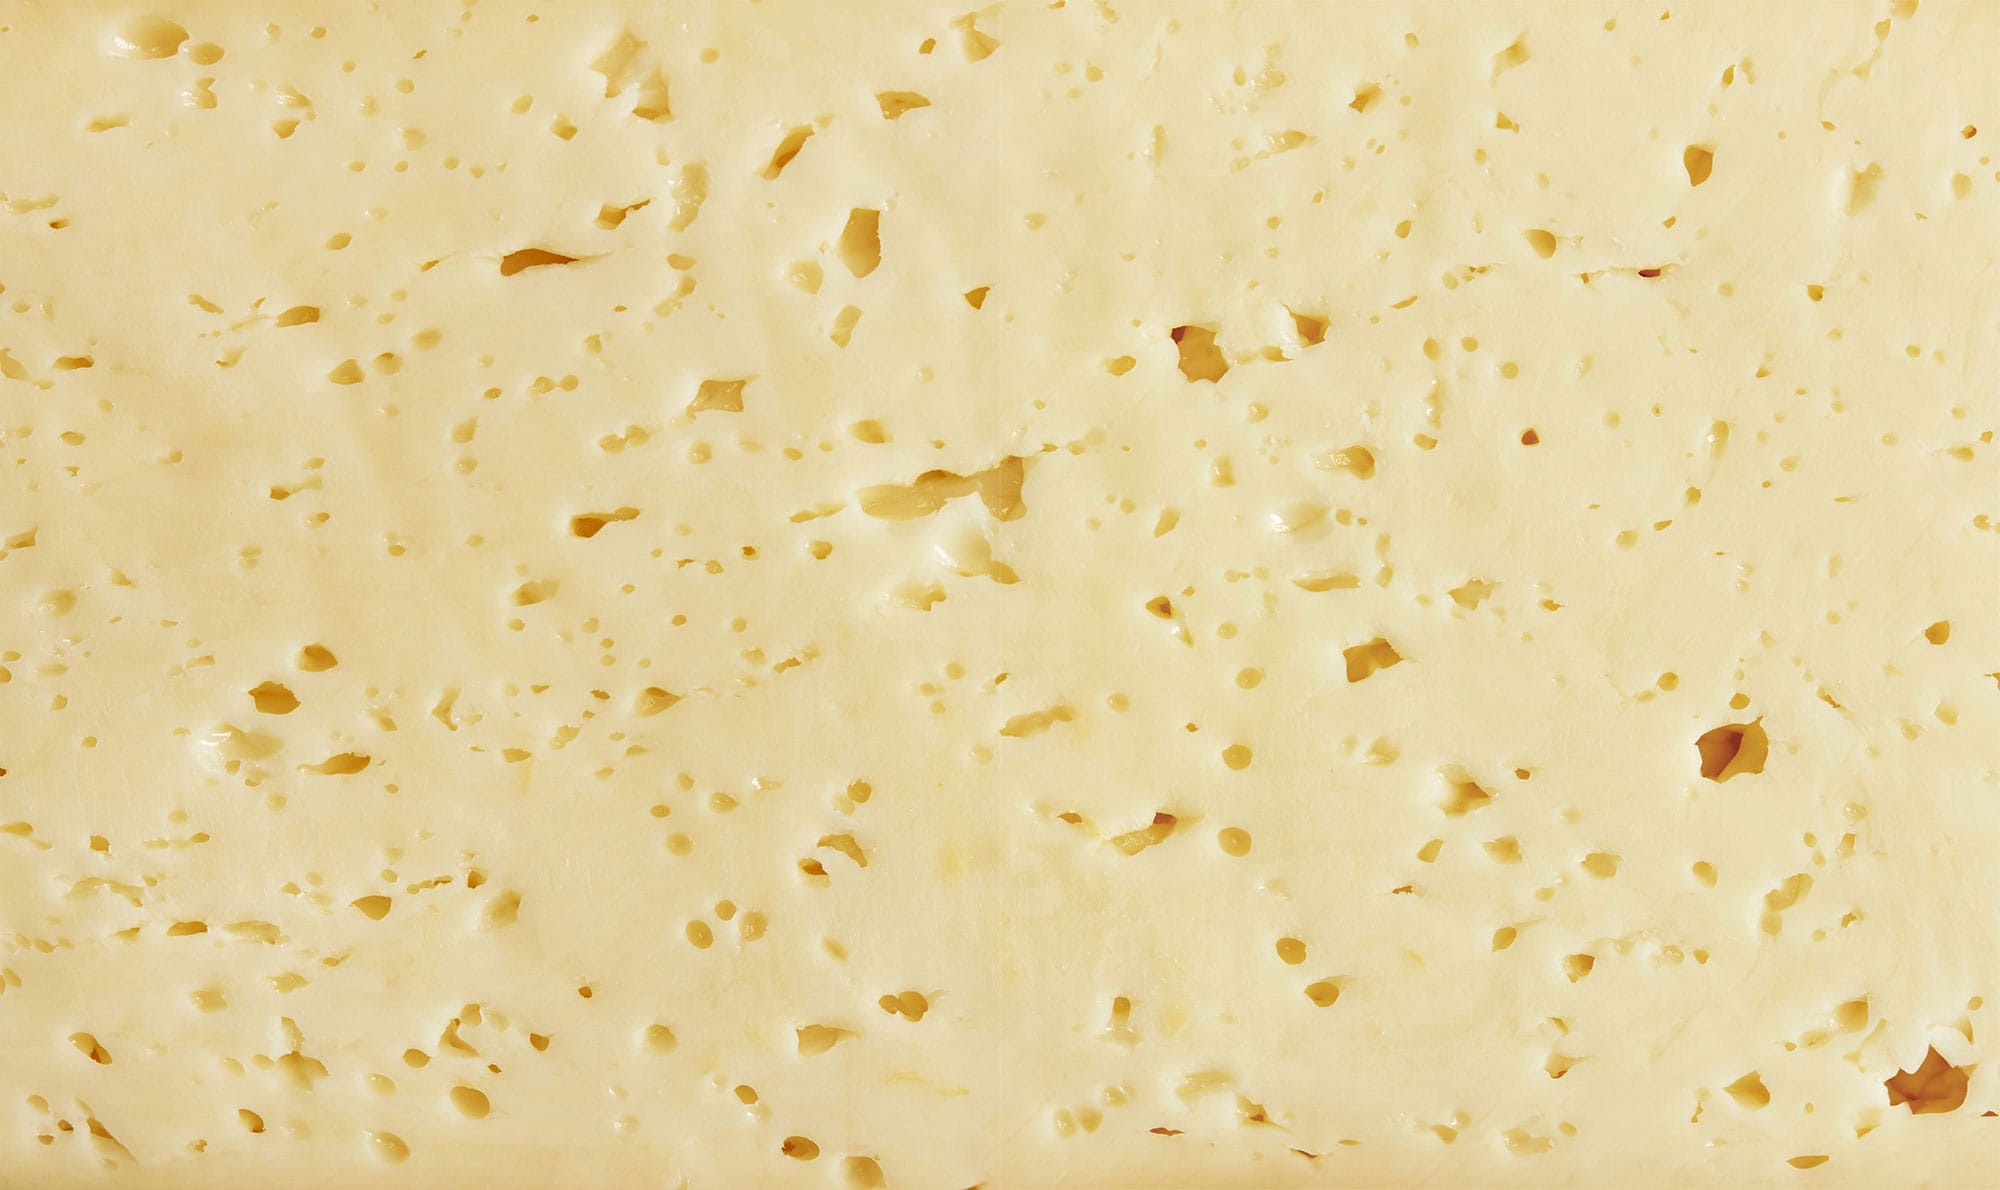
When making cheese at home, I sometimes use the water bath method – for the Swiss Cheese shown here, for example. This is where a stainless steel pan of milk is placed in a warm water bath so that the water around the pan ensures that any temperature changes are gradual. This is another good skill to pick up and gives you a greater level of control.
It is important to keep a record of ageing techniques, temperatures and the environment in which you make your cheese; all these elements will make a difference to the final product.
Once you have mastered these skills, you will be able to mature your own cheeses and, over time can adjust the recipes to reflect any changes you may have made; this way you will create your own customized cheeses.
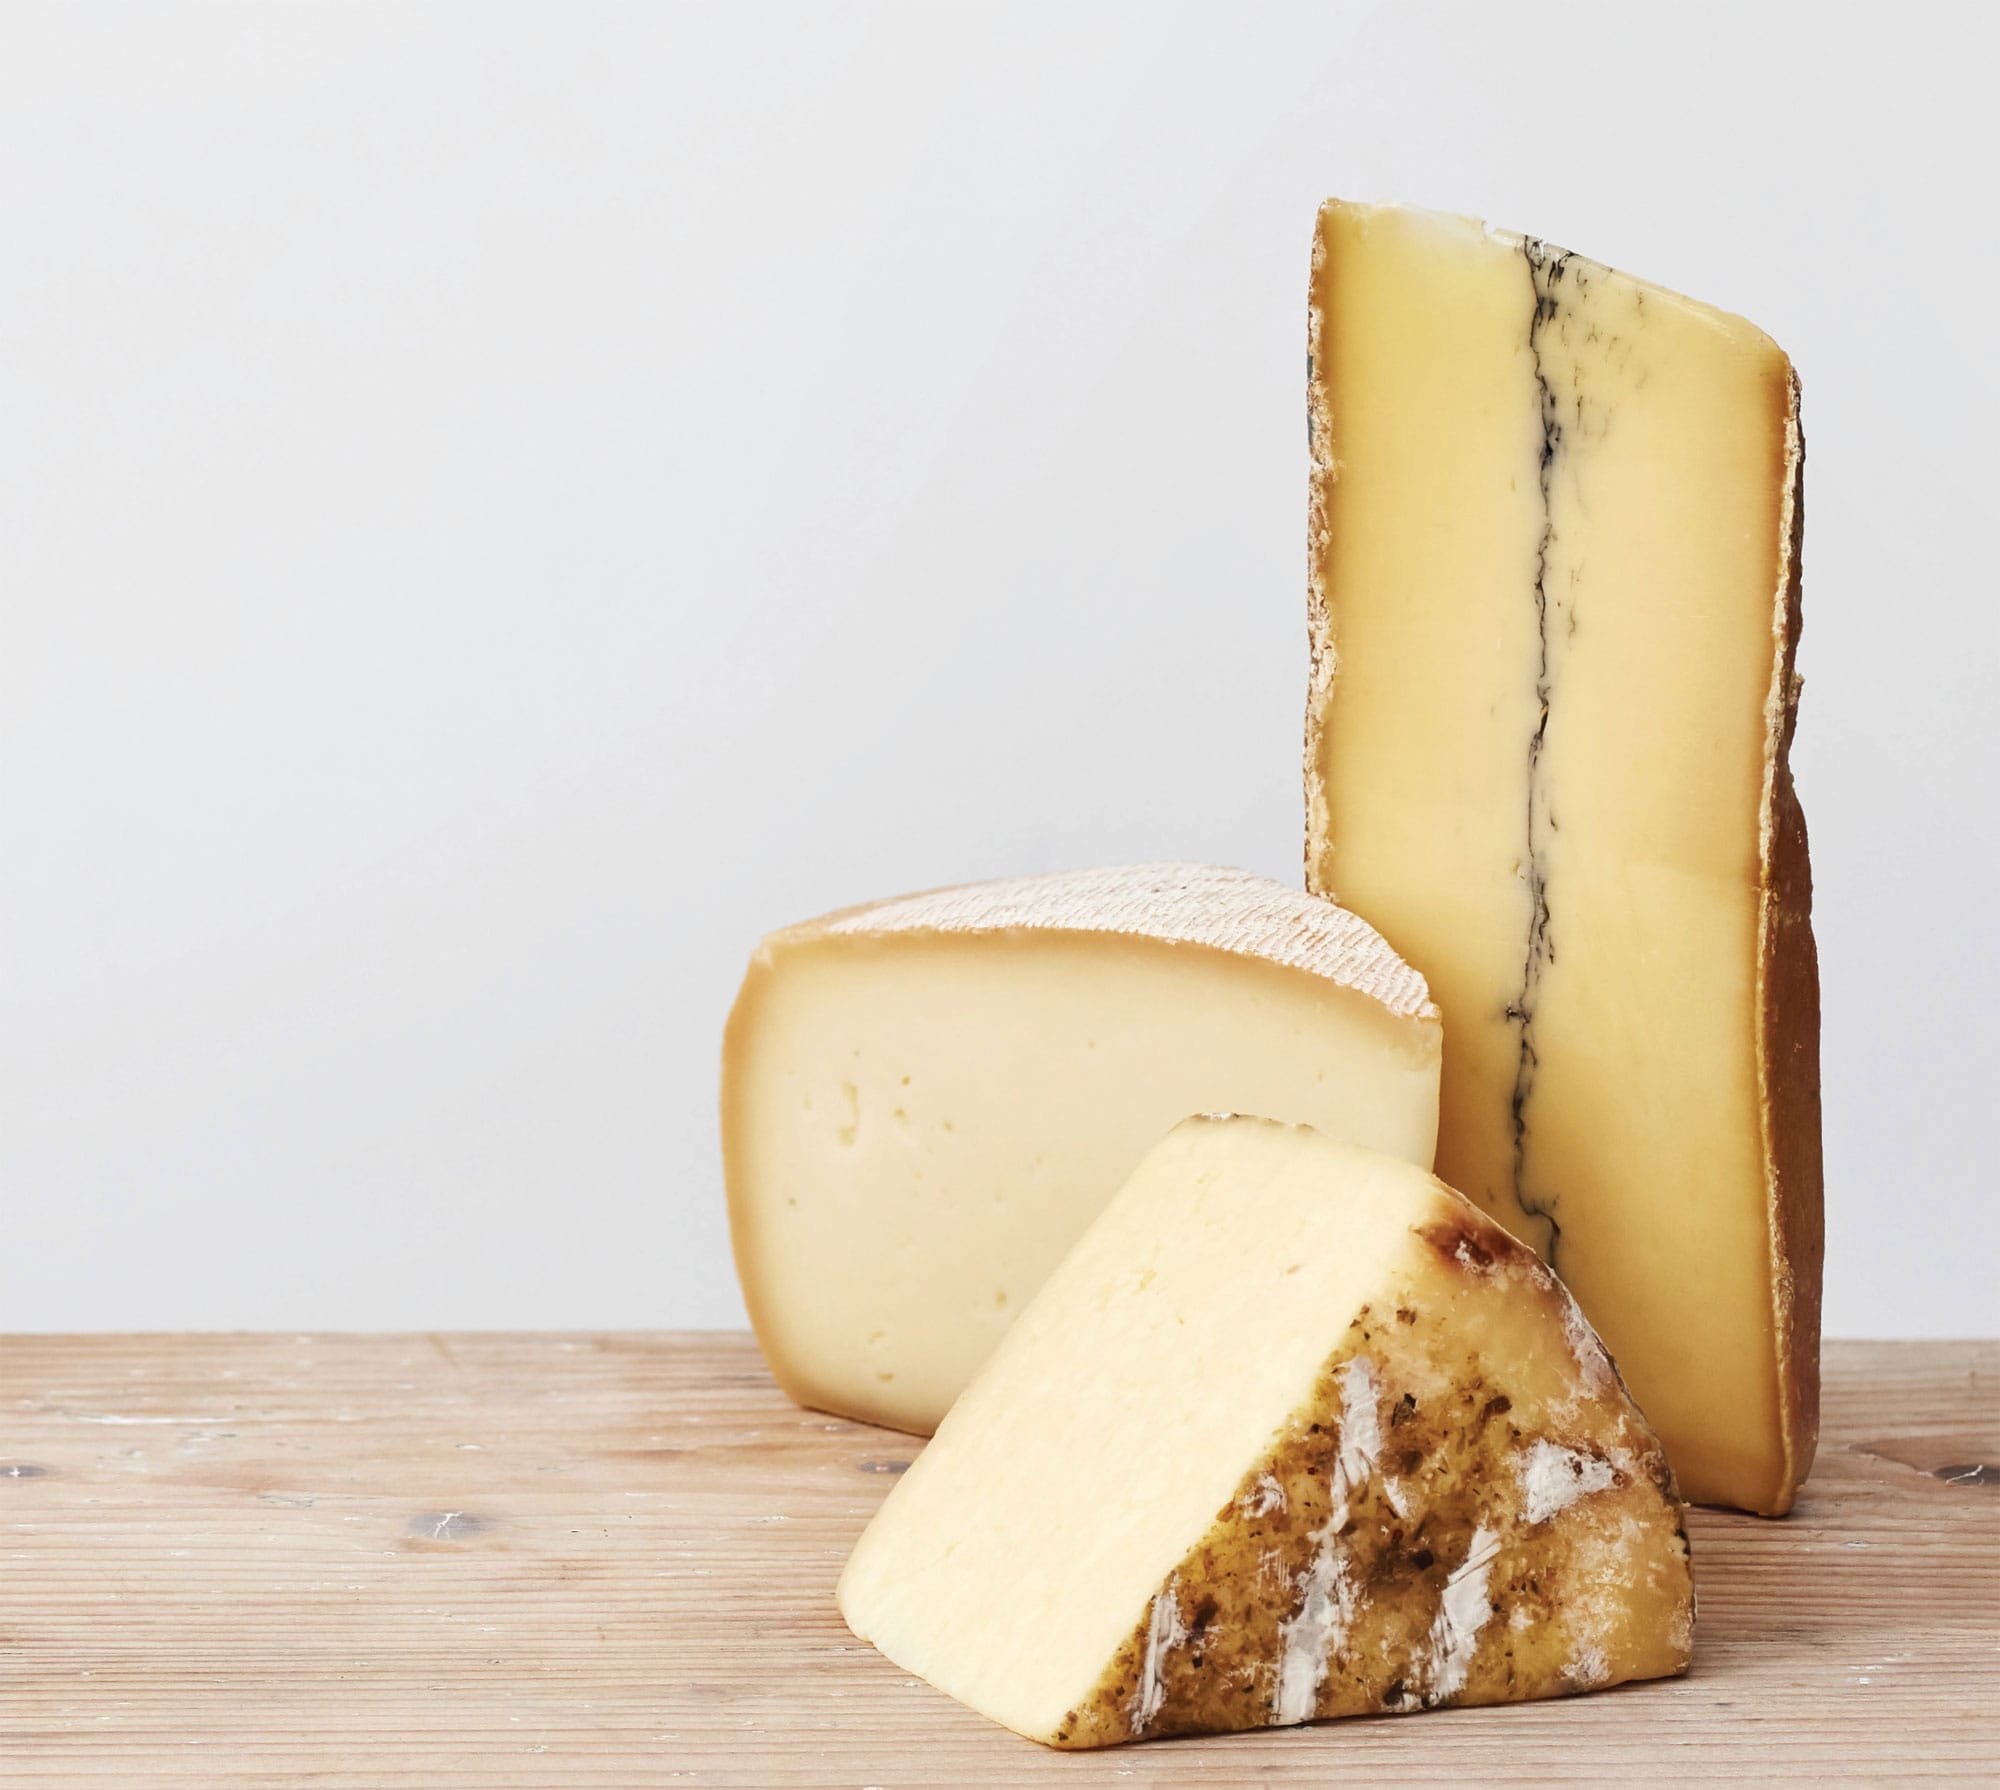
Raclette (left), is the best melting cheese, with a real buttery flavour. Its production dates back over 100 years. Look out for the recipe shown here, which shows how to use this cheese in the most delicious way possible.
Morbier (right), a moreish creamy French cheese, is immediately identified due to the black layer of tasteless ash, which cuts horizontally through the centre of the cheese. This was traditionally used to keep the milk fresh: the cheese was made up of the morning and evening milk, and due to a lack of refrigeration, the ash kept the morning milk fresh.
Hereford Hop (front) is made by the world-famous cheesemaker Charles Martell, the maker of Stinking Bishop. This is his full-fat creamy cow’s cheese, encrusted with toasted beer hops, which give a delicious edge to the flavour.
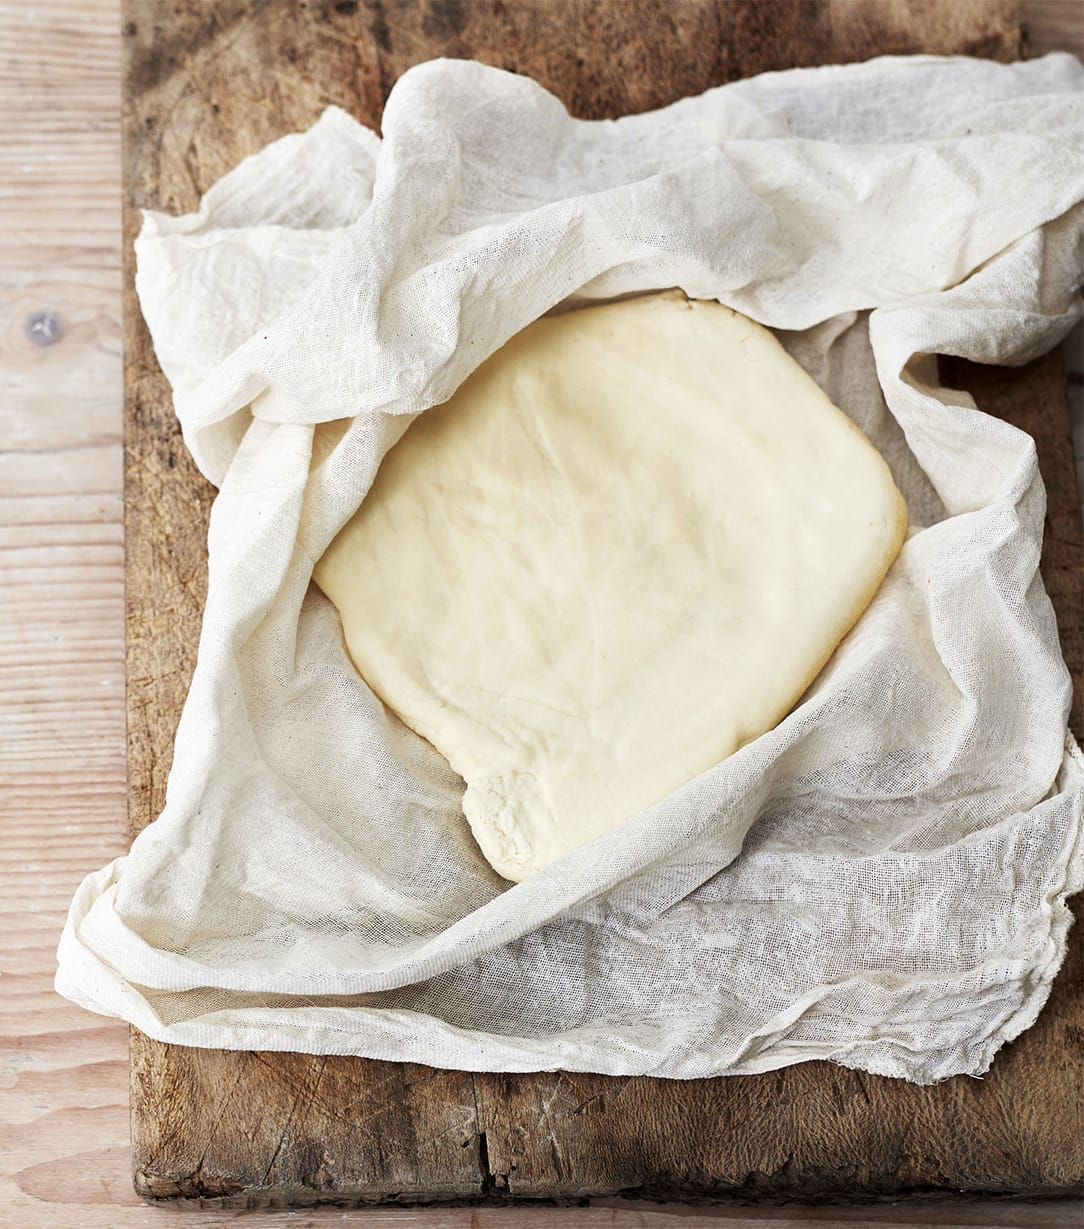
◁ Paneer
Paneer is the most fantastically easy cheese to make, using ingredients you will have in your kitchen. It is a deliciously fresh-tasting cheese, and the great thing about it is that there is no ageing or culturing. Paneer is a very important ingredient in Indian cooking, and is used in many vegetarian dishes; it has a wonderful milky flavour, with a crumbly texture ideal for frying, grilling (broiling) or barbecuing. You can buy paneer at most supermarkets, but homemade fresh paneer tastes much better and is far superior to the mass-produced cheese you can buy off the shelf.
2.3 litres (4 pints/93/4 cups) milk
2 tbsp lemon juice
1/2 tsp salt
MAKES 250g (9oz)
You will need: a cheesecloth or muslin sheet, an instant-read thermometer and 2–3 tin cans or a cheese press

1 Put the milk into a saucepan over a medium heat and simmer until the temperature reaches 93°C (200°F). Be sure to stir occasionally to make sure the milk doesn’t burn or stick to the bottom of the pan. When ready, the milk should look foamy.
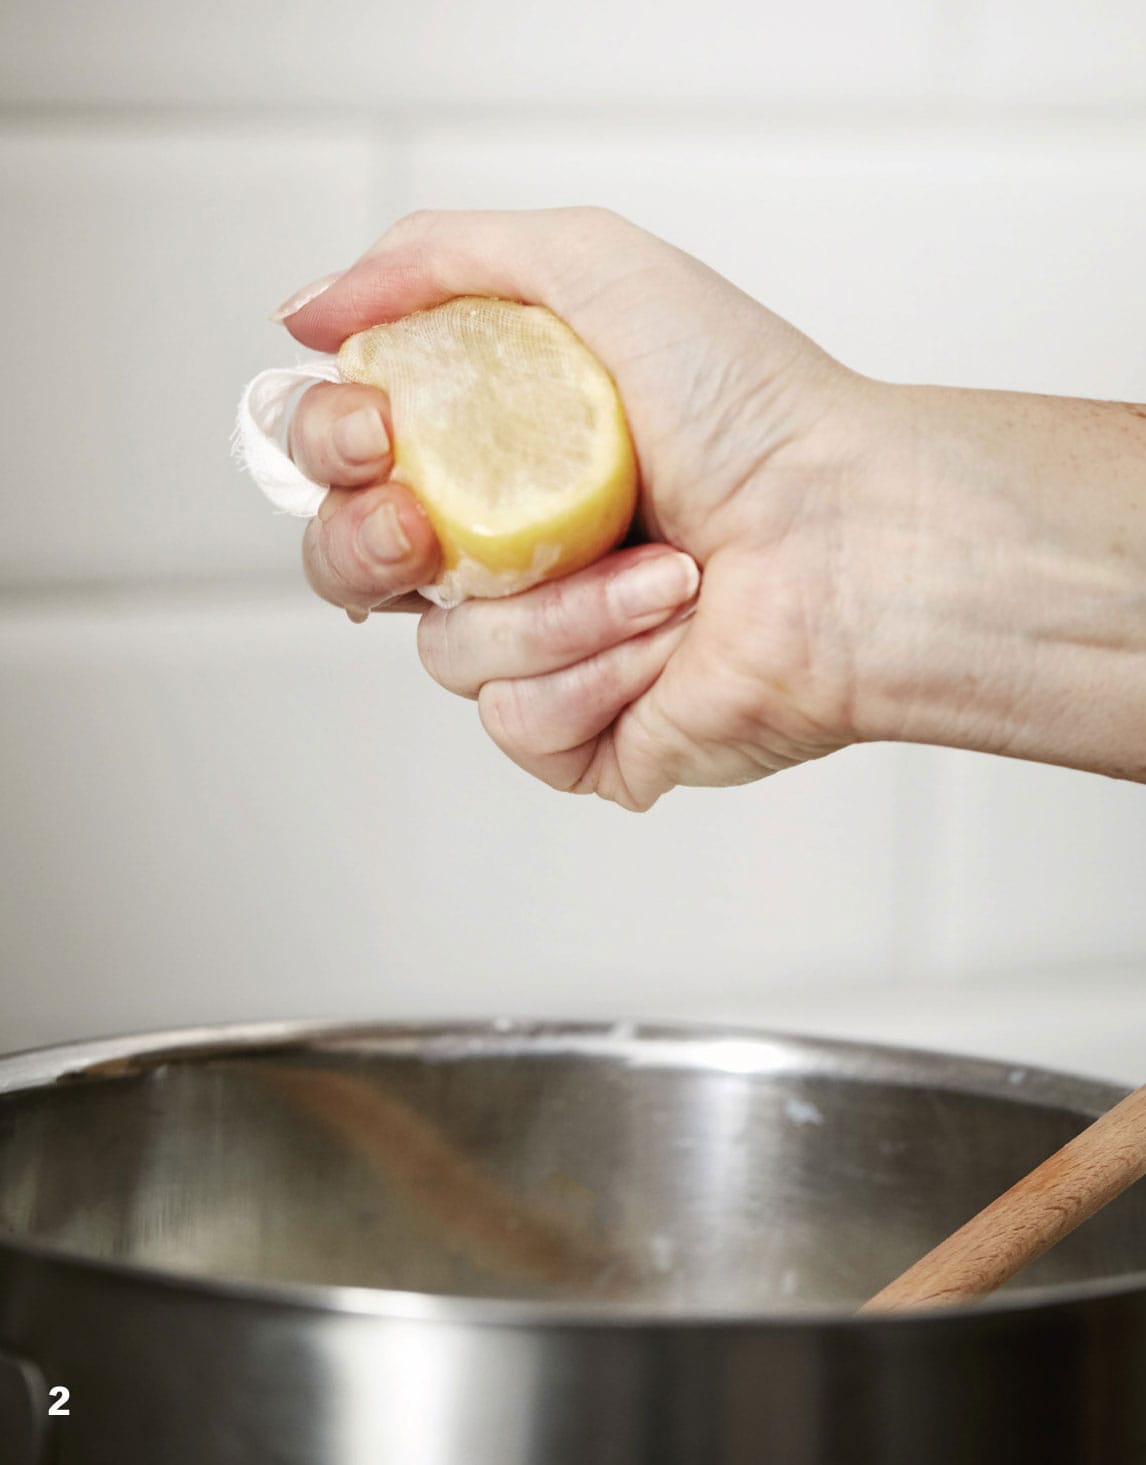
2 Remove the milk from the heat and stir in the lemon juice. It should start to curdle.

3 Leave the milk to stand for 10 minutes, then cover with the pan lid and let it stand for a further 10 minutes. The curds should have completely separated and the remaining water should be yellow in colour.
4 Place a sieve (fine-mesh strainer) over a mixing bowl and line it with the cheesecloth or muslin. Carefully scoop the cheese curds into the sieve (fine-mesh strainer), letting all the whey collect in the mixing bowl below.

5 To remove any excess whey, gather the cloth in your hands and squeeze out all the remaining liquid. Open the cloth out again, sprinkle the salt over the curds and stir through.

6 Keeping the curds in the cloth, move them into a baking dish and shape them into a rough triangle. Wrap the cloth tightly around and over the top of the cheese and place a large plate on top. Weigh down the plate with two or three tin cans, or use a cheese press, and leave for 1 hour. Once pressed, the paneer is ready to eat, or it will keep wrapped in the refrigerator for up to 2 weeks.
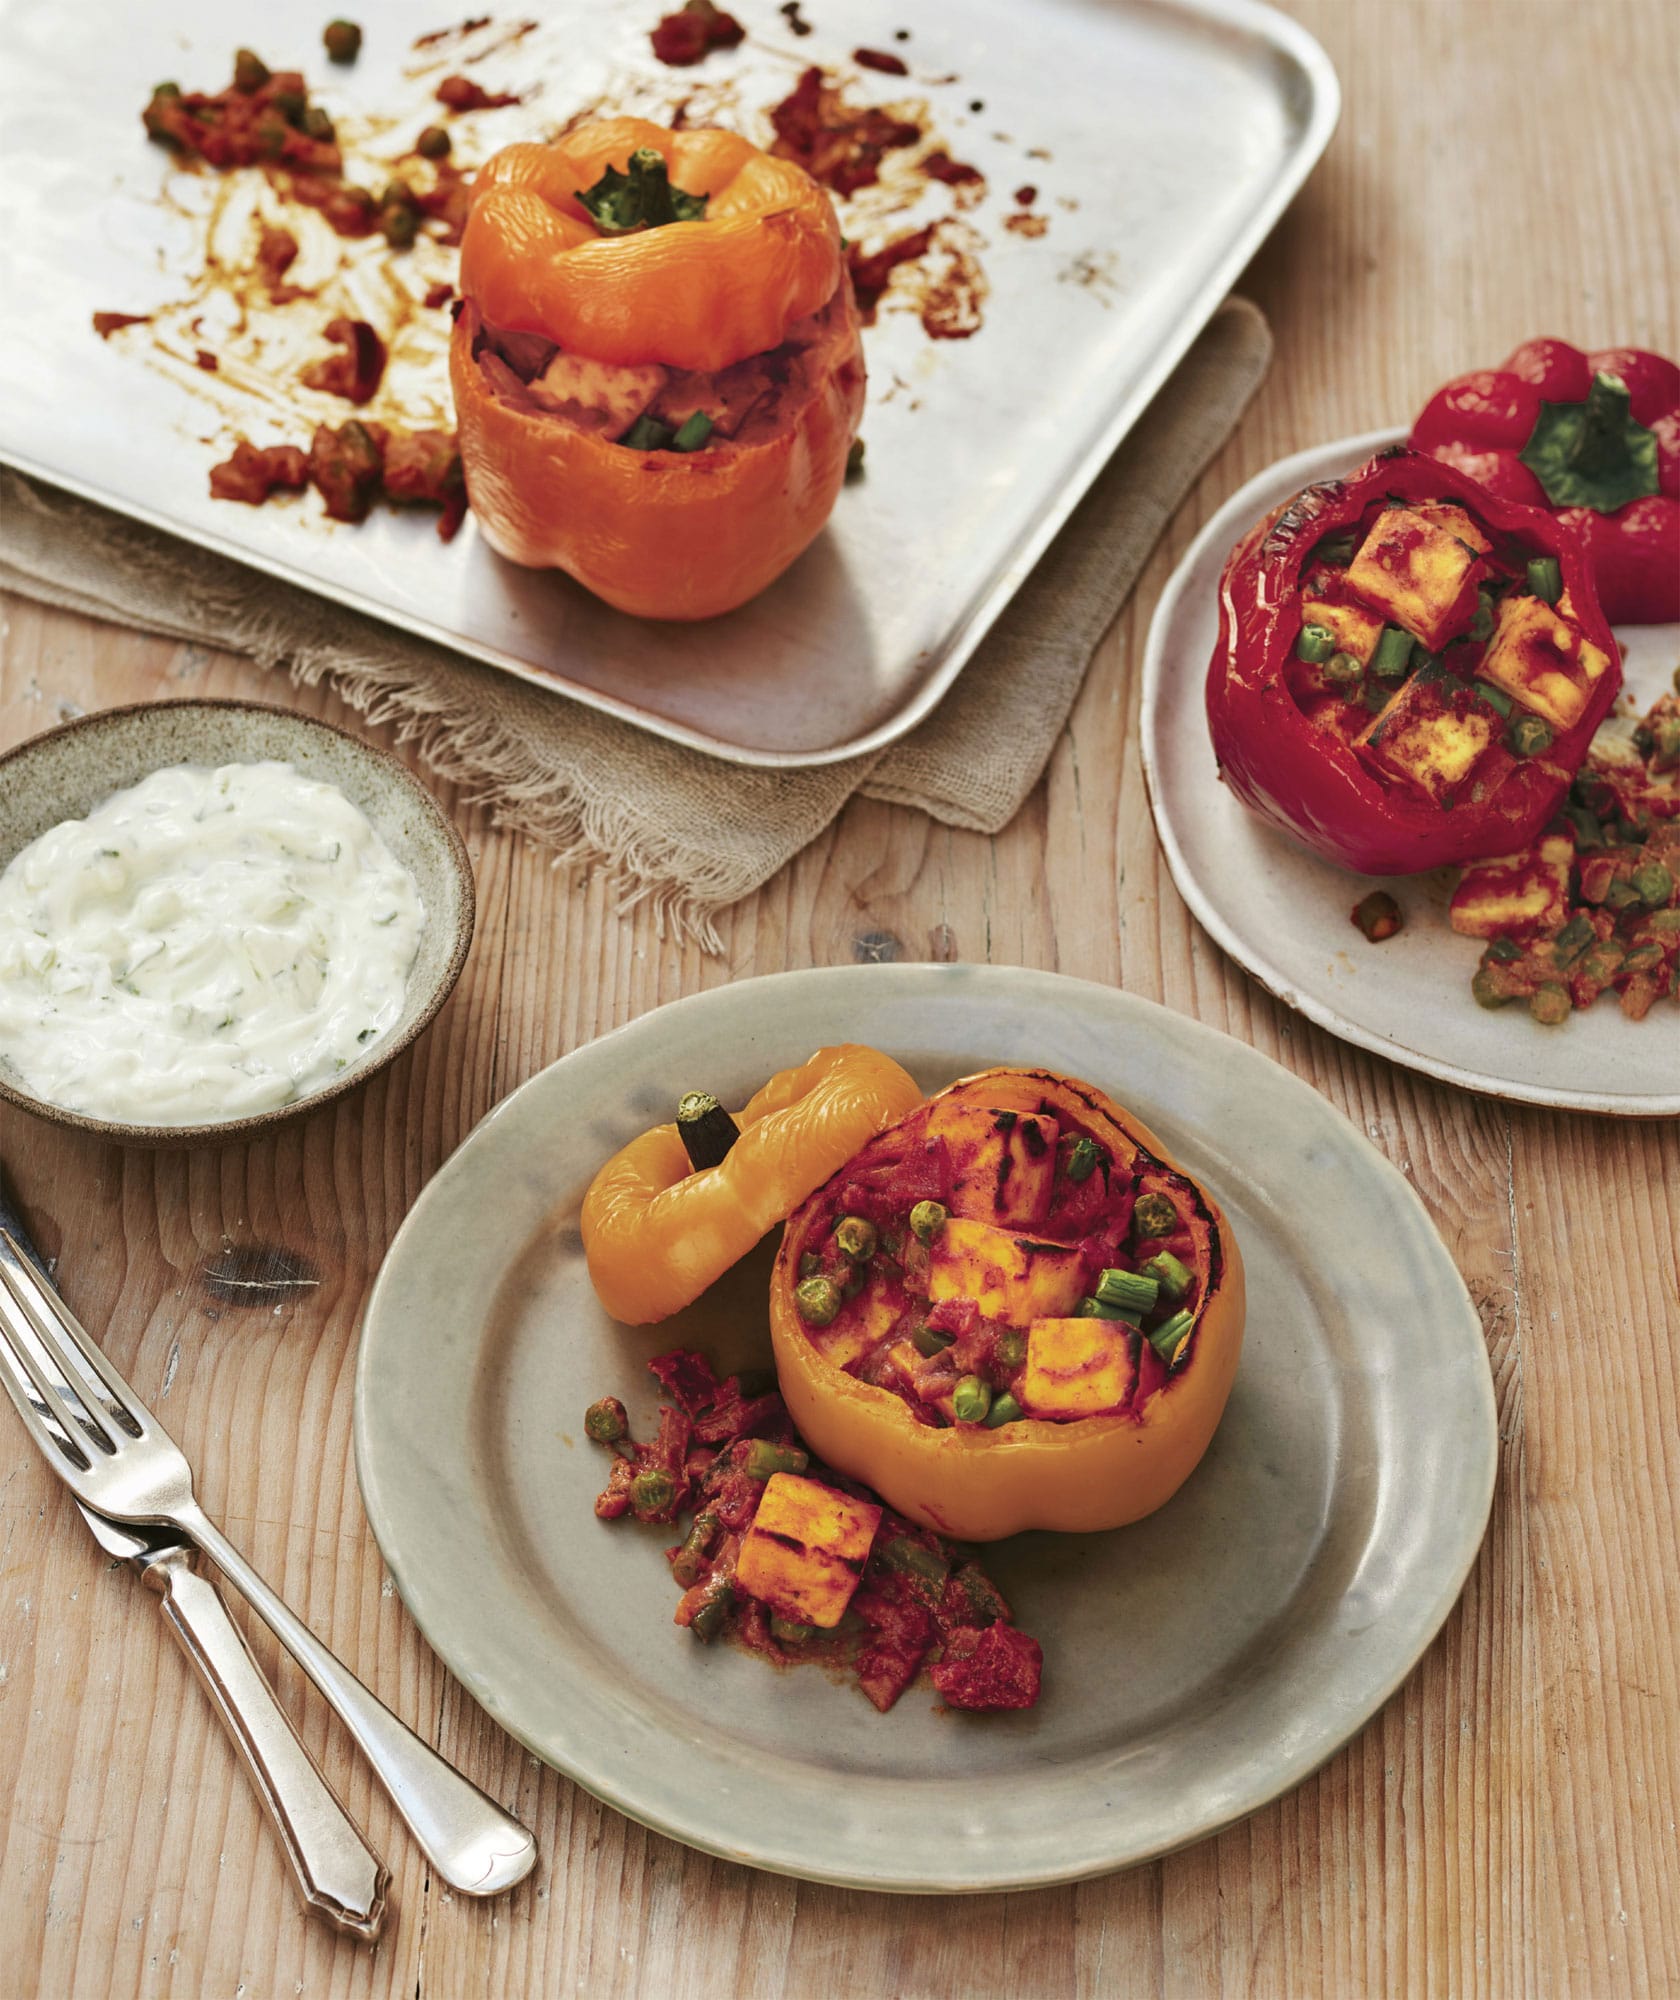
◁ Paneer-Stuffed Peppers
These colourful stuffed peppers make for a satisfying vegetarian dinner. The homemade paneer’s mild, milky flavour and dense crumbly texture go beautifully with the strong, spicy flavours in this dish.
4 large red or green (bell) peppers
4 tbsp coconut oil
2 tsp cumin seeds
1 red onion, chopped
2 handfuls of frozen peas
100g (31/2oz) green beans, chopped
1/2 tsp ground ginger
3 large tomatoes, finely chopped
1/2 tsp turmeric powder
1/2 red chilli, chopped
2 tsp ground coriander
250g (9oz) paneer (see here), cubed
5 tbsp double (heavy) cream
handful of fresh coriander (cilantro), chopped
salt and freshly ground black pepper
SERVES 4
Preheat the oven to 190°C (375°F/Gas Mark 5).
Slice the tops off the peppers, deseed them, then replace the tops. Place the peppers on a baking sheet, spoon over 1 tbsp of the coconut oil and bake for about 25 minutes, or until softened. Remove from the oven and set aside to cool.
Meanwhile, heat the remaining coconut oil in a non-stick saucepan. Add the cumin seeds and fry for 30 seconds until you can smell the cumin.
Add the chopped onion and cook for a few minutes until golden brown, then add your peas, beans, ginger, tomatoes, a pinch of the salt and the spices and simmer for 10 minutes, or until the tomatoes have completely softened.
Add the paneer, then 100ml (31/2 fl oz/scant 1/2 cup) water and stir until mixed. Add the cream and a pinch of black pepper. Simmer until the mixture has heated all the way through. Add the fresh coriander (cilantro) and continue to simmer for a further 5 minutes, adding tablespoons of water as necessary to stop the sauce sticking as the paneer will absorb quite a lot of the liquid.
Preheat the grill (broiler). While it is heating up, fill the baked peppers with the mixture. Grill (broil) the peppers for a couple of minutes until they bubble then replace the tops. Serve with tzatziki or a salad of your choice.
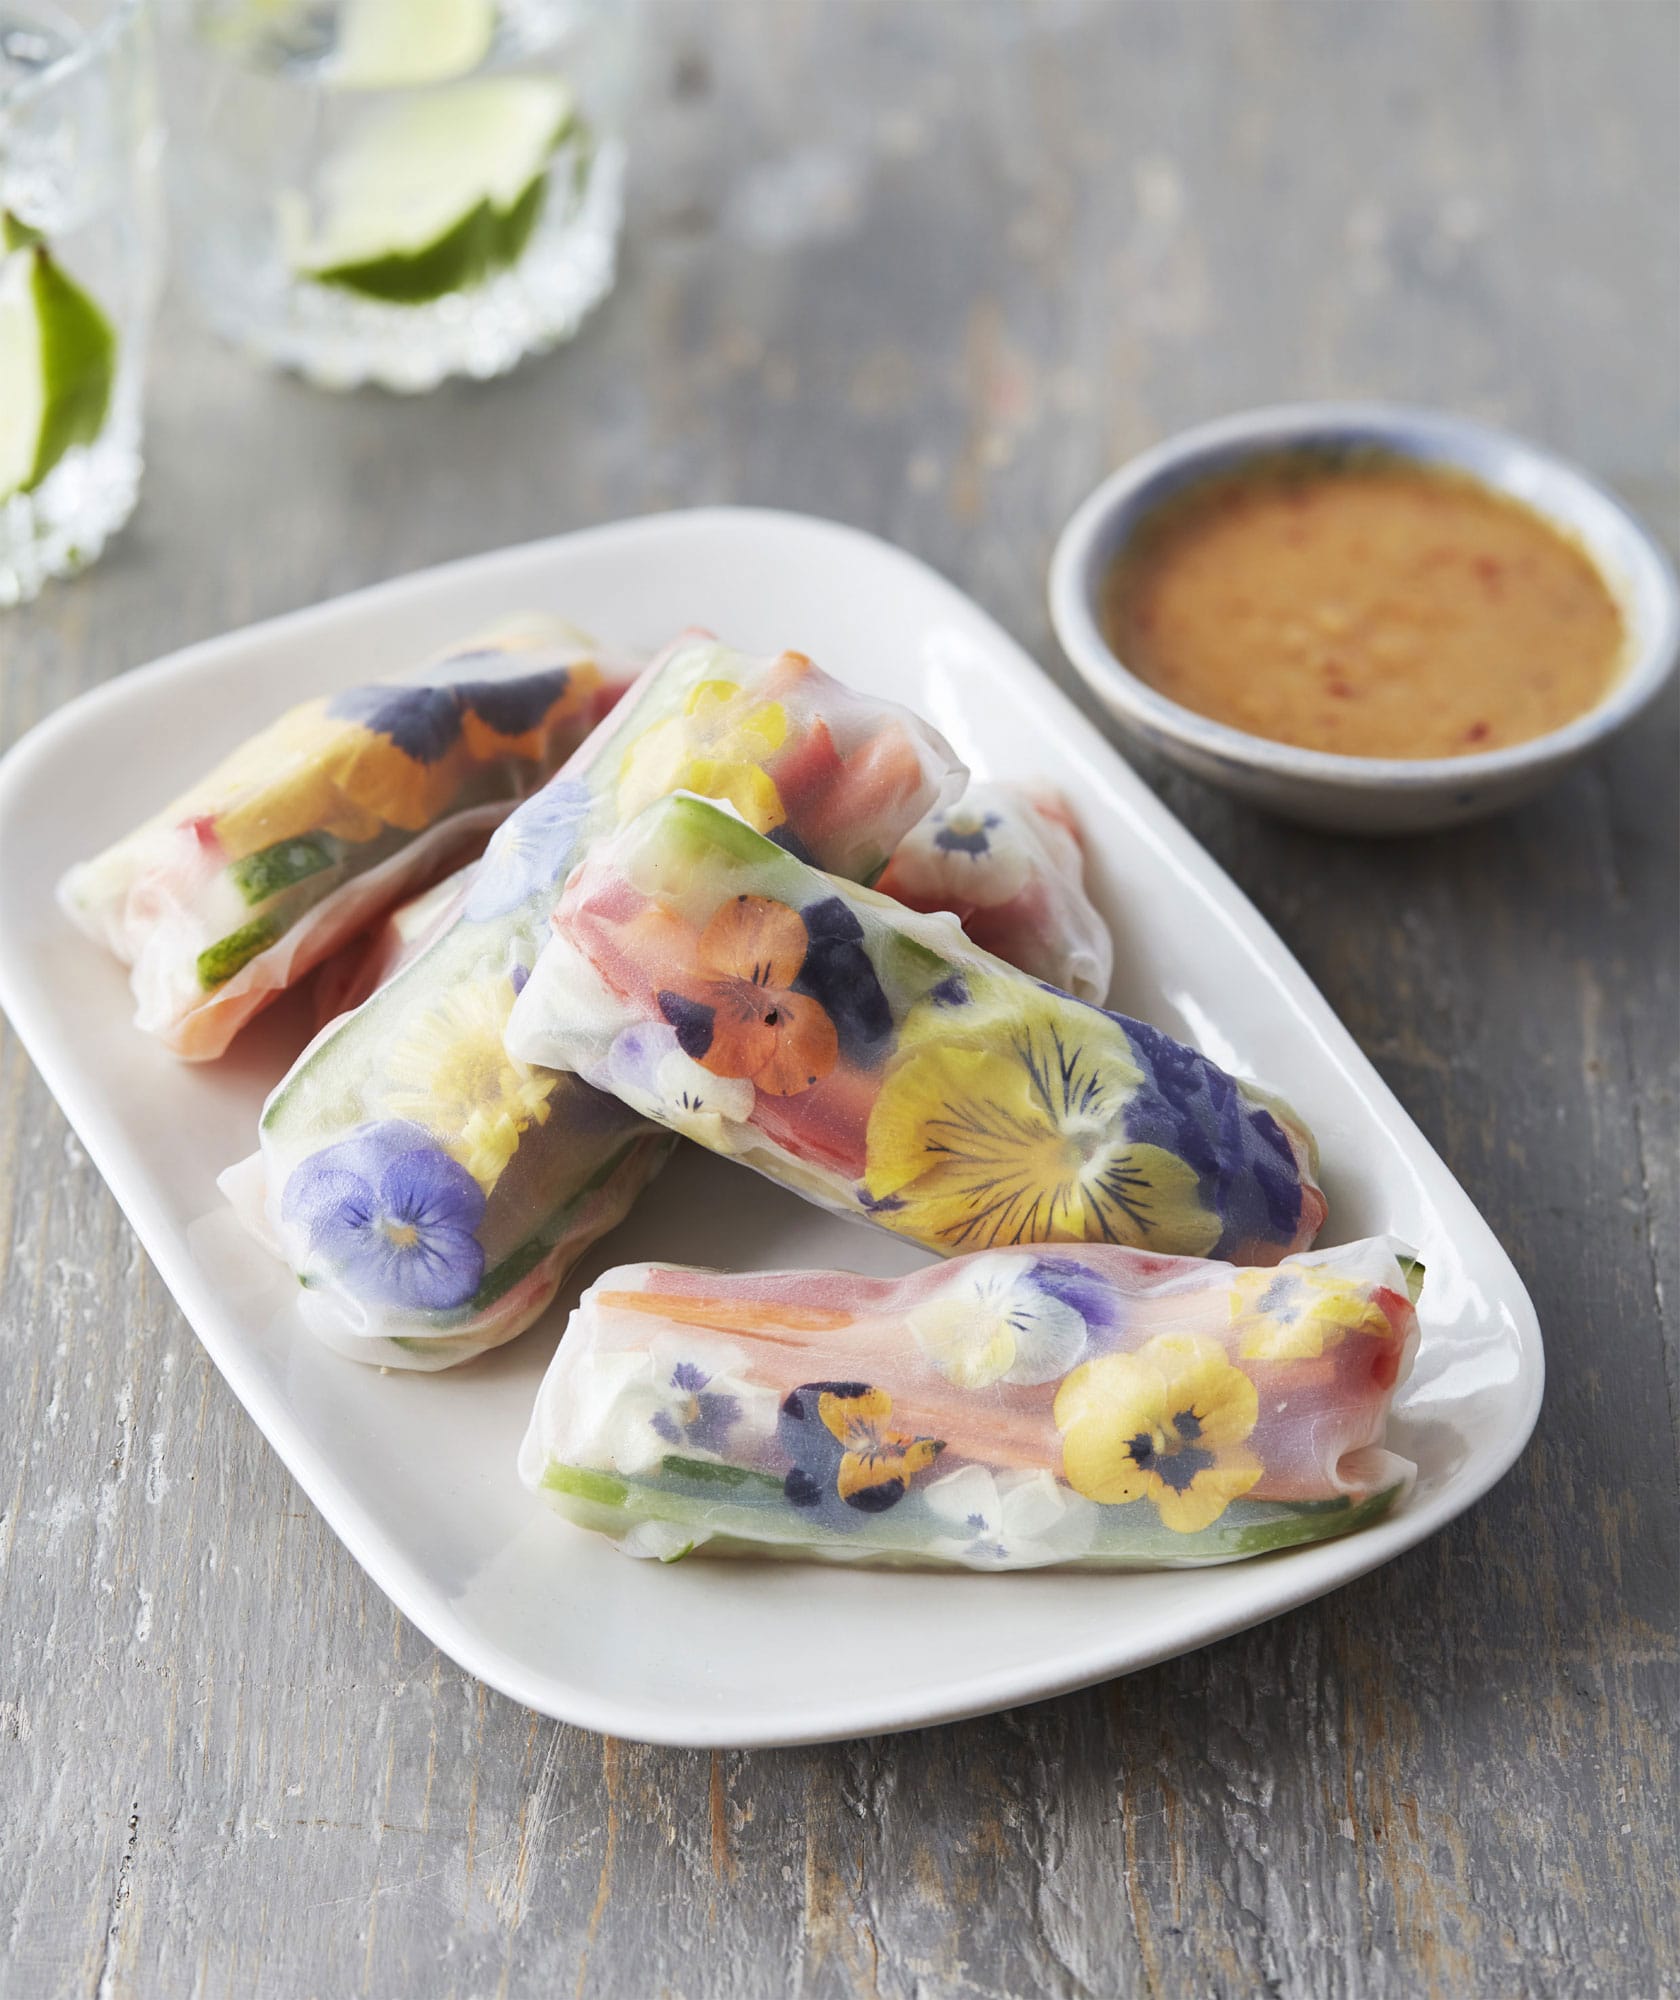
◁ Paneer Summer Rolls with Peanut Butter Dipping Sauce
You can’t go wrong with these rolls. They are the perfect light, healthy meal or snack, with the freshness of a salad. Wrapped in rice paper and filled with fresh ingredients, summer rolls can also be hearty. Vietnamese in origin, they are typically stuffed with shrimp, pork or chicken, but I love using paneer. I also add edible flowers to mine, for no other reason than they look so beautiful! These are perfect nibbles to serve at a party and to impress your guests.
Paneer spring rolls
100g (31/2oz) paneer (see here)
10 rice paper summer roll wrappers
handful of edible flowers
1 large carrot, peeled and cut into thin strips
2 red (bell) peppers, deseeded and cut into thin strips
5 spring onions (scallions), cut into thin strips
1 avocado, stoned, peeled and sliced
handful of fresh coriander (cilantro) leaves, chopped
Peanut butter dipping sauce
1 tbsp sesame oil
1 tbsp garlic-infused oil
1 tbsp soy sauce
2 tbsp sweet chilli sauce
3 tbsp smooth peanut butter
2 tbsp lime juice
SERVES 2–3
Mix together all the sauce ingredients in a bowl and set aside.
Chop the paneer into small pieces and fry in a non-stick frying pan (skillet) over a medium heat for about 5 minutes, until crispy. Set aside to cool.
To make the rolls, simply place the rice paper wrappers into a bowl of warm water for 10 seconds. Once soft, lay some edible flowers face down in the centre of each wrapper so that they show through the rice paper. Top with a mixture of the vegetable strips, avocado, paneer and coriander (cilantro), and drizzle a teaspoon of the peanut sauce over each one.
Fold the top and the bottom of the wrappers over the filling, then roll up from the right side.
Serve the rolls with the leftover sauce for dipping.

◁ Paneer, Potato and Coconut Curry
This has got to be my favourite recipe in the book, mainly for sentimental reasons, as every time I cook this flavour-packed curry I think of my amazing dad. He taught me this recipe when I first took an interest in cooking, and it is the best dish he makes. This will always remind me of our big family meals, with a pot of this gorgeous curry in the middle of the table, lots of naan bread, rice and homemade raita. I hope you love it as much as I do.
4 tbsp coconut oil
3 dried red chillies, chopped
1 tsp mustard seeds
10–12 curry leaves
2 onions, finely chopped
4 tomatoes, finely chopped
2 tsp ground coriander
1 tsp turmeric powder
1 tsp garam masala
250g (9oz) paneer (see here), cubed
7–8 potatoes, peeled and cut into bite-sized chunks
400ml (14 fl oz/1 2/3 cups) coconut milk
3 tbsp desiccated (dried shredded) coconut
1 tsp red chilli powder
100g (31/2oz) frozen peas
handful of fresh coriander (cilantro) leaves
salt
SERVES 4–6
Heat 2 tablespoons of the coconut oil in a large saucepan. When the oil is nice and hot, add the chillies, mustard seeds and curry leaves and cook for a few minutes.
Add the chopped onions and cook for 8–10 minutes until the onions are golden brown. Add the chopped tomatoes, mix well and cook for about 4 minutes. Add the ground coriander, turmeric, garam masala and a little salt to the pan. Mix well and cook for about 5 minutes until the tomatoes and spices are cooked through.
While this is cooking, heat the remaining coconut oil in a frying pan (skillet) and cook the paneer for 3–4 minutes until golden brown.
Add the potatoes to the pan of tomatoes and stir to coat in the onion and tomato mixture. Pour in the coconut milk, coconut and chilli powder, along with about 120ml (4 fl oz/1/2 cup) water. Bring to the boil then reduce the heat and simmer, covered, for 25–30 minutes, stirring occasionally, until the potatoes are just tender. Add the peas and the cheese and mix through. Sprinkle with the coriander (cilantro) leaves.
Serve with rice and naan bread, with mango chutney and yoghurt on the side.
Swiss Cheese
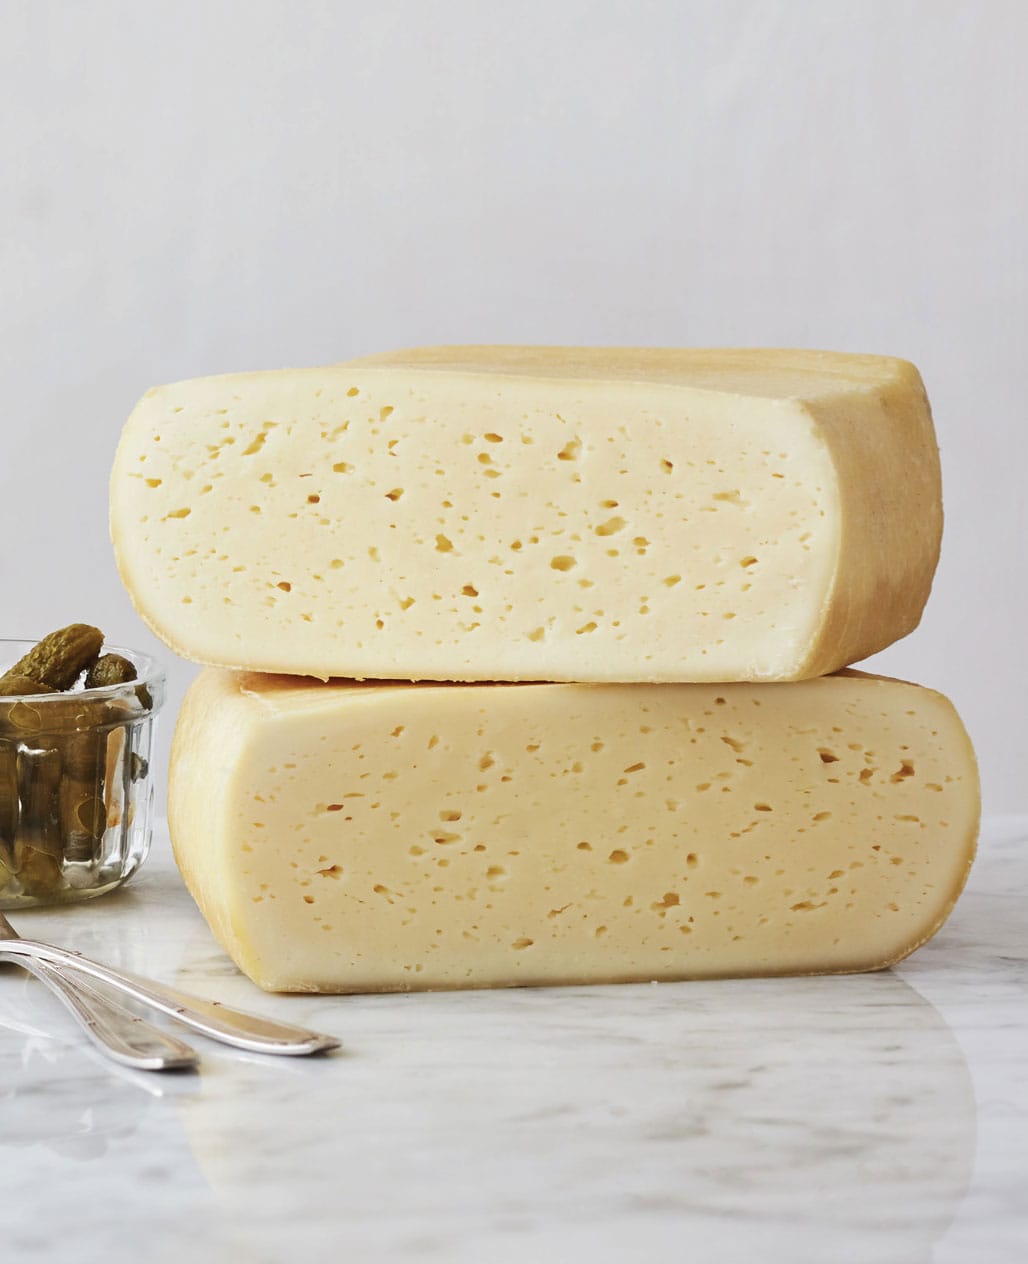
This is a recipe that will put your cheesemaking skills to the test. You may not master it on the first go, but keep trying because the end result is well worth it. The Swiss have a long history of making cheese, dating back 2,000 years, and now you can recreate a little piece of that in the comfort of your own home. Again, make notes as you make the cheese, so you have a record of the best version you produce.
7.5 litres (13 pints/32 cups) milk
1/8 tsp MM100 mesephilic culture or Thermo B culture (for a buttery flavour)
1 tsp + 1 tbsp calcium chloride
pinch of Propionic shermanii (the stuff that creates the holes)
1.5ml liquid rennet
1kg (21/4lb) salt
1 tsp white wine vinegar
MAKES 500g (1lb 13/4oz)
You will need: a cheesecloth or muslin sheet, an instant-read thermometer, a curd knife and a large cheese mould
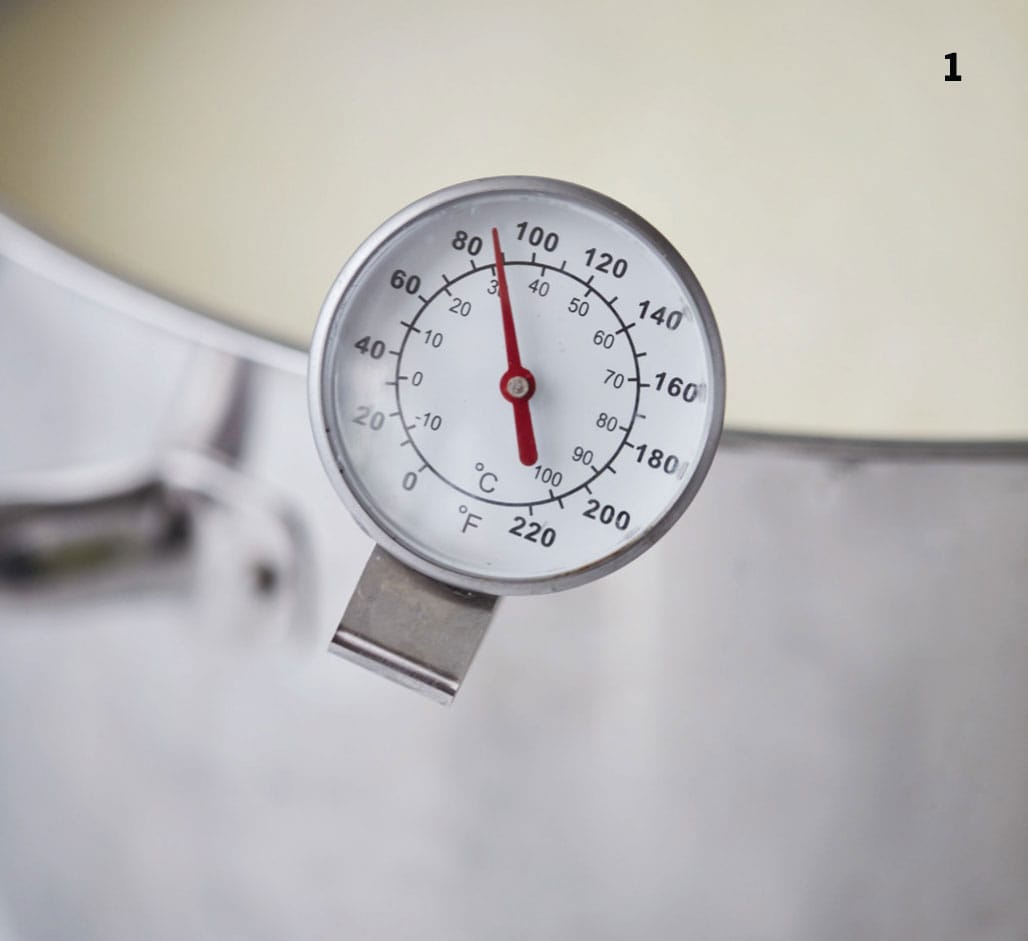
1 In a large saucepan, heat the milk to 30°C (86°F). I do this not over direct heat but by setting the pan in a warm water bath in the sink. Stir the milk gently so it warms through evenly. Once the milk has reached temperature, add the required culture and 1/2tsp calcium chloride and leave for a minute or two.
2 Now add the propionic acid and let this sit for a further 2 minutes, then stir thoroughly. Leave the milk to sit in the warm water bath for 45 minutes, making sure you maintain the 30°C (86°F) temperature throughout. Add hot water to the sink if necessary.
3 Next, add the rennet to the milk, cover and leave to sit for another 45 minutes. You will see the milk thicken and the rennet work its magic.
4 Once the 45 minutes are up, you will see the curds have formed. Now it’s time to cut your curds, first into 2.5cm (1-inch) pieces, then 1cm (1/2-inch) pieces, then 5mm (1/4-inch) pieces, then finally into 3mm (1/8-inch) pieces. Try and do this as evenly as possible. Let the curds rest for 5 minutes.
5 Next, carefully pour off the whey.
6 Now it’s time to cook the curds, which will dry them out. You will need to slowly increase the heat to 49°C (120°F); you can do this by slowly adding hot water directly into the curds. This should take about 15–20 minutes. The final amount of water added should be roughly equal to the whey that was taken out. Stir the curds for 30–45 minutes to create the perfect dryness. The curds should be cooked well, so if you broke into them, they would be firm throughout and bouncy to touch.

7 Once this is done, leave the curds to settle for 20 minutes. Set a sieve (fine-mesh strainer) over a bowl, line it with cheesecloth or muslin and set aside. Carefully drain out enough water from the pan so that the cheese curds are just covered. With your hands, press the curds gently to one side of the pan, so they are together. Once you see the curds form a mass, remove the remaining liquid and transfer the curds into your cloth-lined strainer.
8 Gather the cloth at the top to form a bag, then press the curds into a solid mass, squeezing out the whey. Transfer these curds into your cheese mould.
9 Once the cheese is in the mould it’s time to press it, with a weight of about 2.5kg (51/2lb) set on top of a plate on top of the cheese. Every hour or so, turn the cheese and add the weight again, each time adding a little more weight. After 5 hours you should end up with about 5.5kg (12lb) of weight on the cheese. Keep the cheese somewhere warm while doing this.
10 Now it is time to move the cheese to a cooler environment, about 11°C (52°F). Remove the weights and leave to rest for 12 hours.

11 Once you have left your cheese overnight, you can start preparing your salt bath for washing it. You will need a large bowl or bucket. Lay the cheese in the bottom and add 1kg (21/4lbs) of salt, 1 tablespoon of calcium chloride and 1 teaspoon of white wine vinegar. Top up with 4.5 litres (8 pints/19 cups) of water. Leave the cheese in the salt bath for 3 hours, turning it halfway through and adding a little more salt to the surface.
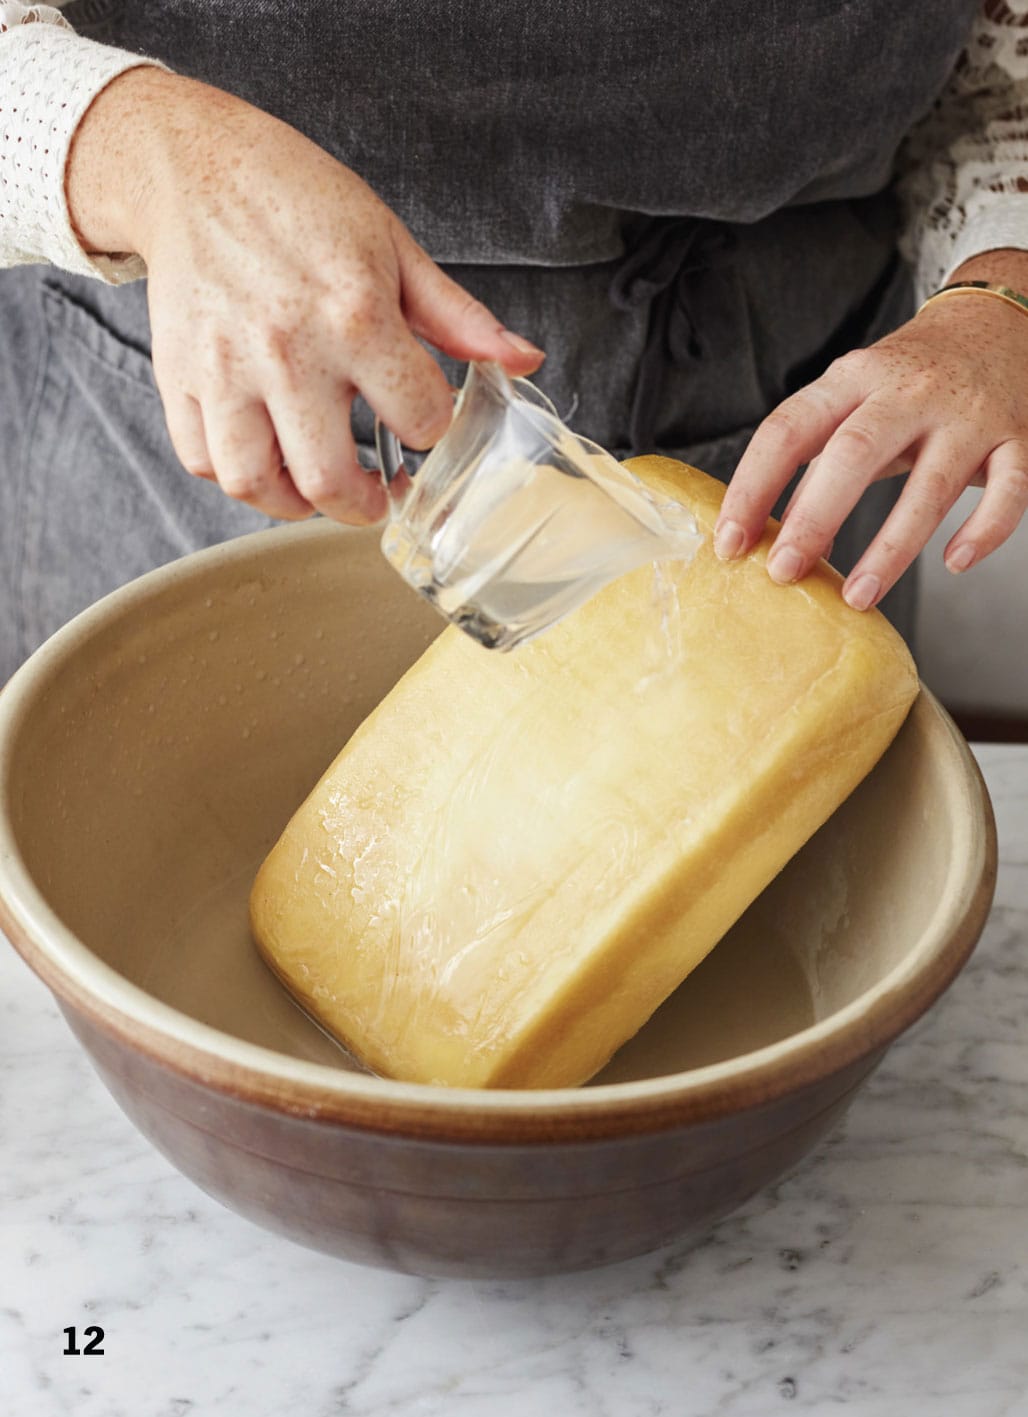
12 Pour out the brine and rinse the cheese with clean water. Leave the cheese to dry off, uncovered, at a temperature of 10–13°C (50–55°F) for 3 weeks. Every few days, turn the cheese over and wash with a damp cloth to stop mould.
13 Now it’s time to age your cheese. It should be kept in an area that is about 18–21°C (65–70°F) for 2–3 weeks; in this time the holes will develop. Try to turn the cheese every few days, as this will stop the moisture forming on one side only. After this time, move the cheese to a cool room at 7–10°C (45–50°F) and let it mature for 1 month. Once cut it will keep for up to 1 month in the refrigerator. Left intact it will continue to mature and the flavour will strengthen.

◁ Cheese Straws
These delicious cheesy straws are a great way to use up odd bits and bobs of cheese in the refrigerator. They’re perfect for dipping, but just as good on their own.
1 sheet of puff pastry
flour, for dusting
1 egg
1 tsp milk
total of 100g (31/2oz) Swiss cheese (see here), Emmental and Gruyère, grated and combined
salt and freshly ground black pepper
MAKES ABOUT 24
Preheat the oven to 180°C (350°F/Gas Mark 4) and line a baking sheet with non-stick baking (parchment) paper.
Lay out the puff pastry on a lightly floured surface. Combine the egg and milk in a small bowl, then brush the egg wash over the pastry dough. Scatter the grated cheese mix all over and add a pinch of salt and pepper.
Using a sharp knife, cut the dough into two pieces horizontally. Then cut each piece into 1cm (1/2-inch) wide strips to make about 24 straws. You can leave them as straight straws or take both ends and twist to create a cheese twist.
Transfer the straws to the prepared baking sheet and cook for about 5 minutes, until golden brown, then place on a wire (cooling) rack to cool.

◁ Easy Raclette at Home
Raclette is an all-time favourite of mine, bringing back wonderful memories of being in Val d’Isère at ski school and coming in from the snow to this melty potato heaven. Raclette is a particularly popular dish in the Swiss Alps and other ski regions, which is where this wonderful cheese comes from.
2 tbsp olive oil
1 onion, thinly sliced
100g (31/2oz) waxy potatoes, such as new potatoes
8 cornichons
6 pearl onions
150g (5oz) raclette cheese, sliced
salt
SERVES 2
Heat the oil in a pan over a medium heat and add the sliced onions. Gently cook the onion for about 7–8 minutes until golden brown, then set aside.
Meanwhile, cook the potatoes in a pan of salted boiling water for 10–12 minutes until cooked but not soft. Drain and leave to sit in a colander for a few minutes to get rid of any excess water, then cut into bite-sized pieces. Combine the potatoes with the onions in the pan, then transfer to two small heatproof dishes. Divide the cornichons and pearl onions between the two.
Preheat the grill (broiler) to a medium heat. Lay the sliced raclette over the potato and onions, then cook for about 2 minutes until the cheese bubbles – keep a close eye on it. Serve and eat straight away.
Halloumi
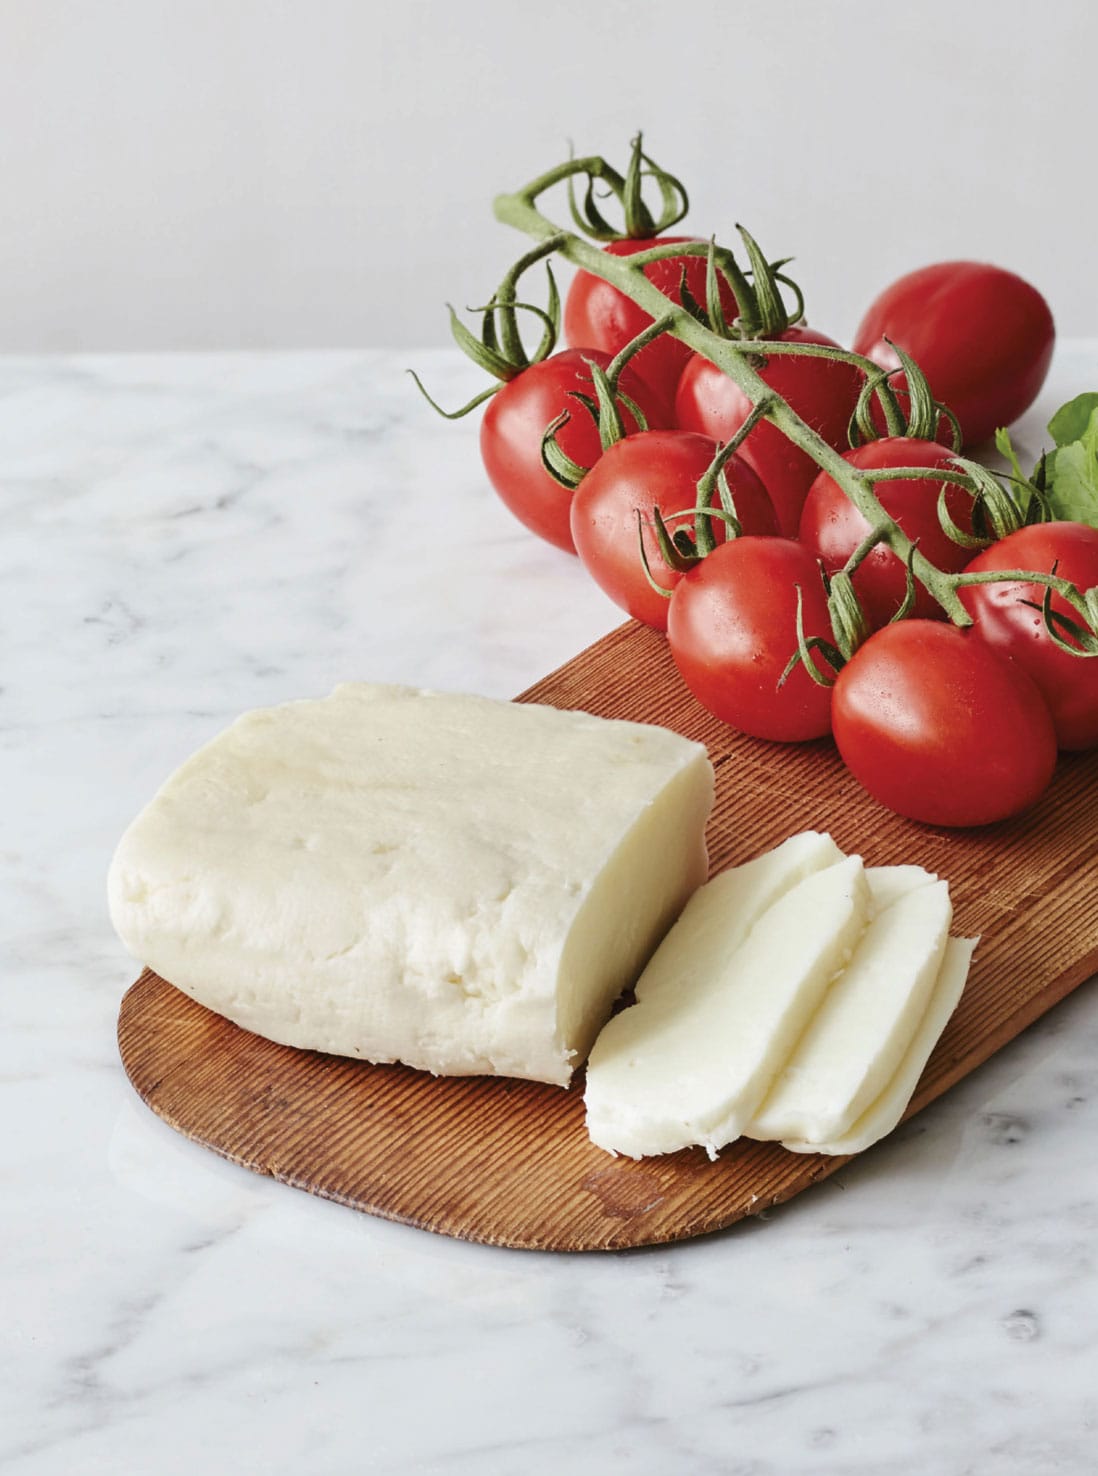
This super-easy halloumi is so delicious, but a far cry from the salty, squeaky halloumi cheese we’re used to. It takes less than two hours to prepare (and the end result is a fantastic homemade Greek cheese!
8 litres (14 pints/34 cups) milk
1/2 tsp liquid rennet, diluted in 60ml (2 fl oz/1/4 cup) cold water
1/2 tsp calcium chloride, diluted in 60ml (2 fl oz/1/4 cup) cold water
rock salt or cheese salt
MAKES 300g (101/2oz)
You will need: a cheesecloth or muslin sheet, an instant-read thermometer and a curd knife
1 Pour the milk into a large saucepan and heat to 32°C (90°F), stirring continuously. Once it reaches the required temperature, add the rennet and calcium chloride and remove from the heat. Stir well and cover with the pan lid for 30–40 minutes to allow the curds to set.

2 Cut the curds into 1.25cm (1/2-inch) cubes using a curd knife, then leave to rest for a further 5 minutes.
3 Return to a low heat and slowly heat to 38°C (100°F). This should take about 15–20 minutes. Set the curds aside to rest for 10 minutes until they start to become solid.

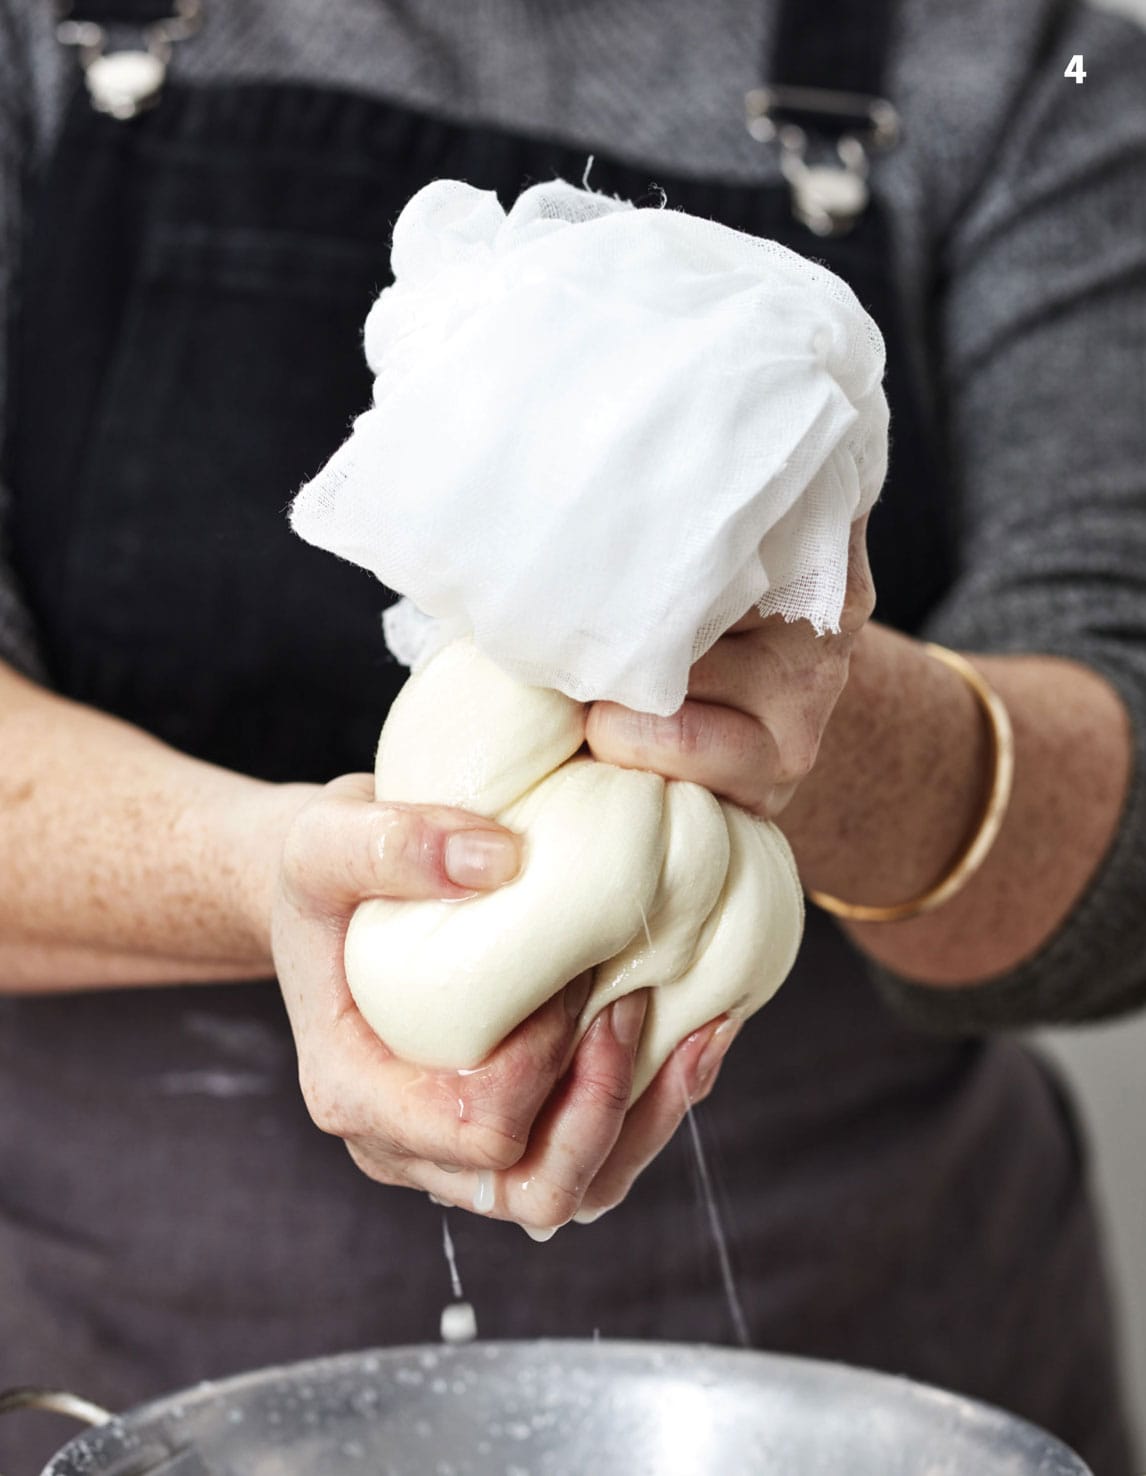
4 Place the cheesecloth or muslin in a sieve (fine-mesh strainer) set over a bowl, spoon in the curds and drain for about 5 minutes until there is no whey left, squeezing the cloth to remove any remaining whey. Retain the whey in the bowl below and set aside.
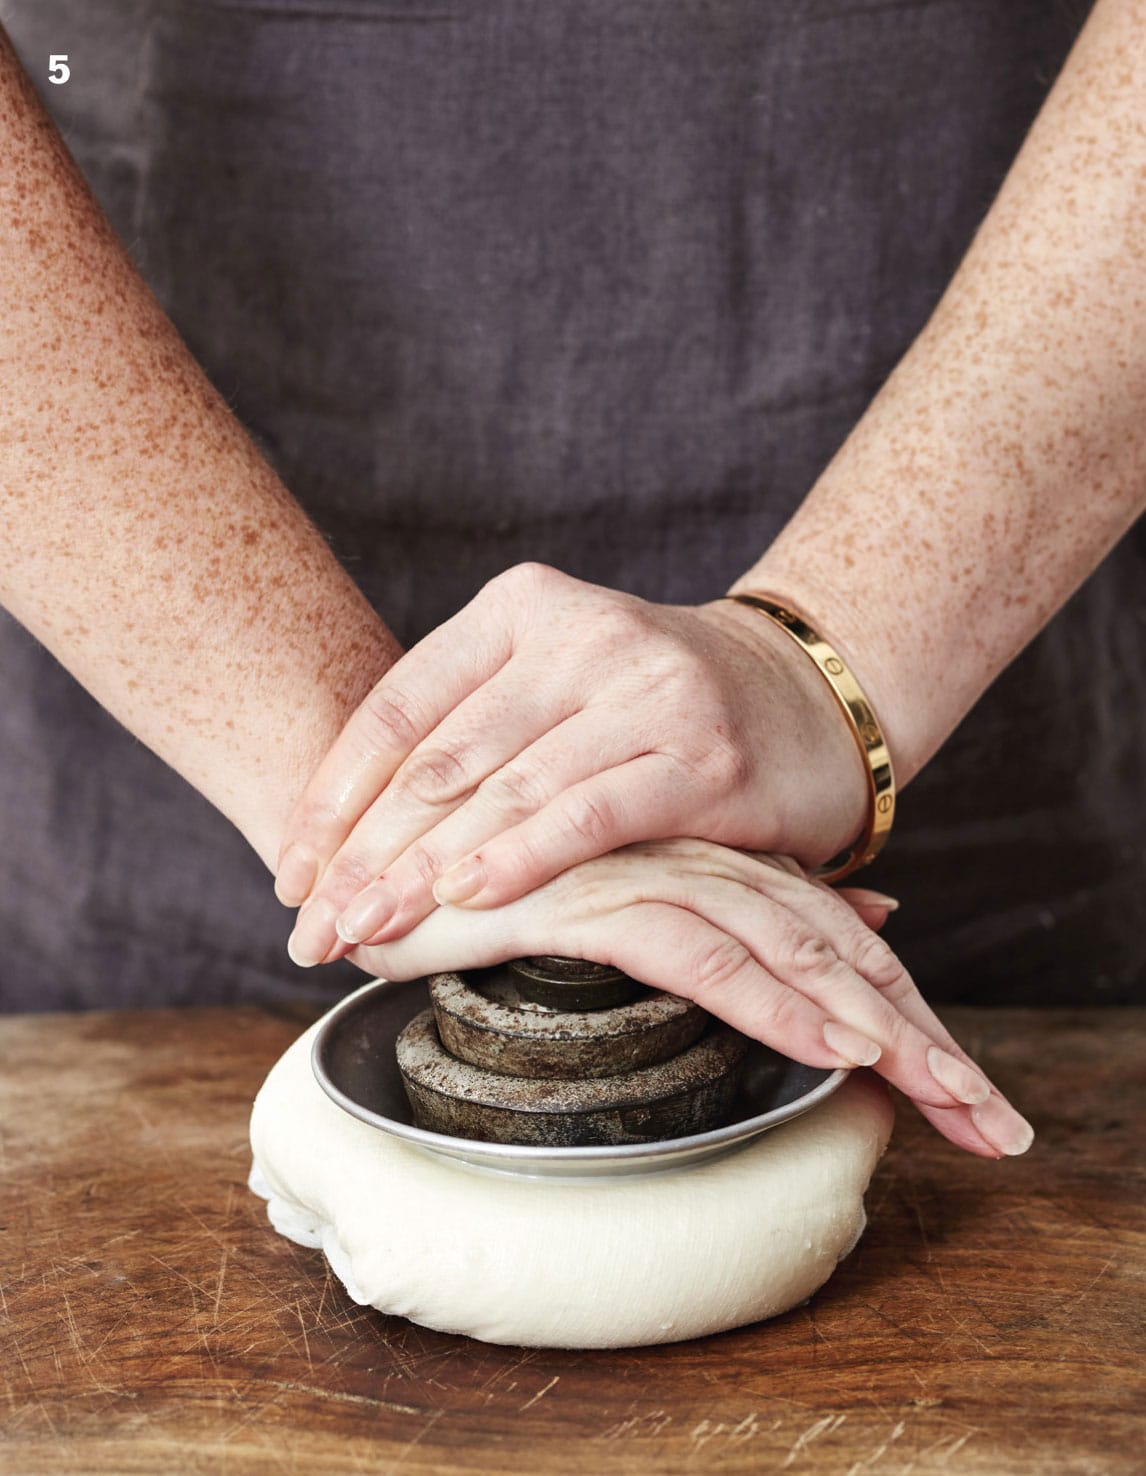
5 Carefully transfer the curds in the cloth onto a large chopping board and fold the cloth into a roughly flat shape (it doesn’t have to be perfect). Make sure the cloth is completely covering the cheese so the curds won’t spill out. Place a second board or a plate on top and add some weight (I usually add about 5kg/11lb). You can use a cheese press if you have one. Leave for 10 minutes, then flip the cheese over and return the weight for another 20 minutes.
6 While the curds are being pressed, return the whey to the hob (stovetop) and heat to 90°C (194°F). Discard any remaining curd that floats to the top.
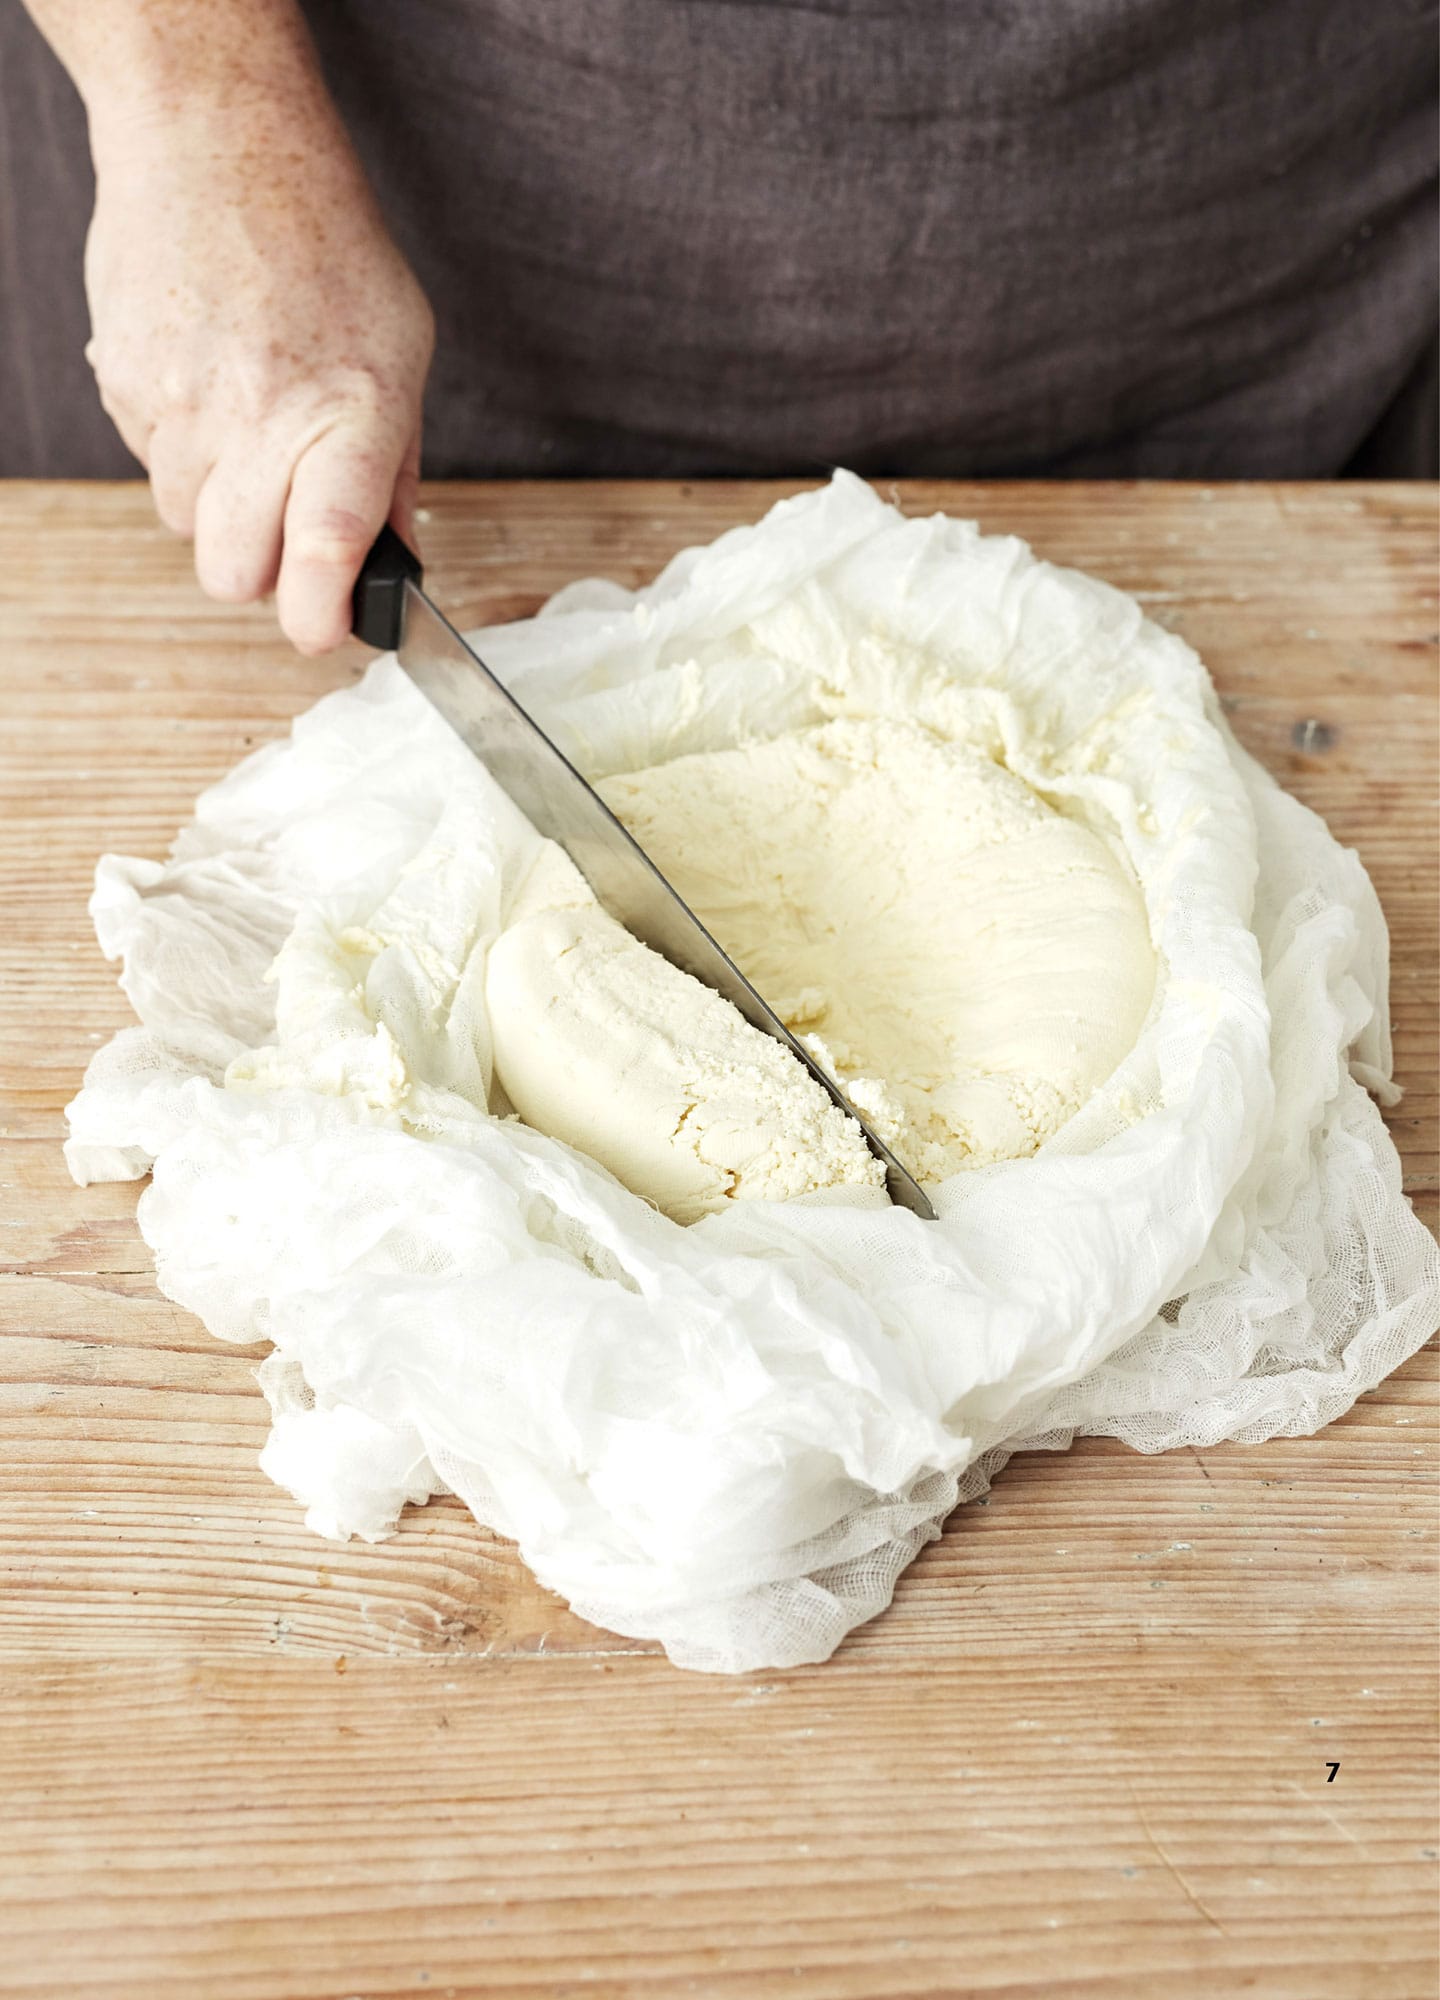
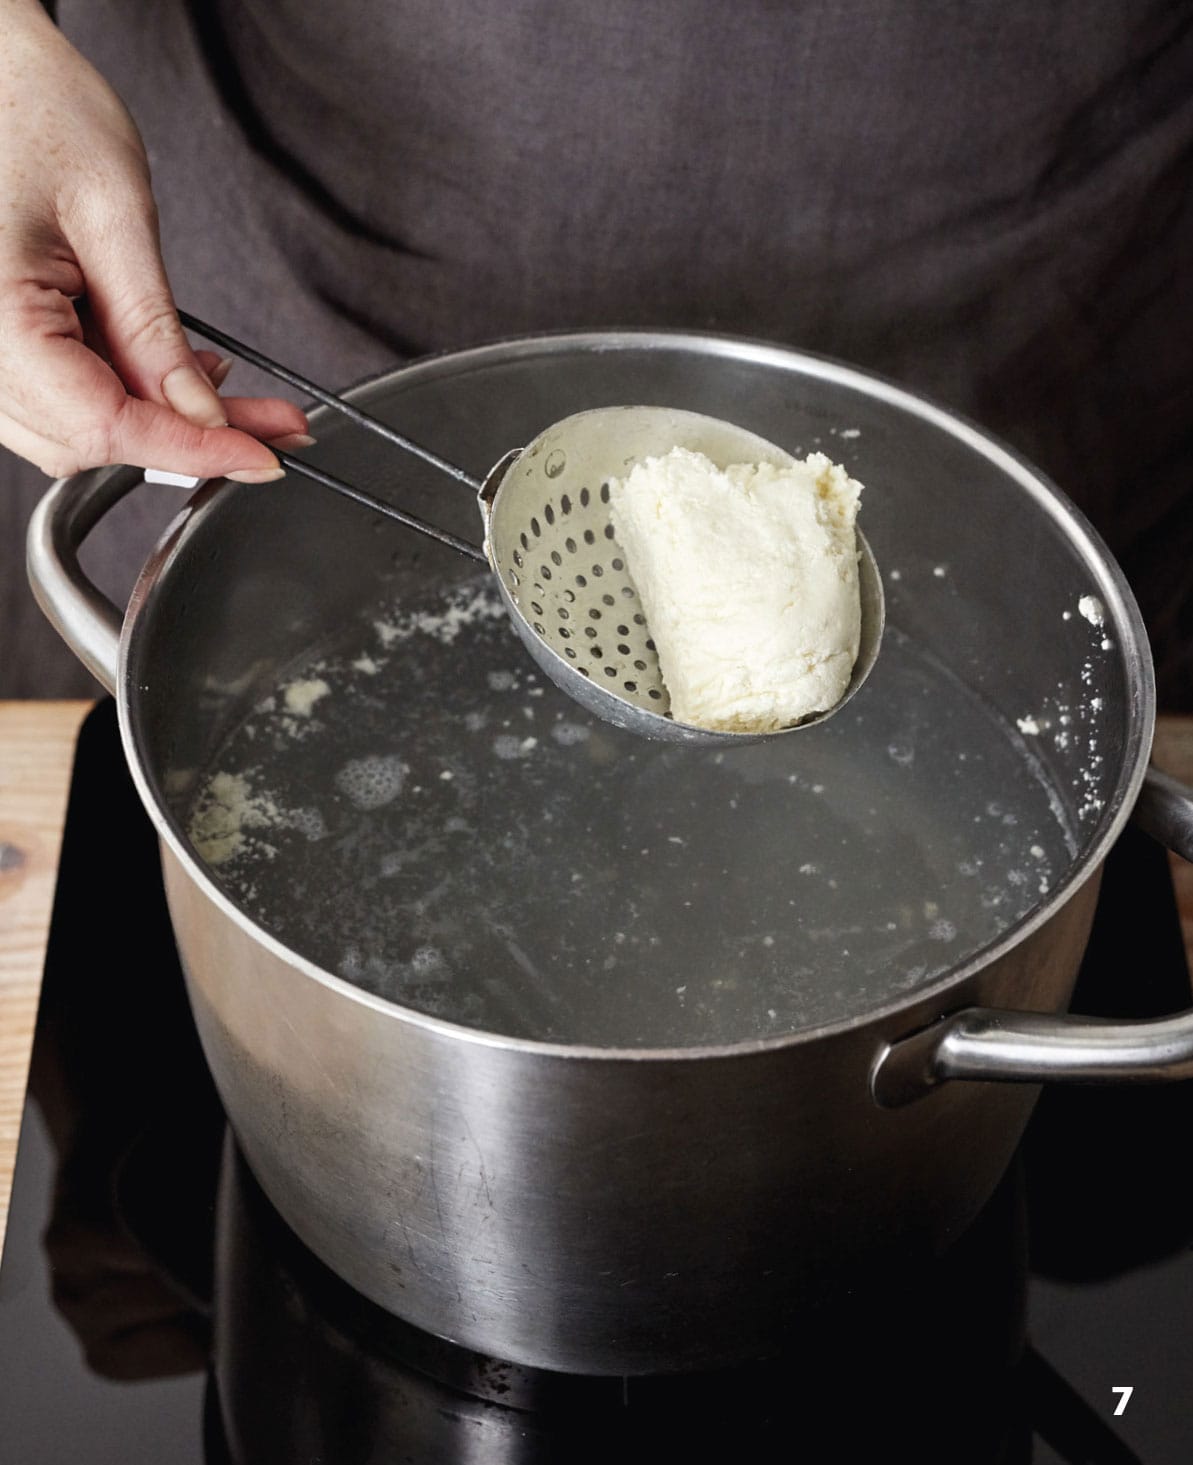
7 Remove the weight and open up the cloth carefully. Cut the curds into 10 x 15cm (4- x 6-inch) pieces, then place them into the hot whey set over a low heat. They should sink to the bottom, but after 45 minutes of gentle cooking they will float to the top. Remove from the heat and set aside for another 15 minutes.
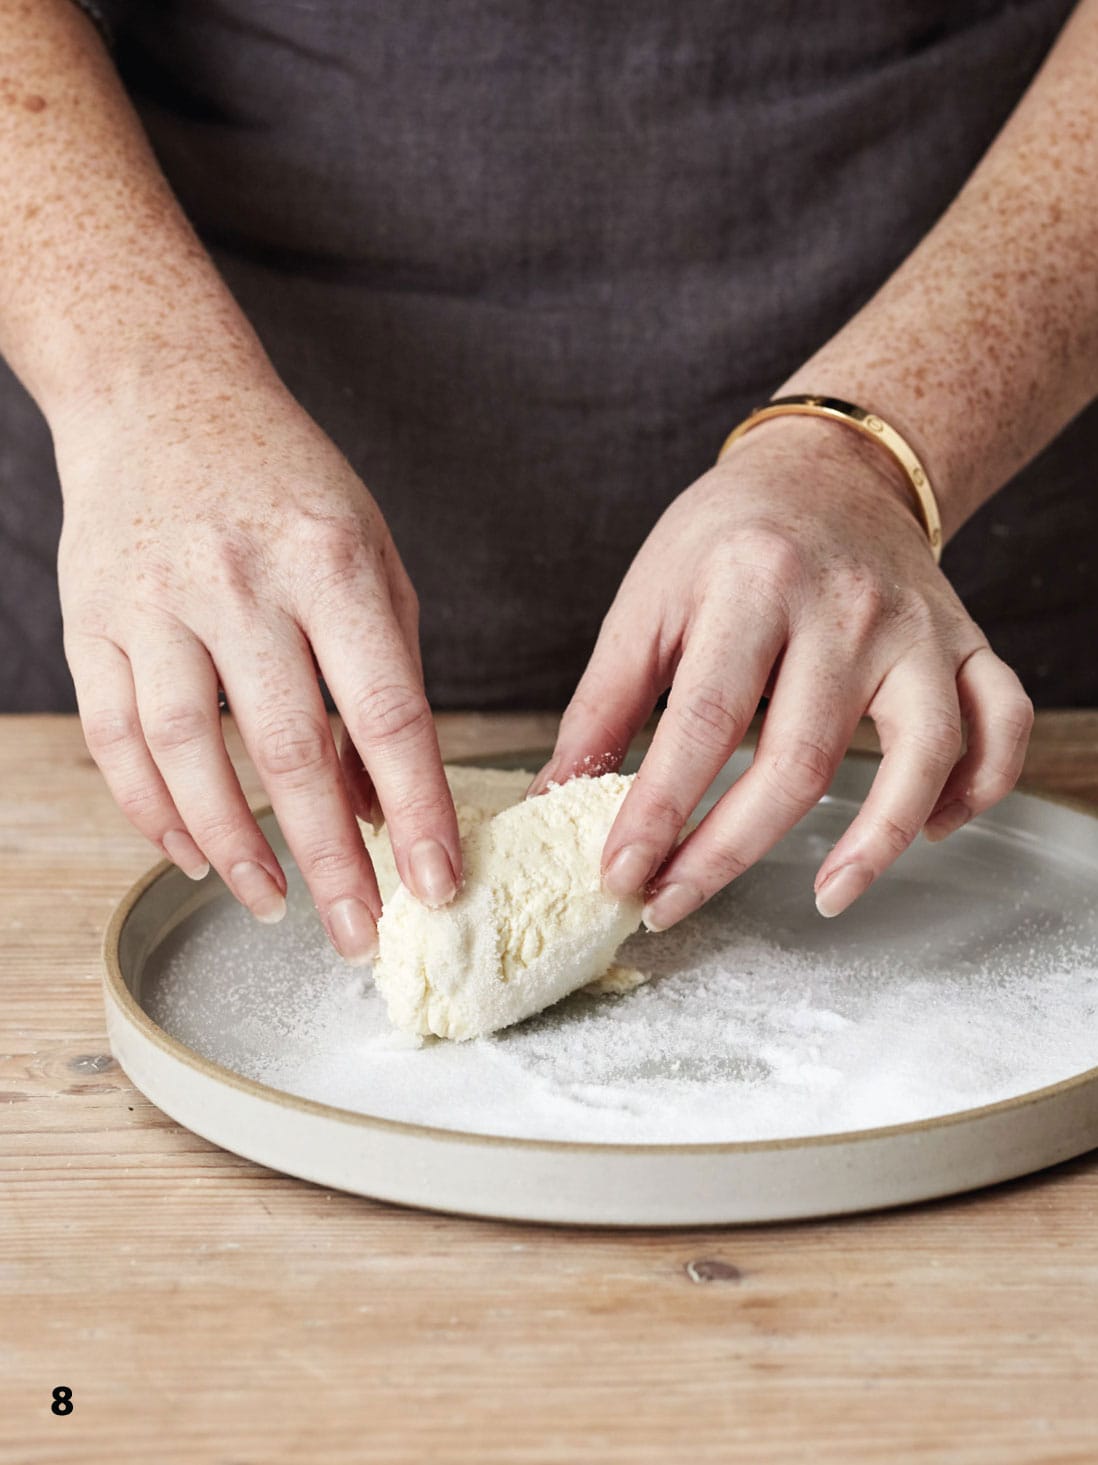
8 Remove the cheese and place it in a shallow dish filled with rock or cheese salt. Coat with the salt, and while the cheese is still hot, fold it in half and leave it to drain in a colander for 1 hour.
9 Place in an airtight container in the refrigerator and leave 24 hours before using so that the salt permeates the cheese. Consume within 1 week. Another method of storage is to vacuum pack the cheese and keep it for up to 6 months in the refrigerator – not that it will last that long as it is too yummy.
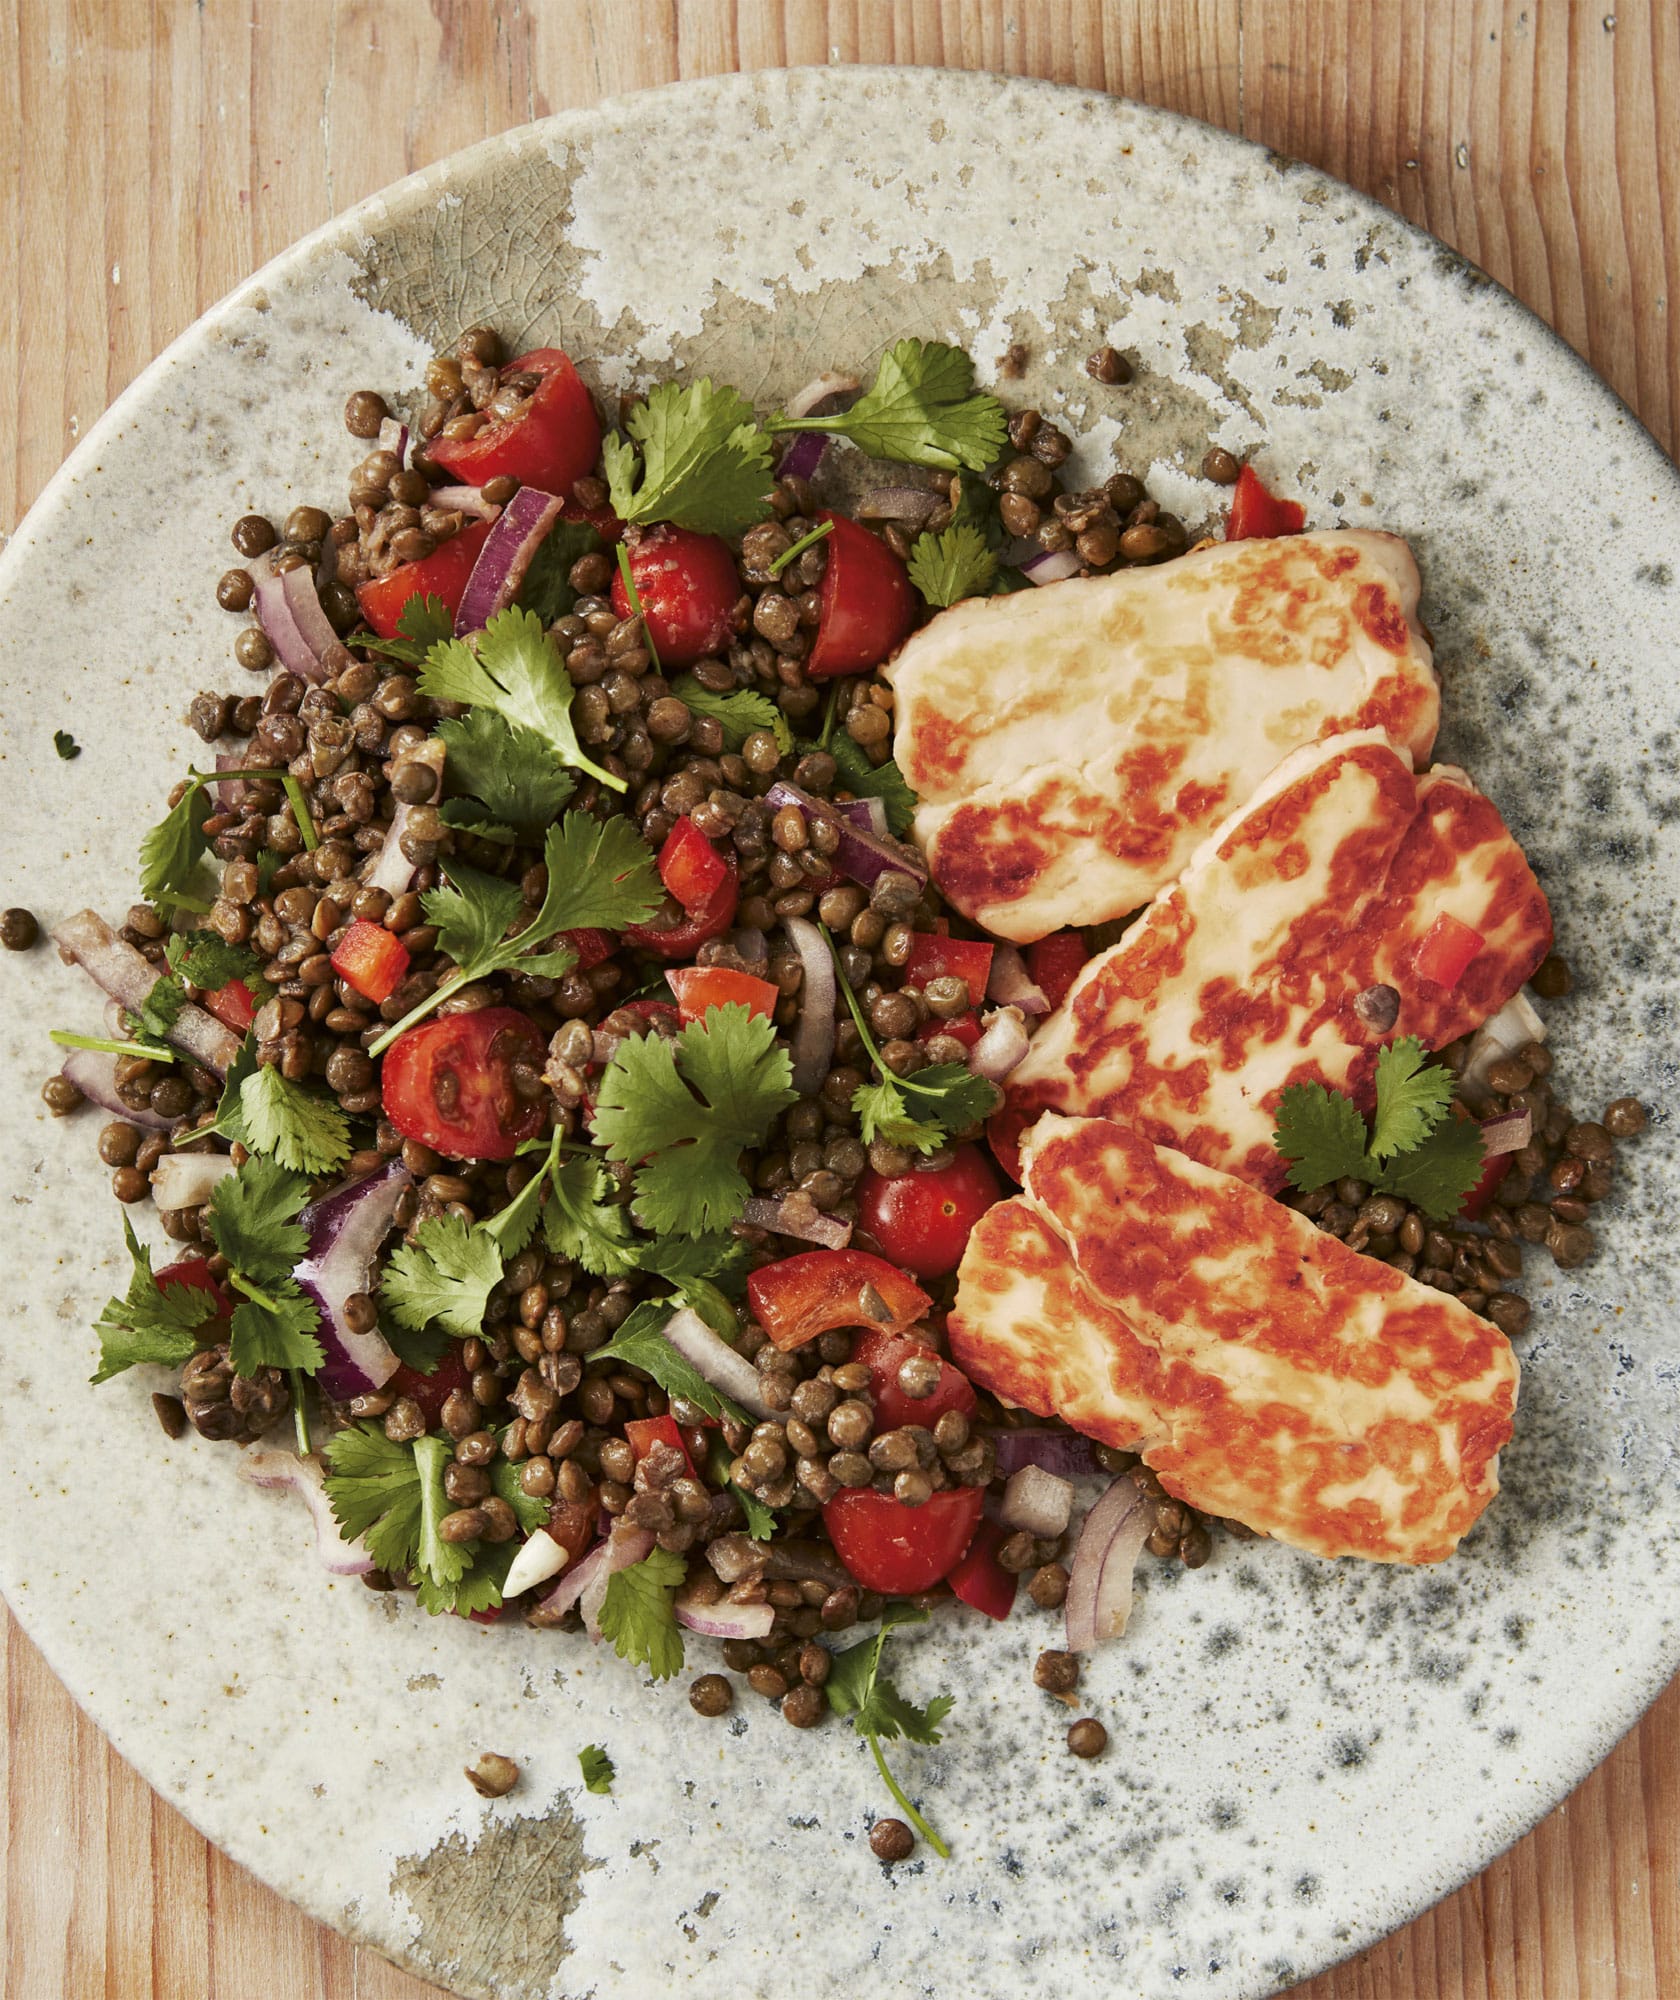
◁ Warm Puy Lentil, Cherry Tomato and Halloumi Salad
The lentils, salty halloumi cheese and rich, juicy tomatoes all work together in this salad to create a light but flavoursome dish that takes seconds to make. I make this in the cheese shop for a quick, tasty lunch.
250g (9oz) cherry tomatoes, halved
1/2 red onion, finely sliced
1/2 garlic clove, crushed
juice of 1/2 lemon
1 tbsp extra-virgin olive oil
150g (5oz) Puy lentils, rinsed
150g (5oz) halloumi (see here), cut into thick slices
small bunch of fresh coriander (cilantro), roughly chopped
salt and freshly ground black pepper
SERVES 2
Toss the tomatoes, red onion, garlic, lemon juice and olive oil in a large serving bowl.
Cook the Puy lentils in a pan of salted water for 20–25 minutes until just tender, then drain and add to the bowl. Season well and toss all the ingredients together.
Preheat the grill (broiler), then grill (broil) the halloumi slices for a few minutes until golden. Stir the coriander (cilantro) through the lentils and serve with the halloumi.
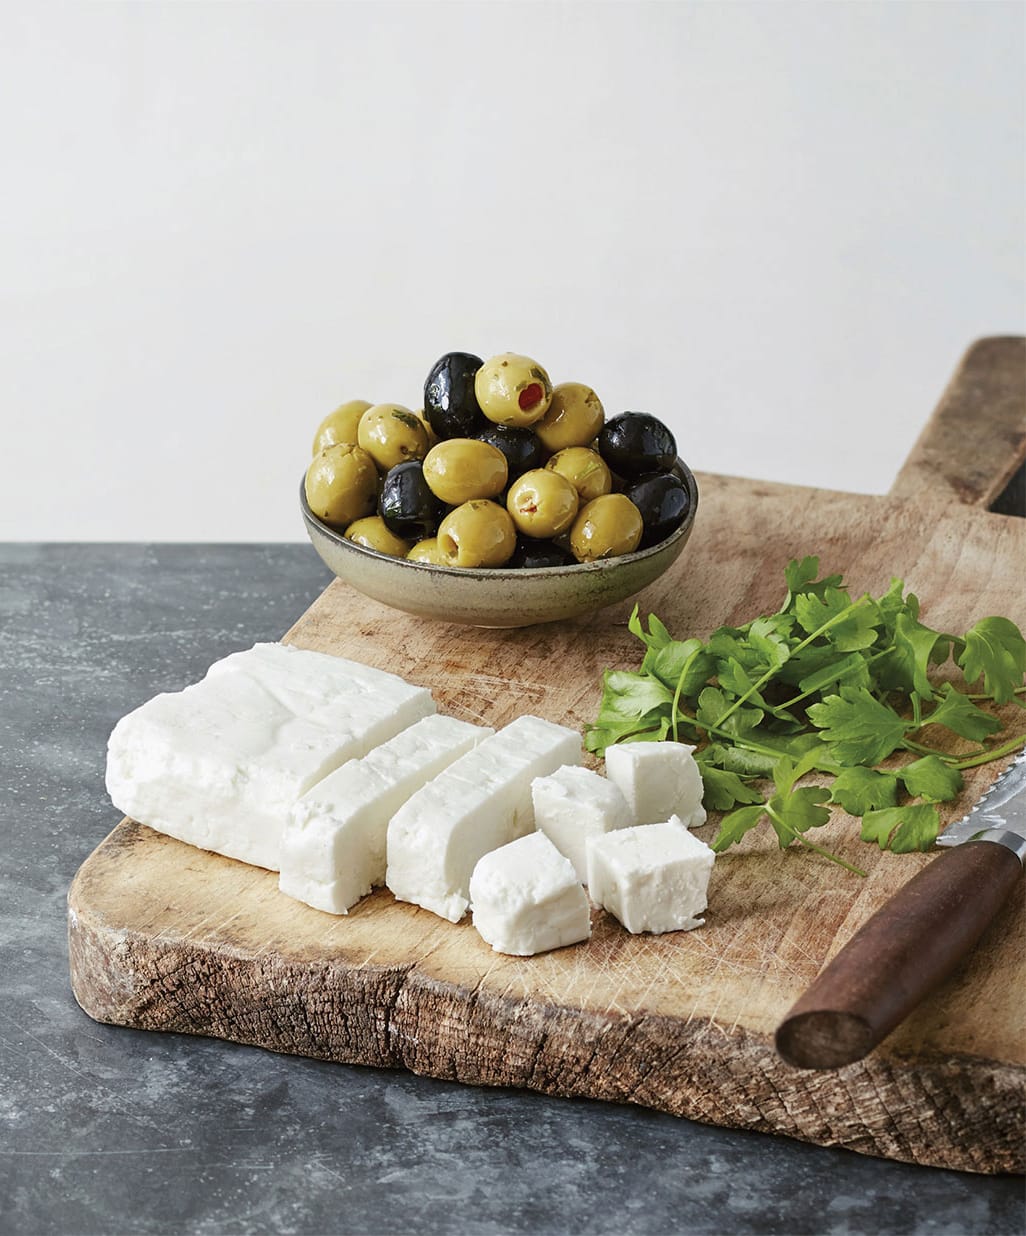
◁ Feta
I adore a fresh feta cheese salad, so I love being able to whip up a batch of feta quickly and easily at home. Once you have mastered it, it’s a really great cheese to experiment with – you can add different kinds of herbs, vegetables or even olives. Have fun with it.
120ml (4 fl oz/1/2 cup) live natural (plain) low-fat yoghurt
3.8 litres (63/4 pints/16 cups) milk
1/4 tsp lipase powder
3/4 tsp calcium chloride
1/4 tsp liquid rennet
50g (13/4oz) salt
fresh herbs, for sprinkling (optional)
MAKES 400g (14oz)
You will need: a cheesecloth or muslin sheet, an instant-read thermometer, a curd knife, a draining mat and a square feta mould
1 In a small bowl, mix the yoghurt with 120ml (4 fl oz/1/2 cup) of the milk.
2 Put the rest of the milk in a large pan over a low heat and heat slowly, the slower the better. You are looking for the milk to reach 32°C (90°F). Stir the milk from time to time so it doesn’t stick to the bottom of the pan. This should take 15–20 minutes. Remove from the heat, stir in the yoghurt mixture, cover and leave for 1 hour.
3 While this is resting, mix the lipase powder with 60ml (2 fl oz/1/4 cup) water and leave this to sit for 30 minutes, then stir in the calcium chloride and liquid rennet and mix to a smooth paste.
4 Set the pan of milk back over a low heat, then add the lipase, calcium choride and rennet mix. Stir in well. Heat the milk to 35°C (95°F), then turn off the heat and cover the pan. Leave it to sit for 2–3 hours to allow time for the curds to set.

5 Once set, cut the curds into 1cm (1/2-inch) squares with your curd knife, right down to the bottom of the pan. Set the pan back over a low heat and heat the curds for 5 minutes. Stir the curds until the temperature reaches 35°C (95°F), then turn off the heat and cover the pot once again, leaving the curds to sit for 1 hour. Stir occasionally.
6 Set a sieve (fine-mesh strainer) over a bowl, line it with cheesecloth or muslin and pour in the curds. Allow the whey to drain off, then set aside 500ml (2 cups) of drained whey. Store in the refrigerator for later.
7 Set another strainer over a large bowl and line it with two layers of cheesecloth or muslin. Pour in the curds and drain off the whey for a further 30 minutes. Following the steps shown here, create a cloth bag and hang the curds over a sink or bowl for about 2–3 hours.

8 The curds should now be more firm and solid. Scoop the curds into a square feta mould (open at top and bottom) set over a draining mat on a plate, packing it well.

9 At this point, sprinkle a few pinches of salt over the top and bottom of the cheese, along with some fresh herbs, if desired. Flip the mould over to do this.

10 Cover and leave to sit at room temperature for 3 days. Turn the feta in the mould daily and add more salt. Each day, pour off any whey as it collects in the plate. Remove from the mould.
11 To wash the cheese, mix 50g (13/4oz) salt with the reserved whey in a bowl until completely dissolved. Submerge the cheese in the mixture, making sure you cover it completely. Refrigerate the cheese for at least 1 week before eating, but you can leave it for up to 5 weeks. The longer you leave it, the more mature and stronger-tasting the cheese will be.
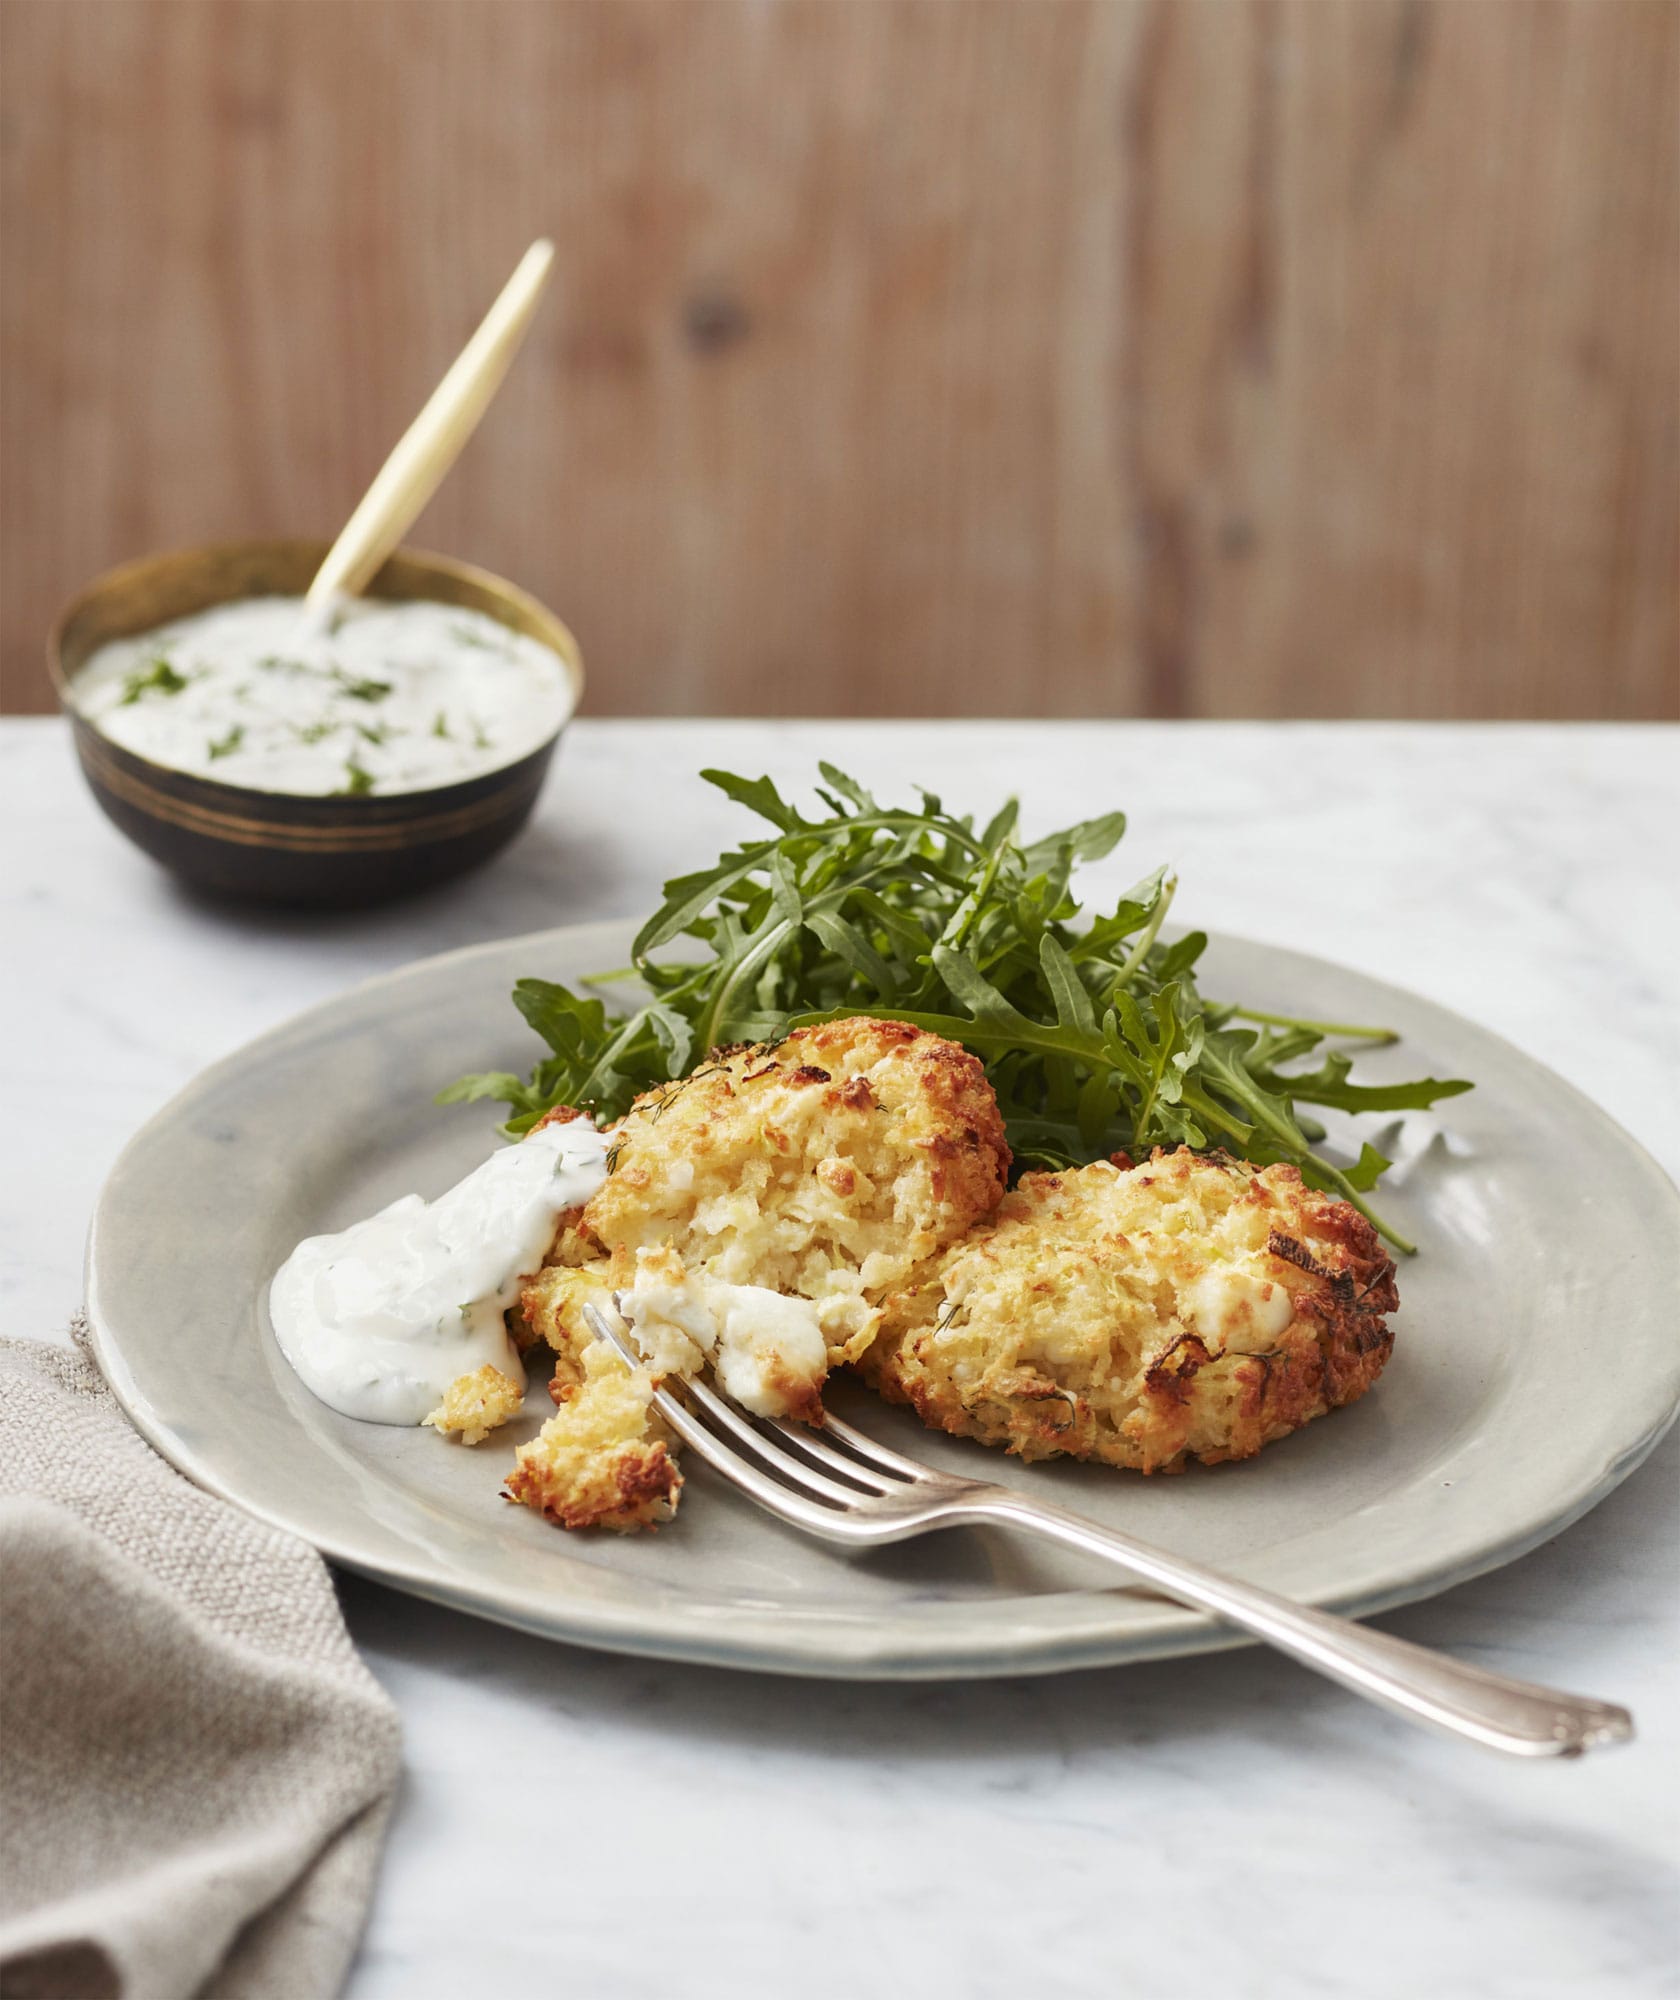
◁ Courgette (Zucchini) and Feta Fritters with Yoghurt Dip
These little beauties make a lovely snack – the perfect recipe for your homemade feta. I first made these fritters because I wanted to use up some leftover veggies from the refrigerator. You could also use carrots, potatoes, and even sweetcorn instead of courgettes (zucchini).
2 medium courgettes (zucchini)
1 tbsp salt
1 garlic clove, crushed
1 tbsp coconut oil
1/2 tsp freshly ground black pepper
2 tbsp chopped fresh dill
2 eggs
1 tsp baking powder
180g (61/4oz) panko breadcrumbs
250g (9oz) feta (see here), crumbled
Yoghurt dip
240g (81/2oz) Greek yoghurt
2 tbsp lemon juice
1–2 tsp chopped fresh dill
SERVES 2
Peel and grate the courgettes (zucchini) into a sieve (fine-mesh strainer) or set over a bowl. Sprinkle with the salt and stir, then leave to sit for 20 minutes. This will get rid of some of the moisture.
After 20 minutes, use your hands to squeeze out as much liquid from the grated courgette (zucchini) as you can, until it feels dry.
Preheat the oven to 180°C (350°F/Gas Mark 4), and line a baking sheet with non-stick baking (parchment) paper.
In a bowl, combine the drained courgettes (zucchini) with the garlic, coconut oil, pepper, dill, eggs, baking powder, breadcrumbs and feta.
Take about 2 tablespoons of the mixture and shape it into a patty, then place it on the prepared baking sheet. Repeat with the rest of the mixture, leaving some space between each patty.
Bake for 20–30 minutes, until golden.
While the fritters are cooking, make the dip. Combine the yoghurt, lemon juice, dill and salt, to taste, in a bowl. Serve alongside the cooked fritters with some rocket (arugula) salad.
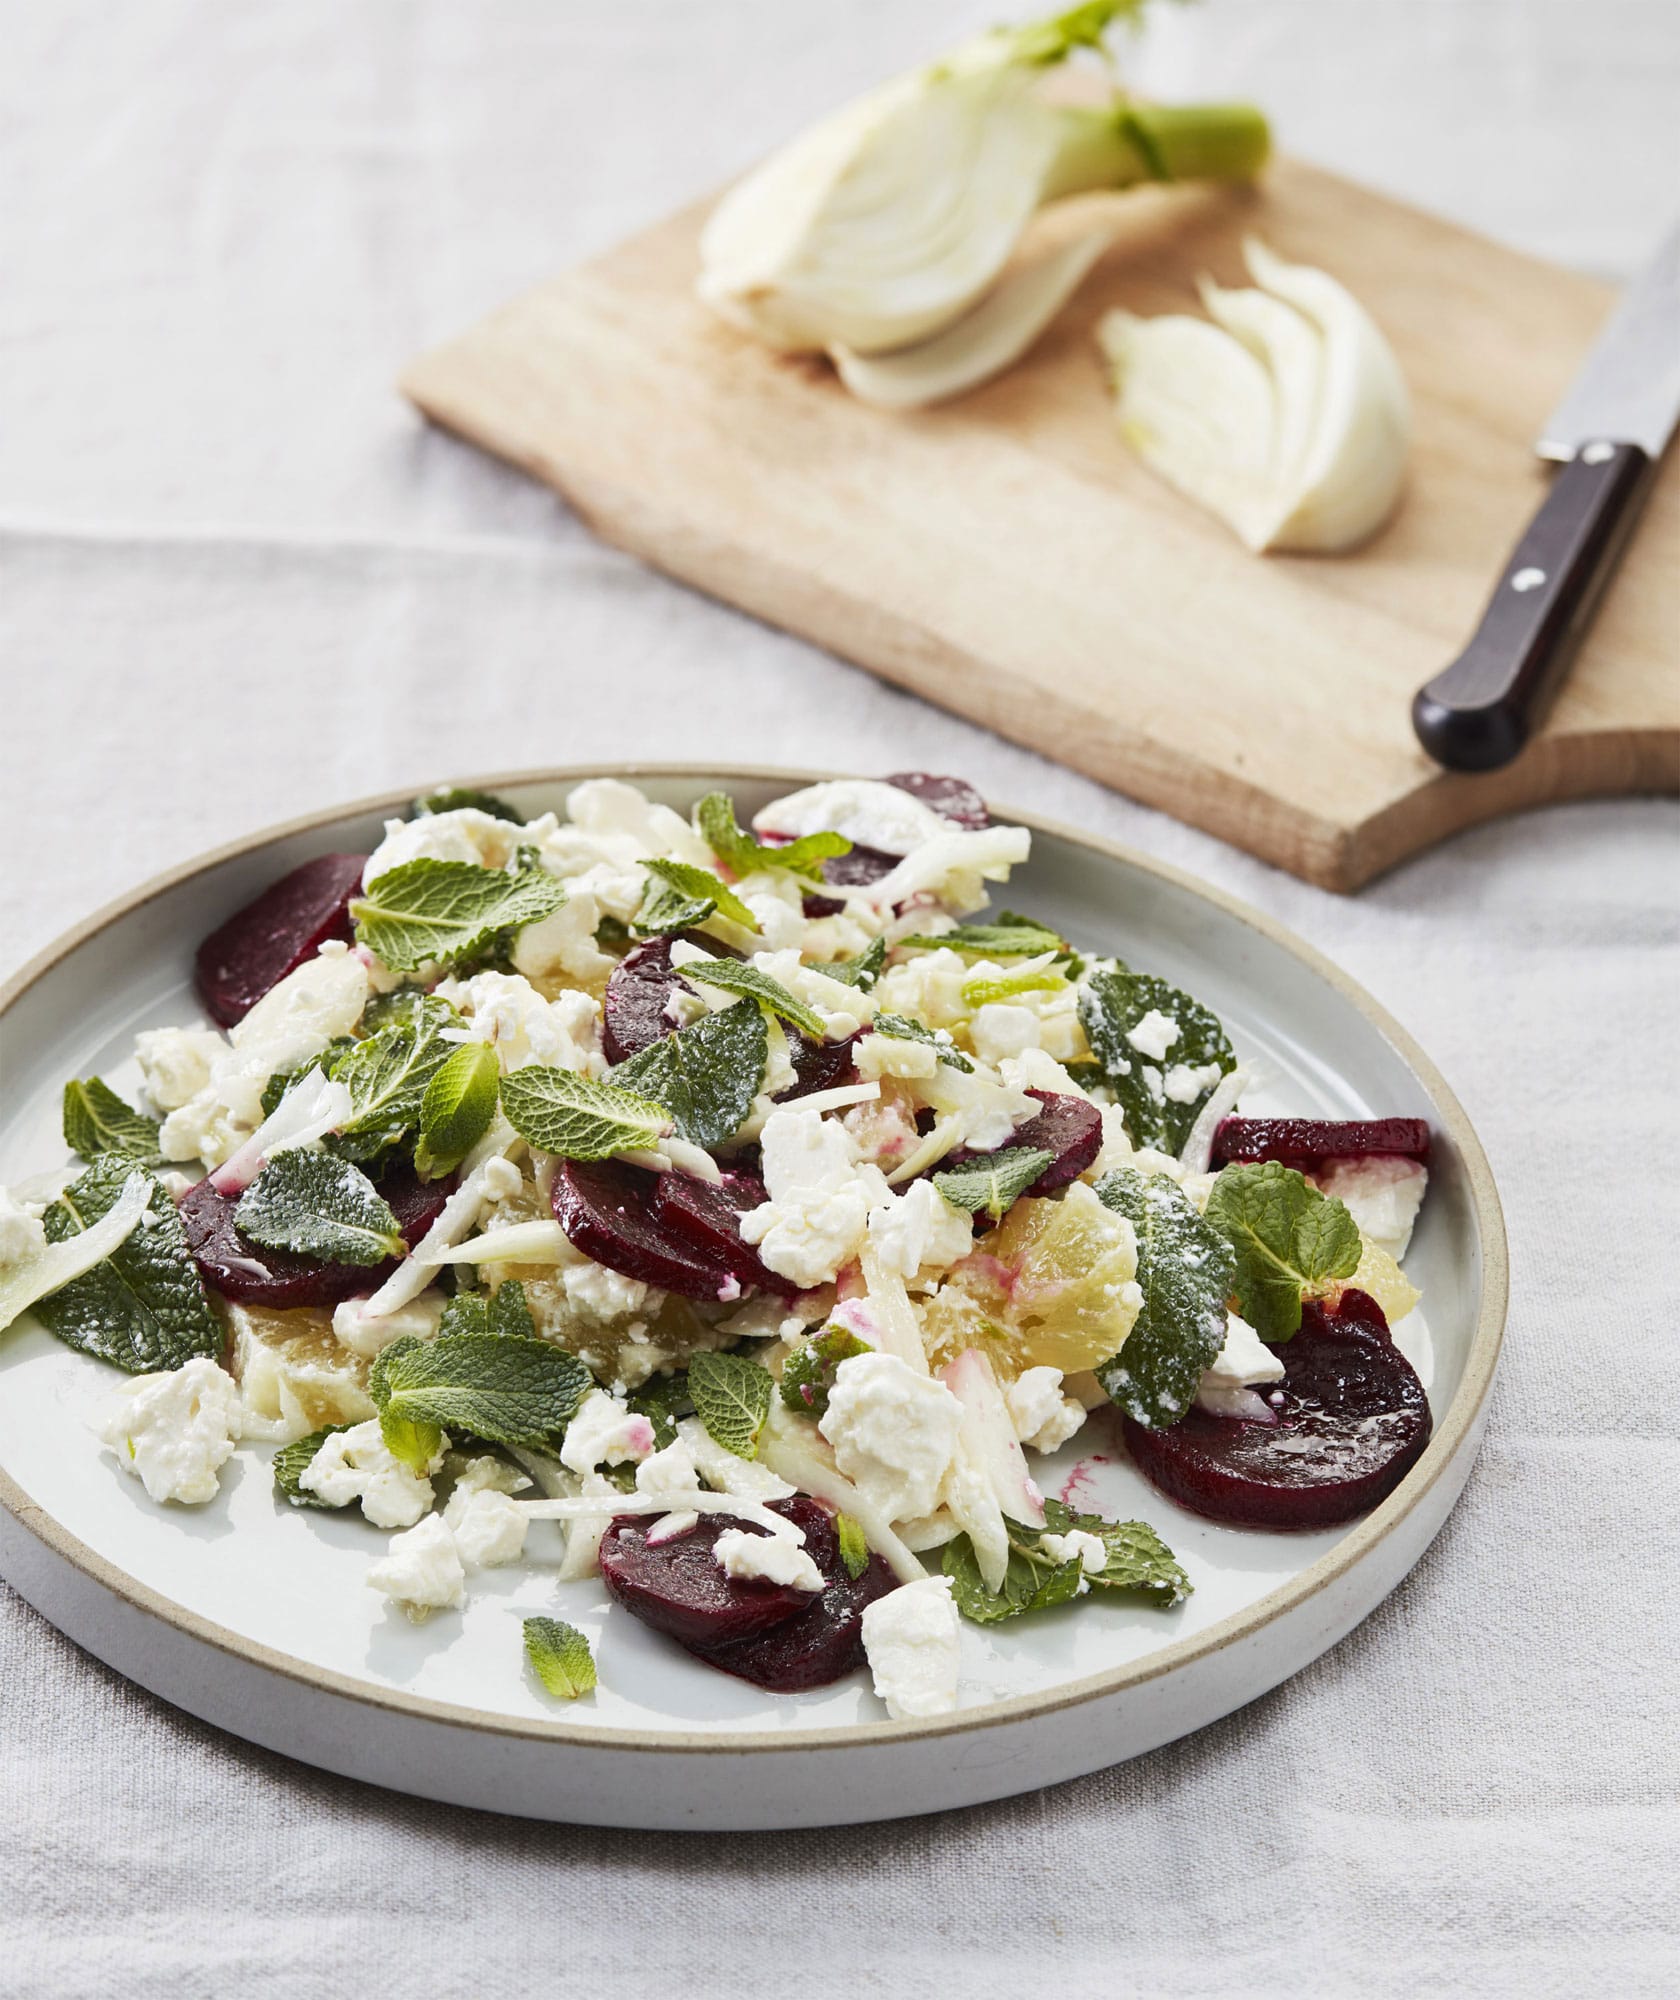
◁ Beetroot (Beet), Mint, Fennel and Feta Salad
Beetroot (beets) and fennel are two of my favourite ingredients. This salad is lovely, and a refreshingly crisp and crunchy addition to any meal.
2 tbsp honey
3 tbsp lemon juice
9 tbsp extra-virgin olive oil
2 heads of fennel
2 handfuls of fresh mint leaves
3 lemons
300g (101/2oz) feta (see here), crumbled
800g (1lb 12oz) cooked beetroot (beets), sliced
salt and freshly ground black pepper
SERVES 2
In a small bowl, whisk together the honey, lemon juice and olive oil. Season with salt and pepper and set aside.
Trim the base and top of each fennel head and halve them. Slice as finely as you can into shreds and place in a large mixing bowl with the mint.
Peel the lemons, then halve lengthways and finely slice into half-moons. Discard any seeds and add the lemon slices to the fennel. Toss in half the lemon and honey dressing, then crumble in the feta.
Place the beetroot (beets) in a separate bowl. Toss in the remainder of the dressing and season to taste. Gently mix the two salads together and serve.