Figure 253: Android Studio New Class Dialog
Much of the content of a digital book to be viewed in EmPubLite will be in
the form of HTML and related assets (CSS, images, etc.). Hence, we will
eventually need to render our content in a WebView widget, for best results
with semi-arbitrary HTML content.
To do this, we will set up fragments for the bits of content:
Right now, we will focus on just setting up some of the basic classes for these fragments — we will load them up with content and display them over the next few tutorials.
This is a continuation of the work we did in the previous tutorial.
You can find the results of the previous tutorial and the results of this tutorial in the book’s GitHub repository:
Android has a WebViewFragment for the native API Level 11+ implementation of
fragments, designed to show some Web content in a WebView. In this step, we will
create a subclass of WebViewFragment that adds in a bit of EmPubLite-specific
business logic.
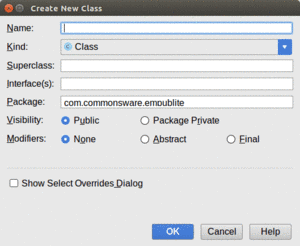
Right-click over the com.commonsware.empublite package in your java/ directory
and choose New > “Java Class” from the context menu. That will
bring up a new-class dialog:
Figure 253: Android Studio New Class Dialog
Fill in SimpleContentFragment for the name and android.app.Fragment
for the superclass. Then, click OK to create this class.
Then, replace the contents of the fragment class with the following code:
package com.commonsware.empublite;

import android.annotation.SuppressLint;
import android.os.Bundle;
import android.view.LayoutInflater;
import android.view.View;
import android.view.ViewGroup;
import android.webkit.WebViewFragment;

public class SimpleContentFragment extends WebViewFragment {
  private static final String KEY_FILE="file";

  static SimpleContentFragment newInstance(String file) {
    SimpleContentFragment f=new SimpleContentFragment();

    Bundle args=new Bundle();

    args.putString(KEY_FILE, file);
    f.setArguments(args);

    return(f);
  }

  @Override
  public void onCreate(Bundle savedInstanceState) {
    super.onCreate(savedInstanceState);
    setRetainInstance(true);
  }

  @SuppressLint("SetJavaScriptEnabled")
  @Override
  public View onCreateView(LayoutInflater inflater,
                           ViewGroup container,
                           Bundle savedInstanceState) {
    View result=
      super.onCreateView(inflater, container, savedInstanceState);

    getWebView().getSettings().setJavaScriptEnabled(true);
    getWebView().getSettings().setSupportZoom(true);
    getWebView().getSettings().setBuiltInZoomControls(true);
    getWebView().loadUrl(getPage());

    return(result);
  }

  private String getPage() {
    return(getArguments().getString(KEY_FILE));
  }
}
If you prefer, you can view this file’s contents in your Web browser via this GitHub link.
SimpleContentFragment is simple, with a total of four methods:
onCreate(), where we call setRetainInstance(true) — the utility of this
will be examined in greater detail in an upcoming chapter.onCreateView(), where we chain to the superclass (to have it create the
WebView), then configure it to accept JavaScript and support zoom operations.
We then have it load some content, retrieved in the form of a URL from a
private getPage() method. Finally, we return what the superclass returned
from onCreateView() — effectively, we are simply splicing in our own
configuration logic.newInstance() static
factory method. This method creates an instance of SimpleContentFragment,
takes a passed-in String (pointing to the file to load), puts it in a
Bundle identified as KEY_FILE, hands the Bundle to the fragment as its
arguments, and returns the newly-created SimpleContentFragment.getPage(), where it returns a value out of the “arguments” Bundle
supplied to the
fragment — specifically the string identified as KEY_FILE.This means that anyone wanting to use SimpleContentFragment should use the
factory method, to provide the path to the content to load. We will see why we
implemented SimpleContentFragment this way in the next chapter.
… we will set up horizontal swiping of book chapters in our tutorial project.