Figure 254: ViewPager on Android 4.3, Showing First Editor
Android, over the years, has put increasing emphasis on UI design and having a fluid and consistent user experience (UX). While some mobile operating systems take “the stick” approach to UX (forcing you to abide by certain patterns or be forbidden to distribute your app), Android takes “the carrot” approach, offering widgets and containers that embody particular patterns that they espouse. The action bar, for example, grew out of this and is now the backbone of many Android activities.
Another example is the ViewPager, which allows the user to swipe horizontally
to move between different portions of your content. However, ViewPager is
not distributed as part of the firmware, but rather via the Android Support
package. Hence, even though
ViewPager is a relatively new widget, you can use it on Android 1.6 and up.
This chapter will focus
on where you should apply a ViewPager and how to set one up.
AdapterView classes, like ListView, work with Adapter objects, like
ArrayAdapter. ViewPager, however, is not an AdapterView, despite adopting
many of the patterns from AdapterView. ViewPager, therefore, does not work
with an Adapter, but instead with a PagerAdapter, which has a slightly
different API.
Android ships two PagerAdapter implementations in the Android Support package:
FragmentPagerAdapter and FragmentStatePagerAdapter. The former is good for
small numbers of fragments, where holding them all in memory at once will work.
FragmentStatePagerAdapter is for cases where holding all possible fragments
to be viewed in the ViewPager would be too much, where Android will discard
fragments as needed and hold onto the (presumably smaller) states of those
fragments instead.
The simplest way to use a ViewPager is to have it page fragments in and out
of the screen based on user swipes.
To see this in action, this section will examine the
ViewPager/Fragments
sample project.
The project has a dependency on the Android Support package, in order to be
able to use ViewPager. In Android Studio, this is a compile statement in the
dependencies closure of build.gradle:
dependencies {
  compile 'com.android.support:support-v13:21.0.3'
}
The layout used by the activity just contains the ViewPager. Note that since
ViewPager is not in the android.widget package, we need to fully-qualify
the class name in the element:
<?xml version="1.0" encoding="utf-8"?>
<android.support.v4.view.ViewPager xmlns:android="http://schemas.android.com/apk/res/android"
  android:id="@+id/pager"
  android:layout_width="match_parent"
  android:layout_height="match_parent">
</android.support.v4.view.ViewPager>
Note that ViewPager is not available for drag-and-drop in the IDE graphical
designers, probably because it comes from the Android Support package and therefore
is not available to all projects.
As you see, the ViewPagerFragmentDemoActivity itself is blissfully small:
package com.commonsware.android.pager;

import android.app.Activity;
import android.os.Bundle;
import android.support.v4.view.ViewPager;

public class ViewPagerFragmentDemoActivity extends Activity {
  @Override
  public void onCreate(Bundle savedInstanceState) {
    super.onCreate(savedInstanceState);
    setContentView(R.layout.main);

    ViewPager pager=(ViewPager)findViewById(R.id.pager);

    pager.setAdapter(new SampleAdapter(getFragmentManager()));
  }
}
All we do is load the layout, retrieve the ViewPager via findViewById(),
and provide a SampleAdapter to the ViewPager via setAdapter().
Our SampleAdapter inherits from FragmentPagerAdapter and implements two
required callback methods:
getCount(), to indicate how many pages will be in the ViewPager, andgetItem(), which returns a Fragment for a particular position within the
ViewPager (akin to getView() in a classic Adapter)
package com.commonsware.android.pager;

import android.app.Fragment;
import android.app.FragmentManager;
import android.support.v13.app.FragmentPagerAdapter;

public class SampleAdapter extends FragmentPagerAdapter {
  public SampleAdapter(FragmentManager mgr) {
    super(mgr);
  }

  @Override
  public int getCount() {
    return(10);
  }

  @Override
  public Fragment getItem(int position) {
    return(EditorFragment.newInstance(position));
  }
}
Here, we say that there will be 10 pages total, each of which will be an
instance of an EditorFragment. In this case, rather than use the
constructor for EditorFragment, we are using a newInstance() factory method.
The rationale for that will be explained in the next section.
EditorFragment will host a full-screen EditText widget, for the user to
enter in a chunk of prose, as is defined in the res/layout/editor.xml resource:
<EditText xmlns:android="http://schemas.android.com/apk/res/android"
  android:id="@+id/editor"
  android:layout_width="match_parent"
  android:layout_height="match_parent"
  android:inputType="textMultiLine"
  android:gravity="left|top"
  />
We want to pass the position number of the fragment within the ViewPager, simply
to customize the hint displayed in the EditText before the user types in anything.
With normal Java objects, you might pass this in via the constructor, but it is
not a good idea to implement a constructor on a Fragment. Instead, the recipe
is to create a static factory method (typically named newInstance()) that will
create the Fragment and provide the parameters to it by updating the fragment’s
“arguments” (a Bundle):
  static EditorFragment newInstance(int position) {
    EditorFragment frag=new EditorFragment();
    Bundle args=new Bundle();

    args.putInt(KEY_POSITION, position);
    frag.setArguments(args);

    return(frag);
  }
You might be wondering why we are bothering with this Bundle, instead of just
using a regular data member. The arguments Bundle is part of our “saved instance
state”, for dealing with things like screen rotations — a concept we will get into
later in the book. For the moment, take it on faith that this is
a good idea.
In onCreateView() we inflate our R.layout.editor resource, get the EditText
from it, get our position from our arguments, format a hint containing the
position (using a string resource), and setting the hint on the EditText:
  @Override
  public View onCreateView(LayoutInflater inflater,
                           ViewGroup container,
                           Bundle savedInstanceState) {
    View result=inflater.inflate(R.layout.editor, container, false);
    EditText editor=(EditText)result.findViewById(R.id.editor);
    int position=getArguments().getInt(KEY_POSITION, -1);

    editor.setHint(String.format(getString(R.string.hint), position + 1));

    return(result);
  }
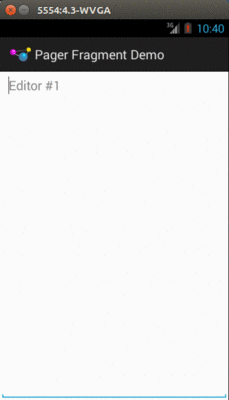
When initially launched, the application shows the first fragment:
Figure 254: ViewPager on Android 4.3, Showing First Editor
However, you can horizontally swipe to get to the next fragment:
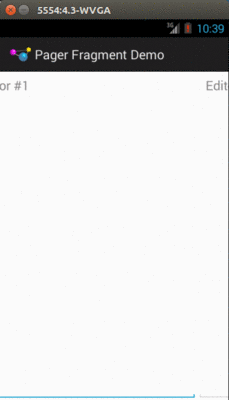
Figure 255: A ViewPager in Use on Android 4.0.3
Swiping works in both directions, so long as there is another page in your desired direction.
You do not have to use fragments inside a ViewPager. A regular PagerAdapter
actually hands View objects to the ViewPager. The supplied fragment-based
PagerAdapter implementations get the View from a fragment and use that, but
you are welcome to create your own PagerAdapter that eschews fragments.
Hence, if you want ViewPager to page things other than fragments,
the solution is to not
use FragmentPagerAdapter or FragmentStatePagerAdapter, but instead create your own
implementation of the PagerAdapter interface, one that avoids the use of fragments.
We will see an example of this in a later chapter, where we also examine
how to have more than one page of the ViewPager be visible at a time.
By itself, there is no visual indicator of where the user is within the set of
pages contained in the ViewPager. In many instances, this will be perfectly
fine, as the pages themselves will contain cues as to position. However, even
in those cases, it may not be completely obvious to the user how many pages
there are, which directions for swiping are active, etc.
Hence, you may wish to attach some other widget to the ViewPager that can help
clue the user into where they are within “page space”.
The primary built-in indicator options available to use are PagerTitleStrip and
PagerTabStrip.
As the name suggests, PagerTitleStrip is a strip that shows titles of your pages.
PagerTabStrip is much the same, but the titles are formatted somewhat like tabs,
and they are clickable (switching you to the clicked-upon page), whereas PagerTitleStrip
is non-interactive.
To use either of these, you first must add it to your layout, inside your
ViewPager, as shown in the res/layout/main.xml resource of the
ViewPager/Indicator
sample project, a clone of the ViewPager/Fragments project that adds a
PagerTabStrip to our UI:
<?xml version="1.0" encoding="utf-8"?>
<android.support.v4.view.ViewPager xmlns:android="http://schemas.android.com/apk/res/android"
  android:id="@+id/pager"
  android:layout_width="match_parent"
  android:layout_height="match_parent">

  <android.support.v4.view.PagerTabStrip
    android:layout_width="match_parent"
    android:layout_height="wrap_content"
    android:layout_gravity="top"/>

</android.support.v4.view.ViewPager>
Here, we set the android:layout_gravity of the PagerTabStrip to top,
so it appears above the pages. You could similarly set it to bottom to have
it appear below the pages.
Our SampleAdapter needs another method: getPageTitle(), which will return
the title to display in the PagerTabStrip for a given position:
package com.commonsware.android.pager2;

import android.app.Fragment;
import android.app.FragmentManager;
import android.content.Context;
import android.support.v13.app.FragmentPagerAdapter;

public class SampleAdapter extends FragmentPagerAdapter {
  Context ctxt=null;

  public SampleAdapter(Context ctxt, FragmentManager mgr) {
    super(mgr);
    this.ctxt=ctxt;
  }

  @Override
  public int getCount() {
    return(10);
  }

  @Override
  public Fragment getItem(int position) {
    return(EditorFragment.newInstance(position));
  }

  @Override
  public String getPageTitle(int position) {
    return(EditorFragment.getTitle(ctxt, position));
  }
}
Here, we call a static getTitle() method on EditorFragment. That is a refactored
bit of code from our former onCreateView() method, where we create the string
for the hint — we will use the hint text as our page title:
package com.commonsware.android.pager2;

import android.app.Fragment;
import android.content.Context;
import android.os.Bundle;
import android.view.LayoutInflater;
import android.view.View;
import android.view.ViewGroup;
import android.widget.EditText;

public class EditorFragment extends Fragment {
  private static final String KEY_POSITION="position";

  static EditorFragment newInstance(int position) {
    EditorFragment frag=new EditorFragment();
    Bundle args=new Bundle();

    args.putInt(KEY_POSITION, position);
    frag.setArguments(args);

    return(frag);
  }

  static String getTitle(Context ctxt, int position) {
    return(String.format(ctxt.getString(R.string.hint), position + 1));
  }

  @Override
  public View onCreateView(LayoutInflater inflater,
                           ViewGroup container,
                           Bundle savedInstanceState) {
    View result=inflater.inflate(R.layout.editor, container, false);
    EditText editor=(EditText)result.findViewById(R.id.editor);
    int position=getArguments().getInt(KEY_POSITION, -1);

    editor.setHint(getTitle(getActivity(), position));

    return(result);
  }
}
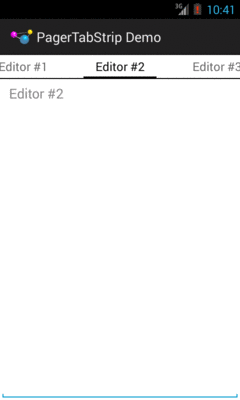
Figure 256: ViewPager and PagerTabStrip on Android 4.3, Showing Second Page
There are many other options for tab-style indicators with a ViewPager.
TabLayout is the only other one officially supported by Google. It
comes from the Design Support library,
which in turn requires appcompat-v7.
Most of the options are open source libraries. The chapter on the
Design Support library demonstrates one such third-party library,
The Android Arsenal’s roster of ViewPager add-ons
mostly consists of indicators, both those formatted like tabs and those
that use other approaches.
Earlier in the book, we looked at many different layout resources from
the
Containers/Sampler
sample project. These were to illustrate how different layout structures
work. The whole UI is wrapped up in a ViewPager with a PagerTabStrip.
However, we set up the FragmentPagerAdapter and the fragments
based on a roster of available sample layouts, driven by resources.
The layout that is used for the ViewPager and PagerTabStrip is
largely the same as what we saw earlier in this chapter:
<?xml version="1.0" encoding="utf-8"?>
<android.support.v4.view.ViewPager xmlns:android="http://schemas.android.com/apk/res/android"
  android:id="@+id/pager"
  android:layout_width="match_parent"
  android:layout_height="match_parent">

  <android.support.v4.view.PagerTabStrip
    android:layout_width="match_parent"
    android:layout_height="wrap_content"
    android:layout_gravity="top"/>

</android.support.v4.view.ViewPager>
So, we have a ViewPager named pager, with a PagerTabStrip
anchored at the top via android:layout_gravity="top".
The data about what layouts to show as tabs is contained in a pair
of array resources. Array resources, as the name suggests, are resources
that hold onto a collection of items. The convention is that they go
in res/values/arrays.xml, though the actual filename is not required
to be arrays.xml.
The sample app has a res/values/arrays.xml file, containing two
array resources: a <string-array> named titles and a generic
<array> named layouts:
<?xml version="1.0" encoding="utf-8"?>
<resources>
  <string-array name="titles">
    <item>No Container</item>
    <item>Bottom-then-Top: LinearLayout</item>
    <item>Bottom-then-Top: RelativeLayout</item>
    <item>Bottom-then-Top: ConstraintLayout</item>
    <item>Stacked Percent: LinearLayout</item>
    <item>Stacked Percent: ConstraintLayout</item>
    <item>URL Dialog: LinearLayout</item>
    <item>URL Dialog: RelativeLayout</item>
    <item>URL Dialog: TableLayout</item>
    <item>URL Dialog: ConstraintLayout</item>
    <item>Form: TableLayout</item>
    <item>Form: LinearLayout</item>
    <item>Overlap: RelativeLayout</item>
    <item>Center: RelativeLayout</item>
    <item>Center: ConstraintLayout</item>
    <item>Bias: ConstraintLayout</item>
    <item>Bias: LinearLayout</item>
    <item>Aspect: ConstraintLayout</item>
    <item>Center Align: LinearLayout</item>
    <item>Center Align: ConstraintLayout</item>
  </string-array>
  <array name="layouts">
    <item>@layout/no_container</item>
    <item>@layout/bottom_then_top_ll</item>
    <item>@layout/bottom_then_top_rl</item>
    <item>@layout/bottom_then_top_cl</item>
    <item>@layout/stacked_percent_ll</item>
    <item>@layout/stacked_percent_cl</item>
    <item>@layout/url_dialog_ll</item>
    <item>@layout/url_dialog_rl</item>
    <item>@layout/url_dialog_tl</item>
    <item>@layout/url_dialog_cl</item>
    <item>@layout/form_tl</item>
    <item>@layout/form_ll</item>
    <item>@layout/overlap_rl</item>
    <item>@layout/center_rl</item>
    <item>@layout/center_cl</item>
    <item>@layout/bias_cl</item>
    <item>@layout/bias_ll</item>
    <item>@layout/aspect_cl</item>
    <item>@layout/center_align_ll</item>
    <item>@layout/center_align_cl</item>
  </array>
</resources>
As the name suggests, a <string-array> holds strings. Here, it holds
literal strings. Alternatively, those could be references to string
resources, using the same @string/... naming convention that we have
seen elsewhere in the book.
The layouts array holds references to the corresponding layout resources,
using @layout/... syntax to identify those resources.
These two arrays are set up in the same order, so the first title is used for the first layout, the second title is used for the second layout, and so on.
The fragment for the pages in the ViewPager is a static nested class
within the MainActivity, named LayoutFragment. This is atypical;
usually a fragment will be in its own Java class. That is because usually
a fragment has a lot of code associated with it. In this case, LayoutFragment
is rather short:
  public static class LayoutFragment extends Fragment {
    private static final String ARG_LAYOUT="layout";

    static LayoutFragment newInstance(int layoutId) {
      LayoutFragment result=new LayoutFragment();
      Bundle args=new Bundle();

      args.putInt(ARG_LAYOUT, layoutId);
      result.setArguments(args);

      return(result);
    }

    @Override
    public View onCreateView(LayoutInflater inflater,
                             ViewGroup container,
                             Bundle savedInstanceState) {
      return(inflater.inflate(getArguments().getInt(ARG_LAYOUT),
        container, false));
    }
  }
When we create an instance of LayoutFragment through the newInstance()
factory method, we pass in a layout resource ID. Through the arguments
Bundle, that becomes available to our onCreateView() method, which
simply inflates that layout and returns it.
The fragment is so short because we are not doing anything with the widgets inside of the inflated layout, such as filling them with data or setting up event listeners.
The MainActivity that contains LayoutFragment has only one method
of its own: onCreate(), which inflates the res/layout/main.xml resource
shown above, finds the ViewPager, and sets its adapter to be
a SampleAdapter:
  @Override
  public void onCreate(Bundle savedInstanceState) {
    super.onCreate(savedInstanceState);
    setContentView(R.layout.main);

    ViewPager pager=(ViewPager)findViewById(R.id.pager);

    pager.setAdapter(new SampleAdapter(getFragmentManager()));
  }
In other words, this onCreate() is pretty much the same as the others
seen in this chapter. Where the fun lies is in this sample app’s edition
of SampleAdapter.
SampleAdapter uses the contents of those two array resources to determine
how many pages there are, what to show in the tabs, and what layout resource
ID to pass to the LayoutFragment:
  private class SampleAdapter extends FragmentPagerAdapter {
    private int[] layouts;
    private String[] titles;

    SampleAdapter(FragmentManager mgr) {
      super(mgr);
      layouts=getLayoutsArray(R.array.layouts);
      titles=getResources().getStringArray(R.array.titles);
    }

    @Override
    public int getCount() {
      return(titles.length);
    }

    @Override
    public Fragment getItem(int position) {
      return(LayoutFragment.newInstance(layouts[position]));
    }

    @Override
    public CharSequence getPageTitle(int position) {
      return(titles[position]);
    }

    int[] getLayoutsArray(int arrayResourceId) {
      TypedArray typedArray=
        getResources().obtainTypedArray(arrayResourceId);
      int[] result=new int[typedArray.length()];

      for (int i=0;i<typedArray.length();i++) {
        result[i]=typedArray.getResourceId(i, -1);
      }

      return(result);
    }
  }
SampleAdapter holds onto a String array of the titles. This is
populated by getResources().getStringArray() in the SampleAdapter
constructor, which reads in the titles <string-array> resource.
Those strings are then used for the getPageTitle() method, and the
length of the strings array is used for getCount().
Getting the equivalent array of the int values for the layout resource
IDs is more cumbersome. We could try calling getIntArray() on
the Resources object returned by getResources(). However, that only
works for <int-array> resources. We cannot use one of those in
res/values/arrays.xml because Android considers @layout/... to be
a resource ID, not just a simple integer.
To work with a generic <array> resource, we need to call
obtainTypedArray() on the Resources object, which we do in the
getLayoutsArray() helper method. This returns a TypedArray,
which effectively is an array of arbitrary resource types. We know
that our array should be all layout resource IDs, so we allocate
an int array to be our result (based upon the length() of
the TypedArray), then iterate over all of the entries and
retrieve the resource ID for that array position (using getResourceId()).
In the end, result has an array of resource IDs, and those
get used by getItem() to supply LayoutFragment with the appropriate
layout resource ID for this page’s position.
There is a chapter on advanced ViewPager techniques that may interest
you!