If you’re fortunate enough to have a genuine surplus of eggs and milk in your life, then this is your chapter.
Compact in size, powerful in nutrition, easy to cook, and delicious to eat, eggs are magical; they are truly a gift to protein lovers everywhere. The transformation of a cured egg can be amazing. Cured and pickled eggs have a texture that is unique; they become firmer and meatier. As with most other preserves, salt and/or vinegar is the key player here, and both yield unique results that must be tested and tasted to be believed.
While I do not have a herd of cows at my disposal, I get stupidly ecstatic making my own simple dairy products, such as yogurt. I am genuinely surprised that it works every time — it feels more like magic than cooking.
You’ll also see that I love to make a simple white cheese (or start with a store-bought cheese) and wash it in flavorful oil, which not only preserves the cheese but also adds complexity to its character.
Preserved Egg Yolks
Perhaps you’ve just whipped up a bunch of meringues, or an angel food cake, or macaroons, and you find yourself with egg yolks to spare. Try salt-curing your bounty, and you will have a delicious secret ingredient at the ready. Use them as you would Parmesan cheese for that same sort of savory, salty flavor: grate them over pasta or soups or stews, or sprinkle over avocado toast. You can also add flavors like cayenne or dried herbs (powdery fine so as not to break the yolks) to the cure if you want to mix things up. Note that the recipe scales up or down well: plan on 3⁄4 cup each of sugar and salt for every four yolks.
1. Combine 1 cup of the sugar and 1 cup of the salt in the bottom of an 8-inch square pan or container large enough to contain eight egg yolks without touching.
2. Use the back of a soupspoon to shape eight evenly spaced indentations in the salt and sugar cure. Don’t dig too deeply; you want every part of the bottom of the yolk to be touching sugar and salt.
3. In a separate dish, separate one egg. Carefully transfer the egg yolk into one of the indentations, and reserve the egg white for another use. Follow suit with the rest of the eggs, one at a time. It’s okay if you accidentally break a yolk, but it’s best to keep them intact.
4. Gently pour the remaining 1⁄2 cup sugar and 1⁄2 cup salt on top of the yolks to form little mounds. Make certain that the yolks are covered completely.
5. Cover the dish or container with a tight lid or plastic wrap. Carefully move it to the refrigerator and let the yolks cure for 4 days.
6. Preheat your oven to 200°F (90°C).
7. Take the dish from the fridge and remove all of the cured yolks; they will be firm enough to handle. Discard the salt and sugar and rinse the yolks to remove the extra cure.
8. Place a wire rack on a baking sheet. Place the yolks on the rack, then slide the pan in the oven. Let them dry and finish curing for 35 minutes. Your yolks are now ready to be used.
Storage
Keep the yolks wrapped in waxed paper in the cheese drawer; the longer they age, the harder and more cured they will become. Refrigerated, they will keep for at least 3 months.
Salt-Brined Eggs
Eggs are porous orbs. Their shells may look solid, but they’re not watertight. While you may be used to the idea of salting your cooked eggs, brining raw eggs in the shell in saltwater is a new frontier. The color of the egg yolks will brighten and their texture will become firm. The flavor is fascinating — salty, earthy, and unique. Note that these eggs must be cooked before being eaten. I find they are at their best when softly boiled for 6 minutes. Try them halved or chopped atop soups, stews, or rice.
1. Place a 3-quart (or larger) container with a lid on a stable surface in a cool, out-of-the-way place away from direct sunlight. Carefully place the whole eggs inside the container, being careful not to break them as you go.
2. Combine the salt and water in a pitcher and stir until you have a cloudy brine. Gently pour the brine over the eggs to cover them completely. It’s important to keep the eggs below the brine line. If the eggs float, fill a ziplock bag with water and use it as a weight to gently submerge the eggs.
3. Allow the eggs to sit in the brine for at least 5 weeks. After 12 weeks, they will be too salty to enjoy. There won’t be any visual change in the eggs.
4. To cook the eggs, place a small saucepan on top of the stove. Gently remove the eggs from the brine and carefully place them in the bottom of the pot (they’re still raw and they still could crack). Pour a pitcher of fresh water over the eggs to cover them completely. Cover the pot and cook over high heat until the water is boiling rapidly. Turn off the heat, keep the pot covered, and set a timer for 6 minutes. When the time is up, immediately drain the eggs and then run them under cold water until cool enough to handle. Use immediately, or refrigerate for up to 1 week.
5. To serve, gently roll an egg to crack the shell all over. Peel the egg. The white will be set but soft, and the yolk will be very firm and bright. Eat the eggs whole, split them in half lengthwise, or chop.
Storage
Once they are cooked, store the eggs in the refrigerator and eat within 1 week.
Slightly Smoky Soy Sauce Eggs
You know those savory, tender hard-boiled eggs that bob in your bowl of ramen? These are those eggs of your dreams, but with a nice little added twist: a tinge of smokiness and astringency from a potent and intoxicating Chinese tea. Eat these in soup, on top of rice, or simply out of hand on the go.
4 teaspoons lapsang souchong tea, in a tea bag or tea ball for easy removal
Instructions
1. Carefully place the eggs in a single layer in a medium saucepan and cover with 2 inches of water. Cover the pot and cook over high heat until the water is boiling rapidly. Turn off the heat, keep the pot covered, and set a timer for 6 minutes. When the time is up, immediately drain the eggs and then run them under cold water until cool enough to handle.
2. Return the saucepan to the stove and add the water, soy sauce, vinegar, sugar, and tea. Bring this brine to a boil, stirring to dissolve the sugar. Turn off the heat and cover the brine to keep it warm.
3. Meanwhile, crack the eggshells for a marbled-looking egg, or peel them completely for a smooth appearance and more soy sauce flavor. To crack an eggshell, gently rap its top and bottom against the countertop, then roll it along its side. If you’re peeling the eggs completely, for best results, start peeling the eggs from the large, round top, where you’ll notice a small pocket of space beneath the shell.
4. Place the cracked or peeled eggs in a 11⁄2-quart canning jar. Discard the tea and pour the brine over the eggs to submerge them completely. If the eggs float, weight them down with a small ziplock bag full of water.
5. Cover the eggs and refrigerate for at least 6 hours to let them take on the flavor of the brine.
Storage
The eggs will keep, submerged and refrigerated in the brine, for up to 10 days, and refrigerated in an airtight container out of the brine for up to 5 days. Save the soy sauce brine, as it can be reused for at least one more batch of eggs.
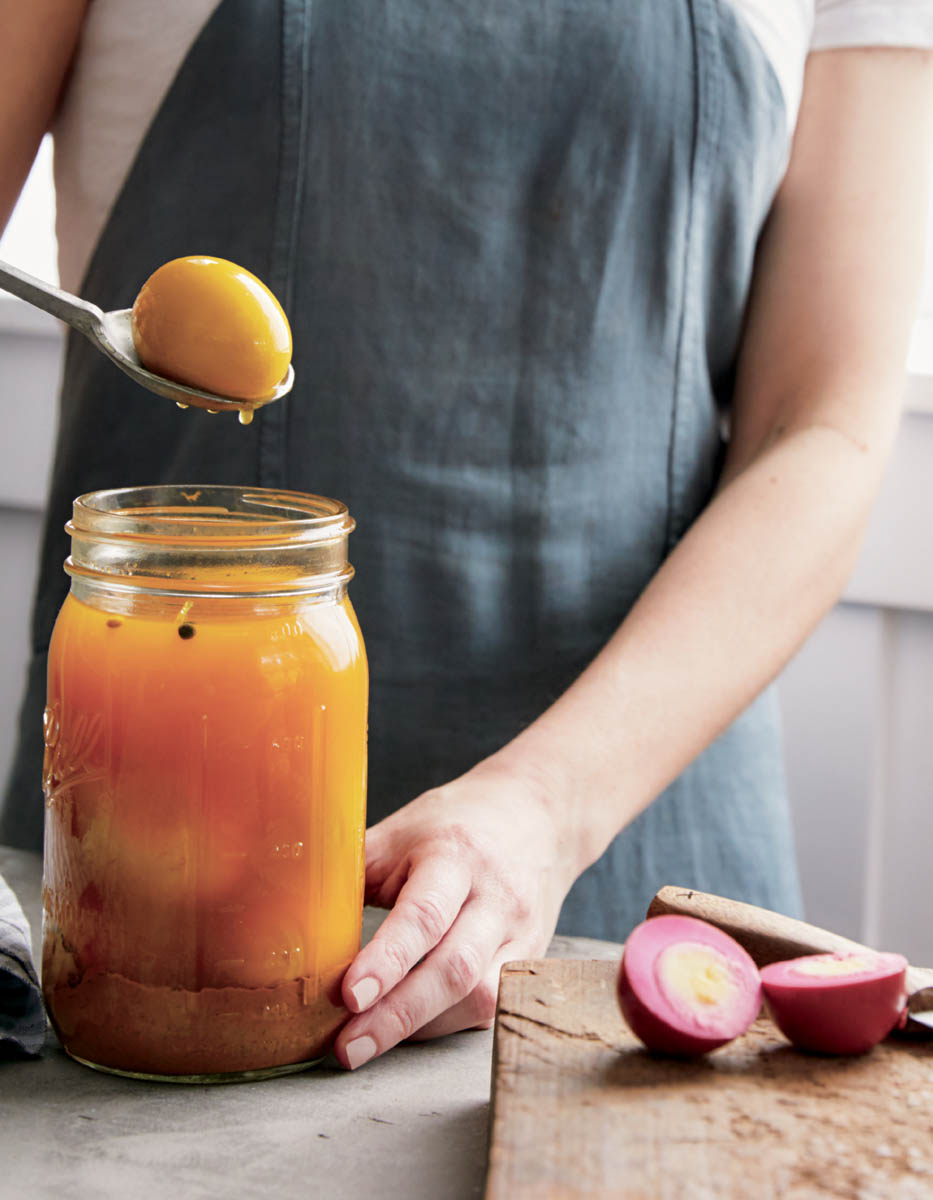
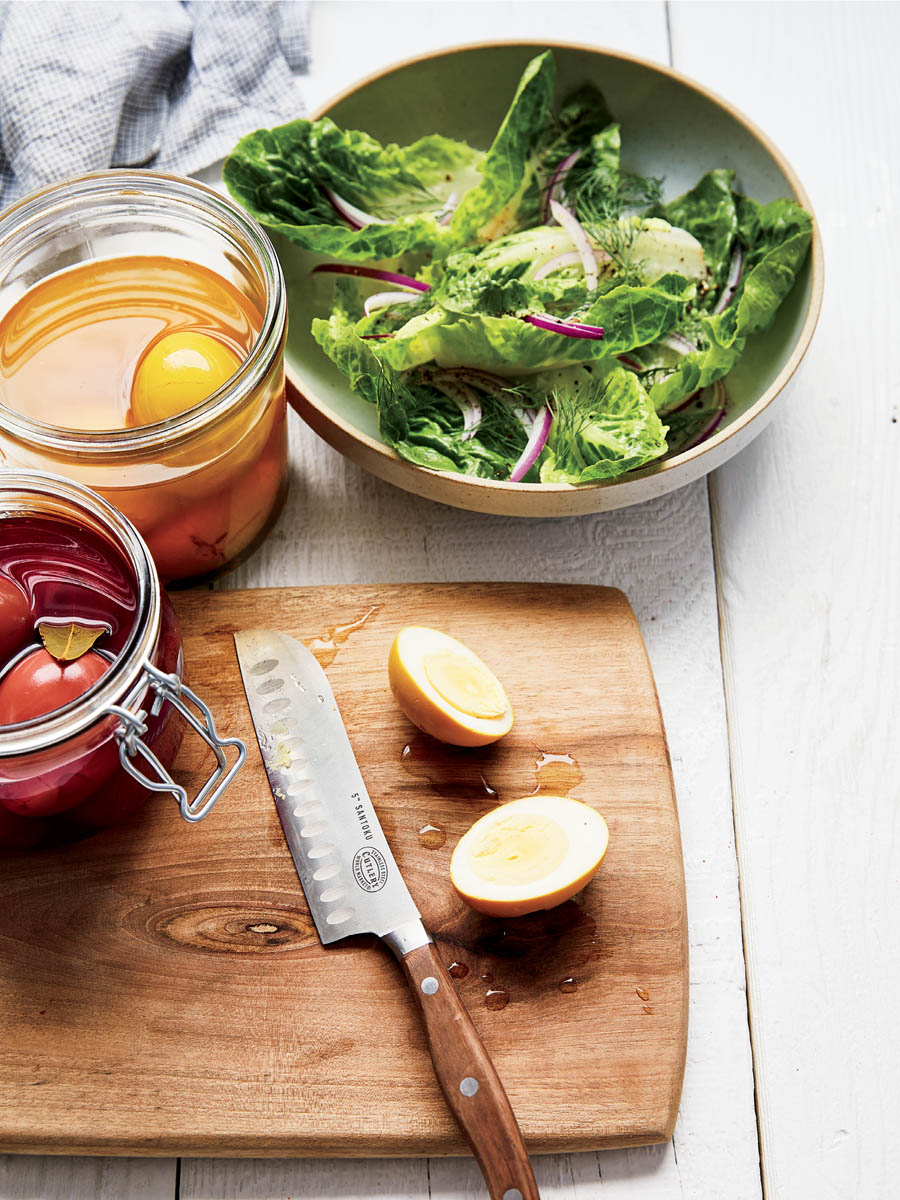
Curry Pickled Eggs
Like jerky, pickled eggs are portable, long-lasting, and full of protein and savory, piquant flavor. The curry flavor here is light, but the sunny color of these beauties will make you return to them again and again.
1. Carefully place the eggs in a single layer in a medium saucepan and cover with 2 inches of water. Cover the pot and cook over high heat until the water is boiling rapidly. Turn off the heat, keep the pot covered, and set a timer for 6 minutes. When the time is up, immediately drain the eggs and then run them under cold water until cool enough to handle.
2. Dry the saucepan and return it to the stove. Add the cumin and the coriander and toast over medium heat, stirring frequently, until they become fragrant, about 21⁄2 minutes. Immediately add the 11⁄2 cups water to stop the cooking, then add the vinegar, garlic, ginger, turmeric, peppercorns, and salt. Bring the heat up to high and boil the brine. Once it reaches a rapid boil, turn off the heat and cover it to keep it warm and let the flavors steep.
3. Meanwhile, crack an eggshell by gently rapping its top and bottom against the countertop, then roll it along its side. For best results, start peeling the egg from the large, round top, where you’ll notice a small pocket of space beneath the shell. Follow suit with the rest of the eggs.
4. Place the peeled eggs in a 11⁄2-quart canning jar. Pour the brine (including its solids) over the eggs to submerge them in the brine.
5. Cover the eggs and refrigerate for at least 4 days to let them take on the flavor of the brine.
Storage
Completely submerged in the brine and refrigerated, the eggs will keep for at least 3 weeks. The brine can be reused for at least one more batch of eggs.
Beet Pickled Eggs
Place these alongside the pretty yellow Curry Pickled Eggs and you have a beautiful, portable potluck item. Eat them whole with beer, slice them atop salads, or split them and make colorful deviled eggs.
1. Carefully place the eggs in a single layer in a medium saucepan and cover with 2 inches of water. Cover the pot and cook over high heat until the water is boiling rapidly. Turn off the heat, keep the pot covered, and set a timer for 6 minutes. When the time is up, immediately drain the eggs and then run them under cold water until cool enough to handle.
2. Combine the beet, garlic, sugar, salt, peppercorns, celery seeds, dill seeds, pepper flakes (if using), cloves, bay leaf, water, and vinegar in the saucepan over high heat. Bring this brine to a boil, stirring to dissolve the sugar and salt. Turn off the heat and cover to keep it warm.
3. Meanwhile, crack an eggshell by gently rapping its top and bottom against the countertop, then rolling it along its side. For best results, start peeling the egg from the large, round top, where you’ll notice a small pocket of space beneath the shell. Follow suit with the rest of the eggs.
4. Place the peeled eggs in a 11⁄2-quart canning jar. Pour the warm brine (including all of the solids) over the eggs to submerge them in the brine completely. If the eggs stick to the side of the jar, shimmy or stir the jar to surround each egg with the brine.
5. Cover the eggs and refrigerate for at least 4 days.
Storage
Completely submerged in the brine and refrigerated, the eggs will keep for at least 3 weeks.
Simple White Cheese
If you have more milk than you know what to do with and you like simple, fresh cheeses like Indian paneer, Mexican queso blanco, and Cyprus halloumi, then you are going to love this cheese. A candy or deep-frying thermometer is essential here, but they are relatively inexpensive and easy to store. For a firmer cheese, you’ll also need a small container with tiny holes stabbed into the bottom (hammering a thin nail a couple of times into a clean, recycled cottage cheese or sour cream container would work well) to press and shape the cheese, but this is optional.
Makes
6–8 ounces
Time
2–6 hours
Ingredients
1 gallon whole milk from any animal (not ultra-pasteurized)
1⁄2 cup apple cider vinegar or lemon juice (from 2 juicy lemons)
2 teaspoons kosher salt (optional, but recommended)
1–2 teaspoons dried herbs, such as thyme and oregano (optional)
1 (1-pint) plastic container with small holes in the bottom (optional, for a firmer cheese)
Instructions
1. Attach a kitchen thermometer to a large pot and pour in the milk. Heat over medium-high heat, stirring often to prevent scorching, until the milk reaches at least 185°F (85°C) but gets no hotter than 190°F (88°C). It should take 20 to 25 minutes to reach this temperature.
2. Slowly add the vinegar to the pot and then stir lightly in an up-and-down motion just to distribute the acid. Turn off the heat and let the pot sit undisturbed for about 20 minutes. The curds (the solid proteins that will become cheese) will separate from the whey (the cloudy liquid).
3. Line a fine-mesh sieve with cheesecloth and set over a bowl. Gently scoop the curds into the cloth-lined sieve. Let the whey drain into the bowl until the dripping stops. At this point, you will have cheese curds that are ready to eat as you would ricotta, but I recommend you flavor the cheese with the salt and herbs. Gently combine the curds with the salt and herbs in a medium bowl, then pour them back into the sieve and let them drain thoroughly again.
4. If you’d like a firmer cheese, you will need to press this cheese to extract more moisture. To do so, spoon the curds into the pint container with holes in the bottom, and place the container on top of a folded kitchen towel to catch any moisture that exudes. Press down on the curds to flatten them and smooth the top. Cover the surface of the cheese with plastic wrap and then place a 1⁄2-pound weight on top (jars of food, clean rocks, or a canning jar full of water). Make sure the weight is evenly distributed or you’ll end up with lumpy cheese. Allow the cheese to press for about 3 hours. Release the cheese from the mold, drain the liquid, and the cheese is ready to slice and eat.
Storage
This is a fresh cheese. It will keep, wrapped in waxed paper in the refrigerator, for about 1 week.
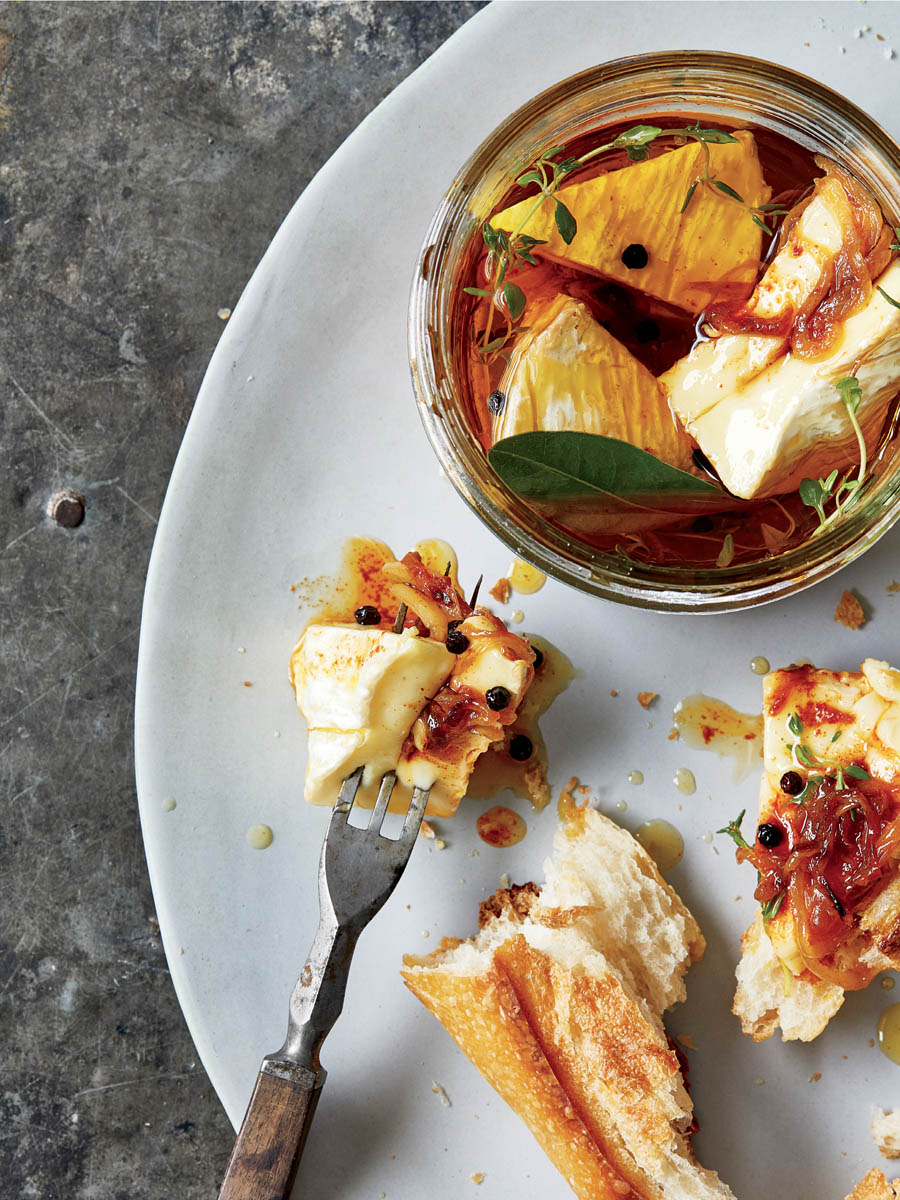
Czech Pickled Cheese
Both strong and mellow, and rich with sweet nuttiness from the onions, this cheese is like no other. I highly recommend using a Spanish smoked paprika (pimentón de la Vera) if you can find it, but Hungarian sweet paprika will also work. This is very easy to put together, and it will be your appetizer or snack on crusty bread for weeks. If you don’t like strong cheese, you can use the same amount of mozzarella or another mild cheese in place of the Camembert. Once the cheese is gone, the flavored oil is outstanding as a bread dip, drizzled over soup, or shaken into a vinaigrette. This cheese also plays well with beer.
2 teaspoons smoked paprika or Hungarian sweet paprika
10 juniper berries
2 dried bay leaves
1 tablespoon black peppercorns
About 7 fresh thyme sprigs
1–11⁄2 cups extra-virgin olive oil
Instructions
1. Slice the onion into long, superthin strips. Heat the oil in a medium skillet over medium-high heat. Add the onion and salt and sauté the onion until it browns all over, 4 to 6 minutes. Add the garlic and cook, stirring often, until the onion and garlic are soft and fragrant, 1 to 2 minutes longer. Remove from the heat, pour the onion mixture into a small bowl, and let it cool.
2. Cut the cheese wheel with a sharp knife into eight wedges. Starting at the tip end of each piece of cheese, slice it horizontally, but don’t cut through the last bit of the cheese near the rind; you’re going to stuff the cheese in the middle like frosting between layers of cake. Lift the top layer of one wedge and use a spoon to sprinkle the paprika between the layers of cheese, then spoon in 2 to 3 teaspoons of the onions. Follow suit with the remaining pieces of cheese.
3. Add the juniper berries, bay leaves, and peppercorns to a quart jar. Press the thyme sprigs flat against the side of the jar. Stack the stuffed cheese in the jar, pressing on it lightly for a tight pack. If there are any remaining onions, use them to cover the cheese. Pour the olive oil over the solids in the jar to cover them completely.
4. Cover the jar tightly and refrigerate. For the flavors to be at their best, wait 2 weeks before eating.
Storage
Keep the lid on the jar and make sure all the solids in the jar are covered completely by the oil. Always keep this refrigerated. If the oil solidifies, let the jar come to room temperature before eating.
Preserved Herbed Feta
Bring your inexpensive feta to this recipe, because curing it in a flavorful brine breathes new life into an inexpensive, simple cheese. The variations on this are just about endless, so feel free to experiment. Nearly any combination of strong flavors (like garlic or chile pepper), fresh herbs, acid or citrus, and a decent extra-virgin olive oil is going to yield delicious results. Smear this cheese on crackers, bagels, or crusty bread, crumble it onto a salad or a soup, or stuff it into an omelet. Toss the cheese into pasta or melt it on grilled vegetables. Save the oil and use it for dipping bread or making salad dressings and marinades. If you like, you may use a firm goat cheese in place of the feta.
Replace the thyme, rosemary, garlic, and chile pepper with any of the following combinations:
Lemon slices, red pepper flakes, and fresh oregano sprigs
Fresh dill sprigs, black peppercorns, coriander seeds, and a pinch of ground turmeric
Kalamata olives, orange slices, and cumin seeds
Crushed garlic, anchovies, and fresh thyme stems
Ingredients
1 large garlic clove, lightly crushed
1⁄4 teaspoon piment d’Espelette (French ground red chile pepper) or ground cayenne pepper
7 fresh thyme stems
1⁄2 fresh rosemary sprig
8 ounces feta cheese, cut into 1-inch cubes
1⁄4 cup red wine vinegar
1 cup extra-virgin olive oil
Instructions
1. Place the garlic and the piment d’Espelette in the bottom of a pint jar. Tuck in the thyme and rosemary against the sides of the jar.
2. Pack the cheese into the jar, but try not to crush the cubes. Pour the vinegar over the cheese, then pour in enough oil to cover the cheese completely. Swirl the jar gently to release any air bubbles and mix the flavors.
3. Cover the jar tightly and let sit in the refrigerator for at least 2 days before serving, swirling it once a day to distribute the flavors. The longer it sits, the more flavorful the cheese will become.
Storage
Ensure that the cheese is always completely covered in oil. The cheese will keep for at least 4 months and will improve with age.
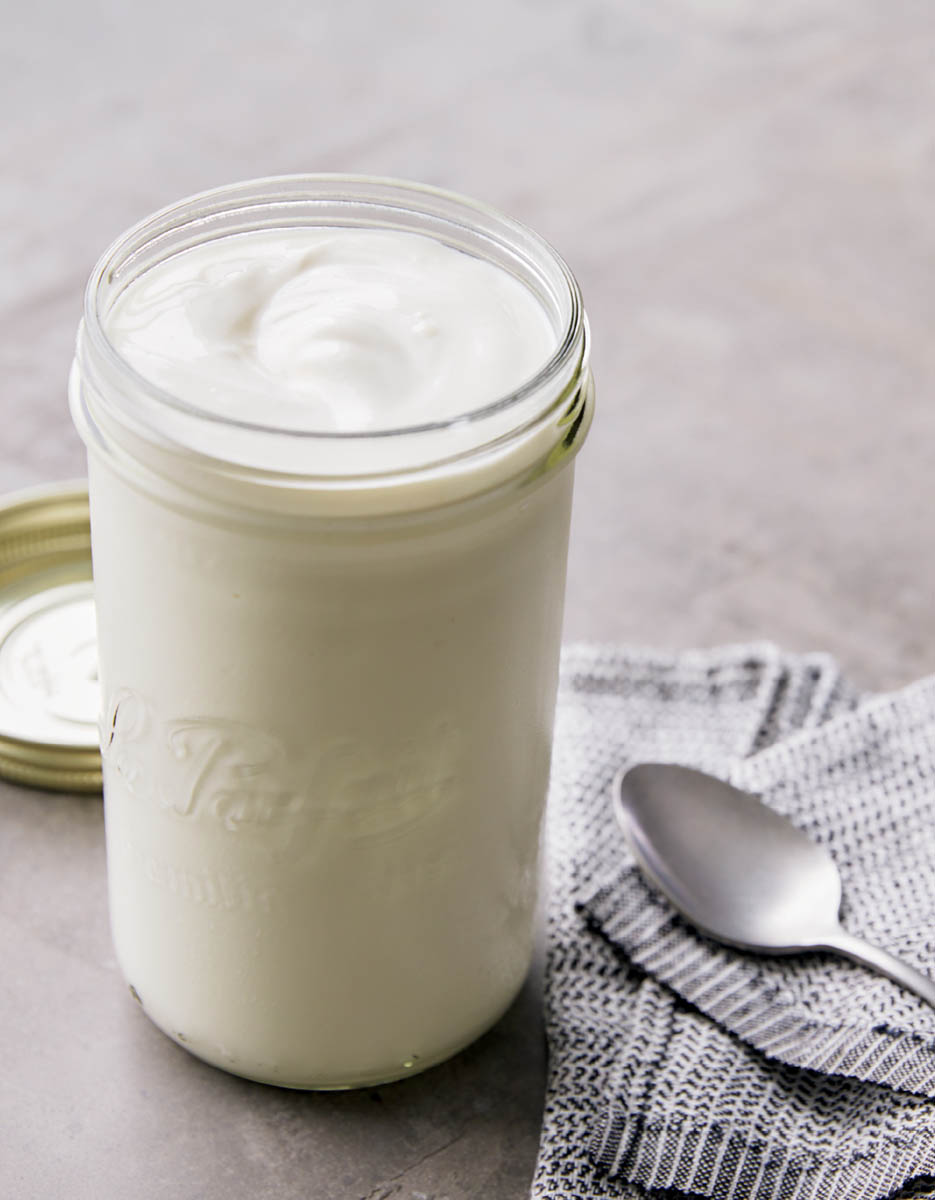
Yogurt
Here, I’m stealing a trick from my pal Nicole Easterday of FARMcurious, an online DIY kitchen enthusiast supply store (and a good resource for yogurt starter, if you like). She is an avid yogurt maker of many years, but her whole yogurt-making approach changed when she received a tip from culinary scientist Harold McGee to hold the milk at temperature for 30 minutes before adding the starter. The result is a homemade yogurt that is properly thick and creamy, and much better than the lumpy stuff made by most home yogurt makers. You will need a candy or deep-frying thermometer for this recipe. I also highly recommend a quart canning jar as well as a canning rack, a silicone trivet, or a thick, folded kitchen towel beneath the jar to keep it from rattling against the bottom of the pot. Before you get started, you’ll also need to figure out how you’re going to keep your yogurt warm during incubation (see step 4). Once you get the hang of making yogurt, this is a kitchen magic trick you will return to again and again.
Makes
1 quart
Time
Up to 14 hours
Ingredients
1 quart whole milk
Yogurt starter or 1⁄4 cup plain yogurt with live active yogurt cultures
Ice cubes or frozen cold packs
Cooler, slow cooker, or heating pads, to keep yogurt warm
Instructions
1. Pour the milk into a quart canning jar. Line the bottom of a Dutch oven with a canning rack, a silicone trivet, or a folded kitchen towel, and place the jar on top. Fill the pot with water around the jar as high as it can go, leaving room for the water to boil without spilling over into the milk. Clip on or place a kitchen thermometer inside the milk.
2. Set the pot over high heat and warm the milk until it reaches 180°F (82°C). It usually takes about 30 minutes to come to this temperature, but it’s important to stir the milk frequently to maintain the heat evenly. When the milk reaches 180°F (82°C), adjust the heat as needed to keep the milk between 180°F and 185°F (82°C and 85°C) for 30 minutes. Stir often.
3. Turn off the heat and carefully remove the jar of heated milk from the pot. Place it in the center of a metal bowl and slowly pour cool tap water around the jar to cool it. Stir the milk frequently to help it cool. Add ice cubes or ice packs to help chill the water around the jar and keep stirring. Let the milk cool to 115°F (46°C). Once it has cooled, add the yogurt starter (following the package directions for use) or the yogurt to inoculate the milk.
4. Screw the lid and band onto the jar and move it to a warm place where it can stay between 100°F and 115°F (38°C and 46°C) for 6 to 12 hours. Some people use coolers made warm by jars of warm water. Others use their slow cooker. I wrap my jar of yogurt in a heating pad set to medium and place it on top of a towel on the counter. Then I stuff another small towel on top and leave it overnight. Note that the yogurt will get tangier the longer it sits, so start tasting it after 6 hours and find the length of time you prefer.
5. The yogurt is now ready to eat, but most people prefer to chill it first. Your finished yogurt will be smooth, with a small amount of liquid whey floating on top; either drink it or simply stir it into the yogurt.
Storage
Covered and refrigerated, this yogurt will keep for at least 1 month.
Note: If you don’t have a canning jar or a rack or trivet to set the jar on, you can still make yogurt by pouring the milk directly into the pot. However, placing the milk in a jar on top of a rack in a pot of water prevents the milk from burning or boiling.
Dried Yogurt Bombs
Forget those yogurt-covered pretzels, the sugar in which far outweighs the good of the yogurt, and make some of these. These portable balls do take time, but they are so simple to make: drain the yogurt to extract as much moisture as possible, roll the stiff yogurt into balls, and dry them. Eat them as they are, break the balls into pieces to mix into your cereal or baked goods, or grate them on top of desserts. A food dehydrator is better than the oven for this recipe because the bombs dry best at a low temperature.
1. Line a fine-mesh sieve with a clean, thin cotton kitchen towel and place the sieve over a large bowl. Pour the yogurt into the lined sieve. The yogurt won’t start dripping right away. Let it sit for 12 hours to extract as much liquid whey as possible. At room temperature, the yogurt will take on more of a tangy taste; if this isn’t your preference, put it in the fridge. The yogurt will become very thick, about the consistency of cream cheese.
2. Place the confectioners’ sugar, if using, in a shallow bowl. With damp hands, roll 2 tablespoons of the yogurt into a ball. Roll the ball in the sugar, then place it on the fruit leather tray of a food dehydrator. Repeat with the remaining yogurt.
3. Dry the balls at 135°F (57°C) for 8 hours, or until they are quite firm. Turn the balls upside down and dry them for another 2 to 3 hours, until firm all over.
Storage
Store the yogurt balls in an airtight container inside your refrigerator’s vegetable drawer. They will keep for at least 2 months.
Frozen Walnut-Yogurt Pops
The flavor combination of creamy yogurt with bitter, earthy walnuts tempered by sweet honey is one of my favorites. Stirred together in a bowl, these ingredients make a breakfast or dessert that is so much more than the sum of its simple parts. These flavors are the inspiration for these protein-filled frozen treats, which are delicious and sweet, with a texture that’s soft and creamy like ice cream.
1. Chop the nuts very finely (they should be about the size of grains of rice). Combine the chopped walnuts, yogurt, honey, maple syrup, and vanilla in a medium bowl. Carefully pour the mixture into six 2-ounce ice-pop molds (or paper cups lined with plastic wrap). Place an ice-pop stick in the center of each pop. Freeze for about 5 hours, or until solid.
2. To unmold the pops, roll each pop mold under hot running water for 30 to 45 seconds, then gently pull on the stick. If you pull too hard, you will pull the stick out! Or remove the paper cups and peel off the plastic wrap.
Storage
Stored in their molds in an airtight container, these pops will keep in the freezer for at least 6 months.
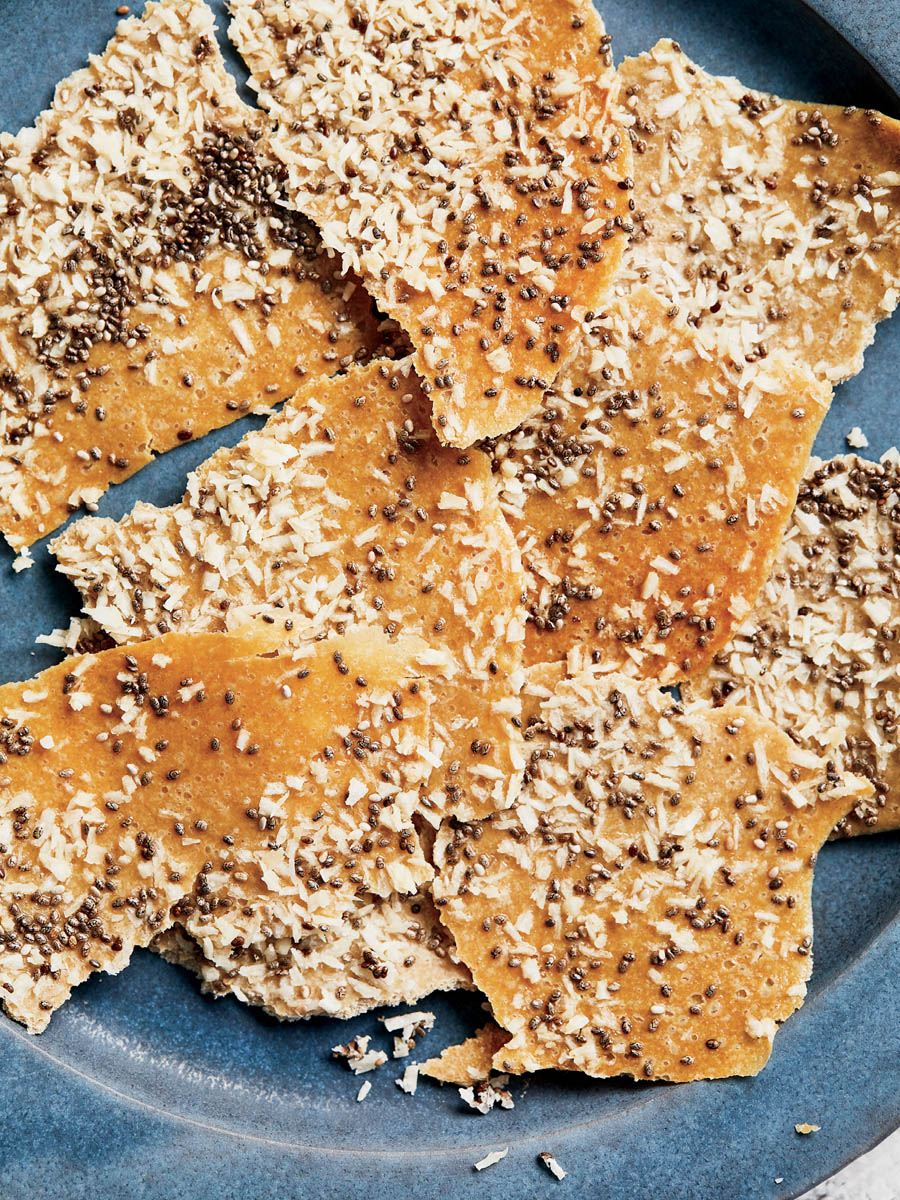
Banana-Yogurt “Pappadams”
This is by no means a real Indian pappadam — that delicious crisp lentil cracker that Indian-food fans know and love. I only call this a pappadam because it looks like it. It’s a thin, light-tan fruit leather of banana and yogurt, topped with dark chia seeds and shredded coconut. Note that you can use a food dehydrator for this recipe (dry for 3 to 4 hours), but the oven seems to work best. Feel free to swap out the bananas for peaches, strawberries, blackberries, blueberries, applesauce, pear sauce, cranberry sauce, or fruit butter.
1. Combine the yogurt, bananas, honey, bourbon, and salt in a blender. (Tip: Put the yogurt in the blender first for easier blending.) Purée until completely smooth.
2. Preheat the oven to 170°F (75°C).
3. Line two baking sheets with parchment paper. Divide the yogurt purée between the lined baking sheets, spreading the mixture very thin (1⁄8 to 1⁄4 inch thick) with an offset spatula or rubber spatula. The yogurt should cover nearly the entire sheet but be slightly thinner in the middle and a bit thicker on the edges. Evenly sprinkle the purée with the chia seeds and then the coconut.
4. Put the baking sheets in the oven and dry the pappadam for 4 to 5 hours, until it’s tacky and solidified all over. The fruit should be sticky but not wet throughout; the center is usually the last part to dry. Remove the pan from the oven and gently peel the fruit from the parchment paper, releasing it from the edges first, then the middle. Flip it over on the baking sheet, then return it to the oven for 30 minutes longer. Use a pizza cutter to cut it into pieces.
Storage
Keep the pieces wrapped in parchment paper to prevent them from sticking to one another, then store in a ziplock bag or airtight container in the refrigerator. The pappadams will keep for several months.