How do you preserve food? Short answer: remove the moisture, which is prone to rot, and/or keep the food away from air to protect it from the natural organisms that will cause it to decompose. Both have the same general result: prolonging the food’s shelf life.
When you start learning about food preservation, you will need to decide which method is the most delicious way to prolong (and ideally enhance) what you’re hoping to store long-term. There are the methods that have been used to preserve food for all of recorded history, and then there are the tried-and-true scientifically tested methods of safe food preservation that have been established in the past century or so by scientists and government advisory boards. You seem like a nice enough person. I mean, sure, we all have our flaws, but I would hate for your food-borne illness to be on my conscience. None of the recipes, as written here, will allow the food to spoil. But some people like to eat raw oysters and raw cheese; others don’t. Some people dump their milk on its date of expiration; others smell it to determine if it has gone off. I will give you all angles on a food preservation technique and its level of risk, both the way it has been done for centuries and the way that modern scientific analysis says is the absolute safest. It is up to you to decide your level of confidence in preservation techniques in the kitchen.
Note that the hunter or farmer starting with fresh meat needs to take some extra precautions. If you’re starting with pork or wild game you’ve prepared yourself, the meat must be treated before it is cured to kill the Trichinella parasite. To treat the meat, the National Center for Home Food Preservation recommends freezing meat cut thinner than 6 inches at 0ºF (–18ºC) or below for at least 30 days. Note that this requires a subzero freezer. A regular home freezer does not get cold enough for the job.
Following is a breakdown of all of the various techniques used throughout the book.
Pickling is the act of preserving a food by replacing its water content with acid, the most common one being vinegar. The process by which the acidic solution replaces the water inside a food is called plasmolysis. Think about a wilted, mushy cucumber forgotten inside your refrigerator drawer. It decomposes because of its water content. Bacteria, molds, and yeast all need water to thrive. In nature, rotting food is a good thing, as it returns plant matter to the soil quickly so that it can become the compost required to grow more plants, which in turn can be eaten or fed to animals. But if that water is replaced with an acidic solution to deter decomposing microbes, it becomes a pickle. Science!
Too much acid and the pickled food becomes too “hot” and biting; this is good for preservation, but bad for flavor. Too little and the food won’t properly cure. You want the right amount of acid that balances flavor and preservation, but the “right amount” varies based on the type of acid used and the moisture content of the food that is being preserved.
Cooks usually make a brine, a liquid solution of an acid (such as distilled white vinegar, white wine vinegar, apple cider vinegar, or red wine vinegar) plus water to tame its heat and potency. It is possible to pickle with strong, big-flavored vinegars like balsamic, but very often the flavor can be overpowering. And while it is frowned upon by the National Center for Home Food Preservation, fresh lemon juice or fresh lime juice can also be a delicious pickling acid for refrigerator pickles, either on its own or in tandem with vinegar. (The center recommends bottled citrus juice for its stability and its known acid content, but its flavor leaves much to be desired. There are over 50 varieties of fresh lemons available around the country at different times of year, but all with different acid levels, and some, like Meyer lemons, aren’t acidic enough for food preservation.) As a rule, don’t expect pickles preserved with citrus juice to keep as long as those preserved with vinegar.
It is a good idea to add some salt to the brine for flavor, but also because it helps pull the moisture out of the food (speeding the process of the acidic conversion). It isn’t necessary, but it’s also very delicious to add some sugar to a brine — not enough to make the pickle sweet, but just to balance the acid. More often than not, cooks add other flavoring agents to the brine as well, such as garlic, ginger, chile pepper, or fresh or dried herbs. The sky’s the limit!
As a general rule of thumb, a tightly packed pint jar of food to be pickled usually contains 2 to 3 ounces each of water and vinegar, 1 teaspoon of kosher salt, and 1 tablespoon of sugar. This is my usual basic brine ratio, and I take it from there.
Highly acidic vinegar pickles (those with a pH of 4.6 or below) can be stored in the refrigerator nearly indefinitely. Over time, the texture of the pickled food may degrade or soften, but if kept cold and beneath the brine line, the pickle will remain preserved. Vinegar-pickled vegetables, but not meat or fish, are also suitable for Hot-Water-Bath Canning.
You don’t need any special equipment to make quick pickles or those stored in the refrigerator. Canned, shelf-stable pickles are another matter. Jump ahead to the canning section below. A canning jar is a good choice because it’s heatproof and allows you to see whether the food is below the brine line, but any container that’s free of odors and has a lid will suffice.
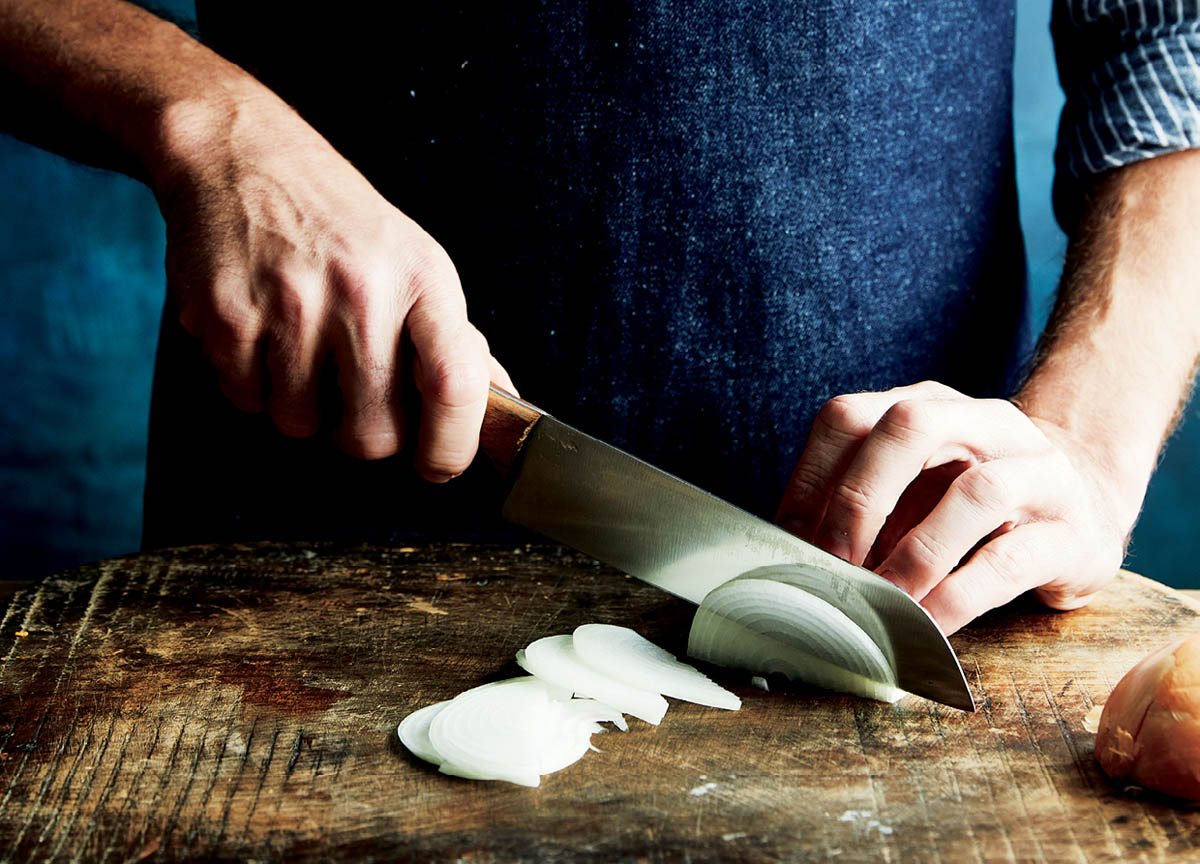
Onions — used either alone or as a complement to other ingredients — lend great flavor to pickles. The thinner the slice, the faster your food will cure.
This preservation method results in vacuum-sealed, air-locked jars that are shelf stable for up to 1 year and do not require refrigeration. The only foods safe for hot-water-bath canning, however, are those that are high in acid: fruits, fruit juices, jams, jellies, fruit spreads, some salsas, tomatoes with added acid, pickles, relishes, vinegars, and some chutneys, sauces, and condiments. In this book, the pickled beans are safe for water-bath canning. Unpickled beans must be pressure canned.
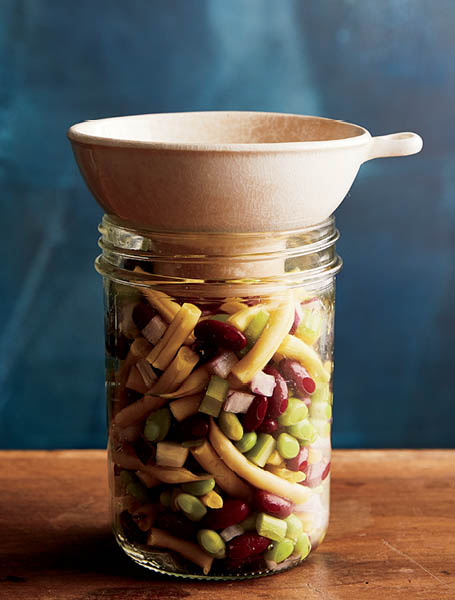
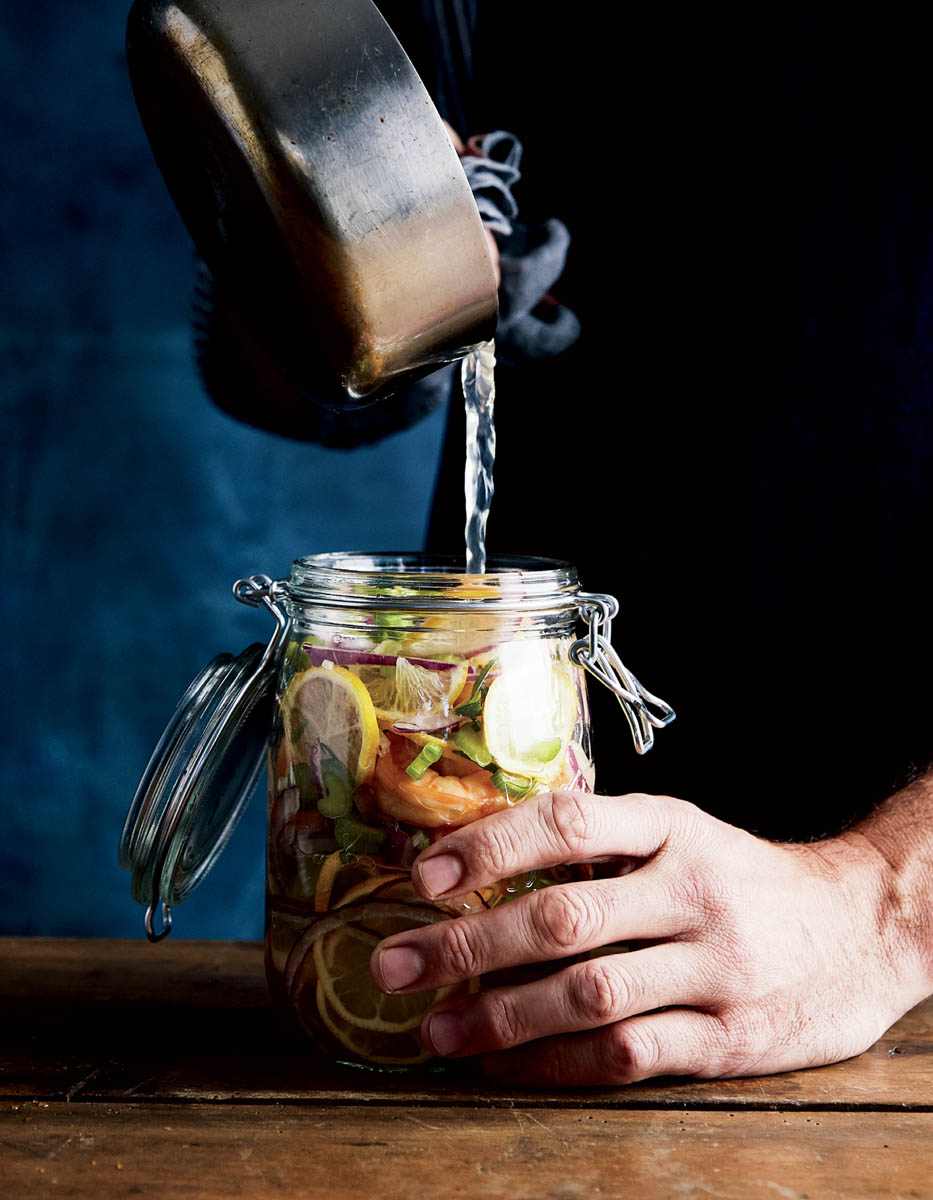
A canning funnel is a great tool for preventing brine splatter.
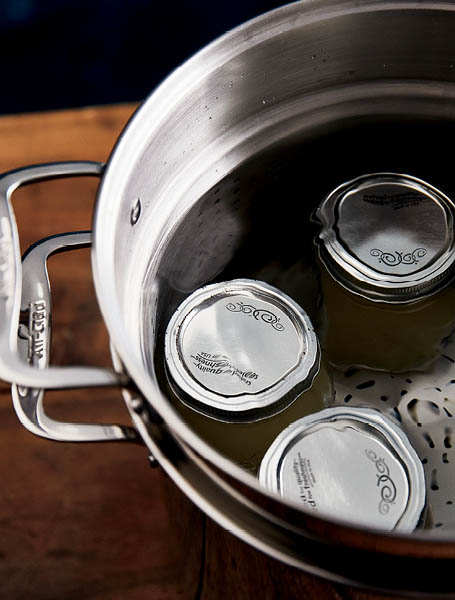
Be sure there is enough water in your canning pot to cover your jars by at least 2 inches.
Notes: During storage, if the lids pop open or if the food doesn’t look or smell right, by all means toss the food in the compost. However, if you’re just nervous about the safety of your canned food, before eating, cook the contents of the jar for 10 minutes at a very rapid boil to kill any potential pathogens. Or remove the lid from the jar and place it in a 350°F (180°C) oven for at least 30 minutes, or until the food reaches an internal temperature of 185°F (85°C).
If you live at a higher altitude, you must adjust your canning accordingly. At 1,000 feet above sea level and higher, water boils at temperatures lower than 212°F (100°C). For safe canning, add 5 minutes of processing time for elevations of up to 3,000 feet, 10 minutes for those up to 6,000 feet, 15 minutes for up to 8,000 feet, and 20 minutes for up to 10,000 feet.
Pressure canning gets the water hotter than boiling temperature (up to 240°F/115°C, rather than 212°F/100°C). This über-scalding temperature is able to kill the bacteria that is more likely to grow in low-acid foods like non-vinegared vegetables, soups, stews, stocks, meats, poultry, and seafood. Use this method to can fish, beans, and stock.
Pressure canning has a lot in common with hot-water-bath canning, but it requires a pressure canning pot, which is a large stovetop or countertop appliance specifically designed for high-pressure heating. There are two types of pressure canners: dial gauge and weighted gauge. Dial gauge canners indicate the pressure inside the canner, but you must monitor them constantly and control them by adjusting the heat. Weighted gauge canners allow you to set the pressure levels on the canner, and they automatically release any pressure above the desired amount. Dial gauge canners are recommended for those living above sea level who need to make adjustments for altitude. Note that dial gauge canners must be calibrated for accuracy once a year.

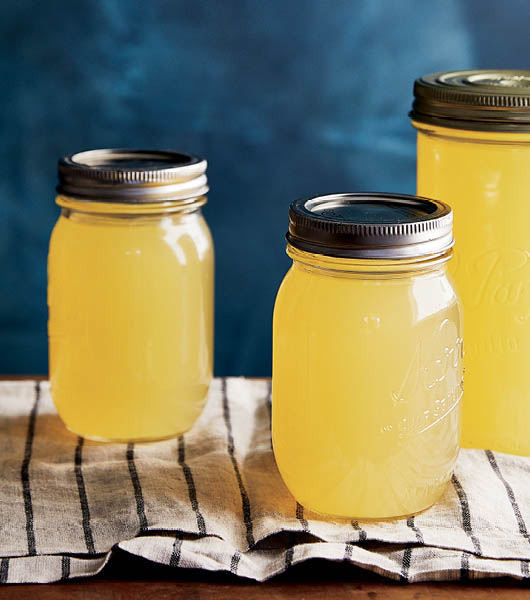
Pressure-can your own homemade chicken stock. It’s the best!
Cool your jars on a towel-lined counter.
Notes: If at any time during storage the lids pop open or if the food doesn’t look or smell right, by all means toss the food in the compost. However, if you’re just nervous about the safety of your canned food, before eating, cook the contents of the jar for 10 minutes at a very rapid boil to kill any potential pathogens. Or remove the lid of the jar and place the jar in a 350°F (180°C) oven for at least 30 minutes, or until the food reaches an internal temperature of 185°F (85°C).
If you live at a higher altitude, you must adjust your canner accordingly. At 1,000 feet above sea level and higher, water boils at temperatures lower than 212°F (100°C). For safe canning, add more pressure: On a dial gauge canner, for 2,000 to 4,000 feet, add 1 pound; for 4,000 to 6,000 feet, add 2 pounds; for 6,000 to 8,000 feet, add 3 pounds. For a weighted gauge canner, just use 15 pounds of pressure for any recipe that requires 10.
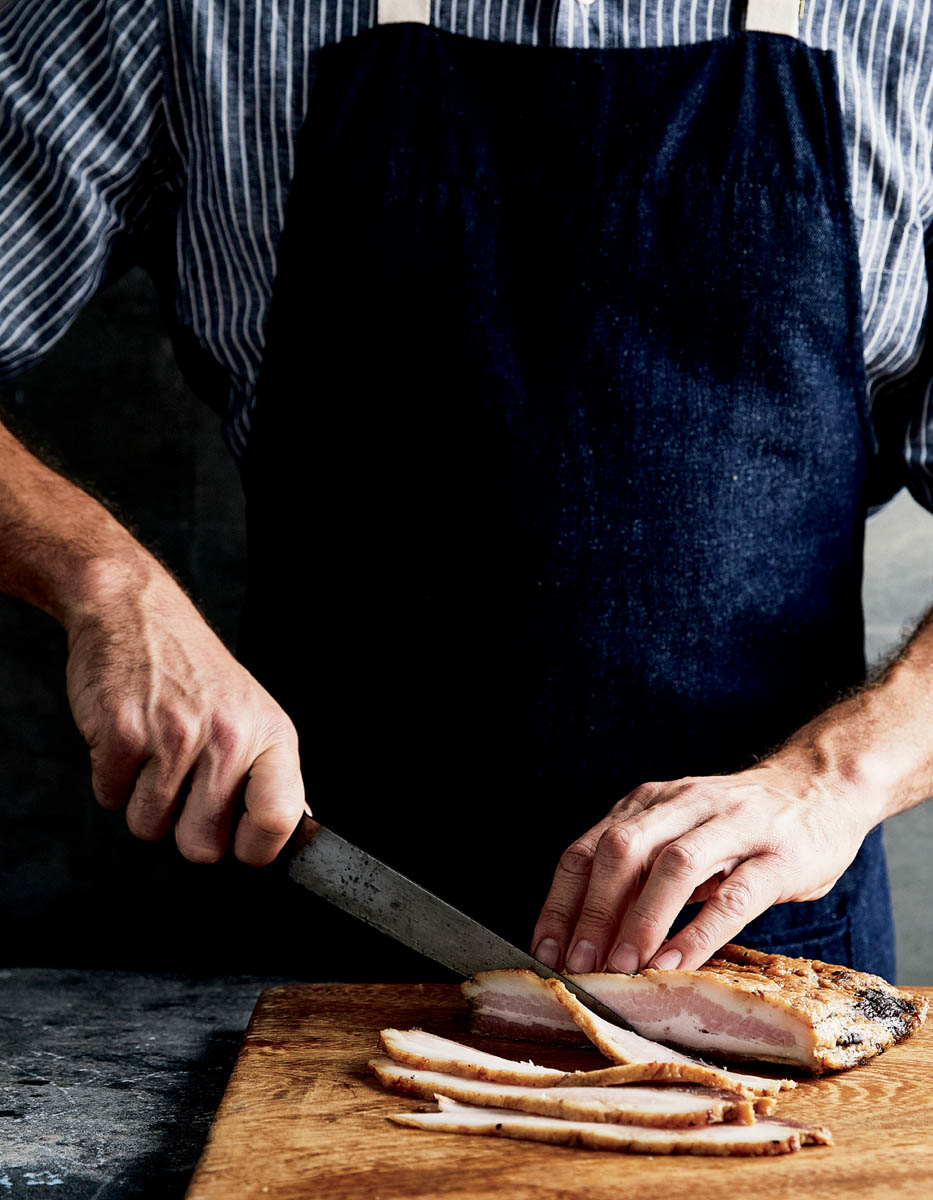
Dry curing involves rubbing or blanketing food with salt (and sometimes sugar and/or other spices) to pull out moisture as it dries. And oh, the deliciousness it can produce! This is the most common method for preparing bacon, some kinds of jerky, and also cured charcuterie like dry sausage and salami. In general, the resulting food is usually fairly salty in flavor and firm and rigid in texture. It can be eaten on its own or fried in slices, and chunks of it can be used to flavor vegetables, potatoes, stews, and more.
Larger hunks can take weeks or months to cure; smaller pieces can cure in days or hours. Traditionally, dry-cured foods were rubbed with salt and then left in a cool, dark place with good airflow. Those looking to cure large cuts will need a cool basement or a dedicated dry-curing box, but we modern food adventurers have something far more efficient than a cave: a refrigerator! It’s cool, dark, away from predators (save for wily midnight snackers), and quite arid; the refrigerator is a wonderfully dry place to help dry-cured food release its moisture and avoid harmful bacteria.
The salt is where the action is, as it pulls the water out of the cells of the food. And salt inhibits the growth of harmful microbes. The amount of salt in dry-cured foods should be about 3 percent of the weight of the food. For example, for every 100 grams of meat or fish, you need 3 grams of salt by weight. Not everyone has a kitchen scale, and math is hard for many of us, so the best rule is this: for every pound of meat, use about 1 tablespoon of kosher salt for a dry cure.
Some dry-cured foods are just buried in a mountain of salt, and sometimes sugar is added to help balance out the sharpness of the salt. Note that all of this salt is not absorbed into the flavor of the finished food — that would be unbearably salty! A blanket of salt just provides extra protection from disease-causing bacteria and sops up a lot of the liquid that a dried protein can exude as it cures. Note that you should not reuse or eat any salt left over from dry curing.
For meats dry-curing in the refrigerator for longer than 1 week, or for cures happening outside the refrigerator, mix sodium nitrite and/or sodium nitrate (also known as pink salt, InstaCure #1, or InstaCure #2) into the salt. This pink curing salt helps prevent spoiling, and as an added bonus, it helps keep the meat pink after curing and/or cooking. For cures that take longer than 1 week in the fridge, or for meat (like bacon) that will be cooked before being eaten, the National Center for Home Food Preservation recommends using InstaCure #1, which contains sodium nitrite and salt. For long cures outside the fridge that aren’t usually cooked before being eaten, such as a Virginia ham, the NCHFP recommends InstaCure #2, which contains sodium nitrite, sodium nitrate, and salt. In either case, use 1 ounce for every 25 pounds of meat, or 1 scant teaspoon of cure for every 5 pounds of meat. All of the dry-cured recipes in this book are done in the fridge in less than 1 week, so pink salt isn’t necessary for safety, though it may be used for appearance. Note that this specialty item can be tricky to locate. Find it at better butcher shops, or order it online (see Resources).
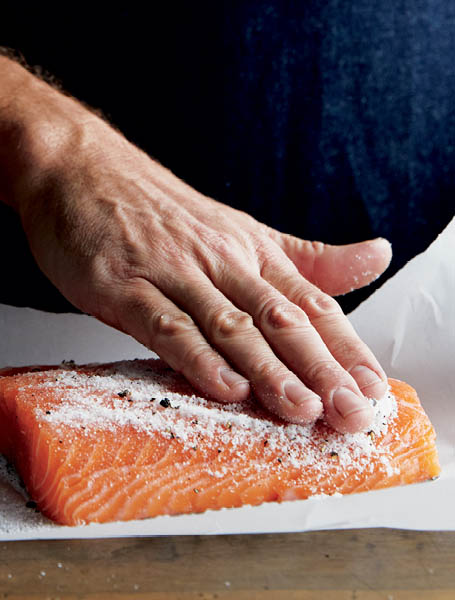
Press the salt into the meat or fish for dry curing.
The love child of marinating and dry curing is brine curing, and it is what gives us corned beef, pastrami, and wet-cured ham, to name a few. In brine curing, meat or fish is dunked into a salt and water solution, which is often flavored with sugar and other spices. The food is submerged below the brine line while it cures. The resulting food is quite juicy and firm. Brined foods take on a well-rounded salty flavor (though they are not as salty as dry-cured foods), and they are usually cooked completely before being eaten.
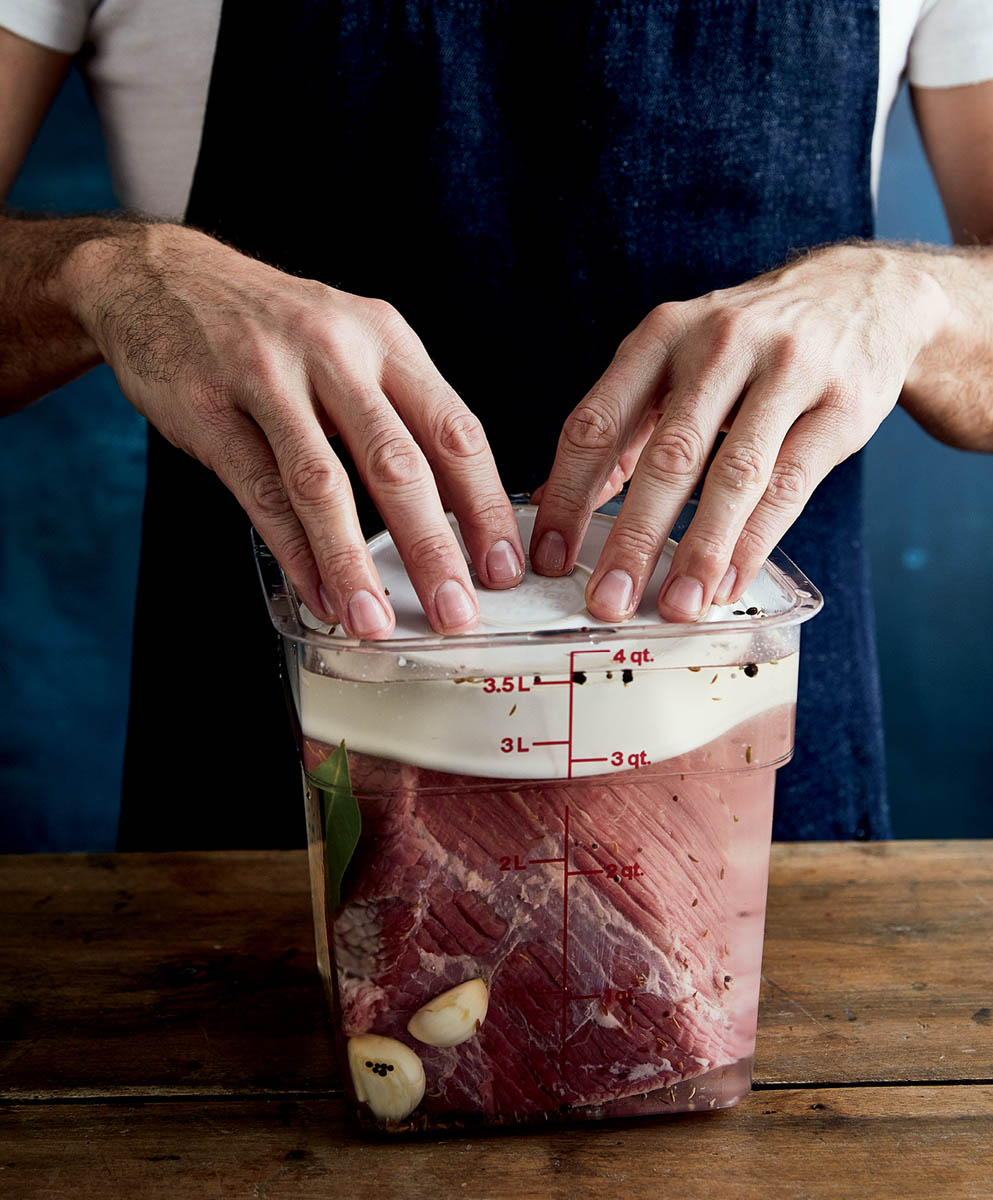
Use an inverted plate to weight curing meat below the brine line.
Traditionally, brine-cured food sat in a cool, dark location — in a cellar, for example — but in the modern day, it’s safer to store brining food in the refrigerator. It can take several days to a week to complete the process of osmosis (whereby the saltwater penetrates the cells of the food), depending on the size of the food to be cured. The meat or fish takes on the flavors of the salt and whatever else is in the brine.
Brine curing requires a large food-safe bucket or container with a lid that can accommodate the size of the meat and enough brining solution to surround it on all sides. This technique also requires tremendous refrigerator space to accommodate the bucket for a week. (I’ve found that brining a ham or a corned beef is a great excuse to clean out the fridge.)
As with dry curing, the salt is the most important thing, as it pulls out the water from the cells of the food and inhibits the growth of harmful microbes. The general rule for brine curing is about 1 cup of kosher salt for every gallon of water. What matters most is that there’s enough brine to surround the meat completely. A small hunk of brisket might need only 1 gallon of solution. A whole hog’s leg may need three times that amount.
When brining meats, mix in sodium nitrite (also known as pink salt or InstaCure #1) with the salt. This pink curing salt gives the kosher salt a boost, helping to prevent harmful bacteria growth (and as an added bonus, it helps keep the meat pink after curing and/or cooking). Add 1 scant teaspoon of pink curing salt to your brine of 1 gallon or more.
Just as you would for pickles, you can add other ingredients to the brine as well. I usually flavor pretty aggressively because the brine tends to mute the flavors. I often reach for a whole onion or several crushed garlic cloves, a large handful of fresh herbs, or the zest of a lemon or orange. I’m also a big fan of adding sugar to wet brines — not because it makes the meat sweet, but because it balances its savory flavor.
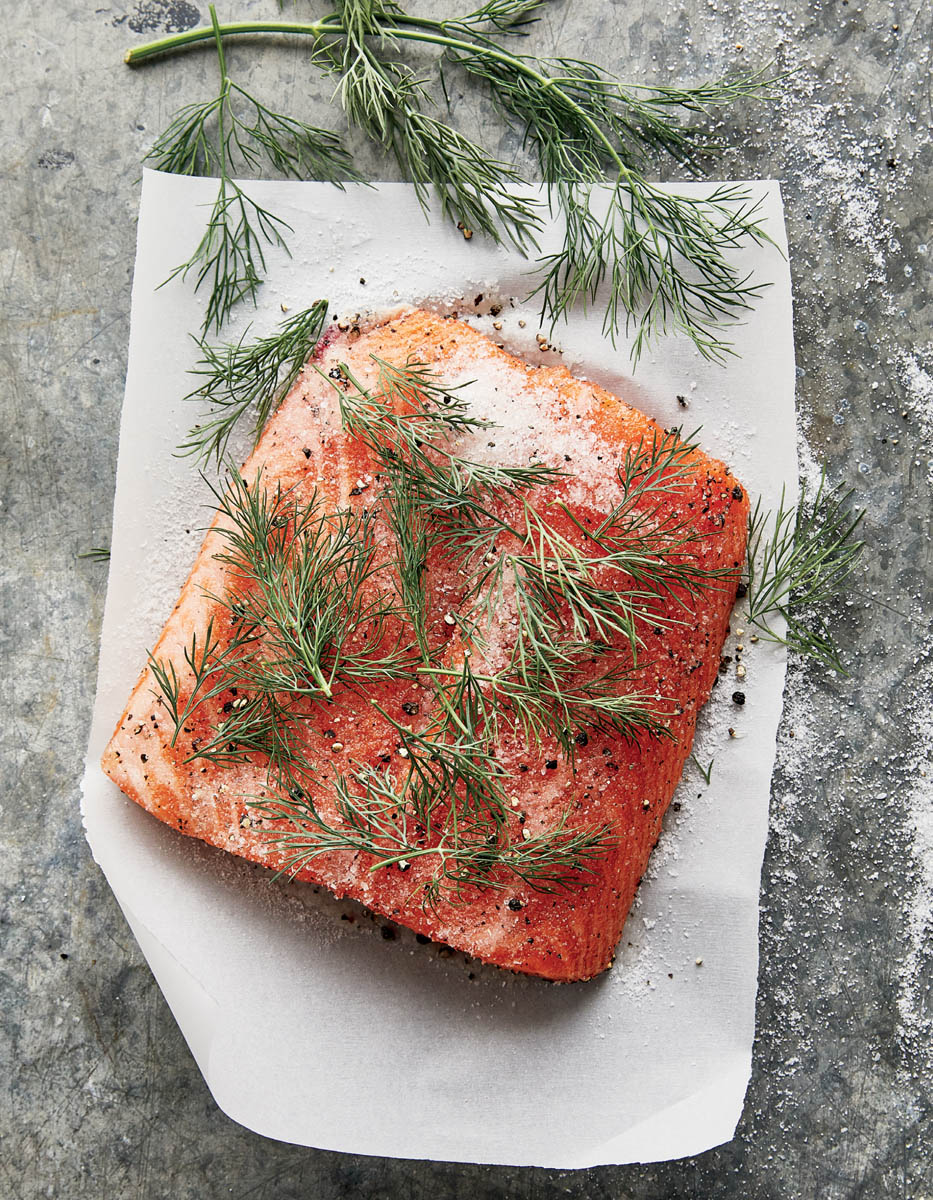
While the curing process is happening, remember that this raw meat and all of its liquid can be quite harmful if ingested. Cleanliness is a must! After the curing process is complete, all of the flavoring agents should be discarded. If you’re planning to smoke the fish or meat, it should be dried thoroughly, until it’s sticky to the touch.
Humans have been successfully drying food around the fire, in the sun, or on hot rocks for centuries. But in the realm of modern food safety, even if you live in a terrifically hot and dry climate, drying food outdoors has its own government-recommended parameters. In modern times, when safety trumps food security for most of us, the best choice is to dry food either in the oven or in a food dehydrator.
Dried food, also called dehydrated food, is most common within these pages in jerky form, but it is also the technique behind Dried Yogurt Bombs and more. Dried food is portable, flavorful, well salted for flavor and preservation, and ripped with a toothsome, chewy texture. While it can easily be tossed into a backpack or a picnic basket for later eating, it’s safest to keep the whole stash in an airtight bag in the refrigerator between snacks. Flavor combinations and permutations abound, as do the cuts of protein that can be dried, from beef to poultry to fish to venison to tofu.
Only lean cuts are suitable for drying, as meat cures but fat will go rancid over time. Some dried meat traditions feature ground meat, but overall this is not recommended, because of its higher incidence of contamination and its fat content. The Bak Kwa is the only dried meat recipe here that starts with ground meat, but it should be grilled or cooked thoroughly before being eaten to kill any possible pathogens.
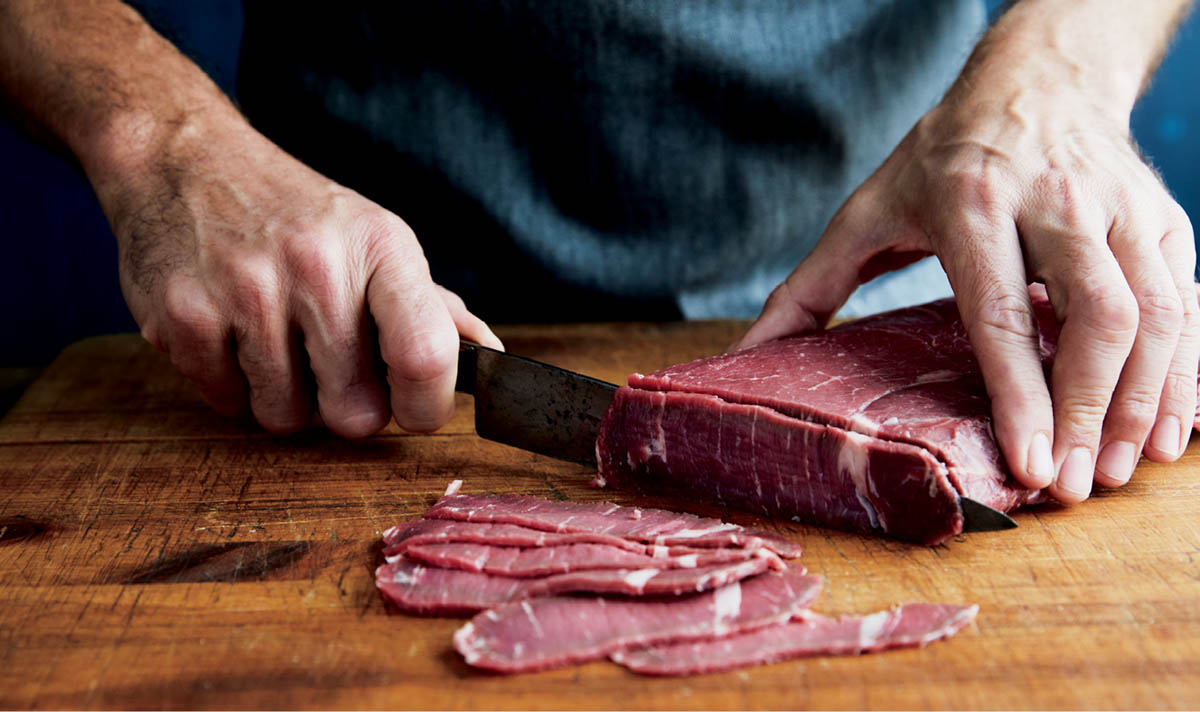
Freezing meat for 20 to 30 minutes firms it, making it easier to cut thin, even slices.
The best thing about drying food in the oven is that you probably already have one. You don’t need a convection oven, but they are excellent for dehydrating. If you don’t have a convection oven, it’s best to prop open your oven door to improve air circulation during drying.
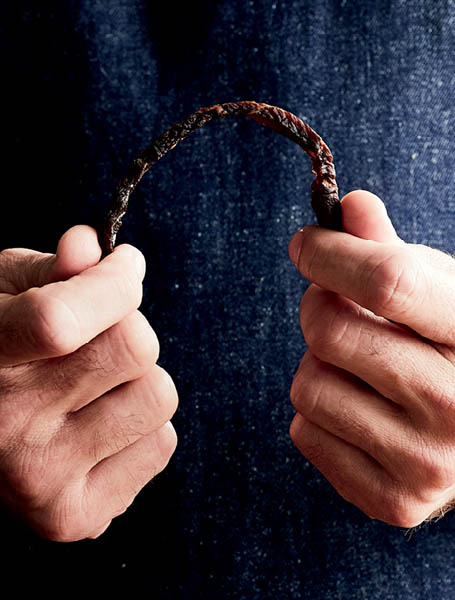
Thoroughly dried jerky should break when you bend it and look “cooked” when split.
Most food dehydrators are very simple machines — you stack ventilated trays of food inside and a fan blows warm, dry air across them — but they take up a lot of cabinet space when not in use. Follow your manufacturer’s instructions for drying meat and fish. The recommended temperature for food safety is 160°F (70°C), but thicker foods can be dried at lower temperatures and then heated until the internal temperature reaches 160°F (70°C) after the drying process.
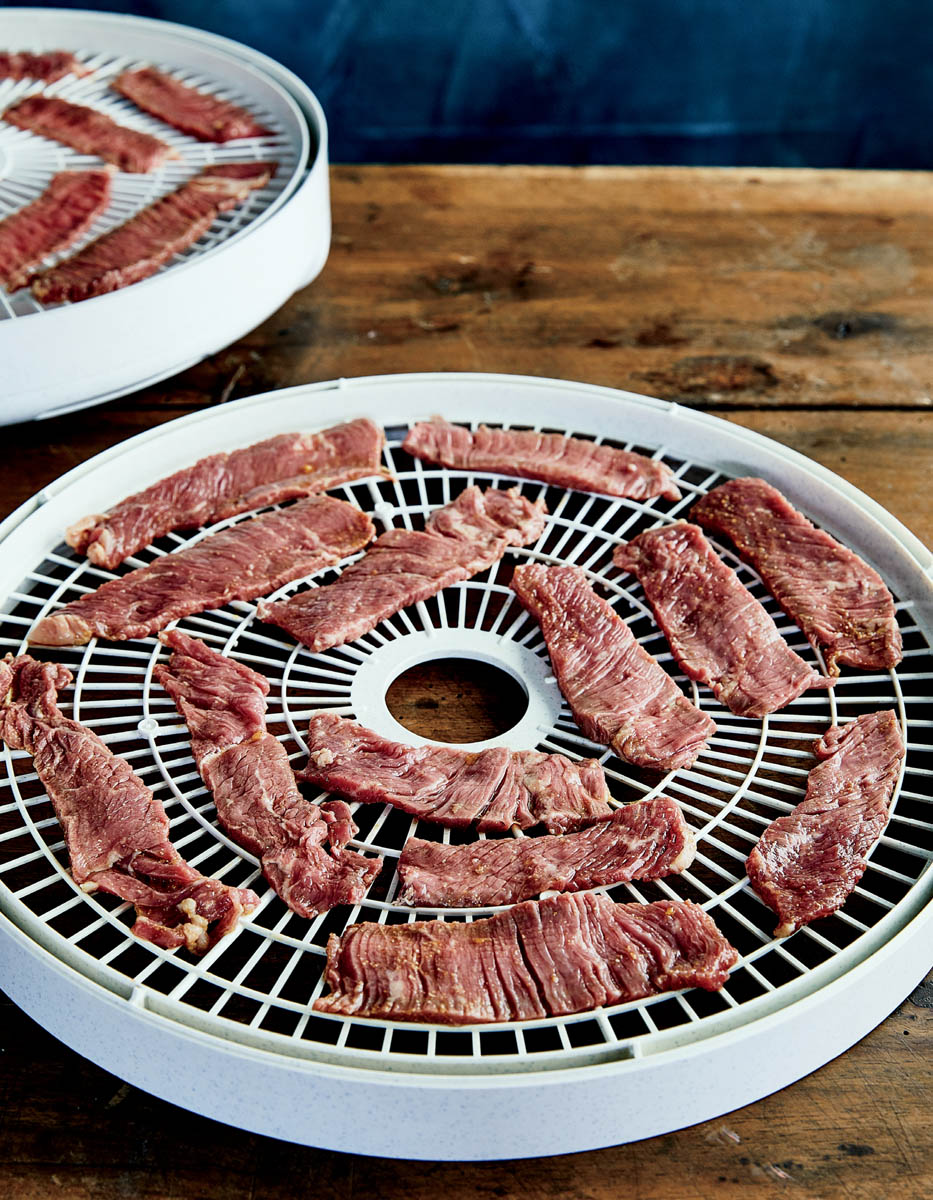
Food to be dried should be thin and laid flat, with space between pieces to allow air to circulate for even drying.
You know this appliance intimately, I’m sure. We don’t do a lot of freezing in this book, save for the Frozen Walnut-Yogurt Pops and the Edamame Pesto, but of course this is a very helpful and modern way to preserve protein — particularly if you don’t have a pressure canner, as it’s also a great way to store beans. It’s essential that you select the right containers for freezing. Plastic is a better choice than glass, as things tend to bang around a lot in the freezer. For liquids, reach for food-safe plastic containers with tight-fitting lids. Fill them nearly all the way, leaving about an inch of headspace at the top. Too much air space will allow your food to develop freezer burn; too little space and the natural expansion of food as it freezes will force that lid to pop off. You can precook dried beans and freeze them, covered in their brine, in reusable pint containers (not canning jars). Well-wrapped bacon or jerky will keep for many moons in the freezer (at least 6 months). For best results with solid food, squeeze out as much air as possible and double- or triple-wrap the food. Don’t forget to mark the contents and date on each parcel.

Plastic wrap is your friend in the freezer. It’s essential that you keep air away from food.
Preserving food, particularly animal protein, by covering it in fat is an ancient form of retaining food security. Long before there was olive oil, coconut oil, or any other plant-derived cooking fat, someone discovered that the fat from animals, when melted down over the fire and poured over the meat to cover it completely, was a great way to keep away the natural microbes in the air that cause spoilage. While fat has a proclivity to go rancid, if kept in cold quarters (like the refrigerator), it keeps air, microbes, and insects away from meat. In addition to French duck confit, there are other traditional foods that are cured in fat and oil, including Mediterranean olive oil–cured fish and olive oil–cured cheese, and Indian pickles that are preserved with mustard oil.
One great thing about fat-cured food is that you actually produce two delicious products: the meat (or fish, or whatever), to be enjoyed on its own or as the base of a dish, and its flavorful fat, useful for frying eggs, sautéing vegetables, and more. Both can be enjoyed on their own or in tandem to lend mad flavor to long-cooked stews and bean pots. (French cassoulet, the quintessential bean dish of duck confit, is a perfect example of the culinary power of fat-cured food.)
Fatty, tough cuts of meat, such as duck legs and pork belly, are best suited to fat curing. The meat is first dry-cured in salt and other flavoring, and sometimes even air-dried to help reduce its water content and prolong its shelf life.
The fatty meat is then covered in fat completely; for duck confit, the tradition is to use duck fat, but any sort of animal fat or plant-based fat can be used. If you’re using a fat that is hard at room temperature, such as coconut oil, lard, or tallow, it should first be gently heated (either in 10-second bursts in the microwave or by placing the jar in a pot of warm water) until it liquefies so that it can be poured.
The meat to be fat-cured is slowly cooked in the fat to release its natural fats and to cook the meat all the way through until tender. The heat helps kill microorganisms and releases moisture from the meat. (Note that some fat-cured foods, such as olives, cheese, or cured sardines, do not require cooking in the fat.)
After cooking and cooling, the food is packed tightly into a canning jar or other vessel that is able to withstand warm temperatures and won’t retain odors with long-term storage. Other flavoring agents, such as dried herbs, may be added to the jar. Use a jar or container that you can see through, and stir the contents with a knife or chopstick if needed to pop any air bubbles that might form inside. The hot liquid fat is then poured over the food to cover it by at least 1⁄2 inch; like wax, the fat creates an anaerobic environment, which helps prevent the food from spoiling. Put tight lids on the jars and keep them cold in the back of the fridge for months. The longer the meat cures in the fat, the more tender it becomes.
While fat-cured meat is fully cooked, it is delicious times a thousand to sear the meat before serving to produce a crisp and appetizing exterior.

After the meat has been cured in the fat, use a knife, chopstick, or other long kitchen tool to pop any air bubbles inside the jar.
If you own a barbecue grill, you already have almost everything you need to smoke meat, fish, nuts, cheese, and more. And if you don’t have a grill, there are still other ways to cheat at crafting smoky food flavor.
There are two methods of smoking food: hot smoking and cold smoking. Hot smoking at low (but safe!) temperatures (140°F to 180°F/60°C to 82°C) is the most common method, and it’s the method that I recommend to the home cook. There are several ways to cold-smoke at a much lower temperature (85°F to 100°F/30°C to 38°C), but they are tricky to get right at home (see Cold Smoking).
In hot smoking, you can buy a smoker and simply follow the manufacturer’s instructions. But if you’re looking to bust out the grill you already own, light a modest amount of charcoal or light a gas grill on low heat, and then add some wood or sawdust to the flames to slowly smolder. You can then place the meat or fish on the grill, as far away from the heat source as possible. The smoke passes over the food until the protein reaches a safe temperature for eating.
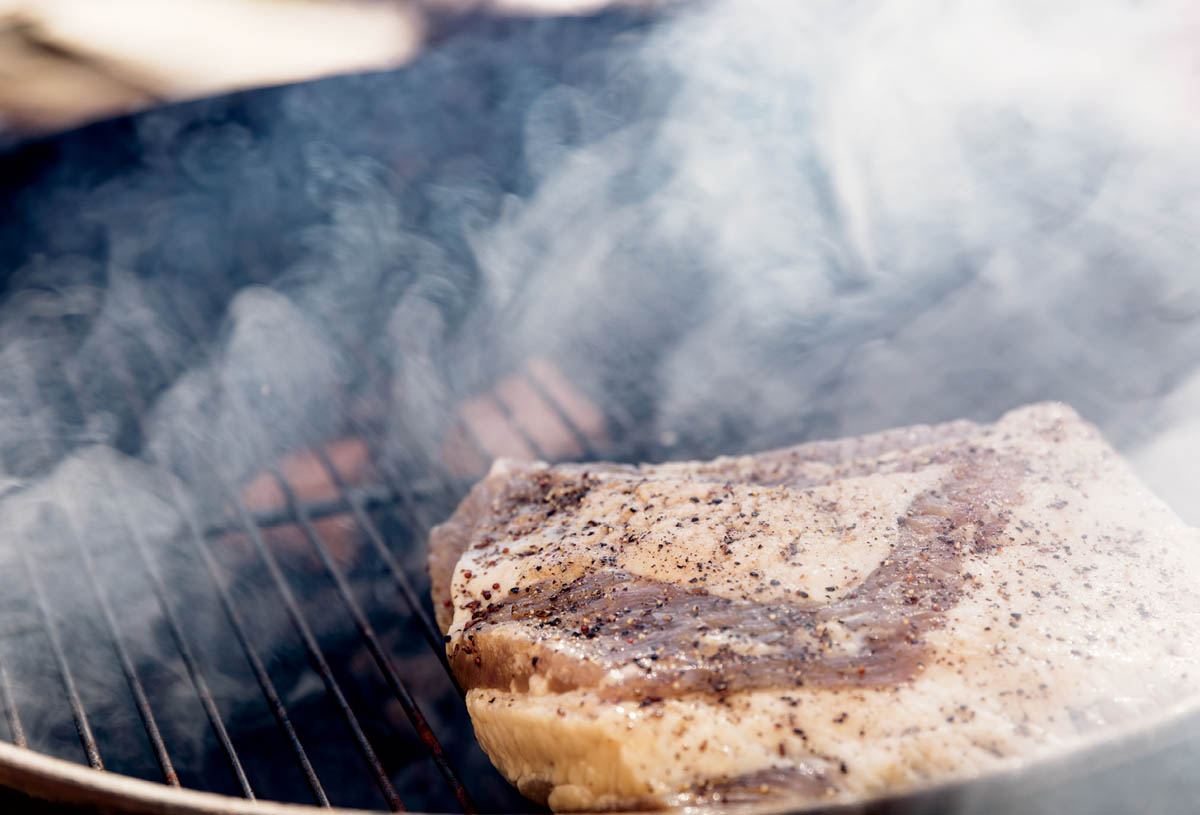
Few things on earth are better than meat slowly smoked on the grill.
In cold smoking, food is smoked at a low temperature, between 85°F and 100°F (30°C and 38°C), for 8 to 12 hours at a stretch or more, leaving meat in the “unsafe zone” of 40°F to 140°F (5°C to 60°C) for long periods of time. Meats are usually cured first with preserving salt (like InstaCure #1) to help prevent spoilage, then left to dry completely, either in the refrigerator or under a fan, until the surface of the meat is sticky to the touch. To achieve the low temperatures, either the heat source is kept far away from the food or the smoke is created with very little heat. Cold-smoked foods tend to have a more tender, softer texture than hot-smoked foods. Besides being used for meat, fish, and poultry, this is a very useful method for adding smoke flavor to things like butter and cheese that would just melt in hot smoking. There are a few factors that make this method tricky to get right at home.
To produce smoke with very low heat, you can use a couple of different methods. Coals or gas can be burned along with soaked wood chips or wood sawdust in one location (just as you would for hot smoking). But the smoke must then be piped into a cool temperature-controlled cold-smoking box far away from the flame. Cold smoking usually requires a lot of space and hardware. The pipes are often laid underground to help the smoke cool. A dedicated low-temperature refrigerator is a favorite cold-smoking box because it is airtight, insulated, and well-priced and comes complete with racks ready to use.
The space and handyman skills needed to build this sort of cold-smoking setup aren’t available to all, and while there are a few workarounds, I don’t wholeheartedly recommend them. There are also widely available and fairly inexpensive appliances sold as cold smokers, but most of them don’t truly keep food cold enough for real cold smoking.
You don’t necessarily need to dig up your yard to lay underground pipes or buy a cold smoker. It is possible, with reservations and cautions, to just use the grill you already have.
There is a family of perforated cold-smoking devices (one popular brand name is the A-MAZE-N smoker) meant to be used atop any kind of grill. You can also make a perforated smoker by partially inverting a fine-mesh sieve into a ring with a hole in the middle. I’m not a huge fan of this method for a few reasons. Most of these devices are designed to be used with barbecue pellets — a compressed kibble of sawdust — but the pellets often contain non-wood ingredients and can leave behind an oily residue. It is possible to cold-smoke in some of these devices with the wood dust or sawdust only, but I’ve found it difficult to light and difficult to maintain the smolder of the sawdust alone. If you go this route, keep a frequent eye on your stream of smoke for the entirety of the smoking time. And know that these cold smokers can raise the internal temperature of the grill as much as 15°F (8°C). Use these cold smokers in the shade to keep the heat from building up.
After the cold-smoking process, it’s safest, though not traditional, for meat, poultry, and fish to be heated to a safe internal temperature before being eaten. A meat thermometer is the only sure way to test for doneness and food safety. Fish is ready to eat when it reaches 140°F (60°C) in the center of its thickest part. Meat must reach at least 150°F (65°C), and poultry 160°F (70°C). (Note that for non-animal proteins like cheese and nuts that are smoked just for flavor, cold smoking alone is sufficient.)
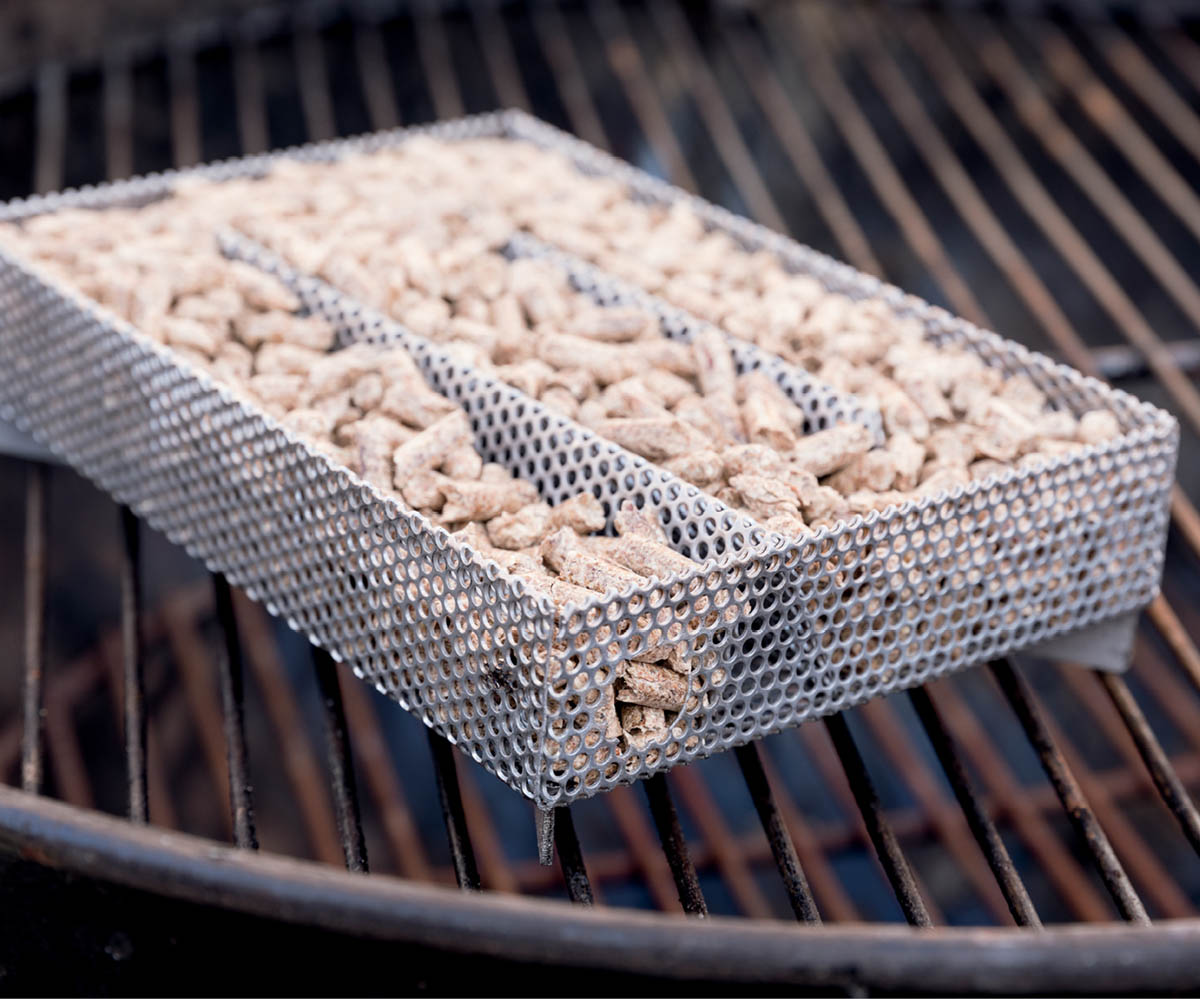
One way to cold smoke at home is to use barbecue pellets in a perforated cold smoker set on a grill.