
AM
Homemade Cinnamon Toast Crunch
Probiotic Rainbow Brekkie Bowl
Breakfast Tabbouleh Bowl with Avocado-Grapefruit “Hollandaise”
Calico Beet Waffles with Coconut Whip and Tutti-Frutti Dust
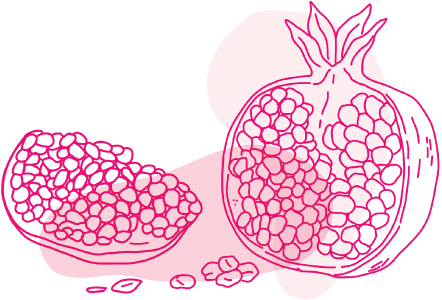
Mixed Grain Pancakes with Cardamom–Pomegranate Seed Syrup
PM
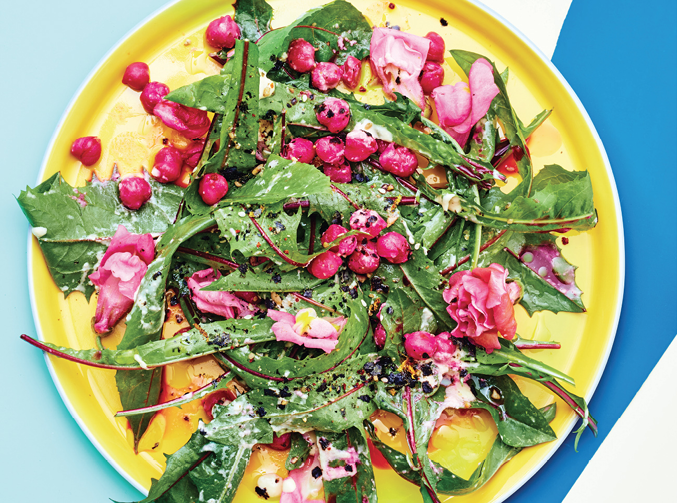
Pickled Chickpeas and Dandelion Greens Salad
Turmeric- and Cumin-Spiced Cauliflower Rice
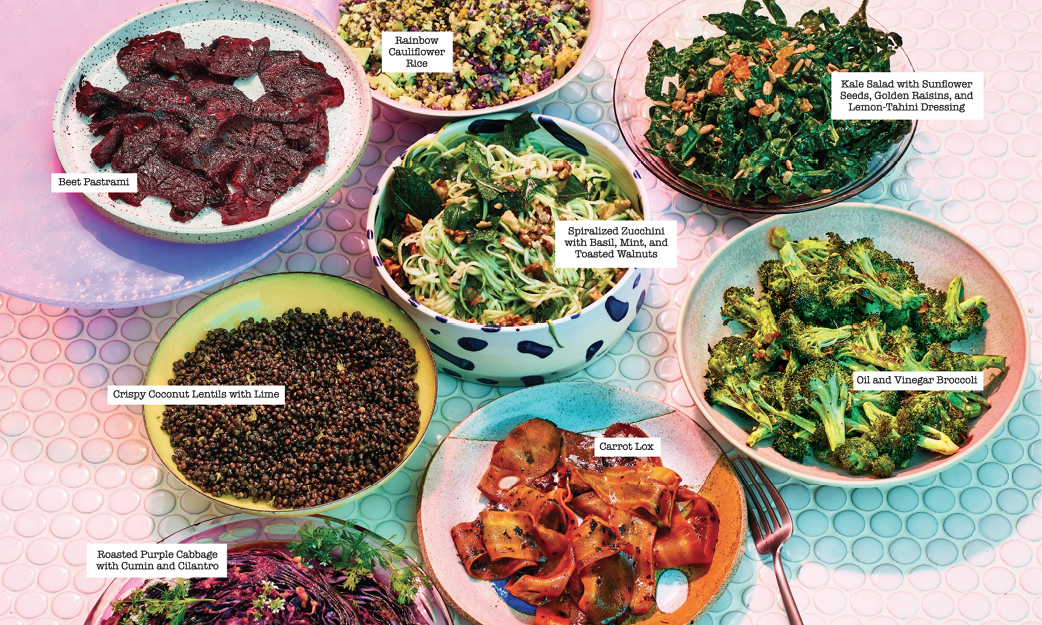
Kale Salad with Sunflower Seeds, Golden Raisins, and Lemon-Tahini Dressing
Crispy Coconut Lentils with Lime
Roasted Purple Cabbage with Cumin and Cilantro
Spiralized Zucchini with Basil, Mint, and Toasted Walnuts
Sweet + Sour Rainbow Radish Tacos
Bean Thread Noodle Salad with Miso-Arugula Pesto
Beet Falafel with Rose-Pickled Veggies
Pineapple Kimchi Summer Sunset Rolls
This chapter is dedicated to café food. Plates and bowls, both sweet and savory, that you’d want to eat for breakfast, brunch, or lunch, but are a little less substantial than dinner.
That includes everything from breakfast custards and multigrain pancakes to a variety of market plate–ready vegetable preps and kimchi summer rolls. Most of the sweeter dishes are reserved for a.m. consumption, while p.m. is built of savories. But ultimately, you can really enjoy any of these at any time—that’s the beauty of café food. This is the kind of food I like to eat every day—it will fill you up without weighing you down. The added bonus—it’s good for you, too.

AM

homemade cinnamon toast crunch
I was one of those kids—and let’s be honest, teenagers—who loved cereal. Growing up, I ate cereal for breakfast; as an adult, I eat it as a snack. But in reality, cereal isn’t the healthiest thing in the world you can eat since it is usually loaded with sugar and often contains artificial ingredients, too. But what about reinventing a childhood classic using ingredients that are better suited to promoting health? That’s what I’ve done here. And the best part is that this cereal is totally addictive, just like the original. You can eat it for breakfast mixed with oats, on its own, or as a midday snack. Reach for your favorite coconut milk or the Malted Majik Milk to mix in.
serves 6
6 tablespoons filtered water
2 tablespoons flax meal
1 ½ cups gluten-free oat flour, plus extra for working the dough
1 cup teff flour
⅓ cup plus 2 tablespoons coconut palm sugar
2 teaspoons ground cinnamon
¼ teaspoon baking powder
¼ cup coconut oil, melted
¼ cup organic unsweetened applesauce
¼ cup almond milk
2 teaspoons pure vanilla extract
1. Stir together the filtered water and flax meal in a small bowl. Let the mixture sit in the fridge to form a sticky consistency while you assemble the other ingredients.
2. Combine the oat flour, teff flour, ⅓ cup of the coconut palm sugar, 1 teaspoon of the cinnamon, and the baking powder in a medium bowl and stir to incorporate. In a small bowl, stir together the coconut oil, applesauce, almond milk, and vanilla extract to combine. Pour the coconut oil mixture into the oat flour mixture and stir until a dense, smooth dough forms. Using your hands, shape the dough into a ball. Wrap the dough in plastic wrap, transfer it to the fridge, and let it rest for 1 hour.
3. Preheat the oven to 350°F.
4. Remove the dough from the fridge. Place a large piece of parchment paper on the counter and sprinkle it with 1 ½teaspoons of the oat flour. Place the dough atop. Lay a second piece of parchment paper on top of the dough and, using a rolling pin, roll the dough between the parchment paper until it is about ⅛ inch thick.
5. Combine the remaining 2 tablespoons coconut palm sugar and 1 teaspoon cinnamon in a small bowl and stir together. Sprinkle the sugar mixture atop the dough evenly to coat, and prick the dough all over with a fork. Using a pizza cutter, cut the dough into ¾-inch squares. Carefully lift the parchment paper and transfer it with the squares to a rimmed baking sheet. Bake until the squares are crunchy and light brown, about 25 minutes.
6. Let the cereal cool on the baking sheet, then gently break the squares apart and transfer them to an airtight container.
Homemade Cinnamon Toast Crunch will keep, in an airtight container at room temperature, for about 1 week.
This recipe was born by accident. I was on a mission to make really delicious avocado ice cream, and had taken out a failed batch from the freezer and left it at room temp, to the point that it had melted into the consistency of a milkshake. Instead of throwing out the almond milk–avocado–coconut nectar mix, I decided to add some chia seeds and make it into a breakfast pudding. I also tossed in dates for chew, almonds for crunch, and apple for acidity and freshness. It’s delicious.
serves 4
1¼ cups Vanilla Bean–Almond Milk or nut milk of choice
1 avocado, peeled and pitted
3 teaspoons coconut nectar
4 medium pitted dates, chopped
2 tablespoons chia seeds
2 tablespoons unsweetened shredded coconut, plus extra for serving
2 teaspoons flax meal
¼ cup toasted almonds (see here), coarsely chopped
¼ of a tart apple, such as Granny Smith, cored and cut into ¼-inch cubes
1. Combine the almond milk, avocado, and coconut nectar in a blender and blend until smooth and thick, about 30 seconds.
2. Transfer the avocado mixture to a medium bowl and add the dates, chia seeds, shredded coconut, flax meal, almonds, and apple. Stir until the chia is fully incorporated into the mixture. Cover and refrigerate until the chia seeds expand, about 20 minutes, stirring the pudding after 10 minutes to break up any chia seed clumps. The pudding should be set, but not hard; if it has become too thick, add a few more tablespoons of nut milk to loosen it.
3. Divide the pudding among four individual bowls, sprinkle with additional coconut, and serve.
Avo-Chia Brekkie Pudding will keep, in an airtight container in the refrigerator, for about 2 days (I recommend eating it sooner than later because the avocado will oxidize as it sits).
Make It Magical
Add ½ teaspoon spirulina powder to the blender along with the almond milk, avocado, and coconut nectar. Then dust a bit atop the pudding once it’s done.


Overnight oats are great because you basically combine a bunch of ingredients, then leave the mix in your fridge overnight, and in the morning breakfast is ready! You can also play around with a combination of ingredients. For example, in place of the mocha flavor profile offered here, you could mix oats, strawberries, chopped macadamia nuts, and almond milk for more of a berries-and-cream situation. Or blend oats with banana, cinnamon, and walnuts for a banana bread–esque dish. In general, I like to add chopped nuts; otherwise the milk-drenched oats are a bit one-note, texturally speaking. I also like adding coffee, as in this hazelnut-mocha version, for an extra morning boost.
serves 4
1 cup old-fashioned rolled oats
¼ cup toasted hazelnuts (see here), coarsely chopped, plus extra for serving
2 tablespoons plus 2 teaspoons tahini
1 tablespoon cacao powder, plus extra for serving
4 teaspoons pure maple syrup
¼ cup hot brewed coffee
½ teaspoon ground cardamom
½ cup Hazelnut Milk or high-quality nut milk of your choice
½ teaspoon ground cinnamon
1. Combine the oats, hazelnuts, tahini, cacao powder, maple syrup, coffee, cardamom, hazelnut milk, and cinnamon in a large glass jar with a lid, or another airtight container, and stir to blend. Cover and refrigerate overnight.
2. In the morning, divide the overnight oats among four bowls and sprinkle with cacao powder and chopped toasted hazelnuts for garnish. Serve cold or at room temperature.
Hazelnut-Mocha Overnight Oats will keep, in an airtight container in the refrigerator, for 2 days.
Make It Magical
Add ½ teaspoon reishi, ½ teaspoon chaga, and 1 teaspoon cordyeeps to the mixture in Step 1.
probiotic rainbow brekkie bowl
I’ve been thinking a lot about plant-based alternatives to yogurt. Sure, there’s coconut yogurt, which I love. But coconut yogurt is not so simple to make at home because the good stuff requires cracking open fresh coconuts and letting the water and flesh mingle with probiotics for a couple of days to get that tangy fermented flavor. In considering other dishes that could stand in for yogurt, I came up with a method for making custards from different types of sweet potatoes, and then adding in probiotics (see here) at the end. The results are a slew of sweet potato–based probiotic custards in varying hues and flavors, like cinnamon-vanilla, coconut-matcha, and orange blossom–clove. This vibrant bowl combines all three.
serves 6
½ recipe Probiotic Coconut-Matcha Morning Custard
½ recipe Probiotic Spiced Purple Yam Morning Custard
½ recipe Probiotic Orange Blossom–Clove Morning Custard
1 recipe Vanilla Bean–Almond Milk or about 2 ½ cups high-quality nut milk of your choice
1 recipe Strawberry–Vanilla Bean Chia Jam
Shelled pistachios, hemp seeds, crushed freeze-dried raspberries, unsweetened shredded coconut, fresh berries, assorted edible flowers, and/or sliced fresh fruit such as papaya, kiwi, dragon fruit, and figs, for garnish (the more the merrier!)
1. Place each of the three custards in a separate medium bowl and dilute with almond milk, adding 1 tablespoon at a time, until the desired pastel hue is reached.
2. Divide the orange blossom custard among six serving bowls, placing it around the outer edge of each bowl and leaving the center of the bowl empty. Spoon the coconut matcha custard into the center half of the bowl. Spoon the purple yam custard into the other side of the bowl.
3. Divide the strawberry jam among the bowls, spooning some atop the custards, and garnish the bowls as desired. Serve immediately.

probiotic coconut-matcha morning custard
This creamy coconut–sweet potato custard takes its green shade from finely milled green tea leaves known as matcha. Since coconut has a fairly neutral flavor, it’s a great base for matcha to shine, adding a complementary hint of tropical sweetness, which enhances matcha’s grassy flavor. You can find many different grades of matcha powder for sale; I always splurge on the highest grade. While I don’t like judging anything based on price, with matcha it’s generally safe to assume that the higher the price, the higher the quality. You generally want to spend about $30 or more for a tin of 40 grams.
serves 4
1 tablespoon chia seeds
4 ½ teaspoons filtered water
2 medium orange sweet potatoes (approximately 2 ½ pounds each), peeled and cut into 2-inch cubes
¾ teaspoon salt (I like pink Himalayan salt)
1 cup full-fat coconut milk
2 tablespoons raw honey
1 tablespoon coconut oil
2 ½ teaspoons matcha powder
1 vanilla bean, seeds scraped out (reserve the pod for another use), or 1 ½ teaspoons pure vanilla extract
2 teaspoons probiotic powder
¼ cup puffed rice, for garnish (optional)
2 tablespoons crushed freeze-dried strawberries, for garnish (optional)
Edible flowers, for garnish (optional)
1. Place the chia seeds in a small bowl, add the filtered water, and stir together to combine. Set aside to thicken while you prepare the sweet potatoes.
2. Meanwhile, put the sweet potatoes in a large pot, add 3 cups of tap water, ½teaspoon of the salt, and bring to a boil over medium-high heat. Cook until the sweet potatoes are soft, about 12 minutes.
3. Remove the sweet potatoes with a slotted spoon and transfer them to the bowl of a food processor. Add the chia mixture, coconut milk, honey, coconut oil, remaining ¼ teaspoon of salt, matcha powder, and vanilla seeds and blend until smooth and custardy, about 3 minutes. Pour the custard into a large bowl, cover with plastic wrap, and chill in the fridge until cold, at least 2 hours and up to 2 days.
4. When ready to serve, stir in the probiotic powder and divide the custard among four bowls. Garnish with the puffed rice, crushed freeze-dried strawberries, and/or edible flowers, if using.
Probiotic Coconut-Matcha Morning Custard will keep, in an airtight container in the refrigerator, for 2 days.
probiotic Spiced purple yam morning custard
When cooking at home, my tuber of choice is the purple yam—a deeply purple-hued root with a thick, almost chewy flesh whose flavor is reminiscent of honey. I love roasting these yams and adding them to lunch tacos (see here), enjoying them as a snack, or pureeing them into a sweet dessert. In this application, I use the yams as the base for a probiotic-enriched breakfast custard that’s served chilled and consumed in the morning just like yogurt!
serves 4
1 tablespoon chia seeds
4 ½ teaspoons filtered water
2 medium purple yams (approximately 2 ½ pounds each), peeled and cut into 2-inch cubes
¾ teaspoon salt (I like pink Himalayan salt)
1 cup Vanilla Bean–Almond Milk or high-quality nut milk of your choice
1 tablespoon coconut oil
½ teaspoon coconut palm sugar
½ teaspoon ground cinnamon
2 teaspoons probiotic powder
4 teaspoons bee pollen, for garnish (optional)
4 teaspoons spirulina crunchies, for garnish (optional)
2 tablespoons coconut flakes, for garnish (optional)
2 teaspoons cacao nibs, for garnish (optional)
1. Place the chia seeds in a small bowl, add the filtered water, and stir together to combine. Set aside to thicken while you prepare the yams.
2. Meanwhile, put the yams in a large pot, add 3 cups of tap water and ½teaspoon of the salt, and bring to a boil over medium-high heat. Cook until the yams are soft, about 12 minutes.
3. Remove the yams with a slotted spoon and transfer them to a food processor. Add the chia mixture, almond milk, coconut oil, the remaining ¼ teaspoon of salt, coconut palm sugar, and cinnamon and blend until smooth and custardy, about 3 minutes. Pour the custard into a large bowl, cover it with plastic wrap, and chill in the fridge until cold, at least 2 hours and up to 2 days.
4. When ready to serve, stir in the probiotic powder and divide the custard among four bowls. Garnish with the bee pollen, spirulina crunchies, coconut flakes, and/or cacao nibs, if desired.
Probiotic Spiced Purple Yam Morning Custard will keep, in an airtight container in the refrigerator, for 2 days.
probiotic orange blossom–Clove morning custard
Foods flavored with flowers, such as rose, lavender, and orange blossom, tend to elicit love or hate responses. While some believe these ingredients taste soapy or perfumey, I am personally a big fan, especially of orange blossom for its pretty, exotic taste. Here, the orange blossom flavor comes from both the honey made from the flower’s pollen and the orange blossom water.
Orange blossom honey is pretty common, but if you can’t find it, feel free to sub in another type of honey and add an extra splash of the flower water.
serves 4
1 tablespoon chia seeds
4 ½ teaspoons filtered water
2 medium orange sweet potatoes (about 2 ½ pounds each), peeled and cut into 2-inch cubes
1 cup Vanilla Bean–Almond Milk, or high-quality nut milk of your choice
4 teaspoons orange blossom honey
2 teaspoons food-grade orange blossom water (see Note)
1 teaspoon ground cloves
¾ teaspoon salt (I like pink Himalayan salt)
2 teaspoons probiotic powder
Matcha-dusted hemp seeds (see here), for garnish (optional)
1. Place the chia seeds in a small bowl, add the filtered water, and stir together to combine. Set aside to thicken while you prepare the sweet potatoes.
2. Meanwhile, put the sweet potatoes in a large pot, add 3 cups of tap water and ½teaspoon of the salt, and bring to a boil over medium-high heat. Cook until the sweet potatoes are soft, about 12 minutes.
3. Remove the sweet potatoes with a slotted spoon and transfer them to the bowl of a food processor. Add the chia mixture, almond milk, honey, orange blossom water, cloves, and remaining ¼ teaspoon of salt and blend until smooth and custardy, about 3 minutes. Pour the custard into a large bowl, cover with plastic wrap, and chill in the fridge until cold, at least 2 hours and up to 2 days.
4. When ready to serve, stir in the probiotic powder and divide the custard among four bowls. Garnish with the matcha-dusted hemp seeds, if using.
Probiotic Orange Blossom–Clove Morning Custard will keep, in an airtight container in the refrigerator, for 2 days.
Note: Food-grade orange blossom water, also called orange flower water, is made by macerating bitter orange blossoms in water, and then distilling that liquid. It’s a popular ingredient in Middle Eastern cooking and should be used in moderation because it can have a powerfully floral flavor. Orange blossom water is sold at Middle Eastern markets, some grocery stores, and online.

breakfast tabbouleh bowl with avocado-grapefruit “hollandaise”
I like the idea of a breakfast salad. So many breakfast bowls start with grain as a base, but what about simply focusing on veggies? Here, I’ve taken tabbouleh—traditionally made with bulgur wheat—and I’ve subbed in cauliflower rice. As a dressing, in place of the typical lemon and olive oil, I’ve added a reworked take on the classic hollandaise sauce, which is made with avocado for creamy richness.
serves 4
1 cup Raw Cauliflower Rice
1 cup chopped fresh flat-leaf (Italian) parsley leaves
1 cup diced cucumber
1 cup diced tomato
2 tablespoons finely sliced scallion
1 teaspoon minced garlic
1 teaspoon fine sea salt
¼ teaspoon freshly ground black pepper
3 tablespoons fresh lemon juice
1 tablespoon olive oil
2 tablespoons chopped fresh dill
Avocado-Grapefruit “Hollandaise”
Carrot Lox, for serving
Combine the cauliflower rice, parsley, cucumber, tomato, scallion, garlic, salt, pepper, lemon juice, olive oil, and dill in a medium bowl and toss together. Divide the tabbouleh among four bowls. Add about 1 tablespoon of the “hollandaise” (or more or less to taste) and a few slices of carrot lox to each bowl. Serve immediately.
Breakfast Tabbouleh Bowl with Avocado-Grapefruit “Hollandaise” will keep, in separate airtight containers in the refrigerator, for 1 day.
calico beet waffles with coconut whip and tutti-frutti dust
These dark pink tie-dye waffles get their vibrant color from beets, which are rich in antioxidants and channel a sweet, earthy flavor. Chinese five-spice powder—a fragrant mix made from a combination of cinnamon, star anise, fennel, Sichuan pepper, and cloves—adds a subtly exotic taste to the beet batter, and both of those flavors pair well with the strawberry dust that’s sprinkled atop.
When making these waffles, I like to leave the outer inch or so of the waffle iron empty, only filling the center—when you close the iron, the batter spills out asymmetrically, creating a lacy, organic shape.
serves 3
2 cups brown rice flour
2 cups Hazelnut Milk or other high-quality nut milk of your choice
¼ heaping cup Beet Puree
2 tablespoons coconut oil, melted, plus extra for greasing the waffle iron
2 tablespoons coconut palm sugar
2 teaspoons Chinese five-spice powder
2 teaspoons pure vanilla extract
1 teaspoon baking powder
¼ teaspoon salt (I like pink Himalayan salt)
Coconut Whip, for serving
2 tablespoons Tutti-Frutti Dust, for garnish
1. Combine 1 cup of the rice flour, 1 chia egg, 1 cup of the hazelnut milk, 4 tablespoons of the beet puree, 1 tablespoon of the coconut oil, 1 tablespoon of the coconut palm sugar, the Chinese five-spice powder, 1 teaspoon of the vanilla, ½teaspoon of the baking powder, and ⅛ teaspoon of the salt in a medium bowl and whisk to blend into a dark pink batter.
2. In a second medium bowl, combine the remaining 1 cup rice flour, 1 chia egg, 1 cup hazelnut milk, 1 ½teaspoons beet puree, 1 tablespoon coconut oil, 1 tablespoon coconut palm sugar, 1 teaspoon vanilla, ½teaspoon baking powder, and ⅛ teaspoon salt and whisk to blend into a light pink batter.
3. Grease the waffle iron on top and bottom with coconut oil and heat the iron according to the manufacturer’s directions.
4. Ladle about ¼ cup or more of the dark pink batter onto the waffle iron, dropping small amounts haphazardly into the center of the iron and leaving some gaps in between. Fill in the gaps with about ¼ cup or more of the light pink batter (leave the outer inch or so of the waffle iron bare) so you have an organically shaped circle of batter in the center of the iron. Close the iron and cook the waffle until light brown and crisp on the outside, about 9 minutes, depending on your waffle iron.
5. Carefully remove the waffle from the iron, transfer it to a plate, and cover with aluminum foil to keep warm. Repeat with the remaining batters (it should make 3 waffles).
6. Serve the waffles warm, topping each with 2 tablespoons of coconut whip and a sprinkling of the tutti-frutti dust.
Makes about ⅓ cup
1 medium red beet, unpeeled and scrubbed
1. Fill a medium pot halfway with tap water and add the beet. Bring to a boil over medium-high heat, then lower the heat to medium and simmer until the beet is soft when pierced with a fork, about 30 minutes. Remove the beet from the water with a slotted spoon and set aside to cool to room temperature.
2. Using your hands, slip the skin off the cooled beet (it will come off easily). Transfer the beet to a food processor and blend until the beet is pureed, about 20 seconds. If needed, add water, a teaspoon at a time, until a puree forms.
Beet Puree will keep, covered in the refrigerator, for up to 5 days.
mixed grain pancakes with cardamom–pomegranate seed syrup
When I lived in Venice, California, my go-to weekend brunch spot was a place on Abbot Kinney named Axe. I am heartbroken that Axe is now closed, but the memory of the Cali-Japanese–inspired café lives on through this pancake. Axe was famous for its nine-grain pancake, a single, inch-thick number that filled an entire entrée-size plate and came crowned with a matchbox-size cut of butter and some maple syrup. As someone who was entirely obsessed with Axe’s pancake, and couldn’t visit the place without ordering it, this version comes very close, even without animal ingredients or gluten. Note, you’ll have to precook the grains and then incorporate them into the batter. It’s also a great way to repurpose any leftover grains you might have on hand!
Serves 3
4 ½ teaspoons filtered water
1 tablespoon chia seeds
⅔ cup cooked millet
⅔ cup cooked white quinoa
⅔ cup amaranth flour
⅓ cup gluten-free all-purpose flour
⅓ cup brown rice flour
⅔ cup coconut palm sugar
¼ cup whole flaxseeds
2 tablespoons poppy seeds
2 tablespoons psyllium husks
1 teaspoon baking powder
½ teaspoon salt (I like pink Himalayan salt)
¼ teaspoon baking soda
1 cup high-quality almond milk, preferably homemade (see here)
About ½ cup coconut oil, melted
2 teaspoons pure vanilla extract
3 tablespoons pure maple syrup
1 teaspoon ground cardamom
⅔ cup fresh pomegranate seeds
¼ cup coconut cream (see here), for serving
3 tablespoons raw or roasted shelled pistachios, coarsely chopped, for garnish
1. Combine the filtered water and chia seeds in a small bowl and stir together to mix. Set aside in the fridge to thicken while you make the batter.
2. Place the millet, quinoa, amaranth flour, gluten-free all-purpose flour, rice flour, coconut palm sugar, flaxseeds, poppy seeds, psyllium husks, baking powder, salt, and baking soda in a large bowl and stir together to combine.
3. Stir together the almond milk, 3 tablespoons of the melted coconut oil, the vanilla, and the reserved chia mixture in a medium bowl. Pour the almond milk mixture into the millet mixture and stir together to form a thick batter.
4. Stir together the maple syrup, cardamom, and pomegranate seeds in a small bowl to combine; set aside.
5. Warm 1 tablespoon of the coconut oil in a small frying pan over medium heat. Add one third of the batter and, using the back of a spoon, press it into a circle about ¾ inch thick and 5 to 6 inches in diameter. Cook until the pancake is light brown on the bottom and set on top, about 4 minutes. Using a large spatula, carefully flip the pancake, adding a little bit more coconut oil to the pan if needed. Cook until the pancake is light brown, 3 minutes more. Using the spatula, carefully transfer the pancake to a large plate and cover it with aluminum foil to keep warm. Repeat with the remaining batter, adding more coconut oil to the pan each time.
6. Place each pancake on a plate and spread the coconut cream on top. Spoon some of the pomegranate seeds and maple-cardamom syrup over the cream, and sprinkle with the pistachios. Serve immediately.

PM
pickled chickpeas and dandelion greens salad
Eat your . . . weeds? You probably don’t really think about eating those yellow flowers that might grow in your front yard, or the green leaves attached. However, dandelions are entirely edible—you can eat the greens raw in a salad, or even sautéed. They’re generally for sale in the spring at farmers’ markets, and add a bitter vegetal flavor to dishes. Look for the young leaves, which are less aggressively bitter than the larger, older ones. And if you’re unable to find dandelion greens, you could sub in other bitter leaves like radicchio.
This salad mixes pickled chickpeas with a spicy mustard vinaigrette that tempers the sharpness of the greens. I’ve added beets to the pickling brine for fun, which tints the chickpeas a pale pink hue. You can, of course, omit this step. The longer you pickle the chickpeas, the more magenta they will become. For a super-bright pink, pickle them overnight. And in the morning when you strain the pickling brine, hang onto it and then use it to pickle sliced white onions, and dye them bright pink, too!
serves 4
For the Pickled Chickpeas
1 cup apple cider vinegar
2 tablespoons plus 1 ½ teaspoons raw honey
4 ½ teaspoons fine sea salt
1 small raw red beet, unpeeled and scrubbed (optional but recommended)
2 cups cooked chickpeas
For the Vinaigrette and Salad
¼ cup Dijon mustard
¼ cup vegetable oil
2 tablespoons apple cider vinegar
2 tablespoons raw honey
½ teaspoon fine sea salt
¼ teaspoon freshly ground black pepper
¼ small shallot, chopped
¼ teaspoon grated fresh ginger
2 tablespoons filtered water
6 cups dandelion greens or other bitter greens
Edible flowers, for garnish (optional)
1. Make the pickled chickpeas: Combine the apple cider vinegar, honey, salt, and beet, if using, in a medium pot and bring to a boil over medium-high heat. Remove from the heat and let cool to room temperature.
2. Place the chickpeas in a medium bowl and add the cooled pickle brine. Let sit at room temperature for 3 hours, or covered in the refrigerator overnight. Strain the chickpeas from the brine (save the brine for another use, if you like).
3. Make the vinaigrette: Combine the mustard, oil, apple cider vinegar, honey, salt, pepper, shallot, ginger, and filtered water in a blender or food processor and blend until the dressing looks creamy and white, about 1 minute. Set aside.
4. Place the dandelion greens in a large bowl, add the dressing to taste, and toss to coat the greens. Add the chickpeas and toss again.
5. Divide the salad among four plates and sprinkle the togarashi atop each. Garnish with edible flowers, if using. Serve immediately.
Cauliflower rice is kind of amazing. Just like regular rice, it is a blank slate to which you can add a bevy of flavors. However, where cauliflower rice has an edge over regular rice is that it’s far lower in calories and carbs and it’s naturally rich in fiber and vitamins. Also, unlike regular rice, it can be consumed both raw and cooked (see Variations).
While places like Trader Joe’s now sell frozen and refrigerated cauliflower rice, it’s a cinch to make your own—all you need is cauliflower and a food processor or box grater. I love to add cauliflower rice—raw or cooked—to tacos and salad, or simply eat it on its own as a side. Oh, and when in season, I mix white cauliflower with purple and Romanesco, the pretty green kind you’ll find at farmers’ markets during the summer, which makes for a colorful medley (see Rainbow Cauliflower Rice).
makes about 4 cups
1 head (about 2 pounds) cauliflower (I like to use a mix of colors whenever possible)
Wash and dry the cauliflower. Pull off and discard the outer leaves and cut the head into 4 quarters. If using a box grater, position it over a large bowl and grate the cauliflower to the size of rice. Alternatively, divide the quarters into florets, place half of them in the bowl of the food processor, and process until the cauliflower is the size of rice, about 20 seconds, then transfer to a large bowl; repeat with the remaining cauliflower.
Raw Cauliflower Rice will keep, in an airtight container in the refrigerator, for 2 days, or in the freezer for about 3 months. Thaw before using.
Variations
Cooked Cauliflower Rice: Heat ½ cup olive oil in a large pan over medium-high heat, add the cauliflower rice and salt and pepper to taste and cook, stirring frequently, until the cauliflower is tender and loses some opacity, about 8 minutes.
Rainbow Cauliflower Rice: If you’re going to mix different colors of cauliflower, use equal portions of each, then proceed with the recipes to make raw or cooked cauliflower rice.
turmeric- and cumin-spiced cauliflower rice
This earthy yellow rice channels Indian cooking thanks to the addition of turmeric and cumin. The flavor is exotic but not overpowering, and you can eat this rice on its own, tossed with salad, wrapped into a breakfast burrito (a personal favorite), or many of the other ways you’d typically consume rice.
serves 4 to 6
½ cup olive oil
4 cups Raw Cauliflower Rice
5 teaspoons ground cumin
1 ½ teaspoons fine sea salt, plus extra as needed
1 teaspoon ground coriander
1 teaspoon ground turmeric
½ teaspoon freshly ground black pepper, plus extra as needed
2 tablespoons fresh lemon juice
Heat a large pan over medium-high heat and add the olive oil. When the oil is hot, add the cauliflower, cumin, 1 ½teaspoons of salt, coriander, turmeric, and pepper and stir to combine. Cook, stirring frequently, until the cauliflower is cooked through and tender, about 8 minutes. Stir in the lemon juice, season to taste with additional salt and black pepper, and serve hot.
Turmeric- and Cumin-Spiced Cauliflower Rice will keep, in an airtight container in the refrigerator, for 2 days. Reheat leftover rice before serving.
By now I’ve probably made versions of this recipe close to one hundred times. I’ve topped this broccoli with Parmesan cheese, squeezed lemon atop, and mixed in toasted almonds—sometimes separately, sometimes all at once. The dish is especially addictive because as the broccoli roasts in the oven, it gets crisp and a bit caramelized from the oil in which it’s tossed. I love this recipe because it’s easy, and can be served warm or cold. Which means you can prep it several hours before your dinner party (or just dinner) and have it ready to go. If you have leftovers, throw the broccoli into a salad or mix it with cooked quinoa the next day.
serves 4
1 large head broccoli, trimmed and cut into florets with stems attached
6 tablespoons olive oil
1 teaspoon fine sea salt, plus extra as needed
½ teaspoon freshly ground black pepper, plus extra as needed
1 tablespoon apple cider vinegar
1 teaspoon minced fresh garlic
½ teaspoon crushed red pepper flakes
1. Preheat the oven to 450°F.
2. Toss together the broccoli, olive oil, salt, and black pepper on a rimmed baking sheet. Roast, tossing occasionally, until tender and golden brown, about 25 minutes.
3. Drizzle the vinegar evenly over the hot broccoli, sprinkle it with the minced garlic and red pepper flakes, and toss on the baking sheet to coat. Season to taste with more salt and black pepper. Serve warm or cold.
Oil and Vinegar Broccoli will keep, in an airtight container in the refrigerator, for up to 2 days.
kale salad with Sunflower Seeds, Golden Raisins, and lemon-tahini dressing

Despite the ubiquity of kale salads, I love the leaf nonetheless, and I often find myself craving it while on the road for long stretches of time. My ideal salad is always made from a base of kale. Here you’ll find subtle umami from the crunchy sunflower seeds and tahini, balanced by the occasional sweetness from golden raisins.
Pro tip: Make this salad several hours before you plan to eat it. The kale is a sturdy-leafed green, and the acidity in the lemon juice helps soften it while it sits. The recipe calls for removing the tough stems from the leaves, but fear not—you can save them for use in another dish (see here).
serves 4
About ¾ bunch lacinato kale, stems removed (reserve them for another use) and leaves shredded (to equal 4 cups softly packed, shredded leaves)
3 tablespoons olive oil
1 tablespoon plus 1 teaspoon tahini (sesame paste)
1 tablespoon fresh lemon juice
¼ teaspoon fine sea salt
¼ teaspoon raw honey
¼ teaspoon gluten-free soy sauce
⅓ cup roasted, unsalted sunflower seeds
¼ cup golden raisins
Place the shredded kale in a large bowl. Combine the olive oil, tahini, lemon juice, salt, honey, and soy sauce in a small bowl and whisk to emulsify. Drizzle the dressing over the kale and use your hands to massage it into the leaves so that the dressing is evenly distributed. Sprinkle the sunflower seeds and golden raisins atop and toss lightly. Cover and refrigerate for a few hours before serving.
Kale Salad with Sunflower Seeds, Golden Raisins, and Lemon-Tahini Dressing will keep, in an airtight container in the refrigerator, overnight.
It wasn’t until recently that I started liking lox. Growing up, many of my friends customarily ate those slices of cured, smoked salmon atop bagels swiped with cream cheese, but it wasn’t really my thing. Have you heard that your taste buds change every seven years? Somewhere along the line, in the last few years, I started enjoying the salty, fishy flavor of lox. In considering a plant-based alternative to mimic that aquatic taste, I’ve brined carrot slices in a spicy and acidic nori marinade. This process takes a few days, but the prep is quick and easy and then you just let the carrots hang out. And while their texture isn’t quite the same as lox—more like a slippery, softer, but still al dente, carrot slice—I’m still loving the result. This carrot lox is super versatile, and can be added to a breakfast or lunch bowl, or layered atop toast.
serves 8
4 large carrots, trimmed and peeled
1 sheet toasted nori
2 tablespoons plus 1 teaspoon rice vinegar
¼ cup gluten-free soy sauce
4 ½ teaspoons olive oil
1 ½ teaspoons chopped fresh dill
½ teaspoon chipotle powder
½ teaspoon fresh lemon juice
¼ teaspoon fine sea salt
¼ teaspoon freshly ground black pepper
1. Preheat the oven to 350°F.
2. Using a mandoline (or a carrot peeler), shave the carrots lengthwise into strips about ¹⁄₁₆ inch thick. Transfer the carrot shavings to a piece of aluminum foil, arranging them in a single layer (more or less) on one half and then folding the other half over and crimping the edges to make a packet. Place the carrot packet in the oven and roast until the carrots are tender, but not falling apart, about 1 hour. Transfer the carrot packet to the fridge and chill for 1 hour.
3. Meanwhile, combine the nori, rice vinegar, soy sauce, olive oil, dill, chipotle powder, lemon juice, salt, and black pepper in a blender or food processor and blend until everything is incorporated and the nori is broken down, about 2 minutes.
4. Remove the carrots from the fridge and transfer the slices to a medium bowl. Add the marinade and stir so that the carrots are completely coated. Arrange the carrots on a flat serving dish so they overlap partially like shingles; pour the remaining marinade on top. Cover with plastic wrap and chill in the fridge for 3 days (or up to 5) before serving.
Carrot Lox will keep, in an airtight container with its marinade, in the refrigerator for up to 2 days.
Crispy Coconut Lentils with Lime
This is one of my favorite recipes in the book. Think crispy lentils with a subtle coconut flavor and bright notes of lime, plus a savoriness from the Pastrami Spice Blend—this dish bursts with flavor. I love to eat these lentils on their own, built into a veggie bowl, or even as a garnish on other dishes. They’re absolutely addictive!
serves 4
2 teaspoons fine sea salt
2 cups black lentils, rinsed and picked over to remove any debris
¼ cup coconut oil
4 teaspoons Pastrami Spice
¼ cup fresh lime juice
2 teaspoons freshly grated lime zest
¼ teaspoon freshly ground black pepper
1. Preheat the oven to 450°F.
2. Heat 4 cups of tap water in a large pot over medium-high heat, add 1 teaspoon of the salt, and bring to a boil. Add the lentils, reduce the heat to medium, and simmer until the water has almost completely evaporated and the lentils have softened and are about 90 percent cooked but still al dente, about 20 minutes. Stir in the coconut oil.
3. Spoon the lentils onto a rimmed baking sheet and smooth them out into a single even layer. Roast, stirring every 10 minutes, until the lentils are crispy, about 30 minutes.
4. Transfer the lentils to a medium bowl and stir in the Pastrami Spice blend, lime juice, lime zest, pepper, and remaining 1 teaspoon of salt. Serve hot.
Crispy Coconut Lentils with Lime will keep, in an airtight container in the refrigerator, for 2 days.
Roasted Purple Cabbage with Cumin and Cilantro
Channeling a Middle Eastern flavor profile thanks to the trifecta of cumin, pomegranate molasses, and cilantro, this tasty cabbage has spice, freshness, and acidity. One of my favorite things about cooking with naturally purple foods is that when you introduce an acid, like lemon juice, the purple turns to pink. So if you serve this cabbage on a plate, when you squeeze fresh lemon juice atop, the cabbage will sport a cool pink-purple tie-dye look.
A couple of notes on this recipe. If you don’t like spice in your food, leave out the cayenne. If you can’t find pomegranate molasses (which is really delicious, I should add), then you can leave it out and just make a dressing from lemon and garlic.
serves 5
1 medium head purple cabbage
5 tablespoons olive oil, plus extra as needed
2 teaspoons ground cumin
1 ⅛ teaspoon cayenne pepper
⅓ cup fresh lemon juice, or more to taste
2 ½ teaspoons pomegranate molasses (see Note)
3 garlic cloves, minced
¼ cup fresh cilantro leaves, chopped
2 teaspoons freshly grated lemon zest
Coarse sea salt
1. Preheat the oven to 400°F. Line a rimmed baking sheet with parchment paper.
2. Slice the cabbage through the core, cutting from top to bottom into 5 slabs each about 1 inch thick (save the two rounded outer slices for another use). Arrange the cabbage slabs on the prepared baking sheet and drizzle each slice with about 1 tablespoon of the olive oil, flipping each piece over to coat both sides.
3. Stir together the cumin and cayenne in a small bowl. Sprinkle the spice blend evenly over the cabbage slices, using your fingers to massage the oil and spices into the cabbage segments. If the cabbage looks dry, add another teaspoon or so of olive oil to coat it.
4. Bake until the cabbage slices are tender when pierced with a fork, about 30 minutes.
5. Meanwhile, put the lemon juice, pomegranate molasses, and garlic in a small bowl and stir to combine.
6. Remove the cabbage slices from the oven and transfer them to a serving platter. Drizzle the lemon juice mixture evenly over the cabbage slices, sprinkle them with the cilantro and lemon zest, and season to taste with salt. Serve immediately.
Roasted Purple Cabbage with Cumin and Cilantro will keep, in an airtight container in the refrigerator, for 2 days. Reheat leftovers in the oven.
Note: Pomegranate molasses is sold at some grocery stores, Middle Eastern markets, and online at Amazon.com.
T his recipe is inspired by the typical spice blend that coats the outside of pastrami, giving the meat its signature savory flavor. Here, rather than rubbing the blend into beef, you’re using it to coat beets. I like to take these beet slices and layer them on avocado toast, add them to salads, or use them to build a market plate. Note, the pastrami spice mix recipe makes more than is needed to coat the beets. Store the leftover spice blend in a glass jar and sprinkle it directly atop your favorite dip or use it to spice up roasted veggies.
makes enough for about 20 toasts; serves about 10
1 teaspoon mustard seeds
1 teaspoon coriander seeds
1 tablespoon coconut palm sugar
1 tablespoon garlic powder
1 tablespoon onion powder
1 teaspoon garam masala
1 teaspoon freshly ground black pepper
2 large cooked beets, trimmed and peeled (see here)
1. Using a mortar and pestle or a food processor, blend the spices until they are coarsely ground and combined (they should not be completely broken down into a fine dust).
2. Preheat the oven to 350°F. Line a rimmed baking sheet with parchment paper.
3. Using a mandoline (or a sharp chef’s knife), slice the beets into thin rounds about ⅛ inch thick. Arrange the beet slices on the prepared baking sheet so that the slices overlap one another halfway, like shingles. Sprinkle 4 teaspoons of the pastrami spice blend liberally atop the beets (store the leftover spice blend in a glass jar; it will keep in an airtight container at room temperature for 6 months).
4. Bake until the beet slices look dry and shriveled (they will be chewy like fruit leather), about 30 minutes. Let the beet slices cool on the baking sheet before using.
Beet Pastrami will keep, in an airtight container in the refrigerator, for up to 3 days.

spiralized zucchini with basil, mint, and toasted walnuts
For me, summers are synonymous with basil pesto pasta—a dish my father would make without fail every June through August, thanks to the abundance of spicy basil leaves available out east on Long Island. My mother grows five types of basil at our summer home, so sometimes the pesto would be flavored traditionally Italian, while other times Thai basil would offer a twist. Regardless of the type, to me, basil equals summer, which equals good times. In an effort to offer up a cleaner riff on pesto pasta, I’ve subbed in zucchini spirals for spaghetti, and added a bit of mint for extra freshness. If you don’t have a spiralizer at home (they’re available online for about $30), you can use a carrot peeler to shave zucchini into wide ribbons.
serves 4
2 medium-large zucchini (to make about 2 cups of spirals)
1 cup packed thinly sliced fresh basil leaves
½ cup packed thinly sliced fresh mint leaves
2 tablespoons plus 1 ½ teaspoons extra-virgin olive oil
2 tablespoons fresh lemon juice
2 teaspoons minced fresh garlic
½ teaspoon crushed red pepper flakes
½ teaspoon fine sea salt
¼ teaspoon freshly ground black pepper
½ cup toasted walnuts (see here), coarsely chopped
1. Using a spiralizer, spiralize the zucchini into spaghetti-like strands (alternatively, use a carrot peeler to shave the zucchini into long, thin strips). Place the strands in a large bowl, add the basil and mint leaves, and toss to incorporate.
2. Combine the olive oil, lemon juice, garlic, red pepper flakes, salt, and black pepper in a small bowl and whisk briefly to emulsify.
3. Pour the dressing over the zucchini mixture and toss to distribute it evenly. Sprinkle the toasted walnuts atop, mix, and serve.
Spiralized Zucchini with Basil, Mint, and Toasted Walnuts will keep, in an airtight container in the refrigerator, for 2 days. Bring to room temperature before serving.
This vibrant soup—named after the colorful Indonesian fabric it resembles—is perfect for summer because it can be eaten warm or at room temperature, and its creaminess comes from protein-rich chia seeds instead of heavy carbs like rice or potatoes. Thanks to the miso, sesame oil, and rice vinegar, it takes on an Asian flavor, thus transforming cabbage, which can taste rather bland, into a bright, umami-rich meal. For the soup’s garnish, I like to squeeze lime atop, which adds acidity and stains the surface a fun pink hue. Then I sprinkle on togarashi, also known as shichimi togarashi, a common Japanese spice blend made from seven ingredients.
serves 4
3 tablespoons fresh lime juice
2 tablespoons chia seeds
4 cups plus 3 tablespoons filtered water
4 cups chopped purple cabbage
4 garlic cloves, peeled
2 shallots, peeled
½ teaspoon fine sea salt
¼ teaspoon freshly ground black pepper
4 teaspoons white miso paste (see here)
2 teaspoons raw honey
2 tablespoons rice wine vinegar
2 tablespoons olive oil
1 teaspoon toasted sesame oil
Seeded Togarashi or store-bought (see Note), for garnish
Freshly grated orange and/or lime zest, for garnish
Lime wedges, for serving
1. Place the lime juice, chia seeds, and 3 tablespoons of the filtered water in a small bowl and stir together to combine. Set aside to thicken while you assemble the soup.
2. Heat the remaining 4 cups of filtered water in a large pot over medium-high heat. Add the cabbage, garlic, shallots, salt, and pepper. Lower the heat to medium and simmer, uncovered, until the cabbage is tender, about 20 minutes.
3. Carefully transfer the cabbage, garlic, shallots, and simmering liquid to a blender or food processor. Add the miso paste, honey, rice wine vinegar, olive oil, and sesame oil and puree until the mixture is smooth and velvety, about 3 minutes.
4. Divide the soup among four bowls and spoon one-quarter of the chia seed mixture into the center of each bowl. Garnish with togarashi, lime zest, and orange zest.
Creamy Batik Soup will keep, in an airtight container in the refrigerator, for 2 days.
Note: If you don’t want to make your own togarashi, you can buy it in Asian food stores, at Whole Foods, and online at Amazon.com.


Sweet + Sour Rainbow Radish Tacos
For a light yet still satisfying take on tacos, this colorful version replaces the traditional corn tortillas with large, thinly sliced radishes. Inside you’ll find a bit of creamy tahini, wedges of baked sweet potato, kimchi for acidity, and a hit of togarashi for nutty spice. Try these petite tacos for breakfast, lunch, or a midday snack.
makes 8 small tacos
1 orange sweet potato, (about 4 inches long), unpeeled and scrubbed
¼ teaspoon fine sea salt
¼ teaspoon cayenne pepper
⅛ teaspoon freshly ground black pepper
1 large black radish, 3 to 4 inches in diameter, scrubbed and unpeeled
4 teaspoons tahini (sesame paste)
¾ cup warm Turmeric- and Cumin-Spiced Cauliflower Rice (see Notes)
1 avocado, peeled, pitted, and sliced lengthwise into 8 wedges
8 tablespoons kimchi (see Notes)
4 teaspoons Seeded Togarashi, or store-bought
Lime wedges, for garnish
1. Preheat the oven to 350°F.
2. Prick the sweet potato all over with a fork and place it on a baking sheet. Bake until soft, about 25 minutes. Transfer the sweet potato to a cutting board and carefully slice it lengthwise into 8 long wedges. Sprinkle the wedges with the salt, cayenne, and black pepper.
3. Meanwhile, fill a large bowl with tap water and add a cup of ice. Using a chef’s knife or mandoline, slice the radish into very thin rounds, each about ¹⁄₁₆ inch thick. Stack the slices into two stacks, mold them into a taco shape, then tie them in place with butcher's twine (or unwaxed, unflavored dental floss in a pinch). Submerge them in the ice bath to firm up (this will help them hold their shape), at least 10 minutes or up to an hour.
4. When the sweet potato wedges are ready, remove the radish taco shells from the ice bath, snip off the string, and pat them dry with a paper towel. Assemble the tacos one by one: Smear ½teaspoon of the tahini in the center of each taco shell, and sprinkle 4 ½teaspoons of the cauliflower rice on top. Layer on 1 sweet potato wedge and 1 avocado wedge, then top with 1 tablespoon of the kimchi and sprinkle with ½teaspoon of the togarashi.
5. Serve the tacos immediately, a few to a plate, garnished with lime wedges.
Notes: I like to make the rice with purple cauliflower or a combination of green Romanesco and white and purple cauliflowers to amp up the rainbow effect. Feel free to make it ahead of time and reheat it in a small pan over medium heat or in the microwave.
Kimchi, a staple in Korean cooking, is a salty-sour fermented vegetable dish. It’s available in the Asian foods aisle at most supermarkets.
Bean Thread Noodle Salad with Miso-Arugula Pesto
This recipe was born by accident. I had set out to make a vegan arugula-basil pesto, and, midway through, I decided that the sauce was lacking the salty umami traditionally added by an aged cheese like Parmesan or Pecorino Romano. I paused for a moment, thinking about nonanimal ingredients that could add a similar flavor, and miso paste popped into my mind. Miso and shiso, sometimes described as “Japanese basil,” are a happy match, and as it turns out, Italian basil and miso play nicely, too. You want your pesto to err slightly on the salty side because you’ll be tossing it with noodles and also a decent amount of fresh arugula leaves.
Personally, I love the slippery, chewy texture of bean thread noodles in this dish, but if you can’t find them, try subbing in sweet potato noodles, or even soba (if you’re avoiding gluten, just make sure that your soba is made from 100 percent buckwheat and not the more common 80:20 buckwheat-wheat mix). While this recipe makes three entrée-size portions, if you want to make this for a larger group, just double the measurements!
serves 3
1 package (about 2 ounces) dried bean thread noodles
¼ cup plus 2 tablespoons pine nuts, toasted (see here)
1 tablespoon nutritional yeast (see Note)
4 cups packed fresh baby arugula leaves
1 ½ cups packed fresh basil leaves
4 ½ teaspoons red miso paste
1 tablespoon extra-virgin olive oil
1 garlic clove, peeled
¼ teaspoon fine sea salt, plus extra as needed
Freshly ground black pepper
Juice of 1 lemon
1. Fill a medium pot halfway with tap water and bring to a boil over high heat. Remove the pot from the heat and add the bean thread noodles. Let the noodles steep, stirring occasionally, until they’re soft and chewy, about 20 minutes. Drain the noodles in a colander and set them aside.
2. Combine ¼ cup of the pine nuts, the nutritional yeast, 2 cups of the arugula leaves, the basil leaves, miso paste, olive oil, garlic, and the ¼ teaspoon salt in a food processor and blend until everything is incorporated and the sauce looks creamy and green, about 90 seconds. Scrape down the side of the bowl with a spatula and blend again for another 20 seconds.
3. Meanwhile, roughly chop the remaining 2 tablespoons of pine nuts. Transfer the noodles to a large bowl and add the remaining 2 cups of arugula leaves. Pour the pesto over all, tossing with tongs so the pesto is evenly distributed between the noodles and arugula. Season to taste with salt and pepper.
4. Just before serving, sprinkle the chopped pine nuts on the noodles and squeeze lemon juice atop. Toss again and serve warm or at room temperature.
Bean Thread Noodle Salad with Miso-Arugula Pesto will keep, in an airtight container in the refrigerator, for up to 2 days.
Note: Nutritional yeast, which comes in small, delicate yellow flakes, is a type of deactivated (i.e., dead) yeast that lends dishes a nutty, cheesy, umami-rich flavor. It’s commonly sprinkled atop salads and adds a savory flavor to sauces (it’s also surprisingly delicious on popcorn).

I grew up eating a ton of Asian food, mainly because it’s what my father loves. Whenever my family would go out for Korean food, my requisite dish was always japchae, a dish made from chewy, slippery sweet potato noodles combined with a mix of sautéed veggies and usually beef, and tossed in a sauce made from soy sauce, sesame oil, and just a touch of sugar. Sweet potato noodles remind me a bit of kelp noodles, which are made from kelp seaweed. I love kelp noodles because they function like pasta, but have almost zero calories (an entire 12-ounce bag has 18 calories), and they take on the flavor of whatever you mix them with.
I’ve cooked with kelp noodles many times, and after a few missteps, I’ve figured out how to make them perfectly. Straight out of the bag the noodles feel brittle, but the pro move is to toss them raw with your sauce of choice, and let the sauced noodles sit for about 3 hours; they will soften and become chewy. I’ve found that sauces with acid, like tomato sauce, work especially well. Here I’ve combined kelp noodles with the elements of japchae (minus the meat)—two of my favorite foods in one dish. As I mentioned, make these a few hours before you’re planning to serve and let them marinate.
serves 4 to 6
1 package (12 ounces) kelp noodles
3 teaspoons toasted sesame oil
2 tablespoons plus 1 teaspoon apple cider vinegar
2 tablespoons gluten-free soy sauce
1 teaspoon coconut palm sugar
¼ teaspoon freshly ground black pepper
2 tablespoons vegetable oil
2 cups thinly sliced green cabbage leaves
1 cup raw carrot matchsticks (from about ½ scrubbed, unpeeled carrot)
7 fresh shiitake mushrooms, cleaned, trimmed, and thinly sliced
4 scallions, roots trimmed, white and light green parts cut into 2-inch lengths
½ teaspoon minced garlic
1 cup packed fresh baby spinach leaves
2 teaspoons toasted sesame seeds (see here)
Olive oil for reheating (optional)
1. Place the kelp noodles in a large bowl. Rinse the noodles several times with tap water and drain well. Using kitchen scissors, roughly cut the noodles into 4-inch lengths. Add the sesame oil and toss to coat. Set aside.
2. Combine the apple cider vinegar, soy sauce, coconut palm sugar, and pepper in a small bowl and stir together with a fork. Set aside.
3. Heat a large pan over medium heat and add the vegetable oil. When the oil is hot, add the cabbage and carrot and sauté, stirring frequently, until the vegetables are shiny and slightly wilted, about 4 minutes. Add the mushrooms, scallions, and garlic and sauté, stirring frequently, until the scallions begin to wilt, about 4 more minutes. Turn off the heat and add the spinach and half of the reserved sauce and stir to combine. The spinach should wilt slightly
4. Pour the vegetable mixture over the kelp noodles in the bowl, add the remaining sauce, and toss to coat. Add the sesame seeds and toss again. Let the noodles sit for 3 hours to soften.
5. Serve at room temperature or reheat in a large pan with a splash of olive oil over medium heat until just warm.
Kelp Noodle Japchae will keep, in an airtight container in the refrigerator, for up to 2 days.

Years ago I visited a restaurant in New York City named Felidia. There, for the first and only time in my life, I noticed a pasta dish on the menu that called for bucatini cooked in red wine, and out of pure curiosity I ordered it. It was incredible—the acidity in the pasta balanced by a rich sauce of melted butter, cheese, and black pepper. Inspired by that dining experience long ago, I’ve reworked that recipe into the following, which is dairy- and gluten-free.
I like to use Banza brand chickpea spaghetti (which is sold at natural foods supermarkets like Whole Foods) because it most closely approximates a classic pasta texture, but you could try other alt-pastas like those made from quinoa.
serves 3
Fine sea salt
½ pound chickpea spaghetti (see headnote)
¼ cup plus 1 tablespoon extra-virgin olive oil
½ tablespoon minced garlic
¼ teaspoon crushed red pepper flakes
Freshly ground black pepper
2 cups dry red wine (preferably vegan), such as Malbec
¼ cup finely chopped fresh flat-leaf (Italian) parsley leaves
¼ cup pine nuts, toasted (see here)
5 teaspoons fresh lemon juice, plus extra as needed
Freshly grated zest of 1 lemon
1. Bring a large pot of tap water to a boil over high heat. Salt it generously, add the pasta, and cook, stirring occasionally so it doesn’t stick, until barely pliable and still hard in the center, about 1 minute. Drain in a colander.
2. Meanwhile, heat a large pan over medium-low heat and add ¼ cup of the olive oil, the garlic, and red pepper flakes. When the garlic begins to brown, sprinkle it with a pinch each of salt and black pepper, add the red wine, and bring to a boil. Add the parboiled pasta and cook, stirring occasionally, until the pasta is al dente and has absorbed the red wine, about 4 minutes. Remove the pan from the heat.
3. Add the remaining 1 tablespoon of olive oil, the parsley, pine nuts, lemon juice and zest, and stir to combine. Taste and add more lemon juice as needed. Serve immediately.
beet falafel with rose-pickled veggies
Rather than simply serving a falafel made from chickpeas, I’ve added beets to make a fun red version of the Middle Eastern staple. Serve them on a plate beside the rose-pickled veggies—in a colorful combo of carrots, purple cabbage, and cucumber—or throw them all over cauliflower rice for a composed bowl. I really love the soft aromatic flavor of the pickle brine, which also lends itself well to other ingredients such as beans or onions. Once you’ve consumed all the pickles, feel free to experiment with the brine and add in other types of vegetables. (Note that you’ll need to make the pickles about an hour in advance.)
makes about 16 patties; serves 8
Coconut oil, for greasing the pan
⅓ cup fresh cilantro leaves
⅓ cup fresh flat-leaf (Italian) parsley leaves
⅓ cup fresh lemon juice
2 tablespoons seltzer water
2 cups cooked chickpeas
1 tablespoon ground psyllium husks
1 teaspoon freshly grated lemon zest
1 garlic clove, peeled
¾ cup chopped, peeled, cooked red beet (see here)
¼ teaspoon ground cumin
⅛ teaspoon ground coriander
⅛ teaspoon cayenne pepper
⅛ teaspoon baking soda
1 ½ teaspoons fine sea salt, or more to taste
⅛ teaspoon freshly ground black pepper
Rose-Pickled Veggies (recipe follows), for serving
1. Preheat the oven to 450°F. Grease a rimmed baking sheet with coconut oil.
2. Combine the cilantro, parsley, lemon juice, seltzer water, chickpeas, psyllium husks, lemon zest, garlic, beet, cumin, coriander, cayenne, baking soda, salt, and pepper in a food processor and process until smooth, scraping down the side as needed, about 90 seconds. Transfer the falafel mixture to a bowl, cover it, and refrigerate to bind the dough, about 20 minutes.
3. Remove the dough from the fridge. Scoop about 2 tablespoons of the dough into your hands and form it into a patty about ½inch thick. Place it on the prepared baking sheet and repeat with the remaining dough.
4. Bake the patties for 15 minutes, then flip them with a spatula and continue baking until they look dry, about 15 minutes more.
5. Serve immediately, with the rose-pickled veggies.
Beet Falafel will keep, in an airtight container in the refrigerator, for 2 days. Before serving, reheat the patties in a 350°F oven for 10 minutes.
Rose-Pickled Veggies
Makes about 1 cup
½ cup white distilled vinegar
⅓ cup apple cider vinegar
¼ cup plus 1 tablespoon filtered water
2 ½ teaspoons raw honey
1 teaspoon dried rose petals (see here)
½ teaspoon whole coriander seeds
½ teaspoon pink peppercorns
½ teaspoon caraway seeds
½ teaspoon fine sea salt
¼ cup raw carrot matchsticks
¼ cup slivered red cabbage
¼ cup cucumber matchsticks
Combine the vinegars, filtered water, honey, rose petals, coriander seeds, pink peppercorns, caraway seeds, and salt in a medium bowl and stir until the honey is incorporated. Add the carrot, cabbage, and cucumber and stir to distribute. Let the vegetables pickle at room temperature for at least 1 hour and up to 2 hours (if pickling longer, cover the mixture and refrigerate it to prevent the pickle flavor from intensifying too quickly).
Rose-Pickled Veggies will keep, in their liquid in an airtight container in the refrigerator, for 1 year (really!).
pineapple kimchi summer sunset rolls
With their ombre pink hue, these beet-stained rolls remind me of a summer sunset. Of course if you don’t want to take the extra step and tint the roll wrappers, that’s entirely fine, but the tie-dye effect adds a fun, playful twist. Beyond their eye-catching presentation, these refreshing rolls pack punchy flavor thanks to the pineapple kimchi within. It’s sweet, spicy, and sour all at the same time, with tons of taste from the gochugaru—a bright red powder made from Korean chile flakes. This recipe will make more pineapple kimchi than you need for the rolls; I like to add the leftovers to pretty much anything: atop veggie tacos, in a breakfast bowl, in place of salad dressing.
makes 18 rolls
For the Wrappers
1 medium raw red beet, unpeeled, scrubbed and cut into 6 pieces
18 spring roll rice wrappers (6 inches each; see Notes)
Black sesame seeds, for garnish
For the Pineapple Kimchi
1 medium pineapple
5 garlic cloves, peeled
1 small shallot, peeled
2-inch piece (about 1 ounce) fresh ginger, peeled and roughly chopped
3 tablespoons rice wine vinegar
1 ½ tablespoons gochugaru (see Notes)
½ teaspoon fine sea salt
For the Filling
2 cups mushrooms, such as shimeji, enoki, or shiitake, cleaned, bottoms trimmed
4 ½ teaspoons olive oil
Fine sea salt and freshly ground black pepper
2 tablespoons gluten-free soy sauce
2 medium carrots, peeled, trimmed, and cut into matchstick-size pieces
2 cups pea shoots
2 cups daikon, peeled and cut into matchstick-size pieces
1 bunch fresh cilantro, washed, 2 inches removed from stalks
1. Preheat the oven to 350°F.
2. Make the dye for the wrappers: Place the beet in a medium bowl and add 1⅓ cups hot tap water to cover. Set aside to steep while you assemble the remaining ingredients.
3. Make the pineapple kimchi: Cut off the crown and stem of the pineapple and discard. Positioning one cut side of the pineapple on a cutting board, and using a chef’s knife, slice off the skin from top to bottom, cutting deeply enough to remove any eyes. Cut the pineapple vertically in half lengthwise and set aside one half. Cut one pineapple half into rough 1-inch cubes, making sure to cut around the tougher core. Transfer about 2 ½cups of the pineapple cubes to a blender (if you have extra cubes, reserve them for another use). Quarter the remaining pineapple half lengthwise, slicing off and discarding the tough central core of each quarter. Slice each quarter into long strips about ⅛ inch thick and 4 inches long. Transfer these pieces to a large bowl and set aside.
4. Add the garlic, shallot, ginger, rice wine vinegar, gochugaru, and salt to the blender and blend until smooth, about 1 minute. Pour the pineapple kimchi over the pineapple strips and toss to coat. Set aside.
5. Make the filling: Toss the mushrooms with the olive oil in a medium bowl (if using shiitakes, slice them into quarters first). Spread the mushrooms in a single layer on a rimmed baking sheet and season generously with salt and pepper. Roast the mushrooms until soft, about 10 minutes. Remove the mushrooms from the oven and transfer them to a small bowl. Add the soy sauce and toss to coat. Set aside.
6. Dye the wrappers: Lay a clean, damp kitchen towel on a work surface. Place a medium, shallow bowl of warm water next to the work surface and the reserved beet water beside that (the beet water should still be warm; if it is not, reheat it gently in a small pot or the microwave). Dip the right side of a wrapper in the warm water to cover it, then quickly dip the left side in the beet water; transfer the dipped wrapper to the damp towel. The wrapper should be just slightly pliable and tinted soft magenta on one side (it will be white on the other and will shade from white to pink as the wrapper continues to hydrate and the dye bleeds).
7. Assemble the summer rolls: Arrange a generous pinch each of the carrot, pea shoots, daikon, and cilantro about 1 inch from the bottom of the wrapper and across both the pink and white sides, leaving a border of about 1 ½inches on the pink side (this side will be wrapped up to form the base of the roll; the white side will be left open, allowing the veg to peek out). Top each mound of vegetables with about 1 tablespoon of mushrooms and 2 teaspoons of pineapple kimchi—be careful not to overfill it!
8. Fold the bottom of the wrapper up and over the filling to cover about ½ inch, then tuck the pink side of the wrapper over to close that end. Continue to roll tightly from the bottom up until the summer roll is wrapped and the vegetables peek out of the white side. Set the summer roll, seam side down, on a plate. Repeat with the remaining wrappers and filling.
9. Sprinkle the summer rolls with sesame seeds and serve immediately.
Pineapple Kimchi Summer Sunset Rolls will keep, in an airtight container in the refrigerator, for up to 2 days. The Pineapple Kimchi will keep, in an airtight container in the refrigerator, for up to 5 days.
Notes: Spring roll rice wrappers, which are sometimes labeled as “spring roll skin,” can be purchased from Asian markets, many supermarkets, and online at Amazon.com, as can gochugaru. But note that some wrappers are made from rice while others are made from wheat. Make sure to read the product’s ingredients to ensure you have the correct rice wrappers.

avocado pizza with tomatillo salsa
This recipe is inspired by an avocado pizza I tried at a restaurant in Mexico City called Huset. While Huset serves its avocado pizza on regular Neapolitan-style pizza dough, I’ve changed up the recipe to make a quick and easy crust that’s gluten-free. I’ve also added tomatillo salsa for acidity. If you don’t want to do the extra work and make tomatillo salsa, you can use store-bought or simply leave that out of the recipe and either add raw or roasted tomatoes, or just amp up the fresh lime juice. I like to eat this for a late lunch or cut it into eight slices as an appetizer. It’s great both warm and at room temperature.
Note that because the crust is bound with psyllium (see here), it takes on a sort of chewy quality. The top will crisp up in the oven, but expect the bottom to stay soft.
makes two 8-inch pizzas
For the Dough
1 tablespoon olive oil, plus extra for greasing the pan
½ cup pureed butternut squash or sweet potato, fresh or canned
¼ cup psyllium husks
¼ cup almond flour
¼ cup oat flour, plus extra as needed
2 tablespoons flax meal
1 teaspoon fine sea salt
¼ teaspoon freshly ground black pepper
For the Topping
2 avocados
2 teaspoons olive oil
2 tablespoons Tomatillo Salsa, plus extra as needed
1 to 2 jalapeños thinly sliced crosswise or minced and seeded
Fresh cilantro leaves or blossoms, for garnish
1 lime, halved
Coarse sea salt, for garnish
1. Make the dough: Preheat the oven to 375°F. Coat two rimmed baking sheets with olive oil.
2. Combine the squash, psyllium husks, almond flour, ¼ cup of the oat flour, the flax meal, the 1 tablespoon of olive oil, salt, and pepper in a medium bowl and, using a wooden spoon, mix until the ingredients are fully incorporated and form a slightly sticky, gel-like dough. Using your hands, divide the dough into two halves.
3. Sprinkle oat flour on a work surface and place one piece of the dough on top. Knead the dough a few times, then shape it into a flat disk. Using a rolling pin dusted with oat flour, roll the dough into a rough circle about 8 inches wide and ¼ inch thick. Repeat with the remaining piece of dough. Carefully transfer the dough rounds to the prepared baking sheet and bake until lightly browned on top, about 10 minutes. Using a spatula, flip the crusts over, then bake until lightly brown on the second side (the tops will still feel slightly soft), 10 minutes more.
4. While the crusts bake, prepare the topping: Slice each avocado in half, lengthwise. Remove the pit. Using your hands, carefully peel the skin away from the flesh and discard the skin. Place the avocado halves, cut side down, on a cutting board and slice them lengthwise into ⅛-inch-thick slices.
5. Remove the crusts from the oven and rub the top of each with 1 teaspoon of olive oil. Layer the avocado slices on top, then dot each with 1 tablespoon tomatillo salsa, and sprinkle 1 tablespoon minced jalapeño on each. Add a few cilantro leaves to each pizza as a garnish, squeeze the juice of half a lime atop each, and finish with a sprinkle of salt. Serve immediately.
I usually make this soup in the summer because it’s filling but light at the same time. And it’s great both hot and at room temperature. I love crumbling a few tortilla chips on top, or even sprinkling on some corn nuts, but this soup is thick enough that you could serve it at a party as a healthy dip with tortilla chips.
serves 3
2 small heads broccoli
¼ cup fresh lime juice, plus extra as needed
1 avocado, halved, peeled, and pitted, plus extra sliced or chopped for garnish
1 garlic clove, peeled
¼ cup packed fresh cilantro leaves, plus 3 cilantro sprigs for garnish
1 tablespoon extra-virgin olive oil
½ teaspoon fine sea salt, plus extra as needed
Freshly ground black pepper
¼ cup crushed tortilla chips or corn nuts, for garnish
1. Fill a large pot with tap water to a depth of 2 inches and place it over medium-high heat. Remove and discard the bottom ½inch of each broccoli stalk, and cut each head into 4 to 6 pieces. When the water comes to a simmer, add the broccoli, cover, and steam until bright green, about 4 minutes.
2. Using tongs or a fork, transfer the broccoli to a high-powered blender or food processor along with 1 cup of the cooking liquid (reserve the rest). Add the lime juice, avocado halves, garlic, cilantro leaves, olive oil, ½teaspoon of salt, and pepper to taste, and blend until pureed, about 30 seconds. The soup should be thick and easily coat the back of a spoon. If it’s too thick, add the reserved broccoli cooking liquid, 1 tablespoon at a time until the desired thickness is reached. Taste and adjust the salt, pepper, and lime juice as needed.
3. Divide the soup among three bowls and garnish each with avocado slices, crushed tortilla chips, and a sprig of fresh cilantro.
Broccoli-Avocado Soup will keep, in an airtight container in the refrigerator, for up to 2 days. Reheat the leftovers before serving.
