The masses of Windows users generally slog through life choosing File→Print, clicking OK, and then drumming their fingers as they wait for the paper to slide out of the printer. But your printer can do more than that—much more. Here are just a few of the stunts that await the savvy PC fan.
If you have more than one PC connected to a network, as described in Chapter 24, they all can use the same printer. In the old days, this convenience was restricted to expensive network printers like laser printers. But in Windows 8.1, you can share even the cheapest little inkjet connected to the USB port of one computer.
To begin, sit down at the computer to which the printer is attached. Open the Devices and Printers window (Figure 19-2). Right-click the printer’s icon; from the shortcut menu, choose “Printer properties.” Continue as described in Figure 19-8.
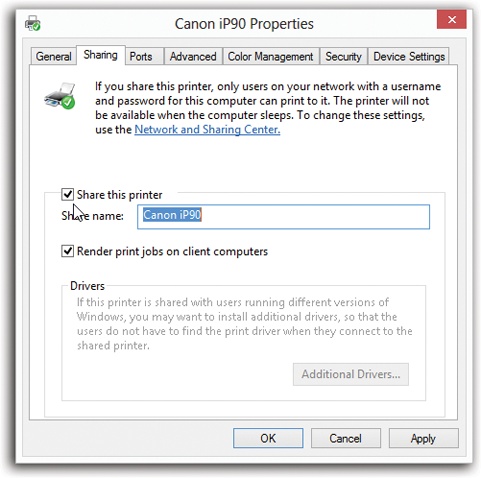
Figure 19-8. Open Devices and Printers. Right-click the printer you want to share, and then click “Printer properties.” Click the Sharing tab. (If you see a “Change sharing options” button, click it.) Finally, turn on “Share this printer.” Click OK. Now this printer is available to other computers on the same network.
Once you’ve shared the printer, its icon shows up in the Devices and Printers windows of all other computers on the same networking HomeGroup (Chapter 25). It’s listed in their Print dialog boxes, their Printer windows, and so on.
If it’s just you, your Dell, and a color inkjet, then you’re entitled to feel baffled by this feature, which lets you declare your printer off-limits during certain hours of the day. But if you’re the manager of some office whose expensive color laser printer makes printouts that cost a dollar apiece, you may welcome a feature that prevents employees from hanging around after hours in order to print out 500 copies of their headshots.
To specify such an access schedule for a certain printer, follow the instructions in Figure 19-9.

Figure 19-9. Right-click your printer’s icon in the Devices and Printers window. From the shortcut menu, choose Properties, and then click the Advanced tab, shown here. Select “Available from,” and use the time-setting controls to specify when your underlings are allowed to use this printer from across the network. Clicking OK renders the printer inoperable during off hours.
If your PC is on a network whose other members bombard a single laser printer with printouts, you might find separator pages useful—the printer version of fax cover sheets. A separator page is generated before each printout, identifying the document and its owner.
This option, too, is accessible from the Advanced tab of the printer’s Properties dialog box (Figure 19-9). Click the Separator Page button at the bottom of the dialog box. In the Separator Page dialog box, click the Browse button to choose a .sep (separator page) file.
If you scroll to the very bottom of the resulting list of geeky Windows folder names, you’ll find four of them:
Sysprint.sep is the one you probably want. Not only does this page include the name, date, time, and so on, but it also automatically switches the laser printer to PostScript mode—if it’s not already in that mode, and if it’s a PostScript printer.
Pcl.sep is the same idea, except that it switches the laser printer to PCL mode—commonly found on HP printers—before printing. (PostScript and PCL are the two most common languages understood by office laser printers.)
Pscript.sep switches the printer to PostScript mode but doesn’t print out a separator page.
Sysprtj.sep prints a separator page, switches the printer to PostScript mode, and sets Japanese fonts, if they’re available on your printer.