5. Transforming Artwork
Lesson overview
In this lesson, you’ll learn how to do the following:
Add, edit, rename, and reorder artboards in an existing document.
Navigate artboards.
Work with rulers and guides.
Position objects with precision.
Move, scale, rotate, reflect, and shear objects using a variety of methods.
Use the Free Transform tool to distort an object.
Work with the Puppet Warp tool.

This lesson will take about 60 minutes to complete. To get the lesson files used in this chapter, download them from the web page for this book at www.adobepress.com/IllustratorCIB2021. For more information, see “Accessing the lesson files and Web Edition” in the Getting Started section at the beginning of this book.

As you create artwork, you can modify objects in many ways by quickly and precisely controlling their size, shape, and orientation. In this lesson, you’ll explore creating and editing artboards, the various Transform commands, and specialized tools while creating several pieces of artwork.
Starting the lesson
In this lesson, you’ll transform artwork and use it to complete an infographic. Before you begin, you’ll restore the default preferences for Adobe Illustrator and then open a file containing the finished artwork to see what you’ll create.
To ensure that the tools function and the defaults are set exactly as described in this lesson, delete or deactivate (by renaming) the Adobe Illustrator preferences file. See “Restoring default preferences” in the “Getting Started” section at the beginning of the book.
 Note
NoteIf you have not already downloaded the project files for this lesson to your computer from your Account page, make sure to do so now. See the “Getting Started” section at the beginning of the book.
Start Adobe Illustrator.
Choose File > Open, and open the L5_end.ai file in the Lessons > Lesson05 folder on your hard disk.

This file contains the three artboards that make up different infographics. Any data presented is purely fictitious.
Choose View > Fit All In Window, and leave the artwork onscreen as you work.
Choose File > Open. In the Open dialog box, navigate to the Lessons > Lesson05 folder, and select the L5_start.ai file on your hard disk. Click Open.

In the Missing Fonts dialog box, ensure that Activate is selected for each font in the Activate column, and click Activate Fonts. After some time, the font(s) should be activated, and you should see a success message in the Missing Fonts dialog box. Click Close.

 Note
NoteFor more information on activating fonts, visit helpx.adobe.com/creative-cloud/help/add-fonts.html.
Choose File > Save As. If the Cloud Document dialog box opens, click Save On Your Computer.
In the Save As dialog box, name the file Infographic.ai, and navigate to the Lesson05 folder. Leave Adobe Illustrator (ai) chosen from the Format menu (macOS) or Adobe Illustrator (*.AI) chosen from the Save As Type menu (Windows), and click Save.
In the Illustrator Options dialog box, leave the Illustrator options at their default settings and then click OK.
 Note
NoteIf you don’t see Reset Essentials in the Workspace menu, choose Window > Workspace > Essentials before choosing Window > Workspace > Reset Essentials.
Choose Window > Workspace > Reset Essentials.
Working with artboards
Artboards represent the regions that can contain printable or exportable artwork, similar to pages in Adobe InDesign or artboards in Adobe Photoshop or Adobe XD. You can use artboards for creating a variety of project types, such as multi-page PDF files, printed pages with different sizes or different elements, independent elements for websites or apps, or video storyboards, for instance.
Adding artboards to a document
You can add and remove artboards at any time while working in a document. Artboards can be created in different sizes. You can resize them in Artboard Editing mode, and position them anywhere in the Document window. All artboards are numbered and can be renamed. Next, you’ll add a few artboards to the Infographic.ai document, which currently contains only one artboard.
Choose View > Fit Artboard In Window and then press Command and – (macOS) or Ctrl and – (Windows) twice to zoom out.
Press the spacebar to temporarily access the Hand tool (
 ). Drag the artboard to the left to see more of the darker canvas to the right of the artboard.
Select the Selection tool (
 ) in the toolbar.
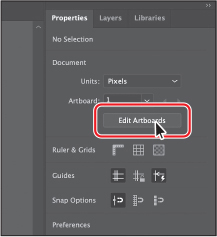
Click the Edit Artboards button in the Properties panel on the right to enter Artboard Editing mode and to select the Artboard tool in the toolbar.
 Note
NoteIf you want to see the Document options in the Properties panel, you cannot have content selected in your document. If need be, choose Select > Deselect.
Move the pointer to the right of the existing artboard, and drag down and to the right to draw an artboard. Don’t worry about the size; you’re going to change it soon.

 Tip
TipYou can also select the Artboard tool (
 ) in the toolbar to enter Artboard Editing mode.
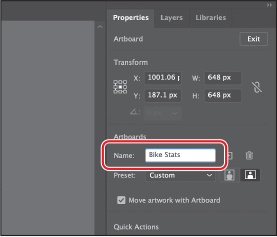
The new artboard should be selected. You can tell it’s selected because of the dashed bounding box surrounding it. In the Properties panel on the right, you’ll see properties for the selected artboard like position (X, Y) and size (width and height), name, and more.
In the Properties panel on the right, select the Width value and type 648. Select the Height value, and type 648. Press Return or Enter to accept the height.

When you convert the document units to inches later, you will see that 648 pixels is equal to 9 inches exactly.
Change the name to Bike Stats in the Artboards section of the Properties panel. Press Return or Enter to make the change.
Next, you’ll create another artboard that’s the same size.
Click the New Artboard button (
 ) in the Properties panel on the right to create a new artboard that’s the same size as the Bike Stats artboard and to its right.
Change the name of the new artboard to Commute in the Properties panel. Press Return or Enter to make the change.

Choose View > Fit All In Window to see all of your artboards.
When editing artboards in Artboard Editing mode, you can see the name of each artboard in the upper-left corner of the artboard.
Click the Exit button at the top of the Properties panel to exit Artboard Editing mode.

 Tip
TipTo exit Artboard Editing mode, you can also select another tool in the toolbar besides the Artboard tool (
 ) or press the Escape key.
Exiting Artboard Editing mode will deselect all artboards and select the tool that was selected before you entered that mode. In this case, the Selection tool is selected.
With the Selection tool (
 ) selected, drag the bicycle and rider group, below the largest artboard, onto the Bike Stats artboard.
Choose Select > Deselect.
Editing artboards
After creating artboards, you can edit or delete them by using the Artboard tool ( ), menu commands, Properties panel, or Artboards panel. Next, you’ll reposition and change the size of an artboard.
Press Command and – (macOS) or Ctrl and – (Windows) twice to zoom out.
Select the Artboard tool (
 ) in the toolbar to enter Artboard Editing mode.
This is another way to enter Artboard Editing mode and can be useful when artwork is selected, since you can’t see the Edit Artboards button in the Properties panel with artwork selected.
Drag the artboard named Commute to the left of the original artboard. Don’t worry about its exact position yet, but make sure it doesn’t cover any artwork.

 Tip
TipTo delete an artboard, select it with the Artboard tool (
 ) and either press Delete or Backspace or click the Delete Artboard button (
 ) in the Properties panel. You can delete all but one artboard.
In the Properties panel on the right, in Artboard Editing mode, you’ll see lots of options for editing the selected artboard. When an artboard is selected, the Preset menu lets you change the artboard to a set size. The sizes in the Preset menu include typical print, video, tablet, and web sizes. You can also switch the orientation of, rename, or delete the artboard.
Click in the larger, original artboard in the center, and choose View > Fit Artboard In Window to fit that artboard in the Document window.
Commands such as View > Fit Artboard In Window typically apply to the selected, or active, artboard.
Drag the bottom-middle point of the artboard up to resize it. When the point snaps to the bottom of the blue shape, release the mouse button.

 Tip
TipYou can also transform multiple selected artboards at one time.
Next, you’ll delete the Bike Stats artboard on the right since you are going to copy an artboard from another document to replace it.
Choose View > Fit All In Window to see all of your artboards.
Click the Bike Stats artboard on the right and press Delete or Backspace to remove it.

When you delete an artboard, the artwork that was on that artboard is not deleted.
Select the Selection tool (
 ) in the toolbar, and drag the bicycle and rider artwork down, below the larger artboard again.
Copying artboards between documents
You can copy or cut artboards from one document and paste them into another, and the artwork associated with that artboard comes with it. This can make it easy to re-use content across documents. For this project, you’ll copy an artboard from a document someone else created for the same project. You’ll copy it into the project you are working on to keep it all in one file.
Choose File > Open, and open the Bike_stats.ai file in the Lessons > Lesson05 folder on your hard disk.
Choose View > Fit Artboard In Window to see the entire artboard.
Select the Artboard tool (
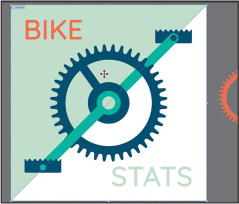
 ) in the toolbar, and the single artboard should be selected. If it isn’t, click in the artboard to select it.
 Tip
TipIf Move Artwork With Artboard is deselected in the Properties panel before you copy an artboard, the artwork on the artboard will not be copied with it.
Be careful about clicking the artboard if it’s already selected! You may make a copy on top.
Choose Edit > Copy to copy the artboard and the artwork on the artboard.
Any artwork in the document but not on the artboard (like the orange gear off the right side of the artboard) won’t be copied.
Choose File > Close to close the file without saving.
Back in the Infographic.ai document, choose Edit > Paste to paste the artboard and the artwork.

Aligning and arranging artboards
To organize the artboards in your document, maybe to keep similar artboards next to each other, you can move and align artboards to suit your working style. Next, you’ll select all of the artboards and align them.
With the Artboard tool (
 ) still selected, Shift-click the other two artboards to select them as well.
 Tip
TipWith the Artboard tool (
 ) selected, you can press the Shift key and drag across a series of artboards to select them, or Shift-click any artboards you want to select.
The Shift key allows you to add artboards to the selection, rather than draw an artboard, when the Artboard tool is selected.
Click the Vertical Align Center button (
 ) in the Properties panel on the right to align the artboards to each other.
You may see that the light green background shape on the largest artboard didn’t move with the artboard. An arrow is pointing to it in the previous figure. That’s because it was locked and locked objects won’t move when you move an artboard.
Choose Edit > Undo Align to get the artboards back where they were.
To unlock the background object and anything else, choose Object > Unlock All.
Click the Vertical Align Center button (
 ) in the Properties panel on the right to align the artboards to each other.
In Artboard Editing mode, you can also arrange your artboards however you like using the Rearrange All Artboards command. This option makes it possible to arrange artboards in columns and/or rows and define precise spacing between.
Click the Rearrange All button in the Properties panel to open the Rearrange All Artboards dialog box.
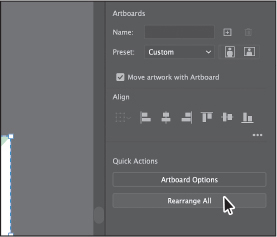
In the Rearrange All Artboards dialog box, you can arrange your artboards in columns and set the spacing between each artboard to a set amount. For instance, if you have a document with six artboards and set the columns to 3, the artboards would be arranged in two rows (or two columns) of three artboards.
Select the Arrange By Row option (
 ) so the three artboards can remain next to each other horizontally, and set Spacing to 40 to set an exact spacing between. Click OK.
Notice that the largest artboard is now first in the row of artboards and the smaller artboards are to the right of it. That’s because the Arrange By Row option ordered the artboards based on their artboard number. You’ll see how to change that number shortly.

Setting options for artboards
By default, artboards are assigned a number and a name, as you’ve seen. When you navigate the artboards in a document, it can be helpful to name them. Next, you’ll learn how to rename artboards so that the names are more useful, and you’ll see other options you can set for each artboard.
While still in Artboard Editing mode, click to select the largest artboard.
Click the Artboard Options button in the Properties panel.

In the Artboard Options dialog box, change the name to Main Infographic, select Show Center Mark to show crosshairs in the center of the artboard (useful for finding the center of an artboard when you want to align content from the center), and click OK.
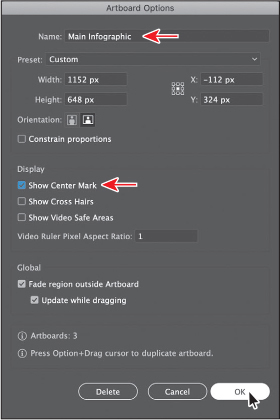
The Artboard Options dialog box has a lot of extra options for artboards, as well as a few you’ve already seen, like width and height.
Choose File > Save.
Reordering artboards
You can navigate between artboards in your document using the Next Artboard ( ) and Previous Artboard (
 ) buttons in the Properties panel with the Selection tool selected, with nothing selected, and while not in Artboard Editing mode, or you can do this from below the Document window. By default, artboards appear according to the order in which they are created, but you can change that order. Next, you’ll reorder the artboards in the Artboards panel so that if you use the Next or Previous Artboard buttons, you navigate in the artboard order you set.
Choose Window > Artboards to open the Artboards panel.
The Artboards panel allows you to see a list of all of the artboards in the document. It also allows you to reorder, rename, add, and delete artboards and to choose many other options related to artboards without being in Artboard Editing mode.
With the Artboards panel open, double-click the number 2 to the left of the name “Commute,” and then double-click the number 1 to the left of the name “Main Infographic” in the Artboards panel.

Double-clicking the number to the left of an artboard name that isn’t selected in the Artboards panel makes that artboard the active artboard and fits it in the Document window.
Drag the “Commute” artboard name up until a line appears above the artboard named, “Main Infographic.” Release the mouse button.

 Tip
TipYou can also reorder the artboards by selecting an artboard in the Artboards panel and clicking the Move Up (
 ) or Move Down (
 ) button at the bottom of the panel.
 Tip
TipThe Artboard Options button (
 ) appears to the right of the name of each artboard in the Artboards panel. It not only allows access to the artboard options for each artboard but also indicates the orientation (vertical or horizontal) of the artboard.
This makes the Commute artboard the first artboard in the list. When you choose artboards from the Properties panel—in this case, 1, 2, or 3—the numbering will follow what you see in the Artboards panel.
Click the Exit button at the top of the Properties panel to exit Artboard Editing mode.
Click the X at the top of the Artboards panel group to close it.
Choose View > Fit All In Window.

Now that the artboards are set up, you will concentrate on transforming artwork to create the content for your project.
Working with rulers and guides
With the artboards set up, next you’ll learn about aligning and measuring content using rulers and guides. Rulers help you accurately place and measure objects and distances. They appear along the top and left sides of the Document window and can be shown and hidden. There are two types in Illustrator: artboard rulers and global rulers. The point on each ruler (horizontal and vertical) where the 0 (zero) appears is called the ruler origin. Artboard rulers set the ruler origin to the upper-left corner of the active artboard. Global rulers set the ruler origin to the upper-left corner of the first artboard, or the artboard that is at the top of the list in the Artboards panel, no matter which artboard is active. By default, rulers are set to artboard rulers, which means the origin is in the upper-left corner of the active artboard.
 Note
Note
You could switch between the artboard and global rulers by choosing View > Rulers > and selecting Change To Global Rulers or Change To Artboard Rulers, depending on which option is currently chosen, but don’t do that now.
Creating guides
Guides are nonprinting lines created from the rulers that help you align objects. Next, you’ll create a guide so you can accurately align the buildings on the artboard.
With nothing selected and the Selection tool (
 ) selected, click the Show Rulers button (
 ) in the Properties panel on the right to show the rulers.
 Tip
TipYou can also choose View > Rulers > Show Rulers.
Click each of the artboards, and as you do, look at the horizontal and vertical rulers (along the top and left sides of the Document window).

Notice that 0 (zero) for each ruler is in the upper-left corner of the active (selected) artboard (the last artboard you clicked in). By default, the ruler origin is in the upper-left corner of the active (selected) artboard. As you can see, the 0 point on both rulers corresponds to the edges of the active artboard.
With the Selection tool, click the text “CITIES WITH LARGEST...” in the leftmost artboard.

Notice the very subtle black outline around the artboard, with “2” showing in the Artboard Navigation menu (below the Document window), which indicates that the Main Infographic artboard is the currently active artboard. There can be only one active artboard at a time. Commands such as View > Fit Artboard In Window apply to the active artboard.
Choose View > Fit Artboard In Window.
That fits the active artboard in the window, and the ruler origin (0,0) is in the upper-left corner of that same artboard. Next you’ll create a guide on the active artboard.
Drag from the top ruler down, into the artboard. When the guide reaches about 400 pixels on the ruler, release the mouse button. Don’t worry about the guide being at exactly 400 pixels.
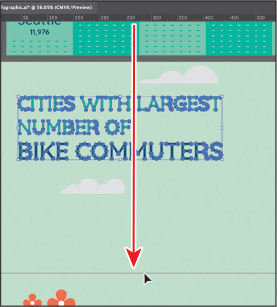
 Tip
TipDragging from a ruler while pressing the Shift key “snaps” a guide to the measurements on the ruler.
 Tip
TipYou can double-click the horizontal or vertical ruler to add a new guide.
 Tip
TipIf you have the Artboard tool selected and you drag a guide to within the artboard boundaries, the guide will not extend beyond the edges of the artboard.
After creating a guide, it’s selected, and when selected, its color matches the color of the layer it’s on (darker blue in this case) when you move the pointer away from it.
With the guide still selected (in this case, it will be blue, if selected), change the Y value in the Properties panel to 400 (pixels), and press Return or Enter to reposition the guide vertically.

Choose Select > Deselect to deselect the guide. In a few sections, you’ll drag content to align it with the guide.
Choose File > Save.
Editing the ruler origin
On the horizontal ruler, measurements to the right of 0 (zero) are positive and those to the left are negative. On the vertical ruler, measurements below 0 (zero) are positive and those above are negative. You can move the ruler origin to start the horizontal and/or vertical measurements at another location. For this project, you were told that a blank area 1.5 inches from the bottom of the artboard needs to be added to the lower-left corner for content coming later.
Choose View > Zoom Out.
Click the Units menu in the Properties panel, and choose Inches to change the units for the entire document.
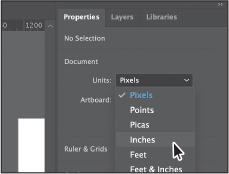
 Tip
TipTo change the units for a document (inches, points, etc.), you can also right-click either ruler and choose the new units.
You can now see that the rulers show inches instead of pixels.
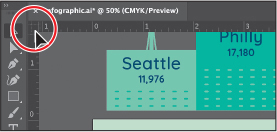
Drag from the upper-left corner of the Document window, where the rulers intersect (
 ), to the lower-left corner of the larger artboard.
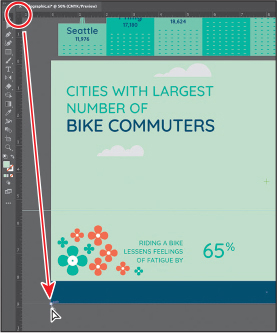
This sets the ruler origin (0,0) to the lower-left corner of the artboard. In other words, the measurements start in the lower-left corner of the artboard.
Move the pointer over the vertical ruler on the left—somewhere between 1 and 2 inches. Double-click on the ruler to add a guide. You’ll position it exactly next.

Look in the Properties panel on the right to see the Y value. Now, because you moved the ruler origin (0,0) to the bottom of the artboard, the Y shows the vertical distance from the bottom of the artboard. Change the Y value to –1.5 (inches), and press Return or Enter.

Select the Selection tool and drag the group that contains the flowers above the guide to leave room for later content.

Move the pointer in the upper-left corner of the Document window where the rulers intersect (
 ), and double-click to reset the ruler origin to the upper-left corner of the artboard.
Choose Select > Deselect.
 Tip
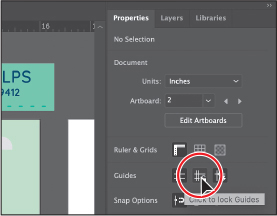
TipYou can also lock guides by choosing View > Guides > Lock Guides. You can hide guides by clicking the Hide Guides button in the Properties panel or pressing Command+; (macOS) or Ctrl+; (Windows).
Click the Lock Guides button (
 ) in the Properties panel to lock any guides you make and prevent them from being selected.
Transforming content
In Lesson 4, you learned how to take simple paths and shapes and create more complex artwork by editing and combining that content. That was a form of transforming artwork. In this lesson, you’ll learn how to scale, rotate, and transform content in other ways, using a variety of tools and methods.
Working with the bounding box
As you’ve seen in this lesson and previous lessons, a bounding box appears around selected content. You can transform content using the bounding box, but you can also turn it off. This makes it so you can’t resize content by dragging anywhere on the bounding box with the Selection tool.
With the larger artboard still showing, choose View > Zoom Out until you see the group of artwork that contains the buildings above the artboards.
With the Selection tool (
 ) selected, click to select the buildings. Move the pointer over the lower-left corner of the selected group. If you were to drag right now, you would resize the content.

Choose View > Hide Bounding Box.
This command hides the bounding box for the group and all other artwork. Now, you can’t resize the group by dragging anywhere on the bounding box with the Selection tool.
Move the pointer over the lower-left point of the group again, and drag the group of buildings down onto the first guide you created, just above the flowers. Notice that the buildings are not aligning to the guide perfectly.

To get the buildings to align or snap to the guide, you need to zoom in closer.
Select the Zoom tool and drag across the lower-left corner of the buildings to zoom in closer.
With the Selection tool selected, drag the lower-left point of the buildings group so that it snaps to the left edge of the artboard and the guide. When the pointer arrow turns white, the artwork is snapped to the guide, and you can release the mouse button.

Choose View > Show Bounding Box to turn it back on for all artwork.
Positioning artwork using the Properties panel
At times, you may want to position objects more precisely—relative either to other objects or to the artboard. You could use the alignment options, as you saw in Lesson 2, but you can also use Smart Guides and Transform options in the Properties panel to move objects to exact coordinates on the x and y axes and to control the positioning of objects relative to the edge of the artboard. Next you’ll add content to an artboard and position it precisely.
Choose View > Fit All In Window to see all three artboards.
Click in the blank artboard in the middle to make it the active artboard.
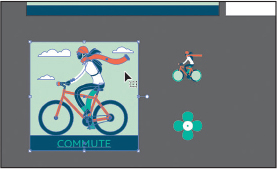
Click to select the group of artwork with the COMMUTE text, beneath the artboards. You may need to zoom out or pan to see it.
 Tip
TipYou could have also aligned the content to the artboard using the alignment options. You’ll find there are at least a few ways to accomplish most tasks in Illustrator.
In the Transform section of the Properties panel, click the upper-left point of the reference point locator (
 ). Change the X value to 0 and the Y value to 0, and press Return or Enter.
The group of content is moved into the upper-left corner of the active artboard. The points in the reference point locator map to the points of the bounding box for the selected content. For instance, the upper-left reference point refers to the upper-left point of the bounding box.
Choose Select > Deselect and then choose File > Save.
Scaling objects
So far in this book, you’ve scaled most content with the selection tools. In this part of the lesson, you’ll use several other methods for scaling artwork.
If necessary, press Command and – (macOS) or Ctrl and – (Windows) (or choose View > Zoom Out) to see the bicycle and rider group off the bottom edge of the artboards.
With the Selection tool (
 ) selected, click the bicycle and rider artwork.
Press Command and + (macOS) or Ctrl and + (Windows) a few times to zoom in to it.
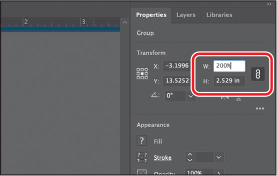
In the Properties panel, click the center reference point of the reference point locator (
 ), if it’s not selected, to resize from the center. Ensure that Maintain Width And Height Proportions is set (
 ), type 200% in the Width (W) field, and then press Enter or Return to increase the size of the artwork.
 Tip
TipWhen typing values to transform content, you can type different units, such as percent (%) or pixels (px), and they will be converted to the default unit, which is inches (in) in this case.
Choose View > Hide Edges so you hide the inside edges.

Notice that the artwork is smaller, but the arms and legs of the person are still the same width. That’s because they are a path with a stroke applied. By default, strokes and effects, like drop shadows, are not scaled along with objects. For instance, if you enlarge a circle with a 1-pt stroke, the stroke remains 1 pt. By selecting Scale Strokes & Effects before you scale—and then scaling the object—that 1-pt stroke would scale (change) relative to the amount of scaling applied to the object.
Choose View > Show Edges so you show the inside edges again.
Choose Edit > Undo Scale.
In the Properties panel, click More Options (
 ) in the Transform section. Select Scale Strokes & Effects. Type 225% in the Width (W) field in the Transform section of the Properties panel and then press Enter or Return to increase the size of the artwork.
Now the strokes applied to the paths are scaled proportionally.
Press the spacebar to select the Hand tool, and drag up so you can see the flower below the person, if you don’t already.
With the Selection tool (
 ) selected, click to select the flower artwork.
Press and hold on the Rotate tool (
 ) in the toolbar, and choose the Scale tool (
 ).
). Note
NoteYou may see another tool instead of the Rotate tool in the toolbar. If that’s the case, press and hold on that tool to select the Scale tool.
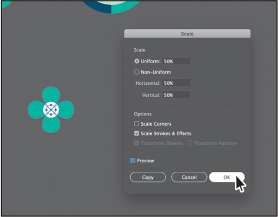
The Scale tool is used to scale content by dragging. For a lot of the transform tools, like the Scale tool, you can also double-click the tool to edit selected content in a dialog box. This is similar to choosing Object > Transform > Scale.
Double-click the Scale tool (
 ) in the toolbar. In the Scale dialog box, change Uniform to 50%, and select Scale Strokes & Effects, if it isn’t already selected. That way, the stroke of the white path in the center of the flower will scale properly. Toggle Preview on and off to see the change in size. Click OK.
 Tip
TipYou could also choose Object > Transform > Scale to access the Scale dialog box.
This method of scaling artwork may be useful if there is a lot of overlapping artwork, for instance, or when precision matters or when you need to scale content nonuniformly, and more.
Select the Selection tool, and drag the flower up onto the artboard with the other flowers in the lower-right corner. You may need to zoom out.

Choose File > Save.
Reflecting objects
When you reflect an object, Illustrator flips the object across an invisible vertical or horizontal axis. In a similar way to scaling and rotating, when you reflect an object, you either designate the reference point or use the object’s center point by default. Next, you’ll copy artwork and use the Reflect tool ( ) to flip artwork 90 degrees across an axis.
Choose View > Fit All In Window.
Select the Selection tool (
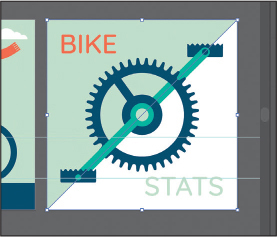
 ), and click the green triangle in the background of the Bike Stats artboard on the right.
Choose Edit > Copy and then choose Edit > Paste In Front to create a copy on top of the selected shape.
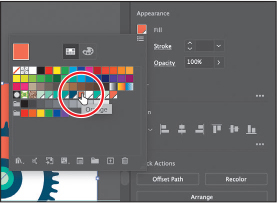
Change the fill color to the swatch named Orange in the Properties panel.
 Tip
TipTo flip content in place, you can also click either the Flip Along Horizontal Axis button (
 ) or the Flip Along Vertical Axis button (
 ) in the Properties panel.
Select the Reflect tool (
 ), which is nested within the Scale tool (
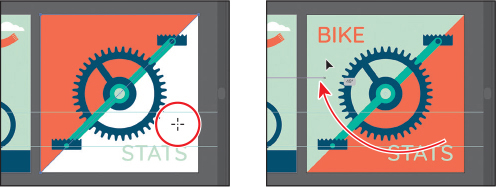
 ), in the toolbar. Move the pointer to the lower-right part of the Bike Stats artboard, and drag clockwise. As you drag, press the Shift key to constrain the rotation to 45 degrees as the artwork is reflected. When the artwork looks like the figure, release the mouse button and then release the modifier key.
 Tip
TipIf you want to copy artwork and reflect artwork as you drag, begin dragging artwork with the Reflect tool. As you drag, hold down the Option (macOS) or Alt (Windows) key. When the artwork is where you want it, release the mouse button and then the key. Pressing Shift+Option (macOS) or Shift+Alt (Windows) will copy the reflected artwork and constrain the reflection angle to 45 degrees.
Select the Selection tool (
 ), and Shift-click the green triangle you originally selected to select both triangles. To group them together, click the Group button in the Properties panel.
Rotating objects
There are lots of ways to rotate artwork, including methods that range from precise to free-form rotation. In previous lessons, you learned that you can rotate selected content with the Selection tool. By default, objects are rotated around a designated reference point in the center of content. In this part of the lesson, you’ll learn about the Rotate tool and the Rotate command.
With the Selection tool (
 ) selected, click to select the bicycle and rider group on the Commute artboard.
Choose View > Fit Artboard In Window.
To select the rider’s helmet, double-click the helmet to enter Isolation mode for the group. Then click the helmet.
Press Command and + (macOS) or Ctrl and + (Windows) to zoom in.

Move the pointer off one of the corners of the bounding box, and when the rotate arrow (
 ) appears, drag clockwise a little to rotate the helmet so the rider can see.
 Tip
TipAs you drag to rotate, pressing the Shift key constrains the rotation to 45 degrees.
 Tip
TipAfter transforming content using various methods, including rotation, the bounding box may be rotated. You can choose Object > Transform > Reset Bounding Box to reset the bounding box around the artwork again.
The Selection tool rotates content around the center by default. The Properties panel (or Control panel or Transform panel) is another way to rotate artwork precisely. In the Transform panel, you can always see the angle of rotation and change it later for individual objects. Next you’ll use the Rotate tool, which allows you to rotate around a different point.
Press the Esc key to exit Isolation mode.
Choose 3 Bike Stats from the Artboard Navigation menu in the lower left below the document window.
With the Selection tool selected, click to select the blue line in the middle of the gear. See the first part of the following figure.
Select the Rotate tool (
 ) in the toolbar (it’s under the Reflect tool [
 ]). Move the pointer over the center of the green circle at the center of the gear. When the word “center” appears, which indicates the center of the green circle, click to set the reference point (which the circle will rotate around). Look at the second part of the figure for where to click.
Now you’ll rotate the blue path around the center of the gear, but you’ll make a copy as you drag to rotate.
Move the pointer above the selected path and begin dragging clockwise. As you drag, press Option+Shift (macOS) or Alt+Shift (Windows) to copy the artwork as you rotate it and constrain the rotation to 45 degrees. Release the mouse button and then the keys when you see –90° in the measurement label.

You need to make two more of the same path, each rotated a further 90 degrees around the gear center. In this case, you’ll let Illustrator simply repeat the copy and rotate you just did.
Choose Object > Transform > Transform Again. Choose it once more to have a total of four blue paths in the gear.
With the Selection tool (
 ) selected and the last blue path selected, Shift-click the other three paths to select all four.
Click the Group button in the Properties panel to group them together.
With the group still selected, double-click the Rotate tool in the toolbar. In the Rotate dialog box that appears, change the Angle value to 50 degrees. Select Preview to see the change, and then click OK.

Transforming with the Free Transform tool
The Free Transform tool ( ) is a multipurpose tool that allows you to distort an object, combining functions such as moving, scaling, shearing, rotating, and distorting (perspective or free). The Free Transform tool is also touch-enabled, which means you can control transformation using touch controls on certain devices. You’ll give the buildings on the larger artboard a shadow.
 Note
Note
To learn more about touch controls, search for “Touch Workspace” in Adobe Help (Help > Illustrator Help).
Choose 2 Main Infographic from the Artboard Navigation menu in the lower left below the document window.
With the Selection tool (
 ) selected, click to select the buildings on the artboard. To make a copy that is pasted beneath the original, choose Edit > Copy and then Edit > Paste In Back. Leave the pasted buildings selected.
Click Edit Toolbar (
 ) at the bottom of the toolbar. Scroll in the menu that appears, and drag the Free Transform tool (
 ) into the toolbar on the left to add it to the list of tools. Drag the Puppet Warp tool (
 ) onto the Free Transform tool to group them together.
Press and hold on the Puppet Warp tool (
 ), and select the Free Transform tool (
 ) in the toolbar.
Press the Escape key to hide the extra tools menu.

With the Free Transform tool selected, the Free Transform widget appears in the Document window. This widget, which is free-floating and can be repositioned, contains options for changing how the Free Transform tool works. By default, the Free Transform tool allows you to move, shear, rotate, and scale objects. By selecting other options, like Perspective Distort, you can change how the tool works.
Move the pointer over the top middle point of the selected buildings. When the pointer changes (
 ), drag up and to the left. Release when the buildings look something like the figure.
Click the Fill box in the Properties panel and change the color to black. Change the Opacity in the Properties panel to 20%.
Choose Select > Deselect.

Shearing objects
Shearing an object slants, or skews, the sides of the object along the axis you specify, keeping opposite sides parallel and making the object asymmetrical. Next, you’ll apply shear to dashes in the roadway you will make.
 Tip
Tip
You can set a reference point, shear, and even copy in one step. With the Shear tool ( ) selected, Option-click (macOS) or Alt-click (Windows) to set the reference point and to open the Shear dialog box, where you can set options and even copy if necessary.
With the Selection tool (
 ) selected, click the blue rectangle at the bottom of the artboard. This is the roadway that you will add a cyclist to in the last part of the lesson.
To make dashes in the roadway, select the Rectangle tool (
 ) in the toolbar. Drag to create a small rectangle on the roadway, making sure it’s in the center vertically.
Change the fill color in the Properties panel to the green swatch named “Dark Green” or similar, and the Stroke Weight to 0, if necessary.
With the shape selected, now you’ll skew it to give it a little perspective.
With the shape selected, select the Shear tool (
 ), nested within the Rotate tool (
 ) in the toolbar.
Move the pointer above or off the right side of the shape, press the Shift key to constrain the artwork to its original height, and drag to the right. Release the mouse button and then the Shift key when you see a shear angle (S) of approximately –130.

To make a copy to the right, choose Object > Transform > Move. In the Move dialog box, change Horizontal Position to 3.2 in to move the rectangle that distance to the right, and make sure the Vertical Position is 0 to keep it in the same vertical position. Click Copy.
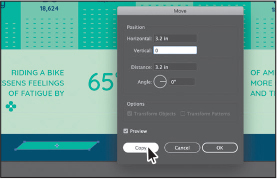
To make more, press Command+D (macOS) or Ctrl+D (Windows) three times to repeat the transformation and make three more copies.

The Command+D (macOS) or Ctrl+D (Windows) shortcut is the keyboard command for Object > Transform > Transform Again.
Choose View > Fit All In Window and then choose File > Save.
Positioning the bicyclist
Before you jump into working with the Puppet Warp tool, you need to get some artwork in place first.
With the Selection tool (
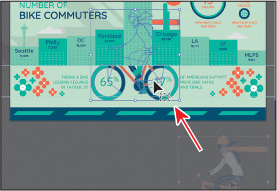
 ) selected, drag the artwork of the bicycle and rider onto the largest artboard above the artwork, as you see in the figure.
 Tip
TipYou can press the arrow keys to move the artwork in small increments.
Make sure “65%” and “47%” are somewhat centered in the wheels of the bike.
Shift-click the flowers group, which includes the numbers, and choose Object > Arrange > Bring to Front.

Press Command and + (macOS) or Ctrl and + (Windows) several times to zoom in closely to the bike.
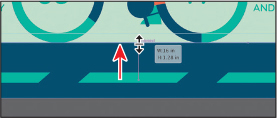
Click the blue rectangle that is the roadway, and drag the top middle bounding point up to make it taller to touch wheels of the bike.
Using Puppet Warp
In Illustrator, you can easily twist and distort artwork into different positions using the Puppet Warp tool. In this section, you’ll warp the bicycle and cyclist artwork.
Click the bicyclist again to select the artwork.
Press and hold the Free Transform tool (
 ) in the toolbar, and select the Puppet Warp tool (
 ).
).
 Note
NoteThe pins Illustrator adds to the artwork by default may not look like what you see in the figure. If that is the case, pay attention to the notes along the way.
By default, Illustrator identifies the best areas to transform your artwork and automatically adds pins to the artwork. Pins are used to hold part of the selected artwork to the artboard, and you can add or delete pins to transform your object. You can rotate the artwork around a pin, reposition pins to move artwork, and more.
In the Properties panel on the right, you should see Puppet Warp options. Deselect Show Mesh.

That will make it easier to see the pins and provide a clearer view of any transformations you make.
Click the pin on the end of the scarf to select it. You can tell that a pin is selected because it has a white dot in the center. Without letting go, drag the selected pin up and down to see how the artwork reacts. When the scarf looks something like the second part of the following figure, release.

 Note
NoteIf you don’t see a pin on the end of the scarf, click to add one.
 Tip
TipYou can press the Shift key and click multiple pins to select them all, or click the Select All Pins button in the Properties panel to select all of the pins.
By default, pins on the artwork help to keep in place the part that is pinned in place. Having at least three pins on your artwork usually achieves a better result. You’ll notice, in this case, that the hair and backpack are distorting as well.
Choose Edit > Undo Puppet Warp as many times as you need to return the scarf to its original position.
Option-drag (macOS) or Alt-drag (Windows) the same pin and notice how the rest of the artwork isn’t moving as much as it did previously.
 Note
NoteYou will most likely see a message “Shapes expanded” after dragging. One of the shapes you dragged was a Live Shape. After dragging, it is no longer a Live Shape.

The Option/Alt key tries to affect the area directly around the pin you are dragging without rotating the part of the artwork you are dragging. Next, you’ll try to make the rider look up or down by rotating their head.
If there are pins on the head and neck, click them one at a time, and press Delete or Backspace to remove them. Arrows are pointing to them in the first part of the following figure.
You can’t move pins on the artwork without moving the artwork, so if they’re not in the right place to rotate the neck, for instance, you can remove pins and add them where they are needed.
Click the neck to add a pin and then click the upper part of the white jacket to add a pin. See the second part of the following figure.

The pin on the neck is at a pivotal area. If you rotate the pin at that point, you can rotate the head. The pin on the jacket will help keep that part of the body from moving as much.
Click the neck pin to select it, move the pointer over the dotted circle, and drag counterclockwise a little to rotate around the pin.

Choose Select > Deselect and then choose View > Fit All In Window.

Choose File > Save and then File > Close.
Review questions
1. Name three ways to change the size of an existing active artboard.
2. What is the ruler origin?
3. What is the difference between artboard rulers and global rulers?
4. Briefly describe what the Scale Strokes & Effects option in the Properties panel or Transform panel does.
5. Briefly describe what the Puppet Warp tool does.
Review answers
1. To change the size of an existing artboard, you can do any of the following:
Double-click the Artboard tool (
 ), and edit the dimensions of the active artboard in the Artboard Options dialog box.
With nothing selected and the Selection tool selected, click the Edit Artboards button to enter Artboard Editing mode. With the Artboard tool selected, position the pointer over an edge or corner of the artboard, and drag to resize.
With nothing selected and the Selection tool selected, click the Edit Artboards button to enter Artboard Editing mode. With the Artboard tool selected, click an artboard in the Document window, and change the dimensions in the Properties panel.
2. The ruler origin is the point where 0 (zero) appears on each ruler. By default, the ruler origin is set to be 0 (zero) in the upper-left corner of the active artboard.
3. Artboard rulers, which are the default rulers, set the ruler origin at the upper-left corner of the active artboard. Global rulers set the ruler origin at the upper-left corner of the first artboard, no matter which artboard is active.
4. The Scale Strokes & Effects option, which can be accessed from the Properties panel or the Transform panel, scales any strokes and effects as the object is scaled. This option can be turned on and off, depending on the current need.
5. In Illustrator, you can easily twist and distort artwork into different positions using the Puppet Warp tool.