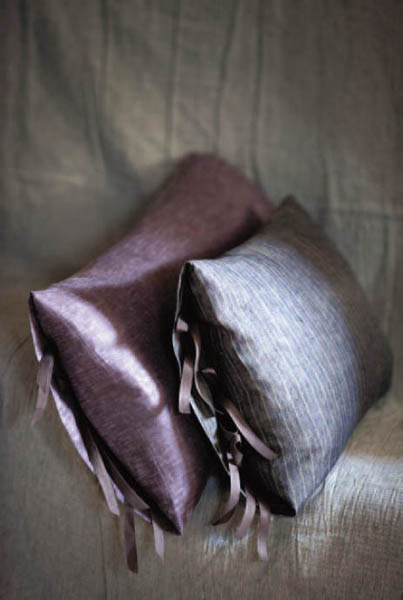
We made these cushions from an old vintage linen sheet, which is beautifully soft but once pressed has that crisp and solid look of more quality-conscious times. Vintage textiles can be found online and in many specialist shops dotted around the country. Take courage and scissors and do not feel guilty about using something really special – you are putting it to work. Pair with our sumptuous throw (see page 121) and add a bolster cushion (see page 103) for an unsurpassably elegant bedtime. Alternatively, use some muted linen with matching tapes for home comfort in any room.

Simple cotton ties are all you need for the perfect finish. As an alternative to vintage white, we have made the pillows in some fabulous linen in muted colors so they can escape the bedroom and hang out with the throw (see page 121) for a spot of luxurious relaxation.
1. Mark and cut two pieces of linen 30 by 16 in/75 by 40 cm (for a snug fit seam allowances are not added to the width). Clip notches 4 in/10 cm from each corner on the long edges (Fig 1).
Fig 1
2. Cut the cotton tape into twelve pieces, each measuring 16 in/40 cm. Take one of the linen pieces and on the inside of one of the short edges, fold over the raw edges by 3/8 in/1 cm and place three tape lengths at 4 in/10 cm intervals; pin (Fig 2, left). Fold the edge over by 3/8 in/1 cm so the tapes are lying across your cloth and topstitch in place (Fig 2, right). Repeat on the other short edge.
Fig 2
3. Flip the tapes back and topstitch along the edge (Fig 3). Now attach the remaining six tapes to the short edges of the second piece of linen.
Fig 3
1. Taking a 3/8-in/1-cm seam allowance, sew the front and back pieces together at the top and bottom edges taking care to line up the notches (Fig 4).
Fig 4
2. Turn over the short edges to the inside at the notch mark (Fig 5a). Pin and sew together at either end of the back piece only, leaving the ends of the top piece free so that they can be slipped over the pillow pad (Fig 5b). Press well.
Fig 5a
Fig 5b
3. If you wish, you can sew a line of edge stitching at the very ends of your pillow cover (Fig 6). This works well on some fabrics but others can end up fluted; make your decision based on how the topstitching looks.
Fig 6
4. Turn the finished cover right side out and stuff the cushion pad into it, slipping the pillow ends over the pad (Fig 7).
Fig 7
5. Tie each pair of tapes firmly together and make loose bows (Fig 8).
Fig 8