CHAPTER 6
Building a Faerie House from the Ground, Up
This chapter is going to be a bit different. Here you will find step-by-step instructions on how to construct two different faerie houses. I specifically designed these two houses for this book and photographed them step-by-step as I built them. The first house, the Green Dreams House, will show you many of the basic techniques needed to help you get started to successfully build a faerie house. There will be written instructions and copious photos to guide you along. This house features curved-wall construction with basic door, window, and fixed-frame roof components, all finished off with an integrated flat base.
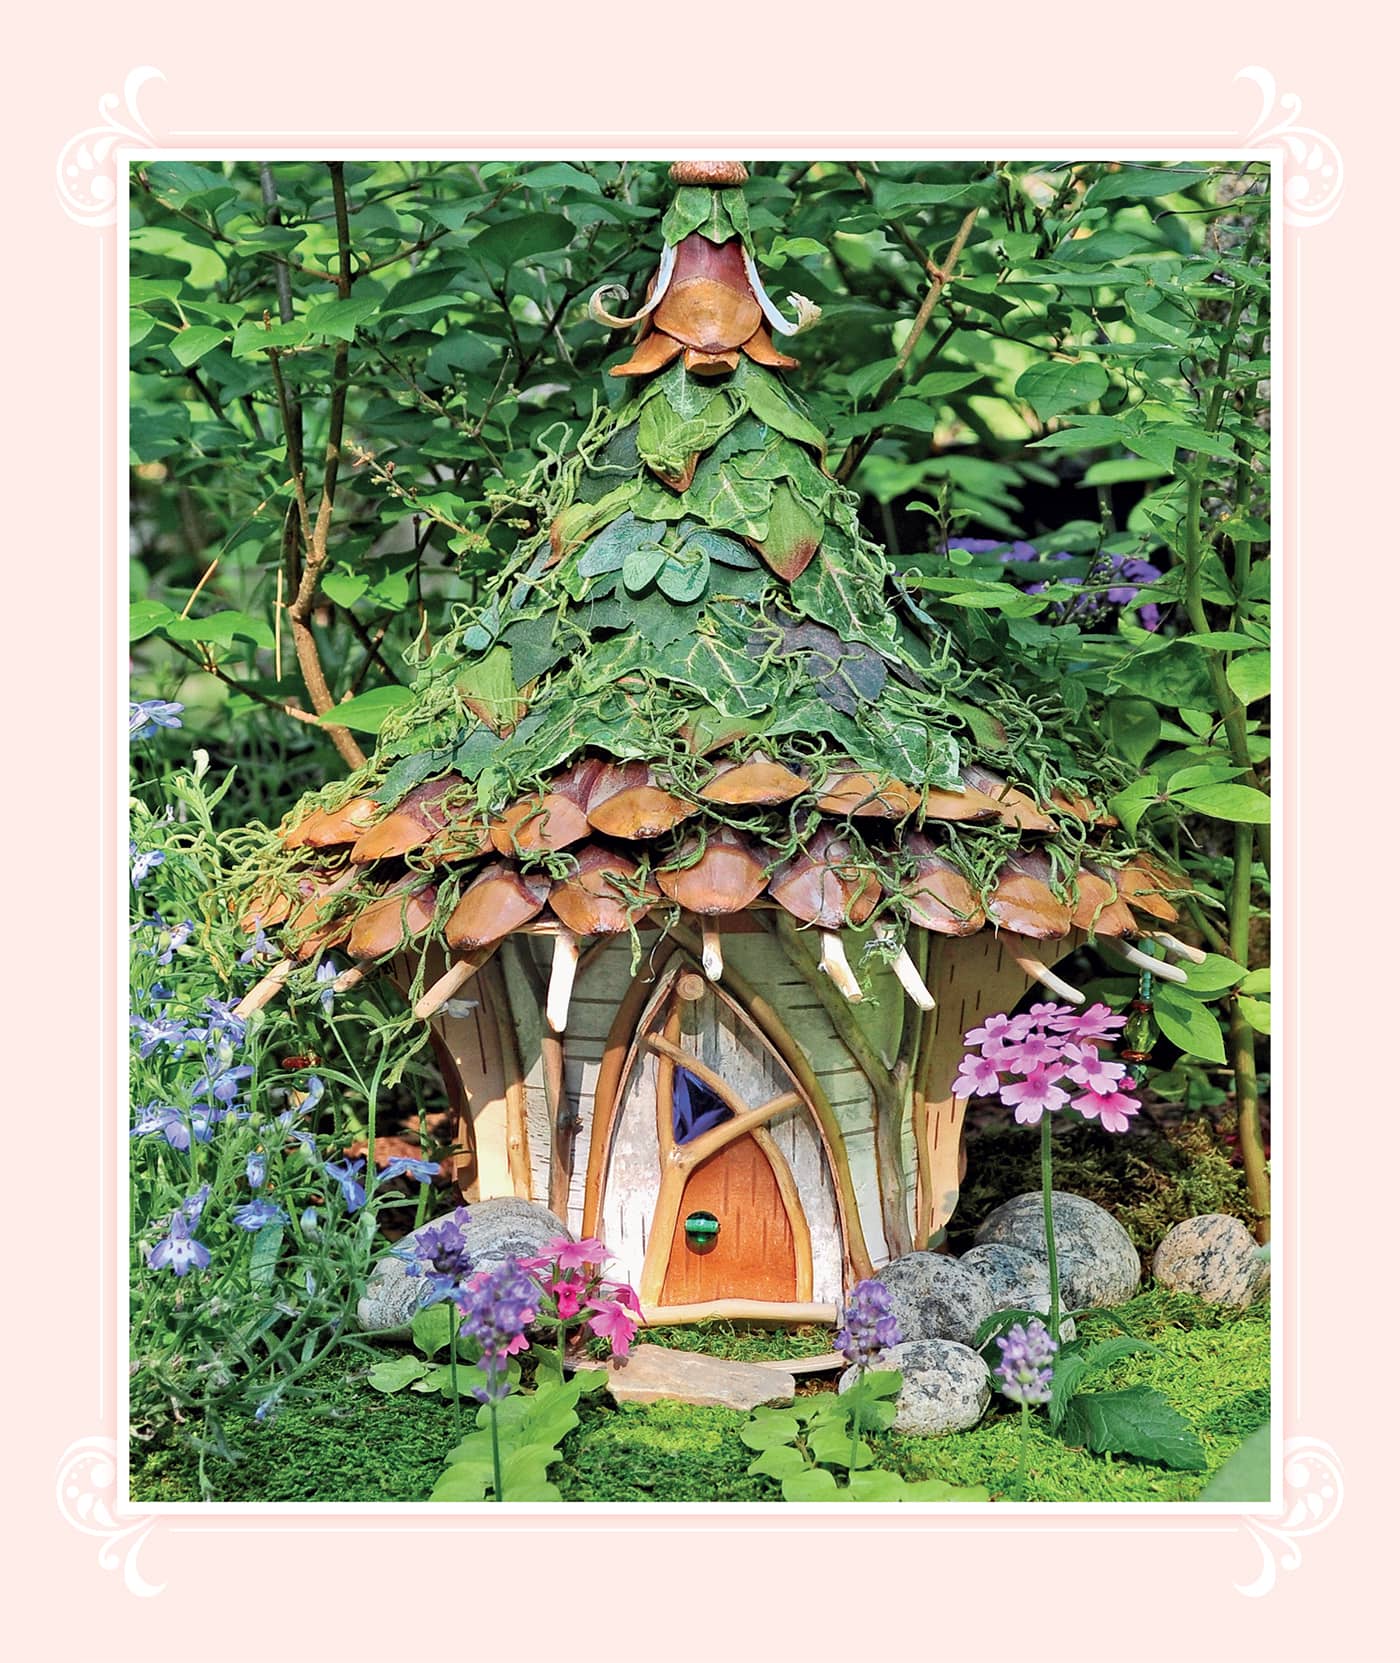
The Green Dreams House in a garden setting.
The second tutorial is advanced and has less text describing the process. This tutorial follows the creation of the Golden Cottage, with flat walls with an arched, hinged door, complex mullioned windows, a bay window feature, and an elaborate removable, lighted roof. The house also features a sculpted and landscaped base. These two houses together were specifically designed to teach you all the key techniques you will need to then set off down your own path of creativity of making charming and unique faerie houses.
As I have suggested many times already in these pages, please read all the instructions and be very familiar with the process before starting. Work slowly and carefully and use lots of patience during each phase of construction, and you will be rewarded with a sweet little house that you can be proud of!
CASE STUDY NO. 1
GREEN DREAMS HOUSE
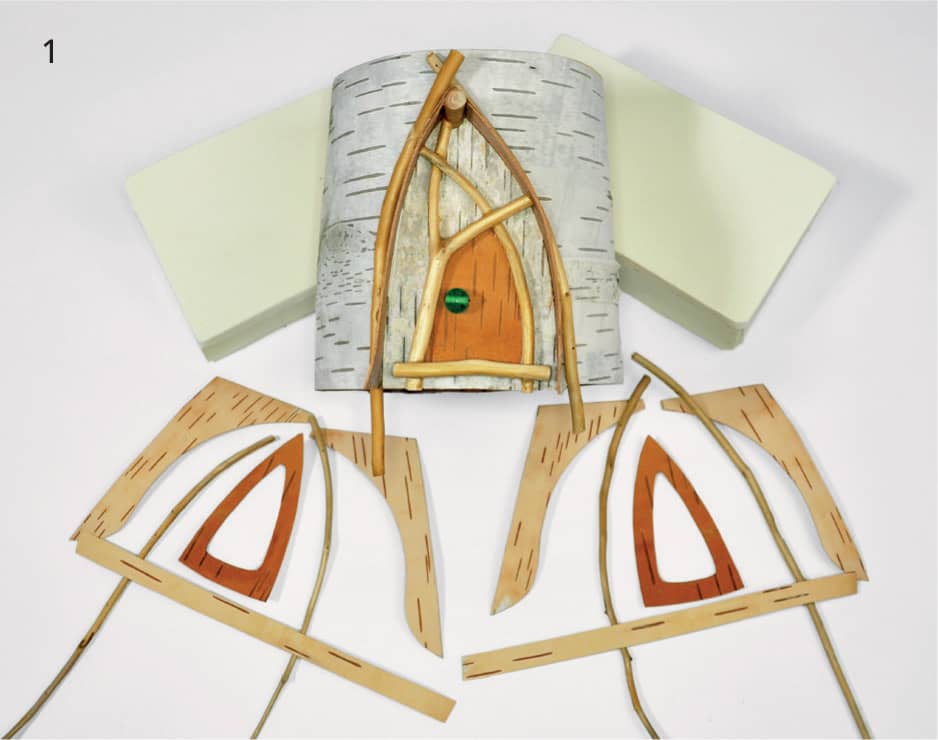
The main body for this house is made from a tube of birch bark that I found in the forest. As with all of the wild-collected materials, it is necessary to clean, dry, and prepare found pieces for use. If you do not have access to birch bark in your area, it is possible to purchase flat sheets and tubes from various suppliers on the Internet—especially on eBay. Feel free to adapt any of the materials in these tutorials to ones that are plentiful in your region. For this project, the tube of birch bark is approximately 6 inches in diameter and 8 inches tall, but this house can be made at any scale as long as you keep things relatively proportional.
1 MAKE AND INSTALL THE DOOR
Follow the instructions in Chapter 3 shown here to make the twig-framed door in vestibule. Once you have made the door, trim and adjust the back edge of the vestibule so that it fits snugly against the curved wall of the main house. Once that adjustment has been made, glue the vestibule to the house using wood-colored epoxy glue. After the epoxy has set, apply a decorative twig to either edge of the junction where the vestibule meets the house—again using wood-colored epoxy. Note: Unless otherwise specified, you should use epoxy for most of these constructions.
2 MAKE AND INSTALL THE WINDOWS
Next, gather your materials for the two triangular-shaped windows with awnings and install them in the house. The tutorial for these windows is found in Chapter 3 shown here.
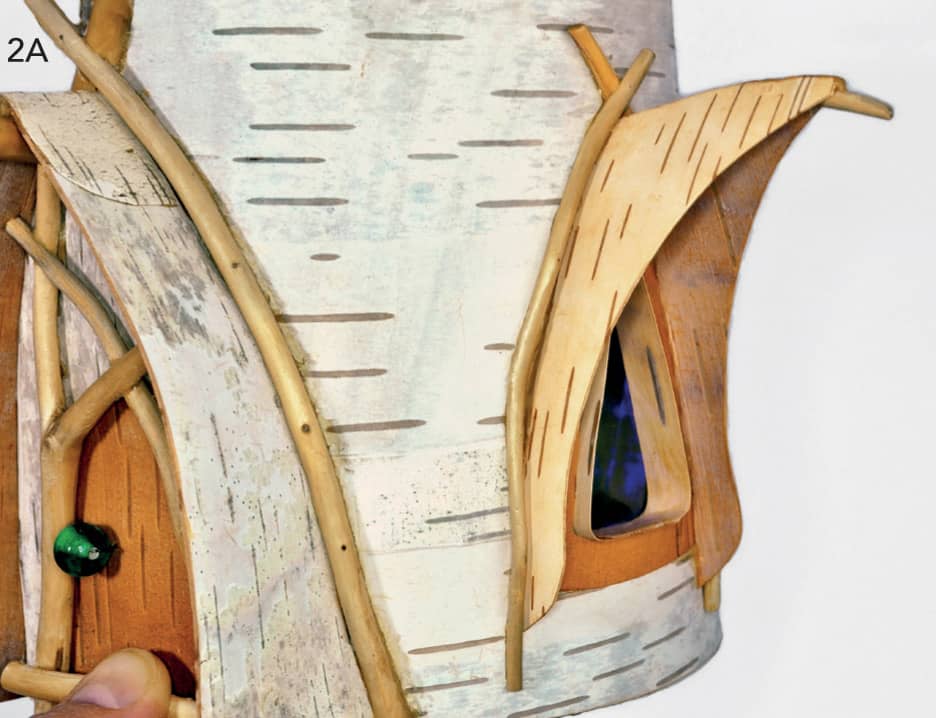
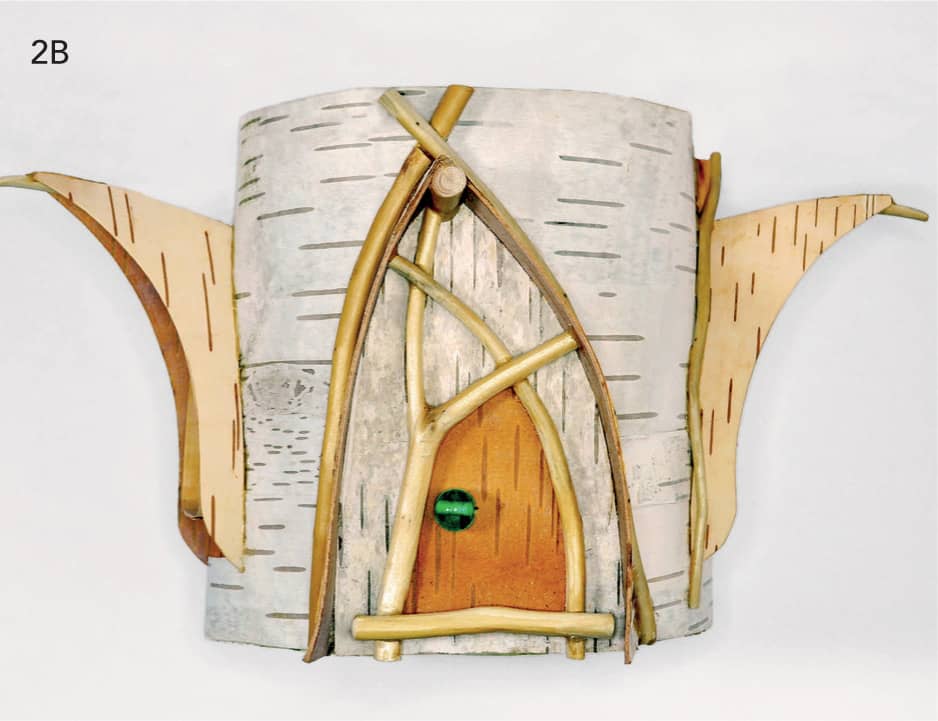
Image 2A is the main body of the house and the installed door with its vestibule, as well as one of the windows with the decorative awning. Note how the twigs have been glued over the junction areas to help strengthen the joints and hide any imperfect bonding.
Notice the way using different colors of birch bark for the awnings and the door can add harmonious subtlety to the main body of the house. In image 2B, the decorative twig outlining the window on the right has been applied. That hasn’t been done to the window on the left. If one wanted to use dark twigs as decorative accents, the resulting look would be different and striking, which may be more appealing to your taste. What is important is to use materials that are durable, beautiful, and pleasing to your eye, so don’t feel that you have to replicate exactly what is being shown here.
The apex of the window awnings and the door vestibule are all at approximately the same distance away from the top edge of the house. In this tutorial example that distance is approximately 1 inch on the nearly 8-inch-tall house. You will need a proportional margin for the next step.
3 INSTALL ROOF BEAMS
Following the instructions in Chapter 5 shown here for the fixed, framed roof tutorial, begin by creating and installing your roof beams as instructed. If your house is smaller than 4 inches, you could use just six roof beams. If your house is larger than 7 1/2 inches in diameter, I recommend using more roof beams. They are a functional yet aesthetic element, and the roof may look weak if there are too few beams in a large house.
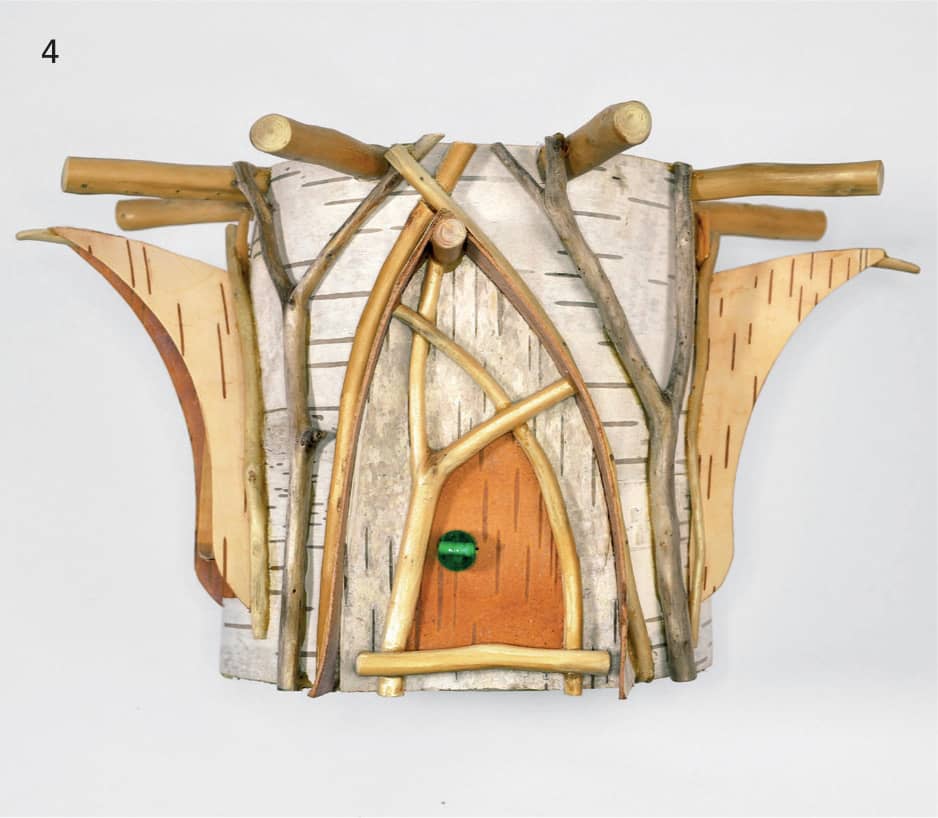
4 APPLY DECORATIVE TWIGS
Now that the roof beams are in place it is possible to fit a matching pair of decorative twigs to the front and back of the house. Getting the roof beams into position first defines available space for adding decorative twigs without interfering with the roof beams.
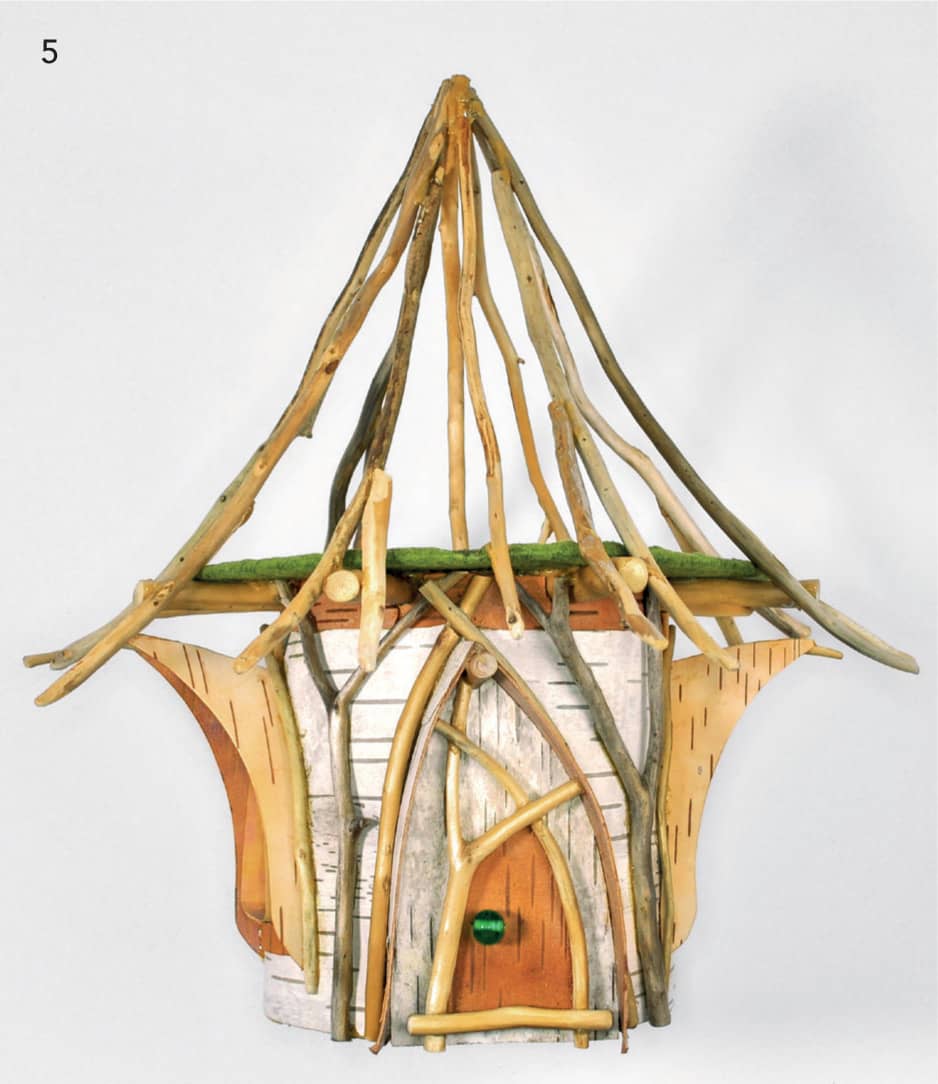
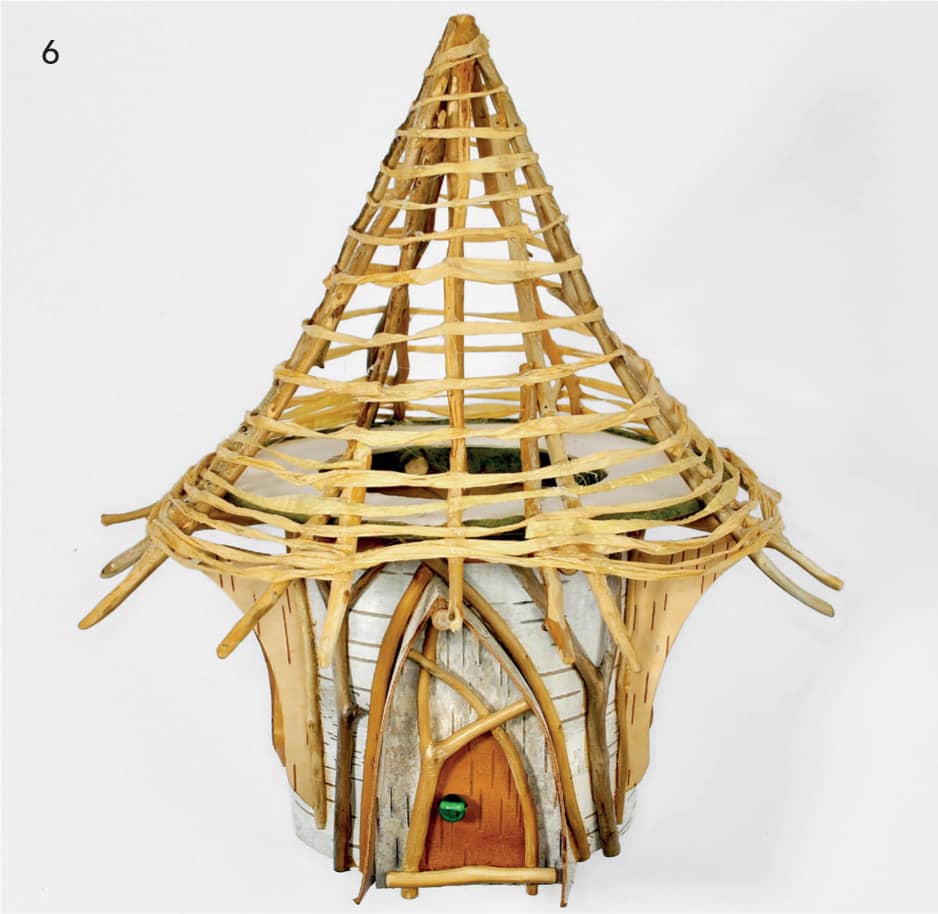
5 INSTALL TWIG RAFTERS AND EAVES RING
Continue to follow the instructions in Chapter 5 shown here and install the roof rafters to create a conical roof for your round house. (You may opt to make a removable roof if you feel confident with your skill level. Just follow those instruction threads instead.)
6 INSTALL UNDERLAYER ROOF SUPPORT
As with the instructions for the framed roof tutorial shown here, use raffia or a similar material, such as heavy thread, yarn, or cotton string, to apply a webbing surface for your mid-layer of roofing. If the house will be equipped with LED lighting (optional) install the lighting at this stage, either before or after the raffia/paper application as you chose. Follow the basic lighting instructions found in Chapter 4 shown here and adapt as you wish for this design.
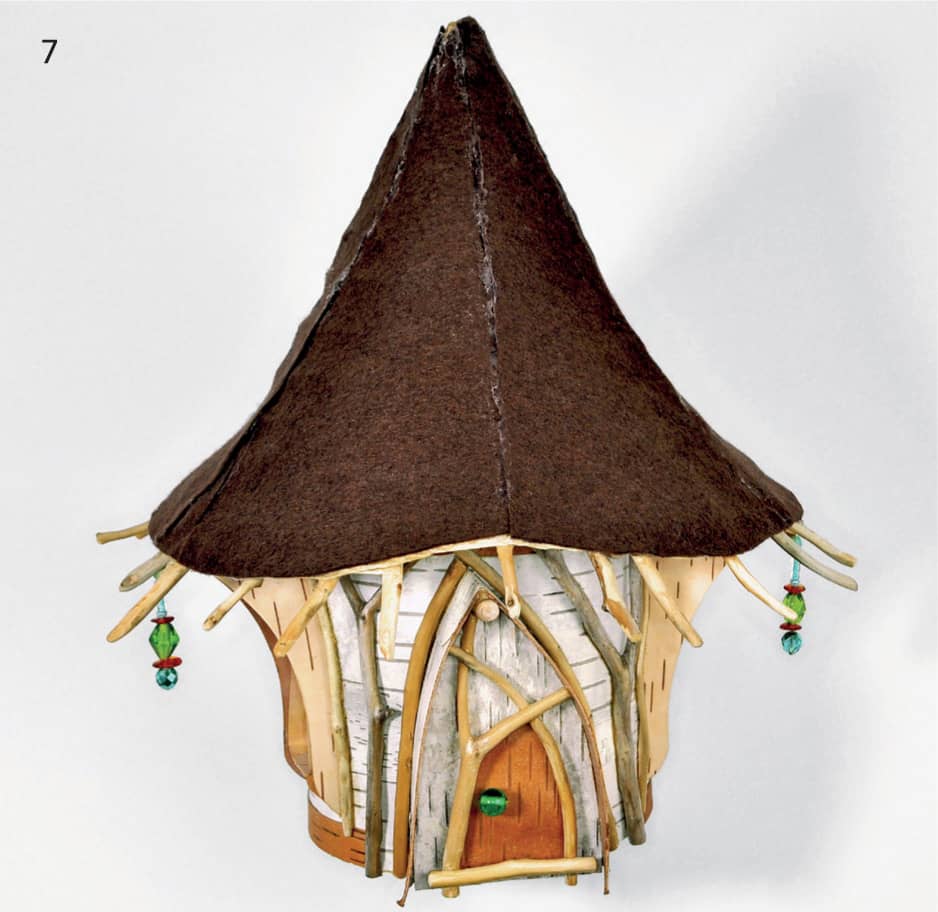
7 COVER THE ROOF WITH THE FELT LAYER
Following the instructions in Chapter 5 shown here and apply the felt layer upon which your final decorative roofing layer will be attached. Use brown felt for any bark, pinecone scales, or other dark roofing materials. Use green or appropriate-colored felt for silk botanicals (either leaves and/or flower petals) that will look harmonious with your final roofing materials.
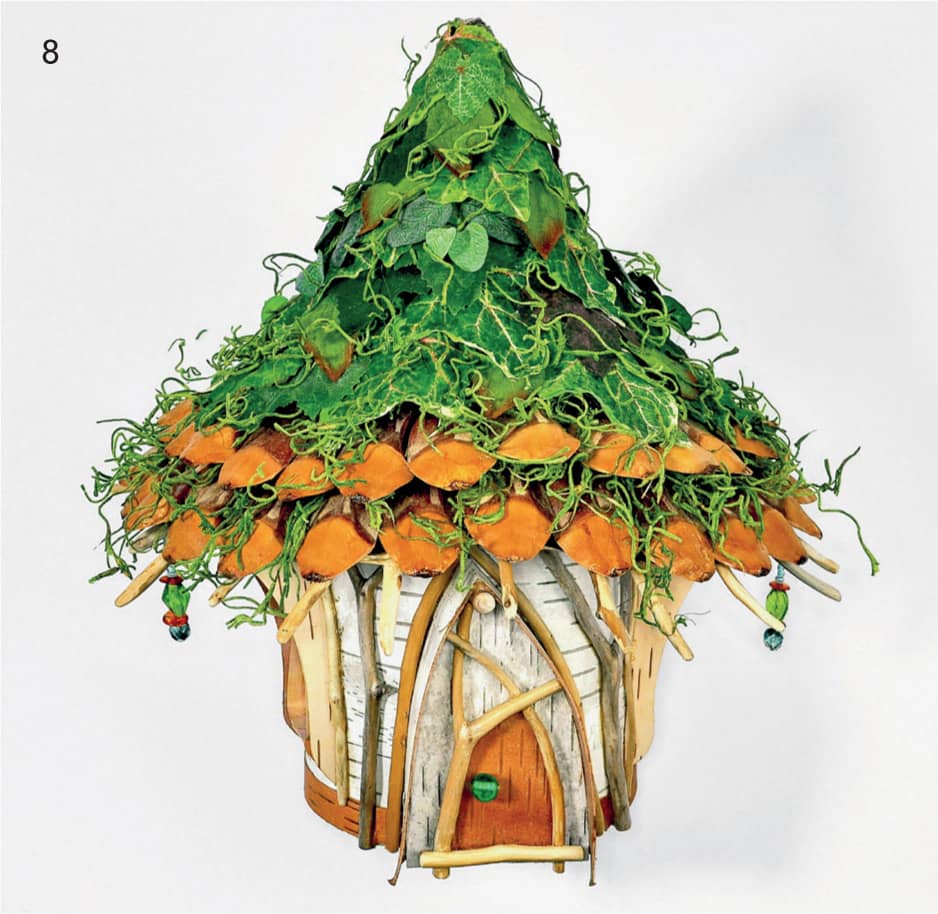
8 APPLY THE FINAL, DECORATED ROOF LAYER
Here we have the finished roof as is described in the tutorial in Chapter 5, shown here, using pinecone scale shingles for the first two layers and silk botanicals for the rest of the roof. Feel free to modify this tutorial and apply whatever roof covering inspires you.
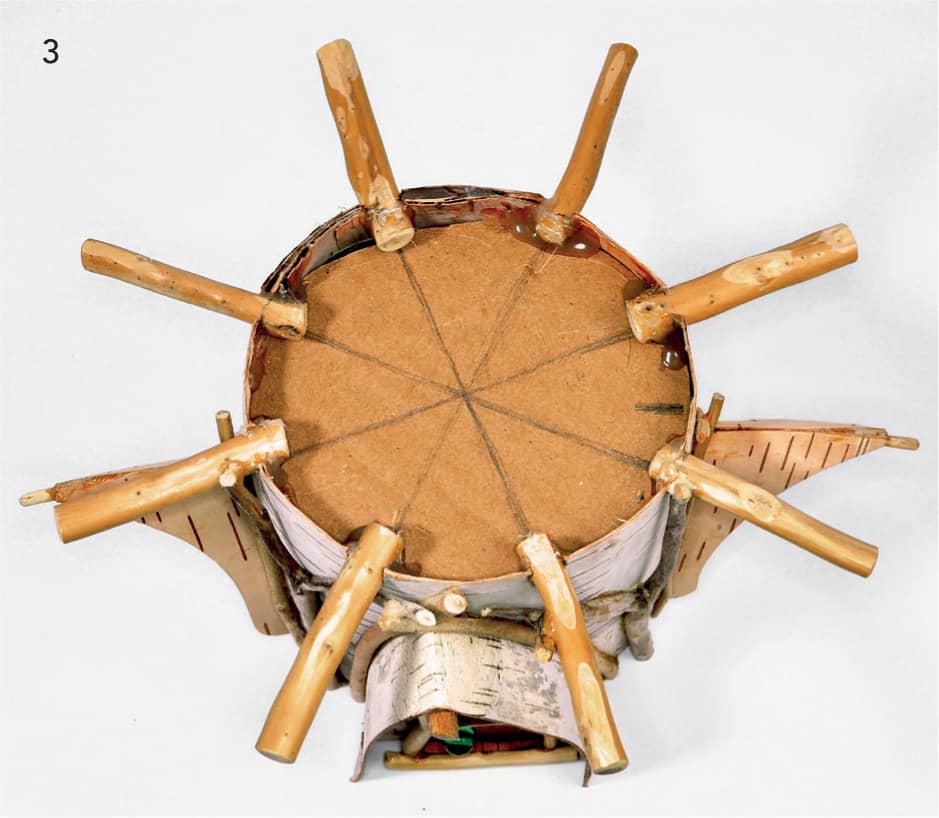
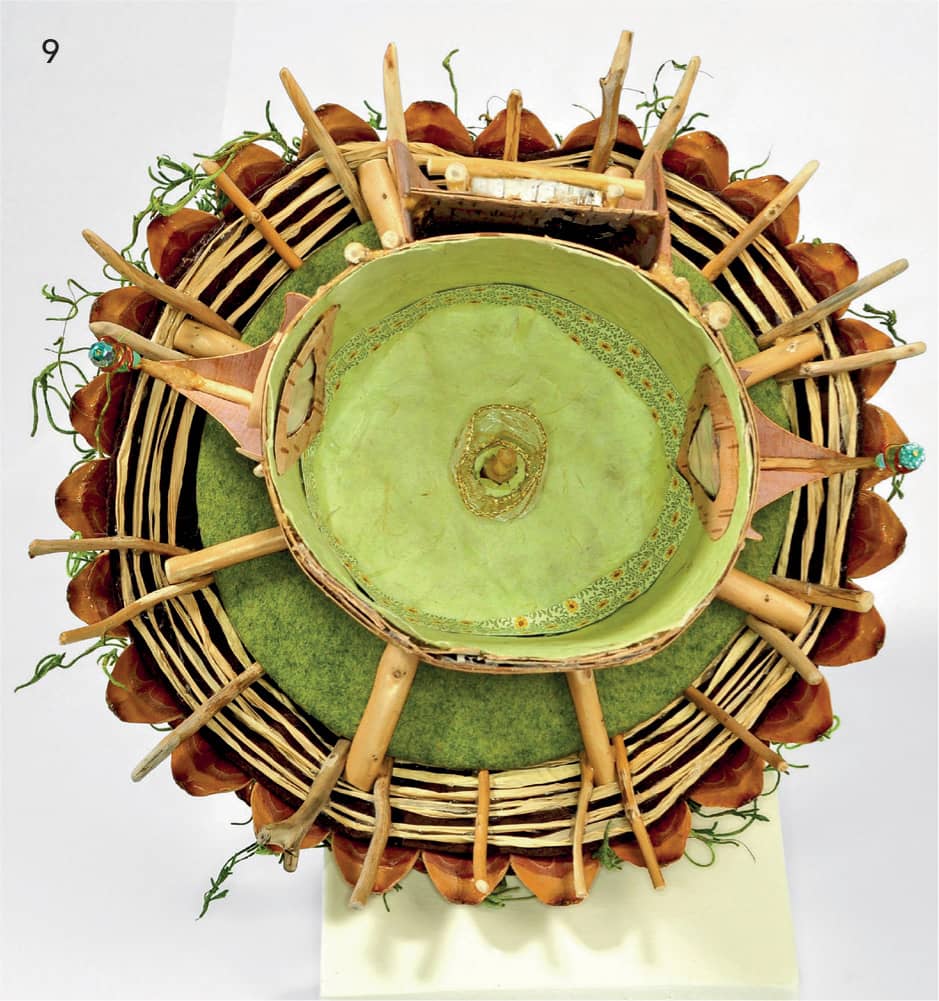
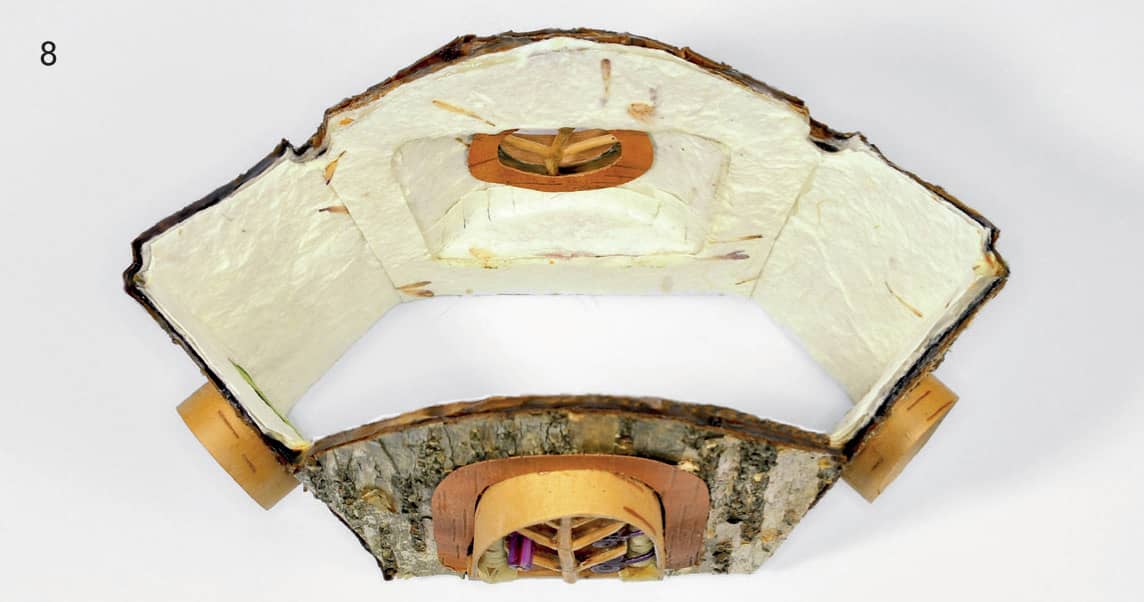
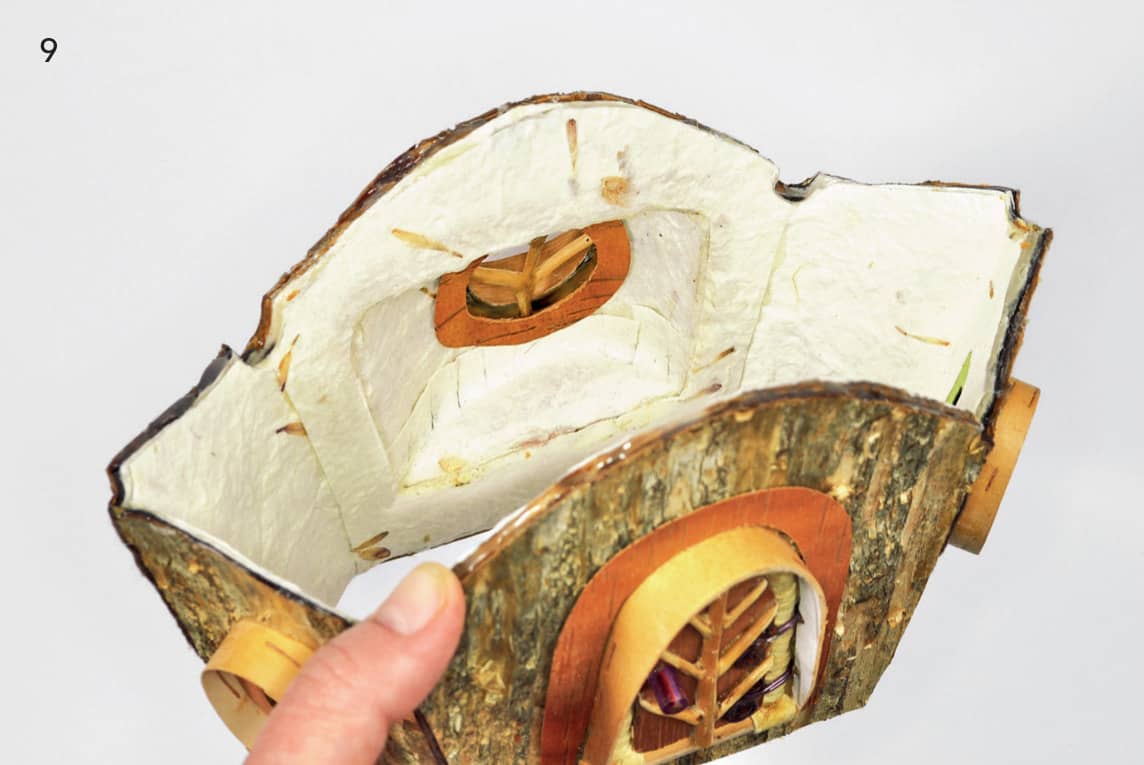
9 FINISH THE INTERIOR OF THE HOUSE (IF DESIRED)
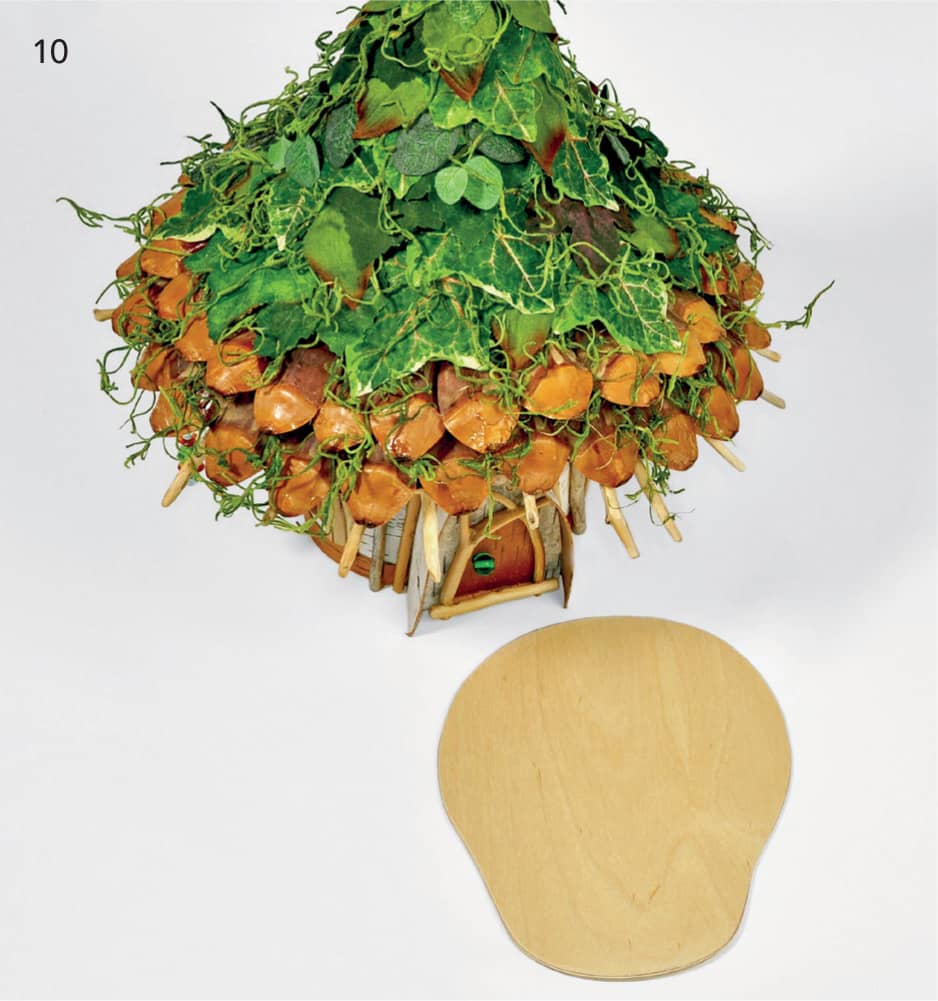
This is the view from the bottom of the house so far. For this simple structure, I’ve chosen to line the main house with a fresh spring green mulberry paper. Using the tracing of the footprint of the house to arrive at the approximate shape and size, make and apply a circle of paper to the ceiling of the room. Next, add the paper to the walls, following the guidelines in Chapter 4, shown here, on finishing the interior. Once the ceiling and the walls are covered with the paper, apply a small decorative strip of printed floral paper to what will be the very top edge of the wall inside the house. (In this example it was approximately 1/2 inch wide.) This decorative strip acts to camouflage any mismatches between the wallpaper on the ceiling paper. The final touch is to add decorative frames over the window openings on the inside to give the interior of the house a nice finish. Any additional decorations, personalization, or other embellishments that you wish to add to the inside of the house must be done now, because the next step will seal up the house completely.
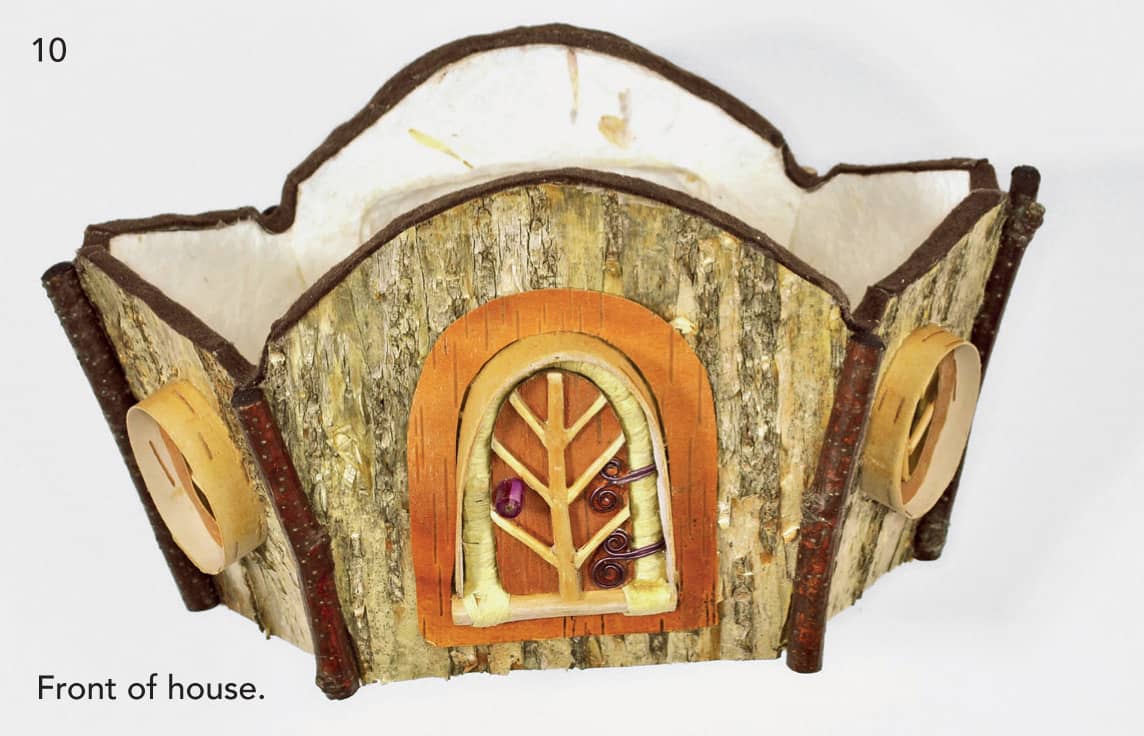
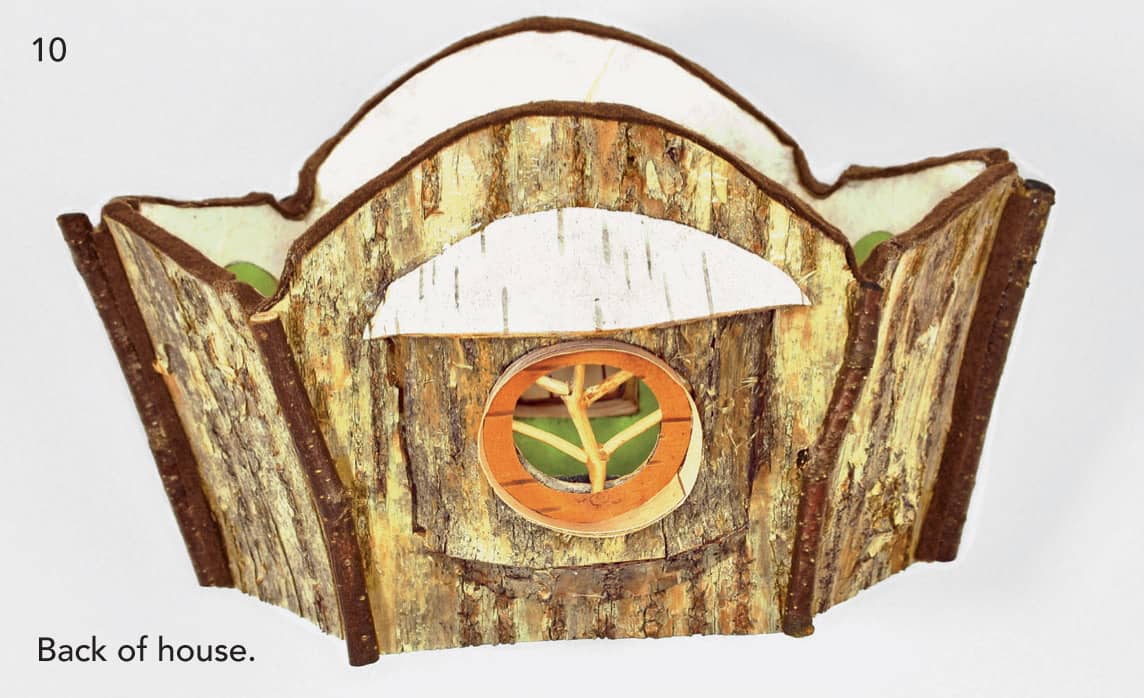
10 MAKE THE BASE
You will make a simple, flat base for this house. Using a sheet of cabinet-grade 3/16- or 1/8-inch-thick plywood, cut out a pear-shaped base. The size of this base is determined by the footprint of the house, including the bump-out created by the door vestibule. The wood extends out beyond the edge of the house by a small margin, as desired. Place the house on the base, and check to make sure that the house is plumb and level. Trim the bottom edge of the house as needed to make it sit square and level.
Smooth and sand the plywood base to a medium-high finish and then seal with several thin coats of spray urethane. Wait until completely dry to attach to house.
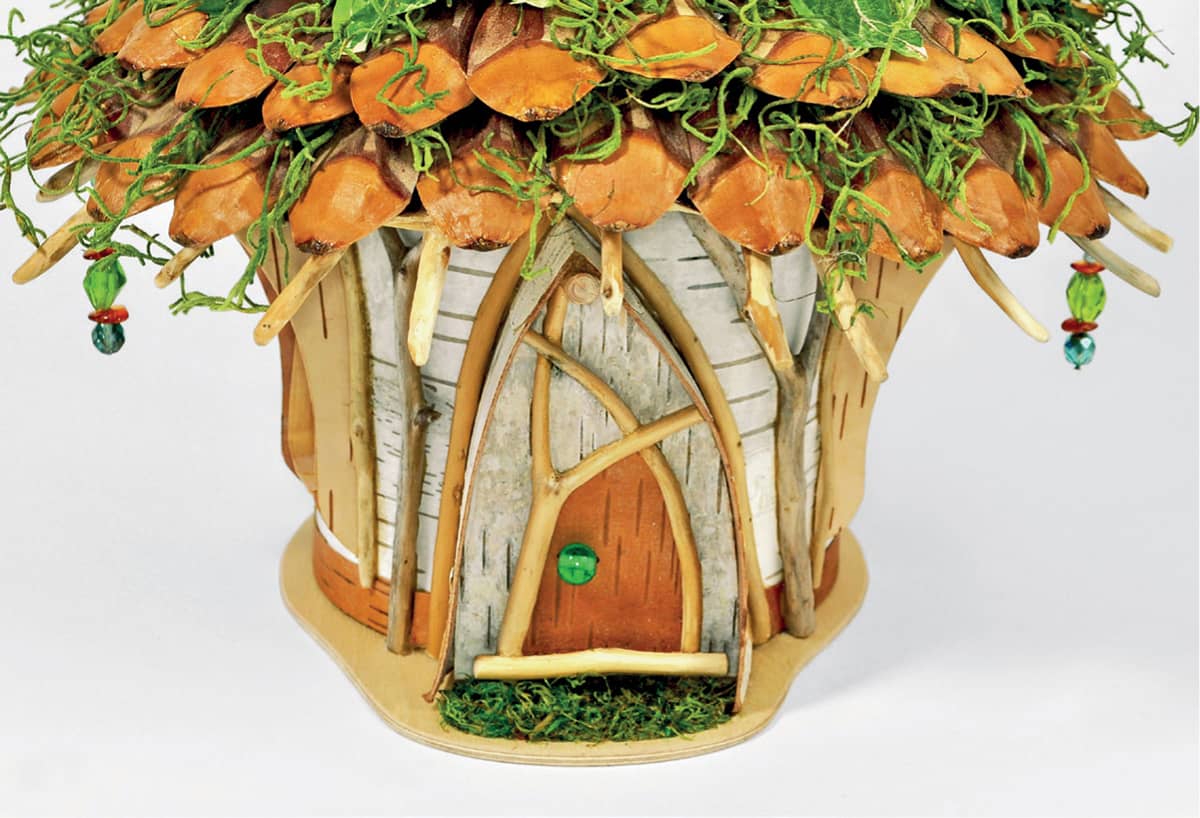
11 ATTACH THE BASE AND DECORATIVE TRIMS
Once the house and base have been fully prepared, check the interior one last time. Apply a bead of wood-colored epoxy to the bottom edge of the house, and quickly attach the house to the plywood base. Clean up any excessive glue before dries.
Once the house is permanently attached to the plywood base, you may wish to add a decorative strip of birch bark (or similar material) around the very bottom of the house. This strip will add an extra layer of contact for added strength, and it will also camouflage any gaps in the joint between the house and the base. You will need to apply this strip in pieces as you work around the twigs. As a final touch, cut and glue a small piece of preserved mass in place as a natural welcome mat.
Now is the time to add glass beads and decorative ornaments the roof and exterior walls of your house.
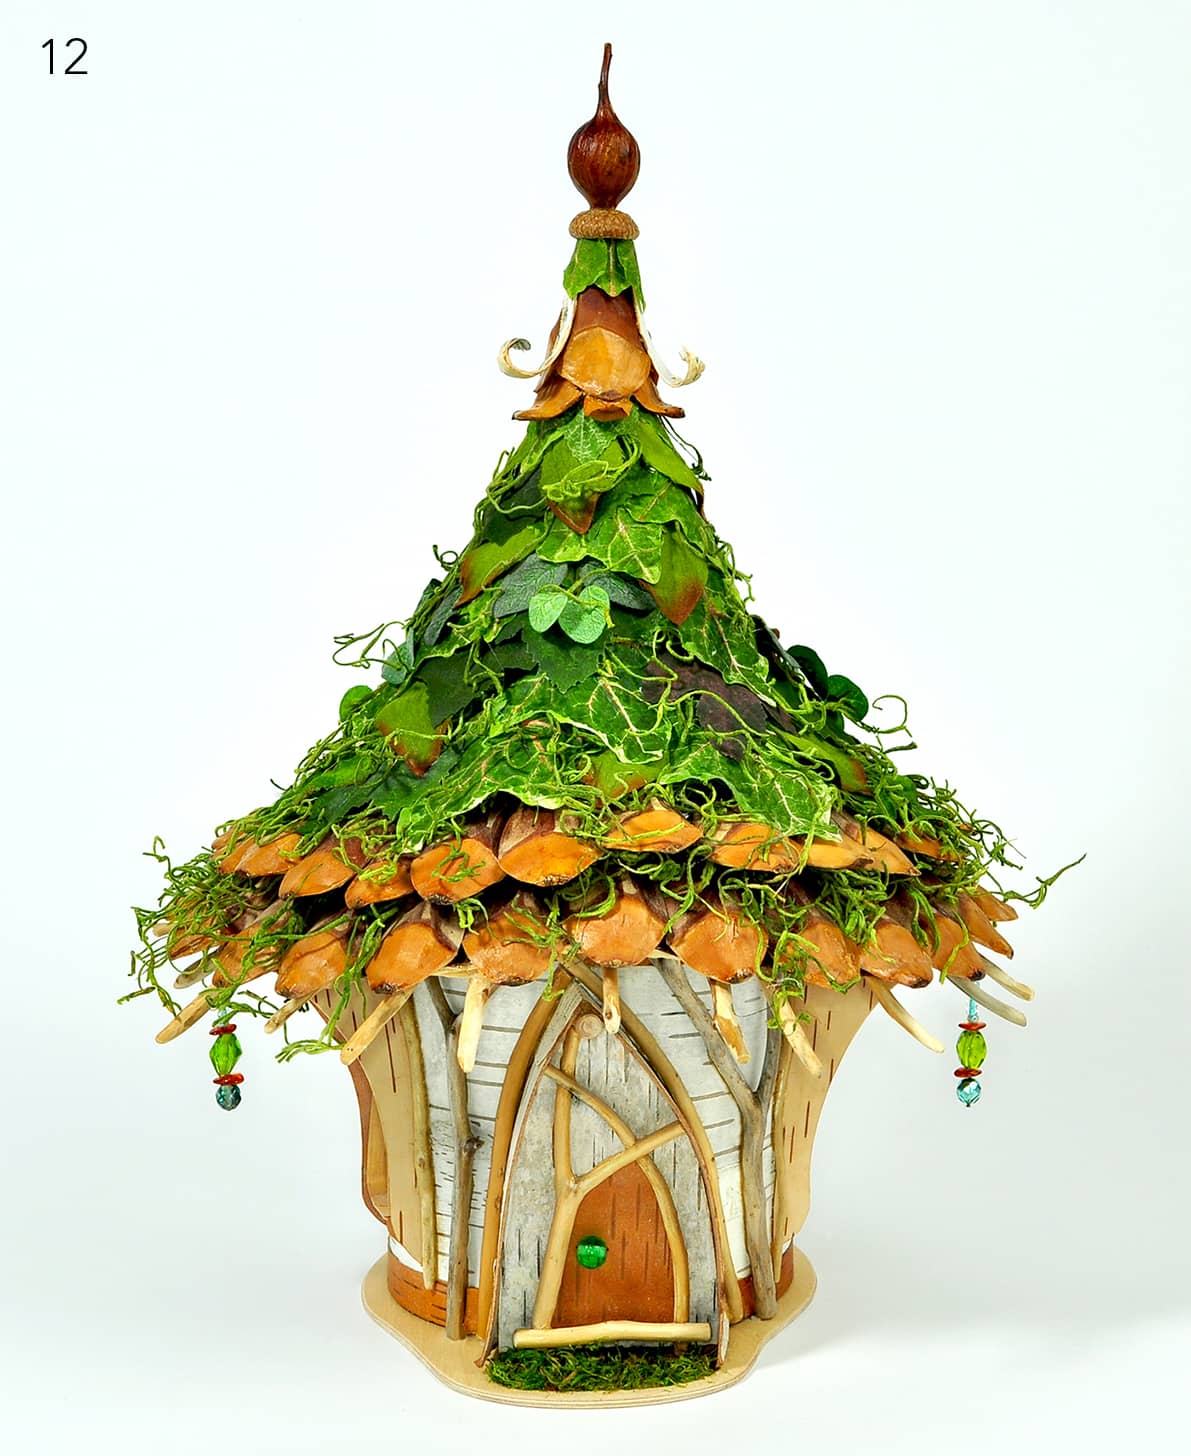
12 MAKE AND ADD A ROOF FINIAL
Follow the instructions in Chapter 5 shown here which describes how to make and install a finial for this conical roof.
To add bead dangles, use jeweler’s head pins or beading wire to create beaded dangles as desired. Glue them into place using epoxy glue.
Your house is now finished and ready to be enjoyed. Congratulations!
CASE STUDY NO. 2
GOLDEN COTTAGE
This tutorial is geared toward the accomplished builder. It is mainly a photo tutorial with minimal instructions, because in order to make it, you need to be familiar with and have practiced many of the building techniques used in this construction. As with all the other tutorials in this book, you can adapt the materials and the process for other creations. Work carefully, and with patience, you can construct this gorgeous house, or one quite like it, with your own touches!
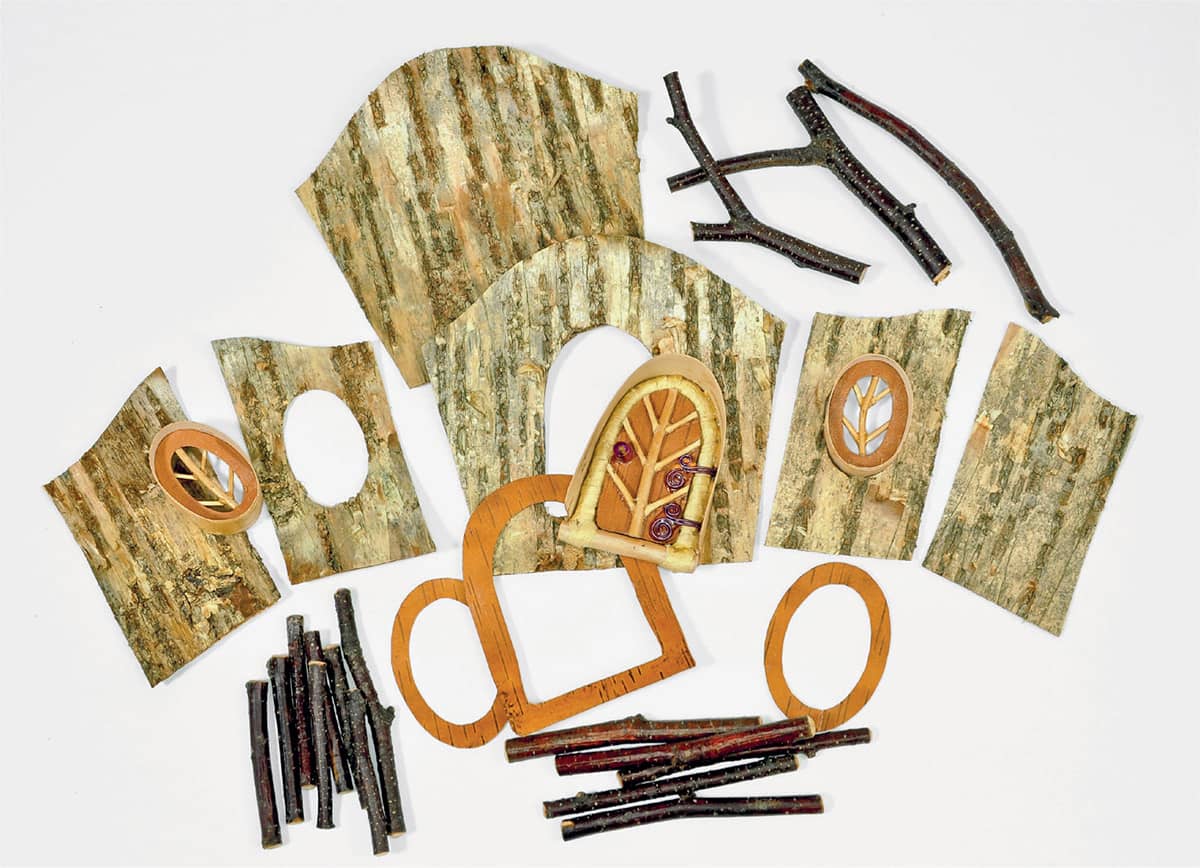
Many of the key elements to make the main house body are made with golden birch bark, but feel free to use any material you like. It just needs to be fairly stiff and rigid. Contrasting twigs for trim will add strength and interest.
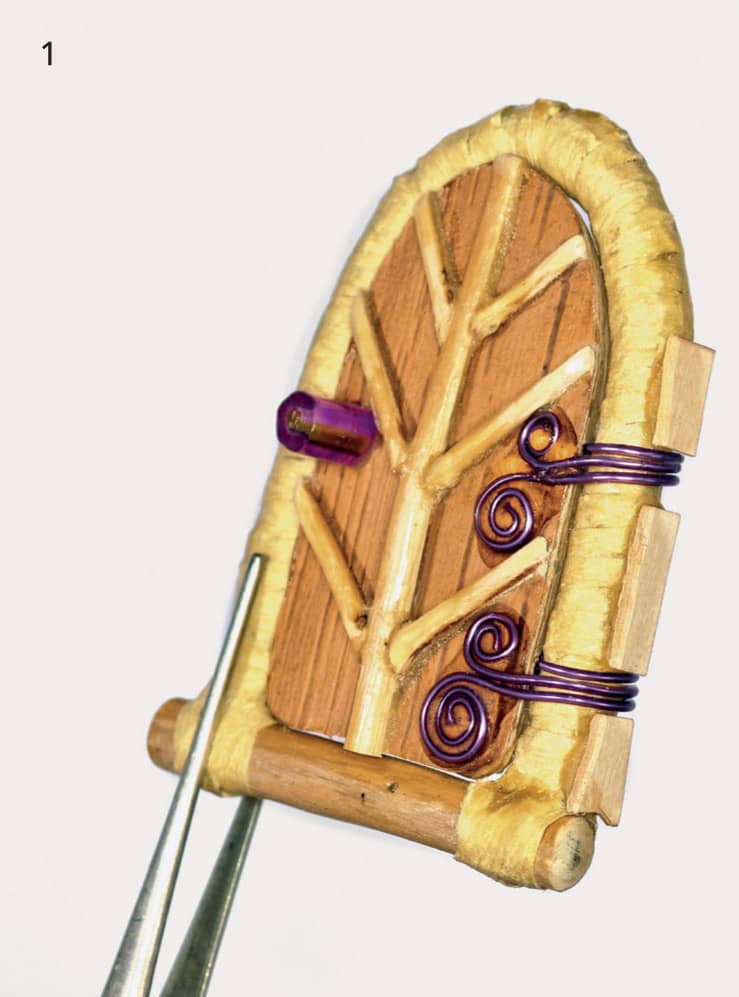
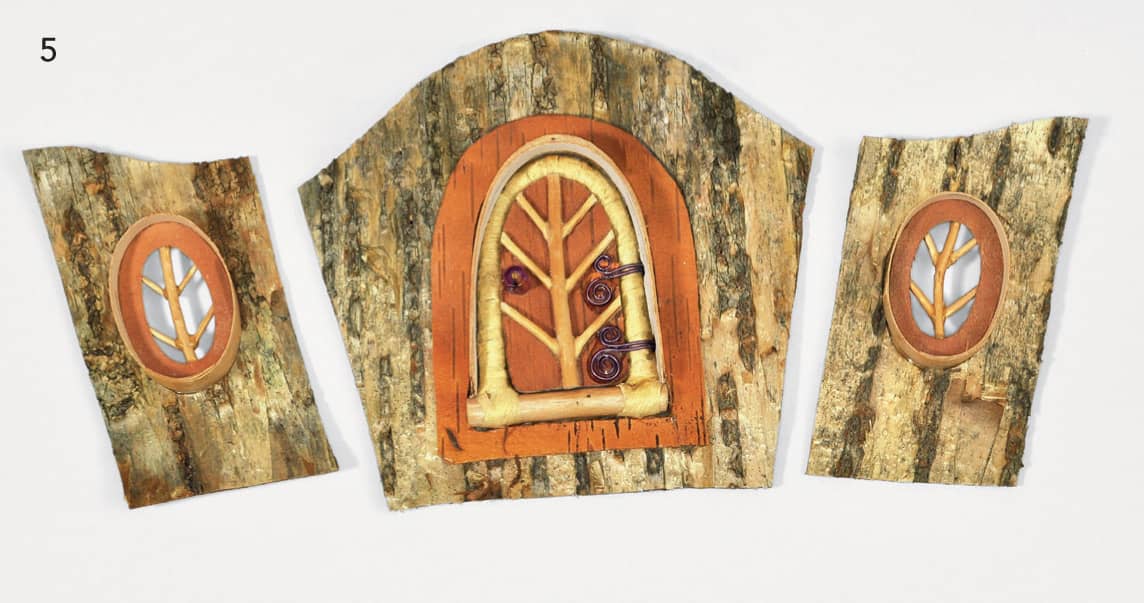
1 BUILD THE DOOR
Follow the tutorial in Chapter 3 shown here and complete a door scaled to your project.
2 BUILD THE BAY WINDOW
Build a bay window in the central back panel as described in Chapter 3 shown here.
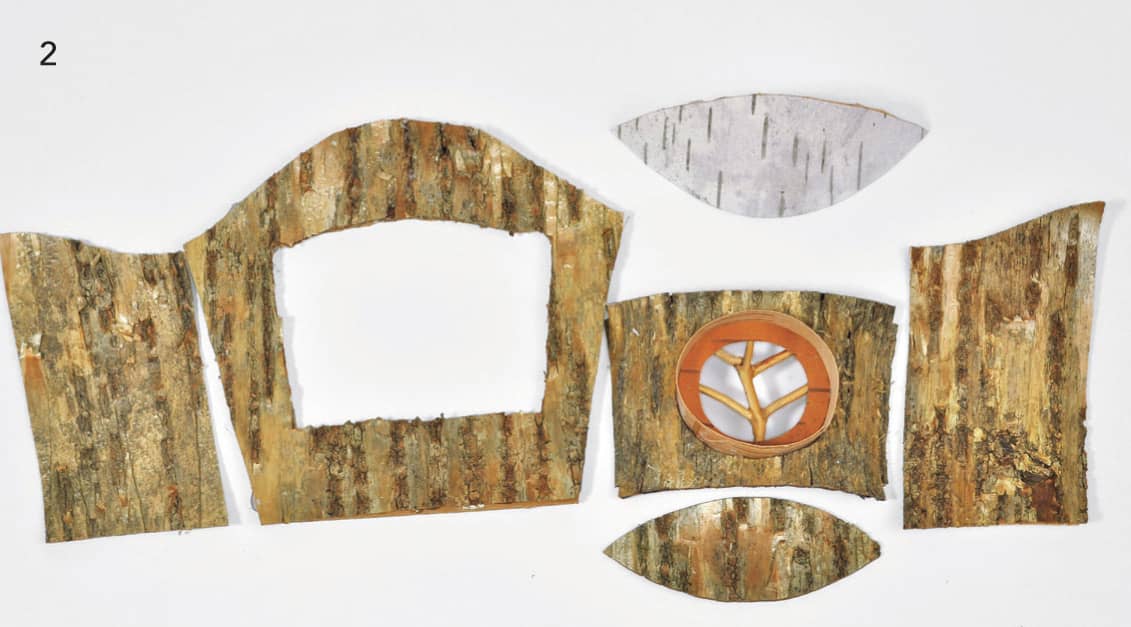
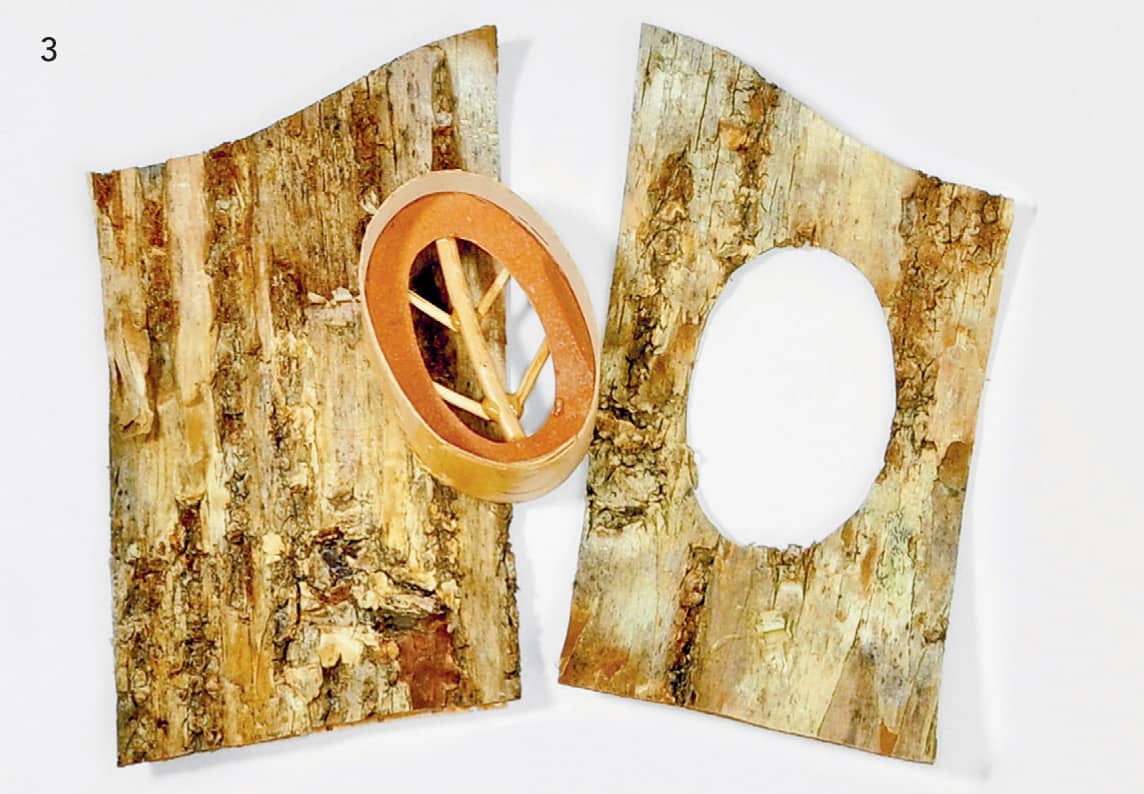
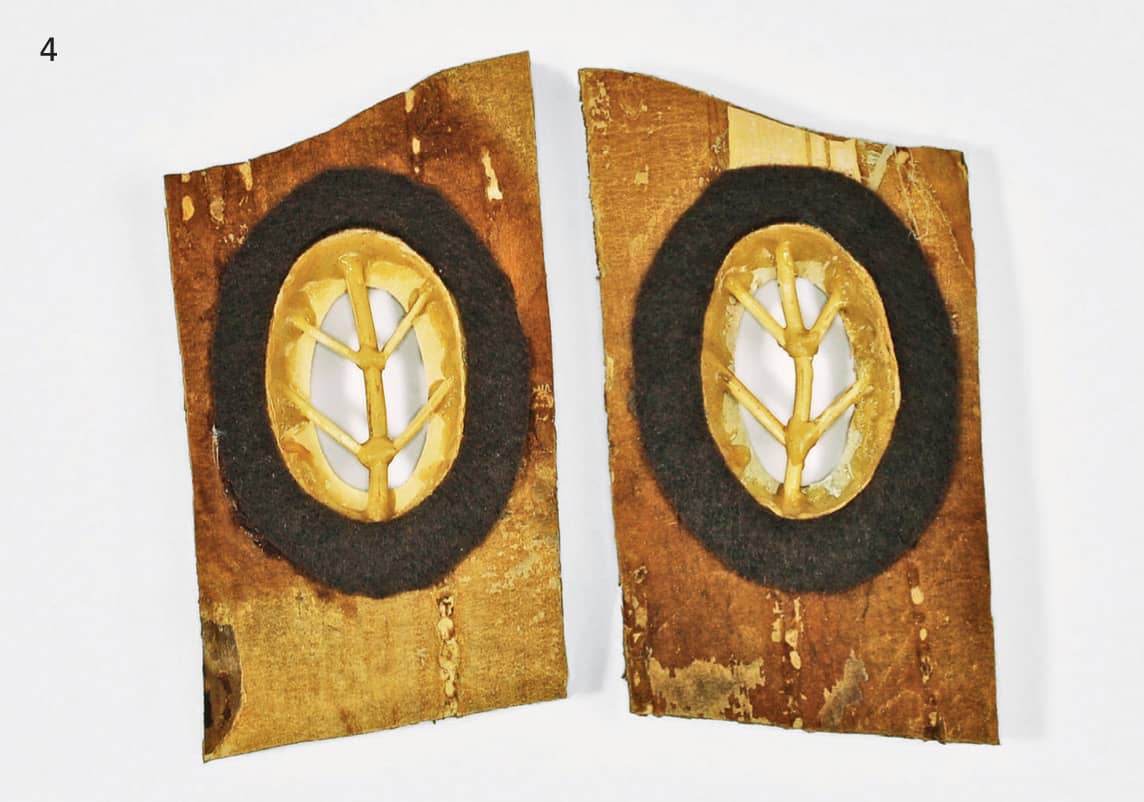
3 BUILD SIDE WINDOWS AND INSTALL
Build and install the side windows as described in Chapter 3 shown here. You can use different mullions if you wish.
4 INSTALL LIGHT-BLOCKING FELT AROUND WINDOWS
Apply felt to cover over all construction joints around all the windows. Check all wall panels for any holes and fill.
5 INSTALL DOOR AND ADD LIGHT-BLOCKING FABRIC
Make a contrasting frame for the door, using the door as a template. Cut an opening in the front house panel and install the door, just as you did the windows. Apply the frame. Apply light-blocking felt around the door on the inside. Using the panels as templates, cut out wallpaper panels. Cut holes for windows and door while all of the pieces are flat.
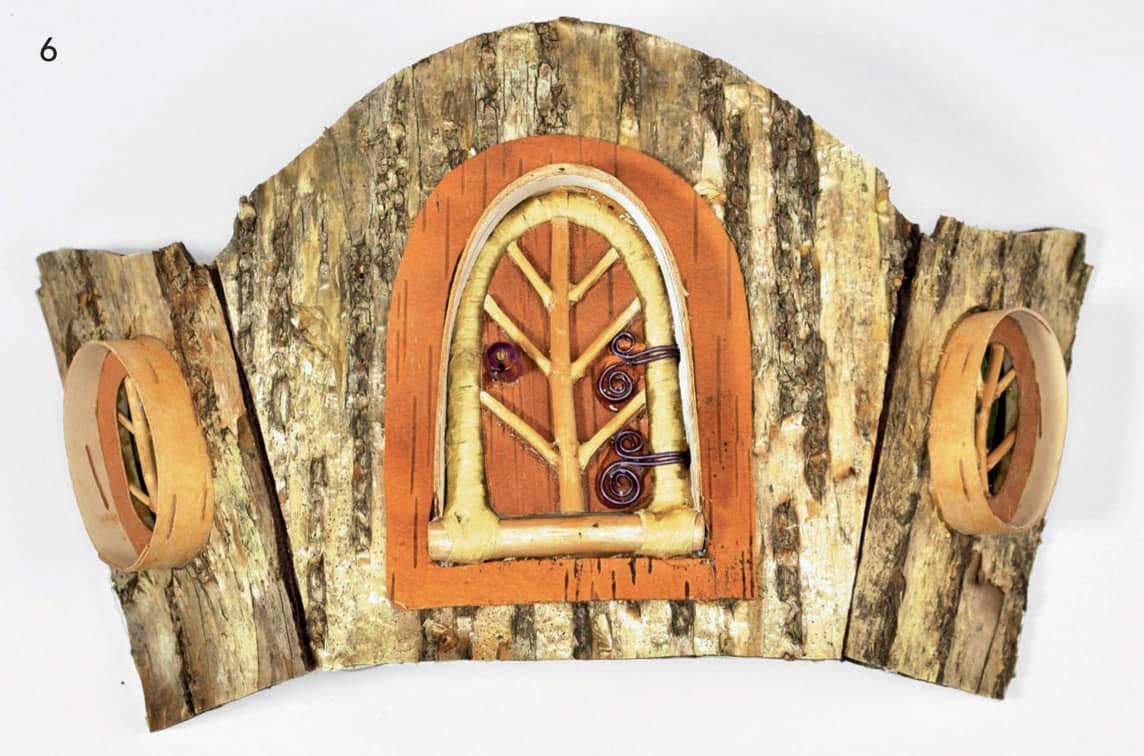
6 JOIN SIDE, FRONT, AND BACK PANELS TOGETHER
Use strips of felt to attach the panels together. Fit panels as closely together as possible but leave a little gap for the twig trim to sit in (applied next). The felt provides a flexible joint that is also strong and light-fast. Connect three front panels together and three back panels together.
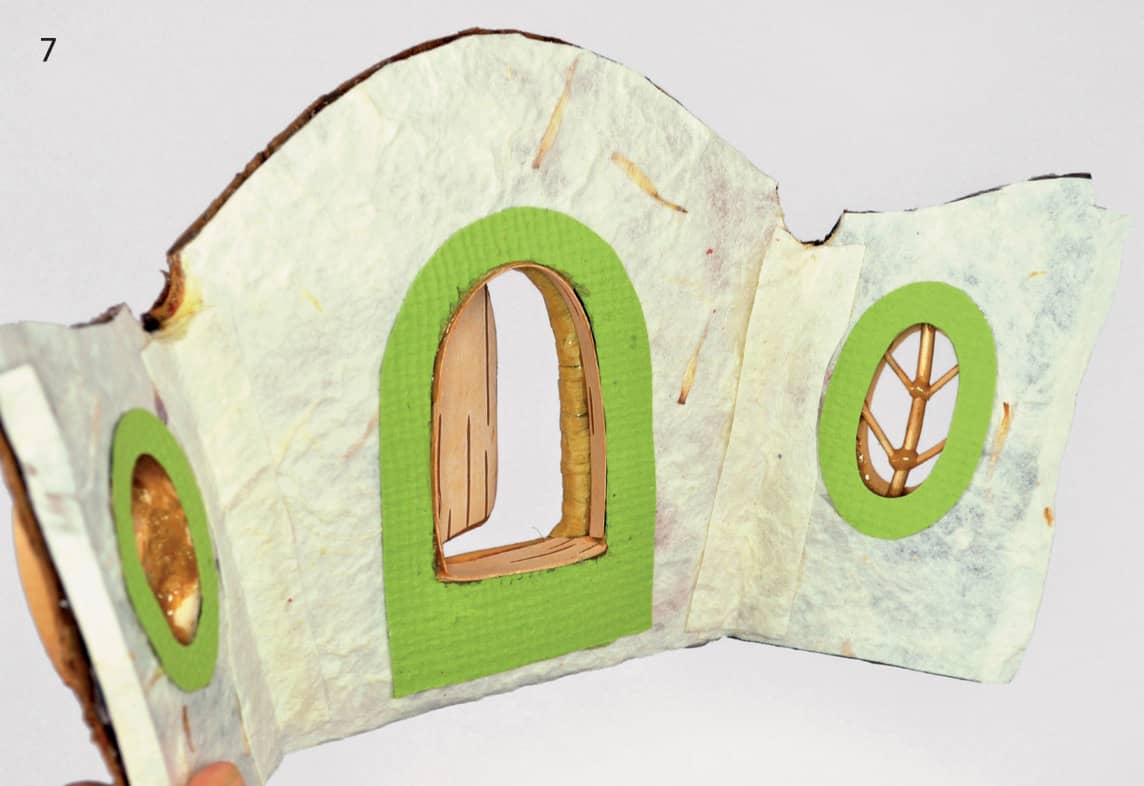
7 APPLY WALLPAPER AND INTERIOR TRIM FRAMES
Apply wallpaper to all the walls (see here). Overlap and trim as needed. Apply decorative interior frames around windows and door.
8 JOIN FRONT TO BACK
Join front to back sections with strips of felt as before (you may need narrower strips than used before as the angle is more acute).
9 FINISH THE WALLPAPERING
Complete installing wallpaper. The house should still be a little bit flexible.
10 FINISH TOP EDGE AND ADD TWIG TRIM
Apply trim twigs to all vertical wall joints. Paint the top end before installing to match bark color, if needed. Use a generous bead of epoxy behind each twig. Do one at a time, and attend to drips before they set. Optional trick: If your twig has a fragile bark that you wish to protect, you can apply a thin coat of glue (clear epoxy for a shiny finish, white glue for a matte finish). Apply the sealed twigs to the house walls as described.
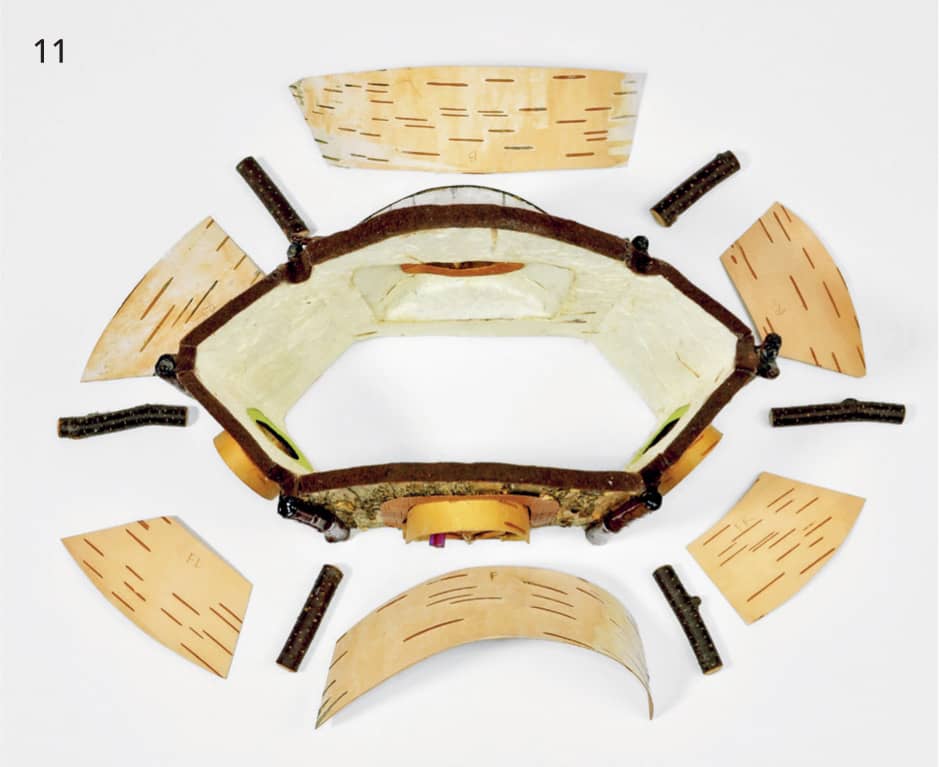
11 BUILD THE BEAMS AND EAVES RING AND APPLY (TEMPORARILY)
With tiny drops of hot glue, temporarily attach the beams as they rest in the wall section joints with approximately 1/2 inch of the beam sitting inside the house. Tip: a single drop to the felt edge strip on either side of the twig should be enough. Cut eaves material as shown. (Make a paper template first to get the shapes right.) You can use bark or any stiff, flexible material. The good side is facing down here.
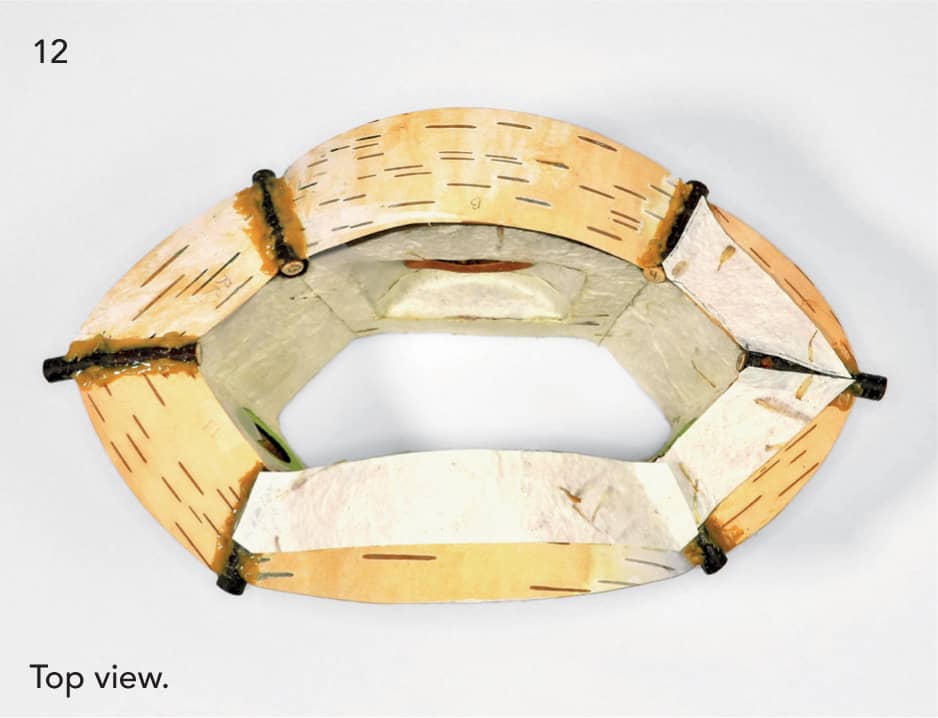
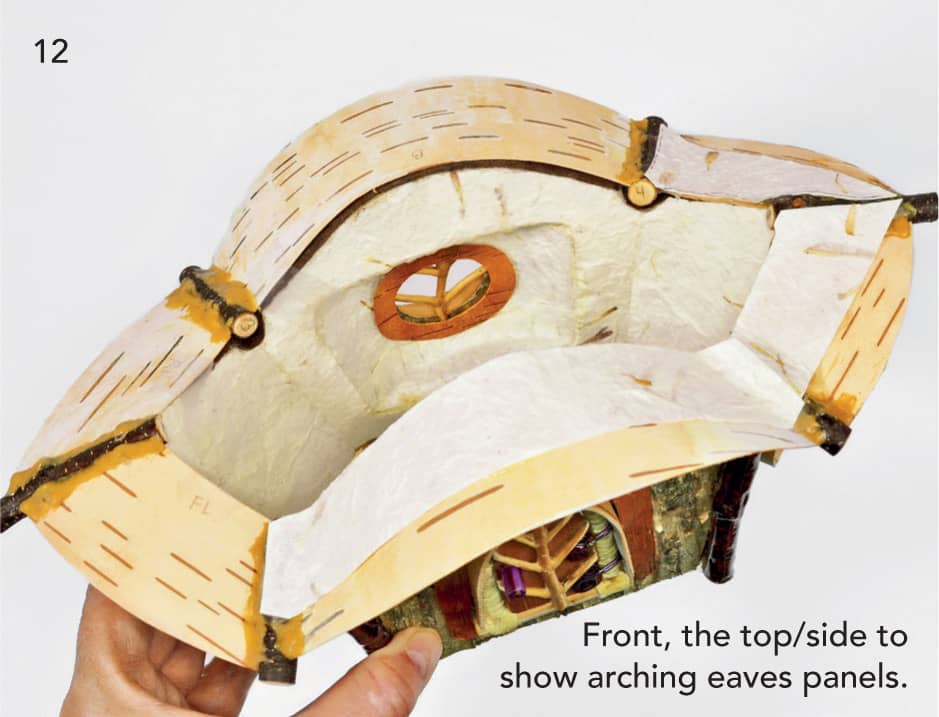
12 INSTALL THE BEAMS AND EAVES RING AND STRENGTHEN THE JOINTS
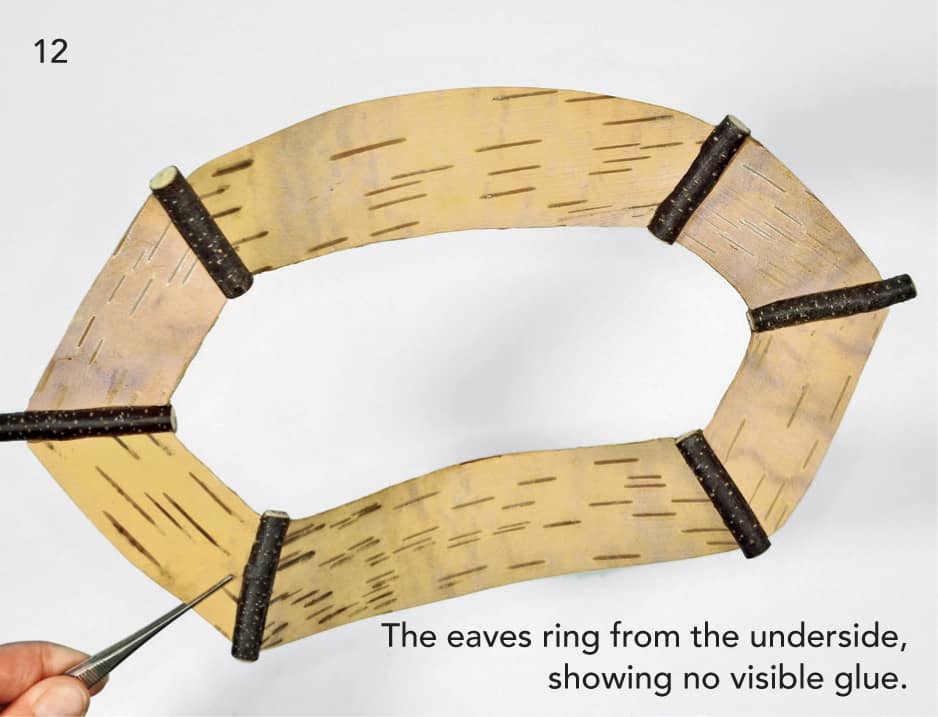
Carefully attach each eaves piece to the beams. Keep all of the glue on the upper side of the ring with none showing below. Do one section at a time, and test to make sure it is not getting stuck to the house. The ring will be very floppy at this point. Attach strips of reinforcing paper to each section, overlapping the beams as shown. Do the entire ring.
With surgical precision, use a sharp knife and cut the ring free from the house. Ideally cut just the drops, not the twigs or the felt.
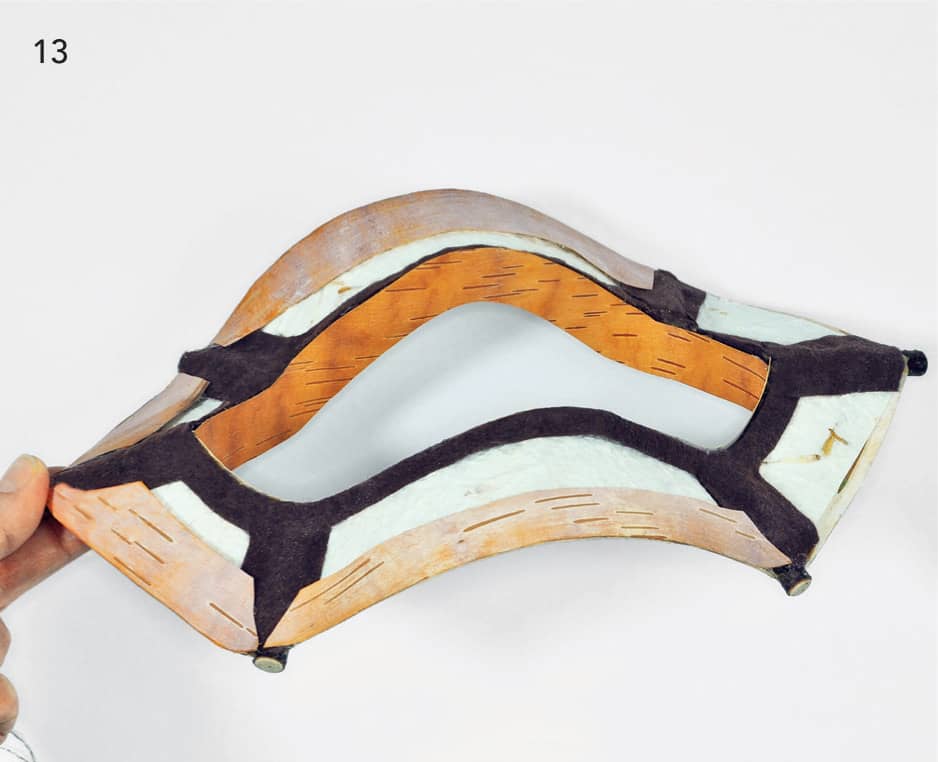
13 CREATE AND INSTALL ROOF LIP AND LIGHT-SEAL THE BEAM JOINTS
This is a very fiddly step, so go slowly and take your time. Glue the felt strips to the backs of the bark with epoxy and form the strip into a curve similar to the inside of the eaves ring. Do both strips.
Now glue each strip into place as shown. The bark faces in, but the strip will attach firmly to the ends of the beams and the edge of the eaves ring. Glue firmly. Apply strips of felt to all of the joints as shown to block and light and add strength. The roof at this point should slip neatly onto the house edge with the lip sitting inside the house. Trim and adjust.
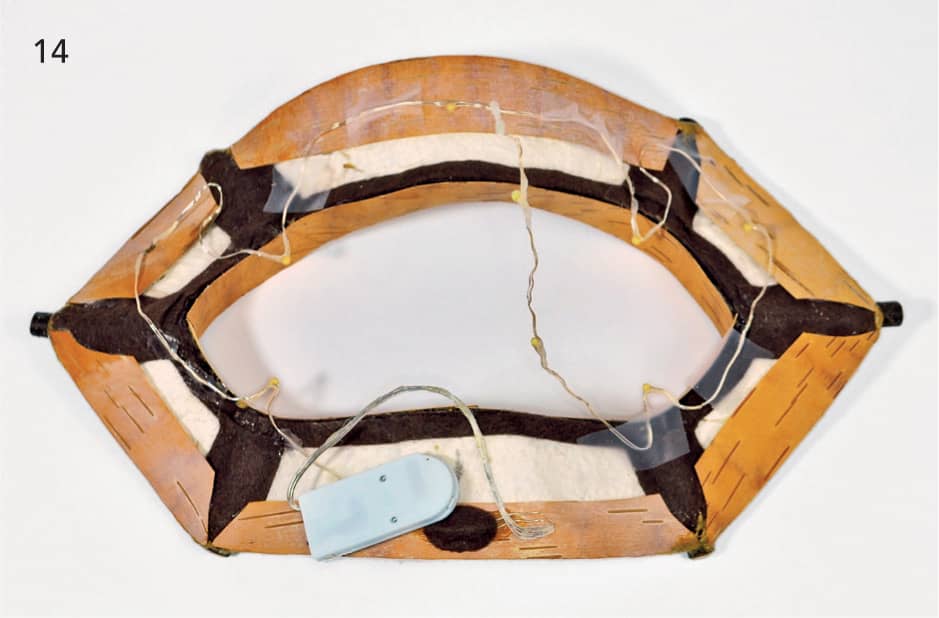
14 BEGIN TO INSTALL LIGHTING IN ROOF
Following the instructions in Chapter 4, see here. Begin to install the lighting. Note that several bulbs are planned for the eaves, four at the inner quadrants (to illuminate the interior) and two bulbs are free to go up inside the cupola. Tack temporarily in place with tape or drops of hot glue.
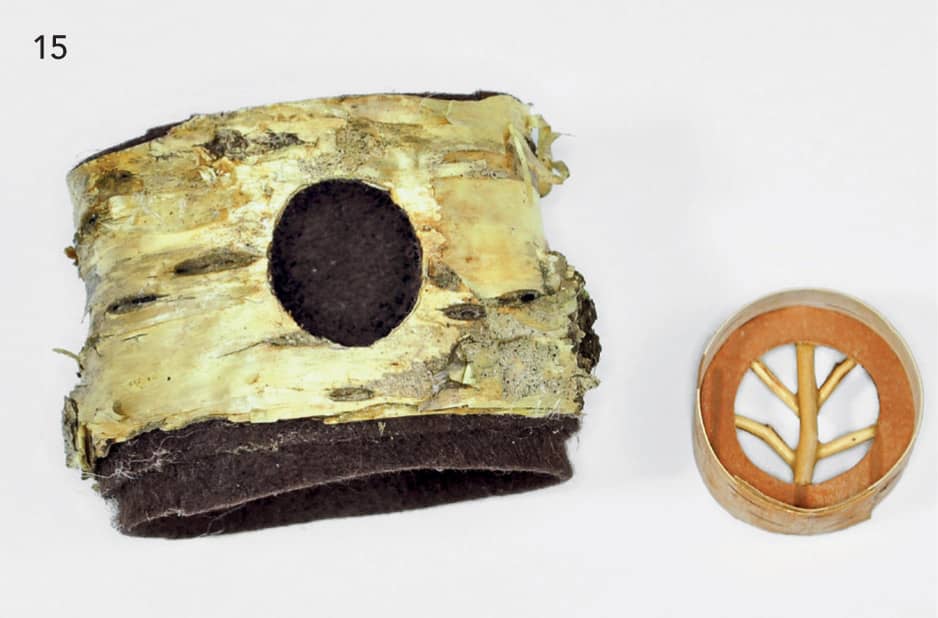
15 CREATE CUPOLA AND WINDOW
Create a round cupola with a window installed. Here it was easier to just line the whole thing with felt for strength and light-blocking. Install window and seal.
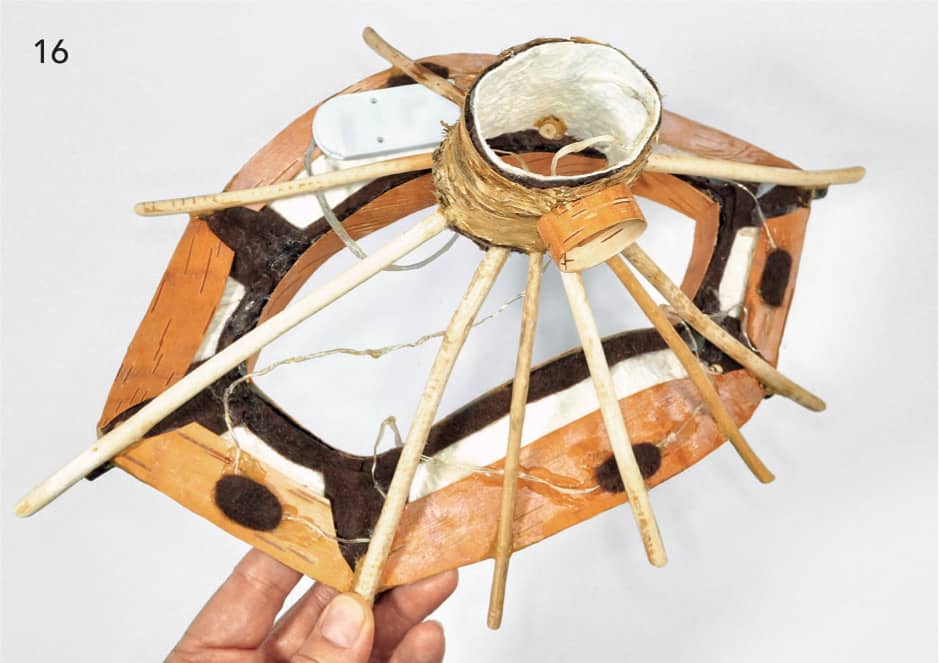
16 CREATE FRAME FOR ROOF AND APPLY CUPOLA
Place eaves ring on house. Use a temporary support to float the cupola approximately where you want it above the roof. Use matching quality twigs to create rafters and join cupola to eaves ring, as shown. Glue lightly until all the rafters are in place, then use more glue to secure. Finish installing the lighting wires. Mask the eaves bulbs with felt ovals. Line the cupola with wallpaper and attach the last lights.
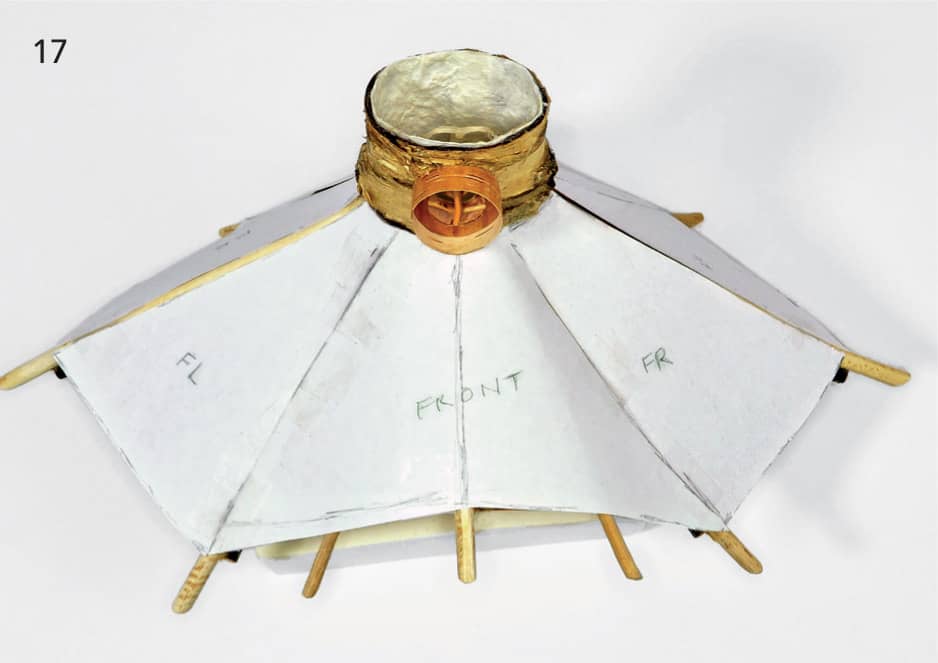
17 MAKE PATTERN FOR PANELED ROOF AND OPTIONAL DECORATIVE LINER
Make a paper template of entire roof as shown. Label each section carefully.
Cut out nice pieces of bark to match each section. You could also skip the bark and use felt panels if you plan on using silk botanicals, conifer scales, or needle felting for a roof finish. Cut matching pieces of decorative paper (good side facing in) if you want to line the roof. (This is suggested with a bark roof.)
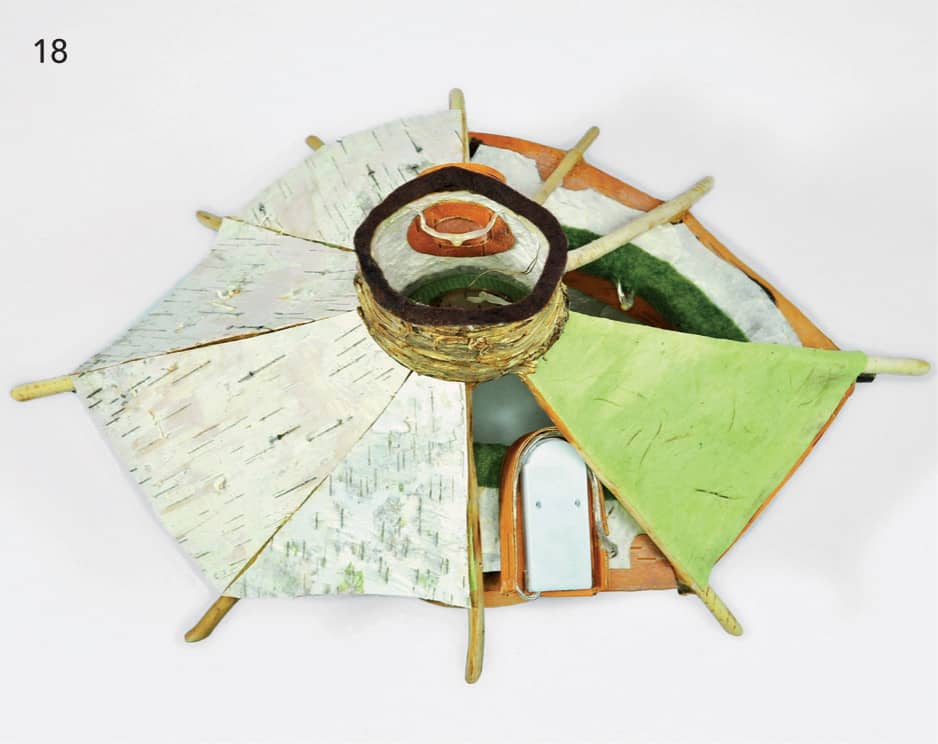
18 CREATE BATTERY BOX, APPLY DECORATIVE LINER, AND OUTER ROOF BARK
Make and install a box for the battery unit as shown (see another photo shown here) in Chapter 3 under Lighting. Attach the cover and seal up (not shown).
Optional: Apply the lining papers to the rafters as shown (green paper). Do all of the roof sections, trimming as needed. Put good side down. Glue securely to rafters all along the length. Seal to eaves ring at wide end.
Apply the bark roof sections as shown on top of the paper liners. Glue firmly. Also attach to the eaves ring if you can do so without distorting the ring.
Glue a ring of felt to the top of the cupola edge.
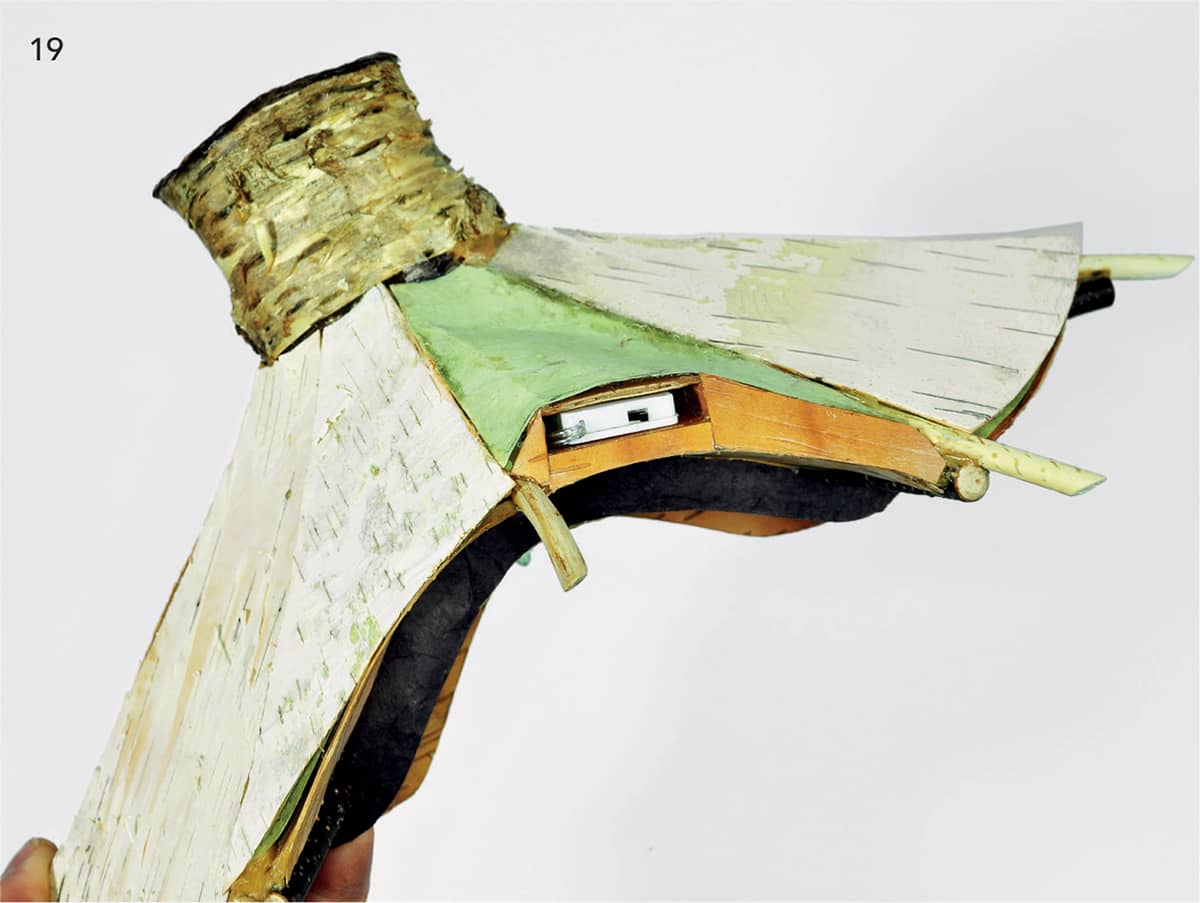
19 CREATE AND INSTALL EAVES FACADE TRIM
Depending on your materials, the battery box will most likely need a special facade to cover over the entire end of the roof section, between the beams, as shown. This will be visible, so take your time and make it perfect.
Apply your last roof section when finished.
Seal the connection between the bark and the eaves around the entire roof. You can fill with felt or bark strips as desired, but the wide ends of each section between the rafters should be sealed up.
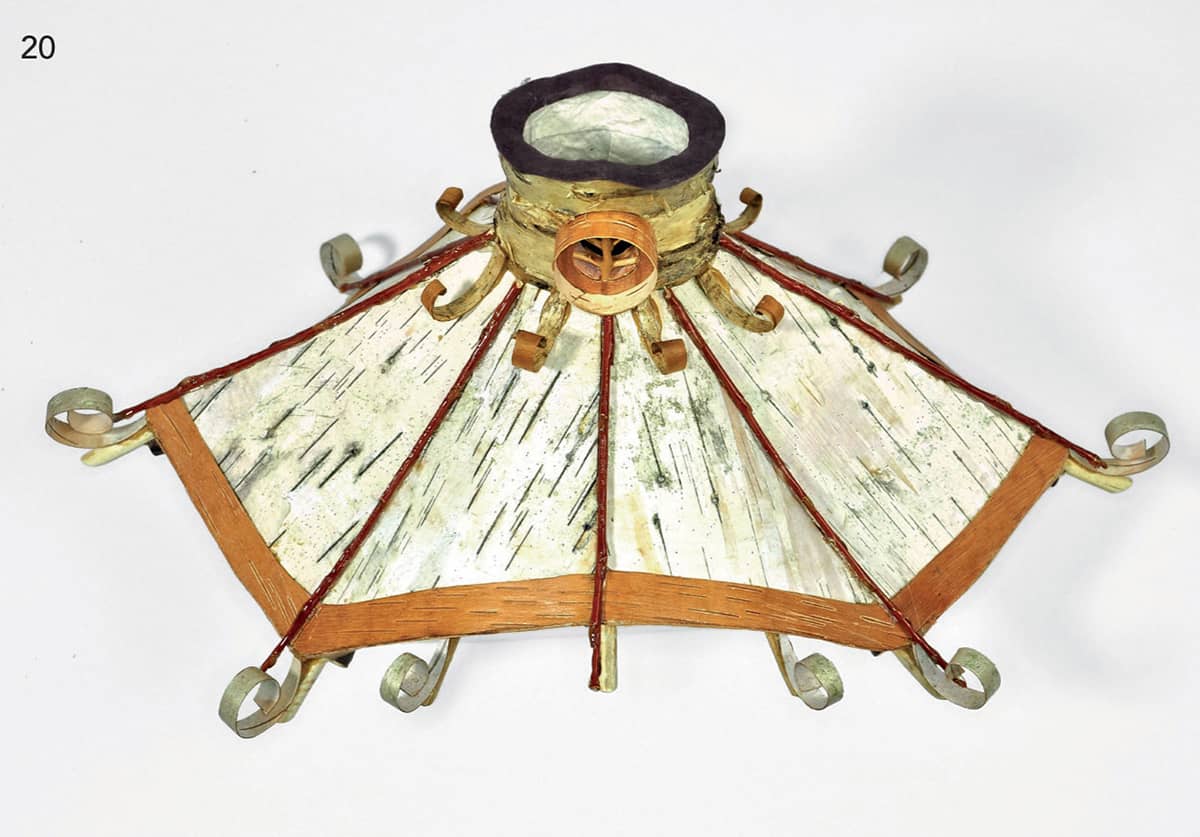
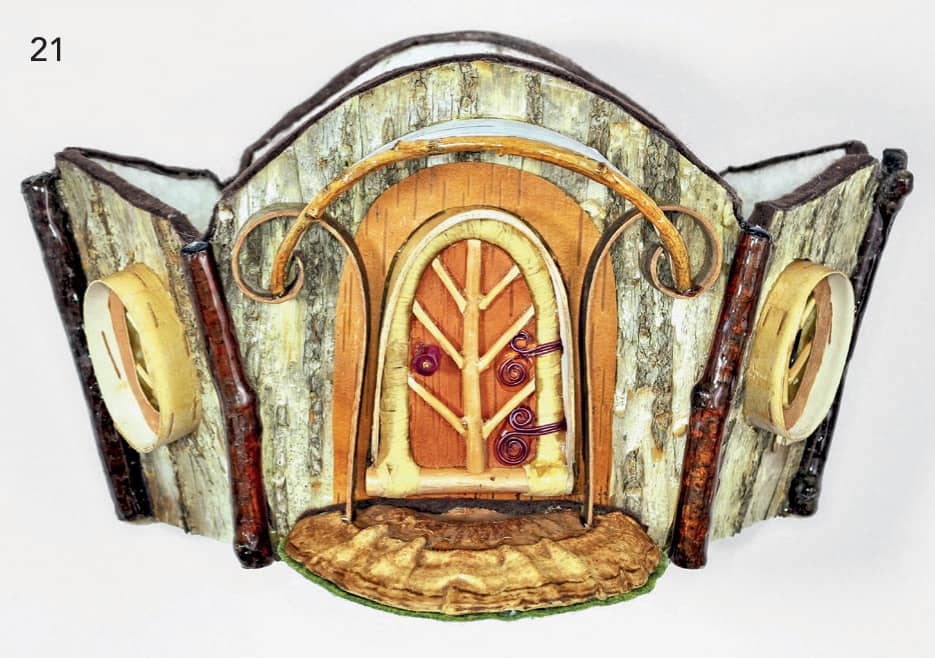
20 APPLY DECORATIVE TRIMS TO ROOF AND CUPOLA
Apply decorative trim as shown. (The contrasting bark edge and dark twigs in the joints as well as curly bits under the cupola are all optional.) Note: Learn from my mistake and do not attach the curls at the ends of the rafters just yet!
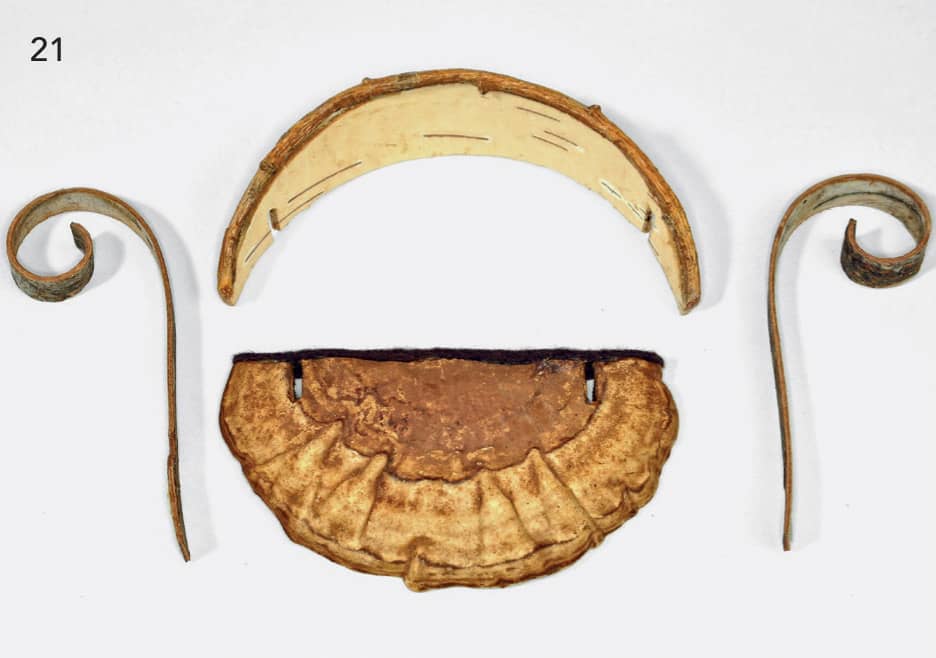
21 CREATE AND INSTALL STOOP AND PORCH (OPTIONAL)
Cut a piece of curved birch bark as shown, and apply a twig edge. Cut and fit a shelf mushroom to fit under the doorsill. Create a means to connect the two. (I used thick, curled birch bark, but any strong, vertical component will work. Be creative!)
Attach fungus to the house wall under the door. Attach curved porch roof so that your vertical posts will fit in between. Attach vertical posts and bark curls now.
22 ATTACH CUPOLA ROOF
Attach the cupola roof with epoxy. Check for light leaks and block with felt strips. Apply faux eaves to the underside of the cupola roof, if desired, before the roof is attached.

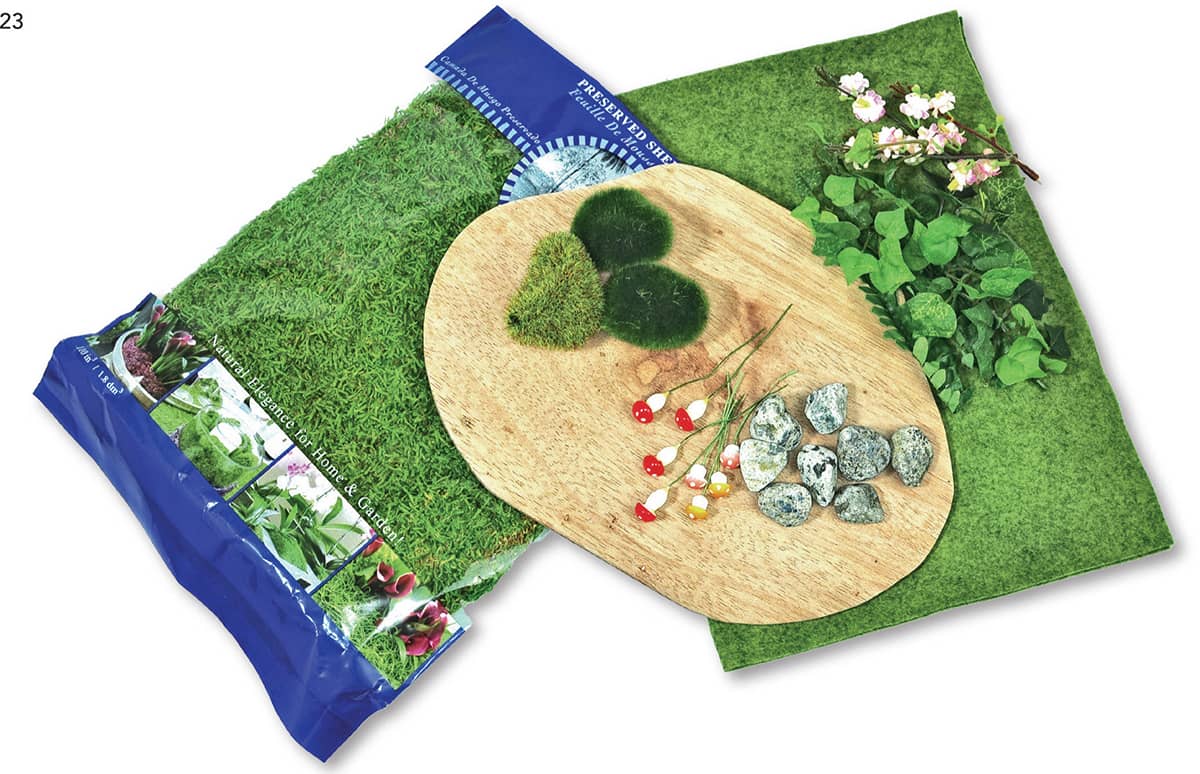
23 MAKE THE BASE
Collect materials for the base: 1/8-inch plywood cut to desired shape, several pieces of felt, preserved moss, and decorations.
24 APPLY FELT LAYERS FOR CONTOURS
You can add layers of felt to make a contoured landscape, or just apply one layer to cover the plywood—your choice. After applying the first flat layer, build layers of green felt around, but not touching, the house.
When sculpted as desired, cover with pieces of preserved moss, cut, and fit as needed. Glue moss down well (hot glue is fine here) to felt.
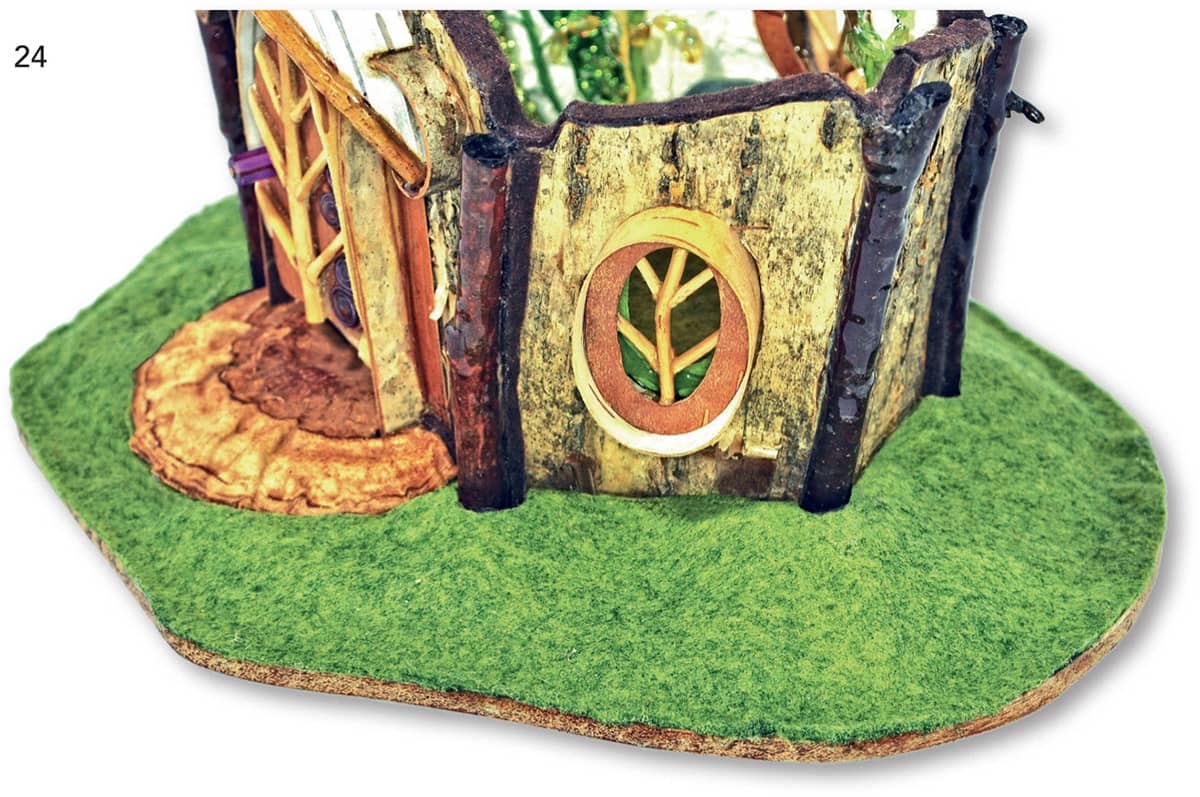
25 DECORATE BASE AND EDGE
Add foliage, stones, flowers, crystals, etc. as desired. Cut a strip of felt and apply to the edge or paint the edge. (Paint before applying any felt layers for best results.)
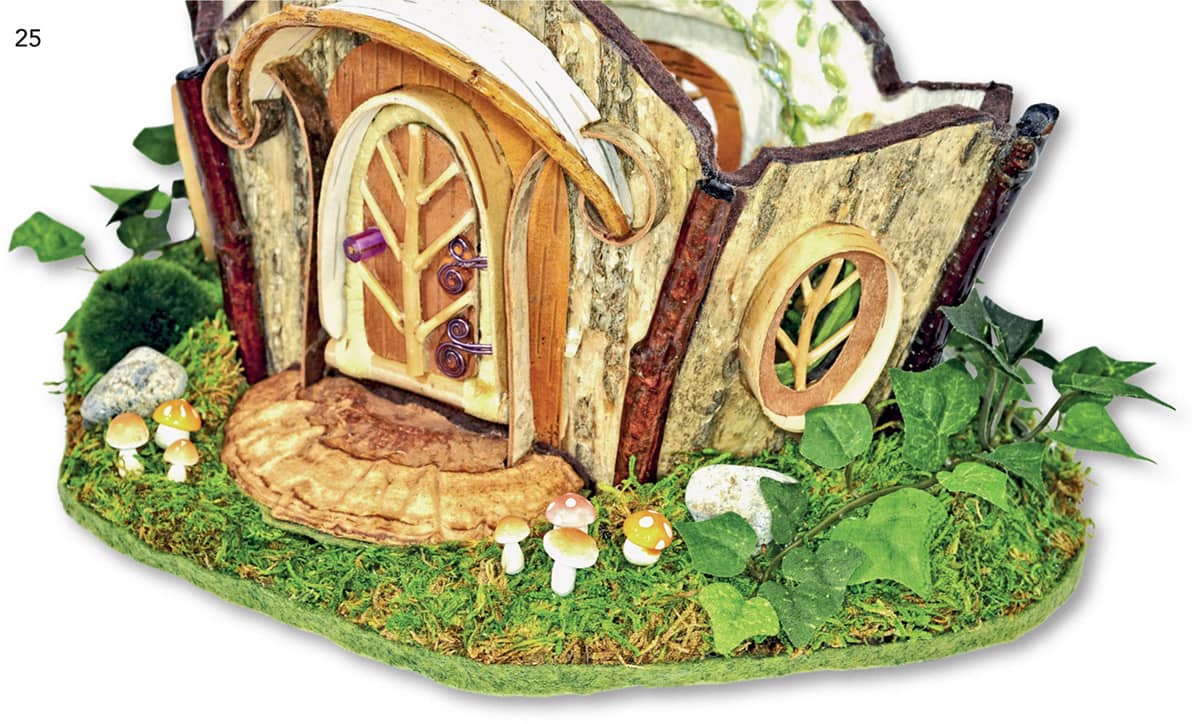
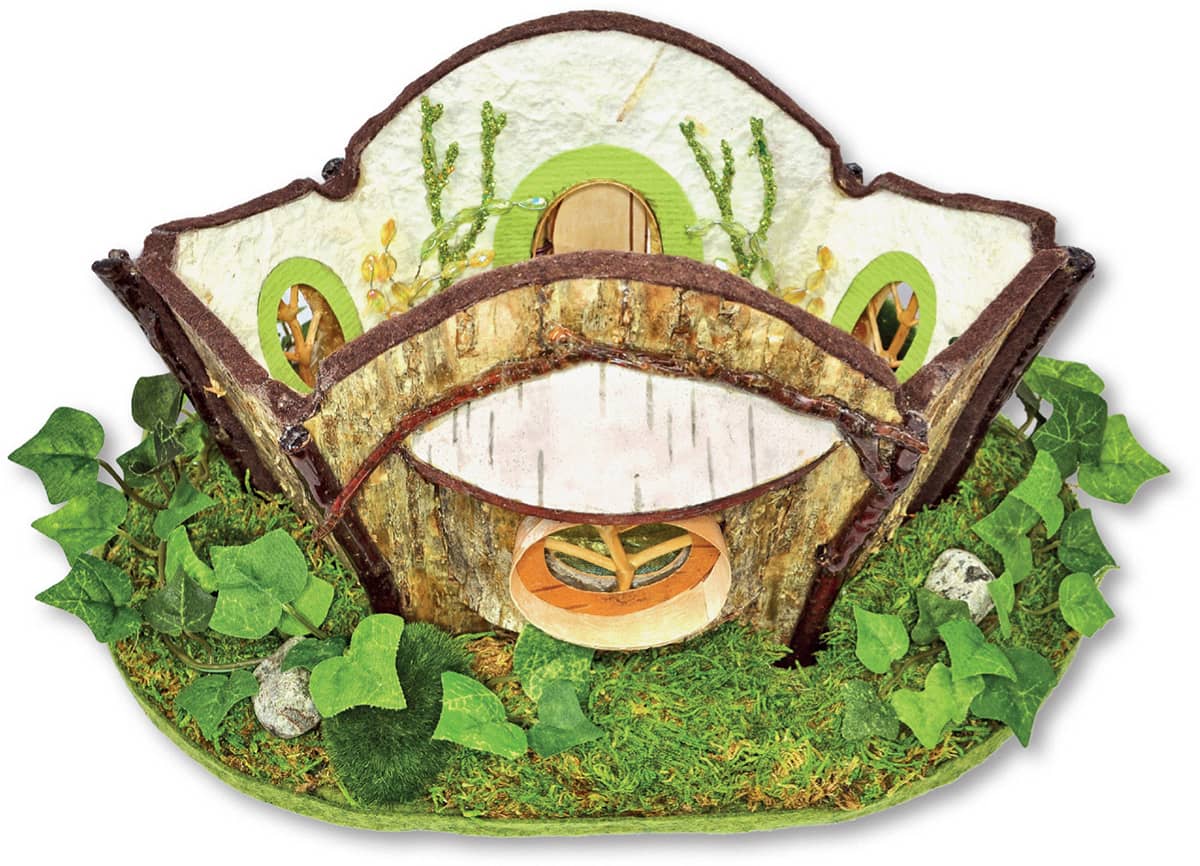
Base, front and back view.
26 APPLY CURLY ROOF TRIM (OPTIONAL)
After all construction is completed, now is the best time to add the curly trim at the ends of the rafters.
Now that you’ve followed these detailed tutorials and step-by-step photo progressions, you should be ready to explore and create your own faerie houses.
Be amazed (and proud)! Enjoy!
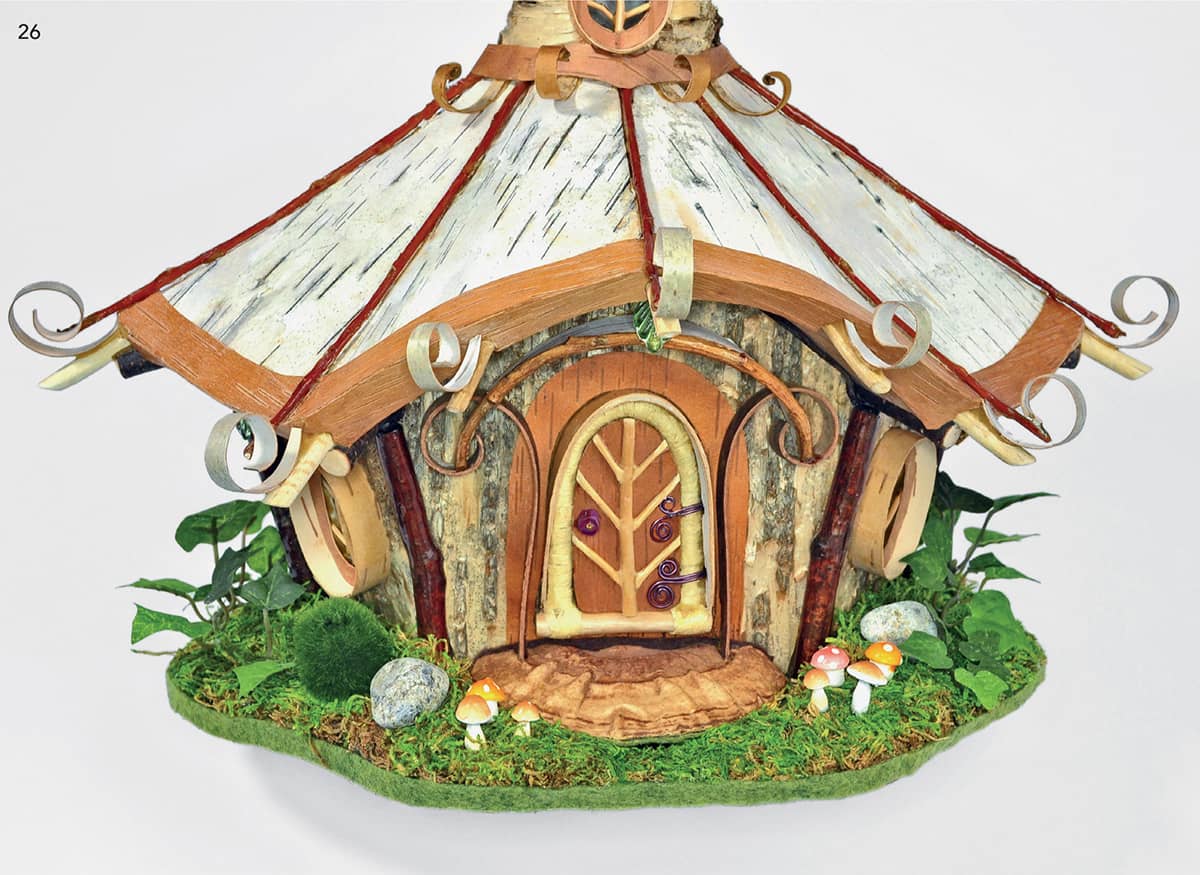
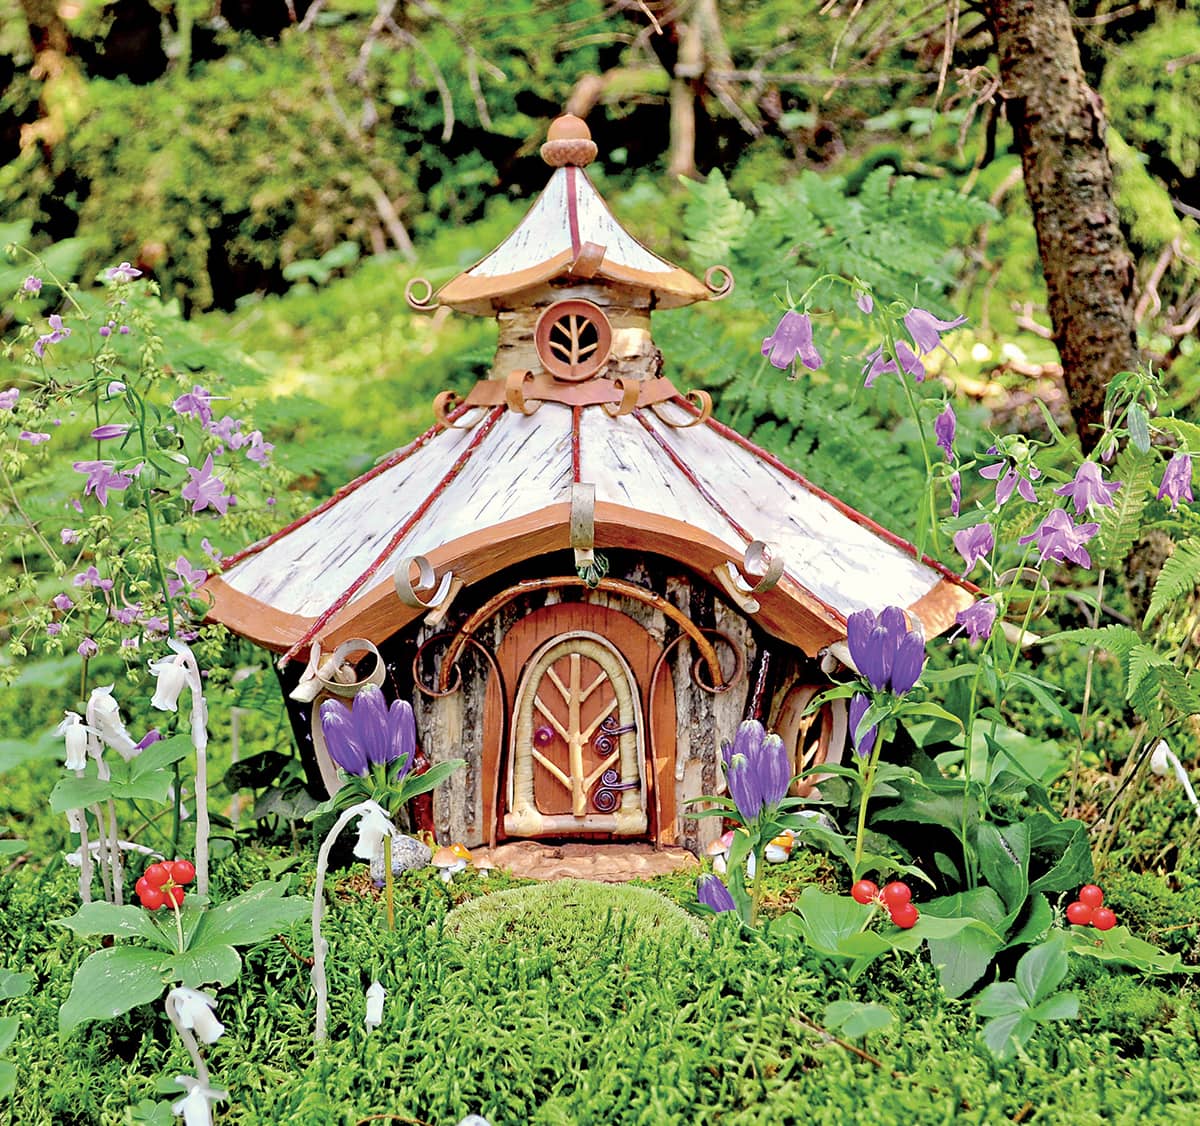
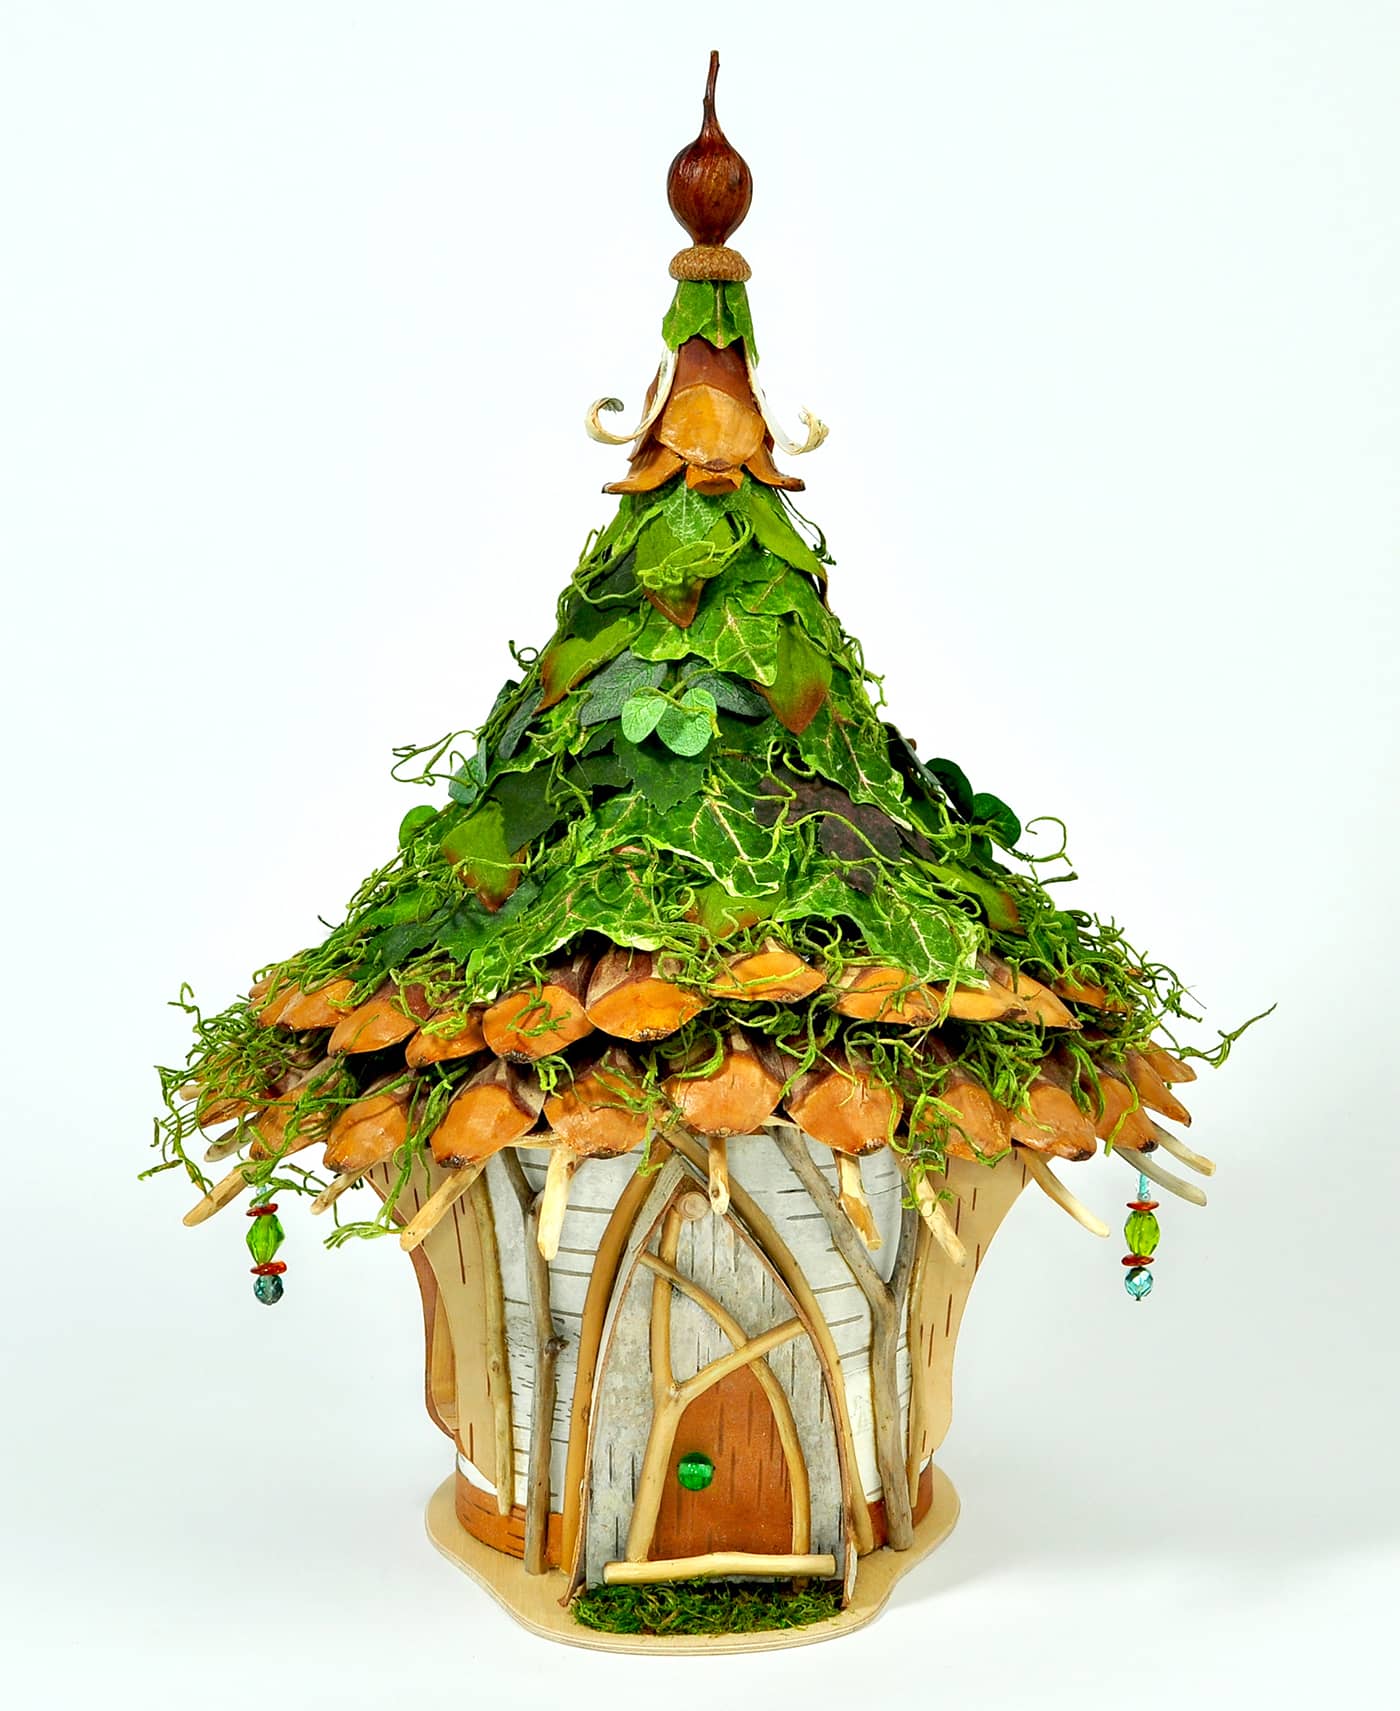
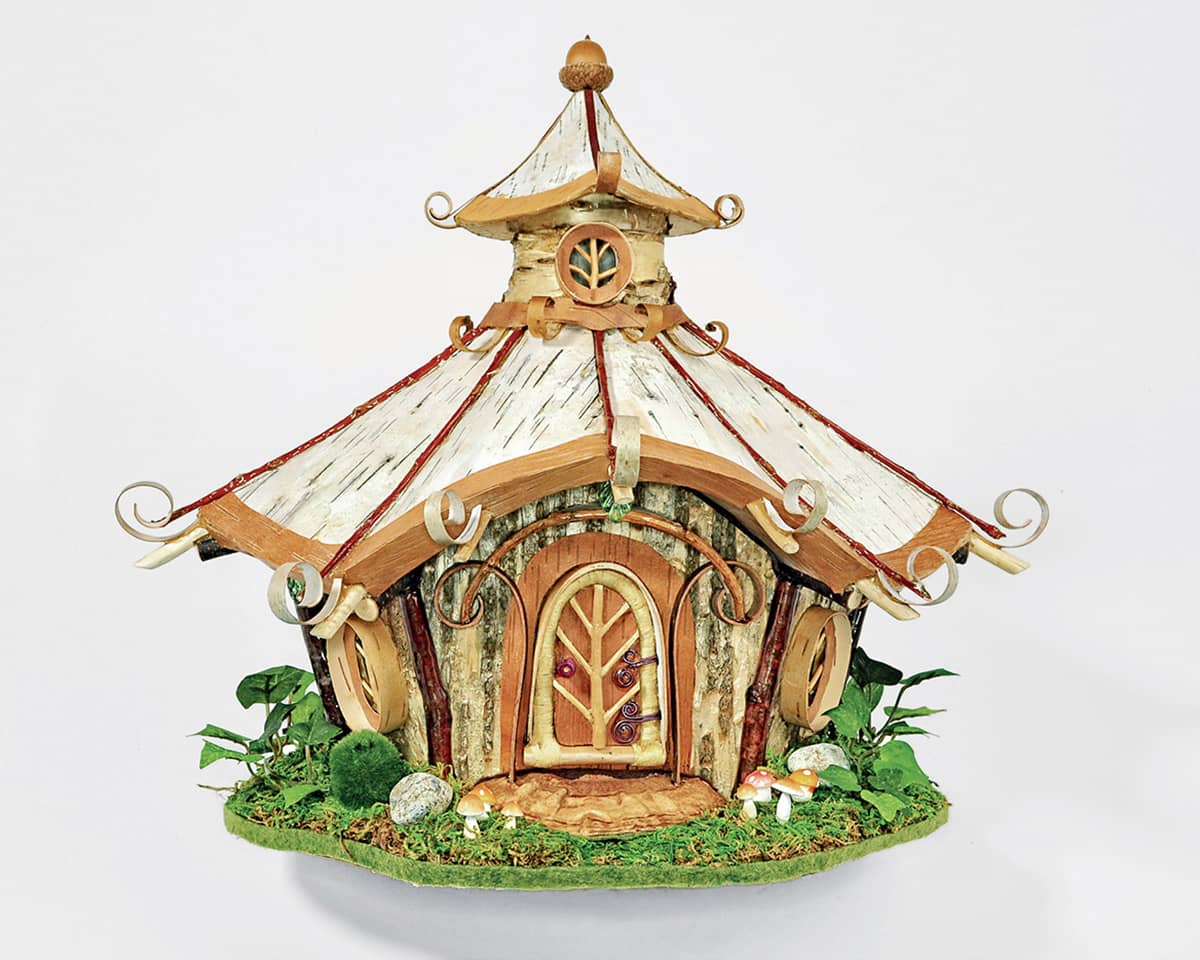
Your finished beautiful Golden Cottage, with a door that opens and a roof that removes so visitors can peer inside to enjoy all your creative work. Well done!