Ubuntu 9.10 was the most current release when this book went to print, but due to the six-month upgrade cycle, Ubuntu 10.04 was already on the horizon and 10.10 was being planned. With such a release cycle, it’s important that you know how you can upgrade Ubuntu to take advantage of new and better features, and to keep your computer secure.
Before upgrading, though, it is always a good idea to acquaint yourself with everything that’s new in the upgrade by visiting the following URL:
| http://www.ubuntu.com/getubuntu/releasenotes |
Click the More » link next to the release for full details. That way there shouldn’t be any major surprises.
Note
By participating in the Alpha and Beta tests, I was able to include in this book the new features and improvements the Ubuntu 10.04 release offers. In fact, the Beta is so good that we considered putting a copy on the companion DVD. However, in the end we agreed that beta tests are just that: tests, and unforeseen bugs might show up that this book couldn’t help you with—so we dropped that idea. Therefore this section shows you how to upgrade over the Internet to the fully tested, final release of Ubuntu 10.04. The same procedure will let you upgrade to all other future versions, too.
There are two ways that you can upgrade your installation of Ubuntu. First, you can download the latest ISO file, burn it to CD, and perform a fresh installation. The download locations you need are listed in the section Downloading a Distribution. Immediately following that, the section Burning a CD or DVD provides all the information you need to burn the ISO to disc.
This method is probably your best choice when you want to set up new Ubuntu installations or provide copies of the latest release to friends and colleagues, or if you have a version of Ubuntu more than one release behind the current release.
However, there’s a much easier way to upgrade an existing installation, as explained in the following section.
Instead of upgrading from disc, you can upgrade Ubuntu directly from the desktop. But before you start, it’s important to ensure that you have applied all the latest updates. To do this, select System → Administration → Update Manager to bring up a window like the one shown in Figure 2-39.
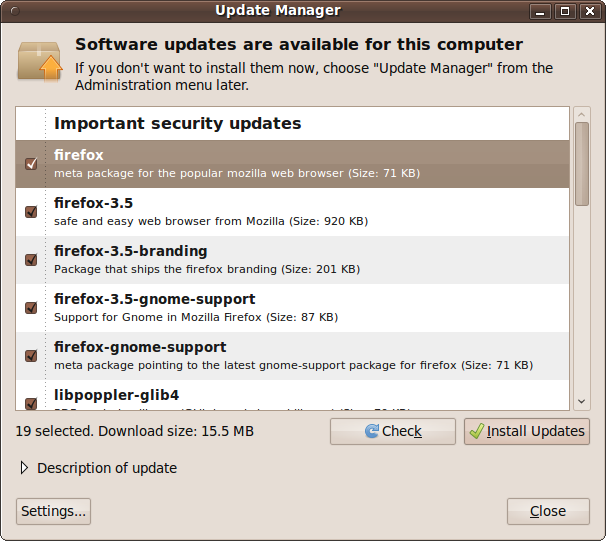
The contents of this window will vary. You may have different upgrades or no upgrades shown, depending on how up-to-date your installation is. But to make absolutely sure that your computer is aware of all the latest available updates, you should click the Check button.
After downloading all the latest information, you may see the same or different updates in the window. If any updates are displayed, click the Install Updates button to install them. If you are asked for your password at any point, you should enter it. You may also be prompted to restart your computer.
On the other hand if, after clicking Check, there are still no new updates, the Install Updates button will be grayed out, indicating that the release of Ubuntu installed is already fully up-to-date.
When a new distribution is available (which usually happens
twice a year, generally in April and October), the top of the Update
Manager screen will show the text “New Distribution release
'xx.xx' is available,” where
xx.xx will be the release number, as shown
in Figure 2-40. If there is no
release newer than your current version, this screen will not be
shown.
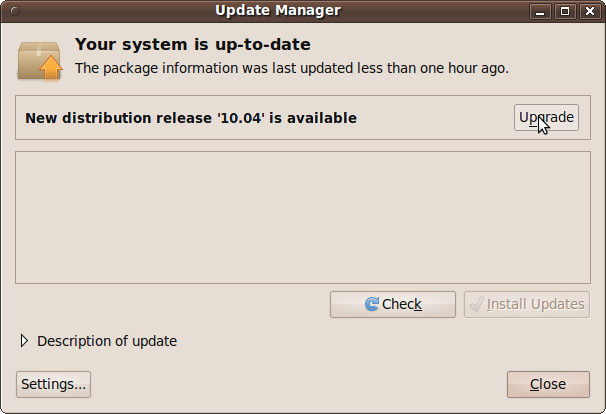
To upgrade to the new distribution, click the Upgrade button and follow the simple instructions on the screen, entering your password if requested and rebooting when necessary.
If your current release is more than one version older than the latest one, you will need to keep repeating the preceding process to upgrade through all the intermediate releases in turn, until you get to the latest one. When no newer release is available, you have finished.
If your installed release is more than one behind the latest and you wish to avoid upgrading through a number of intermediate versions, you will need to download the ISO image file of the latest version, burn it to disc, and perform a full installation from it. Make sure all your data is fully backed up first, though, because a full installation creates a brand new environment, either replacing your original one or creating a new one alongside it (depending on the option you choose). If you decide to overwrite your current installation, you’ll need to back up and restore all your data and configuration options.
Ubuntu 10.04 uses new programs to improve the bootup experience, removing unwanted messages and replacing them with clean graphical animations. In particular the version of GRUB (Grand Unified Bootloader) that is used is now version 2 which, by default, does not display a screen of options. Therefore when you want to choose whether to boot directly into Ubuntu, or into a repair mode, or previous kernel and so on, you need to hold down the Shift key while booting. This causes GRUB 2 to display the standard menu and wait for a key press.