Quick Breads and Casual Cakes
Quick breads is an old-fashioned term that distinguishes these cake-like breads from yeasted ones. Quick breads are quick because they don’t contain yeast, which means they don’t require time to rise. They are leavened, instead, by baking powder and/or baking soda. These breads are often called casual cakes or keeping cakes, because they keep for a few days without getting stale; some even get better with time. Quick breads are often baked in a loaf pan, but muffins and scones also fall into this category. The recipes in this chapter are relatively easy projects that can be made in one go—no waiting, resting, chilling, or decorating necessary. This is a good place to start if you are a novice baker, or if you want to bake something quick and easy. They make great snacks, gifts, and casual desserts. These are my favorite kinds of cake: simple, unadorned, and not too sweet.
Ricotta Chocolate Chip Pound Cake
Orange, Coconut, and Poppy Seed Cake
Spelt Bull’s-Eye Scones with Raspberry Jam
Polenta Cake with Dried Apricot Compote
Zucchini Olive Oil Cake with Citrus Glaze
Cinnamon Swirl Sour Cream Bundt Cake
Flourless Chocolate Olive Oil Cake
Date Walnut Cake with Dulce de Leche
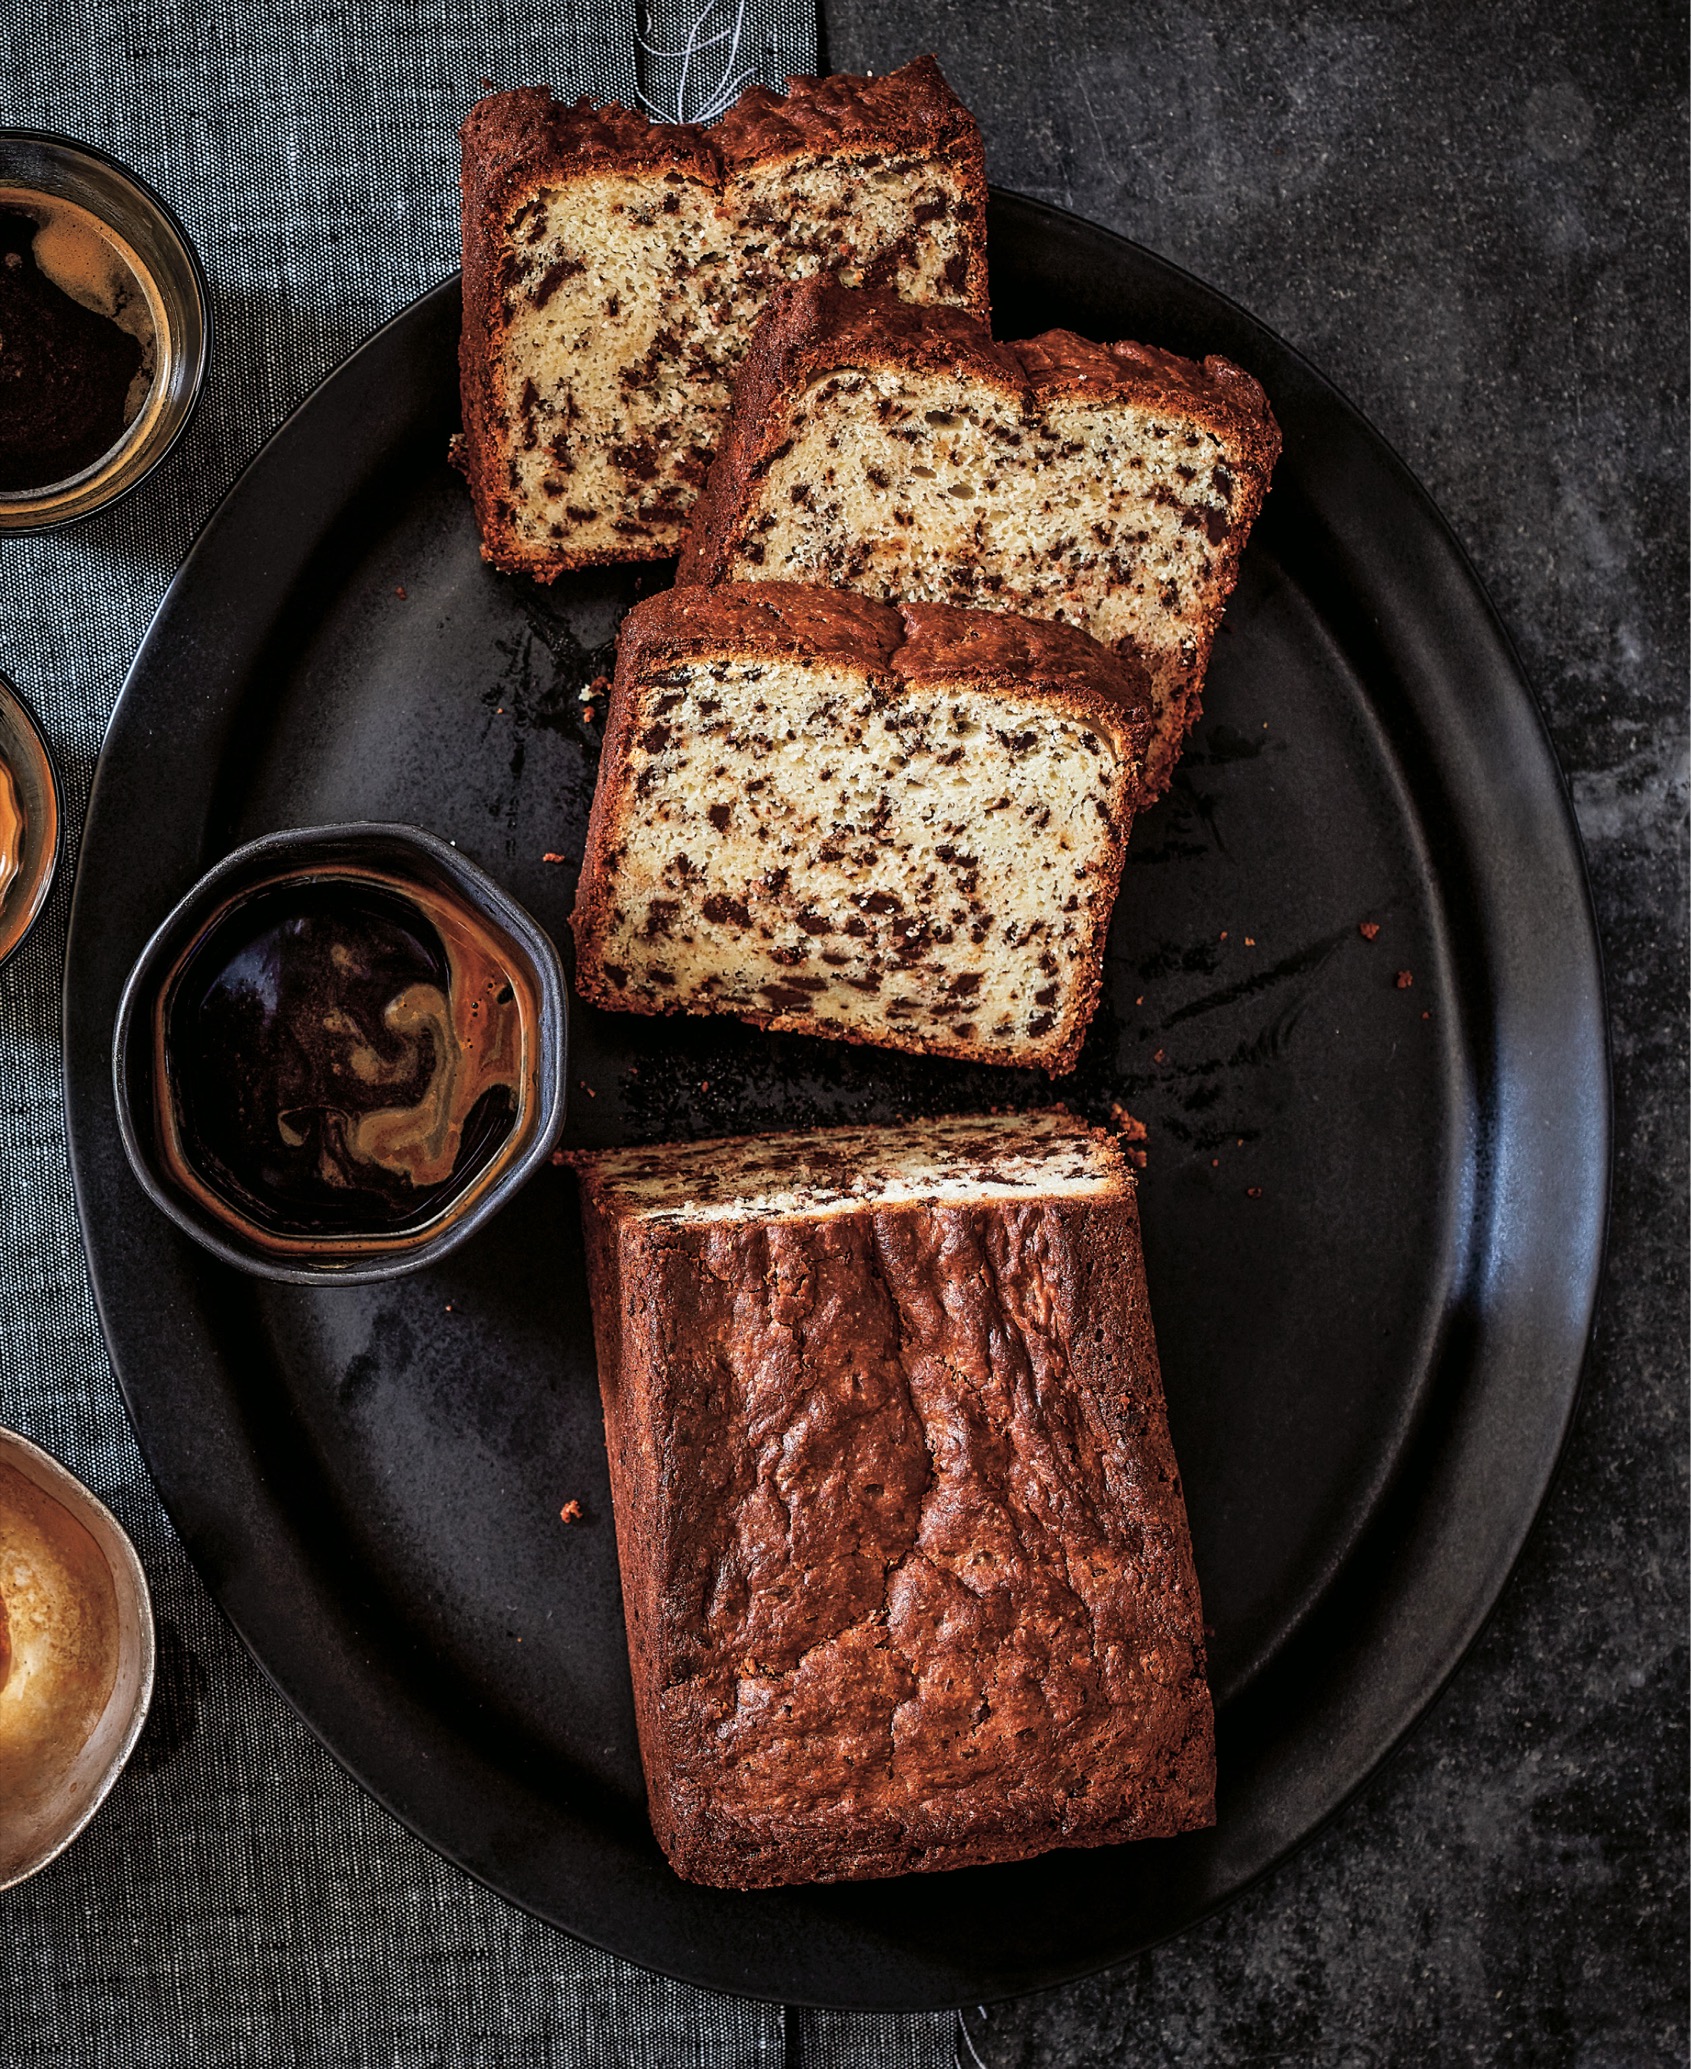
Ricotta Chocolate Chip Pound Cake
Makes 1 (9-inch) loaf
When I was developing the menu for Sadelle’s, I wanted to take nostalgic New York City favorites, such as babka and rugelach, and make them as good as they could be. Chocolate chip cake was not originally on my list of New York classics, until I visited Wall’s Bake Shop, an old-timey bakery on Long Island. I really liked the simplicity of their cake, so I started to develop my own version. Food & Wine magazine called it “a feat of physics,” because the chocolate chips don’t sink in the cake—they are dispersed throughout—which is something I worked very hard to achieve. Chocolate chips, even the mini ones, want to sink to the bottom of the batter. To prevent this, I chop the chocolate very finely before folding the chips into the batter. The smaller, lighter chips float rather than sinking to the bottom of the pan. The cake is great with coffee for breakfast or as an afternoon snack, but it also doubles as a dessert.
This cake is very easy to put together, but it’s a bit tricky to bake. It’s baked in a loaf pan, which is much higher than a cake pan, so the challenge is to make sure it’s cooked all the way through. Where the toothpick test is sufficient for most cakes—and you can certainly use that for this cake--to make sure it is baked properly, I check the internal temperature with a digital thermometer, a bread baker’s trick that I apply to this cake.
Please note that as much as I like to use the best possible ingredients in everything I bake, I have made this both with artisanal ricotta from a cheese shop and with inexpensive ricotta from a grocery store, and to be honest, I don’t think I can tell the difference.
Note You will need a 9- x 4-inch Pullman loaf pan (or a 9- x 4-inch standard loaf pan) to make this.
Nonstick cooking spray
1¼ cups (220 grams) semisweet chocolate chips
1⅔ cups (200 grams) all-purpose flour
1 tablespoon (15 grams) baking powder
1 teaspoon (6 grams) fine sea salt
1⅔ cups (367 grams) whole milk ricotta
12 tablespoons (1½ sticks) unsalted butter, cubed and softened (170 grams)
1½ cups (300 grams) granulated sugar
3 large eggs (150 grams)
1 tablespoon (15 grams) pure vanilla extract
Get prepared
■Arrange the oven racks so one is in the center position. Preheat the oven to 350°F.
■Cut a piece of parchment paper that measures 8 x 12 inches. Spray the bottom and the sides of a 9- x 4-inch loaf pan with nonstick cooking spray. Line the pan with the parchment so it covers the bottom and goes up the longer sides of the pan.
■Chop the chocolate chips until they are about one-third their original size. Pass them through a fine-mesh strainer to strain out the chocolate dust; discard the dust (or reserve it to make Hot Chocolate, this page) and set the chocolate chips aside.
Make the batter
■Whisk the flour, baking powder, and salt together in a medium bowl and set aside.
■Put the ricotta in a food processor fitted with the S-shape blade and process until creamy and smooth, about 1 minute. Set aside.
■Combine the butter and sugar in the bowl of a stand mixer. Fit the mixer with the paddle attachment and beat on medium speed for 2 to 3 minutes, stopping to scrape down the sides of the bowl with a rubber spatula once or twice, until the mixture is light and fluffy. Add the eggs one at a time, stopping to scrape down the sides of the bowl between additions. Add the vanilla, mix it in, and scrape down the sides of the bowl. Add the ricotta and mix on medium-low until it is blended in; note that the mixture will look “broken,” not homogenous. Turn off the mixer, scrape down the bowl, and add the dry ingredients. Mix on low speed until only traces of flour remain visible. Turn off the mixer and take the mixer bowl off the stand. Add the chocolate chips and fold them in with a rubber spatula until they are evenly dispersed, and no flour is visible, making sure to scrape the very bottom of the bowl.
In baking, you often add eggs one at a time, mixing each one in before adding the next. The reason for this is to emulsify the eggs into the batter, suspending the fats with the other ingredients and making for a stable, emulsified batter. A batter that is not stable will lose air holes and the resulting cake will not be as light or delicate and will be more likely to sink.
Bake the cake
■Scoop the batter into the prepared pan and use a small offset spatula to smooth and level out the top.
■Place the cake on the center rack of the oven and bake for 1 hour to 1 hour and 10 minutes, until a digital thermometer registers 200°F when inserted into the center. Remove the cake from the oven and place the pan on a cooling rack to cool for 15 minutes. Remove the cake from the pan by lifting up on the ends of the parchment paper and return to the rack. Discard the parchment paper and let the cake cool completely.

Orange, Coconut, and Poppy Seed Cake

Makes 1 (9-inch) cake
If I could have one bite of cake before I die, this, which is my spin on a “whole orange cake,” would be that cake. It differs from other citrus cakes in that it doesn’t call for the zest and juice, but for the whole orange. You boil the oranges to soften and cook the rinds, and then you put them in a blender and puree them, which makes the cake very moist, and also offers a unique flavor component and richness. It is the quintessential me cake; it has so many layers of flavor that all work together really well. Plus, it’s gluten free. It is also Passover-friendly in that it is nonleavened and contains no wheat flour.
Note You will need a 9-inch springform pan to make this.
2 medium navel oranges
Nonstick cooking spray
3 cups (300 grams) almond flour (made from skinless almonds)
2¾ cups (261 grams) shredded unsweetened coconut
¼ cup (35 grams) poppy seeds
1 teaspoon (5 grams) baking powder
1 teaspoon (6 grams) fine sea salt
6 large eggs (300 grams)
2¾ cups (550 grams) granulated sugar
½ cup (50 grams) sliced almonds
For finishing the cake
⅓ cup (95 grams) apricot jam
1 tablespoon (15 grams) water
Boil the oranges
■Place the oranges in a medium saucepan and add enough water to cover them completely. Place a small heavy plate or saucepan on top of the oranges to weigh them down and keep them submerged. Bring the water to a boil over high heat. Reduce the heat to maintain a steady simmer and cook the oranges for 2 hours, replenishing the water with more boiling water to keep the oranges submerged. Turn off the heat, remove the plate, and use a slotted spoon to remove the oranges from the water and place them aside to cool to room temperature; discard the cooking water. (To cool the oranges more quickly, cut them into quarters when they come out of the cooking water.) When the oranges have cooled completely, put them in the bowl of a food processor fitted with a metal blade and puree. Measure 1½ cups (365 grams) of the orange puree and stir the rest into a bowl of plain yogurt or a smoothie—along with a spoonful of honey, as the orange rind makes the puree slightly bitter. (You can make the puree up to 2 days in advance; transfer to an airtight container and refrigerate until you’re ready to use it.)
Get prepared
■Arrange the oven racks so one is in the center position. Preheat the oven to 350°F.
■Spray the bottom and sides of a 9-inch springform pan with nonstick cooking spray. Cut a piece of parchment paper to fit on the bottom of the pan and place it in the pan. Spray the parchment with nonstick spray and set the pan aside.
Make the batter
■Combine the almond flour, coconut, poppy seeds, baking powder, and salt in a large bowl and whisk them together.
■Combine the eggs and the sugar in the bowl of a stand mixer. Fit the mixer with the paddle attachment and beat on medium speed for 2 to 3 minutes, stopping to scrape down the sides of the bowl with a rubber spatula once or twice, until the mixture is light and fluffy. Add the orange puree and beat on medium speed until it is mixed in. Add the dry ingredients and beat on low speed until no dry ingredients are visible, stopping to scrape down the sides of the bowl as needed. Remove the bowl from the mixer and use a rubber spatula to finish mixing the batter, making sure to scrape the very bottom of the bowl.
Bake and glaze the cake
■Scoop the cake batter into the prepared pan and use a small offset spatula to even out the top. Sprinkle the almonds over the cake.
■Place the cake on the center rack of the oven and bake for 50 minutes. Lower the oven temperature to 325°F and bake for an additional 15 to 30 minutes, until the cake is golden brown and the center springs back when touched. Remove the cake from the oven and set it on a cooling rack to cool for about 10 minutes in the pan. Run a small sharp knife around the edges of the pan to loosen the cake from the pan. Unclasp and remove the ring from the side of the pan and let the cake cool completely.
■Meanwhile, place the jam and water in a small saucepan and heat over medium heat, whisking frequently, until the jam has melted. Pass the mixture through a fine-mesh strainer to remove the solids; discard the solids. Brush the glaze on the top of the warm or cooled cake.

Spelt Bull’s-Eye Scones with Raspberry Jam
Makes 9 scones
There are basically two different types of scones in the world: one, which is referred to as a “cream scone,” is made with cream but no egg; these are the scones you typically think of as English scones. Then there are scones with egg in them, which have a biscuit-like quality. I prefer scones made with egg because the egg, which is dense in fat, adds moisture and richness. This recipe contains eggs, and the resulting scones are flaky and buttery and not dry, with the added bonus of a big spoonful of jam in the center. They are, in my view, the perfect scone.
I often make my own jam, but when I don’t have any on hand, I walk across the street to the deli in my Brooklyn neighborhood and buy a jar of Bonne Maman jam, which is incredibly good quality, especially considering you can get it at just about any regular grocery store.
½ cup (125 grams) buttermilk, well shaken
2 large eggs (100 grams)
2 cups (240 grams) all-purpose flour
2 cups (210 grams) spelt flour
¼ cup plus 1 tablespoon (63 grams) granulated sugar
1 teaspoon (5 grams) baking powder
2 teaspoons (12 grams) fine sea salt
20 tablespoons (2½ sticks) Unsalted butter, cold and cubed (283 grams)
¾ cup (218 grams) Raspberry Jam (recipe follows; or store-bought)
Make the batter
■Whisk the buttermilk and eggs together in a small bowl to break up the egg yolks.
■Put the all-purpose flour, spelt flour, sugar, baking powder, and salt in the bowl of a stand mixer. Fit the mixer with the paddle attachment and mix on low speed to combine, about 30 seconds. Add the butter and continue to mix on low speed until the butter and flour have combined to look like moist crumbs. (Don’t mix so much that you form a solid ball of dough.) Turn off the mixer and add the buttermilk and eggs. Mix on low speed until the dough just comes together and no trace of dry crumbs remain. Cover the mixer bowl with plastic wrap and refrigerate the dough until it is firm, about 2 hours, and up to overnight. (This time allows the flours to absorb some of the liquid and the gluten to relax, which helps to create a tender scone.)
Form and bake the scones
■Arrange the oven racks so one is in the top third of the oven and the other is in the bottom third. Preheat the oven to 375°F.
■Line two baking sheets with parchment paper.
■Remove the dough from the refrigerator and pull about a ½-cup (110-gram) portion. Roll the dough into a ball and pat it into a 2½- to 3-inch-wide disk. Continue with the rest of the dough, dividing the disks among the two baking sheets, spacing them evenly. Once you’ve formed all the scones, use your thumbs to press a tablespoon-size crater into the center of each scone. Spoon 1 tablespoon of jam into each crater you created.
■Place one baking sheet on each oven rack and bake for 25 to 30 minutes, until the scones are light brown, rotating them from front to back and top to bottom halfway through the baking time. Remove the scones from the oven and let them cool for about 5 minutes on the baking sheet. Use a spatula to transfer the scones to a cooling rack to cool to room temperature.
Raspberry Jam
Makes about 1½ cups
Turning 1 pound of raspberries into raspberry jam couldn’t be easier—and the results are so delicious and worth the effort. Because this is a small quantity of jam, it cooks (and can burn) very quickly, so it’s important to keep an eye on it and stir it frequently.
1 pound (about 3 half-pints) raspberries (454 grams)
1 cup (200 grams) granulated sugar
Get prepared
■Place two small plates in the freezer. (You will use these later to check the jam for doneness.)
Make the jam
■Combine the raspberries and sugar in a small (2-quart) saucepan and cook over medium-high heat, stirring constantly, until the sugar dissolves and the raspberries break down and release their juice. When the liquid released from the raspberries comes to a boil, reduce the heat to medium-low to maintain a gentle simmer and cook, stirring constantly, for 8 to 12 minutes, until the jam has thickened, reducing the heat if the jam is sputtering out or sticking to the bottom of the pan.
■To test to see if the jam has set up sufficiently, remove one of the plates from the freezer. Place a spoonful of jam on the plate and return the plate to the freezer for 2 minutes, then gently slide your finger through the jam; if the skin on top of the jam wrinkles, it’s done. If not, put the jam back on the heat and cook it for a few more minutes, then test again in the same way using the second plate you put in the freezer.
■Remove the saucepan from the heat, pour the jam into a heat-proof storage container, and set aside to cool to room temperature with the lid slightly ajar. Cover and refrigerate the jam until you are ready to use it, or for up to several months.
Steamed Persimmon Pudding
Makes 1 (2-quart) cake
The first time I made steamed persimmon pudding, I was living in Southern California, where every autumn there was a bounty of persimmons at the farmers’ market. The market tables would be stacked high with Fuyu and Hachiya persimmons, and on a particular Saturday morning, I came home with a big bag of Hachiyas.
This recipe is based on Marion Cunningham’s steamed persimmon pudding, which I clipped from an old Williams-Sonoma magazine, and which was the basis for my first persimmon pudding.
The Hachiyas, which are more domed in shape compared to squat Fuyus, must be very ripe, soft, and pulpy when you use them for this recipe to succeed. If they are firm and not ripe, their tannin content is too high and they will taste astringent. I like to place the persimmons in the vegetable drawer of my refrigerator to let them slowly ripen until they are soft enough to puree.
Steamed pudding—sometimes called steamed cake—is a rich and moist cross between cake and pudding. It is made in a sealed aluminum mold, which is put into a pot of simmering water with the lid closed, so the cake steams rather than bakes, which makes for a rich, dense, and moist result.
When I first started making steamed cake, I didn’t have a steamed cake mold, so I improvised by using a Bundt cake pan and sealing the top closed with aluminum foil. Later, I found a pretty steamed cake mold at Fante’s, a wonderful kitchenware shop in Pennsylvania, where I am from. I suggest you buy a mold rather than improvising. I hope it will mark the beginning of a long future for you and steamed cake. This cake is so rich, it really should be served on its own, but if you want to dress it up a bit, serve it with unsweetened whipped cream. I often take it to holiday parties; not only is it really pretty, it is also easy to transport. If you are taking the cake somewhere, unmold while it is still warm, to prevent the cake from sticking to the pan, let it cool down, and then carefully put the cake back into the mold. Put the lid back on the mold to carry it where you’re going.
Note You will need a 2-quart (approximately 2-liter) pudding mold and its lid, or a 2-quart Bundt pan and aluminum foil to make this.
1 cup (105 grams) walnuts
Nonstick cooking spray
3 Hachiya persimmons, ripe
2 teaspoons (10 grams) baking soda
1 cup (120 grams) all-purpose flour
1 teaspoon (2 grams) ground cinnamon
¾ teaspoon (4.5 grams) fine sea salt
8 tablespoons (1 stick) unsalted butter, cubed and softened (113 grams)
1½ cups (300 grams) granulated sugar
2 large eggs (100 grams)
2 tablespoons (30 grams) dark rum
1 tablespoon (15 grams) fresh lemon juice
1½ teaspoons (8 grams) pure vanilla extract
1 cup (150 grams) golden raisins
Get prepared
■Arrange the oven racks so one is in the center position. Preheat the oven to 300°F.
■Spread the walnuts on a baking sheet and toast until they are golden brown and fragrant, about 20 minutes, shaking the pan at least once while the nuts are toasting. Remove the pan from the oven and set aside for the walnuts to cool slightly. When they are cool, coarsely chop the walnuts.
■Spray the inside of a 2-quart pudding mold and its lid, or a 2-quart Bundt pan, with nonstick cooking spray.
■Place the pudding mold in a 4-quart stockpot and add enough water to come almost all the way up the sides of the mold but not cover it. Remove the mold. Fold a kitchen towel in quarters and place it in the bottom of the pot. Bring the water to a boil over high heat.
Make the batter
■Cut off the tops of the persimmons and peel with a small serrated knife. Cut the persimmons in half, removing any white stem. Transfer the persimmons to a food processor fitted with a metal blade and puree until smooth. Measure out 1 cup (220 grams) of the puree and reserve the rest to snack on. Transfer the puree to a small bowl. Add the baking soda and whisk to combine. (The baking soda will cause the puree to coagulate into a solid mass, so don’t be alarmed.) Set the puree aside.
■Whisk the flour, cinnamon, and salt together in a medium bowl and set aside.
■Combine the butter and sugar in the bowl of a stand mixer. Fit the mixer with the paddle attachment and beat on medium speed for 2 to 3 minutes, stopping to scrape down the sides of the bowl with a rubber spatula once or twice, until the mixture is light and fluffy. Add the eggs one at a time and mix on medium speed after each addition, stopping to scrape down the sides of the bowl before adding the next egg. Add the rum, lemon juice, and vanilla and mix until combined. Reduce the mixer speed to low, add the dry ingredients, and mix until only some patches of dry ingredients remain. Add the persimmon mixture and mix on low speed until the puree has broken up and is mixed throughout the batter, about 30 seconds; the puree will never become fully homogenized in the batter. Remove the bowl from the stand. Add the walnuts and raisins and mix them in with a rubber spatula, making sure to scrape the very bottom of the bowl.
Steam the pudding
■Spoon the batter into the prepared mold or pan and use the back of the spoon to smooth and level the top. Secure the lid onto the mold (or cover it tightly with aluminum foil) and carefully lower it into the pot of boiling water. Adjust the temperature of the burner to maintain a steady simmer. Put the lid on the stockpot and steam the pudding for 2 hours, adding boiling water to the pot as needed so the water comes at least three-fourths of the way up the side of the pudding mold. After 2 hours, uncover the pot, remove the mold from the pot using kitchen towels to hold it, and remove the lid from the mold, taking care not to burn yourself with the steam that will rise. Check the cake for doneness by inserting a long toothpick or skewer into the center. If the tester comes out clean, the cake is done. If it does not come out clean, replace the lid, return the mold to the pot, and steam the cake for an additional 10 minutes before checking again.
■Remove the mold from the water to a wire cooling rack and let it rest for 15 to 20 minutes before unmolding the cake. Remove the lid from the mold. Put a serving plate on top of the pudding and invert the pudding onto the plate. Serve the pudding at room temperature or chilled.
Polenta Cake with Dried Apricot Compote

Makes 1 (9-inch) cake
When my friend the food writer Charlotte Druckman was writing a story about New York City bodegas (small grocers) for the website Food52, she asked me for a recipe she could include that was made with ingredients you could find at a bodega. This is that recipe, and when I make it, I do buy all the ingredients at my local bodega in Brooklyn. It is a simple cake to make: mix up the batter, scoop it into a cake pan, and bake. It’s not too sweet, so it’s a cake you might leave on the table for your family to snack on one sliver at a time. I used to serve this with kumquat compote, but kumquats have such a short season that I started using dried apricots instead, because you can find them anytime, anywhere—even at the bodega.
Note You will need a 9-inch cake pan or springform pan to make this.
Nonstick cooking spray
1¼ cups (150 grams) all-purpose flour
¾ cup (115 grams) polenta (coarse cornmeal)
2 teaspoons (10 grams) baking powder
1 teaspoon (6 grams) fine sea salt
8 tablespoons (1 stick) unsalted butter, cubed and softened (113 grams)
¾ cup (150 grams) granulated sugar
1 lemon, zested
3 large eggs (150 grams)
1 teaspoon (5 grams) pure vanilla extract
½ cup (120 grams) whole milk
Dried Apricot Compote (recipe follows)
Get prepared
■Arrange the oven racks so one is in the center position. Preheat the oven to 350°F.
■Spray a 9-inch cake pan or springform pan with nonstick cooking spray and set aside.
Make the batter
■Put the flour, polenta, baking powder, and salt in a medium bowl and stir to combine. Set aside.
■Place the butter, sugar, and lemon zest in the bowl of a stand mixer. Fit the mixer with the paddle attachment and beat on medium speed for 2 to 3 minutes, stopping to scrape down the sides of the bowl with a rubber spatula once or twice, until the mixture is light and fluffy. Add the eggs one at a time, mixing until each egg is incorporated and stopping to scrape down the sides of the bowl before adding another egg. Add the vanilla and mix to combine. With the mixer running on low speed, add the dry ingredients in three additions and the milk in two, alternating between the dry and wet ingredients and ending with the dry ingredients. Turn off the mixer and remove the bowl from the stand. Finish mixing the cake with a rubber spatula, making sure to scrape the very bottom of the bowl.
Bake the cake
■Scoop the batter into the prepared pan and use a small offset spatula to smooth and level the top. Place the cake on the center rack of the oven and bake for 30 minutes, until it springs back when touched in the center, and a small knife or toothpick inserted into the center comes out clean. Remove the cake from the oven and set aside to cool for about 10 minutes. Invert the cake onto a cooling rack to cool completely. Gently turn the cake right side up to slice.
■Slice the cake and serve with apricot compote on the side.
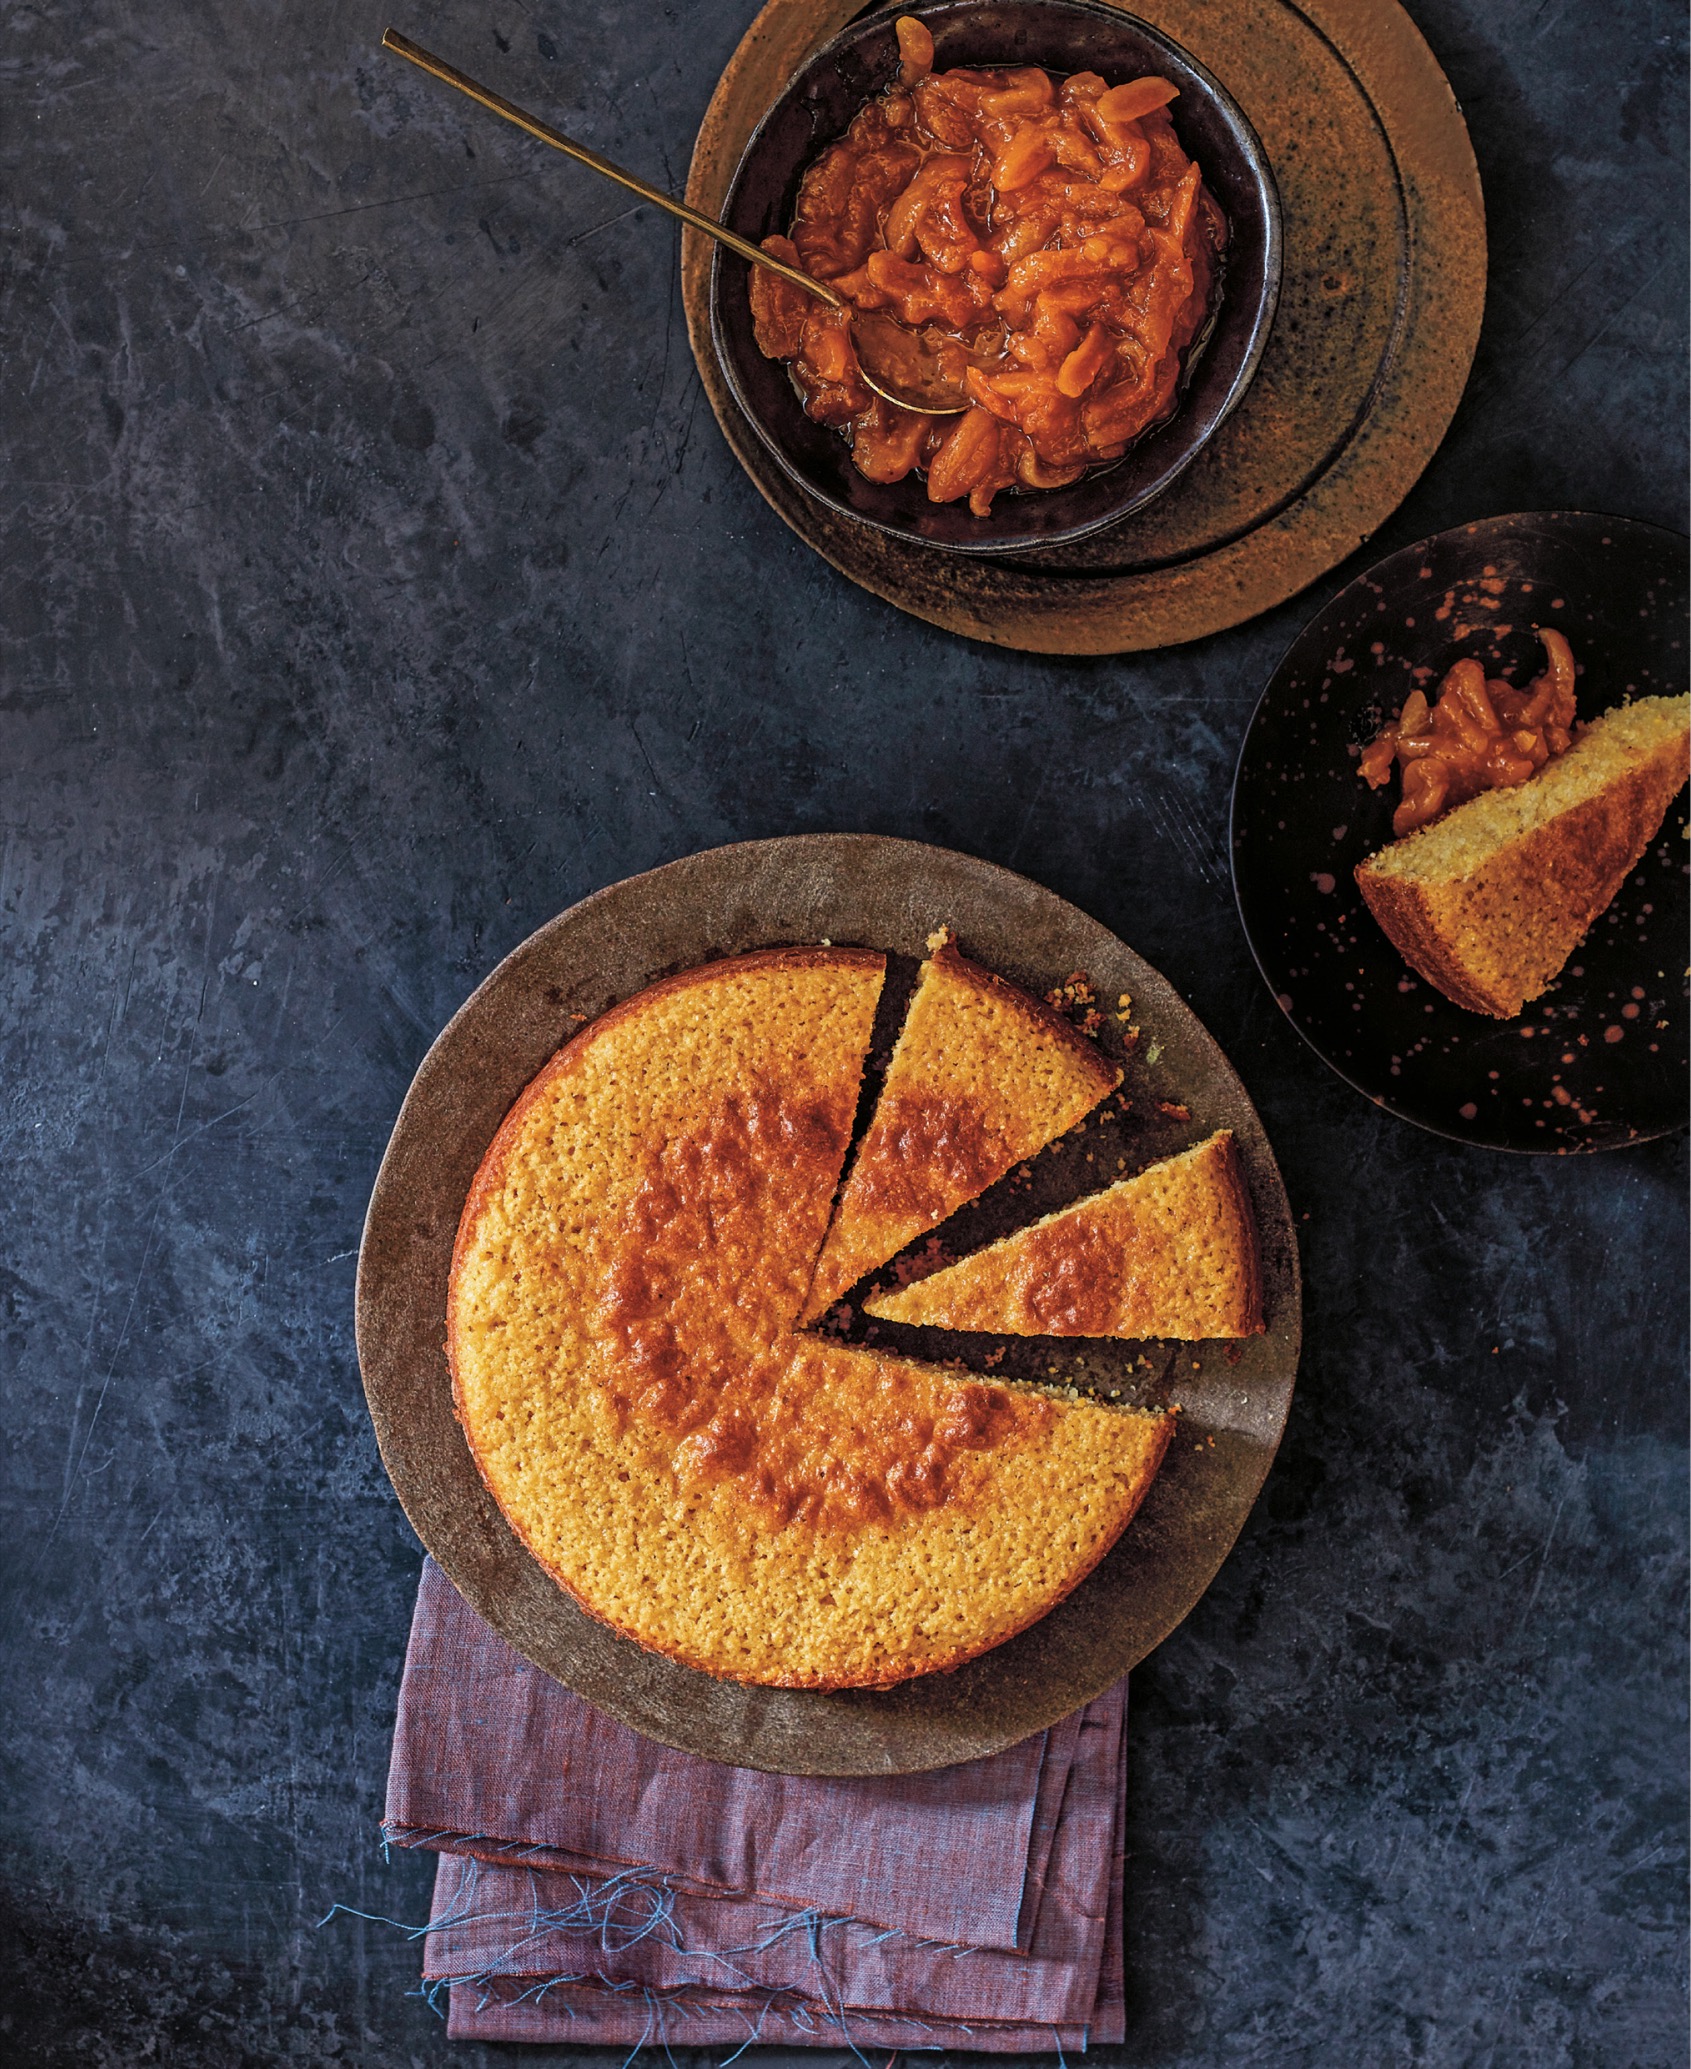
Dried Apricot Compote
Makes about 2½ cups
During the winter, practically the only seasonal fruit you can find is citrus (and even that is coming from California), so you have to think creatively. One of the things I reach for at this time of year is dried fruit, and in particular dried apricots, which I cook with orange juice and a little honey to make a sweet compote. I like their sweet-tart quality, fresh or dried. I prefer brownish, sulfite-free apricots, because I think they are more natural and also have a tangier flavor, but I often use the bright orange ones because that is what they sell at my bodega. Leftover compote is delicious stirred into plain yogurt.
1¼ cups (23 grams) dried apricots
2 cups (470 grams) hot water (100°–110°F)
⅔ cup (165 grams) fresh orange juice
3 tablespoons (60 grams) mild-flavored honey (such as wildflower or clover)
Pinch fine sea salt
■Slice the apricots ⅛ to 3/16 inch thick and place in a small bowl. Cover with the water and set aside to soak for 10 minutes.
■Transfer the apricots and their soaking liquid to a small saucepan. Add the orange juice, honey, and salt and bring to a boil over high heat. Reduce the heat to medium-low to maintain a steady simmer and cook until the liquid is thick and syrupy, about 45 minutes. Turn off the heat and set aside to cool to room temperature. Serve, or refrigerate the compote in a covered container for up to 2 weeks.
Zucchini Olive Oil Cake with Citrus Glaze
Makes 1 (9-inch) cake
This cake is vegan—it utilizes flaxseeds in place of eggs. It also uses shredded zucchini, which contains moisture and gets absorbed by the cake, so it gets even more moist over time. It’s what is sometimes referred to as a keeping cake, which is a way of describing a cake that will still be delicious after three or four days. It is not too sweet, so it makes a great breakfast option.
Note You will need a 9-inch springform pan to make this.
For the cake
Nonstick cooking spray
1½ cups plus more (180 grams) all-purpose flour, for dusting
3 tablespoons (22 grams) flaxseed meal
3 tablespoons (45 grams) warm water
1 pound (2 small to medium) zucchini (500 grams)
½ cup (53 grams) whole-wheat pastry flour
¾ teaspoon (4 grams) fine sea salt
1 teaspoon (5 grams) baking powder
½ teaspoon (2.5 grams) baking soda
½ teaspoon (<1 gram) freshly grated nutmeg
1 orange
1 cup plus 2 tablespoons (226 grams) granulated sugar
¾ cup (165 grams) extra-virgin olive oil
For the glaze
2 tablespoons (30 grams) juice from 1 lemon
2½ tablespoons (37 grams) juice from ½ orange
1¾ cups plus 2 tablespoons (230 grams) confectioners’ sugar
Get prepared
■Arrange the oven racks so one is in the center position. Preheat the oven to 350°F.
■Spray the bottom and sides of a 9-inch springform pan with nonstick cooking spray. Dust the pan with all-purpose flour, invert, and lightly tap the bottom to remove any excess flour. Set aside.
■Stir the flaxseed meal and water together in a small bowl and set aside to soak for at least 10 minutes, or until you’re ready to add it to the batter.
■Place a box grater on a clean kitchen towel. Trim the bottoms from the zucchini and, holding the zucchini by the stem, grate the zucchini on the large holes of the grater, discarding both ends. Close the towel with the zucchini inside and wring it out over the sink to remove as much water as possible. Set aside.
Make the batter
■Put the all-purpose flour, whole-wheat pastry flour, salt, baking powder, baking soda, and nutmeg together in a large bowl and whisk to combine.
■Use a fine Microplane to grate the orange zest over a bowl, grating only the outermost, bright-colored layer.
■Combine the sugar and orange zest in the bowl of a stand mixer. Fit the mixer with the paddle attachment and mix on low speed for 20 seconds to distribute the zest. Add the olive oil and mix on medium speed for about 30 seconds. Add the soaked flaxseed meal and continue to mix on medium speed for about 1 minute to lighten and emulsify the batter. Turn off the mixer and add the zucchini. Mix on low speed to distribute the zucchini, about 30 seconds. Turn off the mixer, add the dry ingredients, and mix on low speed until the wet and dry ingredients are combined. Turn off the mixer and remove the bowl from the stand. Finish mixing the cake with a rubber spatula, making sure to scrape the very bottom of the bowl.
Bake the cake
■Scoop the batter into the prepared pan and use a small offset spatula to smooth the top of the batter.
■ Place the cake on the center rack of the oven and bake for 55 to 65 minutes, until the cake is brown on top, has pulled away from the sides of the pan, and springs back when gently pressed in the middle. Remove the cake from the oven and set it on a cooling rack to cool for about 10 minutes in the pan. (The cake will collapse in the center as it cools, so don’t worry when you see this.) Run a small sharp knife around the edges of the pan to loosen the cake from the pan. Unclasp and remove the ring from the side of the pan and let the cake cool completely.
Glaze the cake
■While the cake is cooling, to make the glaze, whisk together the lemon juice, orange juice, and confectioners’ sugar until no lumps remain. Spoon or brush the glaze over the cake while it is still warm; it is a thin glaze, and it soaks into the cake and is just barely visible in the end. Slide the cake off the bottom of the springform pan onto a cake stand or serving plate.
Cinnamon Swirl Sour Cream Bundt Cake

Makes 1 (10-inch) Bundt cake
In Nancy Silverton’s book Pastries from the La Brea Bakery, she has a recipe for a crème fraîche coffee cake that I have been making for years. Over time, I have tweaked it until it may not be recognizable to Nancy, but to me, it still feels like hers. Where some coffee cakes are so dry and boring all you want to do is eat the crumbly part off the top, the amount of sour cream in this cake creates a moist and tangy cake that balances perfectly with a cup of morning coffee.
Note You will need a 10-inch Bundt pan to make this.
Nonstick cooking spray
3 cups plus more (360 grams) all-purpose flour, for dusting
½ cup (lightly packed) dark brown sugar (100 grams)
2 teaspoons (4 grams) ground cinnamon
2 teaspoons (10 grams) baking powder
1 teaspoon (6 grams) fine sea salt
16 tablespoons (2 sticks) unsalted butter, cubed and softened (226 grams)
1½ cups (300 grams) granulated sugar
1 lemon
2 large eggs (100 grams)
2 cups (454 grams) sour cream
1 teaspoon (5 grams) pure vanilla extract
¼ cup (30 grams) confectioners’ sugar
Get prepared
■Arrange the oven racks so one is in the center and make sure there is enough room above to accommodate a Bundt pan. Preheat the oven to 350°F.
■Spray the inside of a 10-inch Bundt pan with nonstick cooking spray. Dust the pan with flour, invert, and lightly tap the bottom to remove any excess flour. Set aside.
■Put the brown sugar and cinnamon in a small bowl and whisk to combine. Set aside.
Make the batter
■Put the flour, baking powder, and salt together in a medium bowl, whisk to combine, and set aside.
■Combine the butter and granulated sugar in the bowl of a stand mixer. Use a fine Microplane to grate the lemon zest over the bowl, grating only the outermost, bright-colored layer. Fit the mixer with the paddle attachment and beat on medium speed for 2 to 3 minutes, stopping to scrape down the sides of the bowl with a rubber spatula once or twice, until the mixture is light and fluffy. Add the eggs one at a time, beating on medium speed until they are thoroughly combined and stopping to scrape down the sides of the bowl before adding the next egg. Add the sour cream and vanilla and beat on medium speed until the sour cream is mixed in. Scrape down the sides of the bowl and add the dry ingredients. Mix on low speed until no flour is visible. Be careful, because flour can fly out of the bowl when you start mixing. Turn off the mixer and remove the bowl from the stand. Finish mixing the cake with a rubber spatula, making sure to scrape the very bottom of the bowl.
Bake the cake
■Drop half of the batter in spoonfuls around the bottom of the prepared Bundt pan. Use the back of the spoon to even out the batter. Sprinkle about two-thirds of the cinnamon–brown sugar mixture over the batter. Spoon the remaining batter on top of the cinnamon–brown sugar layer and use the back of the spoon to smooth it out. Sprinkle the remaining cinnamon–brown sugar over the top layer of batter.
■Place the cake on the center rack of the oven to bake for 1 hour to 1 hour and 10 minutes, until a toothpick inserted into the center comes out clean and the cake springs back when you press gently with your finger. Remove the cake from the oven and set it aside to cool in the pan for 10 minutes. Invert the cake onto a cooling rack to cool completely.
■Transfer the cake to a serving plate. Put the confectioners’ sugar in a fine-mesh strainer and dust it lightly over the cake.
Flourless Chocolate Olive Oil Cake
Makes 1 (9-inch) cake
I love any cake made with olive oil—oil-based cakes tend to be really moist, and the olive oil in this chocolate cake imparts another layer of flavor. This cake contains polenta, which gives it a nice crunch. It’s so rich and dense that my son, Wyatt, calls it a brownie cake.
Note You will need a 9-inch springform pan to make this.
Nonstick cooking spray
8 ounces (or 1⅓ cups chocolate chips) bittersweet chocolate (226 grams)
½ cup (110 grams) extra-virgin olive oil
1 cup (200 grams) granulated sugar
5 large eggs, separated (250 grams)
3 tablespoons (36 grams) polenta (coarse cornmeal)
1 teaspoon (6 grams) fine sea salt
Get prepared
■Arrange the oven racks so one is in the center position. Preheat the oven to 350°F.
■Spray the bottom and sides of a 9-inch springform pan with nonstick cooking spray. Line the bottom with a parchment-paper round and then spray the bottom with additional nonstick spray. Set aside.
Prepare a double boiler and melt the chocolate
■Unless you are using chocolate chips, chop the chocolate into ½-inch pieces.
■Pour 1 to 2 inches of water into the bottom of a small saucepan and choose a bowl that fits over the saucepan to make a double boiler. Make sure the water is not touching the bottom of the bowl; if it is, pour some water out. Bring the water to a boil over high heat, then reduce the heat to medium-low to maintain a gentle simmer.
■Put the chocolate in the bowl of the double boiler and melt it, using a heat-proof rubber spatula to stir and scrape down the sides of the bowl so the chocolate melts evenly and doesn’t burn. Remove the bowl from the double boiler and wipe the bottom of the bowl so no water drips. Add the olive oil and whisk to combine. Add ¾ cup (150 grams) of the sugar, the egg yolks, polenta, and salt and whisk to combine. Set aside.
Whip the egg whites and mix the batter
■Place the egg whites in the bowl of a stand mixer. Fit the mixer with the whisk attachment and whip on medium-high speed until the egg whites have started to froth, about 2 minutes. With the mixer running, add the remaining ¼ cup (50 grams) sugar in a slow, steady stream. Increase the speed to high and continue to whip until soft peaks have formed, about 2 minutes. Add one-third of the egg whites to the chocolate batter and gently fold them in with a rubber spatula. (I do this by moving the bowl counterclockwise with my left hand as I work my spatula around the edge and up through the center with my right hand.) Add the remaining egg whites and gently fold them in.
I like to beat my egg whites just this side of stiff peaks. This helps them to better expand in the oven as the cake bakes, resulting in a lighter cake. Heat causes expansion in the oven; by not beating the egg whites to their maximum potential, you allow them the room to expand.
Bake the cake
■Pour the batter into the prepared cake pan and use a small offset spatula to smooth and level the top.
■Place the cake on the center rack of the oven and bake for 30 to 35 minutes, until it has puffed up with some small cracks on the surface and feels slightly firm and not jiggly to the touch. Remove the cake from the oven and set it on a cooling rack to cool for about 10 minutes in the pan. (The cake will collapse in the center as it cools; that is part of its rustic beauty.) Run a small sharp knife around the edges of the pan to loosen the cake from the pan. Unclasp and remove the ring from the side of the springform pan and let the cake cool completely. Slide the cake off the bottom of the pan onto a cake stand or serving plate.
Date Walnut Cake with Dulce de Leche
Makes 1 (8-inch) cake
This date cake is a variation of one I made while working at Babbo for Gina DePalma. The walnuts are toasted and ground into a fine walnut flour and the dates are skinned and puréed. The resulting cake pairs perfectly with a dulce de leche, which is easy to make from scratch, or a vanilla custard, like we did at Babbo.
Note You will need an 8-inch square baking pan to make this.
Nonstick cooking spray
1 cup (105 grams) walnuts
2 cups (335 grams) dates (with pits, preferably Medjool)
1½ cups (180 grams) all-purpose flour
1 teaspoon (5 grams) baking powder
½ teaspoon (3 grams) baking soda
¾ teaspoon (4.5 grams) fine sea salt
1 cup (250 grams) buttermilk, well shaken
2 large eggs (100 grams)
½ cup (lightly packed) dark brown sugar (100 grams)
8 tablespoons (1 stick) Unsalted butter, melted and cooled slightly (113 grams)
1 teaspoon (5 grams) pure vanilla extract
Dulce de Leche (recipe follows)
Get prepared
■Arrange the oven racks so one is in the center position. Preheat the oven to 300°F.
■Spray the bottom and sides of an 8-inch square baking pan with nonstick cooking spray. Cut an 8-inch-wide piece of parchment paper and lay it in the pan so it lines the bottom and sides. Trim the paper so it overhangs the edges of the pan by ½ inch. Spray the parchment with nonstick cooking spray.
■Spread the walnuts on a baking sheet and toast them in the oven for 18 to 20 minutes, shaking the pan once during that time for even toasting, until the nuts are golden brown and fragrant. Remove the baking sheet from the oven and set aside to cool the nuts to room temperature.
■Increase the oven temperature to 350°F.
■Place the dates in a small heat-proof bowl and add enough boiling water to cover. Set aside to soak for 10 to 15 minutes, until the skins begin to pull away from the flesh. Strain the dates through a fine-mesh strainer and use your fingers to remove and discard the skins and pits. Set the dates aside.
Make the batter
■Whisk the flour, baking powder, baking soda, and salt together in a medium bowl and set aside.
■Put the walnuts in a food processor fitted with a metal blade and pulse until they are smaller than a lentil; any smaller and they will begin to turn into a paste, like a nut butter. Transfer the ground walnuts to the bowl with the dry ingredients and set aside. (There is no need to wipe down the bowl of the food processor.)
■Place the dates in the bowl of the food processor. Add ½ cup of the buttermilk and process to form a smooth paste, about 1 minute. Scrape the paste into a medium bowl, add the remaining ½ cup buttermilk, and whisk to combine. Set aside.
■Combine the eggs and brown sugar in the bowl of a stand mixer. Fit the mixer with the paddle attachment and beat on medium-high speed until the mixture has lightened in color, about 2 minutes, stopping to scrape down the sides of the bowl with a rubber spatula once during that time. With the mixer running, drizzle in the melted butter and vanilla and mix to combine. Add the date puree and mix on low speed until blended. Turn off the mixer and scrape down the sides of the bowl with a rubber spatula. Add the dry ingredients and mix on low speed until smooth. Turn off the mixer and remove the bowl from the stand. Finish mixing the cake with a rubber spatula, making sure to scrape the very bottom of the bowl.
Bake the cake
■Scrape the batter into the prepared baking pan and use a small offset spatula to even out the top.
■Place the cake on the center rack of the oven and bake for 45 to 50 minutes, until a toothpick inserted into the center comes out clean. Remove the cake from the oven and let it cool for about 5 minutes in the pan. Pull the parchment paper ends to lift the cake out. Remove and discard the parchment paper and place the cake on a serving plate. While the cake is still warm, use a chopstick to poke holes in the cake, leaving about 1 inch between each hole. Drizzle half of the dulce de leche over the cake so it fills the holes and drips down the sides.
■Cut the cake into 9 squares and serve with the remaining dulce de leche on the side.
Dulce de Leche
Makes about 2 cups
Dulce de leche is Argentine caramel, made by cooking milk and sugar together slowly for a long time until the mixture turns into a thick, rich, delicious caramel. If you’ve never made it, you should try it; it’s not at all difficult to do. You will have some left over after serving it with the date walnut cake; drizzle it over ice cream.
4 cups (960 grams) whole milk
1¼ cups (250 grams) granulated sugar
½ teaspoon (3 grams) baking soda
1 vanilla bean
½ teaspoon (3 grams) fine sea salt
Place the milk, sugar, and baking soda in a large saucepan. Split the vanilla bean down the middle with a small sharp knife and use the knife to scrape the seeds out of the bean. Add the seeds and bean to the saucepan. Stir to dissolve the sugar and warm the milk over medium-high heat until the mixture begins to bubble around the edges. Reduce the heat to medium-low to maintain a steady simmer and simmer for 60 minutes, stirring every 10 to 15 minutes, until the mixture is a tan color, and then increase the stirring to every 5 minutes, until the dulce de leche is a beautiful deep amber. Turn off the heat. Remove the vanilla bean. (Use the bean to make Vanilla Sugar, this page, or discard it.) Pass the caramel through a fine-mesh strainer into a large bowl. Whisk in the salt. Serve warm. (If you are making the dulce de leche in advance or if you have some left over, allow it to cool to room temperature, transfer it to a covered container, and refrigerate until you’re ready to serve it, or for up to 2 weeks. Before serving, reheat the dulce de leche in a medium saucepan over medium-low heat, stirring often.)
Banana Bread
Makes 1 (9-inch) loaf
I add a lot of banana to this batter, so you can really taste it. And I don’t add walnuts, because I want it to be all about the banana. It’s a keeping cake, which means it keeps for three or four days without going stale, and, in fact, it gets more moist and more delicious during this time.
Note You will need a 9- x 4-inch loaf pan to make this.
Nonstick cooking spray
1¼ cups (150 grams) all-purpose flour
¼ cup plus 2 tablespoons (76 grams) granulated sugar
½ teaspoon (3 grams) baking powder
½ teaspoon (3 grams) baking soda
½ teaspoon (3 grams) fine sea salt
½ teaspoon (1 gram) ground cinnamon
3 to 4 medium peeled bananas (250 grams)
1 large egg (50 grams)
⅓ cup (83 grams) buttermilk, well shaken
6 tablespoons (85 grams) unsalted butter, melted and cooled slightly
1 teaspoon (5 grams) pure vanilla extract
Get prepared
■Arrange the oven racks so one is in the center position. Preheat the oven to 350°F.
■Spray a 9- x 4-inch loaf pan with nonstick cooking spray.
Make the batter
■Whisk the flour, sugar, baking powder, baking soda, salt, and cinnamon together in a medium bowl and set aside.
■In a separate medium bowl, mash the bananas with a fork until they are pureed with some small chunks remaining (about 1 cup). Add the egg, buttermilk, melted butter, and vanilla and whisk them in with the bananas. Add the dry ingredients and use a rubber spatula to fold them in until no flour is visible, making sure to scrape the very bottom of the bowl.
Bake the bread
■Scoop the batter into the prepared loaf pan and use a small offset spatula to smooth and level out the top.
■Place the banana bread on the center rack of the oven and bake for 50 to 55 minutes, until a toothpick inserted into the center comes out clean, rotating the pan from front to back halfway through the baking time. Remove the banana bread from the oven and let it cool in the pan for 10 minutes. Invert the banana bread onto a cooling rack and flip it again so it is right side up. Let it cool on the rack.
Pumpkin Muffins
Makes 1 dozen muffins
When I was child growing up in central Pennsylvania, I used to go with my parents and grandmother to a restaurant called the Country Cupboard. It was very homey; when you sat down, they brought a bread basket to the table, filled with warm white dinner rolls and pumpkin muffins. I loved the muffins so much, my parents would purchase some to take home, which they would keep in the freezer to heat up for special occasions. It’s funny that we treated them like something so special, because really, they’re very basic. In trying to replicate those muffins, I relied on a recipe I found in a collection from our local church.
Note You will need one 12-cup standard-size muffin tin to make these.
Nonstick cooking spray
2 cups (210 grams) whole-wheat pastry flour
1 teaspoon (5 grams) baking soda
1 teaspoon (2 grams) ground cinnamon
¾ teaspoon (4 grams) fine sea salt
½ teaspoon (1 gram) ground cloves
¼ teaspoon (1 gram) freshly grated nutmeg
1¼ cups (lightly packed) light brown sugar (250 grams)
⅔ cup (150 grams) canned pumpkin puree
2 large eggs (100 grams)
½ cup (110 grams) canola oil
⅓ cup (82 grams) fresh orange juice
½ cup (75 grams) black raisins
Get prepared
■Arrange the oven racks so one is in the center position. Preheat the oven to 350°F.
■Spray a 12-cup muffin tin with nonstick cooking spray and set aside.
Make the batter
■Put the whole-wheat pastry flour, baking soda, cinnamon, salt, cloves, and nutmeg in a medium bowl and whisk to combine. Set aside.
■Put the brown sugar, pumpkin puree, eggs, oil, orange juice, and raisins in a separate large bowl and stir to combine. Add the dry ingredients and fold them together with a rubber spatula, making sure to scrape the very bottom of the bowl.
Fill the cups and bake the muffins
■Scoop the batter into the prepared muffin tin, filling each cup about three-quarters of the way.
■Place the muffins on the center rack of the oven to bake for 25 to 30 minutes, until a toothpick inserted into the center of one comes out clean, rotating the tin from front to back halfway through the baking time. Remove the muffin tin from the oven and let the muffins cool in the pan for about 10 minutes. Run a small paring knife around the outside of each muffin to loosen it. Tilt the muffin tin over and coax the muffins out onto a cooling rack. Turn the muffins right side up and let them cool completely.

Orange, Oat, and Flax Muffins
Makes 1 dozen muffins
I like to eat healthfully, and as a baker, I like experimenting with ways to make healthy baked goods that don’t taste like health food. These gluten-free, dairy-free muffins—made with oat flour, loaded with fruit, and sweetened with brown sugar—are my version of a modern “morning glory” muffin. They’re made with all whole ingredients, including flaxseed meal, which is ground flaxseeds; in recent years, it has been added to baked goods to make them “healthy” the way that bran was added to baked goods when I was growing up. I started making these for a bakery I was consulting for in Pennsylvania. It was the thing I grabbed to have with my morning coffee.
Note You will need two (6-cup) jumbo muffin tins to make these.
Nonstick cooking spray
1 cup (150 grams) golden raisins
1 cup (150 grams) dried cherries
½ cup (85 grams) dried blueberries
1 Granny Smith apple (130 grams)
¾ cup (lightly packed) dark brown sugar (150 grams)
3 large eggs (150 grams)
1½ tablespoons (30 grams) mild-flavored honey (such as wildflower or clover)
1¼ cups (309 grams) fresh orange juice
½ cup (110 grams) extra-virgin olive oil
2⅓ cups (230 grams) flaxseed meal
1¾ cups (161 grams) oat flour
2 teaspoons (10 grams) baking soda
1 teaspoon (2 grams) ground cinnamon
1 teaspoon (6 grams) fine sea salt
1½ tablespoons (22 grams) Demerara (turbinado) sugar
Get prepared
■Arrange the oven racks so one is in the center position. Preheat the oven to 375°F.
■Spray two (6-cup) jumbo muffin tins with nonstick cooking spray and set aside.
■Place the raisins, cherries, and blueberries in a medium bowl, cover with hot tap water, and set aside to soak for 5 minutes. Drain in a fine-mesh strainer; set the strainer on top of a bowl to drain off any excess water while you prepare the muffin batter.
■Peel the apple and grate it on the large holes of a box grater; set aside. (I place the grated apple on top of the dried fruit until I’m ready for them.)
Make the batter
■Whisk the brown sugar, eggs, and honey together in a large bowl. Add the orange juice and olive oil and whisk to combine.
■Put the flaxseed meal, oat flour, baking soda, cinnamon, and salt in a medium bowl and whisk to combine. Add the dry ingredients to the bowl with the brown sugar mixture and whisk until smooth. Add the dried fruit and apple and stir with the whisk to combine, making sure there are no clumps of grated apple in the batter. Set aside for 5 minutes to allow the flaxseed meal to absorb the liquid in the batter.
Fill the cups and bake the muffins
■Scoop the batter into the prepared muffin tins, filling each cup about three-quarters of the way. Sprinkle the muffins with the demerara sugar.
■Place the muffins on the center rack of the oven for 25 to 30 minutes, until a toothpick inserted into the center of one comes out clean, rotating the pans from front to back halfway through the baking time. Remove the tins from the oven and let the muffins cool in the pans for about 10 minutes. Run a small paring knife around the outside of each muffin to loosen it. Tilt one muffin tin over and coax the muffins out onto a cooling rack. Repeat with the second tin of muffins. Turn the muffins right side up and let them cool completely.