9
Rise to the Occasion
Breads, Rolls and Pastries Made with Yeast
Yeast breads (which include sandwich breads, rolls, and baguettes) made without wheat, milk, soy, and eggs, are among the most difficult foods to find off the shelf. Some of the most highly regarded gluten-free bread manufacturers make breads that are also dairy-free but still contain eggs. In my search for off-the-shelf sandwich bread, the best I have found made without the top eight allergens (including eggs) is from Food for Life; they offer both millet bread and rice bread, available in the frozen foods section. I always keep one of these in my freezer, in case I don’t have time to make my own.
The truth is, it’s difficult—but not impossible—to bake yeast bread without gluten, milk, and eggs. There are some limitations; you won’t be able to achieve a flaky crust as you are accustomed to with sandwich bread, nor will you be able to bake a bread with holes and air pockets. On the other hand, you will be amazed that you can actually eat bread again—great tasting bread—and yes, even make a sandwich.
Remember that electric mixer that I told you to put away when making crusts and doughs? Well, it’s time to take it out again; you will be using it to make yeast bread.

About Yeast
Even if you’re not interested in biology, I think you’ll find yeast fascinating. Yeast is a single-celled organism that multiplies quickly when fed sugar in a moist environment. Yes, it’s alive, and that’s a good thing for us bakers. When active yeast combines with starch (in the flour), it converts it to carbon dioxide; this fermentation process is what allows the bread to expand—referred to in the baking world as rising. While you can use different starches and xanthan gum to help hold bread together, there is nothing that can replace the effect yeast has on bread; yeast is primarily responsible for the fluffiness of bread, and it can dramatically change the texture of your baked goods. While it is possible to be allergic to yeast, that is rare. Best of all, yeast is naturally gluten-free and does not contain other top food allergens.
Because yeast has a life cycle, the techniques used to work with it matter. Unlike quick breads, yeast breads cannot be fixed by baking longer; and once the yeast has done its job during the rise cycle, there’s no going back. I’m not telling you this to scare you away from using yeast—on the contrary, my goal is to help you understand yeast so that you can best leverage it in your baking. Yeast can make a tremendous difference, especially when you don’t have eggs as a leavening agent.
Many kinds of yeast are used in baking. The most common are active dry yeast and quick-rising yeast. Both are used in traditional baking, and can be found at the grocery store. Small jars of yeast are usually found on the shelf in the baking aisle. Single-use packets of yeast can generally be found in the refrigerated section. Keep in mind that these are live organisms. Don’t buy yeast in bulk at the discount store; it does expire. The jars of yeast you purchase should be airtight (you will hear a pop when you open them). Unopened, the jars of yeast usually have a shelf life of up to two years, but check the expiration date before you buy. Always store single packets and opened jars of yeast in the refrigerator or freezer. This will extend the shelf life for up to a year after opening. See “Activating and Testing Yeast” to learn how to tell if your yeast is still good. Yeast can be used directly from the freezer or refrigerator.
Active dry yeast is often used in both traditional and allergen-free baking recipes. Just to confuse us, there is no consistent naming convention for this yeast, which is sometimes called dry active, or just active yeast. This yeast is in a semidormant state, and must be activated before you use it. Once activated, it should be added to the bread quickly, to get the best rise. A typical gluten-free recipe that uses active dry yeast will take at least an hour to rise.
Quick-rising yeast also has a few commonly used names. It is sometimes referred to as instant, rapid-rise, or fast-rising yeast. Fleischmann’s calls its version RapidRise yeast; another popular brand, Lesaffre Yeast Corporation, simply calls its product Saf-Instant Yeast. If it has the words fast acting on the label, you know you’ve found the right product. Quick-rising yeast is very similar to active dry yeast, but is smaller grained, doesn’t need to be activated, and requires less time to rise.
While we won’t be using it here, another common yeast I should mention is fresh yeast. It’s also known as cake yeast, but has nothing to do with the cakes you bake; it’s simply sold in a “cake” of yeast (like a cake of butter). This is live yeast, not dried, and I don’t recommend substituting it for active dry or quick-rising yeast.
I use quick-rising yeast in all of the yeast recipes in this book for two reasons: Learning to work with one type of yeast is easier than learning to use multiple types, and quick-rising yeast provides consistent results with the shortest amount of prep time. (See “Using Active Dry Yeast” to learn how to convert recipes to use active dry instead of quick-rising yeast.) In addition to being able to make bread faster, when you use quick-rising yeast, you can follow the same processes for mixing ingredients that you learned when working with batters. Quick-rising yeast needs liquid and sugar to do its job, but that will happen during the mixing process. First, you should mix the dry ingredients (including the yeast) and set them aside. You will then mix the wet ingredients, and add the dry to the wet. In most cases you will then beat the dough for 5 minutes or more. This allows the ingredients to become extremely well blended and pliable. Properly mixed yeast dough will be able to be lifted from the bowl (although it will stick a bit); while I’m not advocating throwing balls in the house, if you were to pat down the dough and throw it across the room like a softball, it would hold together. The exception to this is yeast dough intended to be made in a sided pan, such as Basic Sandwich Bread.
The best gluten-free, home-baked yeast breads are ones made with starchy flours—this means you should choose one of the “white” flours I described in chapter 2. If you prefer to use only multigrain flours, reduce the beating time with the stand mixer from the usual 5 minutes to no more than 2 minutes; multigrain flours tend to break down more quickly than starchy flours do.
While ingredients should be at room temperature for mixing batters, and cold for forming doughs, the liquid ingredients for yeast breads should be warm. The optimal temperature for the water or the non-dairy milk you add is 100°F. This will help the yeast do its job. Water and milk can be warmed using the microwave (for about 20 seconds if it’s at room temperature before warming, or 45 seconds if cold), or in a small saucepan over low heat. Use your probe thermometer to check. If you overshoot, wait until the temperature drops before adding the non-dairy milk to your mixing bowl.
After mixing the ingredients for yeast breads, and forming them into shape for the recipe you are creating, you will need to let them rise. When using quick-rising yeast, the dough should rise for at least 35 minutes. As a general rule of thumb, the smaller the pastry, the less time needed for rise; a dinner roll may require 35 minutes, while bread may require 45 minutes.
Now, are you ready for a big secret? Gluten-free yeast breads are actually simpler and quicker to make than are yeast breads made with wheat. That’s right. I know I told you that making yeast breads without eggs was difficult, and that’s still true. But because we’re working with gluten-free grains, there is no kneading—none of that pounding or beating the dough to break down the gluten. There’s also no need for two rise cycles. Whereas wheat bread may take you upwards of two hours to prepare (and that’s before you even put it in the oven), our gluten-free and allergen-free yeast breads (using quick-rising yeast) require only 35 to 45 minutes of rise time. See “Proofing Methods” to learn more about the best ways to help your bread rise.
When preparing gluten-free bread, you will still be using the paddle attachment on your mixer, rather than the dough hook. Dough hooks were designed to simulate the hand kneading process. Since there is no gluten to break down in the flour, you can go ahead and put that dough hook away. In fact, when working with yeast doughs, you will want to use a light touch. For example, when preparing Basic Dinner Rolls you will need to roll them in your hands; as you do this, you don’t want to flatten or compact them. Instead, roll gently to keep them light and fluffy. Even when using a rolling pin (as with the Multipurpose Flatbread), you are rolling to spread, not flatten; rolling with gentle pressure works best.
How much yeast should you use? A gluten-free bread recipe with 1 ½ to 2 cups of flour will typically require 2¼ teaspoons of yeast. This is precisely how much yeast is contained in the single serving packets, making measuring easy. If you’re working with yeast from a jar, you’ll need to measure using two scoops with your standard teaspoon and one scoop with your ¼ teaspoon. Alternatively, if you plan to be working with yeast a lot, a handy tool to have is a yeast measuring spoon, which measures the full 2¼ teaspoons in one scoop.
Now it’s time for another science lesson: Sugar and water help yeast to grow; salt inhibits yeast growth. Using too much salt in your bread batter will cause your bread to rise very slowly, and may even cause it not to rise at all. So go easy on the salt. Most of my yeast recipes use just a small amount of salt for flavor. A good rule of thumb is to use no more than ¼ teaspoon of salt per cup of flour. On the other hand, sugar is yeast’s best friend. I prefer to use granulated sugar, rather than honey, agave nectar, or other sweeteners, in yeast bread recipes because it performs extremely well. As long as you choose a real sugar (that would be fructose and/or glucose), the yeast will react, but it reacts most quickly with crystal sugar. Stevia will not activate yeast. If you prefer a non-sugar sweetener, you will still need to use at least a teaspoon of sugar to activate the yeast. (See “Sweetening Options.”)
Another element of baking that we must discuss when talking about yeast is temperature. Yeast needs a nice warm climate to grow; bread will rise best in a humid spot that is between 95° and 100°F (see “Proofing Methods”). Likewise, temperature is how you will determine when the bread is done. The toothpick test simply doesn’t give you an accurate reading. While the look of baked bread—a nicely browned crust—can sometimes be helpful in determining when it’s time to take your bread out of the oven, keep in mind that browning will occur differently, depending on the flour blend you choose. The internal temperature of the bread is the only accurate way to determine whether gluten-free yeast bread is done. This is where the probe thermometer comes in. Your bread is done when the thermometer registers between 200° and 205°F. This is no more complex than measuring the temperature of your turkey or pot roast—just stick the thermometer into the thickest part of the bread, and take a reading. The temperature will go up quickly once the bread reaches 180°F, so watch carefully at that point.
You will also notice that most yeast recipes use a baking temperature that is higher than the usual 350°F for batters and doughs. Most recipes in this chapter use an oven temperature of 375°F for baking.
If you must avoid yeast, due to an illness or dietary restriction, I don’t recommend trying to adapt yeast recipes to be yeast-free; they have been specifically designed to take advantage of the fermentation process described here, and sometimes yeast is the only leavening agent in bread recipes. Your best bet in this case would be to focus on quick breads and other yeast-free baked goods.
Basic Dinner Rolls
When eating out allergen-free and gluten-free, the first thing many of us miss is the roll. I am always delighted when I find new options for dining out that cater to food allergies, and more and more restaurants are offering gluten-free bread. It’s common enough that I am now on a quest to find the restaurant with the best gluten-free dinner roll.
This recipe is inspired by the rolls made by the Soul Dog Bakery and served at the Artist’s Palate restaurant in my hometown of Poughkeepsie, NY. Their version of this roll is gluten-free and dairy-free, but contains eggs. My version is similar to theirs, but of course, also egg-free. Garbanzo bean flour gives this roll a unique flavor.
On the cover of this book, you can see what these rolls look like as they are being made.
{ Makes 8 rolls }
½ cup garbanzo bean flour
1½ cups gluten-free flour blend
½ teaspoon xanthan gum (leave out if your flour blend contains xanthan gum)
2¼ teaspoons quick-rising yeast
¼ teaspoon salt
3 teaspoons baking powder
¼ cup sugar
¼ cup sunflower oil
½ cup warm water
3 teaspoons Ener-G Egg Replacer mixed with 4 tablespoons warm water (equal to 2 eggs)
Up to ¼ cup additional flour for dusting
- Line a baking sheet with parchment paper.
- Combine the flours, xanthan gum (if needed), yeast, salt, baking powder, and sugar in a medium bowl. Set it aside.
- Blend the oil, water, and egg replacer mixture together in a large bowl, using a mixer on medium speed, about 1 minute.
- Slowly add the dry ingredients to the wet mixture, mixing on medium-low speed, until combined.
- Beat for 5 minutes on medium-high speed until the dough is pulling away from the sides of the bowl.
- Spread the dusting flour on a smooth prep surface. Scoop the dough on top of the flour.
- Use a bench knife or sharp-edged knife to divide the dough into eight equal-sized portions.
- Roll each portion in the flour to lightly coat. Use your hands to gently roll them into balls (see tip).
- Arrange the rolls on the lined baking sheet.
- Proof for 35 to 45 minutes (see “Proofing Methods”).
- With 5 minutes left to rise, preheat the oven to 375°F.
- Bake at 375°F for 13 to 16 minutes, until the internal temperature is 200° to 205°F.

- When rolling the dough in your hands, be careful not to flatten too much; make believe you are rolling an egg in your palms.

Proofing Methods
In mathematics, a proof is a convincing demonstration that a particular statement is true. Likewise, in baking, the term proof is used to describe the steps taken to demonstrate that the yeast is effective. Proofing the yeast to activate it shows us that the yeast is alive, and proofing the dough is the demonstration that the bread will rise. While the term is used for both steps, it’s important not to confuse the two. In the recipes in this book, because quick-rising yeast is used, you won’t see steps to activate the yeast; it’s not required. What you will see in each recipe in this chapter is a step to proof the work-in-progress baked goods—usually for 35 to 45 minutes. The nice thing about proofing is, once you set it up, you don’t need to do much. This is a good time to start the rest of dinner, set the table, or help the kids with their homework.
But first, you do need to make sure your rolls rise, so let’s talk about proofing the dough. The key elements of proofing baked goods are temperature and moisture. The yeast that’s been added to your bread or rolls is interacting with the sugar and water to multiply. Yeast multiplies best between 100° and 115°F, but the optimal temperature for leavening purposes is between 95° and 100°F; growing too fast will cause cracks and splits in the bread. At temperatures over 120°F the yeast will die, and the bread will flop. The first trick to proofing is to find a place that is warm enough, but not too warm for the bread to rise. The second trick to proofing is moisture. You will get the best results if the spot where you proof the bread is humid. It sounds complicated, but once you find a technique that works for you, you will be able to replicate it for great results, and you’ll be able to say, “I made it myself.”
When I’ve taken baking classes, the kitchen always has a proof box—a large sealed refrigerator-sized box with racks to hold baked goods—where the temperature can be set to precisely 98°F. But I don’t have one of these at home, and I’m betting you don’t either, so let’s explore methods that home bakers use:
- A warmed oven: Many recipe developers will write this technique right into their recipes, as it’s one of the most commonly used methods. With this technique you will preheat your oven to its lowest temperature (most likely between 170° and 200°F). As soon as the oven reaches this temperature, turn it off and wait. The downside to this technique is that it requires waiting for the oven to heat and cool before you can proof. You need to make sure the temperature drops before you proof, or all of your hard work preparing the dough will be for naught. The trick is to catch it when the oven reaches about 115°F (keeping in mind that it will cool even further). If your probe thermometer is able to stay in the oven, you can use it to watch the temperature of your oven fall. When you reach a low enough temperature, place your dough in the middle of the oven. Place a small bowl with water on a lower rack; the water will keep the dough from drying out. Don’t forget to remove the water and dough from the oven before you preheat the oven for baking.
- A warm, humid spot: This method tends to work best in warmer climates, but could be effective anywhere. Places to explore include the top of a clothes dryer that’s just been used, a bathroom where a hot shower has just been taken, or near a warm humidifier (but not right in the spray). It can even be a spot where the sun, or a hot light, warms the counter. This method usually doesn’t result in as high a temperature as some of the other methods do, and it may take a little bit longer for your bread to rise.
- The warming zone on the stovetop: Many modern stoves with glass tops have a space called the warming zone, intended for keeping a dish warm prior to serving. I have found that this is the perfect spot in my home for proofing, and it is my preferred method. Temperatures may vary on your stove, but if I set my warming zone on low in the summer, or medium-low in the winter, I can keep it between 95° and 100°F. If you choose this method, place your probe thermometer right on the burner. When the temperature is right, place your baking sheet right on top of the burner, and rotate it every five to ten minutes to ensure an even rise. Keep the thermometer on the burner to monitor the temperature. To make sure your baked goods stay moist, spray a sheet of plastic wrap with a few drops of water and place it over your baking project (making sure that the plastic wrap does not touch the burner). A similar technique, for those of you without a warming zone but with a glass-top stove, is to preheat the oven early and then use the entire stovetop as your warming zone.
- A cooling rack over a burner on low: This method is similar to the warming zone method, but is a bit harder to monitor. Here, you will turn a burner on low and place a cooling rack over the burner so you have a raised shelf for your warming zone. If you use this method, make sure you have a cooling rack that can withstand direct heat. As with the warming zone method, you should spray a piece of plastic wrap with a few drops of water and cover your bread (and make sure the plastic wrap doesn’t come into contact with the heat). Another way to keep things moist is to turn on the teakettle, on an adjacent burner.
Whichever method you choose, you will need to preheat the oven (usually to 375°F) prior to baking. If you used the oven as your proofing zone, be sure to take your baking project out of the oven before you preheat.
Gluten-free yeast breads and baked goods should expand to about 1.75 times their size during proofing. If your bread hasn’t risen adequately after 35 minutes of proofing, proof it for 10 minutes longer. Once you bake a few yeast breads you will notice that there is a sweet spot for the bread’s rise; at about 20 minutes it may have risen only slightly and between 30 and 35 minutes you will notice faster rising action. Try to be aware of when your bread has fully risen—that’s when it should go into the oven. If you see the dough start to crack or develop tiny holes, you’ve passed the sweet spot (and want to get it into the oven quickly). Many things can affect how quickly bread rises, including the temperature, humidity, altitude, and even the barometric pressure. Try a few yeast projects and adjust the time needed to proof, based on your conditions. Once your dough has risen and you pop it into the oven, that’s about as big as it will get. Although you will still get a small reaction from baking powder and other leavening agents while your bread is in the oven, it’s primarily the yeast that you are relying on to expand the bread.
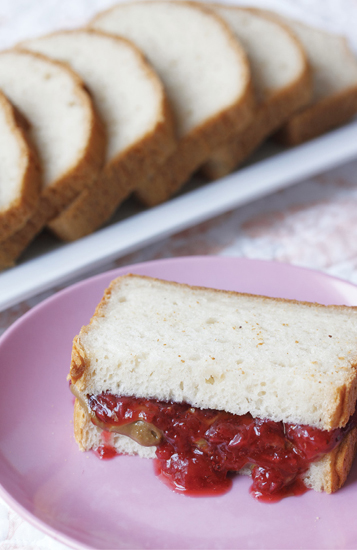
Basic Sandwich Bread
(Pictured with sunflower butter and Strawberry Jam.)
Whereas most yeast breads have a great deal of structure, this bread dough resembles a batter and must be made in a pan. Most of the moisture will evaporate during baking, leaving you with fluffy bread that is perfect for slicing. This is as simple and goof-proof as it gets when making gluten-free yeast bread. This loaf makes a fantastic sliced bread for sunflower butter and jam sandwiches. It’s a basic that you’ll want to make over and over again.
{ Makes 1 loaf, 10 servings (2 slices per serving), or 12 dinner muffins }
1½ cups white gluten-free flour blend (see tip)
1 cup multigrain gluten-free flour blend
½ teaspoon xanthan gum (leave out if your flour blends contain xanthan gum, or reduce to ¼ teaspoon if one of the two flour blends contains xanthan gum)
4 teaspoons quick-rising yeast (see tip)
½ teaspoon salt
4 teaspoons baking powder
⅓ cup sugar
⅓ cup grapeseed oil
1 cup warm water
6 teaspoons Ener-G Egg Replacer mixed with 8 tablespoons warm water (equal to 4 eggs)
- Spray a loaf pan (preferably a 9 by 4-inch gluten-free loaf pan) with cooking oil.
- Combine the flours, xanthan gum (if needed), yeast, salt, baking powder, and sugar in a medium bowl. Set it aside.
- Blend the oil, water, and egg replacer mixture together in a large bowl, using a mixer on medium speed, about 1 minute.
- Slowly add the dry ingredients to the wet mixture, mixing on medium-low speed, until combined.
- Beat for 2 minutes on medium-high speed until the dough is smooth.
- Pour the batter into the loaf pan. Do not fill more than half full.
- Proof for 35 to 45 minutes (see “Proofing Methods”).
- With 5 minutes left to rise, preheat the oven to 375°F.
- Bake at 375°F for 40 to 45 minutes, until the internal temperature is 200° to 205°F.

- I like the mix of white and multigrain flour blends in this bread, but a single gluten-free flour blend can be used.
- Notice that more yeast is used in this recipe than the standard 2¼ teaspoons. If you are using yeast in a packet, be sure to adjust.
- This bread will rise best when a gluten-free loaf pan is used. Alternatively, a 9 by 5-inch loaf pan may be used.
- This bread is great when spiced up with herbs, seeds, or even dried tomatoes. Have fun experimenting with variations.
- Slice the bread before freezing so you can easily remove slices as you need them.
* Variation:
Dinner Muffins: Spray a muffin tin with cooking oil. Follow steps 2 through 5 on for Basic Sandwich Bread. Divide the batter evenly among the muffin cups. They will be about half full. Follow steps 7 and 8. Bake at 375°F for 13 to 16 minutes, until the internal temperature is 200 to 205°F.
Basic Bagels
Eastern European Jews brought bagels to the United States—specifically New York—in the 1880s. My bagels are much simpler to make than the bagels that are proofed for twelve hours and then boiled before baking, as the New Yorkers make them. But these do the trick and pass the test even for true bagel lovers like my husband. While you won’t be eating them with lox and cream cheese, they pair perfectly with jam, taste great plain, and can even be used for sandwiches.
{ Makes 10 bagels }
2½ cups white gluten-free flour blend
½ teaspoon xanthan gum (leave out if your flour blend contains xanthan gum)
2¼ teaspoons quick-rising yeast
1 tablespoon sugar
3 teaspoons baking powder
½ teaspoon salt
¾ cup warm water
½ cup flaxseed gel (equal to 2 eggs) (see tip)
2 tablespoons grapeseed oil
1 tablespoon light olive oil, optional, for brushing tops
- Spray a doughnut pan with cooking oil, or line a baking sheet with parchment paper.
- Combine the flour, xanthan gum (if needed), yeast, sugar, baking powder, and salt in a medium bowl. Set it aside.
- Blend the water, flaxseed gel, and oil together in a large bowl, using a mixer on medium speed, about 1 minute.
- Slowly add the dry ingredients to the wet mixture, mixing on medium-low speed, until combined.
- Beat for 5 minutes on medium-high speed until the dough is pulling away from the sides of the bowl.
- Scoop the dough onto a smooth prep surface.
- Use a bench knife or sharp-edged knife to divide the dough into ten equal-sized portions.
- Use wet hands to gently roll each portion into a long tube with tapered ends.
- Place the bagels into the prepared doughnut pan or onto the lined baking sheet, laying one tapered end over the other. Use your fingers and a drop of water to glue the ends together.
- Proof for 35 to 45 minutes (see “Proofing Methods”).
- With 5 minutes left to rise, preheat the oven to 375°F.
- Brush the tops with a thin coating of olive oil, if desired. If you are using toppings, the coating is recommended.
- Bake at 375°F for 12 to 14 minutes, until the internal temperature is 200° to 205°F.

- The flaxseed gel gives this dough a thicker texture. If you prefer lighter bagels, substitute Ener-G Egg Replacer.
* Variations:
Multigrain Bagels: Instead of a white flour, use a multigrain flour blend such as King Arthur Flour Gluten Free Whole Grain Flour Blend or Bob’s Red Mill Gluten Free All Purpose Baking Flour. Reduce the beating time (step 5) to 2 minutes.
Salted Bagels: Top with coarsely ground salt prior to baking.
Onion Bagels: Top with finely chopped onions prior to baking.

Quick Fixes for Dough
No matter how hard you try and how well you follow the instructions, it’s bound to happen sometimes—after mixing, your dough just doesn’t seem quite right. There’s a fine line between dough that is too wet, dough that is too dry, and dough that is just right. If you catch the problem during preparation, it’s possible to correct the problem.
Dough that is too dry either will remain crumbly as you mix it, or the ball in the mixing bowl will be too stiff. If no dough at all is sticking to the sides of the mixing bowl after blending, that’s a sure-fire sign that your dough needs more moisture. If this is the case, the dough won’t rise properly. This is definitely a problem you should fix, and you should fix it while the dough is still in the mixing bowl. Add warm water, ½ tablespoon at a time, until some of the dough is sticking to the sides of the bowl. Blend on medium-low speed, continuing to add very small amounts of water, until you have the right consistency.
I’d rather have dough that’s too wet than too dry; it’s a bit messier to fix, but too much moisture is easier to compensate for—both with added flour and added baking time. If your dough is too wet it may feel like a thick batter, or will spread when you place it on your preparation surface. You can fix this by adding more flour. For most recipes you will already have a layer of flour below the dough. Sprinkle additional flour on the sides and top of the dough. Use a bench knife to work the flour into the dough, rolling it back and forth, scraping the surface as needed, and folding the flour into the dough. Add more flour, 1 tablespoon at a time, until the dough is easy to work with.
Multipurpose Flatbread
This is one of my favorite recipes. I’ve always been a lover of wraps, flatbreads, and burritos, and you can use this one recipe to make all of these and more. (Yes, I really did name this multipurpose for a reason.) The recipe can easily be scaled up (double or triple the ingredients), if you find that it’s a favorite of yours too. Flatbreads make terrific sandwich wraps, or cut them in half to make a flatbread sandwich. Serve flatbread as hors d’oeuvres with hummus or your favorite allergen-free dip, or cut wedges of flatbread and fill the breadbasket to serve with dinner. Freeze the extras.
Without question, the best flour blend to use with this recipe is Jules Gluten Free All Purpose Flour. (See more on the gluten-free flour blends I recommend.)
{ Makes 8 flatbreads }
1½ cups gluten-free flour blend
¼ teaspoon xanthan gum (leave out if your flour blend contains xanthan gum)
2¼ teaspoons quick-rising yeast
1 tablespoon sugar
¼ teaspoon salt
½ cup plus 2 tablespoons warm water
2 tablespoons light olive oil
Up to 2 tablespoons additional warm water (as needed)
Up to 2 tablespoons additional flour for dusting
- Combine the flour, xanthan gum (if needed), yeast, sugar, and salt in a medium bowl. Set it aside.
- Blend the water with the oil, using a mixer on medium speed, until combined, about 30 seconds.
- Slowly add the dry ingredients to the wet mixture, mixing on medium-low speed, until blended.
- Beat for 5 minutes on medium-high speed until the dough is pulling away from the sides of the bowl. Add up to 2 more tablespoons of warm water, ½ tablespoon at a time, as needed.
- Scrape down the sides of the bowl, and proof (in the bowl) for 35 to 45 minutes (see “Proofing Methods”).
- Sprinkle flour on a smooth prep surface. Scoop the dough onto that surface.
- Use a bench knife or sharp-edged knife to divide the dough into eight equal-sized portions.
- Use your hands to gently roll each portion into a ball, using additional flour to coat the balls.
- With a rolling pin, gently roll out each dough ball until they are between 7 and 8 inches in diameter. Be careful not to use too much pressure. They should be thin, but not paper thin.
- Heat a skillet on medium-high heat. Let it get very hot, and then reduce the heat to medium.
- Grill the flatbreads, one at a time, for 1 to 2 minutes per side. Light browning will occur and some air pockets may form. Be careful not to overcook the flatbreads. It’s better to undercook than to overcook them.

- This is where the mini rolling pin I mentioned earlier comes in handy. If you roll the rolling pin over your lightly floured surface it will keep the pin from sticking to the dough.
- Use small sheets of parchment paper to layer the rolled dough and keep it from sticking to your work surface.
- No oil is needed in the pan when grilling the bread.
* Variations:
Burritos: Make the recipe as described above. Place the burrito ingredients on the flatbread and roll. Serve immediately, or bake with toppings for 15 minutes at 350°F.
Herbed Flatbread: Add 1 teaspoon of chopped fresh parsley and 1 teaspoon of chopped fresh basil to the dry ingredients. Follow the instructions above.
Thin Pizza Crust: Follow the instructions above through step 5. Preheat the oven to 375°F. Spray a pizza tin with cooking oil. Lightly coat the dough with flour, then scoop it directly into the center of the pizza tin. Use a rolling pin to roll the dough to the edges of the pan. Note that the crust will shrink about 10 percent while baking. Bake the pizza crust without toppings at 375°F for 10 minutes. Remove the crust from the oven, flip it over with a spatula, and add the toppings for your pizza. Bake for an additional 15 to 20 minutes, until the toppings are done. This recipe is enough to make one large pizza crust.
Millet Baguettes
I have always loved a baguette with a salad, and wanted to create one in an allergen-free version. Since my son’s favorite grain is millet, I decided to take advantage of the sweetness of that grain in my baguette. If you haven’t tried millet yet, I think you’ll find that it works nicely here, with a hint of a corn taste.
These baguettes can be made as mini baguettes (as described here), or full-size loaves.
{ Makes 2 small baguettes, 4 to 6 servings }
1 cup millet flour (see tip)
1¼ cups gluten-free flour blend
½ teaspoon xanthan gum (reduce to ¼ teaspoon if your flour blend contains xanthan gum)
2¼ teaspoons quick-rising yeast
1½ tablespoons sugar
¼ teaspoon salt
¾ cup warm water
1 tablespoon light olive oil
2 tablespoons cornmeal (for dusting)
- Line a baguette pan with aluminum foil. Spray with cooking oil.
- Combine the flours, xanthan gum, yeast, sugar, and salt in a medium bowl. Set it aside.
- Blend the water and oil together in a large bowl, using a mixer on medium speed, about 30 seconds.
- Slowly add the dry ingredients to the wet mixture, mixing on medium-low speed, until combined.
- Beat for 5 minutes on medium-high speed, until the dough is pulling away from the sides of the bowl.
- Sprinkle the cornmeal on a smooth prep surface, and scoop the dough on top.
- Use a bench knife or sharp-edged knife to divide the dough into 2 equal-sized portions.
- Coat each portion with cornmeal, and use your hands and the bench knife to gently roll each portion into a baguette shape, about 1½ inches in diameter. Try to keep the sides of the baguette as thick as the middle.
- Lift the baguettes into the prepared baguette pan. Round the edges of the baguettes (using a few drops of warm water, if needed).
- Proof for 35-45 minutes (see “Proofing Methods”).
- With 5 minutes left to rise, preheat the oven to 375°F.
- Bake at 375°F for 22 to 25 minutes, until the internal temperature is 200° to 205°F.

- If you need to avoid millet due to a corn allergy, use 2 cups of multigrain gluten-free flour blend. Reduce the beating time (step 5) to 2 minutes. Use additional flour instead of cornmeal.
- If you don’t have a baguette pan, there’s no need to rush out and buy one. Baguettes can be made on a baking sheet, using some props. A common method is to use dowels and cheesecloth to create a concave (or half-cylinder) holder for the baguettes. I find that two or three sheets of heavy-duty aluminum foil, formed into the shape of a baguette pan, can be strong enough to hold the bread.
- Increase the baking time to approximately 30 minutes if you choose to make one large baguette.
English Muffins
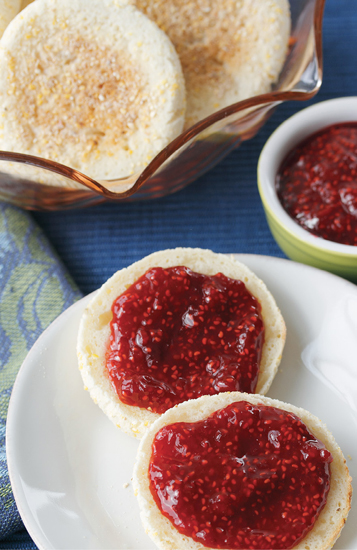
(Pictured with Raspberry Jam.)
As odd as this may sound, some people crave the foods they are allergic to. I can recall the summer that my food-allergic son was eating peanuts by the handful, and another time when he just couldn’t seem to get enough butter on his English muffins—we later learned that he was allergic to both peanuts and milk. But even though he won’t be slathering them with butter, he can still enjoy these English muffins with our favorite jams.
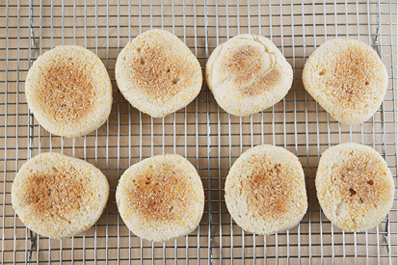
English muffins are simply a form of bread; what makes them recognizable is their round shape, the dusting of cornmeal on both sides, and the fact that they are cooked on both sides. Traditionally English muffins are cooked on a griddle (as you would make a pancake), but these muffins are designed to be baked in the oven. If you’d rather make them on the griddle, that’s okay too!
Because they’re gluten-free, the end result won’t have the same nooks and crannies that a wheat muffin would have, but they’re just as delicious.
{ Makes 8 muffins }
2½ cups gluten-free flour blend
½ teaspoon xanthan gum (leave out if your flour blend contains xanthan gum)
2¼ teaspoons yeast
2 tablespoons sugar
½ teaspoon salt
1 teaspoon baking powder
1 tablespoon apple cider vinegar
¾ cup original hemp milk, warmed to 100°F (see tip)
3 tablespoons Earth Balance Natural Shortening, melted
Up to 3 tablespoons warm water (as needed)
¼ cup cornmeal (see tip)
- Line a baking sheet with parchment paper. If possible, have a second smaller baking sheet (with edges) available, and a second piece of parchment paper.
- Combine the flour, xanthan gum (if needed), yeast, sugar, salt, and baking powder in a medium bowl. Set it aside.
- Blend the apple cider vinegar, hemp milk, and shortening together in a large bowl, using a mixer on medium speed, about 1 minute.
- Slowly add the dry ingredients to the wet mixture, mixing on medium-low speed, until combined.
- Beat for 5 minutes on medium-high speed, until the dough is pulling away from the sides of the bowl. Add up to 3 tablespoons of warm water, ½ tablespoon at a time, as needed.
- Sprinkle the cornmeal on a smooth prep surface, and scoop the dough on top of the cornmeal.
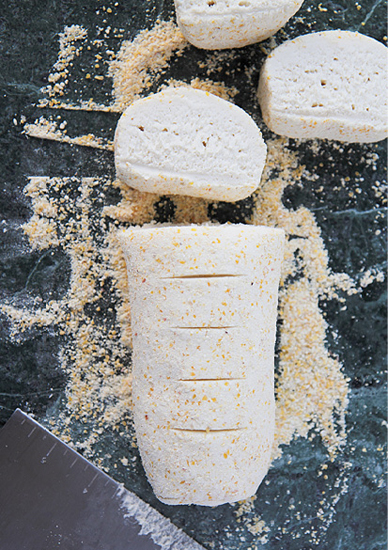
- Use your hands to roll the dough into a log. Use a bench knife or sharp-edged knife to slice the dough into eight equal-sized portions.
- Gently shape each portion into a disk, and coat both sides with cornmeal.
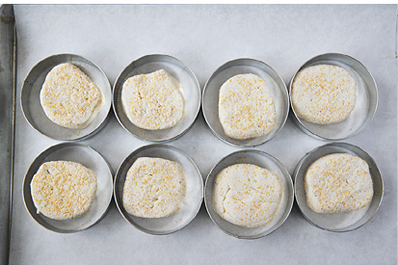
- Place the disks on the larger prepared baking sheet. Sprinkle drops of water on the second piece of parchment paper, and place it on top of the disks. Place the second baking sheet (upside down) over the muffins and parchment paper. This second baking sheet keeps the muffins from expanding too high upward, and forces them to expand outward instead.
- Proof for 35 to 45 minutes (see "Proofing Methods").
- With 5 minutes left to rise, preheat the oven to 375°F.
- Bake at 375°F for 10 minutes. Flip the baking sheets over so that the top is now the bottom. Remove the top baking sheet.
- Bake for 6 to 8 minutes longer, until the internal temperature is 200° to 205°F.

- The hemp milk can be warmed to 100°F using a microwave (for about 20 seconds if it’s at room temperature before warming, or 45 seconds if cold), or in a small saucepan over low heat. Use your probe thermometer to check. If you overshoot, wait until the temperature drops before adding the hemp milk to your mixing bowl.
- Don’t skimp on the cornmeal; cornmeal gives English muffins flavor and texture. If you can’t use cornmeal due to a corn allergy, substitute flax meal or gluten-free quick-cooking oats.
- If you have English muffin rings, go ahead and use them. Place the disks in the muffin rings prior to laying the second baking sheet over them.
- If you don’t have a second baking sheet, flatten the tops of the muffins gently (to help them expand horizontally) before baking, and flip them with a spatula after baking for 10 minutes.
- If you’d like to make these with a griddle on the stovetop, heat a griddle pan and bake them over medium-low heat as you would pancakes, flipping as needed to avoid burning and ensure even baking.

Activating and Testing Yeast
If you choose to use active dry yeast, rather than quick-rising yeast, you will need to activate it before using it. While it is technically already active, the live yeast cells are encapsulated in dry cells, which need moisture and sugar to wake them up and get them moving. To activate it, place the yeast in a small bowl and add 1 teaspoon of granulated sugar and at least ¼ cup of warm water. Stir the mixture gently, and let it sit for 10 minutes. Now is a good time to check your e-mail or pick up the kid’s toys. When you come back, the yeast will be foaming and ready to use. The light brown foam this process creates is not especially appealing, but that’s what you want and how you know that your yeast is still good.
One of the advantages of quick-rising yeast is that you don’t need to activate it. In fact, it works best if you don’t proof it. Unlike active dry yeast, which needs to be woken up slowly before it can do its job, quick-rising yeast is ready to go as soon as it finds sugar and liquid, and it works more quickly, saving you time. This yeast should be added directly to the dry ingredients. Nevertheless, yeast does lose its potency over time, and every few months you should test your quick-rising yeast to make sure it’s still got some spunk. To test quick-rising yeast, use the same technique described above for waking up active dry yeast. You should see a near-immediate foaming reaction if your yeast is still able to do its job. Discard the results of this test; once quick-rising yeast is foaming, it won’t work as well when you mix it into your dry ingredients.
If either your active dry or quick-rising yeast doesn’t foam, it’s time to replace it.
Chocolate Croissants
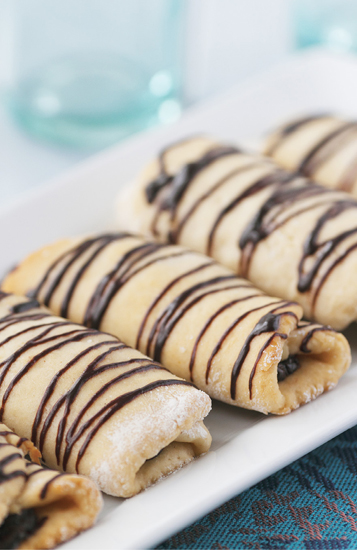
The French refer to chocolate croissants as pain au chocolat. Translated literally, this means “chocolate bread,” and there’s no better place to get it than a street-side café in Paris. Unless of course you need an allergen-free version—in which case you’ll want to make your own at home.
When making a puffed pastry or croissant with traditional ingredients, it’s typical to use puff pastry dough. These are unleavened, made with multiple layers of wheat dough, and lots of butter. The technique to make this dough takes advantage of the gluten in the flour, and results in flaking when baked. Since we’re baking without gluten, my recipe uses yeast to provide some lift. It won’t be as flaky as a croissant made from wheat and butter, but it still gives you that rich, decadent experience you would expect from chocolate bread, and it’s lower in fat.
{ Makes 8 croissants }
1½ cups gluten-free flour blend
¼ teaspoon xanthan gum (leave out if your flour blend contains xanthan gum)
2¼ teaspoons quick-rising yeast
¼ cup sugar
¼ teaspoon salt
2 teaspoons baking powder
¼ cup grapeseed oil
¼ cup warm water
1½ teaspoons Ener-G Egg Replacer mixed with 2 tablespoons warm water (equal to 1 egg)
1 teaspoon vanilla extract
Up to 3 tablespoons warm water (as needed)
Up to 2 tablespoons additional flour for dusting
¾ cup allergen-free chocolate chips
- Line a baking sheet with parchment paper.
- Combine the flours, xanthan gum (if needed), yeast, sugar, salt, and baking powder in a medium bowl. Set it aside.
- Blend the oil, water, egg replacer mixture, and vanilla together in a large bowl, using a mixer on medium speed, about 1 minute.
- Slowly add the dry ingredients to the wet mixture, mixing on medium-low speed, until combined.
- Beat for 5 minutes on medium-high speed, until the dough is pulling away from the sides of the bowl. Add up to 3 tablespoons warm water, ½ tablespoon at a time, as needed.
- Spread a thin layer of flour on a smooth prep surface. Scoop the dough on top of the flour.
- Use a bench knife or sharp-edged knife to divide the dough into eight equal-sized cubes.
- Coat each portion lightly with flour.
- Use a rolling pin to roll out each cube into a rectangle about 6 inches long and 4 inches wide. Place them on the prepared baking sheet.
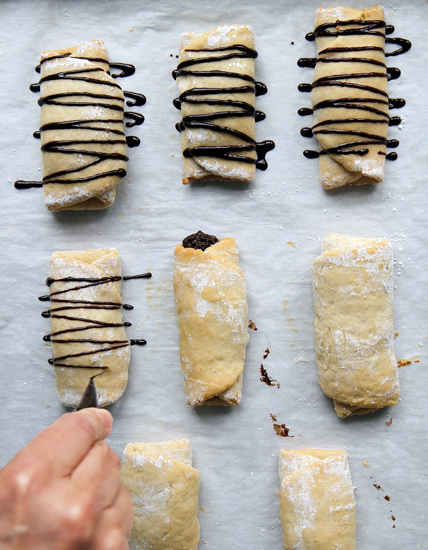
- Place chocolate chips in the center third of each rectangle, and fold the flaps over the chocolate. Place a drop of water under the top flap to help it stay in place, and tuck it under so it stays secure.
- Proof for 35 to 45 minutes (see “Proofing Methods”).
- With 5 minutes left to rise, preheat the oven to 350°F.
- Bake at 350°F for 12 to 16 minutes until the tops are lightly browned and the chocolate is bubbling around the edges.

- Note that the temperature for baking the croissants is 350°F, lower than most yeast bread recipes. You don’t want to burn the chocolate by baking it at too high a temperature.
- Decorate the croissants with the chocolate glaze that follows.
* Variation:
Strawberry Croissants: Instead of chocolate chips, use approximately ¾ cup of Strawberry Jam. Follow the directions above. In step 10, use 2 tablespoons of jam in the center of each croissant. This works equally well with any jam.
Chocolate Glaze
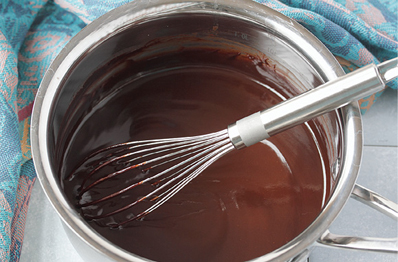
The ingredients of this chocolate glaze are similar to my Ganache, with different proportions. Traditionally both contain cream, but this recipe uses chocolate hemp milk. The trick to a glaze is the consistency; it should be light enough to spread or drizzle easily over croissants, doughnuts, or pastry, but it should also harden shortly after being spread.
This glaze also makes a terrific chocolate sauce for non-dairy ice cream. I love it over So Delicious coconut milk non-dairy frozen desserts
{ Makes about 1 cup of glaze }
1 tablespoon Earth Balance Natural Shortening
2 tablespoons chocolate hemp milk (see tip)
1 cup allergen-free chocolate chips
- Melt the shortening in a small saucepan over low heat.
- Add the hemp milk and whisk the ingredients together. Increase the heat to medium. Continue stirring with the whisk.
- When the mixture is boiling, remove it from the heat.
- Add the chocolate chips. Use the whisk to stir until the chocolate is completely melted and blended with the shortening and milk. Stir vigorously with the whisk for about 2 minutes longer (over no heat), until the sauce darkens and becomes slightly glossy on top.
- Let it cool.

- While I prefer this recipe with chocolate hemp milk, another non-dairy chocolate milk (e.g., chocolate rice milk) or even original or vanilla-flavored non-dairy milk can be substituted.
- For a lighter chocolate sauce, increase the chocolate hemp milk to 6 tablespoons.
- Refrigerate the leftovers. The glaze will harden. Microwave it for 20 seconds and mix well when you’re ready to use the glaze again.

How to Use a Glaze
A glaze, sometimes referred to as a drizzle, is usually lighter than a frosting or a ganache. It’s meant to decorate your baked goods and provide additional flavor, but not to cover your dessert completely. There is no right way to decorate—that’s up to you and your imagination—but here are some means to apply whatever design you choose:
- A squeeze bottle: These can be found in baking shops and specialty stores, but the easiest thing to do is to repurpose an empty bottle that has been thoroughly washed (preferably in the dishwasher) to avoid possible allergens; agave nectar bottles, honey bottles with squeeze tops, and the bottles you use for mustard and ketchup at picnics all work well, as long as they have small holes. I always prefer to glaze my baked goods just before serving, to prevent sogginess. Using a squeeze bottle makes it easy to store the glaze, and to top the baked goods as I’m ready to serve them. Hold one finger over the opening as you invert the bottle and shake the ingredients down to the edge, position it over your doughnuts or croissants, and decorate.
- A small plastic bag: Fill a small plastic bag (a heavy-duty sandwich bag will do) with the glaze. Squeeze the glaze down to one corner of the bag and twist the top. When you’re ready to start decorating, use scissors to snip off a tiny bit of the corner. The more you snip, the larger the hole will be, and the faster your glaze will drizzle out.
- Disposable decorating bags: These are the store-bought version of the plastic bag, made for decorating cakes. They come in all sizes. For glazing, smaller bags will work the best. Fill the bag with glaze. Squeeze the glaze to the tip (the bottom) of the bag and twist the top. Use scissors to snip off a tiny bit of the tip, and decorate as you please.
- Dipping: The simplest of all the glazing techniques, this works well when you want to cover the entire top of a pastry or doughnut with glaze. Pour the glaze into a shallow bowl or dish. Dip the item you wish to glaze upside down into the glaze. After dipping, twist and turn it right side up and you’re done!
Glaze is best used when cooled (about an hour after preparing) but not hardened. Likewise, your baked goods should be cooled when you add the glaze. If you’re pressed for time, go ahead and use it—just know that it will be more like a sauce than a glaze when used warm (and will be a bit messy).
Crescent Rolls
This recipe uses nearly the same ingredients as Chocolate Croissants but instead of filling them with chocolate, these will be shaped into rolls—like the crescent rolls we’re all familiar with that come in a tube. Even the gluten-eating members of your family will fight over who gets the last one.
{ Makes 12 rolls }
1½ cups gluten-free flour blend
¼ teaspoon xanthan gum (leave out if your flour blend contains xanthan gum)
2¼ teaspoons quick-rising yeast
¼ cup sugar
¼ teaspoon salt
2 teaspoons baking powder
¼ cup grapeseed oil
¼ cup warm water
1½ teaspoons Ener-G Egg Replacer mixed with 2 tablespoons warm water (equal to 1 egg)
1 teaspoon vanilla extract
Up to 3 tablespoons warm water (as needed)
Up to 2 tablespoons additional flour for dusting
Up to 2 tablespoons light olive oil
- Line a baking sheet with parchment paper.
- Combine the flours, xanthan gum (if needed), yeast, sugar, salt, and baking powder in a medium bowl. Set it aside.
- Blend the oil, water, egg replacer mixture, and vanilla together in a large bowl, using a mixer on medium speed, about 1 minute.
- Slowly add the dry ingredients to the wet mixture, mixing on medium-low speed, until combined.
- Beat for 5 minutes on medium-high speed, until the dough is pulling away from the sides of the bowl. Add up to 3 tablespoons warm water, ½ tablespoon at a time, as needed.
- Spread a thin layer of flour on a smooth prep surface. Scoop the dough on top of the flour.
- Use a bench knife or sharp-edged knife to separate the dough into six cubed portions.
- Coat each portion lightly with flour.
- Use a rolling pin to roll out each cube into a 6-inch square.
- Use your bench knife to cut each square diagonally into two triangles (you will now have twelve portions).
- Brush the top of each portion with a thin coating of light olive oil.
- Starting with the broadest side, roll up the triangles (as you would with the crescent rolls) and pinch the edges inward.
- Proof for 35 to 45 minutes (see “Proofing Methods”).
- With 5 minutes left to rise, preheat the oven to 375°F.
- Bake at 375°F for 10 to 13 minutes, until the tops are lightly browned.

- You won’t be buttering these rolls, but the olive oil inside will keep them moist and tasty.
Cinnamon Rolls
You might be longing for cinnamon rolls like the Pillsbury Cinnamon Rolls that come in the pop-open cylinder. I loved to make them as a kid—they were the perfect breakfast on a weekend morning. Now, with my own allergen-free recipe I can still make cinnamon rolls for my family, with just a little bit more effort—and you can too.
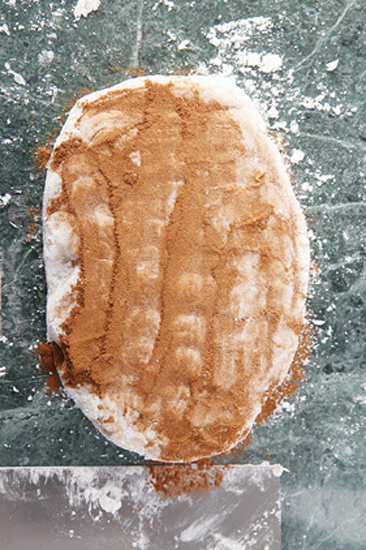
The best cinnamon rolls have a striated effect. The trick to achieving this effect is to hold the cinnamon until after the dough is formed, and then fold it into the dough (see step 8 below).
{ Makes 8 cinnamon rolls }
¼ cup light brown sugar
2½ teaspoons cinnamon
2¼ cups gluten-free flour blend
½ teaspoon xanthan gum (leave out if your flour blend contains xanthan gum)
2¼ teaspoons quick-rising yeast
¼ cup granulated sugar
¼ teaspoon salt
2 teaspoons baking powder
¾ cup original hemp milk, warmed to 100°F (see tip for English Muffins)
¼ cup grapeseed oil
3 teaspoons Ener-G Egg Replacer mixed with 4 tablespoons warm water (equal to 2 eggs)
½ teaspoon vanilla extract
Up to ¼ cup additional flour for dusting
- Spray a medium baking dish with cooking oil.
- Combine the brown sugar and 1½ teaspoons cinnamon in a small mixing bowl, breaking up any clumps of sugar. Set it aside.
- Combine the flour, xanthan gum (if needed), yeast, sugar, salt, and baking powder in a medium bowl. Set it aside.
- Blend the warmed hemp milk, oil, egg replacer mixture, and vanilla together in a large bowl, using a mixer on medium speed, about 30 seconds.
- Slowly add the dry ingredients to the wet mixture, mixing on medium-low speed, until combined.
- Beat for 5 minutes on medium-high speed, until the dough is pulling away from the sides of the bowl.
- Spread a thin layer of flour on a smooth prep surface. Scoop the dough on top of the flour.
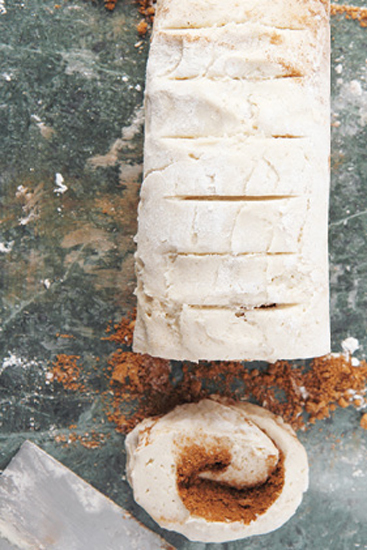
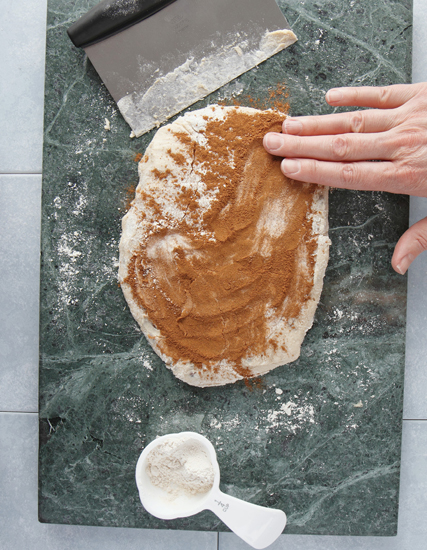
- Use your fingers and bench knife to flatten the dough, about 1 inch thick. Sprinkle the remaining teaspoon of cinnamon on top of the dough. Use your hands to smooth it evenly over the dough. Fold the dough in half (with the cinnamon in the center).
- Use your fingers to flatten the dough to about 1 inch thick and 6 inches wide.
- Sprinkle the sugar and cinnamon mixture (from step 1 above) evenly on top of the dough. Use your hands to smooth the topping, leaving about ½ inch at one end uncovered.
- Roll the dough into a cylinder. At the uncovered edge, use a few drops of water to stick the dough together.
- Use your bench knife to cut eight ¾-inch slices from the dough, forming the rolls.
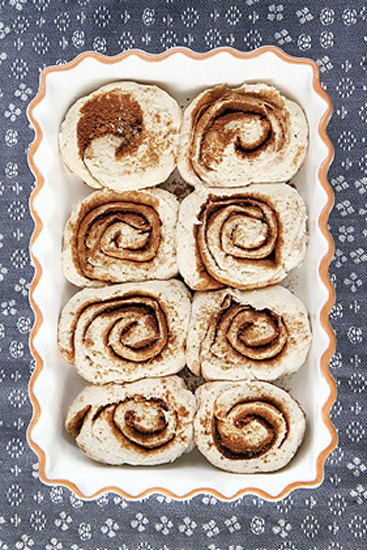
- Arrange the dough in your baking dish, with a small amount of space in between each roll. Scoop up any toppings that may have fallen out, and sprinkle them on top of the rolls.
- Proof for 35 to 45 minutes (see “Proofing Methods”).
- With 5 minutes left to rise, preheat the oven to 375°F.
- Bake at 375°F for 15 to 18 minutes until the tops are lightly browned and the cinnamon-sugar centers are bubbling.

- Top with Vanilla Glaze, if desired.
- A 7 by 9-inch baking dish (with the rolls arranged in two rows of four), or a 9-inch round cake pan (with the rolls arranged in a circle) works well for making cinnamon rolls.
Vanilla Glaze
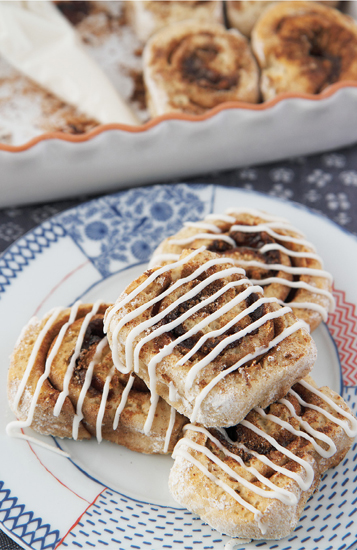
I love vanilla glaze on doughnuts, but my favorite use for vanilla glaze is on top of cinnamon rolls. A cinnamon roll just wouldn’t be a cinnamon roll without the glaze, right?
{ Makes about ¾ cup of glaze }
1½ cups confectioners’ sugar
⅛ teaspoon salt
3 tablespoons Earth Balance Natural Shortening, softened
½ teaspoon vanilla extract
2 tablespoons water
- In a large mixing bowl, combine the confectioners’ sugar, salt, and shortening on low speed, until crumbly.
- Add the vanilla and water. Mix on medium speed, about 5 minutes longer, until the mixture is smooth and creamy.

- Use one of the methods described earlier to decorate your baked goods, or just spread the glaze with a flat knife or spatula for full coverage.
- It’s best to frost your baked goods just before serving them.
* Variation:
Orange Glaze: Substitute ½ teaspoon of orange extract for the vanilla. Add 1 teaspoon of orange zest. Follow the instructions above.
Cinnamon Raisin Bread
This bread uses nearly the same ingredients as the Cinnamon Rolls, and many of the same methods, but the instructions vary enough that it deserves its own day in the sun. And yes, it’s a sunny day every day you make fresh cinnamon bread for breakfast. Although the Cinnamon Rolls and this Cinnamon Raisin Bread are among the most difficult recipes in this book, I think you’ll find that you can master them.
{ Makes 1 loaf, 12 to 16 servings }
2¼ cups gluten-free flour blend
½ teaspoon xanthan gum (leave out if your flour blend contains xanthan gum)
2¼ teaspoons quick-rising yeast
¼ cup sugar
¼ teaspoon salt
2 teaspoons baking powder
¾ cup original hemp milk, warmed to 100°F (See the tip for English Muffins)
¼ cup grapeseed oil
3 teaspoons Ener-G Egg Replacer mixed with 4 tablespoons warm water (equal to 2 eggs)
½ teaspoon vanilla extract
⅓ cup raisins
Up to ¼ cup additional flour for dusting
1½ teaspoons cinnamon
- Spray a 9 by 4-inch loaf pan with cooking oil.
- Combine the flour, xanthan gum (if needed), yeast, sugar, salt, and baking powder in a medium bowl. Set it aside.
- Blend the warmed hemp milk, oil, egg replacer mixture, and vanilla together in a large bowl, using a mixer on medium speed, about 30 seconds.
- Slowly add the dry ingredients to the wet mixture, mixing on medium-low speed, until combined.
- Beat for 5 minutes on medium-high speed until the dough is pulling away from the sides of the bowl.
- Add the raisins to the dough and blend on medium for 30 seconds longer until incorporated.
- Spread a thin layer of flour on a smooth prep surface. Scoop the dough on top of the flour.
- Use your fingers and bench knife to flatten the dough, about 1 inch thick and 9 inches wide. Sprinkle the cinnamon on top of the dough, leaving a 1-inch section at the edge uncovered. Use your hands to spread the cinnamon evenly over the dough.
- Roll the dough into a cylinder. At the uncovered edge, use a few drops of water to stick the dough together.
- Lift the rolled bread and place it into the loaf pan, with the seam on the bottom.
- Proof for 35 to 45 minutes (see “Proofing Methods”).
- With 5 minutes left to rise, preheat the oven to 375°F.
- Bake at 375°F for 40 to 45 minutes, until the internal temperature is 200° to 205°F.

- I find that this bread works best with a 9 by 4-inch gluten-free bread pan, but a regular 9 by 5-inch loaf pan will certainly work.

Using Active Dry Yeast
You will need to adapt the recipes in this book if you choose to use active dry yeast. Use liquid and sugar from the recipe to activate it, and always activate the yeast first. Here is an example of how to adapt a recipe, using the Basic Dinner Roll recipe. The items in bold indicate where an adjustment is needed:
Ingredients (in order used)
|
Using quick-rising yeast:
|
Using active dry yeast:
|
|
½ cup garbanzo bean flour
1½ cups gluten-free flour blend
½ cup xanthan gum (leave out if your flour blend contains xanthan gum)
2¼ teaspoons quick-rising yeast
¼ teaspoon salt
3 teaspoons baking powder
¼ cup sugar
¼ cup sunflower oil
½ cup warm water
3 teaspoons Ener-G Egg Replacer mixed with 4 tablespoons warm water
Up to ¼ cup additional flour for dusting
|
2¼ teapoons active dry yeast
1 teaspoon sugar
½ cup warm water
½ cup garbanzo bean flour
1½ cups gluten-free flour blend
½ teaspoon xanthan gum (leave out if your flour blend contains xanthan gum)
¼ teaspoon salt
3 teaspoons baking powder
¼ cup sugar (less 1 teaspoon)
¼ cup sunflower oil
3 teaspoons Ener-G Egg Replacer mixed with 4 tablespoons warm water
Up to ¼ cup additional flour for dusting
|
Make these changes to the recipe instructions:
- Prior to any other step, mix the yeast, 1 teaspoon of sugar, and warm water. Set it aside and proof the yeast for 10 minutes.
- Following proofing, mix the yeast in with the wet ingredients, rather than the dry.
- Follow the recipe instructions for mixing the remaining ingredients.
- Double the amount of time required for proofing/rising prior to baking. This will be 1¼ to 1½ hours.
The same method can be used to adapt any recipe. Conversely, if you plan to adapt a recipe that uses active dry yeast to use rapid rise, simply add the yeast to the dry ingredients, add the sugar used for activating the yeast in with the dry ingredients, add the water used for activating the yeast in with the wet ingredients, and let the baked goods rise for half the time suggested.


