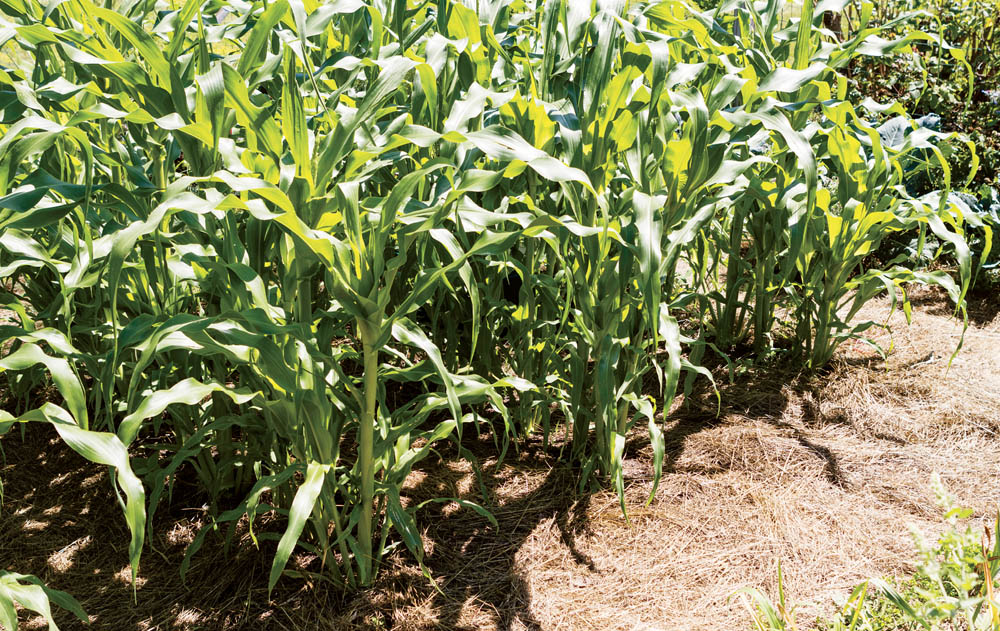
Plant corn in blocks rather than rows so that all of the silks will be showered with pollen, which results in more uniform, well-filled ears.
(Zea mays)
50 row feet per person
‘Luscious’, ‘Ambrosia’, and ‘Bodacious’
Freeze, can, or dry
One of the top taste treats of summer, sweet corn belongs in every garden large enough to grow it. A block of two parallel rows at least 15 feet long is needed, because the best pollination occurs when the pollen (released by tassels at the tops of the plants) drifts to the silks that emerge from the tips of the ears. In small plantings of fewer than 30 plants, you must hand-pollinate corn by sprinkling pinches of pollen onto the silks. Growing sweet corn requires warm soil (above 65°F/18°C), so early summer is prime planting time.
Plant corn in blocks rather than rows so that all of the silks will be showered with pollen, which results in more uniform, well-filled ears.
Corn genetics can be quite confusing, but one type of sweet corn has what is called the “sugary enhanced” gene, often abbreviated as se in seed catalogs. Various se varieties are consistent winners in field trials and in gardens, and you can find varieties with yellow, white, or bicolored kernels. Unlike older types of sweet corn, varieties with the sugary enhanced gene stay sweet for more than 1 week (giving you more time to harvest and process the crop) and feature tender texture combined with rich corn flavor.
All se sweet corn varieties are hybrids, but many are available as certified organic seeds. When choosing varieties to grow as freezer crops, you will get top productivity from midseason varieties, which mature about 75 to 85 days after planting. Midseason sweet corn varieties develop larger ears than early varieties, so harvesting and processing goes a little faster. Excellent varieties include ‘Luscious’ and ‘Ambrosia’ (bicolors) and ‘Bodacious’ (yellow).
Midseason sweet corn varieties develop larger ears than early varieties, so harvesting and processing goes a little faster.
The simple answer is “as much as you can grow,” but that might not leave much room in your garden for anything else. If you have plenty of space and want to preserve a year’s supply, plant about 50 row feet (about 60 ears of sweet corn) for each household member.
When: In late spring or early summer, sow seeds in warm, fertile, and well-worked soil that contains plenty of nitrogen.
Planting: Corn requires more nitrogen than other vegetable crops¸ so plan ahead for this need. To stock the soil with nitrogen, thoroughly mix in a 1-inch layer of fresh grass clippings; composted chicken manure or other well-rotted manure; and alfalfa meal, soybean meal, or another high-nitrogen organic fertilizer (follow label directions). Sweet corn seed must germinate rapidly or it will rot. For best germination, soak seeds in clean water overnight before sowing in warm soil. Many gardeners sow their early sweet corn when apple trees are in full bloom.
Sow seeds 1 inch deep and 4 inches apart, in blocks of two or more rows spaced about 24 inches apart. Two weeks after planting, thin plants to at least 12 inches apart.
Watering: For the first 6 weeks, sweet corn needs only an average supply of water, but things change when the plants reach their reproductive stage. Starting when the tassels emerge and continuing until the crop is ripe, sweet corn needs at least 1 inch of water per week, or 11⁄2 inches per week in very hot weather. Soaker hoses or drip irrigation lines are the easiest and most efficient ways to water sweet corn.
Maintenance: Use a sharp hoe to keep weeds under control. When the plants are knee-high, top-dress the planting with a balanced organic fertilizer scratched into the soil’s surface. Fertilize again when the tassels emerge, using a high-nitrogen organic fertilizer in granular or liquid form.
If plants are blown over by gusty summer thunderstorms, give them a few sunny days to right themselves. It won’t hurt nearly mature plants to grow crooked, but you may need to prop up young plants that don’t get back up by themselves. To prevent this problem, called “lodging,” hill up soil over the base of the plants as you hoe out weeds.
When the tassels emerge from the top of a sweet corn plant, the pollination process has begun. Pollen grains shed by the tassels fall on sticky strands of silk, and if all goes well, lines of perfect corn kernels are born. Excellent pollination produces ears that are filled with wall-to-wall kernels; poor pollination leads to ears with lots of missing kernels. To ensure big, well-filled ears in a garden planting of sweet corn, hand-pollinate your sweet corn by clipping off pieces of pollen-bearing tassel and tapping them over the silks to release small clouds of pollen. This maneuver is especially useful with plants on the ends of the rows, which may not receive as much pollen as those in the middle of a planting. Hand-pollinate in the late morning, when corn pollen is in prime condition. If you hand-pollinate your corn daily for 3 or 4 days, you can be sure of getting plenty of large, well-filled ears.
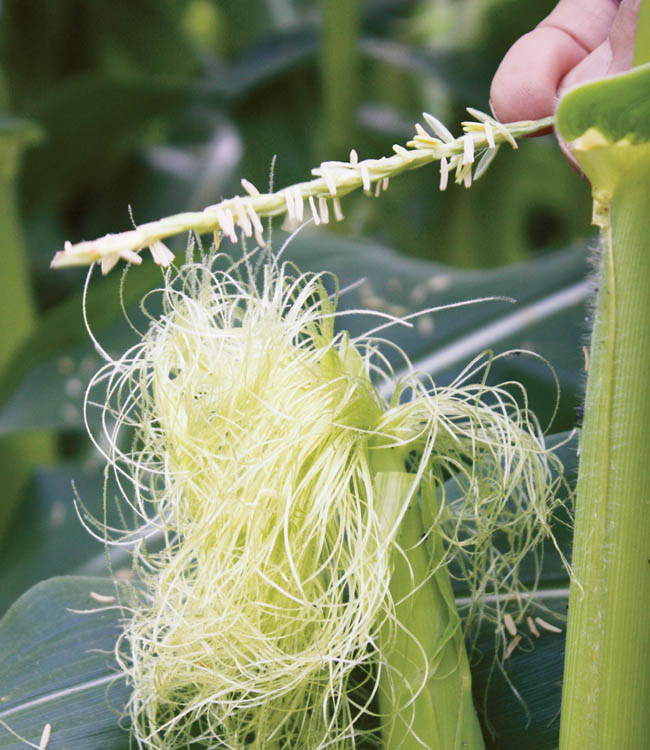
In small plantings, you can hand-pollinate corn by tapping pollen-filled tassels over silks where they emerge from the tips of the ears.
Raccoons and birds. Raccoons closely monitor sweet corn’s progress and stage nighttime raids just as it reaches perfection. To protect nearly ripe ears, tape the ears to the stalk with packing tape. In areas with severe raccoon pressure, you will need at least two strands of electric fencing to protect your corn, installed 4 and 8 inches from the ground. To keep birds from ruining the tips of almost-ripe ears of corn, cover them with paper bags held in place with clothespins or rubber bands.
Corn smut. A fungal disease called corn smut causes kernels to become large and distorted, so they look like monstrous blobs. Although ugly, smutty kernels taste like mushrooms when cooked and are considered a delicacy in some parts of the world. Still, it’s a good idea to remove smutty ears from your garden to limit the spread of fungal spores.
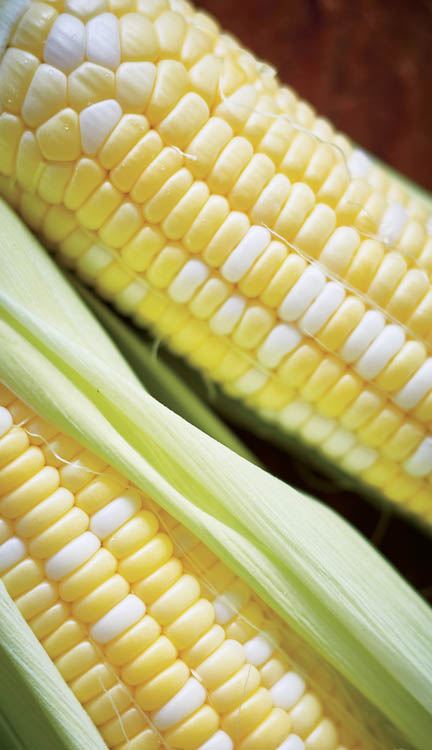
When: Once an ear feels hard and full when you squeeze it, and the silks at the end have dried to a dark brown or black color, pull back the shuck near the tip and examine the kernels. The kernels on ripe ears are plump and tightly packed together, with a glossy sheen. Taste and texture change as ears ripen, too. Ears that are not quite ready taste sweet but lack good corn flavor, while overripe ears have tough, wrinkled kernels that taste starchy.
How: Refrigerate the ears immediately or put them in a cooler kept chilled with frozen water bottles. Process within 24 hours.

The kernels on ripe ears of sweet corn have a glossy sheen and a rounded shape, and the corn tastes good when sampled raw.
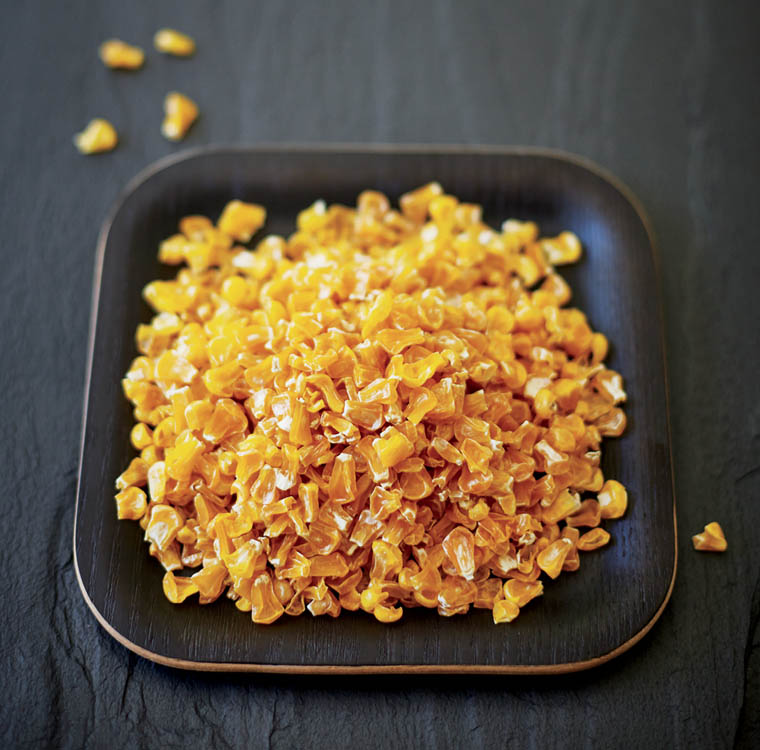
Freezing makes it possible to enjoy sweet corn that tastes summer-fresh at any time of year. Sweet corn also can be canned in a pressure canner, but long processing times (almost an hour for pints) can create a product that seems overcooked compared to the frozen version. In addition to freezing, you can dry a batch of kernels to include in soups or slow-cooked meals. For some families, summer would not be complete without a batch of colorful corn relish hot from the canner.
Choose freezing methods for your sweet corn based in part on how much freezer space is available. Corn off the cob takes up less than one-fifth of the space required for whole ears, which can quickly fill up a shelf. After hearing good reports from gardeners who freeze their corn in the shucks I had to try it, but it’s a shortcut I will never take again. The thawed corn had a mealy texture and flat flavor. Lesson learned! When you want to freeze whole ears, take the time to shuck, clean, and blanch them first. Thaw ears for at least 1 hour, then handle them as if they were fresh-picked ears.
Freeze most of your corn off the cob. Cutting the kernels from raw ears naturally creates creamed corn when milky juice and kernels cook together. If you cook the ears before cutting off the kernels, they will resemble whole-kernel corn sold in cans. The choice comes down to personal preference, but I find that the creamier style is a fast and easy way to get corn into the freezer, and it always gives great results. Use a sharp serrated knife to cut the kernels from raw ears, and then use a spoon to scrape the remaining milky juice off the cobs. Bring the mixture to a simmer, then allow to cool and freeze.
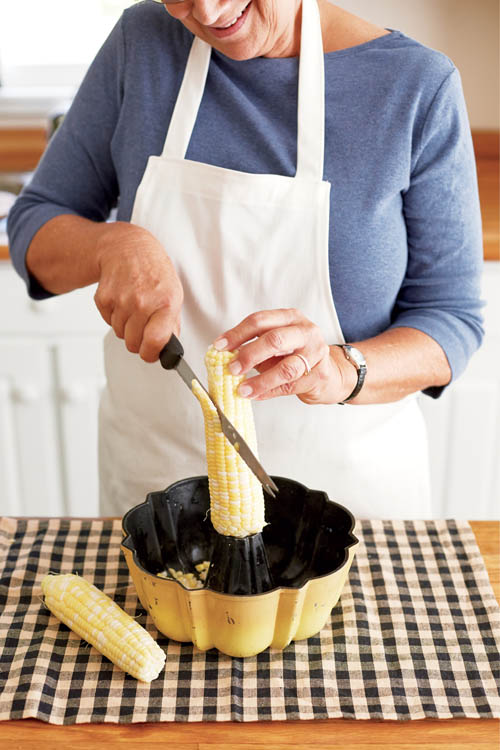
A Bundt pan becomes food processing equipment when you use it to hold ears of corn as you cut off the kernels.
Cutting the kernels from raw ears naturally creates creamed corn when milky juice and kernels cook together.
Corn is a very low-acid vegetable, with a pH range of 6.0 to 6.8. A pressure canner is therefore necessary to can sweet corn on its own. The base processing time for pints is 55 minutes; processing in quarts takes so long that the corn becomes overcooked.
A strong pickling brine (made of 2 cups vinegar, 2⁄3 cup sugar, and 1 tablespoon salt), with no water added, will lower the pH of sweet corn to acceptable levels for processing in a water-bath or steam canner. A small batch of sweet corn relish is a great way to use odds and ends of ripe red peppers, and small jars are a rare treat when added to springtime salads. Adding a small amount of turmeric to the pickling brine helps to lift the color in corn relishes.
If you are drying some of your corn — a smart strategy in the event of freezer failure — you should pre-cook ears to obtain whole-kernel corn. Corn used as animal feed is dried on the cob, but not sweet corn. With sweet corn it is best to boil or steam ears until just done, and then cut off the whole kernels and dry them. The small kernels can scorch because they hold so much sugar, so keep the temperature moderate. Store your dried corn in the freezer or in vacuum-sealed bags in a cool, dry place. Dehydrated sweet corn is wonderful in soups and stews that cook for more than 1 hour.
When you have 20 or so ears of corn to get into the freezer, this recipe is a great time-saver. The corn steams in a little butter and its own milk, and kernels around the edges roast to brown. The delicious results are ready to eat when thawed and heated.
Makes 4 to 5 pints
(Cucumis sativus)
8 plants
‘Little Leaf’, ‘County Fair’, and ‘Marketmore’
Pickle
The cool crunch of fresh cucumbers has made them summer staples for more than 3,000 years, and cucumbers were probably the first vegetable to be preserved using salt fermentation to turn them into pickles. Pickling is still the best way to preserve cucumbers, and methods range from simple refrigerator pickles to salt-brined beauties accented with garlic. If you are a first-time canner, there is little to go wrong with bread-and-butter pickles, which are preserved in a spiced brine made from vinegar and sugar.
Productive and fast to mature, cucumbers are easy to grow in fertile, organically enriched soil with a near-neutral pH. Training the vines up a fence or trellis increases the plants’ productivity and makes the cucumbers easier to pick. Cucumbers and dill for pickling can be grown together in early summer, the best season to grow cucumbers.
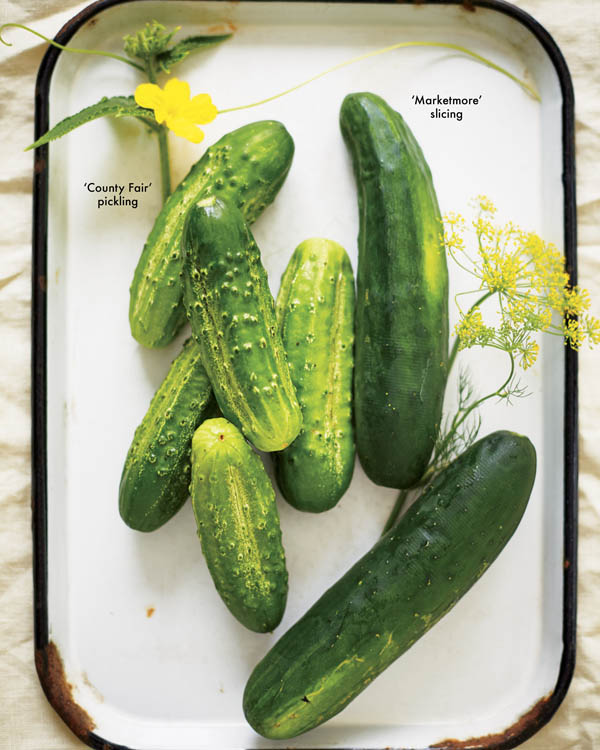
You can make sliced or chopped pickles and condiments using productive slicing cucumbers, but small-fruited pickling varieties are best for fermenting or canning whole.
The size and shape of cucumbers vary with variety, and the best ones for pickling are small pickling cucumbers. These specialized varieties have a low peeling-to-flesh ratio, so they hold up better to canning, and they are the only cucumbers you can use to make salt-fermented pickles. Pickling cucumbers produce all at once, over a 2-week period, and must be picked daily. They are fine for eating fresh, too.
That said, you can make most types of pickles (aside from salt fermented) from American cucumber varieties, which are the dark green, oblong cukes seen in supermarkets. These varieties have been bred for uniformity, productivity, and high levels of disease resistance. As long as they are picked young, American cucumbers make good pickles when sliced, cut into chunks, or finely diced.
Use thin-skinned greenhouse cucumbers only for making refrigerator pickles (see recipe). Thin-skinned greenhouse cukes are meant for eating fresh.
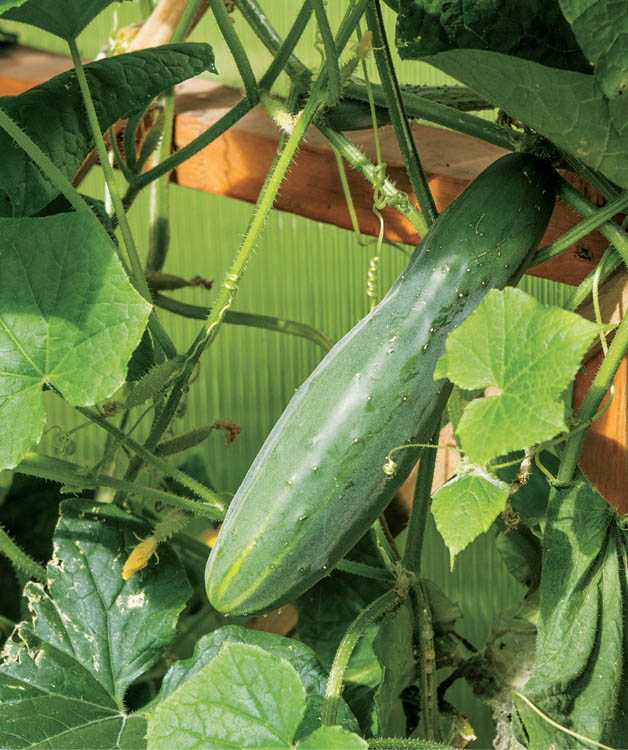
Even when provided with a trellis, cucumber vines need plenty of sunny space to ramble.
Cucumbers are very productive plants, so you won’t need many to produce enough cucumbers for several pickling projects — no more than 8 to 10 plants of a disease-resistant pickling variety like ‘County Fair’ or ‘Little Leaf’ or a productive all-purpose cucumber like ‘Marketmore’. When kept picked, each plant can produce more than a dozen fruits over the 3-week harvest period, so it is easy to grow too many cucumbers. It is the nature of canned cucumber pickles to start going soft after a year, so there is no point in making more pickles than you are likely to eat in 9 months. You may also be pickling other vegetables like asparagus, beets, or green beans — another factor to keep in mind when estimating how many cucumbers to grow for making into pickles.
When: Sow seeds directly into prepared rows or hills 1 to 2 weeks after your last spring frost has passed, and make a second planting a month later. Or start seeds indoors under bright fluorescent lights 2 weeks before your last spring frost date, and set out the seedlings when they are 3 to 4 weeks old, during a period of warm weather.
Where: Choose a sunny site with fertile, well-drained soil. Cucumbers can be grown in rows or in hills spaced 6 feet apart, and you can double yields per square foot by training cucumber vines up a low trellis.
Planting: Mix a 2-inch layer of rich compost into the planting site, along with a light application of a balanced organic fertilizer. Plant seeds 1⁄2 inch deep and 6 inches apart. When the seedlings have three leaves, thin them to 12 inches apart, which is also the proper spacing for transplanted seedlings.
Use a trellis to increase the leaf-to-fruit ratio of your cucumbers, which will increase yields of flawless, flavorful fruits. Any trellis that offers several tiers of horizontal support will work, from string trellises to wire tomato cages. Trellising small-fruited pickling cucumbers also makes them easier to pick.
To protect plants from all types of pests while providing warm growing conditions, grow cucumbers under row cover tunnels until they begin blooming heavily and need to be visited by pollinating insects.
Bacterial wilt. A common disease of garden cucumbers, bacterial wilt is spread from plant to plant by cucumber beetles. Initially a single stem wilts, followed by another, and within a week infected plants are barely alive. If bacterial wilt is common in your area, grow resistant varieties like ‘County Fair’ or ‘Little Leaf’ pickling cucumbers, or protect plants with row covers until they start blooming.
Cucumber beetles. Two species of yellow-and-black, 1⁄4-inch-long beetles often visit cucumber plants. Striped cucumber beetles have black stripes down their backs, while spotted cucumber beetles are yellow with black spots. Both species can be monitored and/or controlled using yellow sticky-cup traps, which are yellow cups stapled to wood stakes that are covered with a sticky substance like Tangle-Trap. Nearby plantings of borage may help suppress cucumber beetle populations by attracting big bumblebees to the area.
Powdery mildew. This fungal disease often infects old cucumber plants, though many varieties offer some genetic resistance. Powdery mildew turns cucumber leaves dull gray, and the plants stop growing. Pull up and compost badly infected plants.
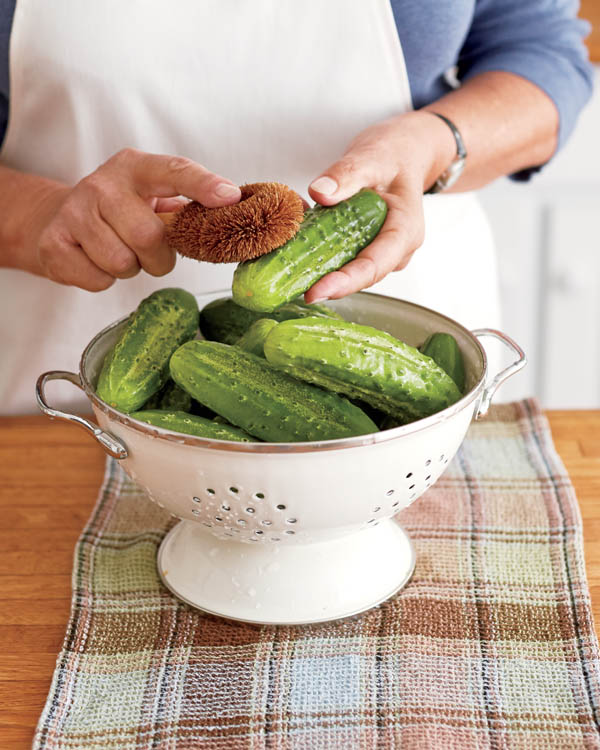
When preparing cukes for fermentation, scrub gently on the blossom end, which old-timers believe is the “activator” spot that contains important starter bacteria for effective fermentation.
When: Cucumber plants self-regulate how many fruits they will carry at a time. Even if you see dozens of female blossoms being worked by bees, only a few of them will develop into cucumbers. To maximize production, promptly harvest fruits as soon as they reach picking size. Pick daily, because cucumbers can get big fast after warm rains.
How: Lightly scrub, pat dry, and refrigerate harvested cucumbers right away. When preparing cukes for fermentation, scrub gently on the blossom end, which old-timers believe is the “activator” spot that contains important starter bacteria for effective fermentation. When you have saved up enough cucumbers, make a batch of pickles.
Cucumbers and pickles are such closely related subjects that some gardeners talk of growing pickles. But then, cucumbers are better at picking up secondary flavors than other vegetables, and truly great pickles deliver a balanced yet complicated taste package. Here are the three main ways to turn cucumbers into addictively delicious pickles.
Refrigerator or freezer pickles. Making a few batches of these easy pickles will teach you so much about basic pickling that you will be ready to move up to canned pickles next time you have a bumper crop. Then again, after trying the recipes below, you may be so happy with your freezer pickles that they become family favorites.
Vinegar-brined pickles preserved in a water-bath or steam canner are fun and easy to make, and strong vinegar brines make the risk of spoilage in properly sealed jars almost nonexistent. Even first-time pickle makers can expect success with bread-and-butter pickles, which use both vinegar and sugar to preserve the cucumbers. Just don’t get too carried away and make too many, because canned pickles often start softening after a year.
Salt-fermented dill pickles are fascinating to make and delicious to eat, but you must have flawless cucumbers of uniform size to make them. Kinked or oddly shaped cucumbers are fine for pickles that are cut into pieces, but with fermented ones you want only the best. Follow the instructions in Fermenting Veggies Step-by-Step when fermenting cucumbers. For truly fine-flavored pickles, include a grape leaf in the fermentation container along with plenty of fresh dill flowers or green seed heads and split cloves of garlic.
For truly fine-flavored pickles, include a grape leaf in the fermentation container along with plenty of fresh dill flowers or green seed heads and split cloves of garlic.
To save seeds from open-pollinated varieties, allow perfect fruits to ripen until they become large and develop leathery yellow or brown rinds. Slice away the rinds without cutting into the seeds, and use your fingers or the tip of a knife to remove the largest, plumpest seeds. Allow to dry at room temperature for 1 to 2 weeks before storing the seeds in a cool, dry place. Many gardening sources recommend fermenting cucumber seeds, but this step is not needed when you work with fully mature seeds. When given good storage conditions, cucumber seeds usually stay viable for 5 years or more.

Making refrigerator pickles is a simple matter of mixing up a brine and pouring it over cut cucumbers. These pickles are ready to enjoy starting the day after they are made, and they will keep in the refrigerator for a month. Don’t worry if the liquid does not quite cover the cucumbers at first. Overnight, the cut pieces will release juices that will raise the level of the brine.
For sweet refrigerator pickles, make a brine of 1 cup vinegar, 1⁄4 cup water, 1⁄2 cup sugar, and 1 teaspoon salt. Heat the mixture just enough to dissolve the sugar. Pour over 2 cups cut cucumbers, or a mixture of cucumbers and thinly sliced onions. If desired, add a light sprinkling of mustard seeds or red pepper flakes. Makes 1 pint.
For dill refrigerator pickles, make a brine of 1 cup vinegar, 1⁄4 cup water, 1⁄4 cup sugar, and 1 teaspoon salt. Heat the mixture just enough for the sugar to dissolve. Pour over 2 cups cut cucumbers, and add 1 teaspoon dill seeds or several dill leaves or flower heads, along with 2 cloves peeled garlic. Makes 1 pint.
Freezer pickles have more pickle flavor compared to refrigerator pickles, and you can eat them for months after they are made. You must pre-salt the cut cucumbers, but you can experiment freely with flavor accents such as herbs, horseradish, or celery seeds. Sliced onions or peppers also can be added as long as they are included in the pre-salting procedure to enhance their texture.
Cut clean cucumbers into uniform pieces and place them in a large bowl. Sprinkle with 2 tablespoons salt. Top with six or so ice cubes, and cover with a cloth. After a minimum of 3 hours, or a maximum of 10, drain the cucumbers in a colander and rinse very well with cold water to remove excess salt. Allow to drain while you make the brine.
For sweet freezer pickles, make a brine of 1 cup vinegar, 1 cup sugar, and 1⁄4 cup water. Heat the mixture just enough to dissolve the sugar. Cool before pouring over 2 cups rinsed and drained cucumbers. If desired, add a light sprinkling of mustard seeds, celery seeds, or red pepper flakes. Pack into freezer containers. Freeze at least a week, and thaw overnight in the refrigerator before serving. Makes 1 pint.
For dill freezer pickles, make a brine of 1 cup vinegar, 1⁄4 cup sugar, and 1⁄4 cup water. Heat the mixture just enough to dissolve the sugar. Pour over 2 cups rinsed and drained cucumbers, and add 1 teaspoon dill seeds or several dill leaves or flower heads, along with 2 cloves peeled garlic and a light sprinkling of red pepper flakes. Pack into freezer containers. Freeze at least a week, and thaw overnight in the refrigerator before serving. Makes 1 pint.
(Allium sativum, A. ampeloprasum)
30 to 50 plants per person
‘Music’, ‘German Red’, and ‘Inchelium Red’
Place in cool storage, dry, or pickle
Garlic is the first vegetable in which many gardeners become self-sufficient. There is plenty of time and space available for planting big cloves in the fall, the best season for planting, and few crops are as easy to store. When properly grown and cured, garlic bulbs kept in a cool, dry room will easily store for months, with some types willing to stay dormant until spring.
Gardeners can grow a different and much more varied assortment of varieties than what is available in stores, which makes growing your own garlic even more rewarding. Fresh garlic is a culinary treat, too, because of the complex flavors and apple-crisp texture found in a newly harvested crop. Once you get started with garlic, it is easy to keep your favorite strains going by planting cloves from your best bulbs in the fall. When planted in prepared beds in October, every garlic clove you plant will grow into a beautiful bulb the following summer.
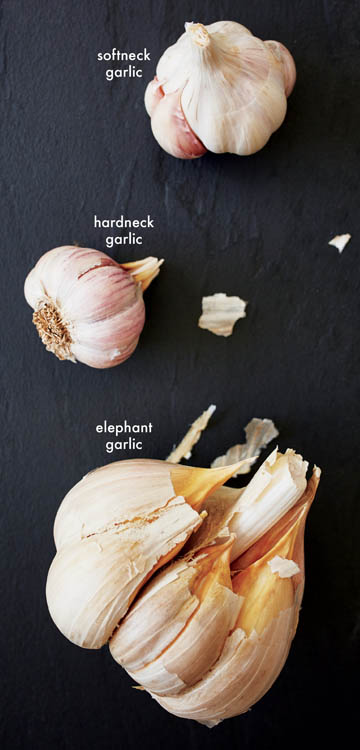
One of the best ways to get started with garlic is to try varieties sold at local farmers’ markets. Garlic for eating and seed garlic are the same, though garlic bulbs sold for planting are usually bigger. Here are the three major types.
Depending on how much cooking you do, estimate 30 to 50 plants per person for a year’s supply. This includes ample seed garlic for planting in the fall.
When: In fall, plant cloves in well-drained beds after the first frost has passed and the soil is cool. Cloves can also be planted in late winter as soon as the soil thaws, but fall-planted garlic produces bigger, better bulbs.
Where: Choose a sunny site, and loosen the planting bed to at least 12 inches deep. Thoroughly mix in a 1-inch layer of mature compost. In acidic soil, also mix in a light dusting of wood ashes. Garlic roots are concentrated in the area just below the bulbs, so it’s a good practice to lay down a balanced organic fertilizer in a band at the bottom of V-shaped planting trenches. This technique places fertilizer exactly where it needs to be for this crop.
Planting: Wait until just before planting to break bulbs into cloves, and do not remove the peeling — it protects the clove until it turns into a plant. Poke the cloves into the ground 4 inches deep and 6 to 8 inches apart, with their pointed ends up. Cover the planted area with 3 to 5 inches of organic mulch, such as shredded leaves.
Where winters are cold, expect to see a few green shoots in fall, which will likely be nipped back by frigid weather. Don’t worry — in spring, new shoots will push up through the mulch. In milder climates, garlic often stays green through winter, but it makes little growth when days are short and cool.
Onion root maggots. Garlic plants that stop making new growth and unexpectedly turn yellow may have been hit by onion root maggots — tiny beige worms (fly larvae) that eat garlic roots and cloves. To reduce the likelihood of these maggots, plant your garlic in soil that has not been planted with onion family crops in the past 2 years. If you often see this pest, dust the area around plants with diatomaceous earth in late spring, which is when the egg-laying females are most active.
Onion thrips. These tiny black elongated insects rasp pale grooves in garlic leaves, but they have many natural predators. Keep areas near garlic and onions mowed to reduce the weedy habitat thrips prefer. Monitor populations with sticky traps, and use a spinosad-based biological pesticide to control serious infestations.
Root rot diseases. When they are hit with a root rot disease, garlic plants usually turn yellow before they wilt and die. Prevent fusarium and other soilborne root rot diseases by growing garlic in well-drained, fertile soil and rotating the planting space with nonrelated crops. Avoid injuring the roots when weeding, because diseases often enter plants through broken root tissues.
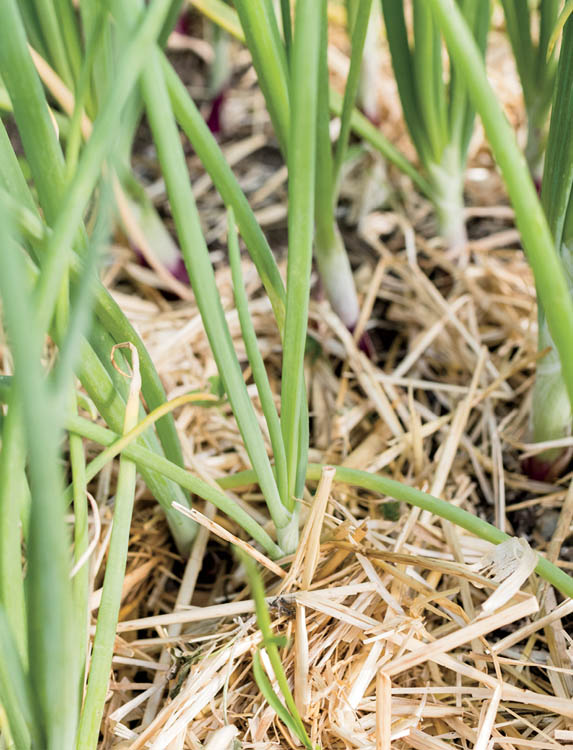
When: Onions can sometimes be left to die back on their own, but not garlic. If you harvest garlic when it is still half green and then slowly cure it for several weeks, the bulbs will dry nice and tight, with plenty of papery outer scales to protect the cloves from spoiling. Here are three ways to tell when garlic is ready to harvest:
How: Use a digging fork to loosen the soil around and beneath the bulbs before pulling them, and take care to avoid bumps and bruises. It is ideal to be able to harvest garlic when the soil is dry, because you can easily shake off loose soil as you harvest the bulbs. But in very rainy years, you may be forced to pull your crop from mud. In this situation, the best way to remove excess soil from the harvested bulbs is to swish them vigorously in a bucket of water. Immediately move the rinsed bulbs to a warm, well-ventilated place where they can drip-dry.

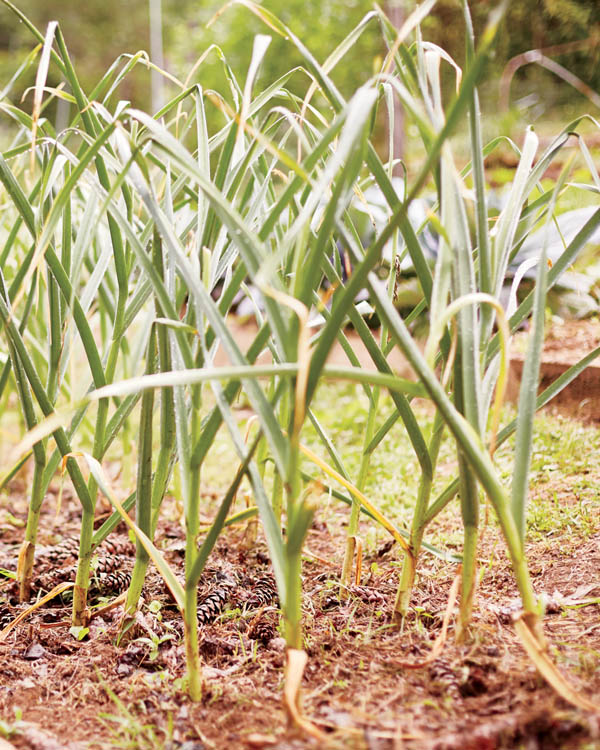
Left: Garlic is ready to dig when the plants begin to wither but are still more than half green.
Right: Use a digging fork to loosen soil from the outside of the row before pulling garlic in early to midsummer.
The curing process begins when you lay or hang the plants in a warm, dry place, with all of their leaves attached, for at least a week. During this time the plants will be quite aromatic. If you live in a dry climate, the garlic can be allowed to cure intact, but where humid conditions prevail, it is best to trim off all but about 6 inches of stem, lightly rub off excess soil from bulbs and twist soil from roots, and return the curing garlic to its drying place. Do not remove the papery outer wrappers, as these inhibit sprouting and protect the cloves from fungal invaders. Let the bulbs dry for at least 2 more weeks, and then trim off the remaining stem and roots. This is a good time to set aside the largest, most perfect bulbs as your planting stock for the next year’s crop.
Commercial garlic is kept at 32°F (0°C) to preserve its shelf life, but cool room temperatures work better for most gardeners. In fact, room-temperature storage works better than refrigerated storage for garlic bulbs, which may break dormancy too soon when kept in the fridge. When kept at 50 to 60°F (10 to 16°C), hardnecks store well for only 4 to 6 months, so use them first. Softneck and elephant garlic store for 8 months or more.

Three weeks after harvest, a collection of cured softneck garlic is ready to trim, clean, and store.
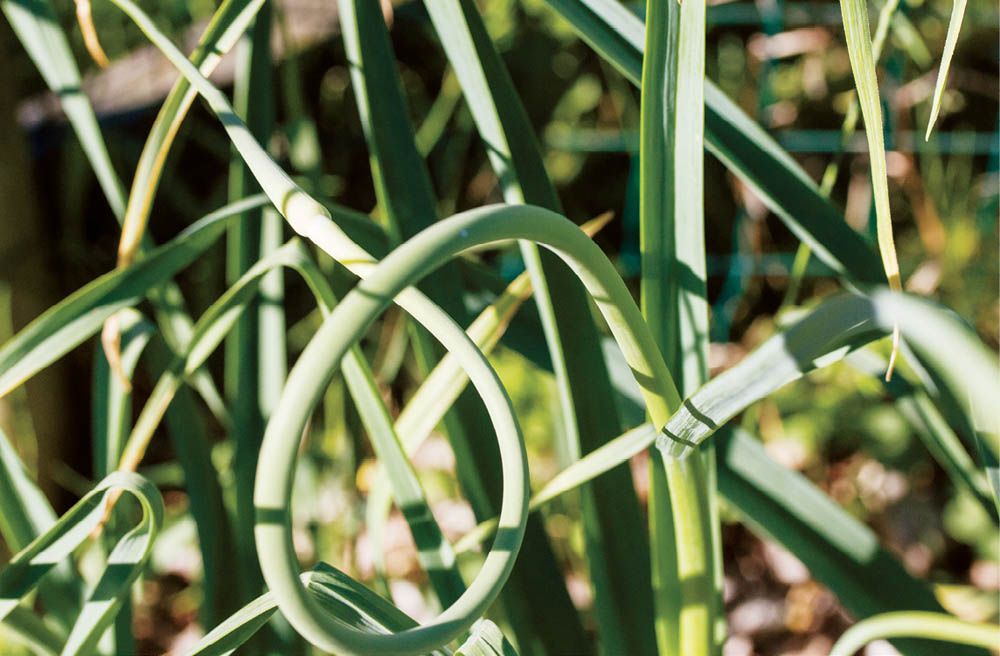
In early summer, hardneck varieties produce curled garlic scapes, which are immature flower buds on curling stems. When cut just as they make a full curl, garlic scapes are a delicious early-season vegetable. Removing the scapes also can increase bulb size by as much as 30 percent, because the plants don’t waste energy developing flowers.
In cooking, garlic scapes are less assertive than garlic cloves, so they are ideal for dishes where you want only a hint of garlic flavor and aroma. Garlic scapes will keep in a plastic bag in the refrigerator for a month, or you can cut them into small pieces, steam blanch them for 3 minutes, and freeze them in freezer bags. In cooking, 1 tablespoon of chopped frozen garlic scapes is equivalent to 1 medium clove of garlic.
Simple cool storage is the best way to store perfect garlic. If you find you have grown too much and need to preserve bulbs for longer than 6 months or so, dry some of your cloves until crisp, and store them in the freezer. Take them out in small batches, and use a dedicated coffee mill to turn them into freshly ground garlic powder.
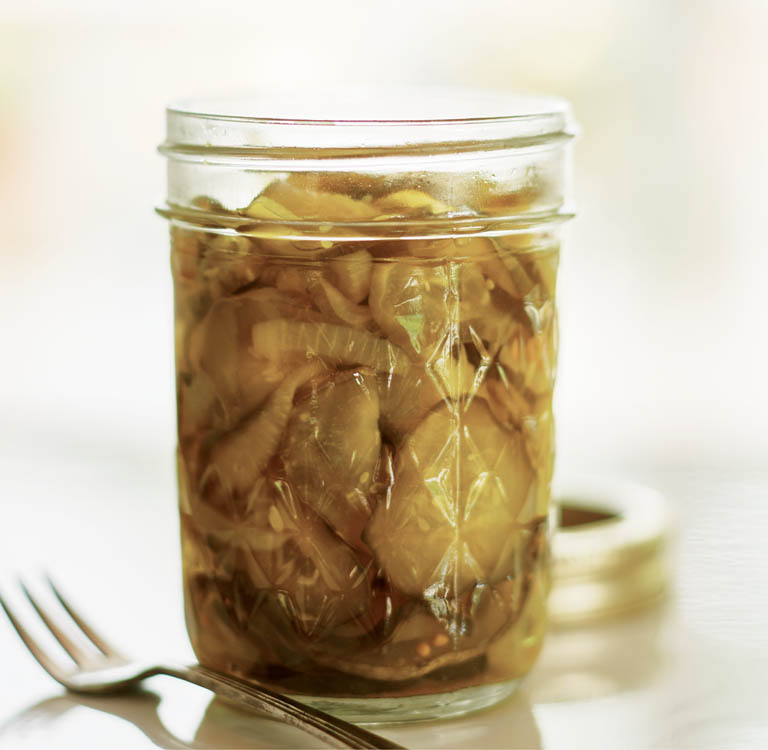
A few half-pints of pickled garlic are cupboard treasures, and pickling tames garlic’s flavors. In lucky years when you have only a few bulbs with serious storage issues that must be preserved, don’t bother to seal garlic pickles in a water-bath or steam canner. Instead, let them marinate in the refrigerator for at least 2 weeks, and enjoy them as refrigerator pickles.
When you need to peel a lot of garlic cloves, plunge them in boiling water for 30 seconds and then cool over ice. Many of the peelings will come away from the cloves by themselves.
Makes 3–4 half-pint jars
(Brassica oleracea, B. napus)
3 plants per person in spring, 9 plants per person in fall
‘Red Russian’, Tuscan, and ‘Redbor’ kale; all collards
Freeze or dry
Super-nutritious and easy to grow, kale and collards are also phenomenally productive in the garden. The naturally healthy plants resist pests and diseases better than closely related cabbage or broccoli, and because their leaves are so large and substantial, kale and collards are the best greens to grow for freezing. Dried kale is also tasty and useful in the kitchen, especially when you want to add a bit of green to an almost-finished dish.
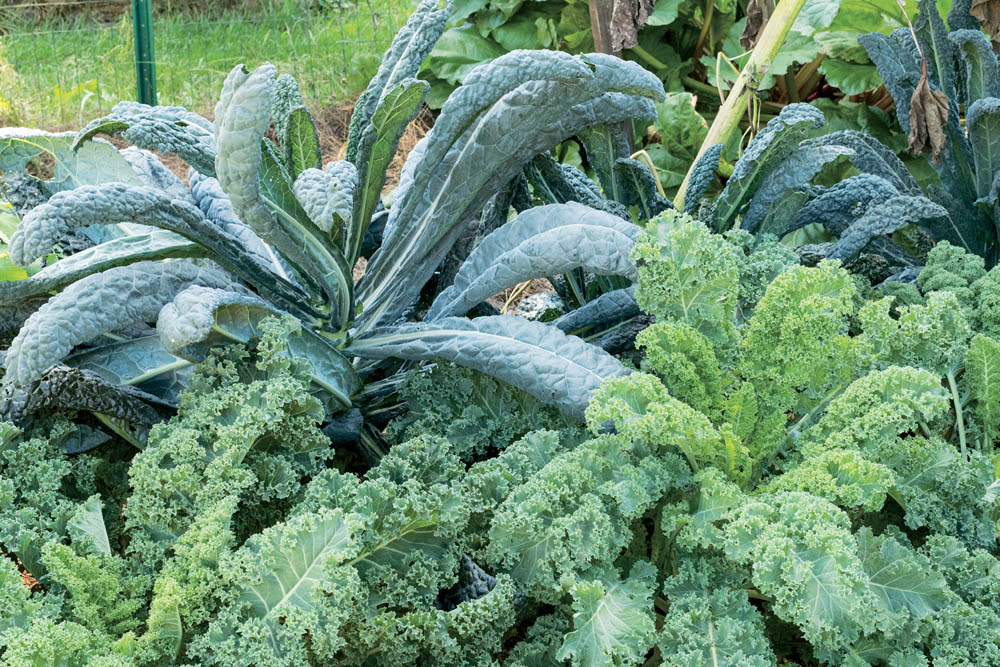

Kale and collards are so closely related that they can be handled as one pantry crop.
Collards and kale need cool weather to grow well, so in most climates you will split your planting plans into spring and fall, using fall for your freezer crop. In spring, allow three plants per person of collards or kale for eating fresh, but triple that amount for collards or kale being grown in the fall. Each vigorous plant will produce about 1⁄2 pound per week for up to 6 weeks.
When: In spring, start kale seeds indoors about 10 weeks before your last frost date, and set them out under tunnels or cloches when they are 5 to 6 weeks old. Start fall plants in mid- to late summer by direct-sowing seeds or starting them in containers in a protected spot.
Where: Kale and collards require an abundance of nutrients, so plant them in soil that has been amended with compost and a balanced organic fertilizer.
Planting: Grow young plants beneath row cover tunnels to protect them from pests and bad weather. Beautiful leaves will be ready to pick in a few weeks, but wait until after frost has sweetened the leaves to harvest kale and collards for the freezer.
Maintenance: Keep the soil constantly moist, and use a biodegradable mulch to limit weeds and help keep the leaves clean.
Cabbageworms and loopers. Kale and collards are often visited by leaf-eating cabbageworms and cabbage loopers, though the insects prefer to munch on cabbage and broccoli. Should you have so many little caterpillars on curly kale varieties that you can’t hand-pick them, one treatment with a Bt or spinosad-based organic insecticide will bring them under control.
Cabbage aphids. These insects are a more vexing problem because they appear in late fall, after most natural predators have retired for the season. Clusters of the gray-green sucking insects may appear on tufts of new growth. Pinch them off as soon as you see them, or give up the fight and compost the plants.
When: Starting when plants have more than seven leaves, harvest the large, older leaves from each plant when they are bigger than your hand.
How: Rinse clean in cold water, pat dry, and store in plastic bags in the refrigerator. Cook or process within 3 days.
You can pressure can low-acid kale and collards, but they require long processing times, which will turn them to mush. Likewise, kale fermented by itself is less appetizing than a mixed ferment that includes crunchy cabbage and carrots. When it comes to preserving collards and kale, freezing and drying are the best options.
Freezing is the best way to put by a lot of kale and collards in ready-to-use form for casseroles, soups, or eating as cooked greens. Wash the greens and cut off the thick sections of stem at the base of the leaves.
For most vegetables I like steam blanching, but with collards and kale, using boiling water is better because it removes bitter compounds from the leaves. After blanching these greens in boiling water for 5 minutes, cool them on ice. When the blanched greens are cool enough to handle, stack three leaves together and roll them up like a cigar. Using a sharp knife, cut the roll into 1⁄2-inch slices, and then go back and cut the slices in half. Pack the greens into freezer containers, squeezing out as much air as possible. If you want small containers of frozen greens for omelets or smoothies, you can freeze the cooled greens in silicone muffin pans and move them to a freezer-safe container when they are frozen hard.
In addition to freezing chopped kale and collards, blanch and freeze a package or two of whole leaves to stuff and serve like cabbage rolls. The blanched, cooled leaves can be frozen flat, or stacked together and rolled into a newspaper-like roll and frozen as a bundle.
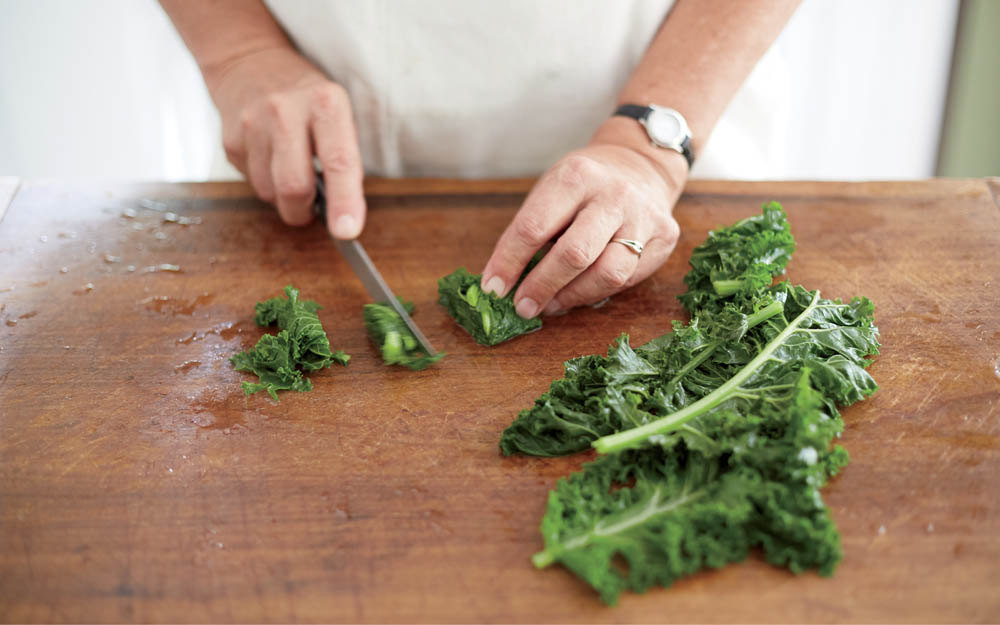
Kale that has been blanched and cooled can be cut into strips before it is frozen.
Kale leaves can be dried plain, with no seasoning, but you can transform kale flakes into nicely flavored kale chips by tossing them with a very light coating of an oil-based dressing just before drying them (see the recipe below). Thicker collard leaves are less pleasing and may taste slightly bitter, but flavored kale chips have a polished crispness that makes them fun to eat, and they will store for months.
Makes 1 quart dried chips
Tuscan kale chips

Every gardener wants to grow greens, and every gardener should probably eat more of them. Salad greens like lettuce and arugula that are eaten raw must be included in every veggie gardening plan, but in small amounts as fits their come-and-go natures. Cooking greens are different, because having a supply of frozen and dried greens means you can make anything from spinach-stuffed pasta to a cheesy chard casserole in record time.
When planted at auspicious times, kale, collards, spinach, and Swiss chard will fill the growing season with the best greens you can eat (commercial growers often use systemic pesticides). I suggest starting in spring with kale and spinach, and growing chard through the summer. Then stock the garden with collards, turnips, and more kale for harvesting in fall, and plant more spinach for growing through winter under a protected frame. Turnips are grown as much for their storable roots as their greens, so they are covered in detail here, but I wanted to include their nutrition information in this chart.
Cooked greens provide a range of nutrients that make eating some kind of greens every day a very good idea.
|
One Serving, Frozen |
Vitamin A (% RDA) |
Vitamin C |
Calcium |
Iron |
|
Chard |
214% |
53% |
10% |
22% |
|
Collards |
308% |
58% |
27% |
12% |
|
Kale |
382% |
55% |
18% |
7% |
|
Spinach |
531% |
8% |
34% |
24% |
|
Turnip greens |
353% |
122% |
32% |
26% |
(Brassica oleracea var. gongylodes)
5 row feet per person in spring, plus another 5 row feet per person in fall
‘Korridor’, ‘Kolibri’, and ‘Kossak’
Freeze, dry, or ferment
One of the newest members of the cabbage family, kohlrabi was bred in Germany in the 1500s. Instead of growing a head like cabbage, broccoli, and cauliflower, closely related kohlrabi develops a rounded “bulb” in its stem, just above the soil line. With a crisp texture and sweet yet savory flavor, some people refer to kohlrabi as a vegetable apple. Growing kohlrabi is easy as long as you use the best planting dates for your climate. If you really love kohlrabi, you can grow spring and fall crops of fast-maturing kohlrabi varieties, and end the season with a few storage-type kohlrabi, which grow unusually large.
Kohlrabi is, in my opinion, one of the finest delicacies in the garden, worthy of planting two or three times each season. In the garden, kohlrabi sports a trim, upright growing habit that makes good use of space.
Kohlrabi is wonderful eaten fresh, but it also freezes well and can be dried if freezer space is tight. Kohlrabi’s crisp texture is also welcome in fall vegetable ferments when mixed with cabbage, carrots, and radishes.

Kohlrabi varieties vary in growth rate and color. The days-to-maturity ratings on seed packets are early rather than average. Be patient and allow at least 60 days for kohlrabi to grow to perfect size; slow-maturing storage varieties need an additional month of growing time.
Plant 5 row feet per person in spring, and the same amount of a storage variety to be harvested in late fall. Fifteen row feet will yield about 10 pounds of kohlrabi.
When: For your first spring sowing of kohlrabi, start seeds indoors about 6 weeks before your last spring frost date. Kohlrabi is not as cold-tolerant as other cabbage family crops, so wait until 2 weeks before your last frost date to set out seedlings. If you prefer to direct-sow kohlrabi, plant seeds around your last frost date.
Start seeds of storage varieties in midsummer, at about the same time you would sow broccoli or cabbage for fall harvest. This is usually about 90 days before your average first fall frost date.
Planting: Kohlrabi plants are heavy feeders that demand moist, fertile soil with a pH between 6.0 and 7.5. Micronutrients are important, so take the time to amend the soil with compost and a standard application of a balanced organic fertilizer before planting. Harden off the seedlings before setting them out, and cover them with row cover or tulle tunnels to exclude insect pests. Thin or transplant seedlings to 8 inches apart, but allow more space when growing vigorous storage varieties.
Maintenance: When growing kohlrabi in spring, use a row cover tunnel to protect the plants from cold winds and insects. Should the little plants refuse to grow even after the soil warms up in spring, drench them with a high-nitrogen liquid fertilizer.
Occasional cabbageworms may need plucking from your kohlrabi plants, though they much prefer cabbage and broccoli. Drying out is a more serious problem when growing kohlrabi, because the plants sit up straight and do not shade surrounding soil. A rich mulch of freshly cut grass clippings or chunky compost is therefore necessary to keep kohlrabi’s root zone cool and moist.
When: Pull up entire plants when kohlrabi grow to 3 inches in diameter. Some people eat the young leaves taken from the tops of kohlrabi as cooked greens, especially in fall when the leaves tend to be sweet and tender. In summer, kohlrabi leaves taste too sharp for most palates.
How: Clip off roots and leaves, and store the trimmed kohlrabi in the refrigerator. Summer kohlrabi will keep in the refrigerator for several weeks, or you can preserve it. In fall, harvest kohlrabi before your first hard freeze and store the trimmed kohlrabi in a refrigerator or root cellar.
One of the great things about kohlrabi is its crisp texture, which you only get in the fresh version. Make it a priority to eat kohlrabi fresh in season, and only turn to preservation methods when you find recipes you love.
Always remove the peeling before eating or preserving kohlrabi. Coarsely grated kohlrabi makes a fabulous slaw, but the most popular way to eat kohlrabi is as oven fries — kohlrabi sticks tossed with salt, pepper, and olive oil, roasted in a hot oven for 20 minutes.
You can blanch and freeze kohlrabi in bite-size pieces, just like broccoli, or include it in mixed packets of frozen vegetables. If you have no freezer space, dry small sticks of kohlrabi that have been blanched and cooled, and use the dehydrated kohlrabi in winter soups and stews.
With the texture of water chestnuts, kohlrabi is a wonderful vegetable to add to fermentation projects. You also can ferment kohlrabi on its own, using the steps given in Fermenting Veggies Step-by-Step for salt fermentation. Kohlrabi that have been peeled and cut into quarters make a great base vegetable for any fermentation project.

If you have no freezer space, dry small sticks of kohlrabi that have been blanched and cooled, and use the dehydrated kohlrabi in winter soups and stews.
(Allium species)
40 bulbs per person
Choose types and varieties that suit your climate
Place in cool storage, dry, or freeze
Packed with flavor and healthful nutrients, onions are a staple food in kitchens throughout the world. Familiar bulb onions are easy to grow as long as you use varieties adapted to your climate and get into the habit of starting them from seeds — the best way to have plants of regionally adapted varieties to set out at the right time. Smaller shallots can be grown from seed or from mother bulbs, and shallots are the champs of storage onions, often lasting well into spring.
It is tremendously convenient to have a store of cured bulb onions and shallots in the barn or basement, but non-bulbing onions including leeks, multiplying onions, and scallions grown from inexpensive sets can expand your fresh onion choices while easing pressure on your supply of stored onions. Diversity is key to pursuing onion self-sufficiency, so you will find coverage of shallots, leeks, and other alternative onions here.
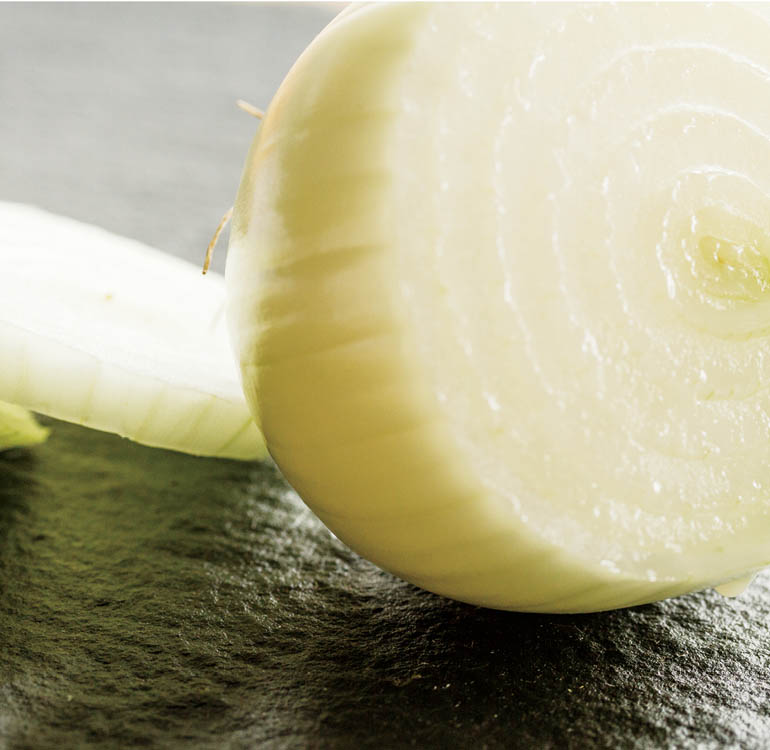
The key to growing robust bulb onions is to provide them with a long, stress-free growing season, because the size of the onion bulb depends on the number of green leaves the plant is able to produce. Each ring in an onion bulb is the swollen base of an aboveground leaf, so onion plants that hold plenty of big leaves produce the best and biggest onions. Changes in day length trigger the bulb-forming process, so onion varieties are sorted into four groups based on how they grow in different latitudes.
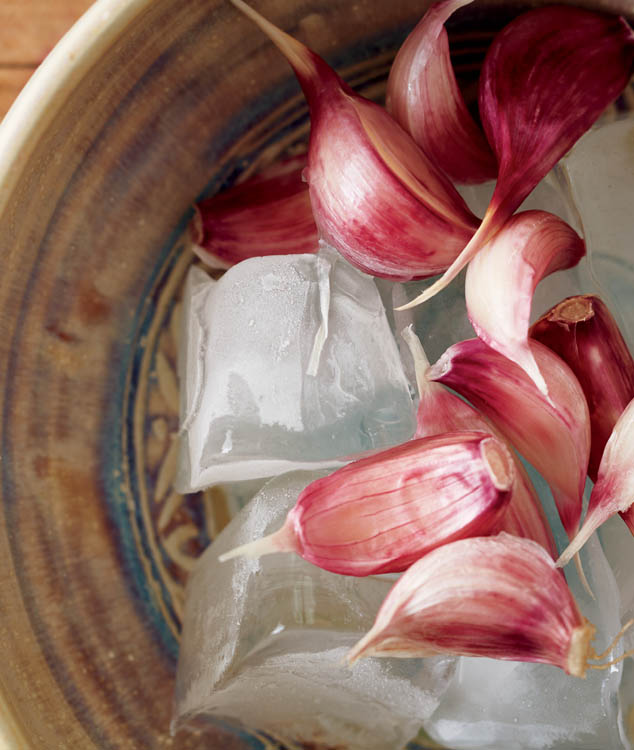
Onions are complex chemical organisms, and their full fury is unleashed when they are cut. As soon as the cells are opened with a sharp knife, a cascade of compounds hits the air, including tear-provoking lachrymator. If the onion is a sweet one, it won’t pack much of a punch, and you’ll get the most flavor from eating it raw or minimally cooked in a stir-fry. In comparison, a pungent onion will add much more body to a soup stock, but its vapors will sting your eyes, and it might give you indigestion if you eat it raw.
The sugar content of spicy storage onions is often quite high, but until the pungency compounds are broken down in cooking, you can’t taste their sweetness.
As for coping with tears when you’re slicing and dicing a mountain of onions for a pickling project, work outdoors if you can, and turn on a small fan to blow the onion vapors away from your face. It helps tremendously to chill the onions for a few hours before chopping, because temperatures below 50°F (10°C) suppress an onion’s ability to gas off. Pungency compounds are concentrated in the root end of the bulb, so it also helps to chop it up last.
Few cooks can make it through a day without using at least one onion, but few gardens can meet this never-ending demand. Estimates of 40 bulb onions per person is reasonable if you are growing plenty of other onions, but per capita consumption of bulb onions is closer to 20 pounds per year, or 80 plants per person.
As long as the growing season lasts, try to fill some of your day-to-day onion needs with non-bulbing onions like scallions and leeks (see Alternative Onions). Grow as many bulb onions and shallots as you can find room for — keeping them together in one row simplifies rotations. If you live from Zones 5 to 7, consider including overwintering onions in your planting plan because the onions are harvested early, with plenty of time to plant another crop in the same space, and you have onions to eat through the first half of summer.
When: You can grow onions from seeds, plants, or sets, but seeds are best because you can choose superior varieties at modest expense and control growing conditions to minimize or eliminate bolting — a big risk with sets. You can start seeds indoors very early, in midwinter, because onion seedlings grow slowly, and the upright plants are easy to hold in containers until it’s time to plant them. Note that seed-sown shallots are grown exactly like bulb onions. I sow and grow bulb onions and shallots indoors at the same time, in neighboring seedling flats that must be labeled because they look so much alike.
It's best to grow onions from seeds because you can choose superior varieties at modest expense and control growing conditions to minimize or eliminate bolting.
Germination: Start with fresh seeds labeled for the current crop year. Onion seeds can be kept for 2 years in a cool, dry place, but fresh first-year onion seeds germinate best. Onion germination is fastest at 68 to 77°F (20 to 25°C), with slight temperature drops at night. The tops of my fluorescent plant lights are flat, and they give off just the right amount of bottom heat needed to help onion seeds germinate quickly, or you can use the top of your refrigerator for bottom heat. To keep the seeded containers moist, enclose them in a roomy plastic bag.
Onion seedlings need bright supplemental light from the day they germinate. Position seedlings close to the bulbs to simulate sun, and keep the lights on for 12 hours a day. When the seedlings have three leaves, transplant them to containers that are at least 4 inches deep, because onion seedlings that are given plenty of vertical root space grow faster and better than those confined to shallow quarters.
As winter gives way to spring, set up a cold frame or plastic-covered tunnel outdoors, and use it as a day-care center for your onion seedlings. Onion seedlings need as much light as they can get, and the best light is outdoors. Bring the plants indoors at night as long as temperatures often drop below 50°F (10°C), and delay planting until about 3 weeks before your last spring frost.
Where: All onions grow best in fertile, well-drained soil with a slightly acidic pH between 6.0 and 6.8. Choose a sunny site, and loosen the planting bed to at least 12 inches deep. Thoroughly mix in a 1-inch layer of mature compost. Providing bioactive compost is important when growing onions, because onions take up much of the phosphorus they need through partnerships with soilborne mycorrhizal fungi.
Planting: Onion roots are concentrated in the area just below the bulbs, so it’s a good practice to lay down organic fertilizer in a band at the bottom of V-shaped planting trenches. This technique places a cache of organic riches where the onions can utilize it early on, during their most active period of growth. Transplant onions to about 4 inches apart.
Maintenance: Once onion seedlings are in the ground, the war with weeds gets into full swing. Skinny onions are notoriously poor competitors with weeds, so they can’t be left to fend for themselves. In addition to attentive hand-weeding with a sharp weeding tool, interplanting onions with arugula, lettuce, and other leafy greens reduces weeds between onion plants, and the greens can be pulled young, before they block light to the onions.
Quickie scallions. The easiest way to grow scallions is to plant inexpensive onion sets sold in spring. Simply poke them into the ground, let them grow for a month, and pull the green onions as needed in the kitchen. You can keep some sets dormant in the refrigerator and plant them in summer for fall harvest.
Bolting is a common syndrome with onions grown from sets, or from oversize seedlings that are set out too early. Sets are a great way to grow green onions (scallions), but for a bolt-free bulb onion patch you’ll need to use seedlings smaller than a pencil, set out after nighttime temperatures have warmed to above 45°F (7°C). If you are growing onions from homegrown seedlings or purchased plants and you are still having bolting problems, the next thing to try is delaying planting until warm weather arrives to stay in mid-spring. Young onion plants that are never chilled rarely bolt.
When onions do bolt, use some of the florets in salads and sandwiches, and let the others offer their nectar to bees and other beneficials. As soon as the flowers fade, lop off the blooming stalks to keep the plants from wasting energy nurturing seeds. Let the plants keep growing for about 3 more weeks, or until they show no new growth and list sideways or fall over.
Follow the instructions for Curing Onions. A couple of weeks into the process, you should be able to see or feel a division between a lopsided but well-formed onion and the stiff base of the seed stalk. Break the two pieces apart, and compost the seed stalk after first checking to see if there is a small elongated onion hiding at its base. Continue curing the “good halves,” but also eat them as quickly as is practical or use them in canning projects. Because they are missing so much of their protective outer sheaths, bolted onions do not store well.
When onions do bolt, use some of the florets in salads and sandwiches, and let the others offer their nectar to bees and other beneficials.
White onion root maggots. When an onion suddenly goes weak and stops growing, gently dig it up to check for the presence of tiny white onion root maggots. The adult flies are attracted by rotting onion tissues, so discourage problems by rotating onions and composting all refuse after harvesting. Where onion root maggots are a recurrent pest, use row covers to protect your onions in spring, when the egg-laying females are most active.
Onion thrips. Thrips rasp pale grooves into leaves, but they have many natural predators. Keep areas near onions mowed to reduce the weedy habitat thrips prefer. Use a spinosad-based biological pesticide to control serious infestations.
Leaf spot diseases. As onion plants become weak with age, they become prey to numerous leaf spot diseases that are aggravated by warm, rainy weather. Warm rain also encourages pink root and several other soilborne diseases that can cause onions to rot. Use resistant varieties when you can, keep them weeded, and grow onions only in sunny, well-drained sites.
You will always have plenty of garden-fresh onions for everyday cooking by including some of these non-bulbing onions in your garden. Many are perennials that will come back or can be replanted for many years.
Egyptian onions (Allium cepa var. proliferum) are often called top-setting, walking, or multiplying onions. Plants develop bulblets atop tall stems in early summer and multiply by division, too. Replant bulblets in summer for fall and spring scallions. The bases of the parent plants can be divided and replanted, or you can dry and cure them like elongated shallots. These rewarding plants are hardy at least to Zone 5.
Bunching onions (A. fistulosum and hybrids) are more refined than multipliers. Instead of forming bulbs, these cold-hardy, disease-resistant plants multiply by division, forming clumps of scallions. Start seeds indoors in late winter, and divide established clumps in spring or fall. ‘Evergreen White’ is hardy to Zone 4; ‘White Spear’ and ‘Beltsville’ are hardy to Zone 5.
Leeks (A. porrum) are easy to grow from seed, though you should be prepared for leeks that are more slender and tender than those sold in stores. Leeks develop long white shanks that can be made longer with deep mulch. The best onions for drying, leek seedlings are tough and easy to handle. Many gardeners grow clumps of leek seedlings in containers and pop them into the garden as small spaces open up for cultivation.
Potato onions (A. cepa var. aggregatum) go by many names, including nest, hill, or pregnant onions, and they may be the ideal homesteader’s onion. Planted in fall, these hardy storage onions produce a “nest” of 2- to 3-inch onions in midsummer. Potato onions are easier to grow and store than larger bulb onions and are more productive than shallots. Replant saved bulbs or make new plantings in fall or very early spring.
Shallots (A. cepa var. aggregatum, A. oschaninii, and hybrids) are a variable group of perennial onions, though new varieties are available that make great crops when grown as annuals from seed. Famous for flavor and long storage time, shallots look like elongated potato onions; some selections are nearly round. Shallots that show signs of breaking dormancy, like green tips or knobby root buds, can be planted in fall, like garlic. But dormant shallots set out in the fall often rot, so it is often safer to wait to plant in early spring. Whether they grew from seedlings or mother bulbs, young shallot leaves are delicious and can be substituted for scallions in any recipe.
With any bulb-forming onion, the rule of thumb is to wait for half of the plants to fall over, and then harvest the entire planting. This is fine if you have dry weather, but under wet conditions it’s better to feel the necks of your plants for a soft spot a few inches above the onion bulb. This soft spot is a sign that the bulb has finished growing, and you can feel it a day or two before the top of the plant falls over. When rain is predicted, it’s best to pull every plant that has gone soft at the neck, because moisture will cause the necks to start rotting.
Shallots and potato onions are an exception to the fall-over rule, because they often splay out over the ground as they divide into separate bulbs, but the plants continue to grow. This rather unattractive posture should therefore be tolerated until the green leaves have withered back at least halfway. Then they are ready to harvest and cure.
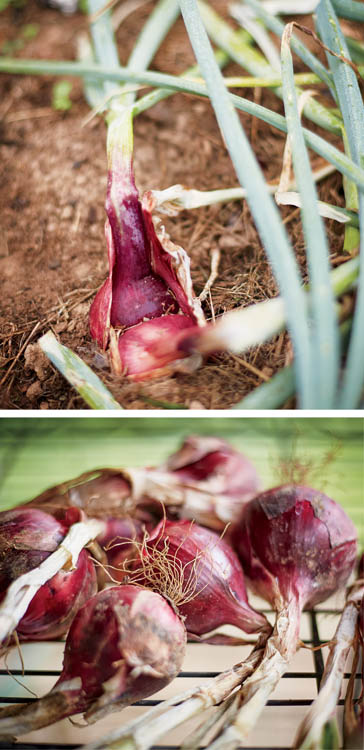
Top: Shallots will continue to grow after their tops have fallen over.
Bottom: Allow harvested onions to cure in a warm, dry place before trimming and storing them.
The process of curing onions takes about a month from start to finish, but it is best not to hurry things. Pull onions, brush off excess soil, and clip off withered leaves. In wet weather or humid climates, allow the plants to rest in a warm, dry place for a few days, and then trim off leaves that have gone slimy or brown, and cut the green ones back to about 12 inches. Lightly rub off soil clinging to the bulbs, and let them cure for a couple of weeks in warm, dry shade.
Groom the bulbs a second time, using scissors to clip off roots and all but 2 inches of the withering tops. Gently wipe the curing onions with a damp cloth to clean them, and arrange them in a single layer in boxes or bins that can be brought indoors (by this time they hardly smell at all). Dry at room temperature for 2 more weeks before moving them to cooler quarters in your barn or basement. If you don’t have a cool basement, look for alternative spots like downstairs closets or under your bed.
Given the same storage conditions, some onions will break dormancy long before others. When this happens, the onions soften and a green shoot may show at the top — a sign to eat it right away. Varieties described in seed catalogs as “hard storage” onions will last until February, though they usually get eaten by then. Well-cured cipollini onions and shallots stay in good condition all the way through winter, so they take over in the kitchen when the bulb onions are gone.
Simple cool storage in the 40 to 50°F (4 to 10°C) range is the best way to store perfect onions and shallots. Check on onions stored in your garage or basement weekly, and look into any funky smells coming from the onion basket.
As you cure your onions, set aside those with imperfections and use them in everyday cooking or canning. Many spicy chutney recipes include onions, and thinly sliced onions are essential in bread-and-butter pickles. Also include chopped onions in vegetable mixtures that are being blanched and frozen. If you want to freeze only onions, the best course is to caramelize them first (see the recipe below). Thinly sliced onions, including green onions and leeks, are a valuable addition to vegetable ferments.
Onions also can be dried with no blanching required, but a quick dip in simmering water helps tenderize leeks while removing bits of soil. Leeks are a dream to dry, finished in a matter of hours. Drying sliced bulb onions may be a good idea if you have more culls than keepers, but keep in mind that dried onions lack the aromatics of fresh ones, and some people find them hard to digest. Besides, let’s say you want to make a warming vegetable soup. The first step is to slowly brown an onion or shallot, fresh with its sugars intact, in a small amount of fat. In this and other cases, caramelization at the bottom of the pan is essential to the dish, and for this only a fresh onion will do. Grow plenty.
Let’s say you have a hundred beautiful onions curing in the garage and a dozen flawed ones waiting in a bucket. Time to make enough caramelized onions to inspire your cooking for weeks to come. Slowly cooking the onions brings out their natural sweetness, and caramelized onions are so versatile they can be used as a foundation for rich French onion soup, slipped into a grilled cheese sandwich, stirred into mashed potatoes, or mixed with any steamed vegetable.
Makes about 2 cups


