Block both incoming and outgoing traffic with CORE FORCE.
As of Windows XP SP2, Microsoft has done the world a favor by enabling the Windows Firewall [Hack #46] by default. However, the Windows Firewall can often give users a false sense of security, especially as the plagues of malware targeting Windows systems grow. While Windows XP’s firewall is great at protecting systems from attacks against services, it does little to prevent keyloggers and other forms of malware from phoning home with your vital private information.
Where XP’s firewall fails,
CORE FORCE (http://force.coresecurity.com) from CORE Security excels. CORE FORCE includes a Windows port of OpenBSD’s Packet Filter [Hack #45]
in addition to a file and registry access monitor and an application binary integrity checker.
Before you install CORE FORCE, exit any applications that need to maintain network connectivity in order to function properly, because the installation process might disrupt them. Then, install CORE FORCE by downloading the installer and launching it. Other than the previously noted caveat of losing network connectivity, the installation process is pretty normal; you select where to install the package files and it installs them.
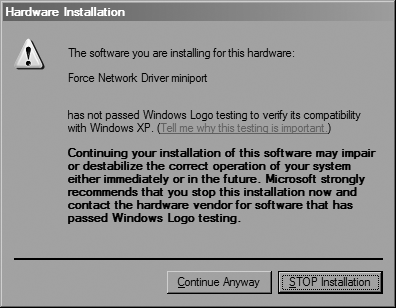
As part of the process, CORE FORCE installs custom firewalling drivers into your network stack, so a dialog like the one shown in Figure 4-9 might alert you that hardware is being installed and ask if you want to stop the installation. This is a normal warning, so you can just click Continue Anyway. (You might be prompted multiple times; if so, just click the Continue Anyway button each time.)
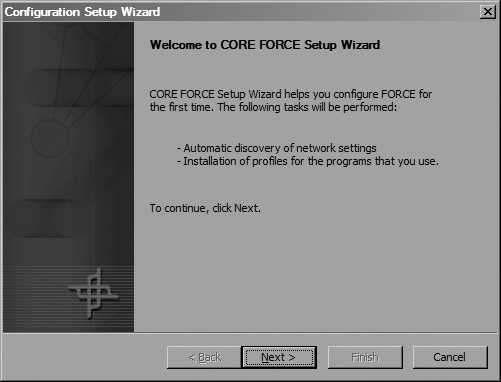
After the installation has finished, you’ll need to restart your computer. Once your system has finished booting up and you have logged in, you’ll be presented with CORE FORCE’s setup wizard, shown in Figure 4-10. This wizard helps you choose how restrictive you’d like the system to be and tell it about your network, DNS servers, and other servers that you access regularly, so that it can apply this information to its firewall rules.
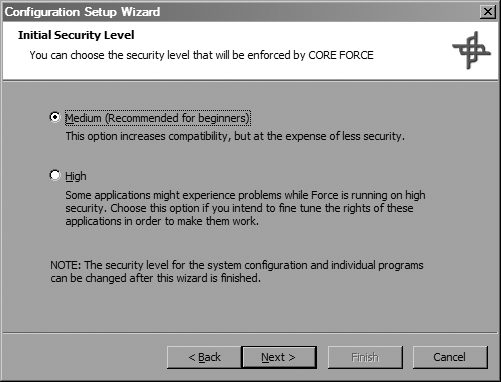
After clicking Next, you’ll be presented with a choice of which security level to use, Medium or High, as shown in Figure 4-11. For now, go ahead and select Medium. You can change this setting and make additional tweaks to your system’s policy in CORE FORCE’s configuration tool when the wizard’s finished.
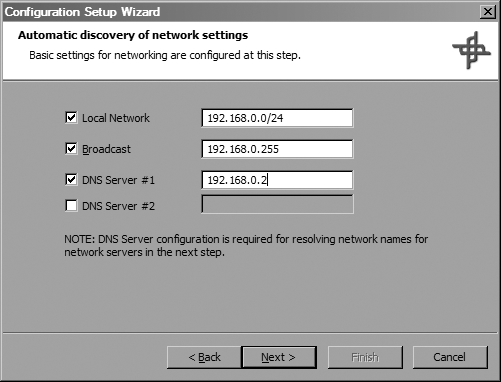
During the next step, the wizard prompts you to enter basic information about your network, as shown in Figure 4-12. This information includes the Classless Inter-Domain Routing (CIDR) address block your local network occupies, your broadcast address, and up to two name servers that you use.
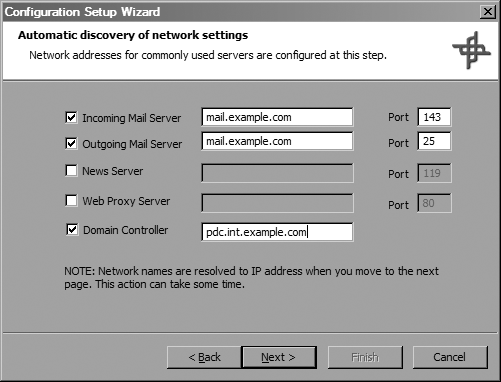
The next step (shown in Figure 4-13) prompts you for information about servers that you use, such as the hostnames of your incoming and outgoing mail servers, your news server and web proxy server (if you have them), and your domain controller.
Items that require a port should have a default filled in for you, but you can change the port used if necessary. For instance, if you use IMAP or IMAP+SSL instead of POP3 for your incoming mail, change the port for your incoming mail server to either port 143 or 993, respectively.
After you’ve entered your server’s information and clicked Next, the setup wizard scans your system for programs for which CORE FORCE has preconfigured profiles. For the most part, these preconfigured profiles limit their corresponding applications to performing only their core purposes. For instance, your email client should be able to connect to your incoming and outgoing mail servers only and, with the exception of saving attachments, it should write files only to certain well-known locations on your system. If someone attempts to exploit your mail client, this setting limits what the intruder can do.
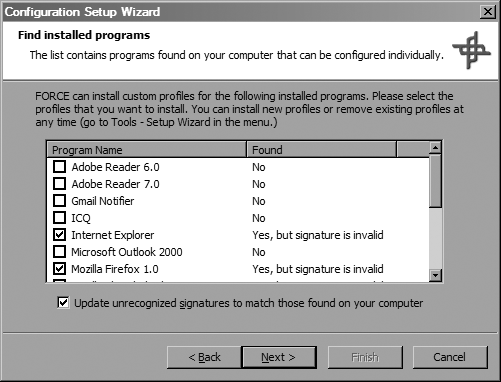
When the setup wizard has finished looking for programs, you’ll be presented with a dialog like the one shown in Figure 4-14.
CORE FORCE adds a checkmark next to any program it locates. You might also see that some programs were found but that their signatures were invalid. Don’t be alarmed about this. CORE FORCE maintains a database of valid program hashes for the applications for which it has preconfigured profiles, and it might display signatures as invalid simply because it does not have the signatures for the most recent versions of programs that are updated frequently (e.g., Internet Explorer and Firefox. You can update CORE FORCE’s database to contain the signatures of what’s currently on your system by checking the “Update unrecognized signatures...” box.
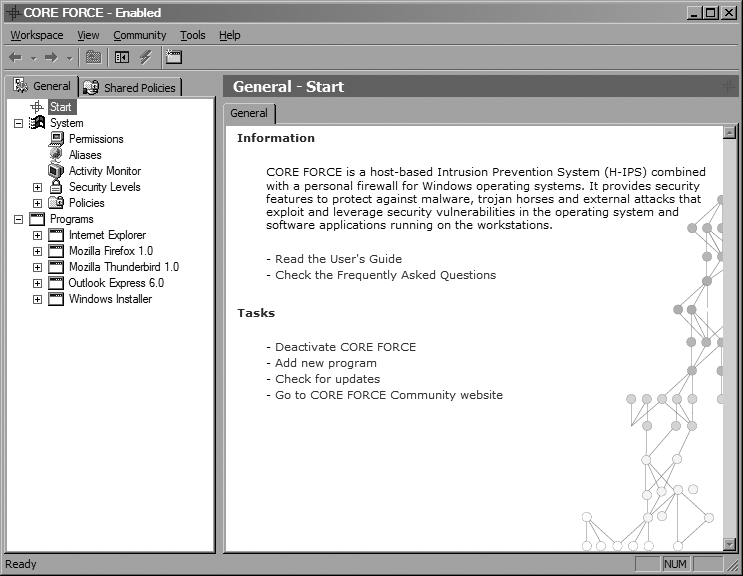
After you’ve finished selecting which profiles to install, click Next to import all of the profiles you have selected. Click Next again, then Finish, and you’re done. CORE FORCE’s configuration interface should appear, as shown in Figure 4-15.
CORE FORCE’s configuration consists of a system-wide default security level and application-specific security levels. In turn, each security level consists of policies that have been assigned to it, such as “Cannot execute from temp,” which define restrictions to be placed on the system or application. Things that can be defined for each policy include firewall rules, Registry access restrictions, and filesystem restrictions.
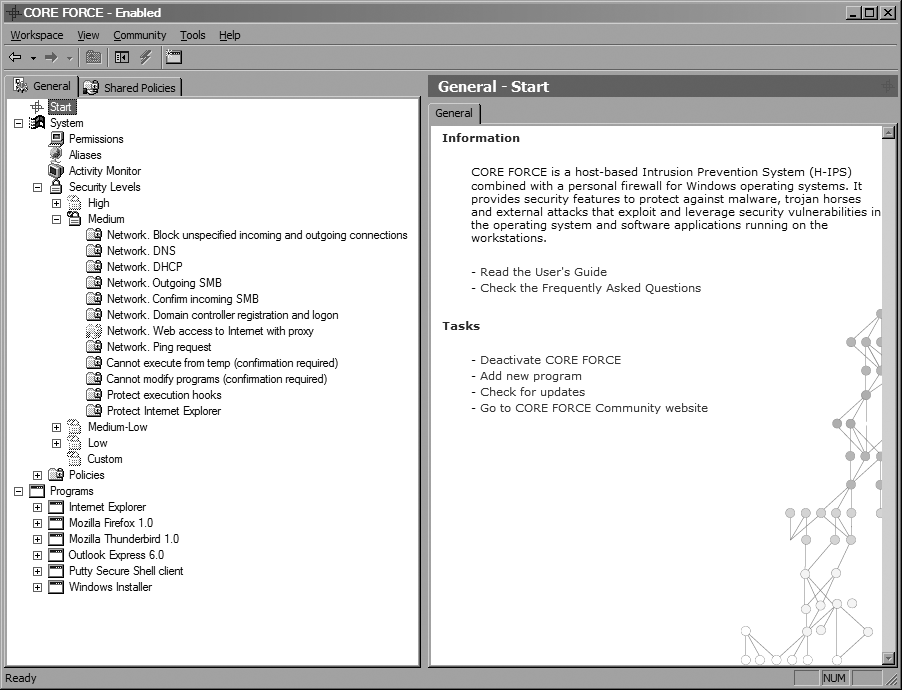
When going through the setup wizard, you selected a security level to use for the whole system. If you want to view exactly what policies a security level has, expand the Security Levels item in the tree view and then expand the security level that you want to examine. Figure 4-16 shows the policies comprising the Medium security level.
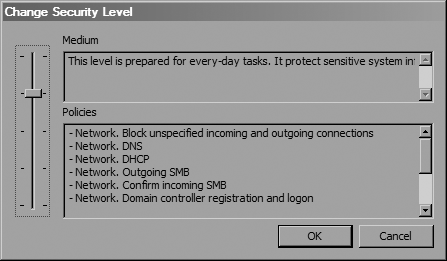
Look over the policies that your current security level enforces. If you decide that you want to change the security level for the entire system, right-click the System item in the tree view and choose Change Security Level. You should see a dialog like Figure 4-17. Use the slider to change the level.
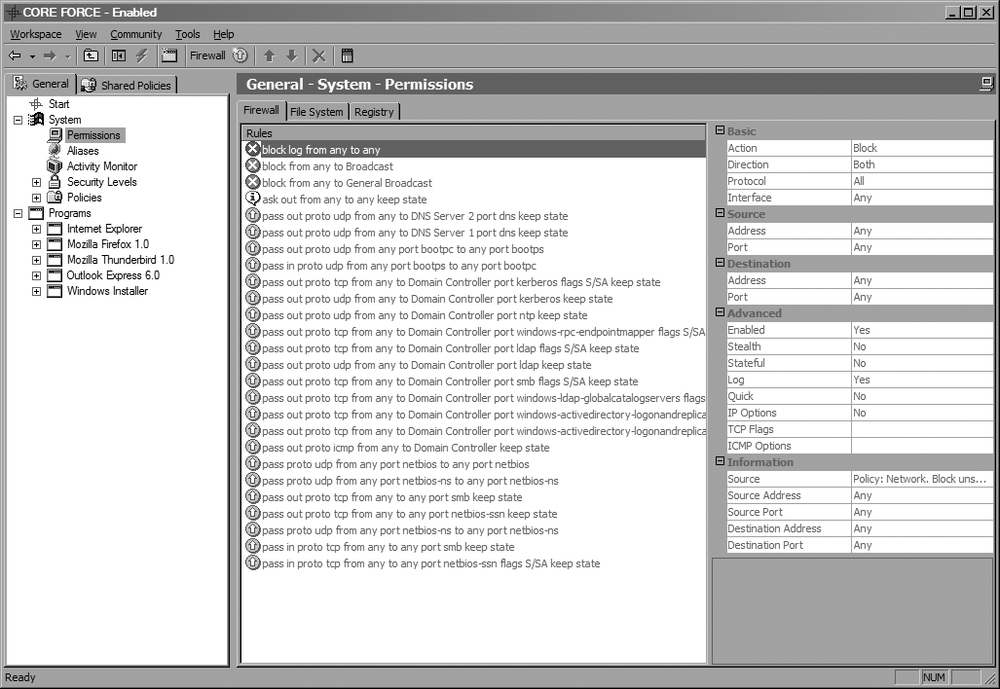
If you want to make the current configuration more or less restrictive, you can modify it at either the system or application level by selecting the Permissions item in the tree view. For instance, Figure 4-18 shows the firewall permissions that are applied to any program that doesn’t have its own settings defined.
To add a firewall rule, right-click within the pane displaying the firewall rules and choose New to insert a rule that allows any packet to pass through the firewall. You can then modify the rule by using the widgets located to the right of the rule list.
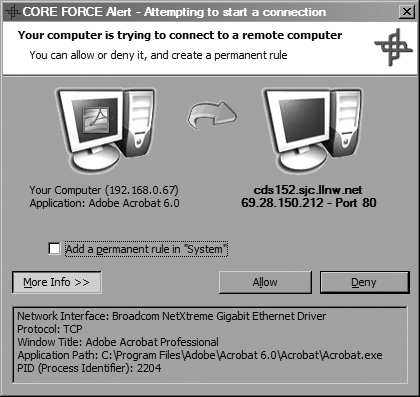
One thing that CORE Security added when porting PF to Windows was a new rule action: Ask. Choosing this action displays a dialog like Figure 4-19, alerting you that an application is attempting to make a connection. From the dialog, you can choose to either allow or deny the connection.
This feature is especially useful for catching software phoning home, but you can also use it to spot an exploited program making network connections that it normally wouldn’t.
As you can see, CORE FORCE is a powerful firewall and system-monitoring package. It provides a great deal of flexibility in terms of which system operations it can track and limit and is very configurable. Unfortunately, there’s not enough space here to cover everything you can do with it, so be sure to take a look at CORE FORCE’s excellent help file.
