5
Warming Up
Essential Pantry Items, Tools, and Rubs, Spices, and Sauces
Preparation is the foundation of good cooking and is especially important when working with fire and smoke. While the term prep applies to being well equipped with regard to tools and materials, it also refers to creating a schedule, getting your mind straight, and building flavor through process. When a meal is going to take upward of twelve hours to cook, you need to have a fair idea of the plot points ahead of time, especially if you’ve got a hungry family to feed or guests to serve. It may sound like a drag to sit down and sketch out in a notebook the timeline of a brisket cook, but you want to know that your food is going to be ready at the time it’s needed—and when barbecuing at home, that’s not always easy to accomplish.
Most of the dishes in this book call for dry brines, marination, air-drying, fermentations, tempering, and the like. These are all simple methods that can be done hours or days ahead, making the day of your dinner quicker and easier. Just because these crucial processes happen well in advance, they shouldn’t be ignored or minimized. And just a tiny bit of early work can drastically improve the flavor and texture of your food and the way it cooks.
Creating a Cooking Timeline
Whether I’m doing a short cook or a long one, I always plot a timeline to keep me on schedule. It is a form of temporal mise en place in which I outline a timed sequence of events from the beginning of a dish to the end, inclusive of everything from shopping and prepping to lighting fires and warming cookers to carryover cooking and resting. A timeline is a road map and an insurance plan if something gets off schedule or I get tired and mentally fuzzy. It allows me to trace back along my path to determine what I have or haven’t done. When you start a cook on one day and finish it on another (or start so early in the morning that it feels like a different day by the time you serve the food), you’ll be happy to have a written plan guiding you.
Since serving the food is what it’s all about, that’s where you start writing your timeline. Just as any restaurant kitchen has prep sheets for its cooks, you will fully plan out your menu and write down all the steps to cooking it, including making a list of the plates, platters, and tongs you need as well as all the ingredients for the cook. These are the puzzle pieces that must be assembled correctly for everything to go off without a hitch. For instance, if you’re planning a brisket cook, you would ask yourself the following questions: How long will it take to cook that brisket? How long to trim it? At what time do I hope to wrap? How long will the carryover be? If I get behind, where can I make up time?
Begin with the moment you want to eat and work your way backward. So if you want to sit down to brisket with friends at 6:00 p.m., you might factor a two-hour rest (depending on conditions) starting at 4:00 p.m. That brisket would come off the cooker at 4:00 p.m., perhaps after a three-hour cooking window following wrapping. That means you’ll wrap in the 1:00 p.m. range. Wrapping is often performed eight to nine hours after putting the brisket on. So, working back from 1:00 p.m., this means the brisket needs to be on the smoker at 4:00 a.m., which means you need to be up and firing up your smoker by 3:00 a.m. And that means trimming and rubbing it at 3:00 a.m., although I almost always trim it the night before and pull it out of the fridge to temper and rub when I get up. You should also probably factor an additional hour somewhere along the line as a safety net. For some extra guidance, I might jot down the projected temperatures that I want to hit at key points along the way, just as I watch for mile markers on a road trip.
In the end, your timeline will look something like this:

Doing a timeline for every dish—or, at least, every major one—may seem like an absurd amount of organization but, trust me, it really helps. If you get into the habit of doing this, you won’t end up like Jordan, who often admits he should have lit the coals earlier as he and his wife, Christie, and their dinner guests sit down to dine at 9:30 p.m.
Essential Pantry Items
To shore up your prep and prevent unexpected, time-consuming hiccups, like having to run to the store for more salt or oil, keep your pantry well and simply stocked. I don’t use much in the way of spices or herbs. I like the flavor of the food to merge with the flavor of the fire—and leave it at that. As a result, my pantry is exceedingly basic, made up mostly of oils, vinegars, salts, lemons, garlic, fermented goods, and some spices. Here are my go-to items.
Apple cider and other vinegars Apple cider vinegar is so central to my process that I buy it by the jug and keep a spray bottle of it on hand, whether I’m cooking in the smoker, on the firepit, or on the grill.
That said, I love the flavors of many different vinegars, so I keep red wine and white wine versions around, as well as sherry, balsamic, and especially rice.
Black pepper I use pre-ground 16-mesh (coarse) black pepper in our rubs and also keep a grinder handy (the incredible Männkitchen Pepper Cannon) for freshly ground black pepper.
Citrus Acidity is key to making your dishes pop, so be sure your citrus bowl is always stocked with fresh lemons, oranges, and limes. I use the zest and peel of citrus in lots of dishes and preps. But, of course, the juice is also crucial. After you remove the zest from a citrus fruit, wrap up the fruit and keep it in the fridge so you can also use the juice later.
Fermented foods Sauerkraut, kimchi, and other naturally fermented foods are a constant around the house, as these condiments add instant complexity and contrast to whatever’s coming off the fire.
Garlic A miraculous little seasoning, fresh garlic not only can last unrefrigerated for weeks at a time (making it convenient to store) but it packs a huge punch, so use it in moderation. Yes, peeling garlic can be a chore, but pre-peeled cloves never have as much flavor as what you break off a whole head. If using it uncooked, tempering freshly minced garlic in vinegar or citrus juice for 10 to 15 minutes takes the edge off.
Grapeseed oil This is my oil of choice for most cooking needs because it has a high smoke point (good for cooking at very high temperatures) and neutral flavor. I keep it in restaurant-style squeeze bottles for mess-free delivery.
Hot sauce I love to make my own hot sauce, but I also keep bottles of other sauces around. Forever on my shelf are Crystal Hot Sauce and Yellowbird Jalapeño sauce (a delicious local product). I like these not just for the spice but also the acidity.
Pickled items Continuing on the theme of acidity, it goes without saying that pickles of all shapes, sizes, and kinds play a huge role in my diet and in my pantry. They are great for garnishes, side dishes, condiments, and snacks.
Salt Kosher is my go-to cooking salt. The granule size and coarseness make it easy to handle when pinching and dusting and keep me from oversalting. Morton Coarse Kosher Salt is denser than Diamond Crystal Kosher Salt, so be sure you’re calibrated to whichever one you’re using.
For finishing salt, I use something along the lines of Maldon Sea Salt Flakes or Jacobsen Salt Co. Pure Flake Sea Salt. These are both beautiful, crunchy, mineral flakes that look and taste delicious, offering pleasant minerality and a soft, not-too-sharp flavor.
Spices I don’t keep a ton of spices around, but they tend to include chile powders, paprika, and other savory items that deliver a little kick. These also would include rubs and seasonings such as Lawry’s, which I mention on this page.

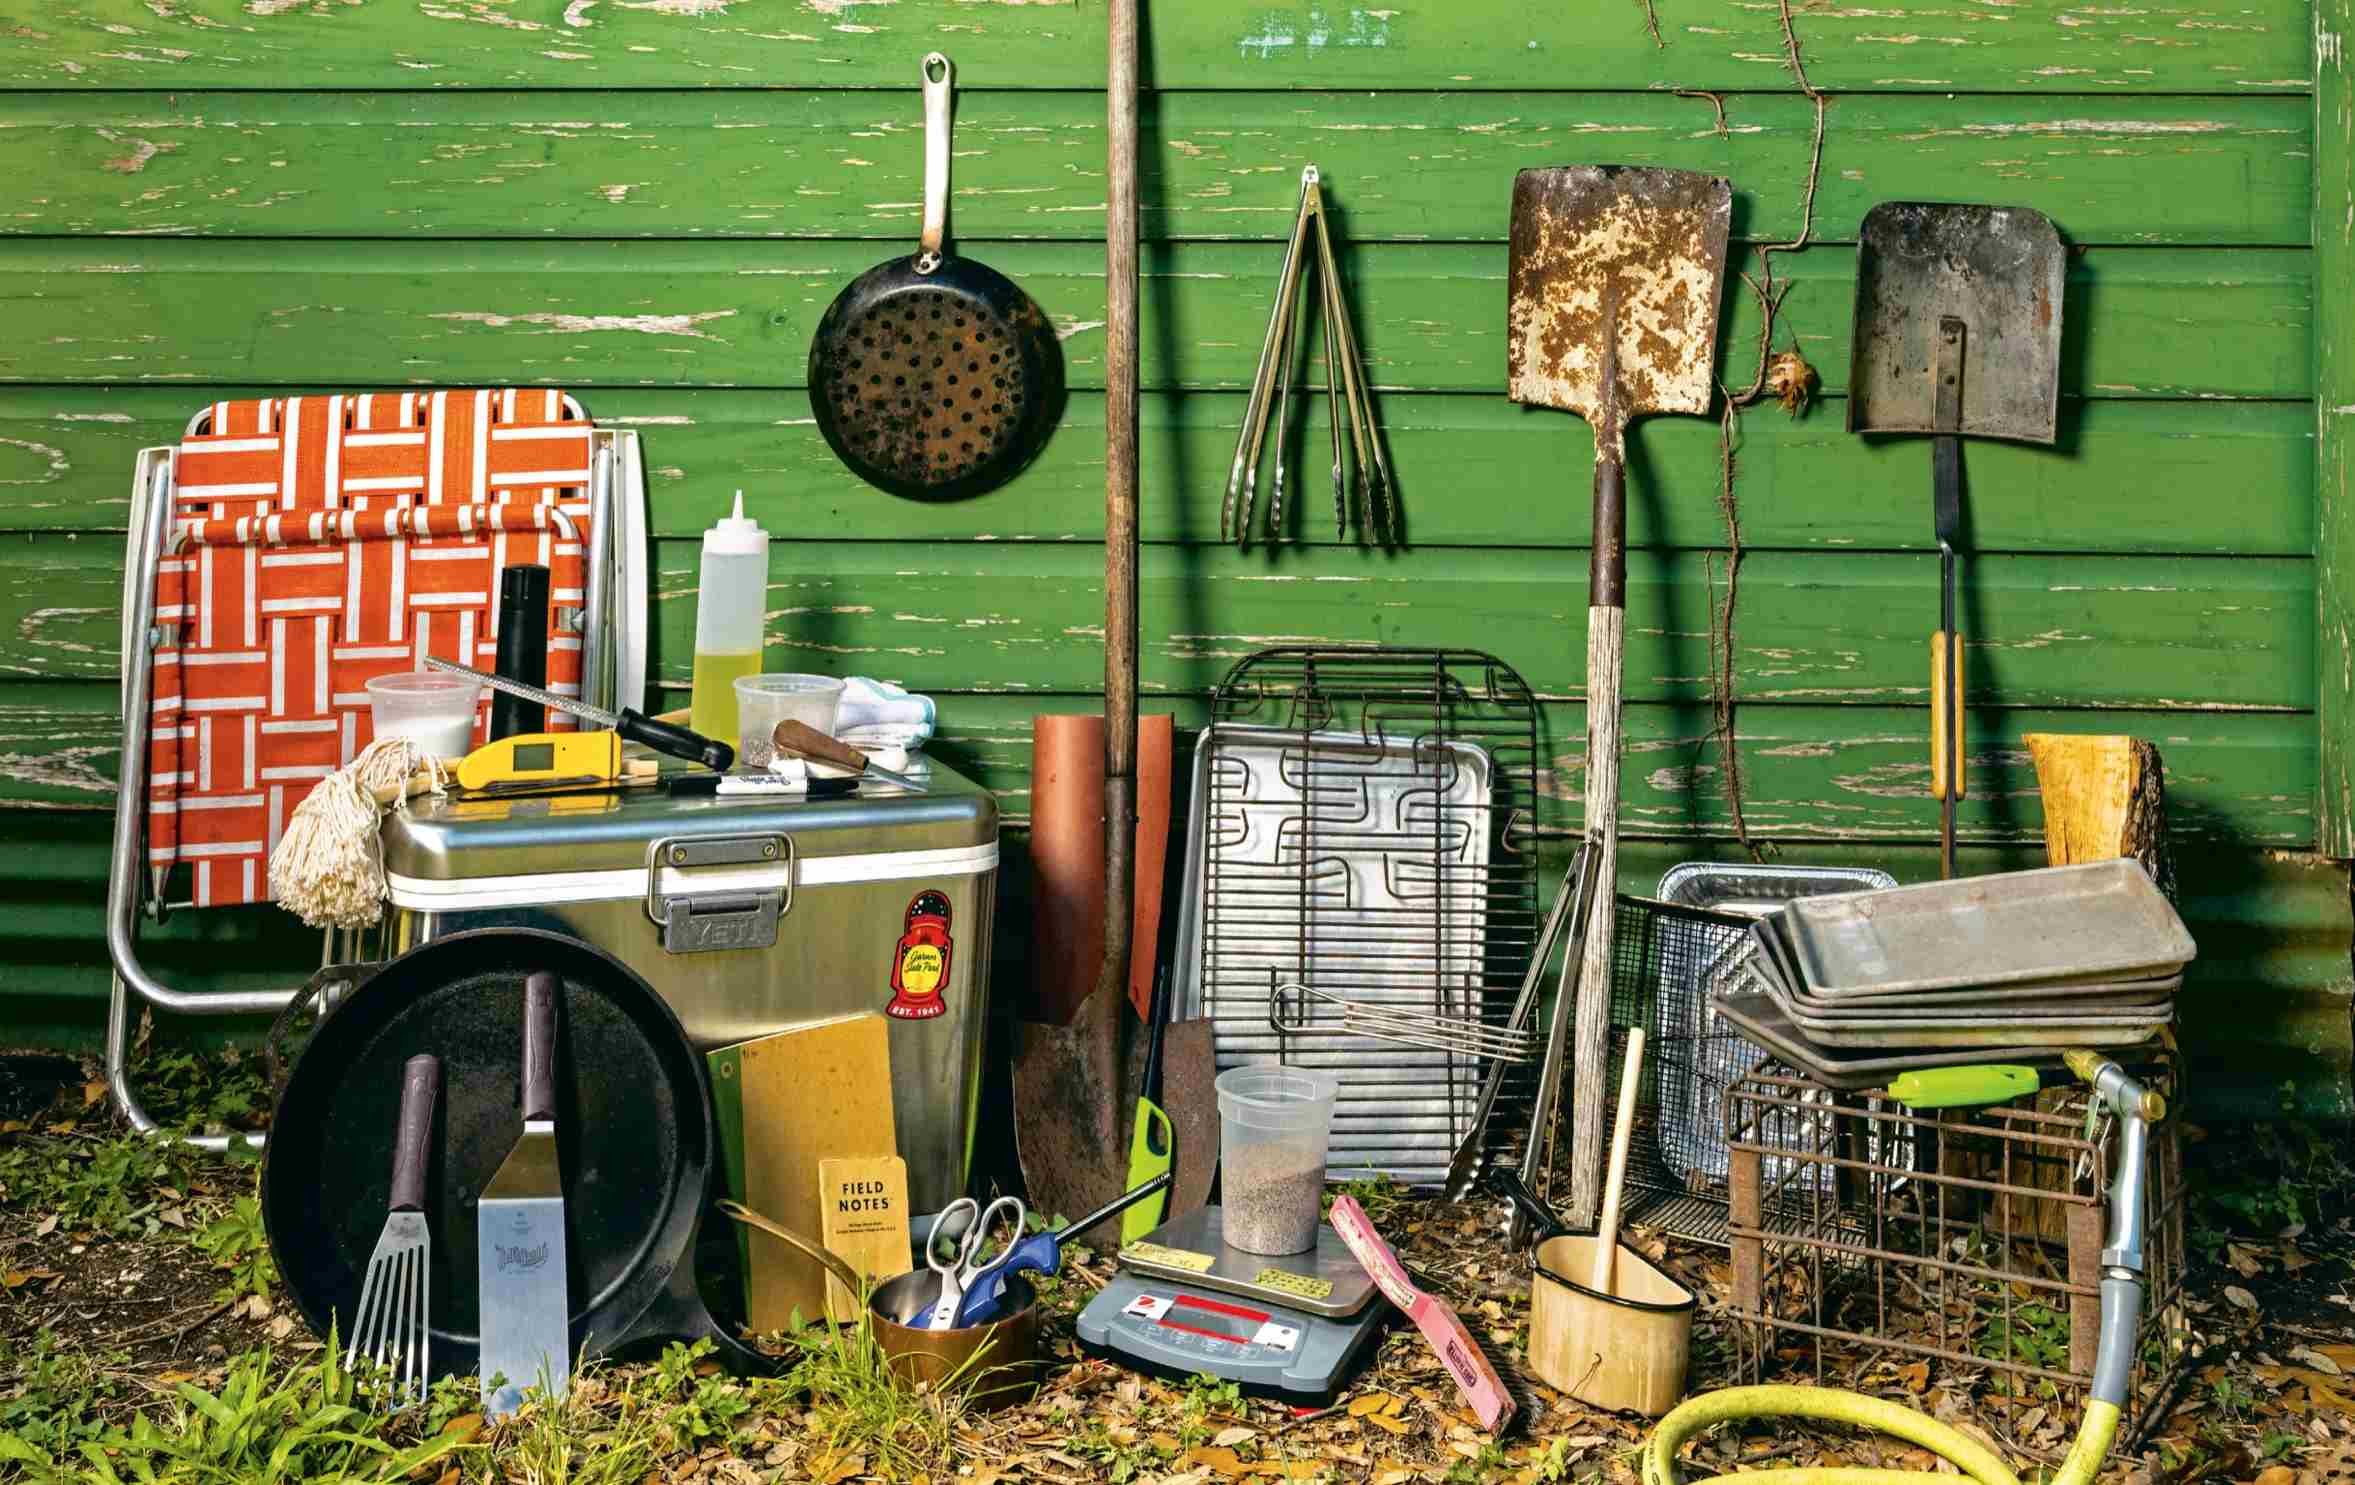
Cooking Tools
I love kitchen gadgets—utensils, knives, pots, pans, thermometers, scales—everything. My ever-expanding collection of kitchen equipment is the bane of Stacy’s existence (well, one of the banes, at least). My excuse is that as a restaurant owner, cook, recipe developer, and constant answerer of questions, I need to be informed. But believe me, I get it when Stacy exclaims, “Maybe we don’t need forty sheet pans at home.”
Confoundingly, and to her point, I also believe that you need very little stuff for cooking. Some pieces of equipment can make your life easier and your cooking a little more refined and accurate, but you can also work around a lot of these gadgets if you don’t have the space or the money…or you do have a significant other who deplores (kitchen) clutter.
So please view the following information through two lenses: (1) the things you need and (2) the things you might want. I try to make clear which items I put in which camp. But some tools—like smokers and grills, tongs and grates—are simply nonnegotiable.
Cast-Iron/Carbon-Steel Pans Having durable and heat-resistant pans that you can throw on a fire or the coals are essential for all kinds of fire cooking. Sometimes you want to use the heat and a bit of the smoke generated by your fire while enjoying the ease of cooking in a pan. Also, even if you’re cooking on a fire, you don’t want every item to taste of the fire. The open-flame grill pan with perforations by Made In is very versatile. You get the best of both worlds—a sear from the steel plus the kiss of the fire—and it keeps your ingredients from falling into the coals.
Chair If you prepped well, you won’t be scrambling around the whole time you’re cooking. After all, barbecuing is supposed to be relaxing and enjoyable. You’ll want to find moments here and there to take a load off, rest those dogs, and enjoy the outdoors while contemplating the weather, reading a magazine, or just daydreaming. So make sure you have a comfy outdoor chair, plus a few extras for a friend or two to relax in—everyone wants to sit by a fire.
Cold Drinks and Ice Chest Don’t mind if I do. An ice chest full of cold beverages is essential to your cook, unless it’s a frigid midwinter evening. But let’s imagine that, most of the time, the conditions are peachy, and you’ll want refreshment whether you are quick-searing steaks or nursing a brisket for the long haul. My only caution: apply moderation. Be wary of the sneaky drinks, such as high-ABV beers, like IPAs, and especially well-made cocktails that magically disappear in seconds. This approach is, to a large degree, how I became a lager or pilsner or light ale guy over time. I love a crisp and refreshing beverage that has just enough alcohol to ease the passing of time without me forgetting something, making mistakes, or falling asleep—all of which can easily happen when you’re planning to be up a good part of the night cooking for the next day.
A good ice chest is a cold drink’s bestie, of course. I’ve been using YETI brand since it first came on the market, and to my mind, no chest offers a better combination of form-factor, insulating power, and lightweight mobility. YETI chests are expensive, however, and the fact is, any cooler will do—even a cheapie that’s not the best quality—as long as you keep it filled with fresh ice.
Cook’s Notebook Keeping a notebook to record timelines (see this page), recipe ideas, shopping lists, and everything that goes into a significant cook is essential. I never used to date my entries, which I regret now. Sometimes I look back on twelve years of recipes and the details of when and how I developed a certain method feel really valuable. So, as always, don’t lose track of time.
Fish Spatula No other spatula is thin enough to slide under a delicate skin to unstick it from a hot pan or grill surface without mangling the fish. But this is also a hardy enough tool to wonderfully flip all kinds of foods besides fish.
Flashlight I’ve got decent outside lighting for my setup, but there are times during a late-night cook when shadows get in the way. Having a good flashlight handy is always wise.
Headlamp
I’ve never seen Aaron wear a headlamp, but my outdoor setup is not as refined, nor is my technique and timing as immaculate, and I often find myself finishing something in the dark that was meant to be done long before. For this reason, I find a headlamp to be invaluable. After a bit of shopping around, I chose the Nitecore NU25 for its brightness but especially for its wide field of illumination, which is helpful if you have a few things going on at the same time. —Jordan
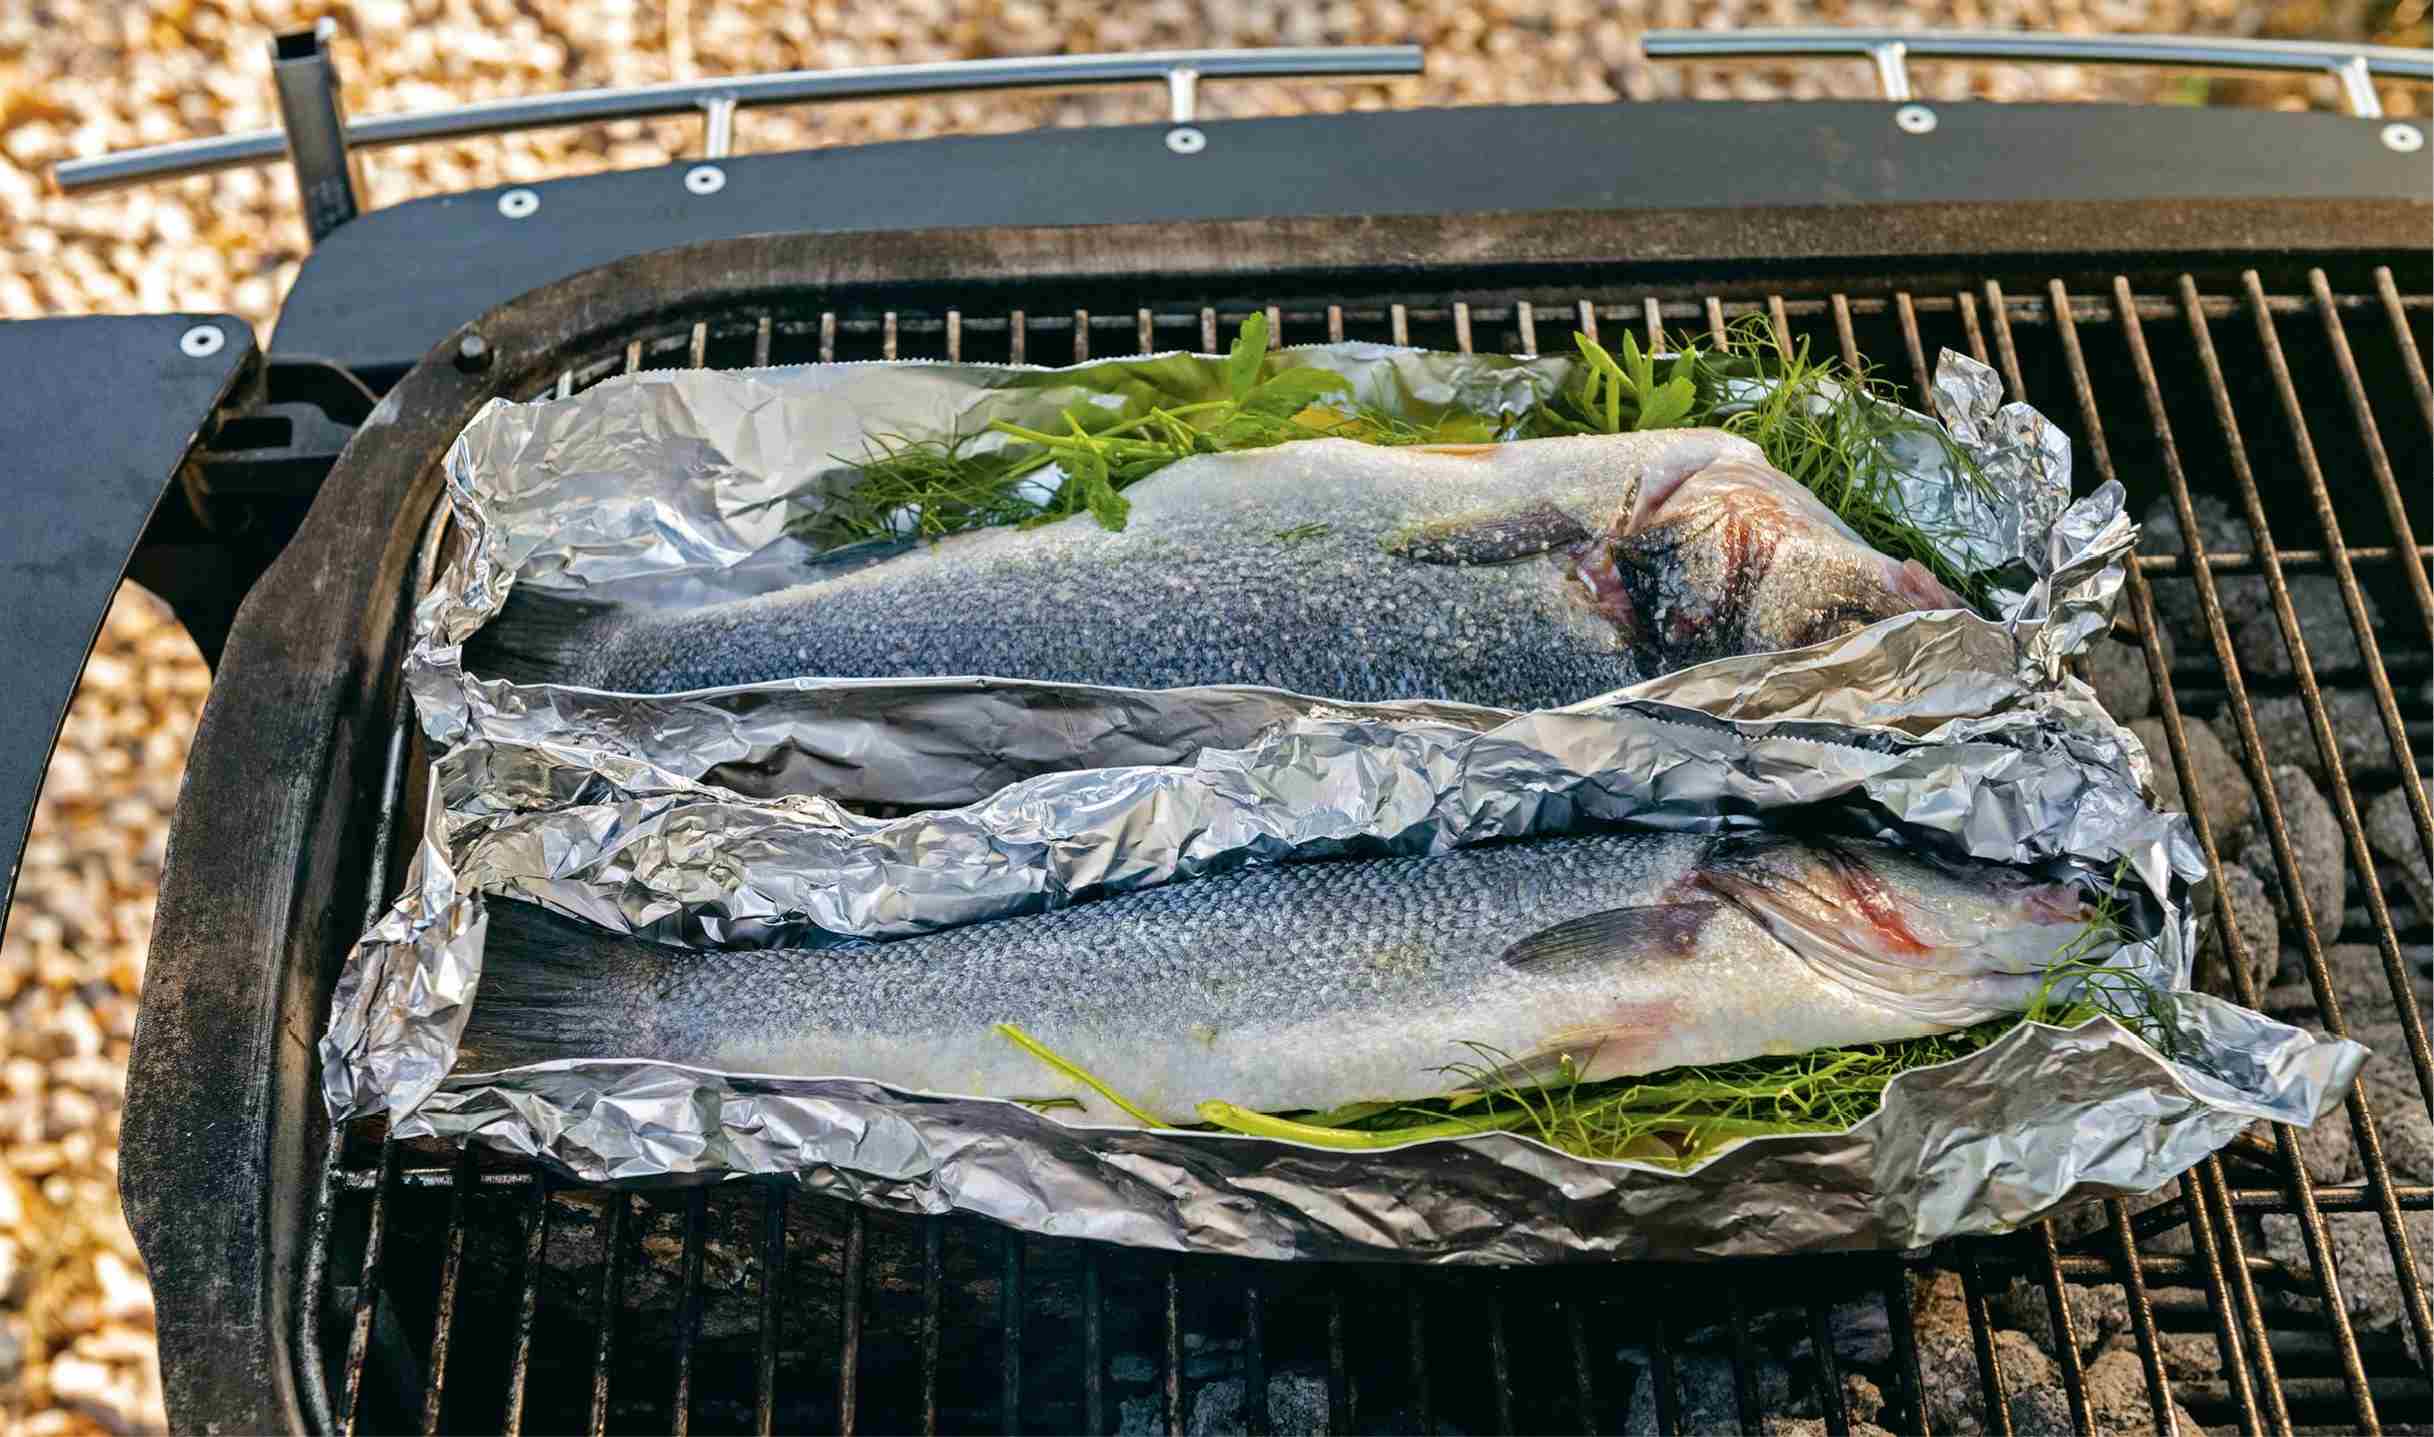
Foil Surely you already keep a good supply of aluminum foil around your house. I get the industrial-size rolls from a restaurant supply store. All the standard household uses apply, but foil can also be fashioned into a durable, malleable, heat-conducting cooking vessel. There’s no better way to get the most out of your fire than to turn a piece of foil into a boat for fish or into an envelope in which to seal vegetables and other ingredients to steam away in their own juices.
Grill/Fryer Basket Most grill baskets are small, weak, and overpriced. That’s why I go to a restaurant-supply store and buy fryer baskets of all shapes and sizes. For vegetables and smaller items that might easily slip through the bars of the grate, a tight-mesh grill basket is a really handy thing. It’s not expensive, but it also doesn’t last too long, so don’t worry if you have to replace it once a year or so.
(Extra) Grill Grates The idea that the sooty black crust that forms on the grill grate adds “flavor” or “soul” each time you cook on it is not only a myth but also positively detrimental to your cook. The only flavors a dirty grate might add to your ingredient are burnt and carbonized along with a sooty, ashy color. That said, a used grate is hard to clean. If you’re entertaining or just tired after a long day, you might not get to washing your grate until the next day (or, let’s be real, the next week or…never). While it’s worthwhile to put a little elbow grease into keeping those things bright and shiny, it’s also okay to replace them once they get beyond recuperation.
Kitchen Scale I’m a big believer in the accuracy, simplicity, and scalability of measuring ingredients by weight, not volume, so a good kitchen scale, like the Ohaus, is a high-priority item. After all, a cup of brown sugar will have varying weights depending on how tightly it’s packed. It’s really easy to build recipes such as sauces and rubs on a scale. Just put a bowl on the scale and tare it, which returns the reading to zero. Add your first ingredient, tare the scale again to return to zero, add the next ingredient, tare again, and so on. This is a beautifully simple and supremely accurate way to cook!
Knives While it’s true that any old knife will do most of the time as long as its decently sharp, there are certain pleasures and advantages in being a bit of a knife geek, which I am. I simply find pleasure in owning and caring for an exquisite, handmade tool that’s been carefully considered and crafted to have a certain balance, weight, and action. When you use such a knife, you can feel all of these qualities: the way it accurately, cleanly, and effortlessly slices and how it feels connected to your body so you don’t get sore. A good knife makes prepping and serving a joy, not a chore—like a jazz drummer having the right drumstick.
I’m on record for liking a mass-produced, machine-made Dexter Russell serrated knife for slicing brisket, and I stand by that. It’s excellent at getting through super-tender, jiggly brisket while keeping the meat and bark intact (if you do it right). I also use that knife for all kinds of other tasks, such as breaking down prime rib.
There is much ado about Japanese versus Western knives, and I think both traditions offer incredible products. Japanese knives are typically thinner, made of harder steel, and have a single bevel (sharpened on only one side), which allows them to slice more cleanly. They are better for precision work and pure slicing, the most common techniques used in much of Japanese cooking. Western-style knives, such as those made by Wüsthof or J. A. Henckels, are heavier, made of softer steel, and have two bevels (both sides are sharpened and come to a V-like point). This style is considered more versatile—it’s a capable slicer, but it’s also good for chopping, scraping, and crushing, which are more usual in Western cuisine. In a Western kitchen, it’s common to have one or two all-purpose knives that can perform most tasks so you don’t have to constantly switch blades. By contrast, Japanese cooks may constantly swap among a number of highly specialized tools.
Although you can find plenty of examples of pure styles, many manufacturers produce blades that blend or overlap the two traditions, such as Japanese-made Western chef’s knives that apply the best of the Japanese craft to the Western double-beveled design. These hybrid knives are the kind that I use most often at home.

Knife Sharpening
When my knives get a little dull, I sharpen them, and you should do the same. A sharp knife is a pleasing knife. When you have a high-quality blade, you need a quality sharpening protocol that takes sharpening shortcuts (like the inexpensive, little plastic tools) out of the equation.
First, you need a whetstone. While many sources say you need a wide range of grits, I keep just one stone with 1,000 grit on one side and 5,000 grit on the other. I bought a rubber holder from Korin, a knife shop in New York with an online store, to secure the stone to the countertop. I often ignore the instruction to soak the stone in water for thirty to sixty minutes before using, because I usually don’t know an hour ahead of time that I’m going to want to sharpen a knife. Instead, I keep a bowl of warm water handy and repeatedly splash water on the stone as I run the knives across it. It is important to hit the right angle as you rub the blade on the steel, a skill that takes practice and attention. Don’t forget to press down hard enough that you actually grind the metal.
For the most part, I sharpen on the 5,000-grit side of the stone only. It’s a fine grain that is perfectly good for honing and maintaining the edge of a knife that’s been well cared for. Occasionally, I may take a few swipes on the 1,000 grit if a knife really needs some help, but that’s rare because I keep my knives in good condition. If I want a superfine edge, I’ll finish it on a piece of printer paper. Some people use a leather strop, but paper works just fine. Many chefs use a steel, though I never do. If you keep your blades sharp, you really don’t need to.
Some of My Favorite Knife Makers
Chubo Founded by an American, this company is a retailer and producer that commissions craftspeople across Japan to create blades while also curating a diverse selection of quality Japanese knives. Its website is very informative about the various styles of Japanese blades.
MAC Much more affordable than Nenox and of amazing quality, MAC is a Japanese brand geared toward Western styles. However, the edge has a bit of a Japanese pitch to it, making it a more acute slicer than most Western-style blades.
Misono This is another terrific and less-expensive Japanese knifemaker. These sturdy, classically shaped knives (many incorporate excellent Swedish steel) really hold their edge. The ten-inch chef’s knife in carbon steel is Jordan’s main blade.
Nenox These are my go-to knives. Nenox is a line of Western-style knives made by Nenohi in Japan. Unfortunately, they’ve become much more expensive than when I first bought them years ago—and they were expensive then. But they’re amazing to work with. Their proprietary alloy of stainless steel is durable and keeps its edge but is soft enough to sharpen easily at home. The weight, balance, and feel of the knives are incredible. If you’re awash in bitcoin money, consider these!
STEELPORT These are very cool, exceptionally crafted knives made from American materials in one of my favorite cities, Portland, Oregon. Founded in 2020, STEELPORT is a fairly new company. The knives are not discernably Western or Japanese in style. They combine elements of many knife-making traditions in original and highly functional tools.
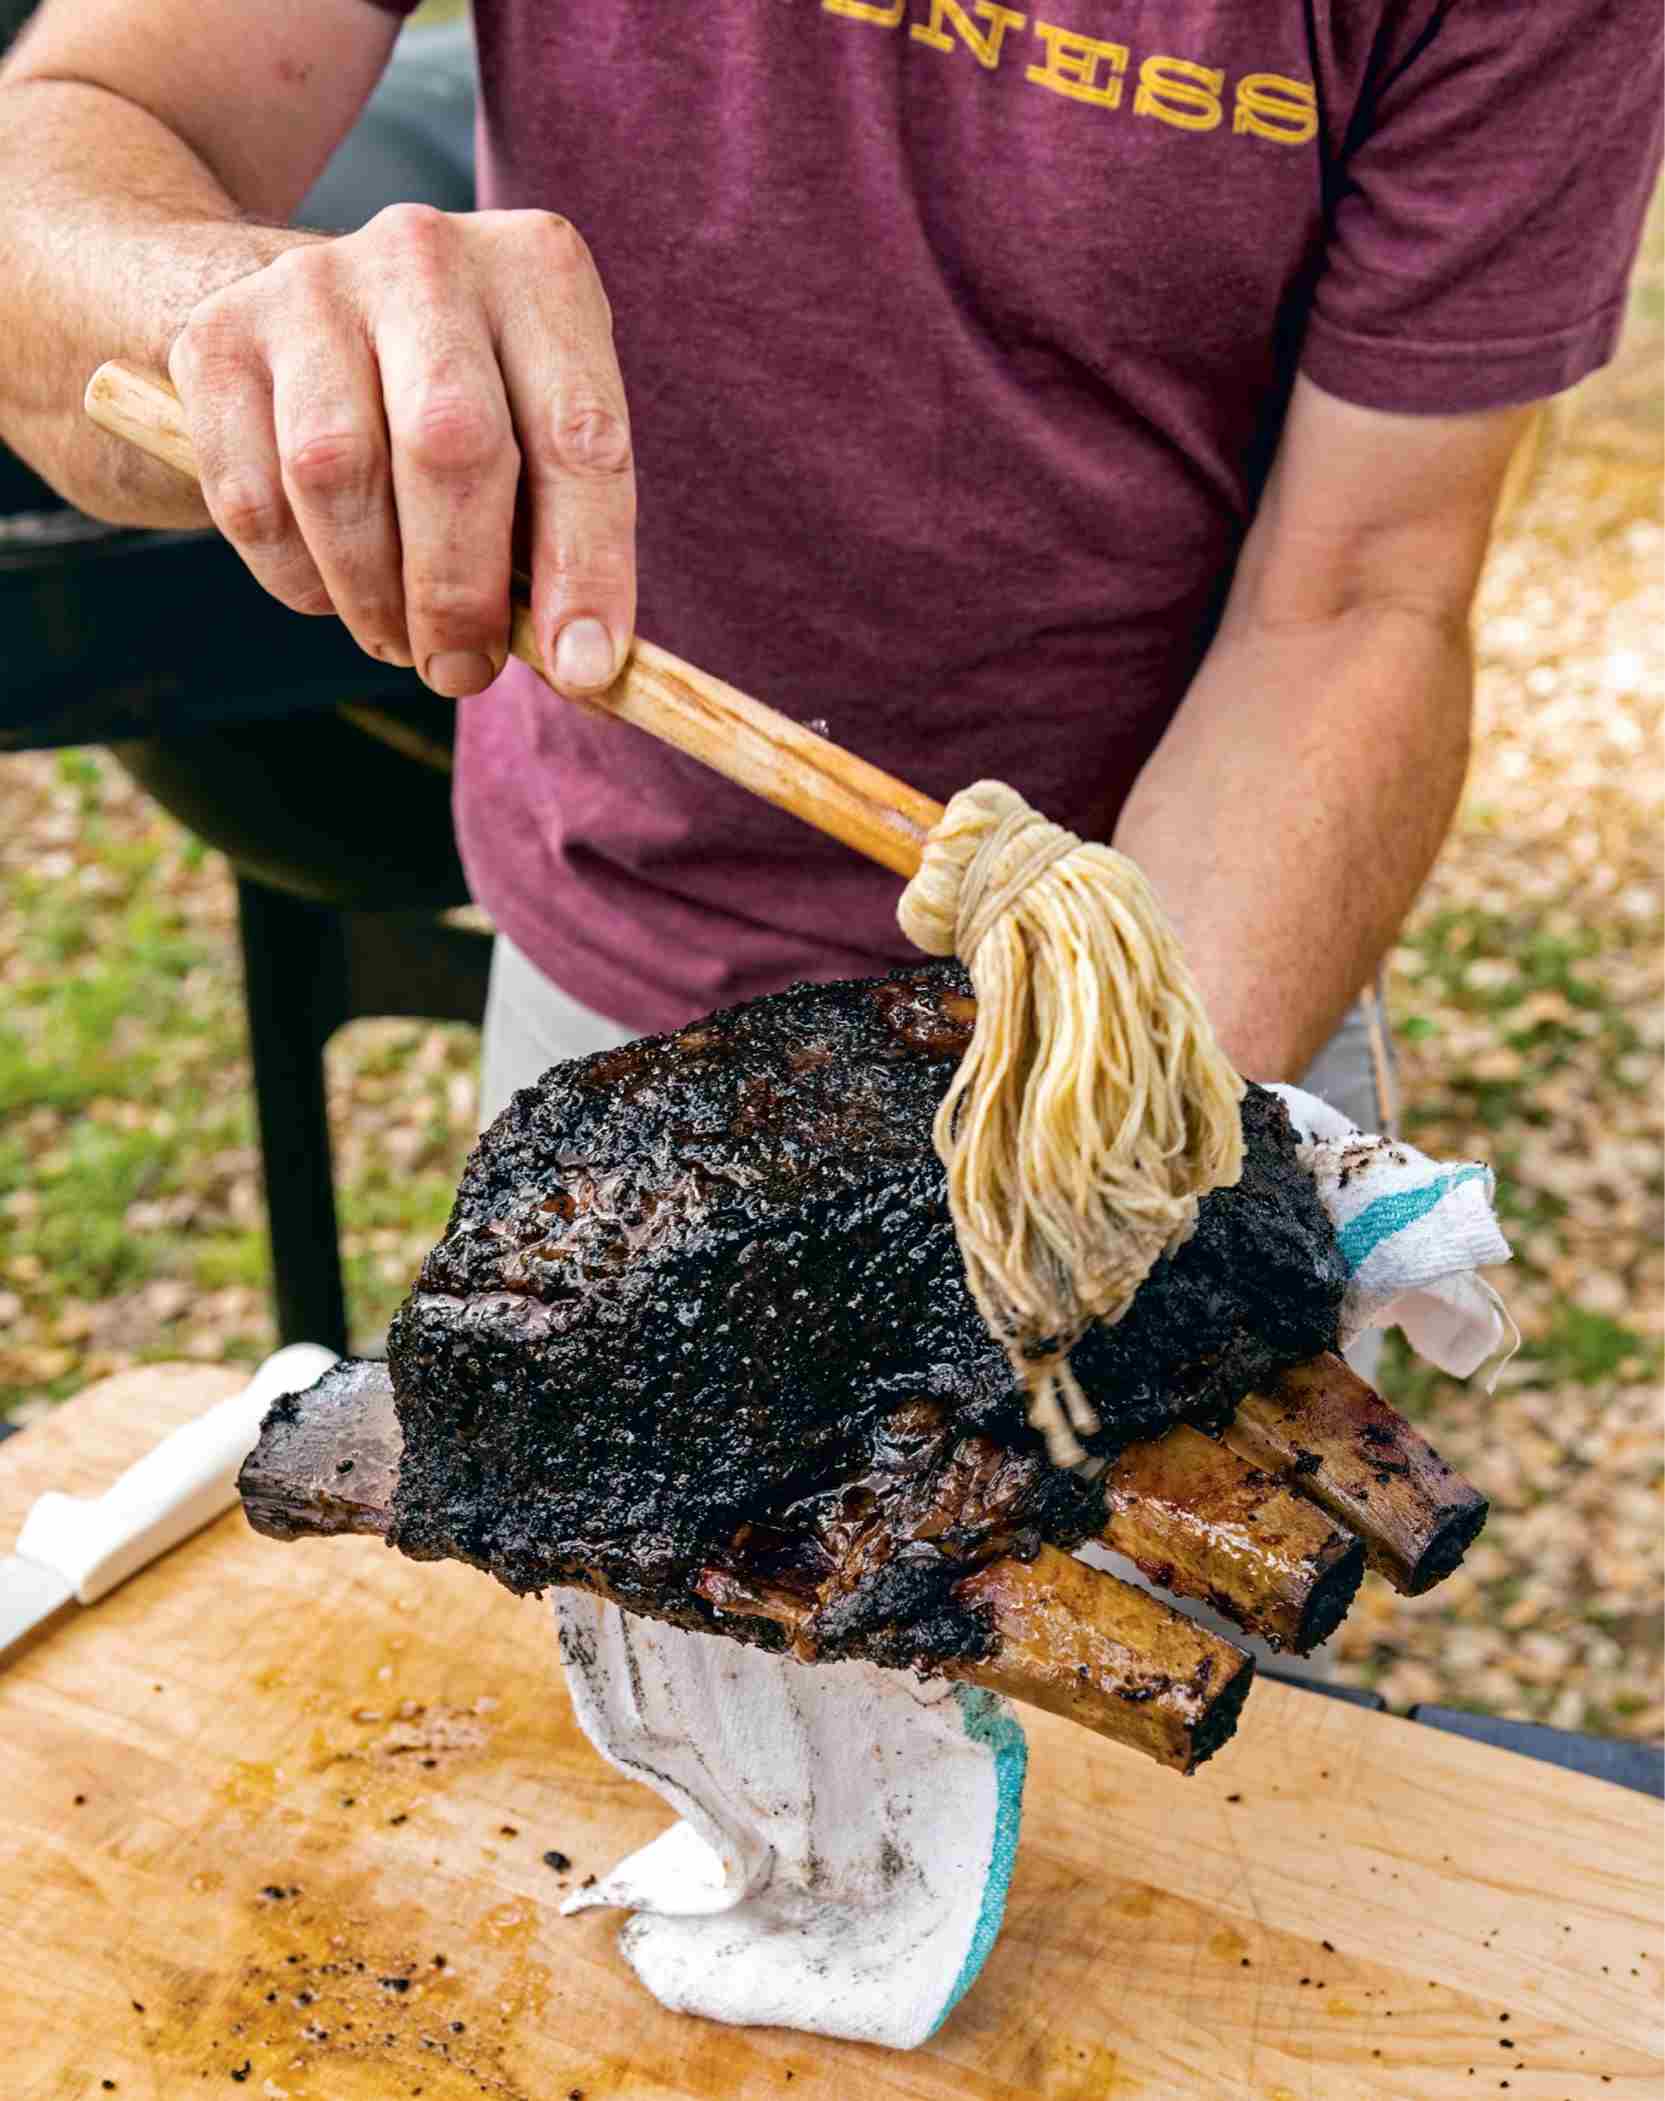
Mop The word mop applies to both the tool and the mixture of ingredients that the tool adds to the food. In this case, I’m talking about the tool, which is a mini-version of what a janitor may wield while cleaning a floor. You could use a spoon for the purpose of applying a (ingredient) mop, but it tends to be less thorough. You can make your own mop from an old towel or other absorptive fabric, or you can buy a dedicated tool.
It’s possible to use a standard kitchen brush to apply a mop, as long as you use the brush as a mop and not a brush. That is, don’t let the brush (tool) touch the meat because you don’t want to rub any sauce off or disturb the bark. So use a mop to apply a mop, but if you use a brush, never brush!
Pepper Grinder Black pepper and smoke were meant for each other. The crackling energy in black peppercorns echoes and intertwines with the snap and hiss of a live fire, so having a good pepper grinder is essential. For me, there is only one grinder to rule them all: the Männkitchen Pepper Cannon. Rarely does a tool rise above all others in its field but, as a fan of quality craft and design, I appreciate this object. Its build, versatility, and functionality are all exceptional. Yes, it’s expensive, but if you grind a lot of pepper, and expect to do the same in the future, you’ll appreciate the investment.
Note: In barbecue, black pepper interacts beautifully with fat, sinking in and almost merging to form the bark. However, on briskets, I don’t use freshly ground pepper. I instead prefer a pre-ground pepper that has aged and mellowed a bit (see this page).
Rags and Towels As with tongs and beer, so with rags and towels: you can never have too many. Wait, what? A piece of foldable cloth is a magical implement, good for everything from cleaning up spills to grabbing heavy slabs of meat to picking up hot irons or wiping off a knife. Just buy a pack of twenty-five. You can launder and reuse them until they fall apart, and if one gets soiled beyond repair, it’s not a big deal to toss it.
Sheet Pans and Sizzle Platters I keep stacks of full-, half-, and quarter-size sheet pans around to serve many functions: as a plate for drying out a steak in the fridge, to transport items between the kitchen and the outdoors, as a baffle in a smoker, and to receive freshly cooked items and their drippings. They are as tough as nails, both freezer- and oven-friendly, and very easy to clean.
The same can be said for sizzle platters, which are little steel or aluminum dishes that you may have seen in restaurant kitchens. These can be purchased inexpensively at a restaurant-supply store and serve much the same function as sheet pans. They’re smaller but just as tough and will happily sit under a broiler. I’ve even been to sophisticated restaurants that serve food on them!
Spray Bottle This is not intended to cool you off on a hot day, but that could be pleasant unless it’s filled with apple cider vinegar, as mine often is. I usually have a couple of spray bottles, one containing vinegar and the other water, within reach. Spraying your ingredient at the end of a smoke, before it’s taken out or wrapped, moistens the exterior, extending the time the food can smoke and helping it cook to just the right moment without drying out.
Thermometer I’m an instant-read-thermometer junkie, especially the model called Thermapen, which I heartily endorse. It’s the most expensive thermometer out there, but also the quickest, most accurate, best designed, and easiest to use. I always have at least two, if not three, on hand.
A good digital meat thermometer won’t really help you determine when brisket or ribs are perfectly done, because doneness on those cuts is somewhat independent of temperature. But knowing internal temperatures provides useful information along the way. A thermometer is also invaluable for checking doneness on such shorter-cooking items as prime rib, tomahawks, pork steaks, poultry, and fish. The speed of the instant-read function is crucial because you only want to have the smoker door open for a very short time while cooking.
There are also ingenious options for checking temperature (connected via Wi-Fi to your phone or an external unit) where you never even have to open the smoker lid. For instance, we tried the popular MEATER device and liked how one end of the thermometer goes into the meat and the other end senses the ambient temperature around the meat. It also tracks the temperature readings and charts them over time for a quick record of your cook. Although the MEATER is very clever and useful, I am usually staring at fire, so pulling out my phone to open the app every time I need to check a temperature is highly inconvenient. And anyway, I think I’m set in my ways, enjoying the simplicity of an old-school (digital!) thermometer.
Tongs In an interview with Bon Appétit magazine, Marie Kondo, author of The Life-Changing Magic of Tidying Up, answered a query about keeping one’s kitchen neat by saying, “Most people have too many tongs!” My response is “Can you ever have enough tongs?” (Stacy’s response: “Do you really need all these tongs?”)
But seriously, I use tongs constantly when I’m cooking outside. I have different sizes, from small ones for precision jobs to extra-long, heavy-duty ones. I use them to turn food but also to reach into a fire and grab a burning log. Indeed, on every cook, I have one pair for handling things inside the smoker or on the grill and another pair for going right into the firebox to arrange and rearrange the architecture of coals and logs.
I’ve found that the extra-long, heavy-duty tongs from a restaurant-supply store are pretty good. But, gee, wouldn’t it be cool if someone made some great ones to their own specs? (Hmmm….… )
Worktable When you’re plotting out your outdoor kitchen, be it a bougie patio affair or a makeshift setup in the dirt around a campsite, do yourself a favor and plan for a table or other elevated, flat working area. Just as counter space always seems to be in short supply in a home kitchen, it’s in even higher demand outdoors where ingredients are going on and off grills and tools, sauces, mops, sprays, seasonings, towels, drinks, kids’ toys—you name it—are looking for a spot to rest. When I go camping, the first thing out of the truck is a folding table. I recommend you do the same and set up either a temporary or permanent work area at your house.
Building Flavor
On weeknights, or even weekends, when you’ve been out all day and need to get dinner ready in a hurry, having a well-stocked cupboard of rubs, condiments, and sauces speeds the delivery of tasty, umami-rich meals. You can buy this stuff or you can make your own, customizing flavors and spice levels to your taste. The great thing is that they last a good long time, so a little effort up front can mean big time savings later on, not to mention the delicious satisfaction of having done it yourself.
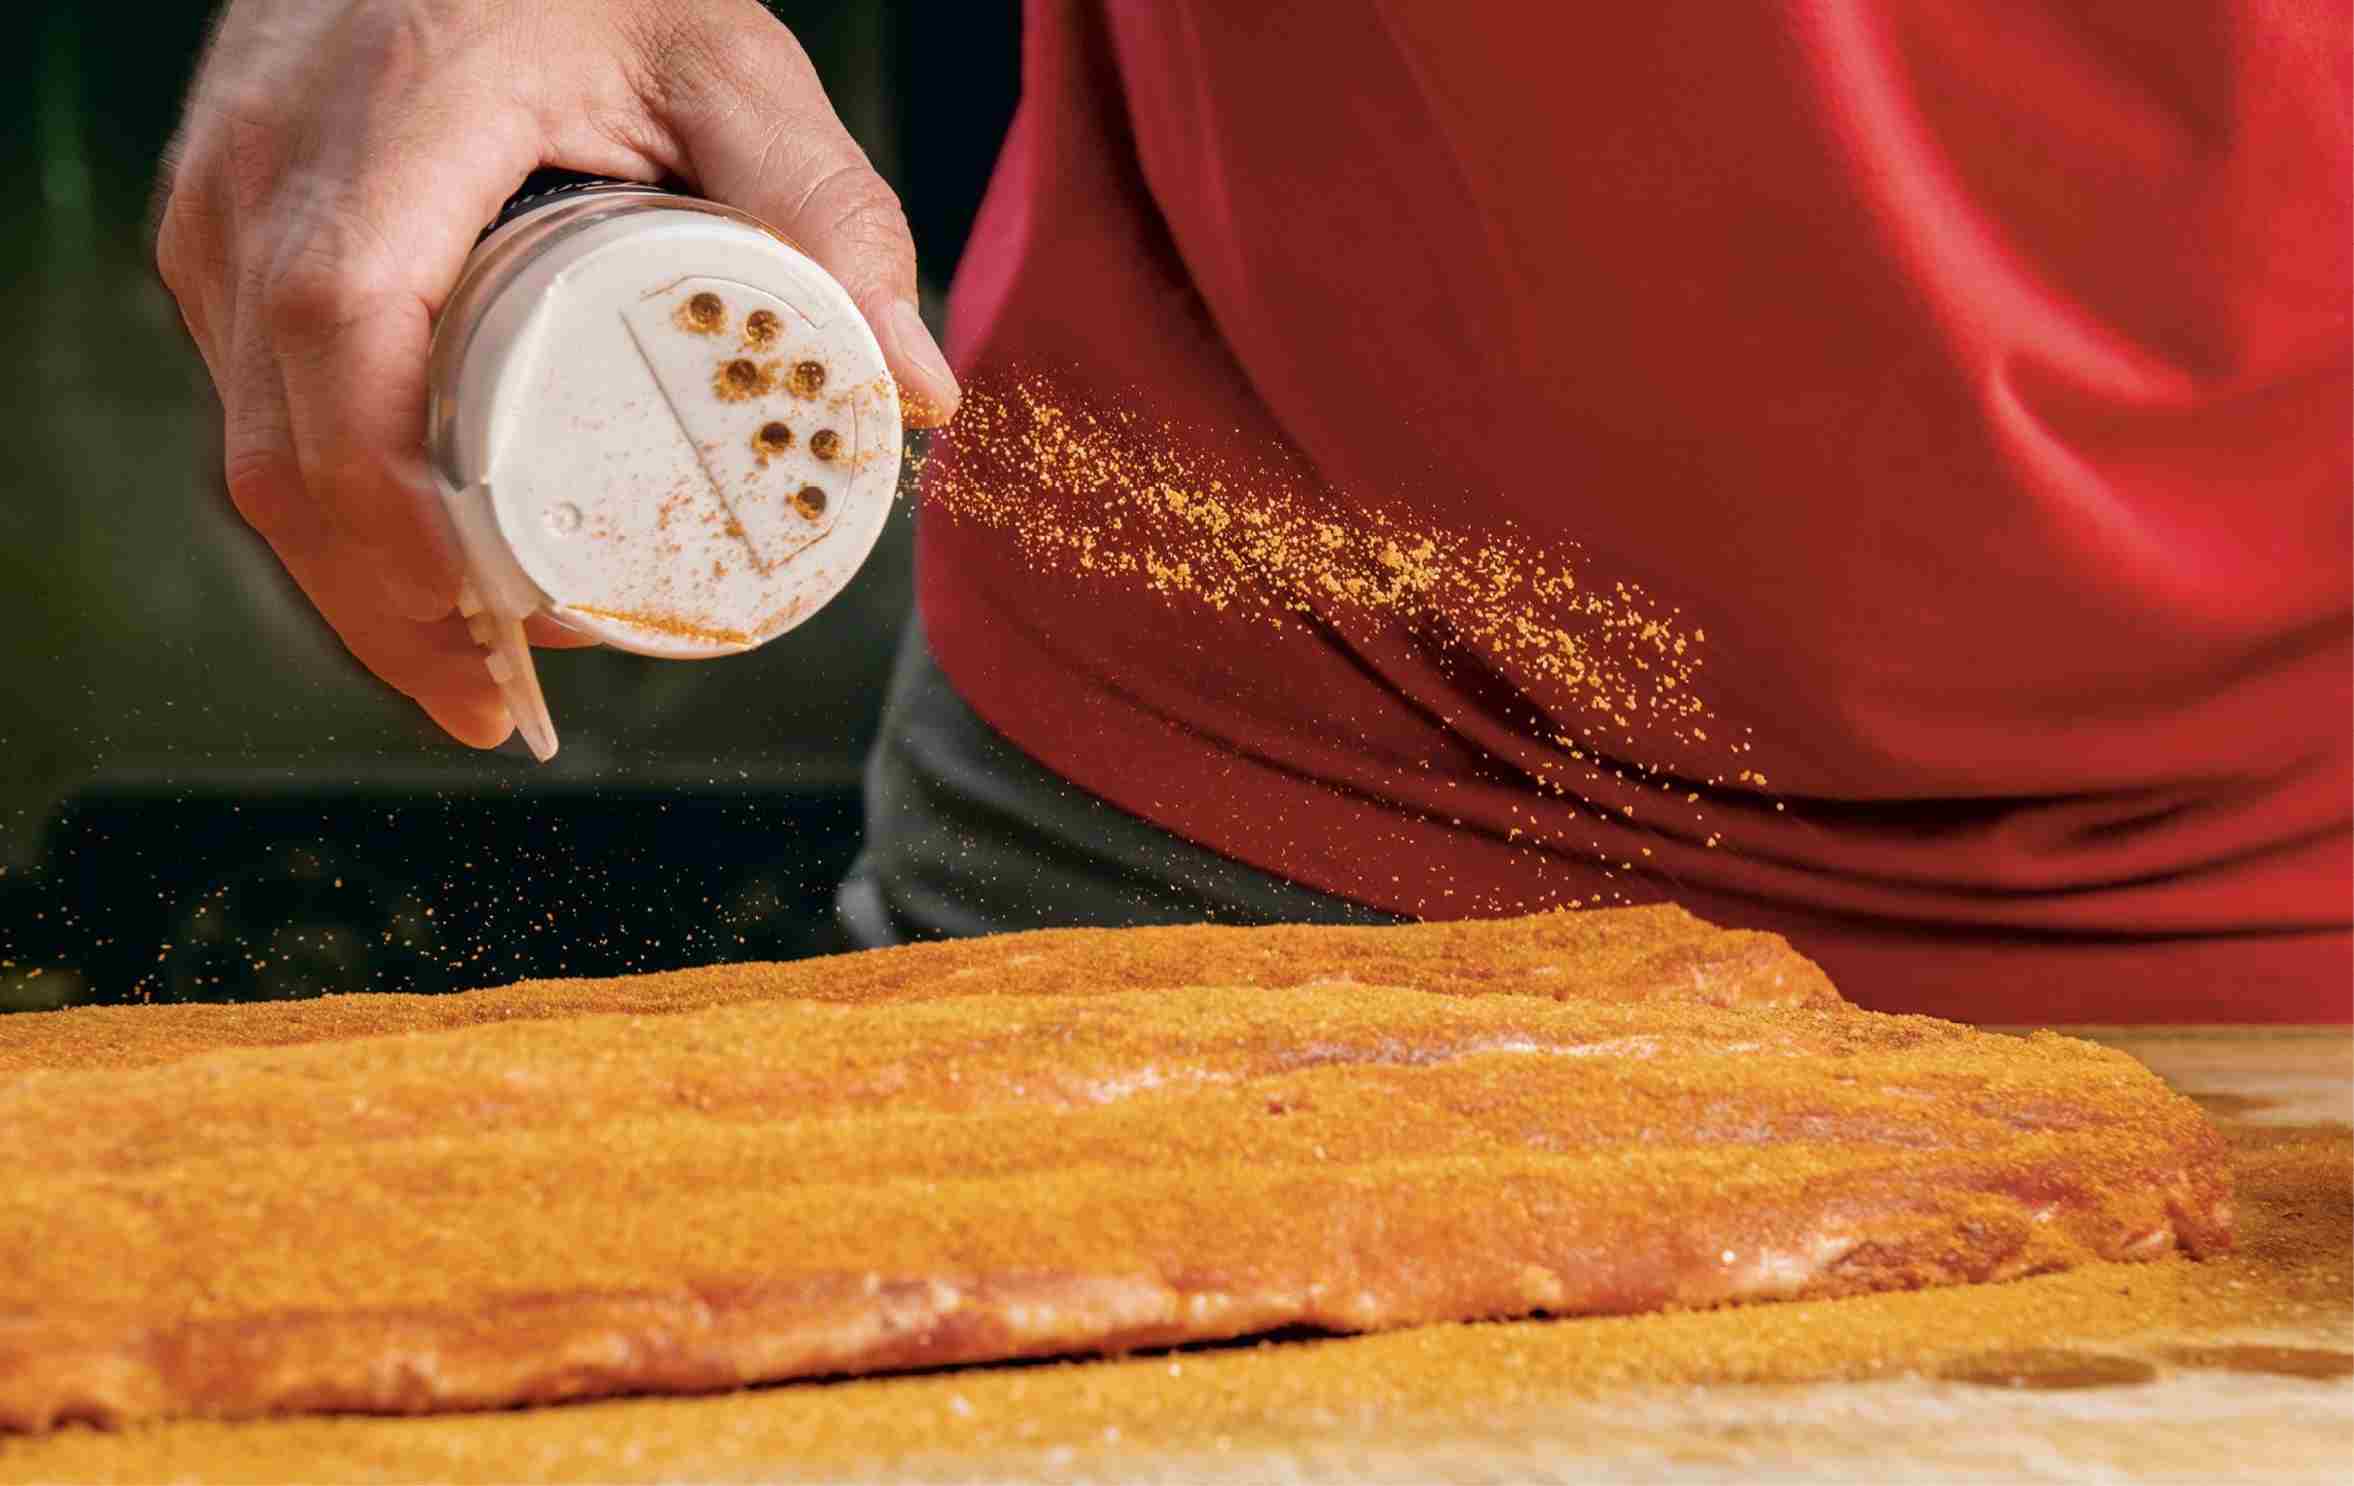
Rubs
Fresh seasonings can be great, but it’s super-handy to have spice rubs in the pantry, whether you’re prepping for a long smoke or just want to add some hassle-free flavor to something you’re about to grill. For this reason, Franklin now manufactures a few basic rubs. Our BBQ Spice Rub is our own (somewhat) less salty take on the iconic Lawry’s Seasoned Salt. Our Steak Spice Rub is an umami bomb with universal applications that just bumps up the flavor of everything. And our Brisket Spice Rub, which is a mix of the classic salt and pepper I’ve always advocated, also makes a good foundation for your own additions.
When I’m first learning how to cook something or developing a new technique, I start with kosher salt as my sole seasoning. Then once I know that my process is solid, I build flavor from there. I truly believe that by the end of an hours-long smoke, what you ultimately want to taste is meat, smoke, salt, and pepper. But that doesn’t mean I won’t keep messing around with different spice blends for the rubs or new flavors for our slathers (like French’s yellow mustard or hot sauce) with the hope that a little extra complexity might make our customers happier.
The fifty-fifty combination of salt and pepper that we use is still unequivocally the best and most reliable seasoning for brisket, ribs, or whatever you want to smoke. It’s our foundation. So if you’re just starting your brisket game, begin with a basic salt-and-pepper rub and then, if you want to mess around with additional flavors, add a layer of something else, like all-purpose BBQ Spice Rub. (But take it easy on the sugar, as it burns at higher temperatures.)
On the following pages are my guidelines for assembling your own basic seasonings. I’m not exactly offering the recipes for the Franklin rubs, but I am giving you the general framework. Creating rubs at home gives you control of the ingredients, saves you a few bucks, and allows you to find the formulas that suit your own palate.
BBQ Spice Rub
Lawry’s Seasoned Salt is an American classic, and I’ve always appreciated it as such. In fact, when I was growing up, my dad put Lawry’s on almost every steak he ever grilled, so it also has a taste of nostalgia for me. As you know, I’m a tinkerer, and I like to custom make things when possible, so following is a list of the most prominent ingredients (in order of volume) that go into our all-purpose BBQ Spice Rub. This is an homage to Lawry’s—with a little less salt.
Use with: Practically everything, but notably on chicken, steaks, and chops, or mixed with salt and pepper for brisket, beef ribs, and baby back ribs. But you can really use it on anything you like, as it’s that versatile.
Makes as much as you want
•Fine sea salt
•Garlic powder
•Onion powder
•Paprika
•Mustard powder
•Mushroom powder
•Celery powder
•Lemon powder
•Granulated sugar
Rubs such as this should be made to satisfy your own taste, which is why I don’t offer volumes for each ingredient. You could make this à la minute to sprinkle on some chicken breasts you’re about to cook up, or you could make a larger volume to last for a while. The base of most rubs is salt, garlic powder, and onion powder. I recommend starting with equal parts of those and adding in amounts of the other, more specialty flavors, like mushroom or mustard powders, in smaller quantities and to taste. Ultimately, combine all of the ingredients to taste and mix well. Store in an airtight container in the pantry for up to 3 months.
Variations: Other possible additions include vinegar powder, tomato powder (be careful, as it can burn), and Worcestershire powder.
Steak Spice Rub
We created this rub to be an umami booster for almost anything you put it on—similar to old-style BBQ seasonings but without any MSG.
Use with: I sprinkle this rub on everything from steaks to pasta sauces; it delivers just that extra bump of deliciousness. For steaks, use this on larger cuts that cook at lower temperatures (like prime rib), as it can scorch at high temperatures.
Makes as much as you want
•Sea salt
•Garlic powder
•Onion powder
•Mushroom powder
•Tomato powder
•Mustard powder
•White pepper
•Granulated beef stock
•Worcestershire powder
•Mustard powder
•Celery powder
Again, start with the base of equal parts salt, garlic powder, and onion powder. Then add the other ingredients in smaller amounts to taste. In a bowl, combine all of the ingredients and mix well. Store in an airtight container in the pantry for up to 3 months.
Variations: Other possible additions include brewer’s yeast, dehydrated parsley powder, and apple cider vinegar powder.
Brisket Spice Rub
A one-to-one ratio (by volume, not weight) of coarse salt and 16-mesh ground black pepper makes up our foundational brisket seasoning, but you can also use this mixture to start building any kind of rub you want.
Fermentations and Pickles
The only flavor as compelling as acidity in any dish is umami. Fermentation and pickling are two excellent ways to obtain both of these elements at the same time. If you don’t already practice these simple ways of building flavor by making delicious condiments, you should definitely consider starting. These recipes require minimal labor and very little active prep. Time itself does most of the work, along with our little friends, the microbes.

Sauerkraut, Two Ways
I always have a jar or two of sauerkraut on hand. There’s something about its tart flavor, prickly acidity, and fermented funkiness that takes the heaviness out of a rich smoked piece of meat. Best of all, it’s very easy to make at home, which—without fail—yields a more complex, delicious, and healthful version than what comes in a can. (Canned sauerkraut undergoes pasteurization, which kills all the beneficial probiotics obtained during fermentation.)
Use with: Kraut is always good on a hot dog, of course, but it’s wonderful served alongside Firepit Pork Shoulder “Steaks” (this page) or Baby Back Ribs (this page). Indeed, it’s even good with Smoked Duck (this page). Serve it chilled, or warm it up gently with some of the meat juices from the cutting board to give it a little extra heft.
Makes 1 quart
Equipment
•Kitchen scale
•Bowl
•Muddler (or some sort of implement such as a pestle or wooden spoon for pressing down hard)
•One 1-quart or two 1-pint widemouthed mason jars
•Rounded glass weights
•Fermentation lids (depending on number of jars)
Fermentation lids can be purchased online, where you’ll find a number of brands, all of which work well. These are not required for making sauerkraut or any other fermented foods, but they do keep your ferment nice and neat. They are a type of air lock, allowing carbon dioxide to escape without letting oxygen in. This makes it harder for mold or other bacteria to grow on top of the kraut. Although almost anything that might grow there is harmless, it is neither appealing to look at nor to think about, so I discourage such growth by using the lids.
The glass weight—a thick, glass disc—can be placed on top of the cabbage at the end to keep it submerged in the brine.
Soprano Sauerkraut
You can make wonderful sauerkraut with nothing more than cabbage and salt, but I like to bump up the complexity and the high notes by adding a bit of garlic and ginger. You can really add any sort of additional seasoning you like. Caraway seeds are classic, but spicy chiles or dill would also be nice.
•1 head green cabbage
•Kosher salt
•2g piece fresh ginger, finely minced or grated on a Microplane
•1 large garlic clove, finely minced or grated on a Microplane
•Distilled or spring water for topping if needed
Using a large chef’s knife, halve and core the cabbage, then slice the halves into a thin julienne. A fine shred improves the fermentation dynamics.
Tare a bowl on the kitchen scale and then weigh the cabbage. Determine what 2.5 percent of the weight of the cabbage is and add that amount of salt. For instance, if you have 800g of cabbage, you’ll add 20g of salt. (If you want a saltier kraut, feel free to up the percentage of salt. Keep in mind that anything more than 5 percent can be painfully salty, and the fermentation process may not work as well.)
Add the ginger and garlic to the bowl and, using your hands, thoroughly mix everything together. Pound the cabbage a bit with a muddler to speed the process of drawing out its liquid. Let the mixture sit for 30 minutes at moderate room temperature to allow the salt to draw moisture out of the cabbage. While the cabbage sits, sterilize the jar(s) by boiling them in a pot of water for 10 minutes, then (carefully) transfer them to a clean kitchen towel.
After 30 minutes, begin to fill the prepared jar(s) with the damp cabbage. After each addition, use the muddler to press on the cabbage, compacting it against the bottom of the jar. As you work your way up, you want the cabbage to be tightly and densely packed. Stop when the cabbage reaches 1 to 1½ inches from the rim of the jar. Pour in any liquid remaining in the bowl. As you pressed down on the cabbage, enough salt water should have naturally released from it to cover the contents of the jar. If you don’t have quite enough, add a splash of distilled or spring water to submerge the cabbage completely.
Press the contents down with the glass weights and seal with the easy-fermenter lid(s). Set the jar(s) in an open container, such as a Tupperware bowl, to catch any liquid that overflows due to expansion during fermentation. Place your jar(s) and container in a dry, dark, room temperature spot.
Within a day or two, you should see tiny bubbles rising to the top when you tap the side of the jar(s). That means the fermentation has started. After 7 to 10 days, feel free to open the lid and taste. You should have a mild-flavored sauerkraut. For more intense earthy and funky flavors, let the sauerkraut go for more time, up to 3 weeks. When the kraut has achieved a flavor you like, suspend the fermentation by putting the whole jar in the refrigerator. The sauerkraut will keep in the fridge for up to 1 month.
Fennel and Radicchio Kraut
This version of sauerkraut combines the refreshing bitterness of radicchio with the anise-flavored lift and added crunch of fennel. The purple cabbage and radicchio combine to turn the mixture a stunning deep purple.
•½ head radicchio
•½ head purple cabbage
•1 fennel bulb
•½ teaspoon fennel seeds
•Kosher salt
•Distilled or spring water for topping if needed
Using a large chef’s knife, halve and core the radicchio and cabbage. Slice the halves into a thin julienne. With the knife, remove the stalks from the fennel bulb, then cut the bulb in half lengthwise and gently remove the core. Now slice it crosswise, matching the size and texture of the purple ingredients. Slice off several of the fennel fronds and peel off the tiny leaves. Mince the tiny leaves finely and reserve about ¼ cup.
Tare a large bowl on the kitchen scale, combine the vegetables in the bowl, add the fennel seeds, and then weigh the vegetables. Determine what 2.5 percent of the weight of the vegetables is and add that amount of salt. For instance, if you have 950g of vegetables, you’ll add 24g of salt. (If you want a saltier kraut, feel free to up the percentage of salt. Keep in mind that anything more than 5 percent can be painfully salty, and the fermentation process may not work as well.)
Using your hands, thoroughly mix everything together. Pound the vegetables a bit with a muddler to speed the process of drawing out their liquid. Let the mixture sit for 30 minutes at moderate room temperature, continuing to allow the salt to draw moisture out of the vegetables. While the vegetables sit, sterilize the jar(s) by boiling them in a pot of water for 10 minutes, then (carefully) transfer them to a clean kitchen towel.
After 30 minutes, begin to fill the prepared jar(s) with the damp vegetables. After each addition, use the muddler to press on the vegetables, compacting them against the bottom of the jar. As you work your way up, you want the vegetables to be tightly and densely packed. Stop when the vegetables reach 1 to 1½ inches from the rim of the jar. Pour in any liquid remaining in the bowl. As you pressed down on the vegetables, enough salt water should have naturally released from them to cover the contents of the jar. If you don’t have quite enough, add a splash of distilled or spring water to submerge the vegetables completely.
Press the contents down with the glass weights and seal with the easy-fermenter lid(s). Set the jar(s) in an open container, such as a Tupperware bowl, to catch any liquid that overflows due to expansion during fermentation. Place your jar(s) and container in a dry, dark, room temperature spot.
Within a day or two, you should see tiny bubbles rising to the top when you tap the side of the jar(s). That means the fermentation has started. After 7 to 10 days, feel free to open the lid and taste. You should have a mild-flavored sauerkraut. For more intense earthy and funky flavors, let the sauerkraut go for more time, up to 3 weeks. When the kraut has achieved a flavor you like, suspend the fermentation by putting the whole jar in the refrigerator. The sauerkraut will keep in the fridge for up to 1 month.
Fermented Hot Sauce
Homemade hot sauce is a truly satisfying project that’s also really tasty. Yes, there are tons of great hot sauces available on store shelves—more than ever before, it seems—but when hot chiles are in season in the summer, I like to buy them by the bushel and make sauce from my own combinations.
You can make a tasty hot sauce just by stewing chiles in vinegar and spices, then pureeing and straining the result into bottles. But fermenting the chiles first brings a complexity and umami that I find irresistible.
This recipe is for a basic chile hot sauce, but you can add other flavors and ingredients to your heart’s content. Ferment your chiles with garlic or other vegetables, for instance. Or add fresh garlic post-fermentation before you puree. Put your chiles on the smoker or grill to add some of the flavor of the fire. Herbs and spices always have a place too. Fruits, like mangoes, pineapples, and berries, can also play a role. Add vinegar or mezcal to the puree for even more complexity. Getting creative with your sauces is half the fun.
Use with: All savory foods!
Makes 1 quart
Equipment
•1-quart widemouthed mason jar
•Kitchen scale
•Rounded glass weight
•Fermentation lid
•Fine-mesh strainer
•Funnel (optional)
•Sauce bottles (optional)
If you already own the quart jar and lid described for fermenting sauerkraut (see this page), you have all you need to ferment chiles for hot sauce. (Be sure to sterilize the jar before filling it, as you did for the kraut.) The strategy is slightly different, though, as you’ll start with a brine. You’ll also need a strainer and, if you want to be able to dash out the sauce onto your food, recycled sauce bottles.
Basic Pepper Sauce
Use any kind of chiles you like or a mix of varieties. The fresher they are, the better. If you want a milder sauce, remove the seeds. The colors that your sauces achieve can be electric. Combine yellow, red, and orange varieties for brilliant shades, or stick with green chiles, like jalapeños and serranos, for an alluring green sauce. A standard brine for successful fermentation ranges from a 2 to 5 percent salt solution. I like mine on the less salty side, between 2 and 2.5 percent. (Salt can always be added later.) That’s about 6g of salt for every 240g (1 cup) of water. Use your scale to make the calculations.
•Water, as needed
•1 to 2 pounds organic chiles, stemmed
•Fine sea salt
•2 garlic cloves
•White wine vinegar for pureeing (optional)
Estimate how much water you’ll need to submerge the chiles once they are packed into the 1-quart jar. Tare a bowl on the kitchen scale, then weigh the water. Multiply the water weight by 0.02 for a 2 percent salt solution (or whatever percentage you wish) and add that amount of salt. Stir to dissolve.
Pack your stemmed chiles into the sterilized jar. You can cut them in half, but don’t bother chopping as they’ll be pureed anyway. Crush the garlic cloves and add to the mix.
Pour the salt brine into the jar, covering the chiles completely and leaving about 1 inch of headspace in the jar. Press the contents down with the glass weights so the chiles are completely submerged and give the jar a gentle shake or stir to work out any air bubbles. Seal the jar with the fermentation lid.
Store the jar in a dry, dark spot at moderate room temperature (anywhere from 65° to 80°F will ferment the chiles very evenly and thoroughly).
Within a day or two, you should see tiny bubbles rising to the top when you tap the side of the jar. That means fermentation has started.
After a week or two, feel free to open the jar and take a whiff. The fermentation funk will get stronger the longer you leave the chiles, so if you like just a light earthiness, consider taking them out now.
Once you’ve deemed your chiles ready, drain the contents of the jar through a fine-mesh strainer, capturing the brine in a bowl. Puree the contents in a blender or food processor with a little bit of the brine or any other liquid to taste. If you use water, it will dilute the flavor a little. Vinegar will give it that classic sharpness and also significantly slow down the ongoing fermentation process. A lot of vinegar will mostly kill the fermentation. If you want a completely shelf-stable sauce, boil it on the stovetop for about 10 minutes to kill the active bacteria. This process also changes the flavor a bit, making it a bit less intense and aromatic.
Strain the puree through the fine-mesh strainer into a bowl, reserving the solids. Now you can adjust the consistency to your liking. If your sauce is a little too thin, stir in some of the solid matter from the strainer. If it’s too thick, strain it again to remove more of the solids. Your sauce should be thick enough to remain a mixed solution without separating too much but thin enough to dribble through the top of your sauce bottle. Simply store the sauce in the mason jar or use a funnel to fill your sauce bottles.
The sauce will keep in the fridge for up to 3 months.
Pickled Veggies
Good ol’ dill pickle slices are a classic condiment for Central Texas barbecue (as are raw onions), and you can guess why. The intense and unctuous flavor of long-smoked meats desperately needs something to cut it, and pickles have the piercing acidity and sharp flavor that both moderate the richness of the meat and refresh your palate for the next bite, just like a sip of wine or beer might do.
I find that pickles go with everything, and that’s how we use them at the restaurant. They dress up a meal and can serve as either condiment or side dish. It’s pretty much a core principle of Franklin Barbecue to have pickles at the ready, as we do at home with fermented hot sauces, sauerkrauts, and kimchi.
You can make fermented pickles by following the brine instructions given with the Basic Pepper Sauce (this page). Those vegetables will indeed get very funky. But for everyday pickles, I preserve vegetables in a seasoned vinegar solution for a day or two—sometimes even a few hours is enough—to get the effect I want.
You will need a 1-quart mason jar with a lid and a rounded glass fermentation weight (or some other form of weight) to keep the pickles submerged. All sorts of vegetables can be pickled. I tend to favor carrots, fennel, onions, radishes, green beans, shallots, and cucumbers. As with hot sauces, you can create a multitude of flavors by adding spices, herbs, and garlic and by using flavored vinegars. Here’s my basic process, using fennel as the main ingredient. (By the way, pickled fennel made it onto the cover of Franklin Steak, but we forgot to include the recipe there. People email about this more often than you’d think. So here it is!)
Use with: Smoky, rich meats and rich, fatty fish.
Makes a scant 1 quart
•1 cup / 230g rice vinegar
•¼ cup / 200g granulated sugar
•1 teaspoon / 4g kosher salt
•1 large fennel bulb
•10 black peppercorns
In a small saucepan over medium-high heat, combine the vinegar, sugar, and salt and warm through, stirring to dissolve the sugar. Do not allow the mixture to boil, as you don’t want the liquid to reduce. Remove from the heat.
While the vinegar mixture is heating, prep the fennel by trimming off the stems and fronds from the bulb, then halving it lengthwise, removing the core and then thinly slicing crosswise on a mandoline or with a knife.
Put the peppercorns into a 1-quart jar and then pack the fennel on top. Pour the hot brine over the fennel and place a glass weight on top to keep it submerged. Leave the jar on the countertop with the lid set loosely on top until the brine cools to room temperature. Tighten the lid and refrigerate the fennel for at least 3 hours or up to 1 day before serving.
The veggies will keep in the fridge for up to 1 month.
Sauces
I’m a traditionalist at heart and truly revere the original folks who cooked barbecue and ran the small-town restaurants where it came into its own. Thus, I’ve always respected the fact that, traditionally, Central Texas barbecue has never employed sauces. Not only is this practice in tune with the sort of bare-bones, hardscrabble style of the people who settled this area and cooked their own version of barbecue, but it is truly the best way to show respect for the art of slow-smoking meat. Woodsmoke, itself, is a complex ingredient and a wonder to experience, with a little salt and pepper, as it interacts with the flavor of the meat.
That said, people love sauces. And by your third or fourth unadorned bite, a little bit of tang or acid, sweetness and spice definitely enlivens the palate. I like to serve my sauces on the side so people can indulge as much or as little as they like.
Over the years, I’ve come up with a number of sauces that I love. Most of these can be mixed and matched with any type of protein, so don’t think that because I paired one sauce with a certain dish here it doesn’t go just as well with something else. (And if you’re looking for the recipes for our barbecue, espresso, and vinegar sauces, check out the Franklin Barbecue book.)
Rye BBQ Sauce
I do like rye whiskey, I must admit. Hence, it has made it into various sauces I’ve thrown together over the years for dinners and events and all kinds of cooks. The basic idea is that rye and cherries go together really well (hey, Manhattan cocktail) and are even better when combined with black pepper and fatty meats. This recipe is a distillation of all those ideas. Pick your favorite not-very-sweet rye whiskey for this; I often use High West Double Rye. This is a pretty sweet sauce, so if it tastes too sweet to you, back off on the jam a bit.
Use with: BBQ chicken, pork ribs, and pork steaks.
Makes about 4 cups
•1 cup / 320g cherry preserves
•1 cup / 275g ketchup
•½ cup / 115g apple cider vinegar
•3 tablespoons / 20g freshly ground black pepper
•2 tablespoons / 12g garlic powder
•2 tablespoons / 12g onion powder
•½ cup / 100g Worcestershire sauce
•4 tablespoons / 65g tomato paste
•2 tablespoons / 30g Dijon mustard
•1 cup / 200g dry rye whiskey
In a medium saucepan over medium heat, combine the preserves, ketchup, and vinegar and warm through. Pour the hot liquid into a blender and puree until silky smooth. Pour the mixture into a 1-quart jar.
Add the pepper, garlic powder, onion powder, Worcestershire, tomato paste, and mustard to the jar and whisk until smooth. Let the sauce cool to room temperature, then add the whiskey and stir to combine. Taste and adjust any flavors as you like, then cap and refrigerate.
The sauce will keep in the fridge for up to 6 weeks, serve as soon as you can.
Spicy BBQ Sauce
Most barbecue sauces are laden with spices but are rarely actually spicy. This one is—or at least it can be as spicy as you want it. The sweetness is balanced in the background, so you don’t really notice it. The secret to a good spicy sauce is the spicy part, not the base, which makes preparing a sauce like this super-easy.
As a base, I simply use Franklin’s standard barbecue sauce, or one that I think would take well to some spicing up, and augment from there. I like a Tex-Mex kind of sauce where the heat comes from Mexican chiles, but you could also mix up a version with Thai bird chiles, sriracha, or whatever you like. Because chiles vary in heat, flavor intensity, and water weight, this is a preparation that needs to be done by taste and to taste.
Use with: I love a tangy, sharp, spicy sauce with brisket, pork ribs, and, especially, chicken.
Makes as much as you want
•1 cup / 100g jalapeño, serrano, habanero, and ancho chiles or a mix of your favorite hot chiles
•2 cups / 450g your favorite barbecue sauce
In a blender or food processor, puree the chiles, adding a splash of water or vinegar if it needs extra liquid to form a puree. In a medium bowl, add the barbecue sauce and slowly add 1 to 2 tablespoons of the chile puree to start, stirring well to combine. Taste it right away, but also let it sit for about 15 minutes and then come back to retaste, as it can take a little while for the heat and flavors to integrate. For more chile pepper impact, add more puree incrementally until it gets to the right balance. If it was too much pepper to start, add a little more sauce to mellow it out.
Red Chimichurri
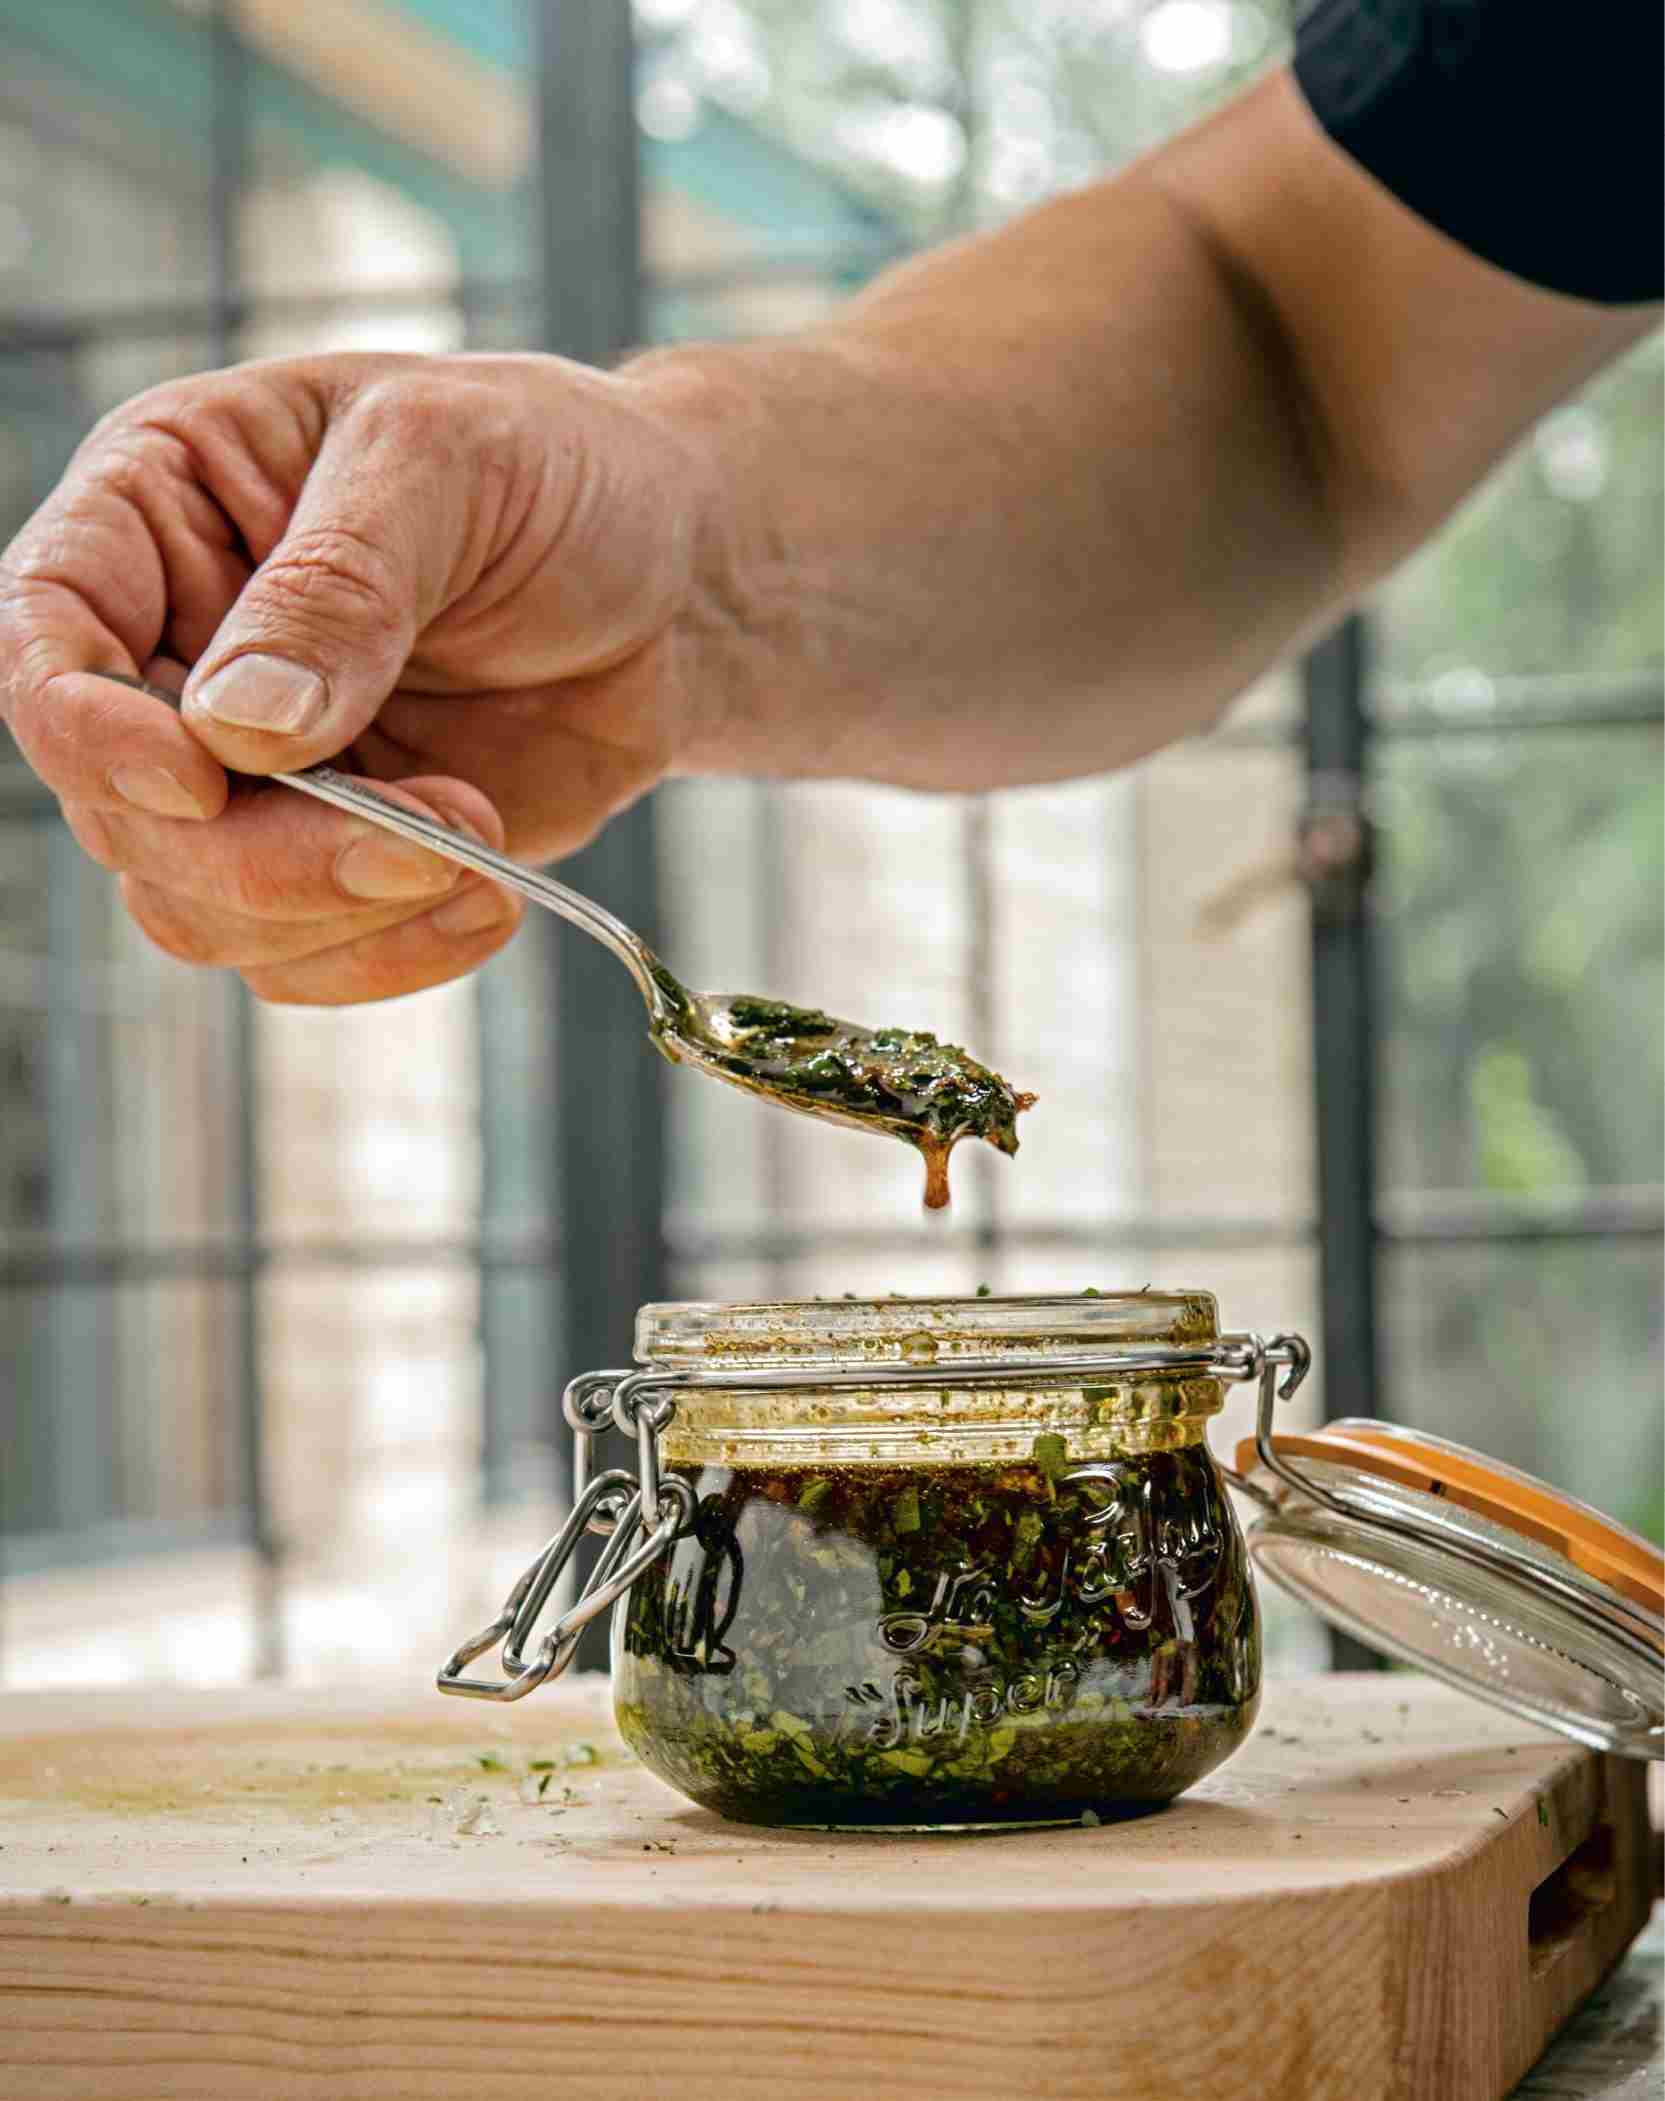
I like sauces and condiments with versatility. After all, who wants to spend all of their time making a different sauce for every dish? That requires a lot of work and organization and results in too many sauces, which lead to muddled flavors. This chimichurri is the answer.
Use with: Almost every protein in this book, but it’s especially delicious with Redfish on the Half Shell (this page).
Makes 1 cup
•½ cup / 115g grapeseed oil
•1 tablespoon / 7g Hungarian sweet paprika
•1 tablespoon / 9g Aleppo pepper flakes
•1 teaspoon / 2.5g ground guajillo chile
•6 garlic cloves, finely chopped
•1 bunch flat-leaf parsley, leaves plucked and finely chopped
•3 tablespoons / 20g finely chopped shallot
•½ cup / 115g olive oil
•4 tablespoons / 45g sherry vinegar
•Finely grated zest of 1 lemon
•1 teaspoon / 4g kosher salt
In a small saucepan over low heat, combine the grapeseed oil, paprika, Aleppo pepper, and ground guajillo chile, stir to combine, and let infuse for about 30 minutes. Stir in the garlic and let it warm for 3 minutes. Remove the pan from the heat and allow the mixture to cool slightly.
In a medium bowl, combine the parsley, shallot, olive oil, vinegar, and lemon zest. Pour in the warm peppery oil and stir with a spoon. Adjust the salt, as needed, to taste.
Pour the chimichurri into a jar, let cool, cover, and refrigerate for 1 to 2 days to allow the flavors to develop before using.
The sauce will keep in the fridge for up to 2 weeks.
