
Kitchen Gadgets We Couldn’t Live Without
While it’s helpful to be prepared with a variety of tools you might need, these are the ones we find ourselves reaching for every day.
HIS
Food processor: For chopping, pureeing, and mixing. I especially like using ours for making galette dough (here) and pesto (here).
Sharp knife: Every kitchen should have a good, sharp chef’s knife.
Immersion blender: Pretty much the best thing ever for pureeing sauces and soups right in the pot.
Tongs: You gotta have a good pair of tongs for cooking, flipping, tossing, and chasing kids around the kitchen. Our boys call our tongs alligators, so we make a game to see who can escape getting chomped!
HERS
Stand mixer: My stand mixer is my BFF in the kitchen. (Please don’t tell Josh—he might get jealous!) I love all of the different attachments—the paddle for creaming and mixing, the whisk for whipping egg whites and cream, and the dough hook for kneading bread and pizza doughs. I also love using a different color mixer for every season, but that’s another story!
Microplane: Great for zesting lemons and limes, grating garlic, and shredding Parmesan cheese over pizza, pasta, soups, salads—just about anything.
Spatulas: I have a colorful collection of spatulas—you can never have too many! They’re the secret weapon for clean, precise baking and essential for scooping the last drop out of cans and jars. And who doesn’t like to lick it after making brownies, cookies, and cakes?
Blender: For making smoothies with the boys. I love being able to hide things like spinach, kale, chia seeds, flaxseeds, and nut butters in their breakfast. They think they are drinking milkshakes, so it’s a win-win!
Organizing Your Ingredients
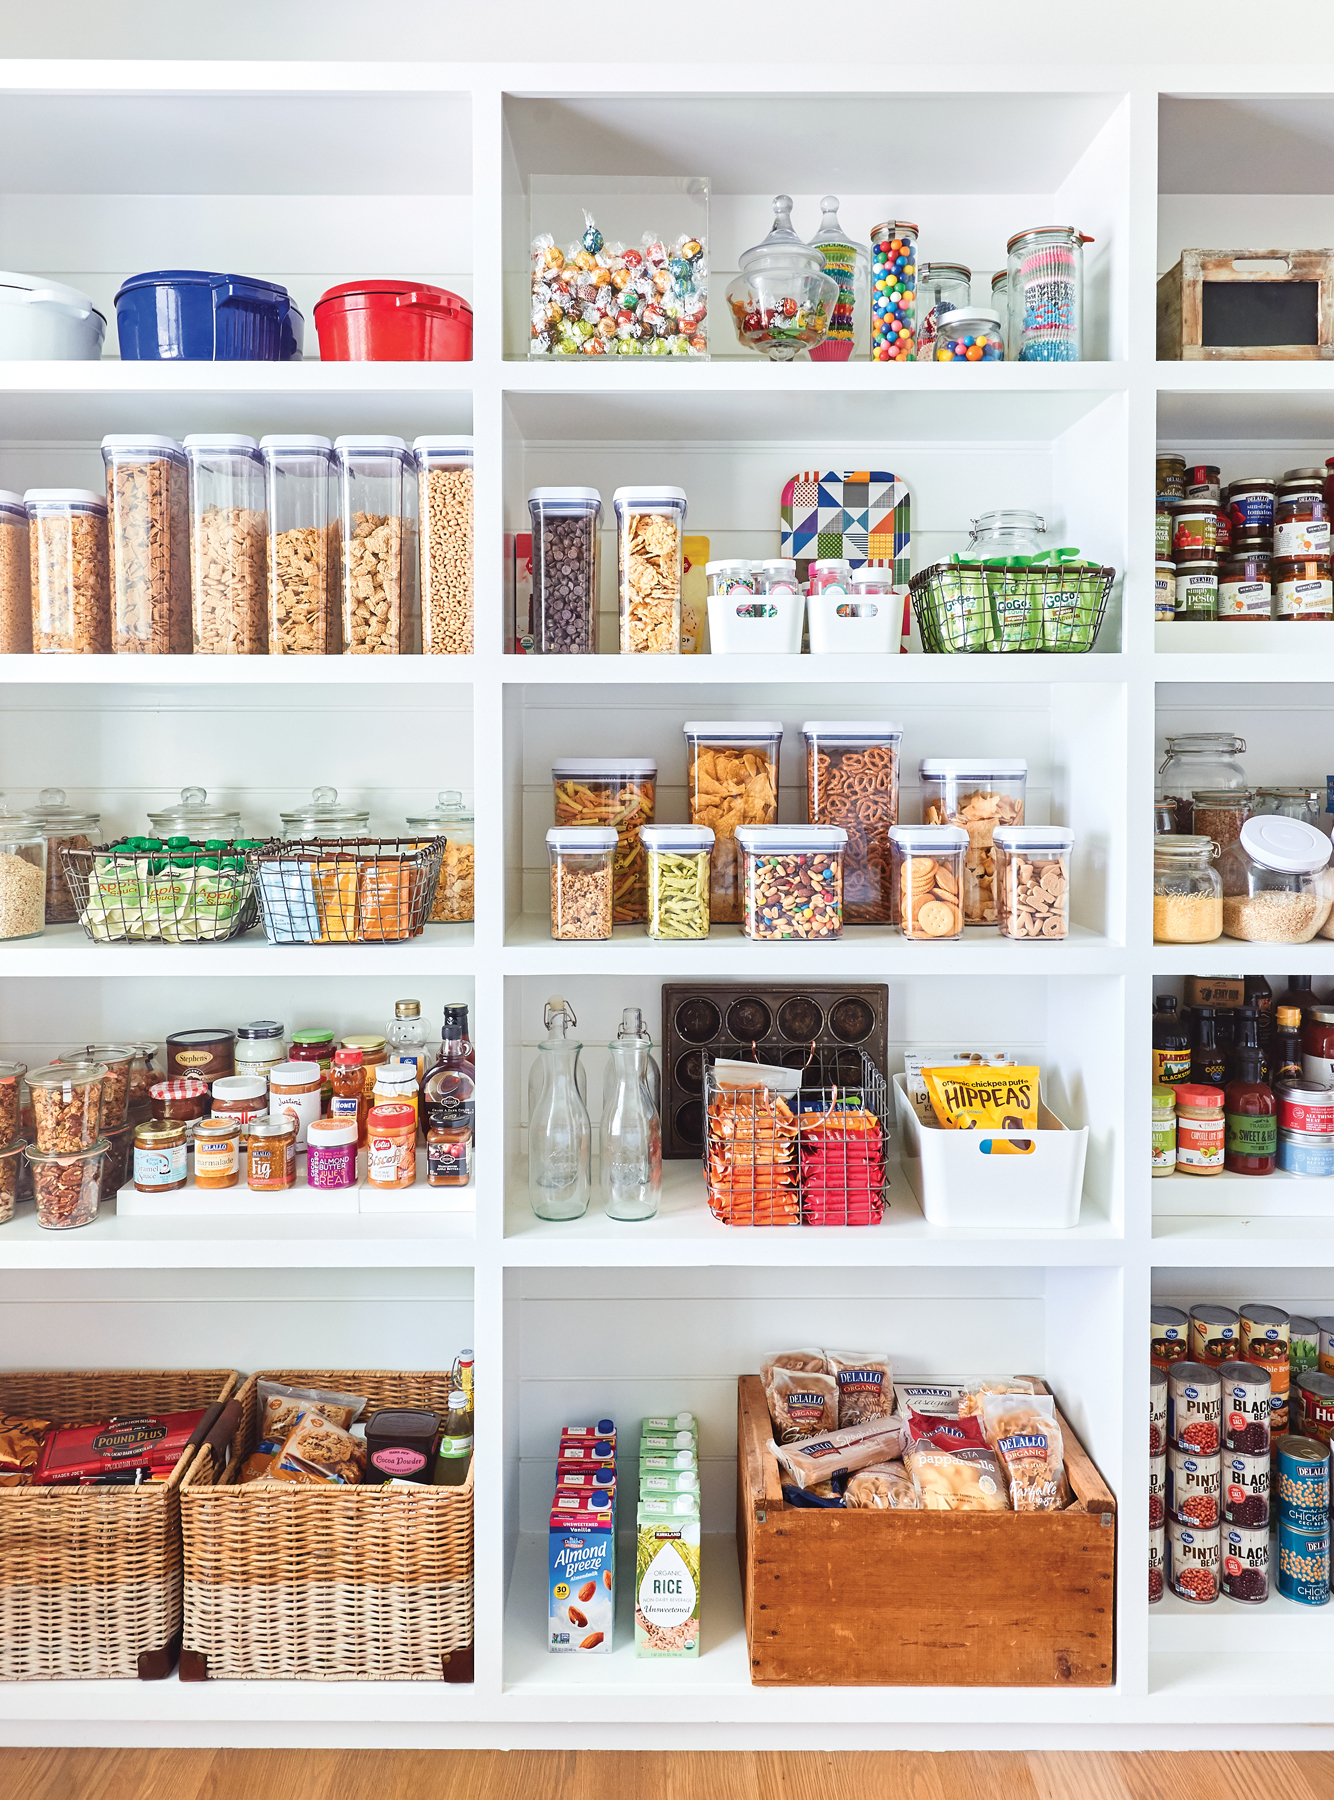
I’m going to let you in on a little secret: The key to becoming a great home cook isn’t all about the actual cooking. A lot of it has to do with being organized. I’ve found that by keeping my kitchen orderly—including my pantry, fridge, and freezer—I have an easier time planning meals, coming up with last-minute meal and snack solutions, and cooking. That’s because it’s easy to see exactly which ingredients I have on hand, and I always know where to find them. (And if you don’t have a pantry, all of these suggestions work for a kitchen cart!)
Here are some tips for keeping your kitchen in good order, no matter how much or how little space you have.
 Divide your pantry items into categories. For example, Canned Goods, Baking Items, Grains, Kids’ Snacks. Use what you already have in there as your guide, and then group like items together.
Use baskets, bins, and containers. Organizational tools like baskets and bins will help you keep the items from each category grouped together, while glass or plastic containers make it easy to see items you use frequently, such as flour, cereal, grains, or nuts (and look so much nicer than plastic bags or boxes!). Clearly label each basket and container. While you primarily want these items to be functional, if you choose coordinating bins, it also happens to look really nice!
First in, first out. Arrange things in each bin so that older items are on top/in front.
Make it kid-friendly, or not. If you want your kids to be able to help themselves to cereal in the morning or snacks in the afternoon, make sure those items are on a lower shelf where they can be reached. On the flip side, if there are treats that you don’t want the kids getting into, make sure they’re on a higher shelf.
Only buy what you need and have room for. It can be really tempting to stock up on items that are on sale, but if you see that your assigned bin for soup ingredients is full, maybe hold off until you’ve put a dent in what you have. If you don’t have room for an item or won’t be able to use it before it expires, pass.
Use what you have before going to the store. Challenge yourself to use what you have in the pantry to make meals and snacks—turn it into a game! And definitely use my un-recipes here to here for inspiration. It will save you time and money.
Spices
I keep my spices in a drawer, laid flat, in alphabetical order so I can easily find them. If you don’t have a drawer large enough for this, you could store spices in a cabinet on risers or a turntable. There are tons of great organizational products out there, and I highly recommend using one.
Another thing to keep in mind is that spices do actually expire! Here’s an easy reference guide for how long you should keep spices before tossing:
Seasoning blends: 1 to 2 years
Dried herbs (basil, oregano, parsley): 1 to 3 years
Ground spices (nutmeg, cinnamon, turmeric): 2 to 3 years
Seeds: 4 years (except for poppy and sesame seeds, which should be discarded after 2 years)
Whole spices (cloves, peppercorns, cinnamon sticks): 4 years
Extracts: 4 years (except for vanilla, which will last forever)
Staple Ingredients
Keeping your kitchen stocked with multi-purpose, mix-and-match-friendly ingredients is essential for making meal prep convenient, easy, and, most importantly, tasty! You’ll be much more likely to reach for that new recipe if you know that most of the ingredients are already in your home, and that ultimately saves you time and money. It also makes on-the-fly meals and snacks so much easier to whip up when you’re short on time.
Pantry
Grains and Breads
Bread: Keep your favorite on hand for avocado toast or a quick sandwich. (And remember that bread freezes really well!)
Tortillas: We like to have both flour and corn tortillas for tacos, wraps, homemade chips, and nachos.
Dried pasta (whole-wheat and regular)
Rice and grains: Keep a stash of your favorite short- or long-grain rice plus other options like quinoa, couscous, and farro.
Packaged Goods, Canned Goods, and Condiments
Roasted red peppers: Perfect to toss into salads and pastas.
Canned tomatoes (diced, crushed, whole, and fire-roasted): Great for slow cooker meals, soups, and sauces.
Tomato paste: For great depth of flavor in stews and sauces. Try to find one that comes in a tube so you can save what you don’t use.
Chicken and/or veggie broth or stock
Mayonnaise: For sandwiches, salads, dips, and dressings.
Ketchup: For the dippers!
Mustards (yellow, Dijon, and whole-grain): For sandwiches or to add to sauces, vinaigrettes, and marinades.
Hot sauce
Soy sauce (or tamari soy sauce if you want a gluten-free option)
Worcestershire sauce
Coconut milk: A great nondairy option for adding instant creaminess.
Canned beans (black, chickpeas, pinto, and cannellini): For dips, salads, soups, and homemade veggie burgers.
Canned or jarred artichoke hearts
Olives (green, black, and Kalamata): Sprinkle them into salads, chop them into tapenade, or just set out a dish for snacking.
Jam: Choose your favorite for sandwiches or roll-ups, or to top ice cream!
Nut butters (almond, peanut, sunflower, and tahini): For sweet or savory toast, sandwiches, baked goods, granola, dressings, and sauces.
Oils, Vinegars, Spices, and Dried Herbs
Salt (kosher and coarse sea salt)
Extra-virgin olive oil
Coconut oil: Great for baking and cooking.
Nonstick cooking spray (olive oil, coconut oil, or vegetable oil): Essential for greasing pans.
Vinegars (balsamic, golden balsamic [slightly less caramel-y than dark balsamic], red wine, apple cider, and rice wine): For dressings, sauces, and marinades.
Dried herbs and spices: Use flavors that you love to dress up simple cooking preparations. Save money by buying these in bulk—just don’t forget to refresh your stock every so often. See here for when dried herbs and spices typically expire. And remember that you can usually swap out fresh herbs in a recipe and use one-third of the amount of dried herbs instead.

Baking Supplies
Unbleached all-purpose flour: Good ol’ AP flour can generally be used in any recipe and give you great results.
Whole-wheat flour and white whole-wheat flour: Full of vitamins and fiber, these hearty flours give great nutty flavor to anything you use them in. The main difference between them is that white whole-wheat flour is made from a different variation of wheat, which gives it a lighter color. Feel free to substitute whole-wheat flour for up to 50 percent of all-purpose flour called for in a recipe!
Old-fashioned rolled oats: For homemade oatmeal, overnight oats, oatmeal cookies, or to add extra body and creaminess to smoothies.
Granulated sugar
Light brown sugar
Honey
Pure maple syrup
Pure vanilla extract
Baking soda
Baking powder
Cream of tartar
Chocolate chips (semisweet, milk, dark, or white chocolate; butterscotch; peanut butter): For cookies, tossing into trail mix or granola, or eating right out of the bag.
Unsweetened cocoa powder
Dutch-process cocoa: Produces a richer, deeper chocolate flavor than regular cocoa powder.
Chocolate chunks or chocolate bars: Great for making homemade candies, ganache, chocolate chunk cookies, or even the occasional s’more…
Shredded coconut (sweetened and unsweetened)
Nuts (almonds, peanuts, cashews, pistachios, pecans, or walnuts): For snacking, baking, and cooking.
Dried fruit (raisins, cranberries, apricots, blueberries, currants, mango, strawberries, or cherries): For stirring into cookies or quick bread, tossing into a salad, mixing into granola or trail mix, or as a snack on their own.
Flaked sea salt
Tortilla chips: It doesn’t get better than sheet-pan nachos or Friday afternoon chips and salsa!
Pita chips: For dipping and scooping, or crumbling over salads.
Pretzels
Crackers
Rice cakes
Fridge
Produce: Opt for fruits and veggies that you know you’ll eat! An assortment of greens, veggies for roasting, and fruits for throwing into lunch bags is a great place to start. Think about what’s in season and what looks fresh at the market. Add things like garlic and onions and lemons and limes to the mix for extra flavor.
Fresh herbs and spices: Buy what you love to eat and toss them into soups, braises, dressings, and roasts. Save money by planting your own herb garden or buying potted herbs.
Meat and seafood: We buy in bulk and freeze things for later—it saves money and means we have a bigger selection to choose from, whether it’s a whole chicken or breasts and thighs, ground meats, sausages, or various cuts of pork or beef.
Dairy and Eggs
Butter
Eggs
Milk (cow’s, almond, and coconut)
Plain Greek yogurt: For dips, sauces, dressings, and smoothies.
Cheese: Have a variety on hand for shredding, grating, melting, and snacking—cheddar, Havarti, mozzarella, feta, goat, pecorino, Parmesan—whatever you love most.
Freezer
Frozen fruits and vegetables: A great shortcut! They’re budget-friendly and full of flavor since they are usually picked and frozen at peak ripeness.
Chia seeds: For baking, smoothies, and breakfast chia puddings.
Flaxseed meal: Perfect for adding fiber to smoothies and another great staple for baking since it can be used to substitute for eggs.
Ice cream and sorbet—obviously!
Meal Planning Tips
Meal planning is essential. I highly recommend taking an hour once a week to get yourself in great shape for the week ahead. It saves you time, money, and stress; and you will always have the answer to the question, “What’s for dinner?” When 5 p.m. hits, you’ll have everything you need to make one of your favorite recipes or pull together a quick un-recipe (see here). Pick a day that works well for you (I like Sunday) and see what you already have in your fridge and pantry (a great reason to keep things well organized!), then think about what you and your family love to eat (flip through this book for inspiration!) and check the week’s schedule to see which nights might need to be meals on the go. Give breakfasts, lunches, and snacks some thought too. A little planning goes a really long way—you’ll reduce the number of meals you eat out, the amount of food you throw away, and the amount of time it takes to pull something together on the fly. And the food you make will be so much more delicious. Everyone wins!
Here are tricks and tips I use every single week:
1. Brainstorm. When choosing recipes for the week, I think about these things:
What’s the weather like? Hot summer nights call for no-cook salads or simple grilled meals, versus chilly winter evenings that beg for something warm and cozy.
Do I have items I need to use up? Check the fridge, freezer, and pantry for items that are either about to reach their expiration date or have just been sitting around for a while. It’s a great challenge!
What’s the theme? So I’m not starting from scratch every week in terms of figuring out what to make, we designate theme nights—think Meatless Monday, Taco Tuesday, Breakfast for Dinner, Pizza Friday, etc. And don’t forget about Clean Out the Fridge Night!
What do the kids want? The best way to get your kids to eat new foods and recipes is to get them involved in picking them out. I always take requests when figuring out what’s on the week’s menu, or I let them pick dinner one night a week. Even if they pick pizza every time, you can get creative with how you’re serving it up.
How can I use leftovers? Take into account that many recipes will make enough to leave you with leftovers that can be repurposed for another meal. Either you can freeze them and serve as-is another night (maybe a couple weeks later so no one gets sick of it!), or you can use the components in different ways, like turning roast chicken into quesadilla stuffing or a soup topping. I love a two-for-one!
2. Read the recipes. If you’re using a new recipe, be sure to read the recipe all the way through so you aren’t surprised by how long it takes, or whether it calls for any special equipment.
3. Set the menu. After you’ve figured out what you’re going to cook for which meal, write it down. Use a planner, calendar, or notebook. Or a really fun option so the whole family can get excited is to put a big dry-erase or chalkboard in the kitchen.