
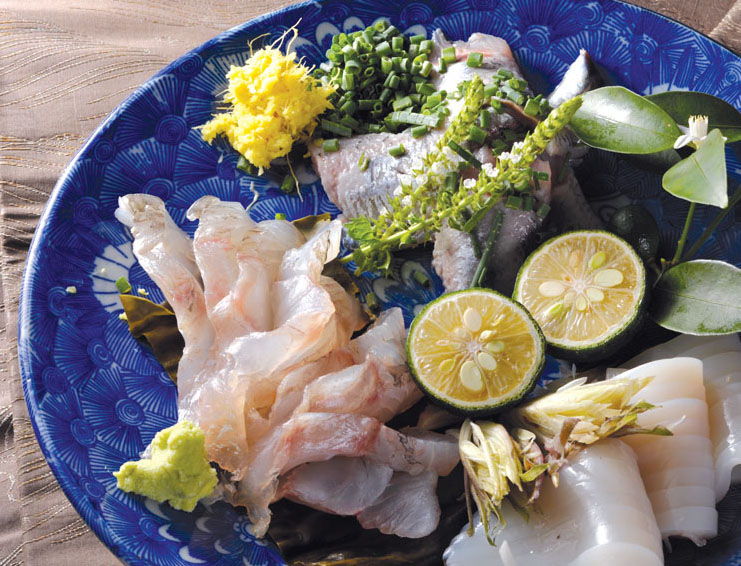
RAW FISH
HAND-CHOPPED JACK MACKEREL WITH MISO
SEARED BONITO WITH GINGER, GARLIC, AND CHIVES
CITRUS AND VINEGAR–MARINATED HALIBUT
COOKED FISH AND SEAFOOD
CHARCOAL-GRILLED YELLOWTAIL COLLAR
FOIL-WRAPPED BROILED SALMON WITH BUTTER
SPRING ONION AND GINGER–STUFFED STEAMED SNAPPER
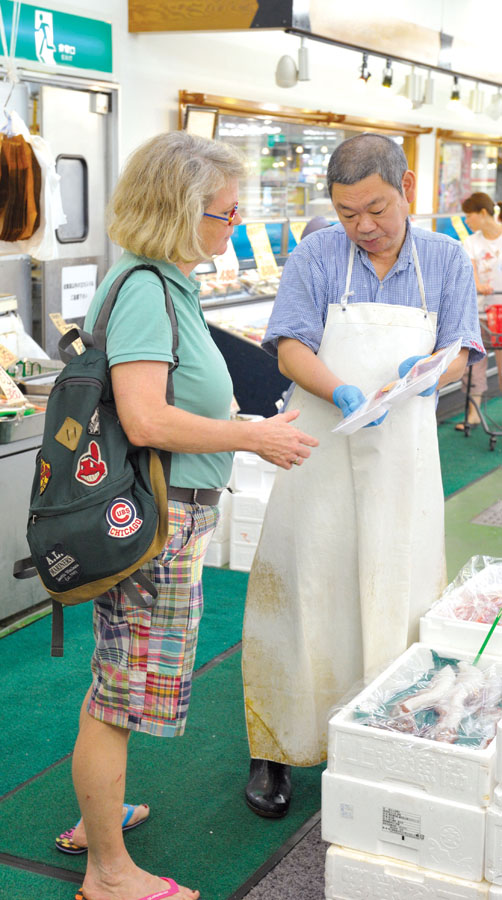
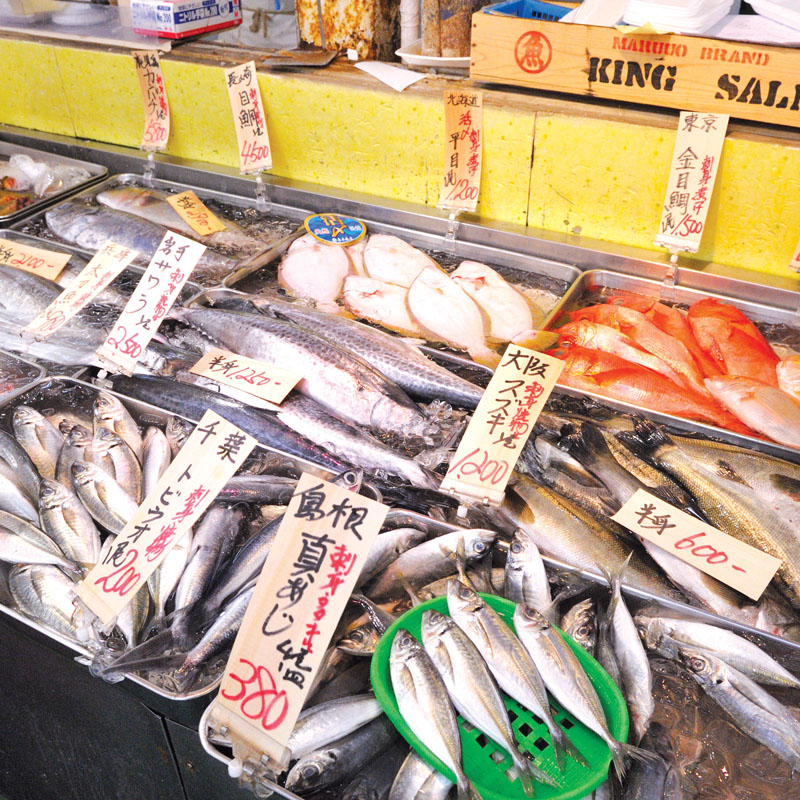
THE FISHMONGER

A lot of people don’t like the family of fish that includes true mackerel and jack mackerel, something I could never understand until a recent conversation at a cooking class in Vietnam with Patricia Wells. People have a problem with these lean (but slightly oily), shiny varieties, which are sometimes fishy or dry if the cook isn’t careful. But raw is seductively mild. The addition of miso in this simple preparation is brilliant, as are the chives. In Japan, I use wild green onions in the spring. If your jack mackerel filets have a slightly strong smell, the optional egg yolk will introduce a creamy note and make the fish milder.
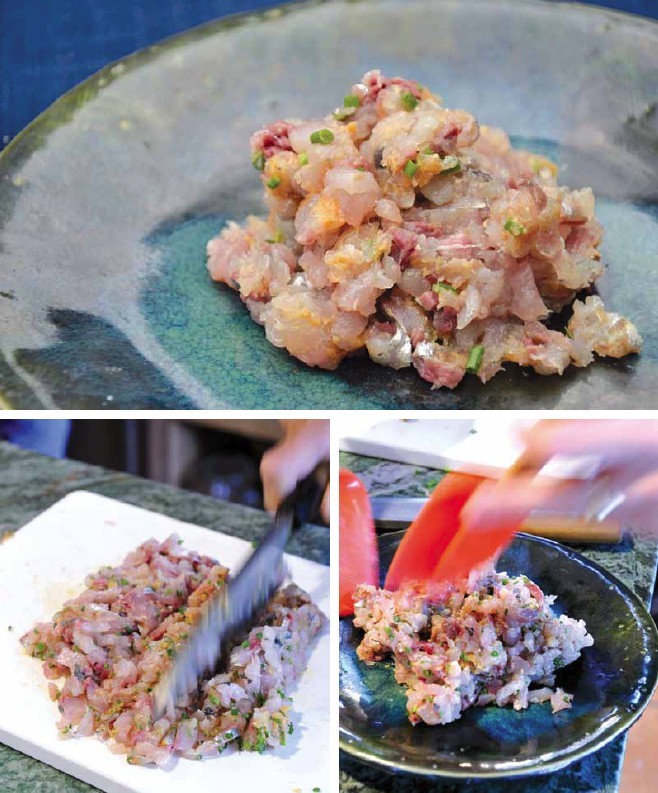
hand-chopped jack mackerel with miso SERVES 6
NAMERO
3 sashimi-grade, very fresh jack mackerel (about 3½ ounces/100 g each)
2 tablespoons brown rice miso
1 tablespoon finely chopped chives or scallions
1 very fresh raw egg yolk, at room temperature (optional)
Lemon wedges (optional)
With a razor-sharp knife, remove the head from the fish by slicing the ventral gill diagonally up to the edge of the head near the dorsal fin. Then cut open and gut. Rinse off the blood and lingering insides under cold running water. Pat dry. Cut off the hard scale line that extends laterally up from the tail area on both sides of the fish. Remove the skin from the flesh by grasping the top corner of the skin and peeling it back away from the flesh. The ventral edge of the fish has a hard ridge and does not like to give up the skin, so take care. As this takes practice, don’t lose heart if you are clumsy at first. If you have a nice fishmonger, he might perform this operation for you.
Slice the jack mackerel filets in ¼-inch (6-mm) strips, then again into a ¼-inch (6-mm) dice. With the fish still on the chopping board, drop the miso on top of the diced fish and sprinkle with the chives. Add a farm-fresh yolk if you like. Chop the ingredients into the mackerel with your razor-sharp knife until well distributed and the mackerel amalgamates together into a roughly chopped mass.
Serve as an appetizer, as is or with a lemon wedge, or even spooned on top of a mild water cracker. It’s also lovely in hand-rolled sushi.
VARIATION: Substitute flying fish or sardine for jack mackerel. Excellent with tuna or bonito, but skip the miso. Add finely chopped garlic or grated ginger to the bonito.
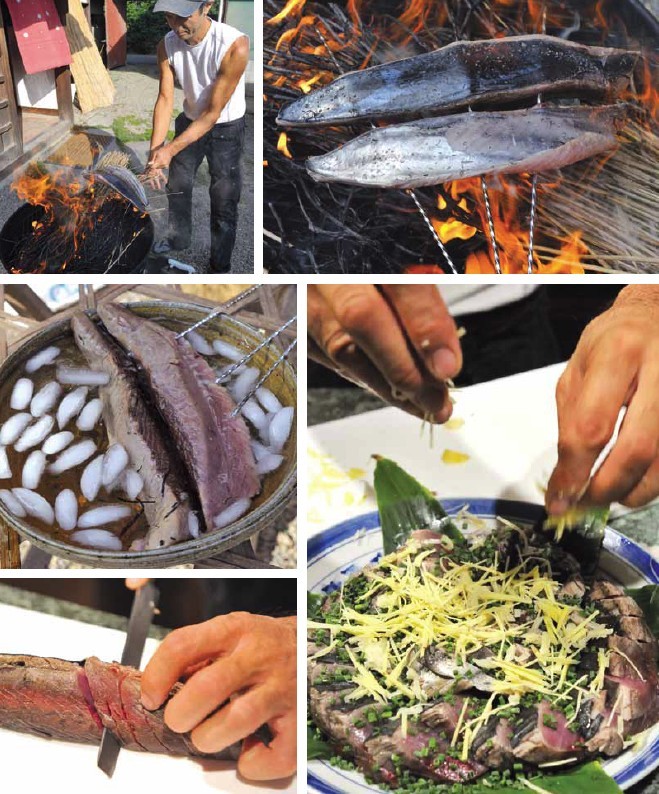
In Japan, bonito (skipjack tuna) season starts in spring with lean, clear-flavored flesh and ends in fall with fatty, darkly flavored (and colored) meat. I love both seasons, but I particularly like to taste the change in flavor and fat as we move into the summer. I also like that the fish makes sense. In the spring you are looking for lighter and brighter food, whereas in the fall you are ready for stronger or heartier fare. Nature is funny that way. If we leave it be, it gives us what we want when we want. No need to eat out of season.
seared bonito with ginger, garlic, and chives SERVES 6
KATSUO NO TATAKI
A side of sashimi-quality fresh bonito
Sea salt
DIPPING SAUCE
4 tablespoons soy sauce
4 tablespoons yuzu, sudachi, or Meyer lemon juice
GARNISH
3 tablespoons finely chopped chives
1 tablespoon coarsely chopped garlic
1 tablespoon finely julienned ginger
½ tablespoon yuzu, sudachi, or Meyer lemon zest (optional)
Cut out the dorsal bone to create 2 elongated triangular-shaped filets. Scrape off any hard spots on the flesh. Set the filets side by side on a cutting board or dinner plate and salt lightly on all sides from about a foot (30 cm) above the fish.
Poke the filets through the horizontal side, skin side up, with five 1½-foot (40-cm) long metal skewers, keeping the handles all at the same place and the tips radiating out like an open fan.
Heap straw in a barbecue and light (or prepare a high-flame charcoal grill). Carefully hold the skewered filets directly in the flames, rotating until the skin sizzles and all sides are seared. (Take heed: This operation is quite difficult if there is any breeze.) Plunge the filets into ice water to cool. Remove from the water, pat dry, and wrap in a clean kitchen towel before refrigerating. Alternatively, sear over a hot stove flame, wrap in a paper towel, and place in the fridge for 1 to 2 hours or 30 minutes in the freezer to cool.
When ready to eat, slice diagonally into ¼-inch (6-mm) thick pieces and fan out overlapping slices on a beautiful round dinner plate, working from the outside in like flower petals.
Make the dipping sauce by mixing the soy sauce and citrus juice. Sprinkle the sliced fish with the dipping sauce and garnishes. Serve immediately.
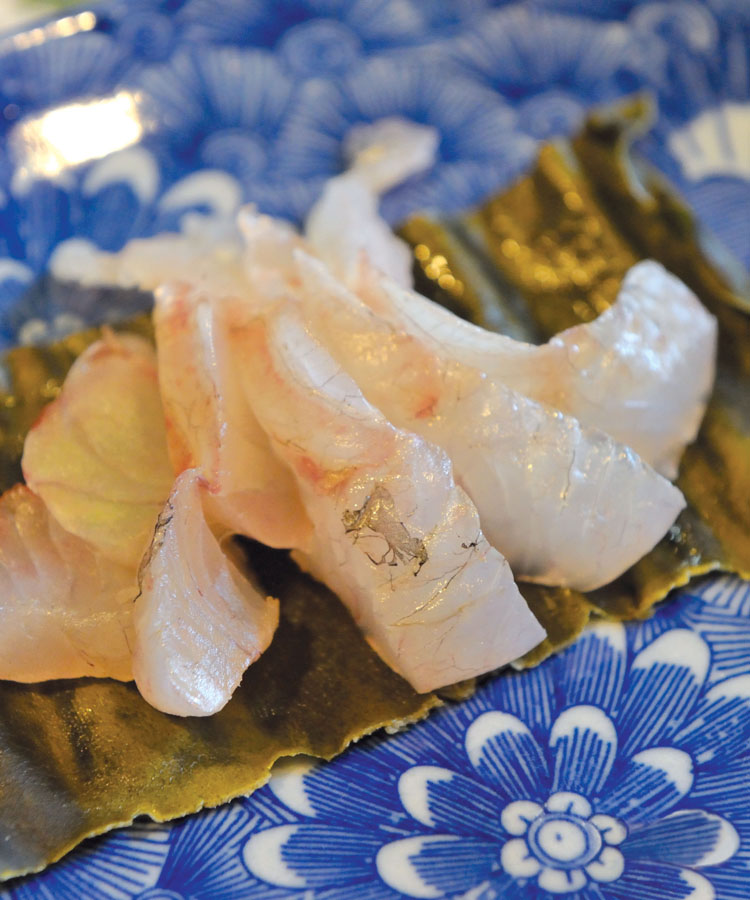
The konbu wicks out some of the moisture from the fish, leaving the flesh tighter and firmer in texture. In Japanese this is called shimeru, “closing up.” That extra element of firmness renders this style of sashimi a good choice when putting together a fish shabu-shabu dinner. Sashimi treated by this method has a gentle flavor, and I often prefer kobujime-prepared fish to raw.
kelp-wicked red snapper SERVES 6
MADAI NO KOBUJIME
1 red snapper, skinned and filleted into 4 pieces (about 1 pound/500 g fish meat)
½ teaspoon fine sea salt
4 tablespoons sake
2 to 4 pieces konbu (enough to cover the surface of the fish)
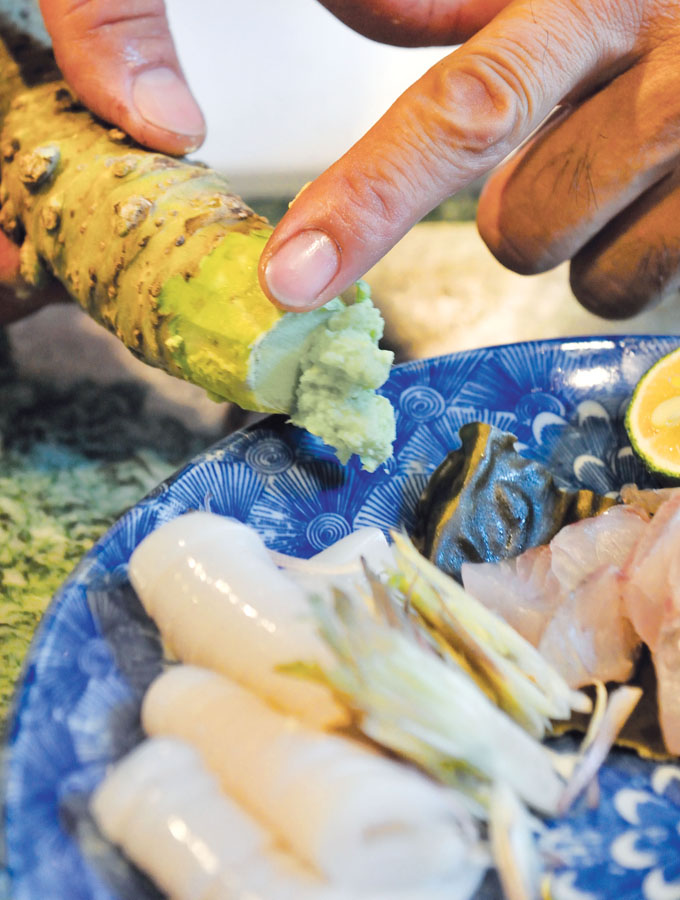
Freshly grated wasabi (optional)
Organic soy sauce
Remove the pinbones from the fish with flat-bladed tweezers. Cut off any discolored parts. Sprinkle the salt lightly across the surface of the filets from a couple of feet above the fish. (This technique, called tatejio, ensures an even distribution of salt over any given surface.) Pour the sake onto a dinner plate and soak the konbu pieces in the sake to soften. Cover the belly side (as opposed to skin side) of the fish with one layer of konbu (you can place narrow pieces side by side if you do not have wide pieces).
Tear off two connected absorbent paper towels and place 2 snapper filets along the shorter edge, about 5 inches (12 cm) in. Fold that edge of the paper over the fish and gently roll up the fish to wrap. Repeat with the other 2 filets. Enclose in plastic wrap and refrigerate overnight (or at least 4 to 6 hours). This process wicks out the moisture and firms up the flesh of the fish, giving it a pleasantly tight texture.
Remove the fish from the fridge, peel off the konbu from each filet, and use the konbu to line a serving plate. Slice the fish into ¼-inch (6-mm) thick pieces at a diagonal, slide your knife under the sliced fish, and arrange it attractively on top of the konbu-lined platter, either in a single line of fish, or two or three. Serve with freshly grated wasabi (if possible) and a small dish of soy sauce.
SASHIMI

Shime Saba is the sashimi preparation that Tadaaki seems to crave most—and he makes it whenever he comes across some beautifully fresh mackerel. Mackerel is more of a winter fish, but it can also be delicious in the summer, depending on where it was caught. The vinegar “cooks” the mackerel a bit and takes away the fishiness that may accompany cooked mackerel. Like most other silvery fish, mackerel is eaten with grated ginger, not wasabi. Also, be sure not to skimp on the salt—it is necessary for the success (and safety) of this dish. The salt cures the fish and renders the mackerel able to be eaten raw.
vinegared mackerel SERVES 6
SHIME SABA
2 (5½-ounce/150-g) deboned mackerel filets, skin on
Fine sea salt
2 to 4 pieces of konbu (enough to cover the surface of the fish)
Rice vinegar
1 (¾-inch/2-cm) square piece of peeled fresh ginger, grated
Organic soy sauce
Set the mackerel filets on a dinner plate or in a shallow plastic container. Salt both sides heavily—the surface of the fish should be almost ⅛ inch (or at least 2 mm) thick with salt. Don’t hold back! Cover with plastic wrap and refrigerate for 30 minutes.
Meanwhile, lay the konbu across a dinner plate and splash it with rice vinegar to soften.
After 30 minutes, remove the salt-covered mackerel from the fridge and rinse in cold water. Pat dry with a towel and set the filets on a chopping board. Remove any center bones with flat-headed tweezers and the skin with a razor-sharp knife (slide your knife blade in between the skin and the flesh, get some purchase and pull the skin out, keeping the blade angled down toward the skin and the board). This little operation takes practice, so keep at it. You will get better, I promise.
Piece together the vinegar-soaked konbu on top of the belly side of the skinned filets. Wrap each filet in one absorbent paper towel, and place both in a heavy-duty, large resealable plastic bag. Dump in the vinegar from the konbu soaking plate and add more vinegar until the paper is soaked. Squeeze out the air, roll, seal the bag, and let marinate in the refrigerator for 20 to 30 minutes while you finish preparing dinner. (If you are not ready to serve at the end of 30 minutes, unwrap as detailed below, pat dry, wrap in absorbent paper toweling, and refrigerate until ready to slice.)
Take the fish out of the fridge and remove from the bags. Peel off the paper towel and the konbu and discard both. Slice the mackerel into ⅓-inch (8-mm) thick pieces at a diagonal—but before cutting each new slice, cut a slit halfway through the middle of the slice of mackerel (at the exact same angle as you are cutting) to make the fish easier to eat. The cured fish meat should have a frosty cast and should not be rosy pink (thus indicating you did not salt the fish as heavily as needed). If not, repeat the salting process and vinegar bath for 15 minutes each to finish the cure.
Slide your knife under the sliced fish and arrange it attractively on a couple of small plates (or as part of a larger sashimi plate)—either in a single line of fish or two or three lines resting against each other. Serve with the freshly grated ginger and a small dish of soy sauce.

Kanchan prepared this for the Soba Dinner at Chez Panisse in 2008. A visit to the Monterey Fish Market on Pier 33 in San Francisco yielded a gorgeous halibut, so fresh that it hadn’t yet gone into rigor mortis. Kanchan thought it might be a good fish for a miso treatment, but Tom Worthington from Monterey Fish advised against it. That particular kind of halibut was difficult to broil and could easily become chalky, so Kanchan opted to treat the halibut with citrus and vinegar instead. It was citrus season at the time (February), and after experimenting with different flavors, he decided to use a mixure of Meyer lemon with a bit of fresh orange juice and a hint of rice vinegar for his sujime. Kanchan was inspired to use Meyer lemons—a new flavor for him. In Japan, I like to use yuzu.
citrus and vinegar-marinated halibut SERVES 6
HIRAME NO YUZU-SUJIME
4 to 6 pieces of konbu (enough to wrap the whole piece of fish)
¼ cup (60 cc) rice vinegar
1-pound (450-g) piece of sashimi-grade halibut filet, deboned and skinned
½ teaspoon fine sea salt
4 tablespoons yuzu juice; or 3 tablespoons Meyer lemon juice plus 1 tablespoon orange juice
Freshly grated wasabi (or from a tube)
Organic soy sauce
Put the konbu on a dinner plate and splash it with the rice vinegar to soften.
Set the halibut on a board and sprinkle lightly but evenly with salt on both sides from a foot (30 cm) above the fish (tatejio).
Remove the konbu from the vinegar (save the konbu-flavored vinegar until the next day) and shake off the excess liquid—it should not be dripping. Lay the halibut filets, belly side up, on a board and cover each filet with the vinegar-soaked konbu, piecing together to make sure that the whole surface of each filet has been covered. Stretch out two 2-foot (60-cm) long pieces of plastic wrap and place a konbu-draped filet across the middle of each one. Cover the skin side of each of those 2 filets with the vinegar-soaked konbu and place 1 of the remaining 2 filets on top. Fold up the plastic wrap to enclose each pair of konbu-wrapped halibut filets and seal tightly. Place all of the filets in a resealable plastic bag and refrigerate overnight but no longer than 24 hours.
The next day (within an hour of serving, but preferably right before removing the fish from the refrigerator) combine the yuzu (or Meyer lemon and orange) juice with 1 tablespoon of the reserved konbu-flavored vinegar (if not enough, supplement from the vinegar bottle).
Thirty minutes before serving, take the halibut out of the fridge and remove from the plastic bag. Unwrap and peel off the konbu, but do not discard. Lay the halibut in a small nonreactive shallow pan (or plastic container) and pour the citrus juice-vinegar mixture over the fish. Refrigerate for 15 minutes, flip, return to the fridge for 15 more minutes, then remove from the juice and pat dry with a clean kitchen towel.
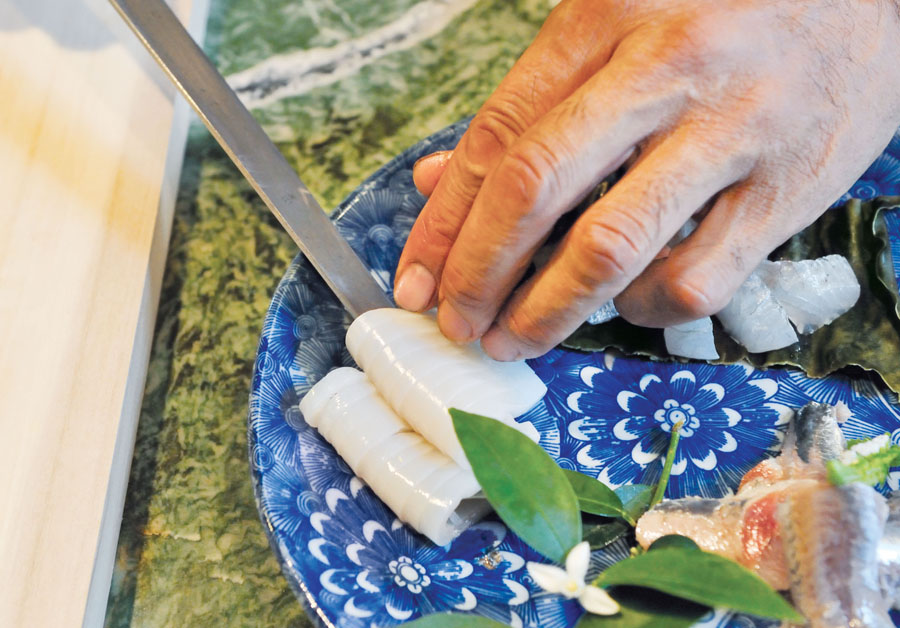
Slice the halibut at a diagonal into ¼-inch (6-mm) thick pieces. If the fish is wide, cut those slices in half again crosswise (the sashimi cut should not be much longer than 2 inches (5 cm), or shorter than 1 inch (2.5 cm).
Slide your knife under the sliced fish and arrange it attractively on a couple of small plates (or as part of a larger sashimi plate) in a few lines resting against each other. Slice the softened konbu into fine ribbons and mound next to the halibut slices. Serve with grated wasabi and a small dish of soy sauce.
In Berkeley, for the 2010 Soba Dinner preparations, one morning Kanchan, Christopher (my eldest), and Sylvan Brackett from Chez Panisse (and Peko-Peko Catering) all trouped across the Bay Bridge to check out the freshly caught fish at Monterey Fish. It was an early mission (very early), so Andrew and I chose to stay in bed. When we finally hooked up back at Sylvan’s cooking studio in Oakland, Kanchan regaled us with his tale of grabbing out fish guts (liver and eggs, to be precise) and yellowtail collars from the refuse pile due to be jettisoned. He cackled with glee at his “finds” and shook his head over the American waste. While he did not serve those orphan parts at the Chez Panisse dinner, the cooks were the lucky recipients later that night. Kanchan simmered the eggs and livers in soy sauce- and mirin-flavored dashi. The texture was slightly crunchy on the tongue and mildly sweet in the mouth—lovely. And the boldly fatty yellowtail collars, broiled, were meaty and succulent. Good in the oven, these are even better on the barbecue.
charcoal-grilled yellowtail collar SERVES 4
BURI KAMA
1 yellowtail collar (9 ounces/260 g)
Sea salt
Grated daikon
Soy sauce
Prepare a barbecue using hardwood charcoal (the fire needs to burn down, so do this a good 45 minutes before cooking). The collar sputters a bit from its natural fish oils, so cook over low heat.
Lay the yellowtail collar on a small clean grate and set directly over the fire. Sprinkle lightly with salt from a foot (30 cm) above the fish (tatejio) and cook slowly for about 10 minutes. Flip carefully and salt the other side. Flip every 10 minutes or so and cook for a total of 20 to 30 minutes, depending on the thickness and the heat.
Alternatively, broil slowly on a rack set over a foil-lined broiler pan in the third position from the top of the oven. Check after 5 minutes to gauge the broiler heat. If the collar is browning too quickly, move the rack to a lower position. Turn several times for even cooking and browning. Depending on the broiler, this will take from 10 to 15 minutes.
Transfer the collar from the grill to an attractive plate. Squeeze a few spoonfuls of grated daikon in your fist to remove excess liquid, mound on the plate next to the collar, and drizzle the center of the mound with soy sauce. Let people dig in with chopsticks as a convivial first course or snack with drinks before dinner.
VARIATION: Substitute the collar for a similar fatty fish such as salmon.

Though I prefer the white-flesh varieties such as tobiuo or tachiuo, any of the oily-skinned, shiny fish do well as small chopped patties and are a nice change from the typical meat or chicken ones. If the patties seem to separate a bit during the cooking process, it means you should have added more egg yolk. Egg yolks differ dramatically in size, so they are always an approximation at best when listed in recipes. In general, a bit more yolk is better than too little because the yolk acts as a binder. The method here follows pretty closely the method for hand-chopped jack mackerel—another good choice for these patties—as are sardines or herring.
flying fish patties SERVES 4
TOBIUO NO HAMBAGU
About 1 pound (450 g) flying fish or cutlassfish filet, skinned
2 tablespoons brown rice miso
2 large raw egg yolks, at room temperature
2 teaspoons potato starch (katakuriko)
1½ tablespoons finely chopped scallions or chives
3 tablespoons good-quality rapeseed oil
1 lemon, cut into 6 wedges (or 2 sudachi cut in half)
Slice the filets into thin strips (¼ inch/6 mm), then crosswise into the same size dice (¼ inch/6 mm) with a razor-sharp knife. Leave the fish on your chopping board and spoon the miso directly on top of the diced fish along with the egg yolks. Sprinkle with the potato starch and strew with the chopped scallions. Chop the ingredients into the flying fish with your knife by lifting and fluffing until the mixture has come together into a well-distributed homogeneous mass.
Form into 4 patties by gently slapping between cupped hands.
Heat the oil in a large frying pan over medium-low heat. When nicely warm, drop the patties into the oil and fry 2 minutes on one side. Turn and fry 2 minutes on the opposite side. Cover and cook 2 more minutes on low. Uncover, turn the heat back up to medium-low, and cook 1 more minute before removing the pan from the heat. The patties should be golden brown and firm but not unforgivingly hard to the touch; if not, cook a tad more. Serve with a wedge of lemon or, better yet, half of a sudachi.
I love the slightly crusty grains of salt that meet your tongue on random bites of salt-broiled fish. The salt is a subtle flavoring but definitely present. This kind of preparation epitomizes the simplicity that draws me to Japanese country food. Supremely fresh fish and minimal work yield a beguilingly tasty dish that anyone will want to replicate—well, unless you’re not a fish person.
salt-broiled herring SERVES 6
NISHIN NO SHIOYAKI
4 medium-sized fresh herring
Sea salt
Grated daikon
Soy sauce
Lay the fresh herring on a foil sheet set over a grate. Place the oven rack in the third slot from the top of the oven and preheat the broiler. Sprinkle the herring with salt and broil for 15 minutes. Flip carefully and salt the other side. Broil 10 more minutes. Share the fish or serve 1 fish per person for big eaters.
Squeeze a few spoonfuls of grated daikon in your fist to remove the excess liquid and mound on the plate next to the fish. Drizzle the center of the mound with soy sauce.
VARIATION: Use any other fish one normally eats whole such as trout, saury, sardine, aji (jack mackerel), or sayori (halfbeak). For the thinner or smaller fish, cut the cooking time down to 10 minutes on the first side and 5 on the second.

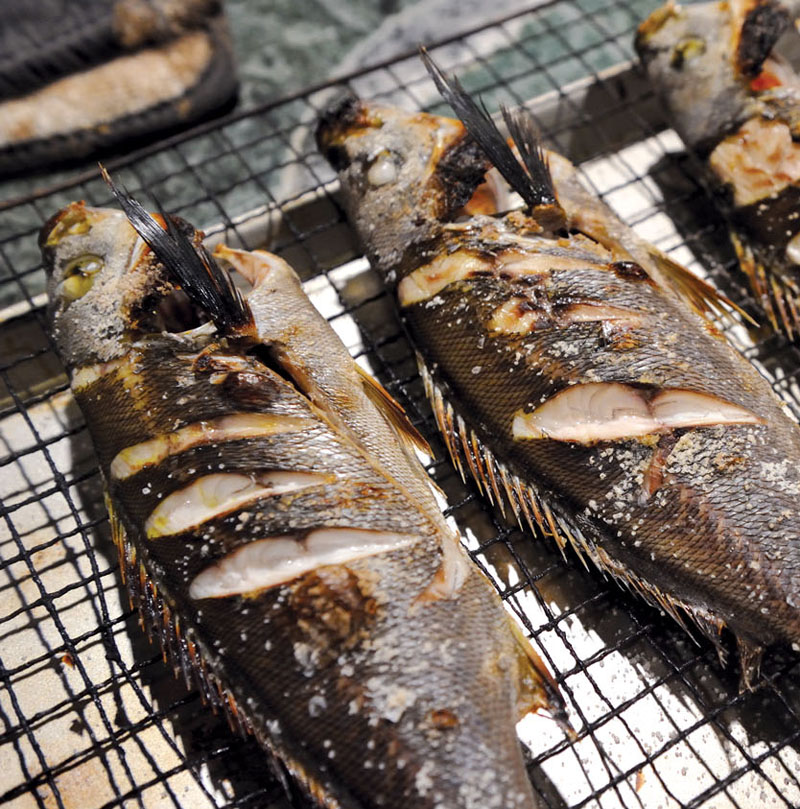
Cutting deep slits in the flesh of a slightly larger fish such as grunt will help circulate the heat and cook it more evenly. The salt leaves a dry frost around the slits when grilled, and thus makes for an impressive presentation. Grunts are fatty and mild, but not oily, so when cooked their meat is almost fluffy.
salt-broiled grunt SERVES 6
ISAKI NO SHIOYAKI
3 medium-sized fresh grunt, or any other whole thick, mild fish, gutted and scaled
Fine sea salt
Place the oven rack in the third slot from the top and preheat the broiler.
Cut ¼-inch (6-mm) deep diagonal slits in both sides of the fish. Check to make sure the hard fin on the dorsal side of the fish has been cut off. Lay the whole fish on a grate set over an oven pan. Sprinkle the fish lightly with salt and broil for 10 minutes. Flip carefully and salt the other side. Broil 5 more minutes. Serve family style, two people sharing 1 fish.
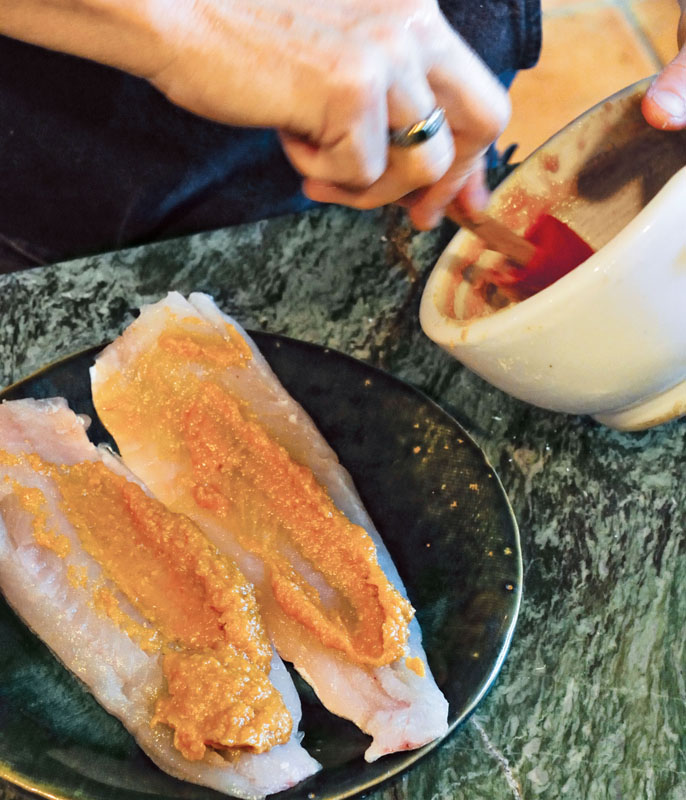
Miso tends to burn when broiling, so be very careful that the fish is not close to the heat source. Also do not forget to oil the grill with a mild oil such as rapeseed. The miso dries out on the skin, giving the fish a slight crust and a moist center.
miso-broiled cod SERVES 4
SUKESODARA NO MISO YAKI
3 tablespoons brown rice or barley miso
1 tablespoon sake
4 small (¾-inch/2-cm) thick cod or pollock filets (about 2½ ounces/70 g), skin on
Set the oven rack in the third slot from the top and preheat the broiler.
Measure the miso into a small bowl and whisk in the sake. Lay the cod filets on a cutting board or plate. Spread the miso mixture evenly over the surface of both sides of the fish.
Transfer the filets, skin side down, onto an oiled fish rack, and perch on a cookie sheet to catch any drips. Broil for 4 minutes, flip gingerly (the miso sticks), and broil the skin side for 3 minutes. Carefully remove the filets from the rack and serve immediately or at room temperature.
VARIATION: Salmon filets would also be a good choice. Barbecuing will result in a more flavorful fish but take care that the coals are at a very low ember.
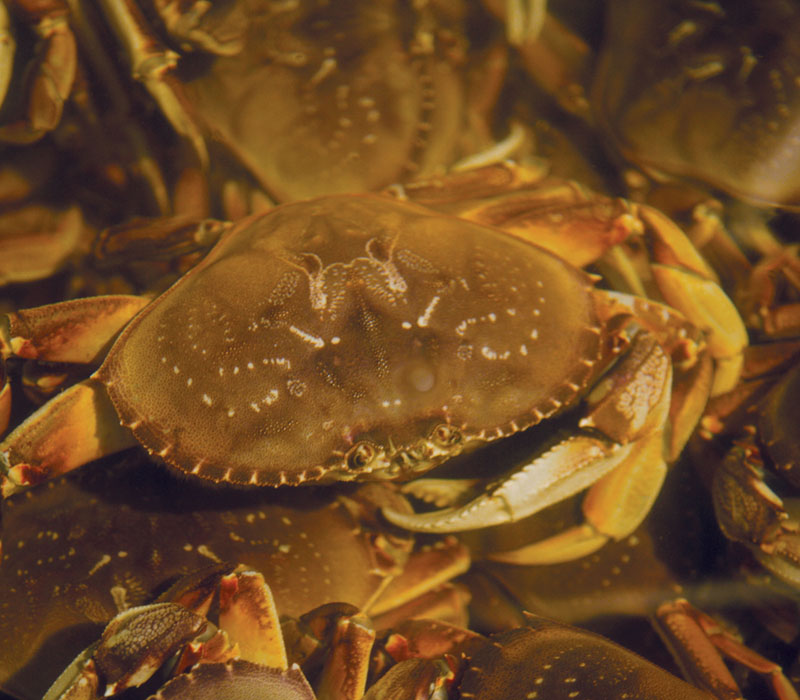
CRAB “MISO”


Although not my first taste of sushi, my first “regular” sushi bar was called Onna no Shiro near the gates of Grant Street in San Francisco around 1980. The sushi bar was connected to a karaoke hostess bar by a fake Japanese-style bridge. Best friend Cecily Dumas and I became pals with the young sushi master, Sachio Kojima, and the counter waitress, Mama-san. We followed him when he opened up his own place on Geary Street called Kabuto Sushi. At Kabuto, Sachio developed several signature dishes, including one of my favorites: salmon mushiyaki. At the time, I didn’t think how ridiculously simple it would be to make at home. Of course the whole thing hinges on fresh local salmon, so do wait for salmon season. Also, at around 80 grams (3 ounces), Japanese fish filets are smaller than the ones in the U.S., so you might want to cut large filets in half.
foil-wrapped broiled salmon with butter SERVES 4
SAMON NO MUSHIYAKI
4 (¾-inch/2-cm) thick salmon filets, skin on (about 3 ounces/80 g each)
1 teaspoon sea salt
4 teaspoons sake
4 teaspoons butter
4 scallions or 8 to 12 chives
Set the oven rack on the third slot from the top. Preheat the broiler.
Season the salmon filets with sake and salt, then dab a teaspoon of butter on top of each filet before curling a scallion (or a few chives) on top of the fish. Wrap in foil (see opposite).
Broil for 10 minutes on a rack set over a pan to catch the drips.
Serve as is or remove from the foil packages.
VARIATION: Any fresh fish filets are moist and delicious prepared this way: red snapper, cod, yellowtail, swordfish, halibut . . . whatever. Just adjust the cooking time according to the thickness of the fish. Or omit the butter and scallion and increase the sake to 1½ teaspoons for a more pristinely austere version that will balance well with a meal containing tempura or other deep-fried food.
FOIL WRAPPING
Tear off four 8-inch (20-cm) long pieces of lightweight foil from a 12-inch (30-cm) wide roll and lay out side by side on your workplace. Set one filet on each piece of foil. Make sure the foil is big enough to enclose the filets well so the sake will not leak out. Sprinkle the filets lightly on both sides with about ¼ teaspoon salt from about a foot (30 cm) above the fish, then splash each with a teaspoon of sake.
Bring the two long edges of foil together and roll down, then squeeze the ends tightly to seal up the fish. Scrunch up the ends and bend them in toward the middle a bit to prevent the juices from running out.

Sea bass, with its lean, white flesh, benefits from a gentle cooking method. Rather than broiling, we prefer to foil-wrap sea bass, seasoned with a little salt and sake, and cook it in a bamboo steamer. This cooking method helps avoid the inevitable drying of lean fish like sea bass or halibut, making it an (almost) foolproof cooking technique. In the U.S. fish is often sold cut crosswise into steaks, whereas in Japan the fish is halved, then each filet is cut diagonally into thin filets. Try to get filets if possible—otherwise you could substitute thick half-steaks.
sake-steamed sea bass SERVES 4
SUZUKI NO SAKAMUSHI
4 (¾-inch/2-cm) thick sea bass filets, skin on (about 3 ounces/80 g each)
1 teaspoon (or more) sea salt
4 teaspoons sake
Fill a large wok or sauté pan with high sides and a curved bottom halfway with water and bring to a simmer over high heat. The pan should be large enough to be able to set a steamer over but not in the simmering water.
Season the fish with the sake and salt and wrap in foil. Cook in the steamer over medium-high heat for 20 minutes. Set the steamer basket on a dinner plate to catch the drips. Place the hot foil packages of sea bass on individual plates or as part of a dinner plate with vegetables and rice.
VARIATION: Any lean fish filets can be substituted for the sea bass. You are looking for a mild, elegant taste.

The morning of one of our photo shoots, I zoomed over to the fish market while Miura-san was photographing flowers in the garden. I bought a slew of fish but ultimately ran out of time to prepare all of them. I don’t quite remember what I had in mind for the snapper, but Tadaaki kindly took it over and put together this aromatic and subtly nuanced dish. The snapper wouldn’t quite fit in the steamer, and before I could stop him he whacked off the tail, hence looked a little too bizarre to include a photo.
spring onion and ginger–stuffed steamed snapper SERVES 6
MADAI NO NEGI-SHOGA MUSHI
1 fresh snapper (about 2 pounds/1 kg)
1 negi or 2 thick spring onions, cut into julienne slivers
1 (1-inch/2.5-cm) square knob of ginger, peeled and slivered
Sea salt
¼ cup (60 cc) sake
Run the back side of a kitchen knife across the surface of the snapper to remove the scales. Take out the insides and cut off the hard dorsal fin. Wash the fish well in cold water to rinse out the blood and lingering guts. (Or have the fishmonger do this for you.)
Stuff the snapper with the slivered negi and ginger. Sprinkle salt lightly all over the fish inside and out. Place on top of a plate set inside a bamboo steaming basket set over simmering water. Pour the sake over the fish, cover, and steam for about 15 minutes, or until done. The fish should no longer be translucent but should not cook until dry.
VARIATION: Substitute any similar mild-flavored local medium-sized fish that will fit nicely (whole) in the steamer.


Freshly caught clams of all sizes and shapes are abundant in Japan and not expensive. Most of the smaller varieties are used in daily cooking, since they go well with miso soup. The important point is to get very fresh clams or even mussels. In this recipe, take care that the greens don’t become muddy colored. I would sacrifice heat retention and leave the pot uncovered after they are cooked. These clams are also tasty for a cold snack the following day.
clams simmered in sake with scallions SERVES 6
ASARI NO SAKAMUSHI
8 cups asari or any small local clams
About 3 cups (750 cc) sake
1½ thin negi or 4 scallions (both white and green parts), cut into medium dice
1 teaspoon sea salt
2 dried japones or árbol hot chile peppers, crumbled (optional)
1 handful roughly chopped mitsuba leaves
Cooked Japanese rice, for serving
Scrub the clams in several changes of cold water to express some of the sand. Scoop the clams up with your hands or a wire sieve and drop into a large heavy pot with a lid.
Glug in enough sake to fill the pot about three-quarters the height of the clams. Sprinkle with the negi, salt, and chile peppers, if using. Replace the lid and cook on high heat until the clams have opened. Stir in the mitsuba and cook for about 30 seconds more. Serve in bowls as an appetizer or accompanied with a bowl of cooked Japanese rice. Discard any unopened clams.
VARIATION: Substitute flat-leaf parsley or cilantro for the mitsuba. For a heartier version, add 4 cups (1000 cc) spinach leaves, washed and chopped into 4-inch (10-cm) pieces, in place of the aromatic herbs. For another twist, swirl some of the hot clam liquid into 3 tablespoons of miso, whisk to emulsify, and stir back into the pot right before serving. Omit the salt.
My mother-in-law always puts eggs in her batter, as does Tadaaki, but I find egg makes the tempura spongy. Tempura requires a big pan full of oil, so of course the thrifty farmwife will fry up a variety of vegetables when she makes tempura—and the result will be a large draining tray heaped with batter-fried vegetables (and fish). The Hachisu family was numerous, so it took a bit of time to fry all the tempura. As a result, most of the fish or vegetables had cooled by the time they got to the table. And yes, they were a little spongy.
But now that I am older, I prefer to make tempura the way I like to eat it—crispy and burning hot. You will most likely end up with extra batter at the end—just toss it. If you are ready to go whole hog and fry up vegetables and fish in the same meal, I would use two smaller saucepans of oil so you can fry them at the same time (never fry vegetables after frying fish, despite what your farmer husband says about wasting oil). Serving this tempura hot from the oil means you may not be able to sit down right away and eat with the others. But then you might enjoy the occasional solitary meal.
cod tempura SERVES 4 TO 6
MADARA NO TEMPURA
Best-quality rapeseed or peanut oil
½ cup (75 g) good-tasting cake flour
½ cup (125 cc) cold sparkling water
⅛ teaspoon fine white sea salt
3 or more large ice cubes
7 (¾-inch/18-mm) thick cod filets (2 to 2½ ounces/60 to 70 g each)
Fine white sea salt, organic soy sauce, or warm Tempura Dipping Sauce for serving
Line a cookie sheet with paper towels on top of one whole newspaper (folded in half) to absorb the oil from the tempura. Set the sheet next to the stove. Over low heat, warm 4 inches (10 cm) of oil in a medium-sized, heavy, stainless steel saucepan.
Meanwhile, whisk the flour with the sparkling water and salt in a medium-sized bowl. Take out two pairs of long cooking chopsticks or tongs. Use one pair to dip the fish in the batter and one pair to remove the tempura from the hot oil. (Or just use your bare fingers to dip the fish in the batter if your sink is handy for a quick washup.) A flat slotted or mesh skimmer also works well to scoop the cooked tempura from the sizzling oil. Increase the heat on the oil to medium—be careful that the oil does not smoke. Test the readiness of the oil by dripping a little batter into the oil before you begin to fry. The batter should form a small ball as it hits the oil but should not brown immediately.
Toss the ice cubes into the tempura batter with chopsticks. Dip 3 or 4 cod filets in the batter, lift up each filet (one by one), and slip into the side of the pot of hot oil. (Remove the ice cubes to a small bowl and add more if necessary for subsequent batches. The point is to chill the batter but not dilute it.) The oil will bubble furiously, then slowly subside. Make sure the filets are not sticking to each other. Gently pry them apart with your chopsticks if they are. Turn the filets as they cook to promote even cooking and adjust the oil temperature as you go. The fish should be cooked at a moderate rate in the actively bubbling oil, but the batter crust should not take on color too fast. When the bubbles start to subside and the fish is golden brown, remove to the paper-lined cookie sheet. Serve hot with fine white sea salt, soy sauce, or warm dipping sauce.
VARIATION: Most any fish filets will substitute well for the cod as long as the fish is very fresh. Watch the bubbles and the oil temperature. The cooking time will depend on the thickness of the filets.

There is something intriguing about the slightly dry sheen that forms on the surface of the fish as it dangles out in the fresh air. Himono (dried or semidried fish) are perhaps most commonly made from the more oily, silver-skinned fish varieties such as jack mackerel (aji), but butterfish (ebodai), with its pink flesh, is a beautifully mild alternative. We don’t air-dry fish as much as we should for the simple reason that it takes a bit of foresight. You must visit the fish market in the morning because the fish has to hang outside for at least half a day. Air-dried fish is a common breakfast food, perhaps because it needs only a simple pass under the broiler, so is quickly prepared—and because the dry, slightly salty flesh goes well with a morning bowl of rice.
air-dried butterfish SERVES 4 TO 6
EBODAI NO HIMONO
4 butterfish, gutted, degilled, and butterflied (heads intact)
Salt
Grated daikon (optional)
Soy sauce (optional)
Lay the fish on a wide pan or board and salt lightly on both sides from about a foot (30 cm) above the fish. This method is called tatejio—the distance from the fish ensures even coverage of salt.
Hang the fish outside in a cool shady spot to air-dry for half a day or so but not longer than 1 day. Either poke the fish directly on a hook twisted into a shaded board or thread string through the heads and hang from a tree. In Japan, we also use tiered fish-drying baskets made of blue nylon (usually sold only in the winter when most of the fish drying is done). I have seen these nets sold online from China in lots of 500 though not elsewhere. The net baskets are useful but not crucial to the process.
Grill the fish lightly over a low-ember charcoal fire (or on a rack set in the third level from the top under a broiler flame)—about 4 minutes, skin side up, then 6 minutes, stomach side up (this is opposite if broiling in the oven). The saying goes: Umi hara, kawa sei—“Cook the flesh side of sea fish first, but the skin side of river fish first.”
Serve 1 fish per person hot or at room temperature. Delicious as is or with (squeezed) grated daikon drizzled with soy sauce.
MIRINBOSHI