

TSUKEMONO: PICKLES
TURNIPS AND TURNIP LEAVES PICKLED IN SALT
SALT-MASSAGED NAPA CABBAGE WITH YUZU SLIVERS
SMASHED CUCUMBER PICKLES WITH GARLIC
CUCUMBERS PICKLED IN SOY SAUCE AND MIRIN
CARROTS PICKLED WITH KONBU AND DRIED SQUID
SWEET-VINEGARED DAIKON AND CARROTS
YOUNG GINGER PICKLED IN PLUM VINEGAR
SUIMONO: SOUPS
MISO SOUP WITH POTATO SLIVERS AND WAKAME
CLEAR FISH BROTH WITH CHOPPED SCALLIONS
NABEMONO: ONE-POT DISHES
UMEBOSHI

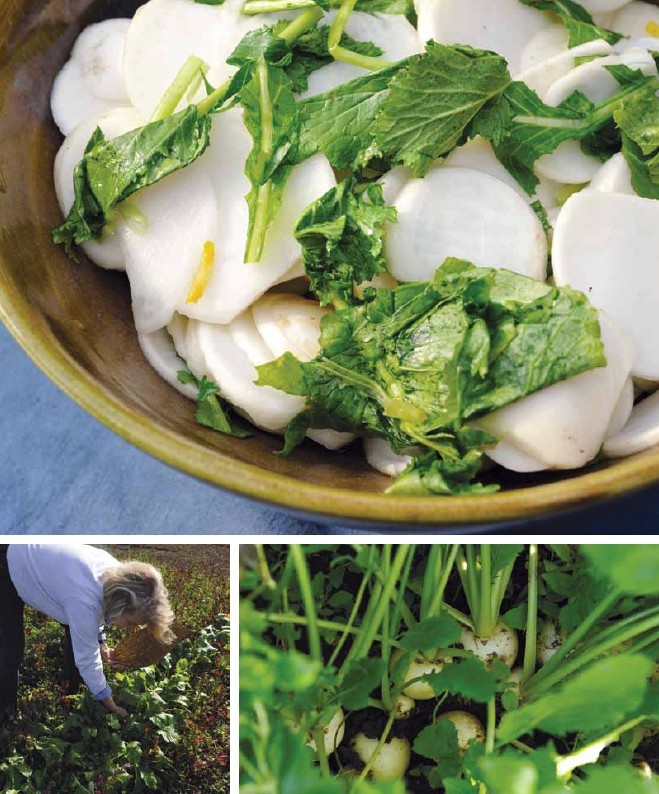
My friend Sharon Jones still talks about when Tadaaki whipped up a simple little Japanese breakfast for her while I slept in. He made her a quick bowl of miso soup, and while the katsuobushi-konbu dashi was steeping, he sliced up some turnips he had grown, threw in the leaves as well, and tossed them with sea salt and aromatics. A bowl of rice with a raw egg rounded out the meal, and Sharon was hooked. Mother of a budding farmer and a chef, Sharon is also on the board of directors of Chez Panisse and tends goats in her spare time. But something about the food and the feeling of Japan captured her heart during the three months she spent in this country, and that feeling pulls her back here. This dish epitomizes everything I love about Japanese farm food: simple, pristine flavors of the field and quick to prepare.
turnips and turnip leaves pickled in salt SERVES 6
KABU NO SHIOZUKE
8 tender turnips with leaves (about 1½ pounds/675 kg)
Scant 2 tablespoons sea salt (27 g)
2 yuzu or 1 Meyer lemon
2 small fresh or dried red chile peppers
1 teaspoon slivered ginger (optional)
Slice the tops off the turnips and reserve. Pare away any discoloration on the turnips and cut them in half vertically, then crosswise into thin (⅛-inch/3-mm) half rounds. Pick through the leaves and slice a couple of small handfuls into 2 by 1¼-inch (5 by 3-cm) pieces. Toss the turnips and leaves together in a medium-sized bowl and sprinkle with salt. Gently but firmly massage the salt in to distribute well to encourage the turnips to exude a bit of their water.
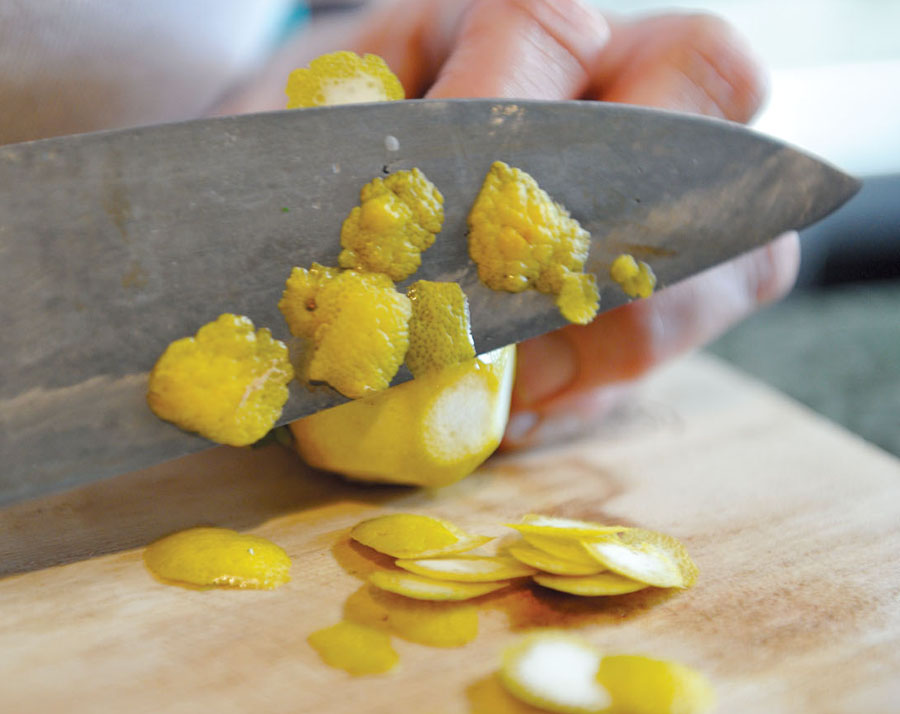
With a very sharp knife or vegetable peeler, shave off the outer yellow zest of the yuzu or lemon, taking care to avoid the bitter white pith. Stack small slices of zest and slice into very thin strips. Slice the chiles into thin rounds. Slide the zest, chiles, and ginger slivers, if using, into the bowl with the turnips. Massage one more time and serve immediately or pack in a resealable plastic bag and chill for a couple of hours. These keep for a few days refrigerated; however, they will continue to leach out water so they will not retain their pleasing crispness.
RATIO: turnips : salt—10 : 4
VARIATION: Slice carrots into thin rounds or daikon into thin quarters (or halves, depending on the size of the daikon) in place of turnips; adjust the salt to taste. Be sure to slice carrots fairly thin, since they will not soften with salt as much as juicier roots such as turnips or daikon. Include the leaves if at all possible, because they not only add color to the dish but also give the sweet vegetables an added earthy, piquant pizzazz.
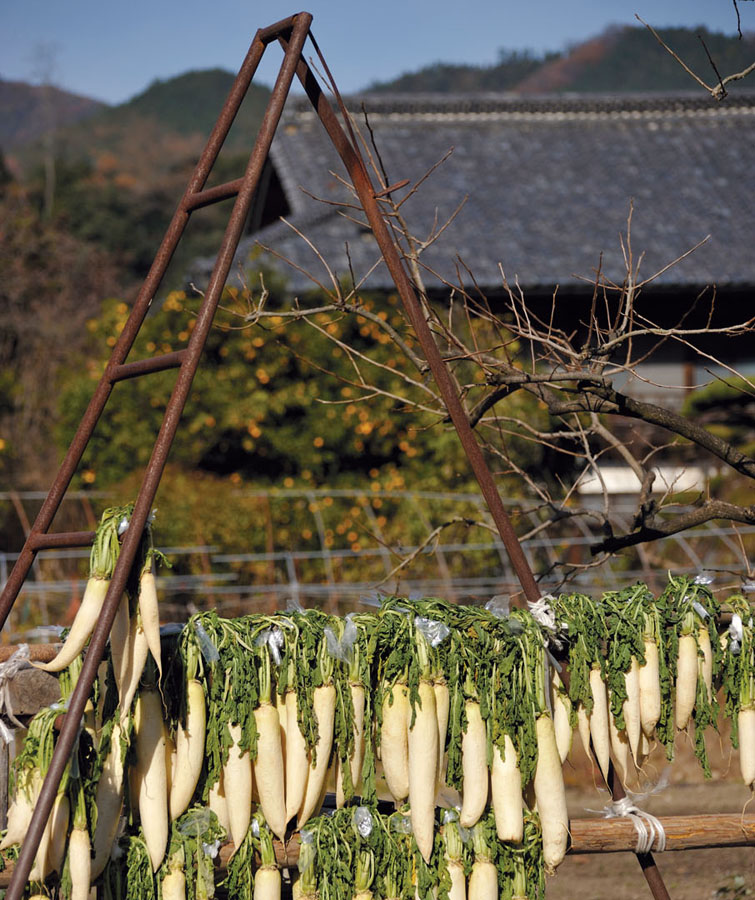
Napa cabbage (hakusai) and daikon are to Japanese winter as eggplant and cucumbers are to summer. If a farming family grows nothing else, at least they will be growing those two vegetables during their seasons. As my father-in-law approached his eighties, he grew fewer and fewer vegetables, but I can still picture him out in the field tying up his heads of napa cabbages to prevent them from spreading out loosely, as is their natural tendency. The Japanese value the white juicy stalks with pale crinkly leaves that form when tied; also the tight cylinder shape is necessary for making cabbage pickles, since the cabbages are sliced vertically and dried in quarter wedges. Nappa is the generic term for leafy greens in Japanese, so most likely the American name derives from that term. The Japanese word for napa cabbage, hakusai, means “white vegetable.”
We don’t tie all of our hakusai because we also like the leafy green part, not just the crisp white stems. While not as useful for pickles, the green leaves are more versatile for salads. When we did a soba dinner at Chez Panisse in 2010, the chef, our friend Kanji Nakatani (Kanchan), made a salt-massaged (shiomomi) dish with radicchio tardivo, sorrel, and chervil—it was stunning. So feel free to experiment, though if you are using strong greens such as sorrel, just a little goes a long way. This kind of salt-massaged treatment works beautifully as a fresh relish-type addition to a plate and makes a nice accompaniment to salt-grilled fish.
salt-massaged napa cabbage with yuzu slivers SERVES 6
HAKUSAI NO SHIOMOMI
½ napa cabbage, sliced vertically through the head (about 1½ pounds/600 g)
1½ tablespoons sea salt
Slivered zest from 2 small or 1 large yuzu, or Meyer lemon
½ small dried or fresh red pepper, sliced into fine rounds (optional)
Remove the core with a V cut and slice the cabbage crosswise into fine strands. Scrape into a large mixing bowl and toss with the salt, yuzu zest, and red pepper, if using. Massage the cabbage gently until its natural juices have run out but it is not completely fatigued.
Pack into a resealable plastic bag, squeeze out all the air, and roll tight. Chill in the fridge for about 15 minutes. Remove from the fridge, lift the cabbage from the accumulated liquid, and squeeze. Taste, add a touch more salt if needed, and serve.

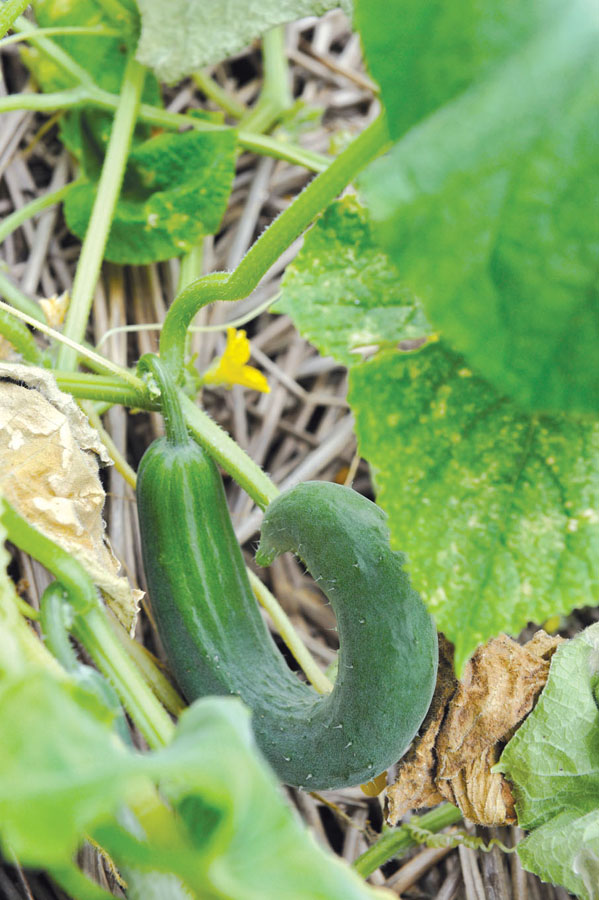
This is the kind of uninhibited style of cooking Tadaaki loves. It is very manly and visceral as you get right in there with the smashing and breaking. We eat baskets and baskets of cucumbers during the summer and somehow never seem to tire of their crispness. Our teenage sons love this approach to pickling because it is one we only started using a couple years ago and the novelty has not faded.
smashed cucumber pickles with garlic SERVES 6
TATAKI KYURI
1¾ pounds (800 g) Japanese cucumbers (5 or 6 medium)
2 cloves garlic, roughly chopped
2 teaspoons fine sea salt
Lay the cucumbers on a large cutting board and bang them gently but firmly with a Japanese pestle (surikogi) or rolling pin to crack (and slightly smash) the surface of the cucumbers. Break into rough chunks with your hands and drop into a freezer-style gallon-sized resealable plastic bag. Mash the garlic with a pinch of the salt in a mortar with a pestle. Sprinkle the remaining salt over the cucumbers, scrape in the mashed garlic purée, and massage in lightly to distribute the salt and garlic. Roll up the bag and squeeze out the air, then refrigerate for about 10 minutes.
Remove from the fridge when ready to eat, and drain the cucumbers in a wire mesh strainer set over a bowl. Serve before dinner with drinks or as a side dish with any broiled fish, teriyaki-style meats, or steak.
VARIATION: Stack 8 shiso leaves, roll into a cigar shape, and slice into fine tendrils; toss gently but well with the cucumbers before serving. Finely slivered ginger (about ½ tablespoon) also adds a bright note—massage in with the garlic. Substitute Western cucumbers, but peel and seed first.
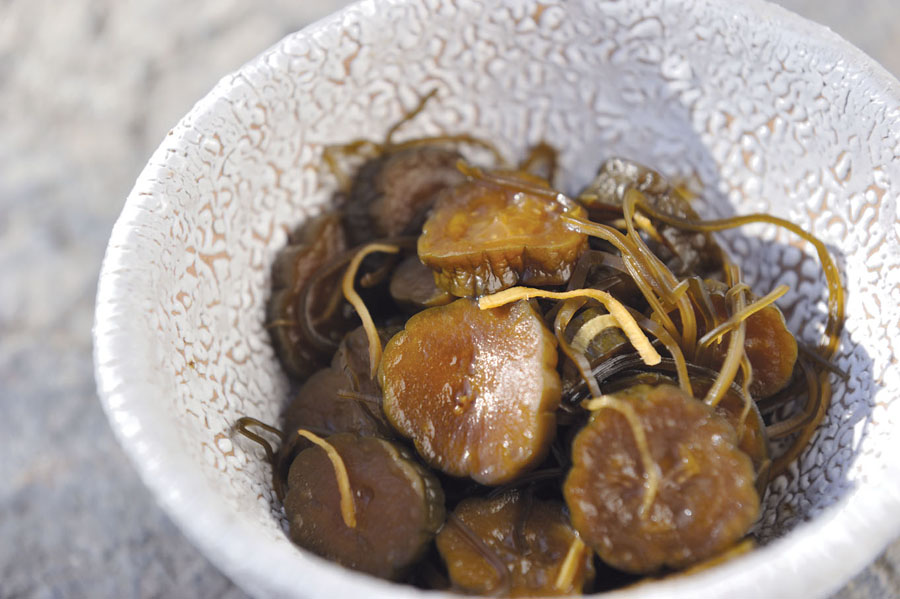
Tadaaki made these pickles while I was writing this book. I had more than enough recipes already, so tried to ignore his inpromptu pickle-making project, but they were so good I had to include the recipe. These full-flavored pickles have a hint of sweetness that I somehow like, and are quite addicting.
cucumbers pickled in soy sauce and mirin SERVES 6
KYURI NO AMAJOYU-ZUKE
1½ cup (375 cc) organic soy sauce
1 cup (250 cc) best-quality mirin
½ cup (125 cc) organic rice vinegar
2 pounds (1 kg) Japanese cucumbers (7 or 8 medium)
1 (1-inch/2.5-cm) knob of ginger, peeled
A small handful (about ½ cup/125 cc) of konbu threads (ito konbu)
4 myoga, quartered lengthwise (optional)
Measure the soy sauce, mirin, and rice vinegar into a large saucepan and bring to a boil. (Remove from the heat once the liquid has boiled, if you have not finished cutting the cucumbers.)
While the pickling liquid is coming to a boil, cut the cucumbers into ¼-inch (6-mm) rounds and the ginger into very fine slivers.
Drop the cucumber slices, ginger slivers, konbu threads, and optional myoga into the boiling pickling liquid and cook 1 minute over medium-high heat. Remove the pan from the heat and let cool for about 1 hour.
Strain out the liquid and reserve the cucumbers, ginger, konbu, and optional myoga in a medium-sized bowl. Bring the strained pickling liquid to a boil again, throw the cucumbers and all the other aromatics back into the boiling liquid, and cook for 1 minute over medium-high heat. Remove the pan from the heat and let cool for 1 hour.
Repeat this step once more for a total of three times. After you have heated the pickles three times, let them cool in their pickling solution, covered. They are now ready to eat and can be stored in the refrigerator for up to 1 week.
RATIO: soy sauce : mirin : rice vinegar—3 : 2 : 1
My brother-in-law, Noriaki, makes matsumae zuke at New Year, and these garlic-infused carrots, more a salad than a pickle, are one of the dishes I look forward to most during the holidays. The fresh, crunchy julienned carrots and konbu strips are subtly flavored with garlic, and the salty sea taste of the dried squid (and konbu) comes through in the background, tantalizing your tongue. Matsumae zuke is a relief from the characteristically sweet New Year foods (osechi ryori) such as dried fish simmered in sweetened soy sauce until dense and syrupy. In the past, as each New Year approached, the whole family (including the men) helped do a big cleaning, and the women cooked sweet-simmered foods that would keep well at room temperature for about a week. During the New Year holiday, shops and markets were closed, and this was the time women were “allowed” to take a break from preparing the daily meals. When we were first married, there was a steady stream of visitors during the days after New Year, now not so much. And today the shops remain open. For many families, the custom of doing the big New Year cleaning has slipped away, and many families just buy their osechi ryori. You can even buy a set at 7-Eleven. I know because my mother-in-law bought one a few years ago. (She tried to bring it out at the traditional family dinner on December 31. We gently but firmly vetoed that.)
carrots pickled with konbu and dried squid SERVES 6 TO 8
MATSUMAE ZUKE
1 (9 by 3-inch/22.5 by 7.5-cm) piece of konbu
2 tablespoons sake
1 pound (500 g) carrots
1 teaspoon salt
½ piece (MSG-free) dried squid (surume)
3 small cloves garlic, finely chopped
2½ tablespoons organic soy sauce
Break the konbu into 4 pieces, set on a small plate, and douse with the sake. Let soak while you cut the carrots into 1¾-inch (4-cm) julienned matchsticks, slide into a medium-sized bowl, and gently toss with salt. Let sit for 10 minutes, squeeze the carrots by handfuls to express out any accumulated liquid, and drop them into a clean medium-sized bowl as you go.
Remove the konbu from the sake, reserve the soaking liquid, and slice the soaked konbu into ⅛-inch by 2-inch (3-mm by 5-cm) strips. Add the konbu strips to the bowl of carrots.
Starting with the legs, snip the dried squid into ⅛-inch by 1-inch (3-mm x 2.5-cm) slivers with a pair of sturdy kitchen shears. Some legs will be too thick, so you will need to slice them up the center to thin; but be sure to cut the body portion laterally. Add the dried squid slivers to the bowl of carrots and konbu.
Season with the garlic, soy sauce, and 1 tablespoon of the sake reserved from soaking the konbu. Mix well and set aside for several hours to allow the flavors to intermingle and the squid and konbu to soften. This keeps well stored in the refrigerator for more than a week. It’s good straight from the fridge or served at room temperature.
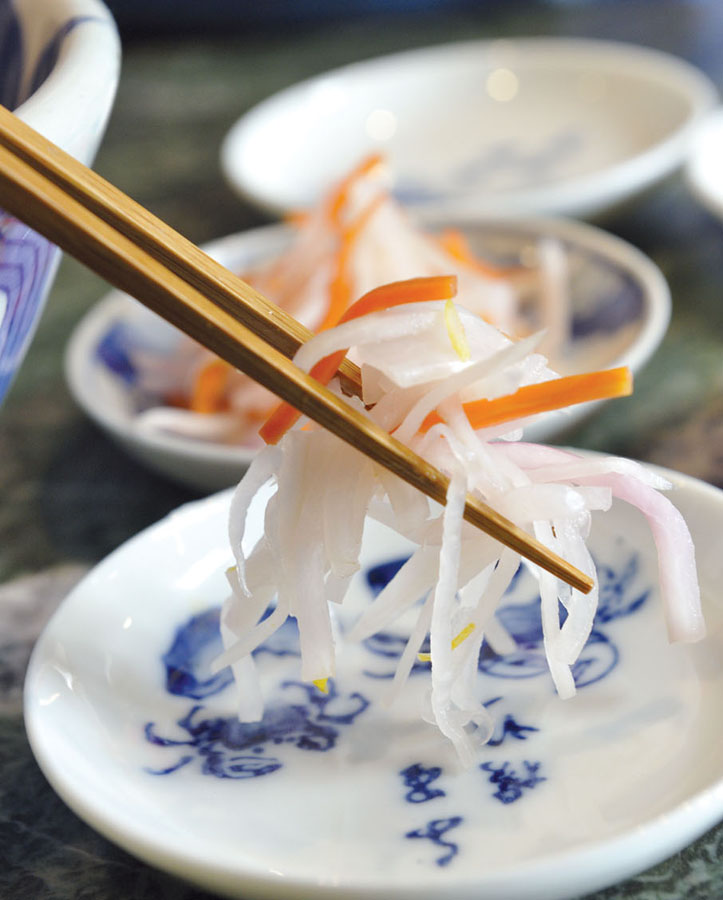
Often served at New Year, namasu is a bright and crunchy dish that acts as a refreshing digestive during the holidays when there are guests and we tend to overeat. The sugar-to-vinegar ratio is one of taste, but I prefer these a bit astringent, with not too much sugar, since daikon and carrots are especially sweet in the winter. Namasu keeps for about a week and is a pretty splash of color on the table with almost any meal. The carrots are a dominant color that can overwhelm the dish, so keep the balance of daikon to carrot at roughly 2 : 1 (or 70 percent daikon and 30 percent carrots). This dish is best made in winter from freshly picked daikon and carrots at their peak of flavor.
sweet-vinegared daikon and carrots SERVES 4 TO 6
NAMASU
1 cup (250 cc) organic rice vinegar
3 tablespoons organic granulated sugar
3 cups (700 cc) julienned daikon (1¾-inch/4-cm thin matchsticks)
1¼ cups (300 cc) julienned carrots (1¾-inch/4-cm thin matchsticks)
1½ teaspoons sea salt
Zest from 2 small yuzu or 1 large Meyer lemon, cut into fine slivers
Heat the vinegar and sugar together in a small saucepan over low heat to melt the sugar. Cool to room temperature before using.
Keep the daikon and carrots in two separate bowls. Sprinkle the daikon with 1 teaspoon salt and the carrots with the remaining ½ teaspoon salt. Massage the salt in gently and let sit for 10 minutes before squeezing out the excess water and dropping into a clean medium-sized mixing bowl. Toss the daikon and carrots with the slivered yuzu peel and cooled sweet vinegar. Chill for 1 day before serving cold.
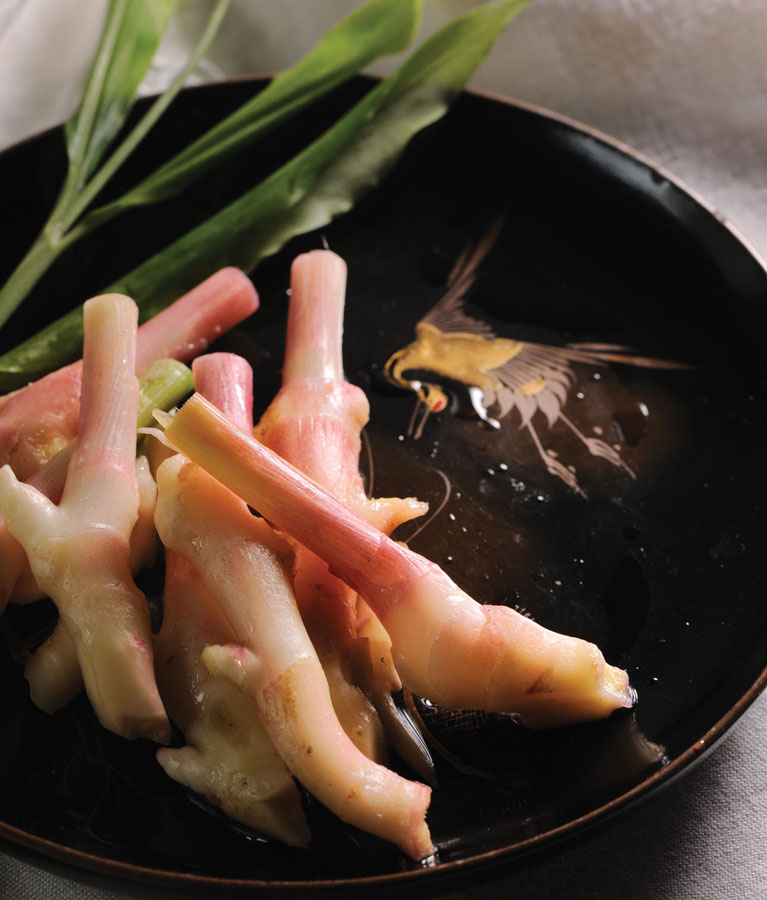
Pickling is a way of life in Japan, though sadly the custom is waning. One element that comforts me is the logic in so many pickling methods. When you are in a hurry, you can just sprinkle juicy vegetables, such as turnips or cucumbers, with salt, massage, let sit a couple minutes and voilà—instant pickles. Using the liquid produced in making umeboshi (umesu) as the pickling agent accomplishes the same simple task. The air is heavy during our muggy Japanese summers, so the hot flash of ginger is quite nice at the end of the day. Tadaaki often stops by the field on his way home from egg deliveries and grabs some young summer ginger to eat raw, scooped into a mound of miso, as a before-dinner snack. Here, the young ginger is pickled in plum vinegar and good served with a bowl of rice and a fried egg for breakfast. Any way, young ginger gives you a hot zing.
young ginger pickled in plum vinegar SERVES 6
MESHOGA NO UMEZUKE
4 pale pink young ginger roots (sold with green stems intact)
1 cup (250 cc) plum vinegar (umesu)
Separate the ginger into single stalks. Wash well and cut off the leaves and stalks about 3 inches (7.5 cm) above the root portion. Lay the roots in a plastic container along with the plum vinegar. Let marinate in the refrigerator for half a day before serving. Use fairly soon, maybe within a day or two, for the ginger will continue absorbing the salty/sour flavor of the plum vinegar.

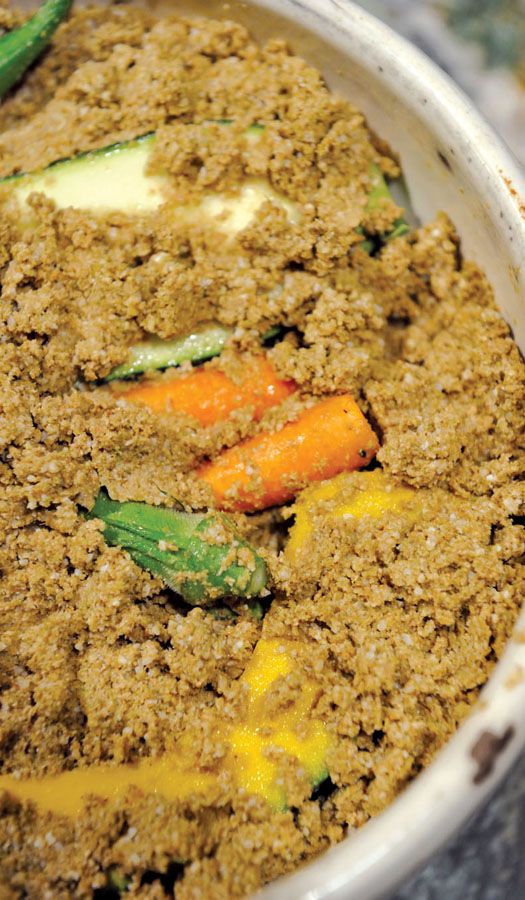
DRIED EGGPLANT

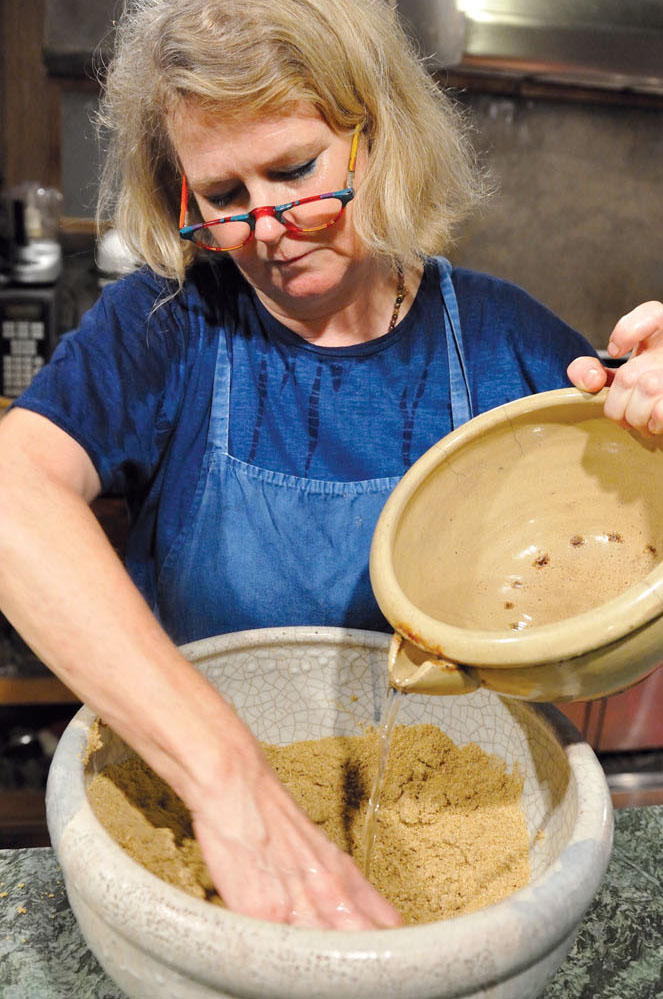
Years ago, when Tadaaki and I were first married, we made rice bran pickles (nukazuke). They immediately captivated me. The mildly sour rice bran imparts an unusual tang to the vegetables that is more subtle than the typical salt, soy sauce, or vinegar pickles. Also the rice pickling mash (nukadoko) creates wick-dry pickles with an indescribable flavor that is impossible to duplicate otherwise. Nukazuke often accompanies the bowl of rice served at the end of a casual-style Japanese meal. I’ve heard of people keeping their nukadoko fresh and alive for years. But we are not one of them—we would lose track of the days and forget to turn the nukadoko to keep it from getting sour. And eventually we had to toss the whole thing and start again, though often not until the next summer, at the height of eggplant and cucumber season—two vegetables that are transformed by nukadoko into cannot-stop-eating pickles. But now we have a rice polishing machine in the garage, so fresh rice bran is available when it is time to make our nukadoko. Because inevitably I still manage to forget to turn the mash, and inevitably the mash becomes sour. But that’s okay. Life is a process, and so is pickle making. It’s okay to make mistakes along the way. That’s called being human.
zucchini pickled in rice bran SERVES 6
ZUKKINI NO NUKAZUKE
NUKADOKO
10 cups (1¾ pounds/800 g) rice bran (nuka)
11 tablespoons (about 6 ounces/165 g) salt
3 tablespoons brown rice miso
2 (4 by 2-inch/10 by 5-cm) pieces of konbu
5 dried red peppers
6 strips tangerine or sour orange peel, such as daidai or Seville (optional)
Mild vegetable cuttings or pieces: carrot, zucchini, squash, green beans, etc.
Nukazuke
4 small zucchini (or 1 large)
Parch the rice bran over a low flame in a large wok or frying pan until dry and powdery to the touch. (The bran should be warm but must not brown.) Remove from the heat and dump into a large mixing bowl.
Bring 4 cups (1 liter) water to a boil with the salt; stir to dissolve. Stir the brine into the parched rice bran to make a thick paste and fold in the miso. Mix well. Pack the bran mixture (nukadoko) into a large crockery pot with a lid or a plastic container. Poke in the konbu, dried red peppers, and citrus peel (making sure they are completely submerged).
Nukadoko is a living thing, so embrace the natural beauty of it and don’t be afraid of it. The nukadoko needs about a week to ripen and grow “good bacteria.” You will see no visible change each day, but you will be able to taste how the nukadoko progressively sours and develops a more complex flavor profile as each day passes.
When starting your nukadoko, store the crock at room temperature, out of direct light. Each day, starting with Day One, put a few cuttings or pieces of vegetable into the mixture and let sit overnight. The following day, pick out the vegetables and discard. Turn the mixture over with your hands to aerate and promote its health. Taste the mixture each day to understand how it is changing and how it is alive. If you forget to turn the mixture one day, it may have formed a fine white bloom. Scrape it off. If you forget for two days in a row, you risk souring the nukadoko. Three days and it’s gone—you might as well throw the whole thing out and start again.
After a week, the nukadoko should be nicely seasoned and ready to use. If tended, it will keep for years.
To make the nukazuke, roll the small zucchini in a little sea salt. If the zucchini is oversized, cut it in half crosswise, again lengthwise, and scoop out the center spongy part with seeds. Push the zucchini into the nukadoko until completely covered and leave for 4 to 6 hours. Remove the zucchini, wash off the bran mash, dry well, and slice into ½-inch (12-mm) rounds or half-moon shapes.
Whether you make pickles every day or not, you must turn the mixture every day, or it will go off—once a day in the winter, but twice a day in the summer. Most vegetables will be done in about a half a day in the summertime but will take a few hours longer on cold winter days. Also the nukadoko should be saltier in the summer to hinder spoilage. As winter approaches, you can let the salt balance gradually soften.
Taste the nukadoko every day, and never forget that it is a living thing, so multiple variables come into play. It takes some trial and error, but don’t be afraid to try and don’t be afraid to fail. It’s all a learning experience.
RATIO: rice bran : salt—10 : 2
VARIATION: Cucumbers, carrots, okra, green beans, thin-skinned mild green peppers, Japanese eggplants, radishes, myoga, turnips, squash, or daikon. Pink- or purple-skinned vegetables such as eggplant, radish, and myoga should be rolled in salt before putting them into the nukadoko to prevent discoloration. The softer vegetables will be done in about a half a day, but the daikon will take longer since it is thick and fibrous.
PLUCKING DUCK FEATHERS

I love wakame—slippery and tasting of the sea. And we are lucky to be able to occasionally find good fresh wakame at our local fish market. But there is also a funny (fairly pushy) old lady who sometimes comes by our neighborhood hawking hand-salted wakame. Even when I tell her we still have some, she insists I buy more. I’m not sure from what small seaside town she hails, but she has a thick country twang that is hard to understand. I suppose I should just buy her wakame when the opportunity arises, since she does not come that often and wakame keeps indefinitely in the fridge. Although I never came across it, I’ve read that salted wakame is available in some Japanese grocery stores in the U.S., and that a few fish markets are selling the fresh—in any case, the dried variety substitutes quite nicely.
miso soup with potato slivers and wakame SERVES 6
JAGAIMO TO WAKAME NO MISO SHIRU
1 small handful of wakame, dried or fresh
1 medium potato (4½ ounces/125 g)
Scant 1⅓ cups/300 cc Dashi
2½ tablespoons organic brown rice miso
Rinse the fresh wakame, drain, and cut into bite-sized pieces (about 1½ inches/4 cm long); or rinse the salt from the salted wakame, soak for 10 minutes in a medium-sized bowl covered with cold water, drain, and chop into bite-sized pieces. Alternatively, soak the dried wakame in a medium-sized bowl for 20 minutes in cold water and chop if needed.
Peel the potato and slice into thin matchsticks. Pour the dashi into a medium-sized saucepan and drop in the potato slivers. Bring to a boil over medium-high heat, reduce to a gentle simmer, and cook about 5 minutes or so, until the potato is soft but not falling apart. Add the softened wakame pieces.
Measure the miso into a small bowl and dip a whisk into the miso to catch up all 3 tablespoons. Dunk the miso-covered whisk into the dashi and swirl it around in the soup liquid until the miso is well incorporated. Ladle the soup into small bowls (lacquer if you have them). Serve immediately, either before a meal or at the end with a bowl of rice.
VARIATION: Drop in a few small squares of tofu cut into a ⅓-inch (8-mm) dice from a quarter of a 10.5 oz (300 g) block of Japanese-style “cotton” tofu after adding the miso. Heat gently (and briefly) to warm the tofu squares.
Miso soup with clams is the most orthodox of all miso soups, and while often accompanying a sushi meal at sushi shops, it is also a well-loved home recipe. Usually miso soup is made by stirring miso into a dashi base; here, however, the clams exude their own liquor, so water (with or without sake) is the base. This soup relies on small clams for its presentation, so do not be tempted to make this with clams whose shells are larger than ½ inch (12 mm).
miso soup with small clams SERVES 6
ASARI NO MISO SHIRU
2 cups littleneck or Manila clams (asari in Japan), about 14 ounces (400 g)
½ cup (125 cc) sake
About 3 tablespoons mild-flavored organic miso (such as brown rice)
1 very thin scallion (or several chives), finely chopped
1 small bunch mitsuba, leaves removed (optional)
Scrub the clams in several changes of cold water to express some of the sand, then scoop them up and drop in a medium-sized saucepan. Pour the sake over the clams, cover, and bring to a boil over high heat. As soon as the clams start to open, add hot water to cover, replace the lid, and bring to a boil once again. Continue cooking until (almost) all the clams are open. (Some clams will never open—discard those.)
Dip a small whisk into the measured miso, drop the miso-covered whisk blade into the soup liquid and swirl to incorporate the miso into the soup. Ladle the soup, shells and all, into small lacquer bowls with lids (if you have them), and garnish with the chopped scallion or mitsuba leaves but not both. (More is not always better!) Serve immediately before a meal or at the end with a bowl of rice.
VARIATION: You can substitute teensy black freshwater mussels (shijimi) for the small asari or littlenecks, but these may not be available abroad. If you use shimiji, skip the sake-steaming step. Scrub and rinse the mussels, put them in a medium-sized saucepan with cold water to cover, place the lid on the pan, and bring to a boil just until most of the mussels have opened. Be careful not to overcook, since they will lose their flavor. Add the miso and green garnish following the directions above.
I have loved this soup since I first tasted it more than forty years ago, and my infatuation has not waned in the intervening years. This is Japanese cooking at its very best, with the crystal-clear flavor of the delicate fish broth and just a hint of aromatics such as finely sliced scallions or a couple of mitsuba leaves. Of course this soup is only good made from fresh, clean bones, so do take care to visit a fisherman or fishmonger before starting out. Also, I would not use bones from large oily fish such as those in the tuna family, since they tend to have a bigger flavors than you want—or maybe not. After all, in the end this is a personal decision. We typically make this fish broth after a trip to the fish market.
clear fish broth with chopped scallions SERVES 4
SAKANA NO ARAJIRU
2 cups (500 cc) very fresh bones and head from a mild-flavored fish, such as snapper or sea bream
Sea salt
1 thin negi (Japanese leek) or 2 thick scallions
1 (½-inch/12-mm) piece of ginger, peeled
1 small bunch mitsuba, leaves removed (optional)
1 very thin scallion or several chives, finely chopped
Strew the fish bones over a foil-lined cookie sheet and sprinkle very lightly with salt (just a hint of cooked salt is good enough to add depth of flavor to the stock). Broil both sides of the bones and head on the second rack from the top of your oven. Do not blacken, but make sure the natural oils of the fish have come out and the skin is sizzling.
As the fish bones and head are broiling, bring 4 cups (1 liter) of water to a boil in a medium-sized saucepan (large enough to hold the bones and head). Cut the negi or scallions into 2-inch (5-cm) lengths and the ginger into fine slices.
Plop the broiled bones into the boiling water along with the negi and ginger aromatics. Lower the heat and simmer gently for 30 minutes. Pour the soup through a fine-mesh strainer into a clean saucepan. Taste for salt and add a pinch or two if necessary. The broth should taste of the sea but not have an overpowering flavor profile. The salt should be a hint in the background. This is an elegant, mild broth that serves to refresh. Ladle into small beautiful bowls and drop in a few mitsuba leaves, if using, or a sprinkling of finely chopped very thin scallion or chives.
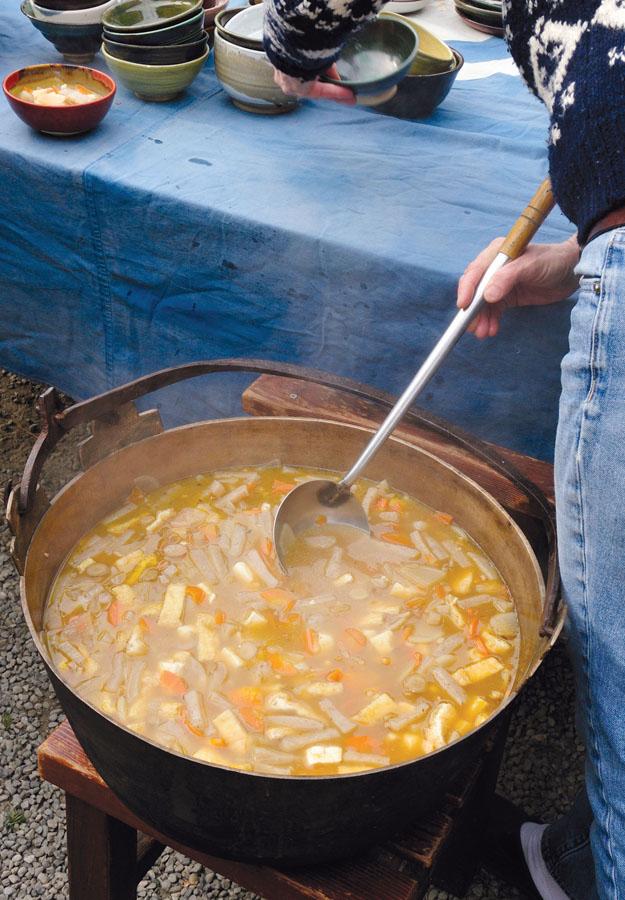
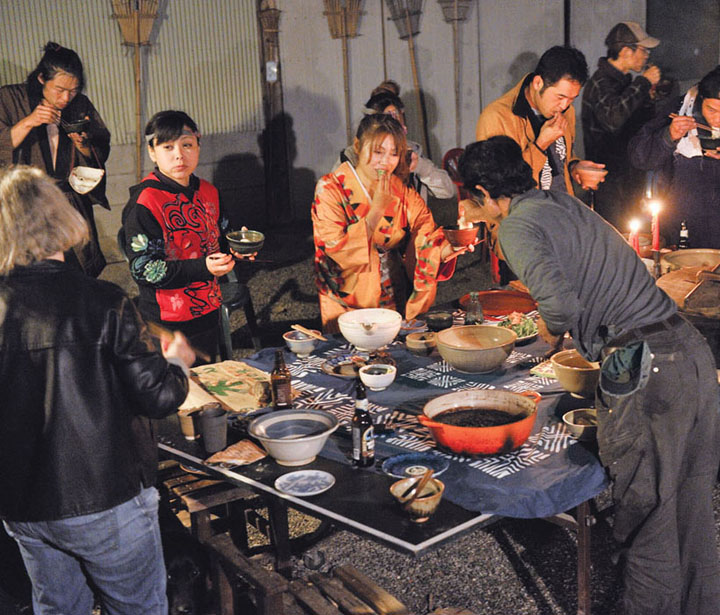
TOKANYA


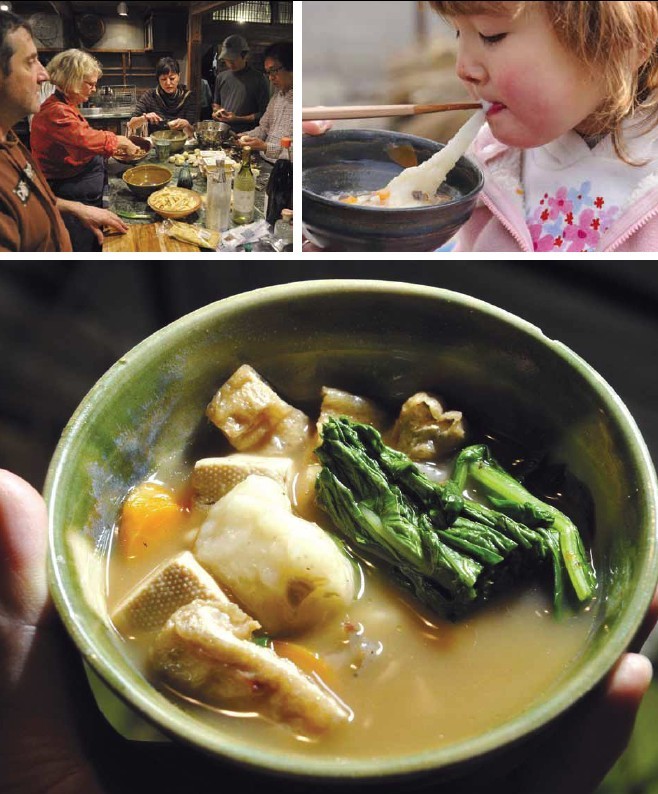
Traditionally this was a vegetarian soup made with root vegetables, tofu, konnyaku, and perhaps dried shiitake for depth of flavor. But we often make a broth from our Christmas duck carcasses for the kenchinjiru we serve at New Year because we have them. I add some sliced ginger and a few generous stalks of Japanese negi (substitute thick spring onions or thin leeks) to the duck bones and simmer the soup for a couple of hours or more. For a vegetarian broth, I would drop a generous piece or two of konbu into a large pot of cold water and bring it to a boil, then proceed to make the root vegetable soup.
country soup with vegetables SERVES 8
KENCHINJIRU
2 large carrots
2 burdock roots (gobo)
1 small daikon
4 taro roots (sato imo)
2 (10.5-ounce/300-g) blocks best-quality soft tofu (use momendofu in Japan)
4 pieces thin fried tofu (usuage), cut in half lengthwise, then crosswise into ¼-inch (6-mm) strips
4 tablespoons best-quality rapeseed oil
8 cups (2 liters) duck, chicken, or konbu broth, hot
1 (1-pound/500-g) block konnyaku (optional), see Note
¾ cup (180 cc) organic soy sauce
7-spice powder (shichimi togarashi)
Scrub equal amounts of carrots, gobo, and daikon with a rough brush (tawashi). Slice into thin rounds, half-rounds, or quarters depending on the thickness of the roots. With the gobo you probably want to make diagonal cuts since they tend to be long and thin. The vegetables should be fairly uniform in thickness and size, as you will be cooking them together and most likely eating the soup with chopsticks. Peel and slice the same amount of taro root (sato imo) as you did for each of the other vegetables. Keep the daikon and taro each in separate bowls. Split the tofu in half horizontally, then into 4 pieces lengthwise and 6 pieces crosswise (creating 48 small cubes). If the usuage is not fresh, pour boiling water over it to remove oil and any odors—or maybe just skip it.
Film a small amount of oil in a large soup pot and sauté the sliced carrots and gobo for a few minutes before adding the sliced daikon. Stir and sauté a minute or so longer, then add the hot broth. Throw in the sliced taro, bring to a boil over high heat, and cook until the vegetables are getting soft but not falling apart (about 20 minutes or so).
Slide in the tofu, usuage, and konnyaku, if using (see Note), and simmer a few minutes more until heated through. Season with organic soy sauce to taste and serve with a bowl of white rice on the side. Pass the shichimi togarashi for those who like a little extra kick.
NOTE: Fill a large pot halfway with water, toss in a small handful of salt, and bring to a boil. While the water is heating, tear the konnyaku into 1½-inch (4-cm) misshapen blobs (a little bigger than bite-sized). If using mochi, slice the konnakyu instead into thin (1½ by ¼-inch/4-cm by 6-mm) strips. Boil the konnyaku pieces over medium-high heat for 15 minutes, drain, and reserve.
MOCHI: Drop pieces of hot mochi into the soup and eat immediately.


During my first winter in Japan, my friends took me to a tiny little one-counter late-night eatery where we were served yudofu. I had previously only eaten cold tofu (almost daily), but was seduced by the warmth of the tofu and the simplicity of the garnishes in this dish. We don’t make yudofu as often as other nabe (one-pot dishes), though I wish we did. I crave lighter flavors, but with a house full of teenaged boys and a farmer husband all looking for a little more “meat on the bones” in their dinner, I have to give in to their desires. Tofu is one of those heavenly foods that is best in Japan, but easily made at home—you just need a bit of patience and a tofu-making kit (see Resources) doesn’t hurt. For $50 you can buy two—enough to make two large bricks of tofu (about the size of four pieces of the tofu sold in Japan).
You will need a portable tabletop gas burner to make this dish at the table.
simmered tofu with garnishes SERVES 4
YUDOFU
2 (10.5-ounce/300-g) pieces of Japanese-style “cotton” tofu, cut into 1-inch (2.5-cm) cubes
1 (1-inch/2.5-cm) knob of ginger, peeled and grated
2 or 3 thin scallions (with whites), cut into fine rounds
1 sheet of nori, crumbled or cut into fine slivers (about 1½-inch/4-cm) lengths
2 or 3 (6-inch/15-cm) pieces of konbu
Katsuobushi-Infused Soy Sauce (Tosajoyu)
Cooked Japanese rice, for serving
Divide the tofu cubes between a couple of small plates. Put the grated ginger, sliced scallions, and nori separately into three small bowls. Fill a flameproof casserole (donabe) one-third full with cold water, drop in the konbu, and bring to the table with the tofu and garnishes.
Slide some of the tofu pieces into the donabe. Bring to a gentle simmer on the tabletop burner set at medium heat. While the water is heating, heat the tosajoyu in a small pan on the stove over low heat.
Pour a little tosajoyu in a small bowl set in front of each person, and when the tofu has heated through, scoop some tofu into the bowl with the tosajoyu. Garnish to taste with ginger, scallions, and nori and eat. (Once all the tofu has been served, cook more.) Serve with a small bowl of Japanese rice on the side.
Monkfish (anko) is an exceptionally ugly fish, but it is also exceptionally delicious. The flesh is firm and flavorful and contains natural gelatins, so it holds up well in a nabe. If you are lucky enough to get a very fresh whole fish, check the liver (ankimo), and if it smells sweet, cook it separately. Remove any veins from the ankimo, lay it on a piece of foil, salt it, splash it with sake, wrap tightly, and let sit in the fridge for 1 hour. Remove from the fridge, rinse, and pat dry with a muslin towel. Wrap in heavy-duty plastic wrap and roll into an even cylinder. Twist the ends to close. Enclose the cylinder in aluminum foil and steam for 30 minutes. Chill before eating dipped in ponzu with squeezed grated daikon and red pepper. (This is known as momiji oroshi. Make 3 vertical holes in the top of the daikon and poke in 3 small dried chiles, then grate.) If the liver is small, simmer as is in the nabe.
You will need a portable tabletop gas burner to make this dish at the table.
monkfish nabe with mizuna SERVES 6
ANKO NABE
1 large bunch mizuna
12 to 18 enoki mushrooms, bottom ends sliced off
2 thick negi (Japanese leeks) or thin leeks, dirty (or sandy) bottoms removed
1 (10.5-ounce/300-g) block Japanese-style “cotton” tofu, cut into 8 pieces
2 or 3 (6-inch/15-cm) pieces of konbu
1½ pounds (750 g) monkfish, “bones” included
Cooked Japanese rice, for serving
Slice the root ends off the mizuna and cut the leaves crosswise into 2-inch (5-cm) bunches. Stack on a platter or in a basket with the enoki. Cut the negi or leeks into 2-inch (5-cm) lengths and heap with the mizuna and enoki. Put the tofu on a small plate. Fill a flameproof casserole or clay pot (donabe) one-third full with cold water, drop in the konbu, and bring to a boil over high heat.
While the water is heating, chop the monkfish (cutting the meat through the bones) into 1¾- to 2-inch (4- to 5-cm) rough pieces. Put the fish pieces into a medium-sized serving bowl and bring to the table with the vegetables and tofu.
Bring the casserole with hot konbu water to the table and set onto the gas burner. Ignite the burner and bring back to a boil, then reduce the heat to a brisk simmer. Drop some monkfish pieces into the casserole along with some tofu, negi, and enoki. Once the fish and vegetables are almost cooked, clear an area in the casserole by pushing aside the cooking vegetables and poke a handful of mizuna into the broth so it is completely submerged. The mizuna will cook quite quickly (since it is a salad green). Ladle out some of the nabe into each person’s bowl, making sure that each ingredient made it into the bowl. Splash in a little ponzu to taste.
There will be a fair amount of bones, so prepare a bone bowl for the table. Make sure to finish all the fish and vegetables in the nabe before adding more. Serve with a small bowl of Japanese rice.
VARIATION: You can substitute any fish with firm flesh, any mild mushrooms, or any spicy greens. Adjust the cooking time according to the thickness of the ingredients. Instead of eating with a bowl of rice, some people (particularly ones drinking sake) like to add cooked rice to the pot of rich vegetable-infused fish broth (strained) at the end and eat as a savory porridge (Rice Simmered in Broth) to finish the meal.

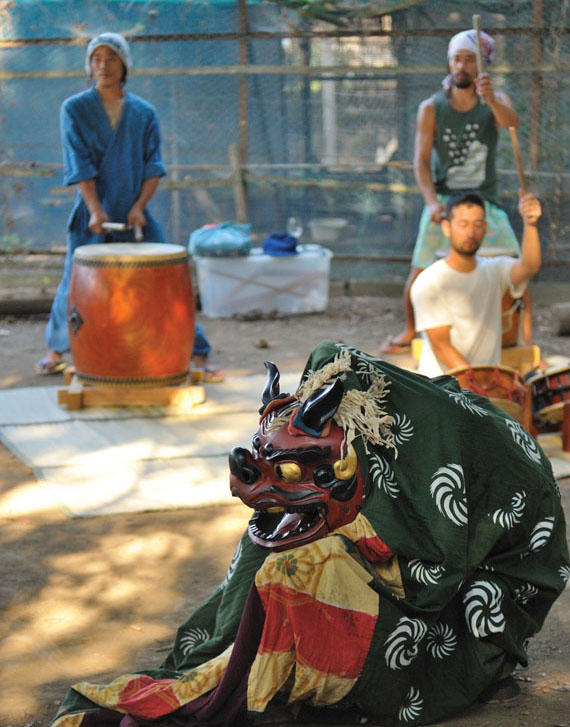
SHISHIMAI


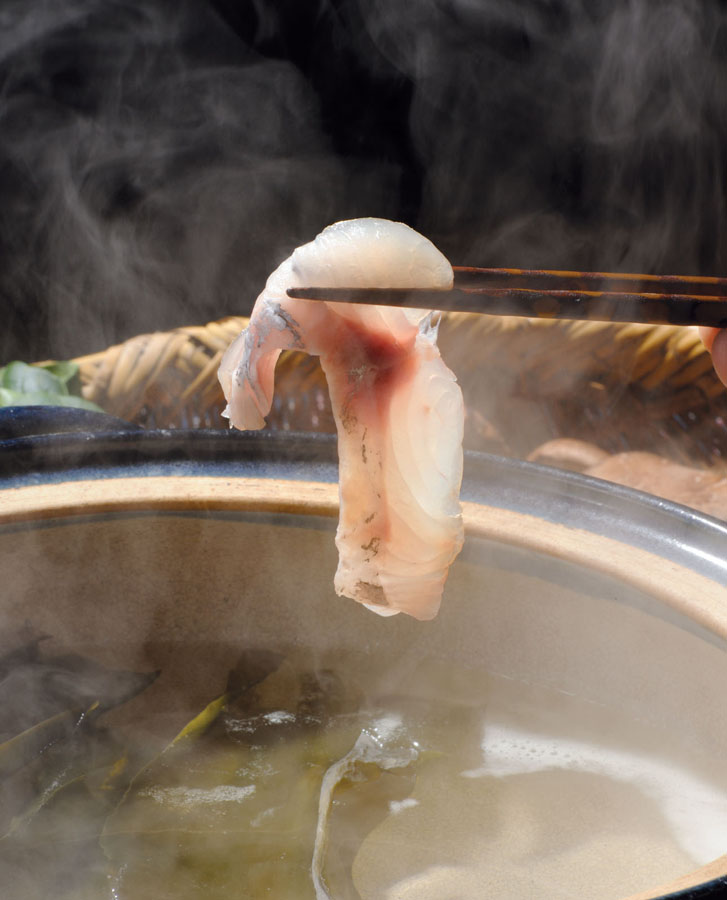
When we were first married, Tadaaki loved to make fish nabe because they were easy and we always had lots of vegetables. After a while, I told him enough with the nabe, and we stopped eating them for a couple of years. Typically Shabu-Shabu is prepared with beef, but one day Tadaaki had the inspiration to make fish shabu-shabu, perhaps because he knew I wasn’t fond of oversimmered foods and we don’t eat much beef. A brilliant idea, it became a favorite dish of the whole family. But this time around, we were careful not to overuse it, despite the fact that it was exquisite, a snap to throw together (especially if you use precut sashimi fish instead of curing kelp-wicked fish), and convivial to boot.
You will need a portable tabletop gas burner to make this dish at the table.
kelp-wicked red snapper shabu-shabu SERVES 8
MADAI KOBUJIME NO SHABU-SHABU
16 shiitake mushrooms, woody stem bottoms removed
2 bunches bitter greens, such as mustard or turnip, cut into 2-inch (5-cm) lengths
2 (10.5-ounce/300-g) blocks Japanese-style “cotton” tofu, cut into 8 pieces
2 or 3 (6-inch/15-cm) pieces of konbu
Cooked Japanese rice, for serving
Remove the konbu from the prepared kelp-wicked fish and line two small plates with it. Slice the fish into ¼-inch (6-mm) thick pieces at a diagonal. Lay each sliced filet on top of the konbu-lined plates.
Arrange the vegetables attractively on a platter or basket. Put the tofu on two small plates. Fill a clay pot (donabe) or flameproof casserole one-third full with water and add the dried pieces of konbu (not the ones that were used to wick the fish). Take all the ingredients to the table and place the clay pot on the gas burner.
Start up the tabletop burner and bring the water to a boil. Add some of each kind of vegetable and several pieces of tofu. Once the vegetables are just cooked (the greens should still remain brightly colored), lower the flame. Ladle out some broth with a little of each kind of vegetable and a piece of tofu into a small bowl set in front of each guest. Flavor with a splash of ponzu to taste. Guests should grasp a piece of kelp-wicked snapper with their own chopsticks and swish in the simmering broth for a second or until no longer raw but still translucent in the center. (This swishing action sounds like shabu-shabu, hence the name.) Dip in the ponzu-flavored broth and eat the vegetables and tofu between bites of fish.
Do not replenish the vegetables or tofu until guests eat all of the first batch (otherwise you’ll end up with an unsightly mixture of gray vegetables and green). Serve with a small bowl of Japanese rice.
VARIATION: Any kind of pleasantly flavored white fish will work for this delicate nabe. Mizuna or even mitsuba would be excellent alternatives to the bitter greens, but they will cook much more quickly. In this case, begin by cooking just the shiitake and tofu, then add these tender greens several minutes later. Feel free to use another kind of Japanese-style or local mushroom in place of the shiitake.


Shabu-Shabu was the favorite dish eaten at the obligatory end-of-the-year parties (bonenkai) that I attended when first in Japan. One-pot cooking (nabemono) is ridiculously easy, so you have to wonder why these parties took place at restaurants. I didn’t really think about it at the time because everything was new and I was just lapping up all there was to see, taste, and learn. The first time I had shabu-shabu was six months into my stay in Japan. I still wasn’t accustomed to the fat surrounding the thinly sliced meat, so I picked off what I could. But that was a bit silly (and in retrospect, embarrassing), since the fat quantity was minimal and some is necessary for giving richness to this very simple but elegant preparation.
You will need a portable tabletop gas burner to make this dish at the table.
shabu-shabu SERVES 6
16 shiitake mushrooms, woody stem bottoms removed
¼ head napa cabbage, cut crosswise into 2-inch (5-cm) lengths
4 thin negi (Japanese leeks) or spring onions, cut into 2-inch (5-cm) lengths
1½ pounds (700 g) marbled sirloin, sliced sliced crosswise into ³⁄³²-inch (2.5-mm) thin sheets by a butcher (see Note)
2 (10.5-ounce/300-g) blocks Japanese-style “cotton” tofu, cut into 8 pieces each
2 or 3 (6-inch/15-cm) pieces of konbu
Cooked Japanese rice, for serving
Arrange the vegetables attractively on a platter or basket. Lay the meat slices on another platter or have the butcher slice them directly onto your own platter in his shop. Put the tofu on two small plates. Fill a clay cookpot (donabe) or flameproof casserole one-third full with water and add the konbu. Take all the ingredients to the table and place the clay pot on the gas burner.
Bring the water to a boil over high heat on the tabletop burner. Reduce the flame to a lively simmer, and add some of each kind of vegetable and several pieces of tofu. Once the vegetables are just cooked (the cabbage should be soft but not starting to discolor), lower the flame to a gentle simmer. Ladle out some of the broth with a little of each kind of vegetable and a piece of tofu into a small bowl set in front of each person. Flavor the broth in the bowls with a small splash of ponzu to taste.
Each person picks up a piece of sirloin with his or her own chopsticks and swishes it in the simmering broth for a couple seconds or until no longer raw but still slightly pink. Dip in the ponzu-flavored broth and eat with the vegetables and tofu. Do not replenish the vegetables or tofu until guests eat all of the first batch. Serve with a small bowl of Japanese rice.
VARIATION: I am particularly fond of peppery mizuna greens and bright mitsuba leaves—either would go well with the delicate meat. Shimeji mushrooms (or chanterelles!) would also be an excellent substitute for the more meaty shiitake.
NOTE: If you are able, prepare a platter for the butcher to lay the meat slices in an overlapping pattern. This will make serving much easier (and prettier).