
MEN AND YAKUMI: NOODLES
SOBA WITH WALNUT DIPPING SAUCE
SOMEN WITH GINGER, MYOGA, AND SCALLIONS
MESHI: RICE
YELLOWTAIL SASHIMI ON HOT RICE WITH BROTH
SUSHI
Simmered gyoza are one of my earliest Japanese food memories (if you don’t count the sukiyaki savored as a young girl at Sakura Gardens in Palo Alto—with its raised tatami-matted rooms, shoji doors, and servers in kimono—a rare treat for our family of six wild children). I first had gyoza (or so I thought) at a little Japanese coffee shop opposite my (at the time) favorite sushi bar, Onna no Shiro, by the gates of Grant Street in San Francisco. By then I had already gone down the rabbit hole for sushi, and I fell in love with those gyoza as well. But the coffee shop closed early, and in those days I never got out to eat until late, so did not eat them as often as I’d like until I arrived in Japan and began haunting the ramen shops.
About twenty years ago, we had a party at our house for my husband’s karate group. One sensei had a small factory and employed Chinese workers, whom he brought along to the party. And at this party they taught us how to make gyoza, Chinese style (simmered instead of steam-fried). At that time I remembered a bunch of us from Stanford hanging out at the house of my roommate, Diana Hu, in Palo Alto making boiled pot stickers, known in Japanese as sui gyoza (“water” gyoza). I love how life comes full circle sometimes. In our house, this is how we make gyoza.
simmered gyoza SERVES 6
SUI GYOZA
GYOZA SKINS
¼ teaspoon sea salt
1 cup (150 g) good-tasting all-purpose flour, plus more for sprinkling
GYOZA FILLING
1 cup (¼ pound/100 g) finely chopped napa cabbage
2 teaspoons fine sea salt
½ pound (225 g) headless unpeeled Gulf shrimp
⅔ pound (300 g) thinly sliced pork shoulder meat or fine-ground pork
2 tablespoons sake
1 tablespoon soy sauce
1 heaping tablespoon grated ginger
2 or 3 finely chopped garlic chives (nira)
FOR DIPPING
Rice vinegar
Soy sauce
Rayu (Chile-Infused Sesame Oil)
Bring ½ cup (125 cc) of water to a boil over high heat in a small saucepan and stir in the salt to dissolve.
Measure the flour into a medium-sized mixing bowl. Using a pair of long chopsticks, mix the still very hot salt water into the flour in small additions until the dough holds together. Knead until smooth and pliable—it should be softer than your earlobe. Shape into a ball, wrap with plastic, and let rest while you prepare the filling.
Fill a medium-sized heavy pot about halfway with water and bring to a boil.
Meanwhile, make the filling: Put the napa cabbage in a bowl that can hold about 2 or 3 cups (500 to 750 cc). Sprinkle with the salt and massage in well but don’t overwork it. Let sit 10 minutes before squeezing very well to express every bit of liquid you possibly can.
Remove the shrimp meat from the shells and hand chop finely. Scrape into a large mixing bowl. Finely hand chop the pork shoulder and add it to the shrimp. Mix in the squeezed napa cabbage, sake, soy sauce, and grated ginger. Knead gently until the filling mixture is smooth and well amalgamated.
Roll the dough on a floured surface into a long cylinder 2 inches (5 cm) in diameter. Pinch off 1-inch (2.5-cm) pieces of dough and roll into 4-inch (10-cm) circles. Flour and stack as you go.
(Stuffing the gyoza goes a lot quicker if you have help, so try to enlist family members.) Fill a small bowl of water halfway with cold water and set it next to you. Place a wrapper in your palm and spoon a little dollop of filling right above where the middle crease would be if you folded the round into a half-moon. You want to get as much filling as you can in and still close the gyoza well—about a teaspoon or so depending on your gyoza skins. Dip your index finger into the cold water and run it along the half circle where your filling is. Close the circle by folding over the front flap and making ¼-inch (6-mm) pleats at ¼-inch (6-mm) intervals as you adhere it to the wet edge, all the while curving the back dough into the pleated front. Sound complicated? I admit it does, but all I can say is that it is easier than it sounds, and ultimately, even if you just make a smooth-edged half-moon, it will still be delicious (especially with homemade wrappers from artisanal flour).
Plop as many gyoza as can comfortably cook in your simmering pot of hot water (they should not be crowded when they rise to the surface). Cook, gently stirring to avoid sticking, at a lively simmer on medium-high heat until the gyoza rise to the surface. Cook a few minutes longer, then scoop a few gyoza and a very small amount of the hot water broth (just to keep the gyoza warm) into small rice bowls. Serve with a bowl of rice on the side. Unlike steam-fried gyoza, this dish makes a satisfying supper, especially if served with a daikon, carrot, or napa cabbage salad.
Each person should drizzle a little each of vinegar, soy sauce, and rayu to taste into a small soy sauce dish and dip the gyoza in the mixture before eating.
VARIATION: The balance of shrimp to pork can be adjusted according to your taste. And the garlic chives (nira) can be omitted, since they are quite pungent and may linger on your breath until the next day.
RAMEN
Tadaaki usually makes the ramen at our house, but I go for a simpler method and have slashed and burned his here. David Chang’s it is not, but we cannot all follow the Momofuku ramen method, so keep in mind the basic idea and experiment from there.
I like to make stock from the leftover bones of chickens I have roasted whole, stuffed with garden thyme branches and quartered lemons. Our chickens are so sublime that I add nothing but water along with the thyme sprigs and drippings off of the cutting board. I tried to cook the soup all night, but the gas alarm company called my mother-in-law in the middle of the night, and she crept upstairs to wake my husband. He has now nixed the overnight cook method. This deeply flavorful chicken soup makes an unforgettable ramen broth for homemade ramen (though not strictly orthodox). Also a dab of any reserved pan juices in each bowl adds extra complexity to the homemade ramen.
ramen at home SERVES 4
TEUCHI RAMEN
BROTH
2 small carrots, cut into 1-inch (2.5-cm) lengths
2 small negi (Japanese leeks) or spring onions, cut into 1-inch (2.5-cm) lengths
1 (¾-inch/2-cm) knob fresh ginger, peeled and finely sliced
4 free-range chicken thighs, bone-in (or 8 wings)
1 teaspoon sea salt
2 tablespoons best-quality rapeseed or sesame oil
NOODLES
2 tablespoons sesame oil
2 cups (300 g) good-tasting all-purpose flour
2 large eggs, at room temperature
2 egg yolks, at room temperature
TOPPINGS
1 small bunch boiled, squeezed, and chopped bitter greens (bok choy or komatsuna)
3 tablespoons finely chopped negi (Japanese leeks) or scallions
1 sheet nori, cut into eighths
Rayu (Chile-Infused Sesame Oil), for serving (optional)
Yuzu Kosho, for serving (optional)
FLAVORINGS
Miso
Soy sauce
Sea salt
Start the ramen soup early in the day or at least several hours before dinner.
Heat the oven to 450˚F (235˚C). Put the carrots, negi, ginger, and chicken thighs in a cast-iron pan and sprinkle with the salt and oil. Smoosh the oil around to coat all the chicken and vegetables and roast for 30 to 45 minutes in the middle of the oven.
Scrape the roasted chicken and vegetables and all of the pan drippings into a large heavy pot with 4 quarts (4 liters) of cold water and bring to a boil over high heat. Lower the heat and simmer, covered, for 1 hour. Uncover, pull out 2 thighs, place in a medium-sized bowl, and ladle a bit of broth over to allow the meat to cool gently. Simmer the stock, uncovered, for 1 hour more. If you are in a hurry, use half the amount of water and cook in a pressure cooker. (In Japan, meat is usually not sold on the bone, so Tadaaki uses chicken wings. N.B.: Most ramen shops use pork bones as the base to their broth, though chicken bones and dried fish usually play some role as well.) After the chicken meat has cooled for a half hour, shred, moisten with a ladle of broth, and reserve. When the stock is done, strain into a clean saucepan and keep warm over low heat.
Prepare the ramen noodle dough by mixing 2 tablespoons of the sesame oil into the flour with your fingers until crumbly. Add the eggs and egg yolks and stir with your hand until just incorporated. Knead on a clean, flat surface for 5 minutes until pliable but stiff. Let the dough rest while you prepare the ramen toppings.
Fill the largest stockpot you own with hot water and bring to a boil over high heat.
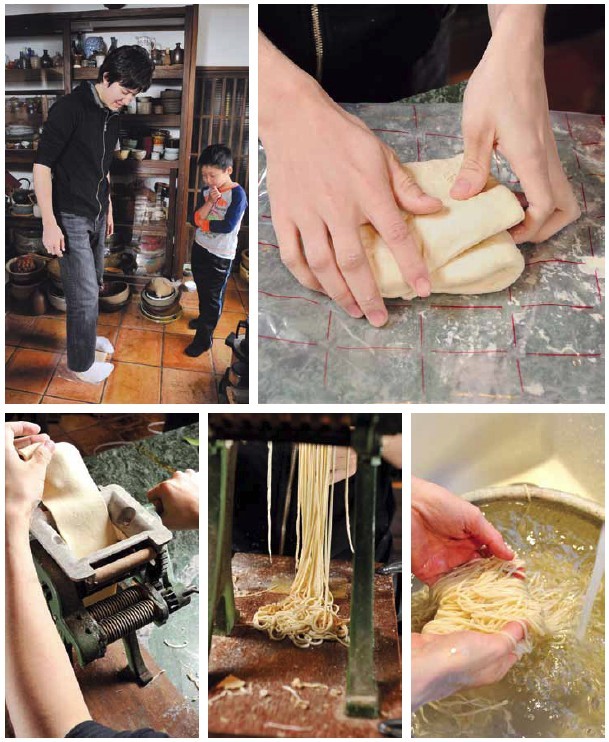
Roll out the ramen noodles following the udon noodle method, but roll them a little thinner than the ⅛ inch (3 mm). Cut them on the linguine setting of a pasta machine (or by hand). Slice into 9-inch (22-cm) lengths with a pizza cutter, flour well, and toss to distribute the flour. Leave on the workspace, but do not clump into a mass.
Take out one large soup bowl per person and add seasoning to each bowl according to each person’s desire: 1 tablespoon miso, 2 teaspoons soy sauce, or ½ teaspoon salt. Mix a little broth in to melt the salt or emulsify the miso. Distribute the reserved shredded chicken pieces among the bowls along with the small amount of broth in which it was cooled.
Boil the noodles for 2 minutes and right before the noodles are done, add 2 or 3 ladlefuls of broth to the bowls. Set a large strainer in a bowl and after 2 minutes has elapsed, scoop the noodles out of the boiling water with a small fine-mesh strainer and drop into the large strainer. Divide the noodles among the bowls filled with soup and quickly add 2 egg halves, a dollop of greens, and a piece of nori before sprinkling liberally with the negi. Serve immediately. If you are doubling (or tripling) the recipe, do not be tempted to cook more than 4 portions at a time. Continue cooking more noodles, but the first four people served should dive in, otherwise the noodles will inflate beyond control!
If added spice is desired, drizzle soy sauce or miso ramen with rayu and dab salt ramen with yuzu kosho.
VARIATION: You can also substitute semifresh ramen noodles (sometimes found at Japanese or Chinese grocery stores) or dried. Follow the directions on the package for cooking. They will not be as good.

Tadaaki was always the noodle maker in our house. When I developed this recipe for an article I wrote a few years ago, I had Christopher roll out the noodles because I was busy (and a bit intimidated). I promised him he only had to roll enough for us to shoot the photo for the article, so he obliged. But at the end of the shoot, I was left with the rest of the dough and no Christopher. He showed me how to adjust the pasta machine, and I discovered how simple making noodles is. And my noodles turned out to have the perfect thickness.
udon noodles SERVES 6
TEUCHI UDON
½ tablespoon salt
3⅓ cups (500 g) organic, unbleached cake or pastry flour
1⅔ cups/400 cc Noodle Dipping Sauce
Garnishes (suggestions follow)
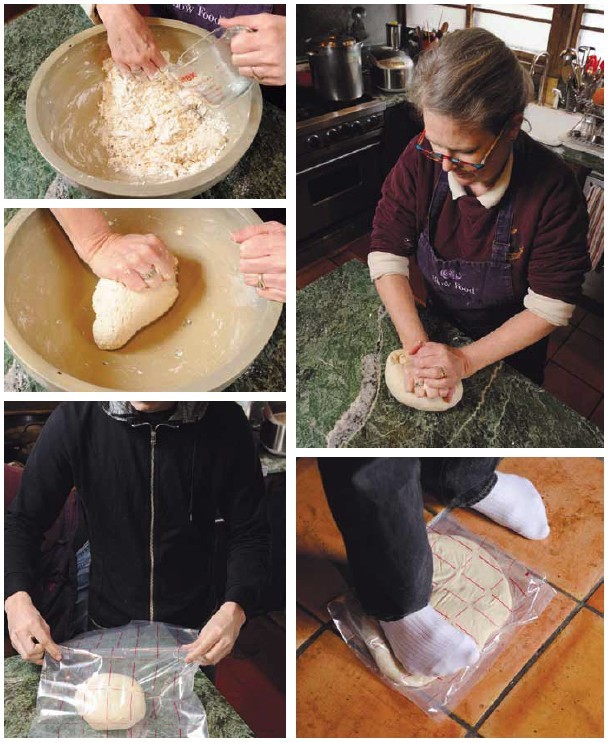
Dissolve the salt in ⅔ cup (160 cc) water. Measure the flour into a large mixing bowl. Add the salt water and mix until the dough holds together. Knead until smooth and pliable, then transfer to a heavy plastic bag. Pat the dough out to a 2-inch (4-cm) thick rectangle and knead further by rhythmically and firmly treading on the dough. Remove the dough from the bag, fold in thirds, and repeat the treading process a few times. (Or process with a metal blade in a food processor until the dough is crumbly and knead by hand.) Udon dough, like pasta dough, is dense and semidry, otherwise it will stick when rolled.
Roll out with a pasta machine, making rectangles about 2 feet (60 cm) long by ⅛ inch (3 mm) thick. Cut the noodles on the thin linguine setting and cut in half horizontally for 1-foot (30-cm) lengths. Flour the cut noodles as you finish each batch so they will not stick together.
Alternatively, roll out into a rough oblong shape on a counter surface with a 30-inch (75-cm) long dowel 1½ inches (3 cm) in diameter. Roll from the center out, periodically rolling the dough around the dowel to keep from sticking on the counter. When the dough has reached the desired thickness, roll it around the dowel, slide the dowel out, and gently flatten the roll of dough to cut. Slice into ⅛-inch (3-mm) wide strips with a broad-bladed, razor-sharp knife.
Fill a large stockpot with hot water and bring to a boil. Set a large mixing bowl in the kitchen sink and fill with cold water. Scoop up half of the raw udon and boil for 2 to 3 minutes, depending on thickness. The noodles should be softer than pasta but not mushy. Plunge the noodles into the bowl of cold water and refresh under cold running tap water. Shake off and swirl the small bunches into 3 attractive piles arranged on a dinner plate. Cook the rest of the udon in the same fashion.
Dip the udon noodles in a small bowl of dipping sauce (tsuyu) with flavor garnishes (yakumi). Slurping is de rigueur in Japan.
FLAVOR GARNSHES (YAKUMI): Use finely slivered citrus peel, finely chopped fresh green chile, slivered fresh ginger, torn sansho leaves, a chiffonade of shiso leaves, or finely chopped scallion or chives. Each diner sprinkles the desired garnishes into a small bowl of dipping sauce.
Although soba is a challenge to make at home, it is certainly not impossible. Dried soba makes an admirable alternative as long as you choose the best-quality buckwheat noodles you can find. I prefer organic and also tend to select packaging that looks artisanal or aesthetically pleasing, with the perhaps naïve idea that packaging and contents relate.
soba with walnut dipping sauce SERVES 6
KURUMI SOBA
½ cup (125 cc) whole fresh walnuts
1 pound (500 g) dried soba
1⅔ cups (400 cc) Noodle Dipping Sauce
2 tablespoons finely sliced rounds of scallions, mainly white part
Fill the largest stockpot you have with hot water and bring to a boil over high heat.
Grind the walnuts in a suribachi or mortar until powdery but not pastelike.
Follow the directions on the package, but in general, soba takes about 4 to 5 minutes of cooking to become the right texture of soft with a little bite.
While the noodles are cooking, place two large mixing bowls in the kitchen sink (if two fit—otherwise use just one bowl) and fill with cold water.
When the noodles are cooked, scoop them out of the boiling water and immediately plunge them into the first bowl of cold water to take the intial heat off. Swirl once and scoop into the other bowl. (You can skip the second bowl dip if you want, but this is Tadaaki’s method.)
Refresh under cold running tap water. Shake off and swirl small bunches of soba into several attractive piles on a flat bamboo noodle basket set over a dinner plate to catch the drips. (If you don’t have a basket, put the noodles directly on the plate or on a lacquer tray.)
Serve with a small bowl of dipping sauce flavored with a heaping teaspoon of ground walnuts and a healthy sprinkling of scallions.
The Austrian owner and her Japanese husband of the English school where I worked served somen to me for lunch one day my first summer in Japan, and I was entranced by the ice-cold noodles and fresh-flavored garnishes. Years later, I participated in a nagashi somen party put on by some of the mothers at Sunny-Side Up! A narrow, canted trough from gray plastic piping was set up, with one end elevated above shoulder height and the other end about waist level. They fed a hose into the top of the trough and placed a bucket at the bottom end. Everyone received a ladle of dipping sauce in their bowl, along with some garnishes, and then stood on either side of the trough. Someone dropped the somen into the top of the trough so it sped down the watercourse, careening along toward the waiting bucket. The trick was to catch up a dollop of somen from the cold water, plunk it in the bowl of sauce, and eat. Loads of fun . . . but a bit hard to get full, all things considered.
somen with ginger, myoga, and scallions SERVES 6
SOMEN
3 myoga, cut lengthwise into fourths
2 tablespoons finely sliced rounds of scallions, mainly green part
1 tablespoon finely slivered fresh ginger
1 pound (500 g) dried somen
1⅔ cups (400 cc) Noodle Dipping Sauce
Fill a large stockpot with hot water and bring to a boil over high heat.
Set each quarter piece of myoga (one of the cut sides down) on a cutting board and cut into thin lengthwise slices with a razor-sharp knife. Mound the myoga slices in a small bowl and bring to the table with the scallion rounds and slivered ginger.
Place a large mixing bowl in the kitchen sink and fill with cold water. Drop the somen into the boiling water and cook for about 2 minutes, or according to the package directions.
As soon as the noodles are done, scoop them out of the boiling water and slide them into the bowl of cold water. Start running more cold water into the bowl and hold onto the somen so it won’t run out of the bowl. When the noodles have cooled, turn off the tap.
Grab the somen, one handful at a time, give it a shake, and set the swirls on a bamboo noodle basket or plate. Bring the somen to the table. (If you are using a noodle basket, you will need to set the basket on top of a dinner plate to catch the drips.)
Serve with a small bowl of dipping sauce. Sprinkle a bit of the myoga, ginger, and scallion into the dipping sauce, plunk in some somen, and slurp.
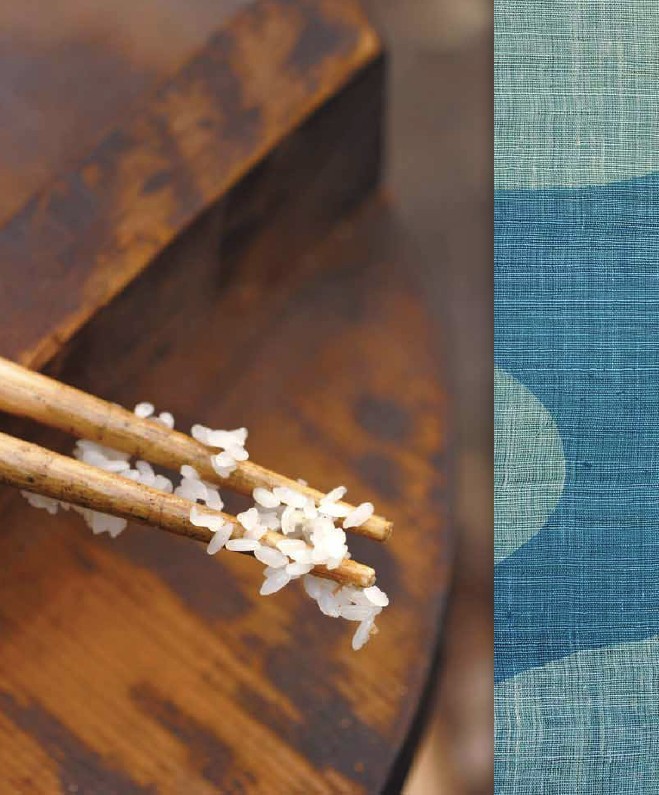
ON WASHING RICE
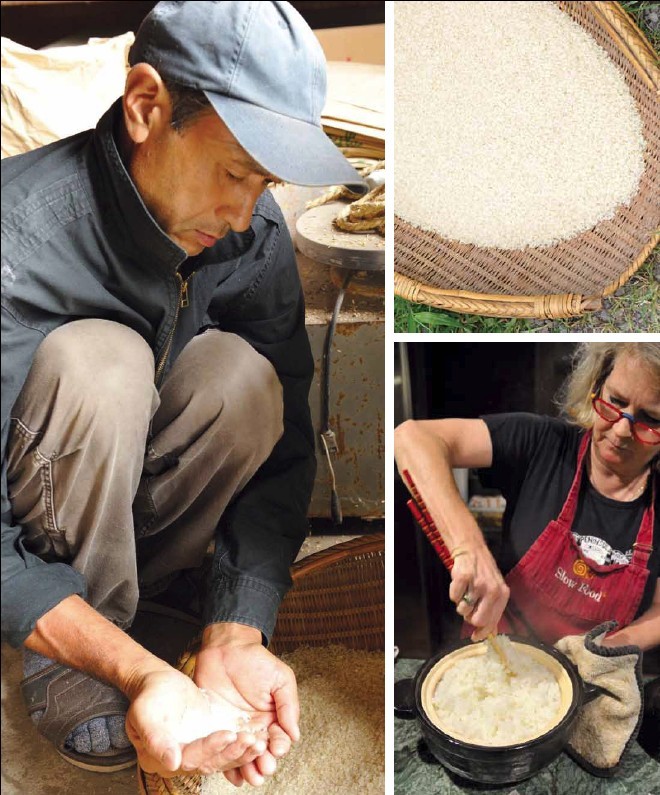

Most Japanese who cook will make at least one pot of rice in their rice cooker every day. Inevitably the repetition of the task of washing the rice will lead to some feeling of disassociation or the desire to hurry through the task. Rice washed lackadaisically will lose a bit of spark. The rice will not be bad but it also will not be great. It’s worth giving the rice some attention while you wash it and perhaps one more clear water rinse before cooking.
plain rice MAKES 4 CUPS (1000 CC)
GOHAN
2 cups (500 cc) Japanese-style short-grain rice
Measure the rice into a rice cooker receptacle or a heavy, medium-sized saucepan. Fill the receptacle or pan to the very top with cold water and pour off any debris or little bugs floating to the top (don’t be squeamish; better bugs than chemicals). Scrub the rice in your fist to dislodge extra bran. Fill with cold water repeatedly, pouring off the water each time until the water runs clear. Drain one last time and pour 2 cups (500 cc) cold water into the rice, sloshing around the sides a little to dislodge any grains sticking to the sides of the pan. If possible, let sit for 30 minutes before cooking.
Cook in a rice cooker by selecting the correct setting. Or cook in a heavy, covered saucepan on the stove. Bring the rice to a boil in the covered pot (bubbly steam will escape around the edges of the pot lid). Turn the heat down immediately to the lowest setting and cook slowly until you hear little crackles when you lower your head close to the bottom of the pan (but be careful not to burn your ear!).
Let the rice sit for 5 minutes, then fluff with chopsticks to aerate (a paddle can easily smash the rice). In cool weather, it is best to store leftover rice overnight at room temperature, since refrigerating will cause the rice to harden.
RATIO: rice : water—1 : 1
After Tadaaki graduated from college, he returned home to live with his parents and work with his father as is the custom for the son designated to take over the family business. A naturally curious guy, Tadaaki was interested in trying new foods and experimenting with different eating styles. He decided to replace his daily white rice with brown rice but found himself losing his appetite at an alarming pace as each day passed. For this reason, we do not eat as much brown rice in our family as I would like. The method here follows the traditional Japanese way of making rice. For fried brown rice, I often boil the rice like pasta in plenty of water so that the brown rice is drier and easier to fry.
brown rice MAKES 4 CUPS/1000 CC
GENMAI
2 cups (500 cc) Japanese-style short-grain brown rice (genmai)
Measure the rice into a rice cooker receptacle or a heavy, medium-sized saucepan. Fill the receptacle or pan to the very top with cold water and pour off any debris. Briefly scrub the rice between both of your palms and fingers and rinse once more. Drain, then measure 3 cups (750 cc) water and add to the rice. Soak for 30 minutes before cooking to absorb some of the soaking water.
Cook in a Japanese rice cooker by selecting the brown rice (玄米) setting, though be aware that this cooking cycle takes appreciably longer than the normal one. Or cook in a heavy saucepan on the stove as described.
Let the rice rest for 5 minutes, fluff with chopsticks, and serve. To store leftover rice, try to avoid chilling it. It can be stored in small containers in the freezer and reheated for later use.
RATIO: rice : water—1 : 1.5
VARIATION: For a more pilaf style, toss the brown rice into a large, heavy pot of boiling water and cook for 30 minutes. Drain, return to the pot, cover, and let rest for 20 minutes before using.
The first time I tasted hot sushi rice was at a sushi counter in Tokyo’s Tsujikji fish market. It was an eye-opener. The sushi master had just run out of rice and an assistant brought a steaming batch of freshly made sumeshi in a wooden tub. By the time the master had patted out our sushi, the rice had cooled enough not to cook the fish but was still pleasantly warm in contrast to the cold fish. Delicious.
sushi rice MAKES 6 CUPS/1500 CC
SUMESHI
3 cups (750 cc) Japanese-style short-grain rice
2 tablespoons sake
1 (6-inch/15-cm) piece of konbu
6 tablespoons rice vinegar
3 tablespoons organic granulated sugar
2 teaspoons fine sea salt
Wash the rice according to the method for Plain Rice. Add 3 cups (750 cc) filtered water to the washed rice, remove 2 tablespoons of the water, and replace them with the sake. Slip in the konbu and let sit for 30 minutes. Cook the rice following the method for Plain Rice or on the sushi rice (すしめし) setting of a rice cooker.
Measure the rice vinegar into a small bowl and stir in the sugar and salt. Set aside to dissolve while the rice is cooking, stir occasionally if you think about it.
Five minutes after the rice is done, discard the konbu and dump into a wide wooden tub (handai) or onto a large wooden cutting board. Sprinkle the prepared sushi vinegar over the rice and aerate the rice carefully with a flat paddle by cutting into the rice grains and lifting them up from the bottom (similar to folding in egg whites) while fanning the rice with a flat Japanese fan or a piece of cardboard with your other hand (the definition of a chew-gum-and-walk kind of operation, so enlist a helper.) Do not smash! The idea here is to cool the rice quickly in order to facilitate the absorption of vinegar into the rice grains. It will take several minutes for the steamy rice to come to body temperature. Cover with a damp cloth until ready to use. Do not store in the fridge.
RATIO: rice : water—1 : 1

On trips back to the United States, I never liked the airline food (who does?). And after my first son was born, I realized bringing my own food was the only option if I wanted to stay one step ahead of the inevitable travel cold brought on by sleep deprivation and lowered resistance. Traveling with one baby is exhausting; I ended up traveling with three. And the food I brought with us kept me going.
My mother-in-law, like many older Japanese farm women, has a bent back, so it was hard for her to hold babies. But she is an expert at making country sushi: inarizushi and inaka zushi—a traditional meal she prepared for special days. So I enlisted her help in making our lunches for the plane. She was ecstatic to be useful to her son’s stubbornly independent foreign bride (me) and whipped up several boxes each time we went—enough for about eight people, but we did our best to finish. You eat both inarizushi and inaka zushi with your hands—no need for soy sauce—but a hot towel is recommended for wiping fingers. Clean tasting and slightly sweet for a needed energy boost, these two country styles of sushi are typically made ahead of time to be eaten later in the day. They are excellent choices for travel lunches or bento boxes. (In the countryside, we call these rolls inaka zushi, but they are probably known best as futo maki.)
You will need a bamboo sushi rolling mat for this recipe.
country sushi rolls MAKES 6
INAKA ZUSHI
1½ cups (200-g package) salted jellyfish (kurage)
1 tablespoon dark sesame oil
½ teaspoon red pepper flakes
3⅓ cups (800 cc) Noodle Dipping Sauce
1 tablespoon unhulled sesame seeds, roasted
Sea salt
6 dried gourd strips (kanpyo)
½ small burdock root (gobo), cut into 3 by ¼-inch (7.5-cm by 6-mm) batonettes
2 medium carrots, cut into 3 by ¼-inch (7.5-cm by 6-mm) batonettes
Rice vinegar
6 sheets nori
6 cups (1500 cc) Sushi Rice
1 tablespoon finely julienned ginger
Soak the jellyfish in a large bowl of cold water for 1 to 2 hours. Rinse out the excess salt in several changes of cold water, then drain and squeeze. Heat the sesame oil with the red pepper flakes in a small saucepan over medium-high heat until they turn bright red. Toss in the drained jellyfish, increase the heat to high, and sauté for a minute or so. Be careful not to burn it! Add 2 tablespoons of the noodle dipping sauce and simmer for 5 minutes on medium-low heat to reduce most of the liquid. Roast the sesame seeds in a small dry pan, shaking over medium-high heat until they start to pop. Toss them into the jellyfish.
While you are soaking the jellyfish, massage some sea salt into the kanpyo. Fill a medium-sized bowl with cold water and soak the kanpyo for 20 minutes to reconstitute. Drain and squeeze, then cut into manageable lengths of about 4 inches (10 cm) or so.
Fill a medium-sized saucepan three-quarters full with water, salt lightly, and bring to a boil over high heat. Drop in the gobo batonettes and simmer briskly for about 2 minutes until half done (they should just be starting to soften). Scoop the gobo out with a small strainer and set over a bowl to drain. Follow this same process to cook the carrot for about a minute or so in the same water used to boil the gobo.
When the carrot pieces are half done, drain. Dump the simmering water, add the remaining noodle dipping sauce (after you have taken out 2 tablespoons for seasoning the jellyfish), and return the drained carrots and gobo back into the saucepan along with the reconstituted kanpyo. Place some parchment paper or a drop-lid (otoshi buta) on the surface of the vegetables and simmer until they are soft; cool in their broth.
Pour a little rice vinegar into a small bowl and set it next to where you will be making the sushi rolls. Place a bamboo sushi-rolling mat on your work space, the side with the flat rolling bar should be closest to you. Lay one nori sheet on top of the mat, shiny side down (with the grain going crosswise). Scoop a cup and a half (250 g) of sushi rice onto the sheet of nori, dip your fingers in the rice vinegar (splashing vinegar up to your palms), and spread the rice evenly to the edges, including the rolling end, but leave a 1¼- to 1½-inch (3- to 4-cm) border at the finishing end. Lay a few pieces of each of the above ingredients about a third of the way up from the bottom of the rice parallel to the rolling edge. But easy does it, as this roll can get quite large. It shouldn’t be much more than 2 inches (5 cm) in diameter when done. Roll tightly and firmly away from you one rotation, and squeeze gently with both hands along the roll. Pick up the edge of your rolling mat and continue to roll to the end. Lift up the mat-enclosed roll, adjust the mat, and smooth the roll into an even cylinder. Wrap each roll separately in parchment paper, then plastic wrap and serve anytime that day (or the next).
When Baachan brings over a plate or two of her sushi, I find myself reaching for these silky little pillows of rice before the country sushi rolls packed with simmered vegetables. There is something about the squishy, slightly sweet deep-fried tofu wrapping that is immensely appealing (and almost addicting).
stuffed tofu pouches SERVES 6
INARIZUSHI
10 pieces usuage (deep-fried tofu)
2⅔ cups (600 cc) Noodle Dipping Sauce
Rice vinegar
6 cups (1500 cc) Sushi Rice
Fill a medium-sized saucepan three-quarters full of water and bring to a boil over high heat. Slap the usuage against the counter to help pop the two sides apart (this was traditionally the kids’ job) and drop in the boiling water for 1 minute to remove the excess oil. Drain in a fine-mesh strainer. When cool enough to handle, cut in half crosswise.
Bring the noodle dipping sauce to a simmer over medium heat in a medium-sized saucepan and slip in the usuage halves. Lay some parchment paper or a drop-lid (otoshi buta) on the surface of the usuage and simmer gently on low heat for 5 minutes, occasionally switching the bottom ones to the top to ensure even flavoring. Remove from the heat and cool in the liquid.
Pour a little rice vinegar into a small bowl and set it by your workplace. Pluck a seasoned usuage half out of the pan and pry it apart to create a pocket. Place it in your palm, dip your free hand in the vinegar, and grab a small handful of sushi rice (a heaping ⅓ cup/75 g). Press the rice gently into a compact oval, but do not squeeze. Stuff the rice inside the usuage pouch, tucking one edge of the ends over the other to close up the opening. Arrange on a plate as you go and cover with plastic wrap until serving. These keep for at least a day, unrefrigerated, in cool weather.
I first ate hand-rolled sushi for dinner at a friend’s family home on Christmas Eve. I loved the idea that you could just eat and eat and eat (and not worry about the bill). Tadaaki used to pass by the fish market every Saturday on the way home from egg deliveries, and temaki zushi was our Saturday dinner for years. These days Tadaaki’s delivery schedule has changed, so we make sushi at home when we have the whim but perhaps less regularly than before.
hand-rolled sushi SERVES 4 TO 6
TEMAKI ZUSHI
About 2 pounds (1 kg) assorted fish, cut for sashimi
3 tablespoons finely chopped scallions or chives
2 tablespoons freshly grated ginger (if squid or shiny silver fish are included)
2 tablespoons freshly grated wasabi
12 shiso leaves
20 sheets (or more) nori, cut into quarters
Soy sauce (as needed)
6 cups (1500 cc) Sushi Rice
A small handful of sprouted daikon (optional)
Arrange the sashimi fish attractively on a plate with some green leaves or julienned vegetables to keep the fish apart. Mound the chopped scallion and grated ginger in a free spot on the perimeter of the sashimi plate and dab some wasabi in a free corner. Put the shiso leaves and nori separately on small plates. Bring all these plates to the table.
Set a medium-sized plate and a small saucer in front of each person and pour a little soy sauce into the saucer. Put the sushi rice in a medium-sized serving bowl with a rice paddle and bring it to the table.
Make your own hand-rolled sushi by laying a piece of nori, shiny side down, across your palm, then spreading some sushi rice on the nori. (Better not to go hog wild here because the roll will quickly become too awkward to eat if overstuffed.) Using chopsticks, pick up a couple of pieces of sashimi and drape them over the rice. Scrape some wasabi across the nori and sprinkle the fish with chopped scallion or top with a fresh shiso leaf, or daikon sprouts, if using. You don’t need all three, since the idea is not to include everything but the kitchen sink. Roll up the nori square straight (not cone fashion), dip in the soy sauce, and eat. This is a well-loved family meal in Japan and often the answer for how to eat fairly good sushi on a budget.
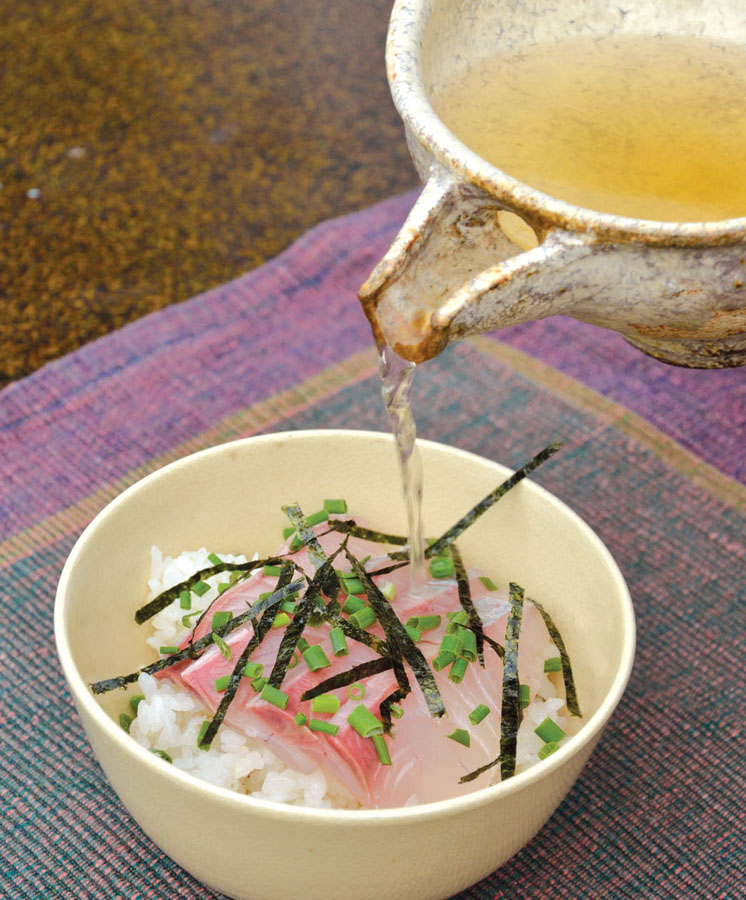
Besides curry rice, this is my youngest son Matthew’s favorite dish and he requests it often. Cha means “tea” in Japanese, so chazuke by nature (if not the name alone) signals a dish involving tea (in this case, green tea). But we don’t drink green tea, so it’s not something we have lying around—and typical farming families had drank up their tea at tea break. Tadaaki makes a light dashi, then flavors it with soy sauce. I prefer the clean taste of salt. Either way, no tea. Also we only use beautifully fresh sashimi-cut fish garnished with the nori and green onion to surprise your tongue. Good for breakfast, a light lunch, or a starter before dinner.
yellowtail sashimi on hot rice with broth SERVES 4
BURI CHAZUKE
1⅓ cups (300 cc) Dashi
½ teaspoon fine sea salt
2 cups (500 cc) hot Plain Rice
16 slices yellowtail sashimi (buri or kampachi)
4 teaspoons chives or thin scallion tops, chopped into fine rounds
¼ sheet nori, snipped into fine threads (about 2 teaspoons)
Heat the dashi with the salt in a small saucepan over low heat to dissolve. Keep warm.
Scoop the hot rice into four small bowls with a rice paddle. Lay 4 slightly overlapping sashimi slices over the rice in each bowl. Sprinkle with chives and cover with enough salted dashi to almost reach the top of the rice (about ⅓ cup/85 cc). Sprinkle with nori threads and serve immediately.
VARIATION: Substitute salmon, sea bass, flounder, or similar sashimi-grade cuts for the yellowtail. Add a little slivered yuzu or Meyer lemon zest with the chopped chives.
I never was a big fan of fried rice because it can end up a bit greasy and a little too heavy on the rice component. But one night in Berkeley, I stopped by Michelle and Rayneil De Guzman’s house for an early dinner with their darling little toddler, Renato. Rayneil (of Filipino heritage) put together a light version of fried rice that converted me. Rayneil cooks in the Café at Chez Panisse, so his cooking reflects both his heritage and his training: very eclectic and always delicious. I never say no to an invite to dinner at the De Guzmans’, and, more often than not, just invite myself. Inspired by Rayneil, I thought a summer vegetable version of fried rice (chahan) would be both fresh and light. I was not wrong. In the summer, when vegetables are coming out of your ears, it’s fun to see how many you can get on the plate. This particular fried rice is irresistible because it packs so many of those wonderful summer vegetables into the dish and thus yields a very bright version of a dish that can quickly become overly brown or too oily. If you have any tofu hanging around, cut it into small ½-inch (12-mm) squares and strew over the rice before garnishing with the green aromatics. The cold silky tofu juxtaposes well against the hot rice.
fried rice with corn and peppers SERVES 6
TOMOROKOSHI TO PIMAN NO CHAHAN
4 cups (1000 cc) Plain Rice
3 ears corn
About 5 tablespoons organic rapeseed oil
1 large onion, cut into ¼-inch (6-mm) dice
Fine sea salt
1 tablespoon finely chopped ginger
½ tablespoon finely chopped garlic
2 small mild Japanese red peppers or 1 large Western, cut into ¼-inch (6-mm) dice (1 cup/250 cc)
4 eggs, at room temperature, beaten with ¼ teaspoon sea salt
3 tablespoons soy sauce
3 tablespoons finely chopped negi or scallion, including the white part, for garnish
3 tablespoons finely slivered shiso leaves, for garnish
While the rice is cooking, prepare the vegetables.
Set each corncob in a large bowl and cut the kernels off the cob with a sharp knife. After all the kernels are removed, go over the cob with the back of the knife to get the juicy corn “meat” still adhering to the cob. Break up the kernel clumps with your fingers and measure—you should have about 1½ cups (750 cc).
Heat 2 teaspoons rapeseed oil in a large, well-seasoned wok or frying pan over medium heat. When hot, add the onion and a large pinch of salt. Sauté while stirring gently with a flat wooden spoon to distribute the oil. After a couple of minutes, toss in the chopped ginger and garlic. Stir for a minute or two more and scrape into a bowl big enough to house all of the fried rice vegetables as they are cooked.
Wipe the pan and heat 2 more teaspoons of oil over medium heat. Throw in the peppers and a pinch of salt. Lower the heat and stir-fry for a couple of minutes, stirring constantly. The peppers should just lose their raw edge but should not really be cooked at this point. Dump in the corn kernels, and add another teaspoon of oil and a large pinch of salt. Stir gently to distribute. Cover and cook for a minute or two more over low heat, until the corn and peppers have softened but still have a slight crunch. Push the cooked onion aside and add to the bowl.
Wipe the pan again and heat 1 tablespoon oil over high heat. Add the salted eggs and cook quickly, while continually scraping the bottom of the pan to incorporate the cooked egg layer into the raw egg mixture on the surface. Remove the cooked eggs to another medium-sized bowl while still slightly runny.
Turn the cooked rice onto a flat wooden basin (handai) or large wooden cutting board and cut into the rice with a rice paddle, spreading out the rice to aerate and release steam. Wash the wok or frying pan and heat 2 tablespoons oil (in the clean pan) over high heat.
Dump the rice into the pan and sauté for several minutes, stirring constantly with a flat wooden spoon, turning the bottom layer up over the top layer to ensure even cooking and to dry out the rice. When all the rice has met the oil and has been seared by the bottom of the pan, stir in the soy sauce. Sauté for a few more minutes to evenly distribute the soy sauce. Once the rice is evenly colored by the soy sauce and no white remains, stir in the cooked vegetables. As soon as the vegetables are well incorporated into the rice, turn off the heat and add the cooked egg, cutting it up with the flat edge of the spoon as you distribute it into the fried rice.
Scoop a few large spoonfuls onto a plate and sprinkle with finely chopped negi and shiso threads. If additional salty flavor is needed at the table, opt for fine sea salt over soy sauce.
VARIATION: If you don’t have any red peppers to create the arresting yellow-red-green color trilogy, you could optionally add 1 cup (250 cc) of ¼-inch (6-mm) diced fresh tomatoes that you have quickly sautéed in ½ teaspoon rapeseed oil with a pinch of salt. Alternatively, you could skip the sauté and strew the chopped fresh tomatoes on top of the fried rice before serving. Folding the quickly sautéed tomatoes into the fried rice will result in a slightly wetter dish. Either way, sprinkle with the shiso and green onion before serving.
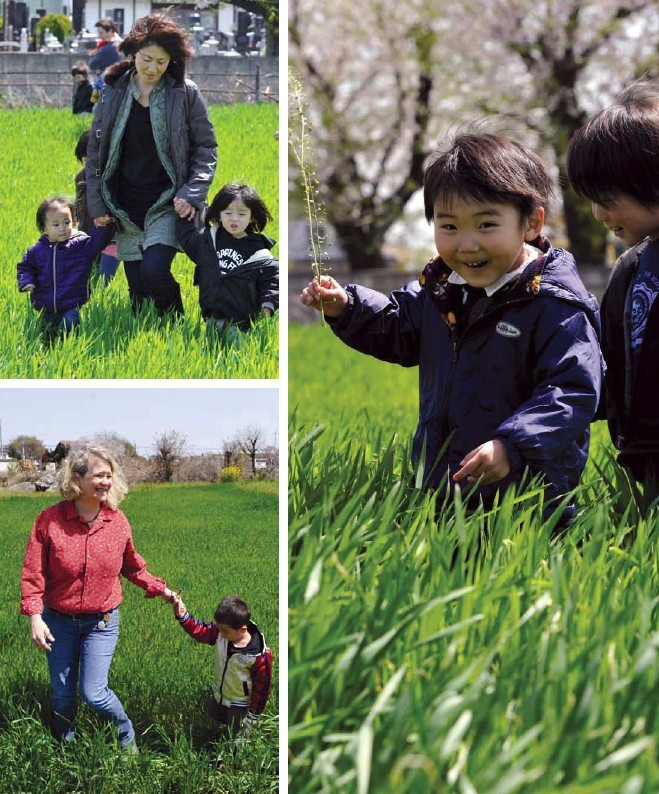
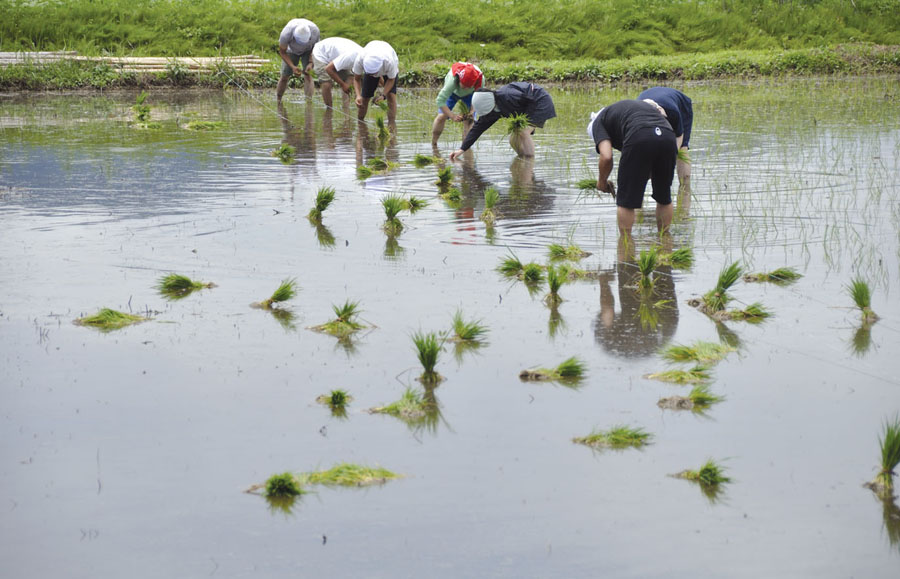
RICE PLANTING


Our meat shop had a fire and was closed for a couple of months and I felt less than inspired when faced with the choice of supermarket meats. One day I needed a fresh new idea to liven up the SSU! school lunch and was moved to re-create a dish I had loved at a now defunct organic cafe run by our dear friend Matsuda-san (the mayonnaise maven). I had always wondered what happened to the chef who, like Matsuda-san, had a innate feeling for creating interesting and delicious food from local ingredients and the organic vegetables that Matsuda-san grew. Later, I discovered her waitressing at another local organic café that serves uneventful pizza. What a waste!
natto fried rice SERVES 6
NATTO CHAHAN
4 cups (1000 cc) Brown Rice, boiled pilaf style (see variation)
5 tablespoons rapeseed oil
1 large carrot, peeled and diced
3 small onions, diced
1 (1-inch/2.5-cm) piece of ginger, peeled and finely chopped
Fine sea salt
2 usuage (deep-fried tofu pouches), cut into ½-inch/12-mm dice (optional)
3 eggs, at room temperature, beaten with ¼ teaspoon sea salt
2 tablespoons soy sauce
2 (3-ounce/80-g) packages natto, well aerated and seasoned with the accompanying sauces
4 to 6 tablespoons Japanese Mayonnaise
4 to 6 tablespoons finely chopped scallion, including white part
While the rice is cooking, heat 1 tablespoon rapeseed oil in a large, frying pan over medium heat. When hot, add the carrot, onions, ginger, and ¼ teaspoon salt.
Stir-fry for a couple of minutes, stirring constantly with a flat wooden spoon. Cover and cook for a few more minutes, until the vegetables have just softened but are not completely cooked through. The carrot should still have a bit of snap. Scrape into a medium-sized bowl.
If using the usuage, wipe the pan one more time and heat 1 tablespoon oil over high heat. Throw in the usuage and ¼ teaspoon salt. Toss quickly over high heat; pop a piece in your mouth to make sure the surface has crisped a little but has not toughened. Transfer to a small to medium-sized bowl.
Wipe the pan again and heat 1 tablespoon oil over high heat. Add the salted eggs and cook quickly, while continually scraping the bottom of the pan to incorporate the cooked egg layer into the raw egg mixture on the surface. Remove the cooked eggs to another medium-sized bowl while still slightly runny.
Dump the cooked brown rice into a large bowl. Heat the remaining 2 tablespoons oil in a large, heavy pot over high heat. Add the rice and sauté for several minutes, stirring constantly with a flat wooden spoon, turning the bottom layer up over the top layer to ensure even cooking. When all of the rice has been heated up, stir in the soy sauce. Sauté for a few minutes more to evenly distribute the soy sauce, then stir in the cooked vegetables and usuage (if using). Once mixed in, turn off the heat and add the cooked egg, cutting it up with the flat edge of the spoon as you distribute it into the fried rice.
Scoop a few large spoonfuls onto a plate and add a few dollops of whipped natto. Spoon a little mayonnaise on top of the natto and sprinkle with scallion. If additional salty flavor is needed at the table, opt for fine sea salt over soy sauce.
Serve with a leafy green salad dressed with Miso Vinaigrette.

My mother-in-law made sekihan every farm holiday (when she wasn’t making country sushi rolls). She would pack it in lacquer boxes, lay some leaves from our nandina berry shrub (pictured on the cover), and include a small paper-wrapped packet of roasted sea salt and sesame seeds. She would bike over (even then, a little wobbly) and deliver these boxes to us at our former house a few blocks away (now the site of my little school, Sunny-Side Up!). In those days I was less accustomed to having food show up on my doorstep, but always welcomed those lacquer boxes of sekihan. I liked the sharp taste of salt on my tongue and the way the beans rolled against the pleasantly sticky rice. I also liked that (in my mind) it went with any food and that it kept for a day or so. Sometimes I felt boxed in a corner if presented with perishable extra food when I already had a tableful. I’ve progressed from that brash young farmwife who chaffed at country customs, and have learned to receive graciously. While writing this book, I realized that my mother-in-law had not made sekihan in a few years—maybe not even since she began eating dinner at our house every night (after my father-in-law died). Like so many customs, the making of sekihan almost slipped away unnoticed, but now it is Tadaaki’s aunt Katchan or I who make the sekihan and pack it in the lacquer boxes. And someday it will be our sons.
red bean rice MAKES ABOUT 7 CUPS (1750 CC)
SEKIHAN
½ cup (125 cc) azuki beans
3¾ cups (900 cc) glutinous rice (mochi gome)
2 tablespoons fine sea salt
4 tablespoons unhulled sesame seeds
Starting the day before, soak the azuki for about an hour or so. Drain, add cold water to cover about 2 inches (5 cm) above the beans, and bring to a simmer over medium-high heat. Reduce the heat to low and continue simmering until cooked halfway. Drain the beans and reserve the pink simmering liquid. Once the beans have cooled, chill them in the fridge to use the following day but be sure to take them out a couple of hours before cooking so they can return to room temperature.
Wash the glutinous rice until the water runs clear and soak overnight in a medium-sized bowl with the cooled bean simmering liquid. This soak is essential because the bean liquid imparts a lovely pink hue to the rice.
Fill a wide, deep, slope-sided pan or wok half full with water and bring to a boil over high heat.
Drain the mochi gome and mix it with the half-cooked beans in a medium-sized bowl until the beans are well distributed into the rice. Line a steamer basket with a thin muslin cloth and dump in the rice and beans. Poke a 2-inch (5-cm) hole in the center of the rice with your finger to give the rice space to expand. Fold the edges of the cloth in loosely (leaving a small air vent in the center to allow steam to escape) and cover. Set the steamer basket above but not touching the boiling water.
Steam over high heat for about 15 to 20 minutes, until there is a strong blast of visible steam rising from the rice (signaling that, not just the steaming water, but the rice itself has taken on intense heat). Uncover the steamer and open the muslin cloth. Sprinkle a little bit of water on the surface of the rice and beans (uchi mizu), rewrap (leaving a vent hole), and re-cover. Do this two or more times. It will take from 30 to 40 minutes for the rice to steam. As the rice steams, the hole you poked will swell and almost disappear. Check the doneness by inserting a chopstick into the rice. If you feel resistance or roughness, the rice is not yet done; if the chopstick slides in nicely, the rice is done. Of course, this is subjective. Some people like a bit of bite to their grains, and some people prefer them quite soft. Use your best judgment by tasting it.
While the sekihan is cooking, roast the sea salt over low heat in a small pan to remove any lingering dampness. Scrape into a small bowl. Toast the sesame seeds over medium-high heat, shaking the pan, until they pop. Add to the salt in the bowl and combine with a small spoon.
When the rice and beans are finished cooking, dump them into a large, shallow wooden tub (handai) or the back of a wide wooden cutting board. Cut, spread, and fluff with a rice paddle to cool.
Pack in lacquer boxes and, if you have them, set a small sprig of leaves snipped from a nandina shrup on top of the rice as a natural preservative. (Katchan also dusts a minute amount of sugar over the sekihan to help keep it soft.) Serve sprinkled with toasted sesame seeds and roasted salt. Keeps at room temperature for a couple of days, depending on the weather.

Calling these rice “balls” is a bit misleading, since onigiri are usually triangular in shape. Although onigiri are now sold alongside sandwiches in the local convenience shops, in years past, they were the easy, well-balanced meal. There are any number of fillings that can be used, ranging from fish to pickles to preserves. (Convenience store onigiri wrappings are cleverly designed; the nori stays crisp until unwrapped, and the unwrapping sequence has a fascinating choreography.) Though if you don’t mind taking about thirty seconds to pat an onigiri together and another to wrap up a piece of nori separately, you can make your own and avoid the convenience store ones (that, despite the ingenious wrapping, inevitably contain MSG and preservatives).
salty salmon rice balls MAKES 8 TO 10
SHAKE ONIGIRI
4 small salmon filets, weighing 2½ ounces (70 g) each
2 teaspoons fine sea salt, plus extra for the rice balls
4 to 5 sheets nori, cut in half
4 cups (1000 cc) Plain Rice
Sprinkle the salmon on both sides with about ½ teaspoon salt from about 1 foot (30 cm) above the fish. Seal tightly in a zippered plastic bag, roll, and refrigerate for at least half a day or overnight. (The longer it cures, the saltier the salmon becomes. This is purely a matter of taste, but typically, the salmon is quite salty.)
Once the salmon is sufficiently salted, cook it under the broiler on a rack set over a pan in the second shelf slot from the top of the oven. Broil for 10 minutes, skin side up, and 5 minutes, skin side down. Remove from the broiler and peel off the skin. Check for any bones and remove those as well. If the idea of adding some crispy skin to the salmon meat sounds good to you, broil the skin for 4 minutes in the top rack of your oven, until it has brown splotches and the skin fat is sizzling.
Crumble the salmon meat into a medium-sized bowl, finely chop the extra broiled salmon skin if you are using it, and fold into the salmon.
Set out four small rice bowls at your workplace, along with a small bowl of water (for your fingers) and a small saucer of salt. Lay your nori out on the workplace or a board, shiny side down. Line each rice bowl with plastic wrap, dip your finger into the water and smooth it around the plastic (to help the salt adhere), then sprinkle in a little salt. Scoop out a scant cup of hot, aerated cooked rice (150 g) and plop it into one of the rice bowls. Do the same for the other three. Poke about a tablespoon or two (to taste) of salty salmon into the center of the rice and smooth the hot rice around the salmon by enclosing it with the plastic wrap. Shape the onigiri by cupping the rice ball in one hand and cupping your other hand on top to encircle. Squeeze together repeatedly to make a compact triangular ellipse. Unwrap from the plastic, and set each one in the middle of the top half of one of the nori strips. Fold the bottom half of the nori over the rice ball and tuck the free corners over the exposed rice. These are best eaten right away, steaming hot, but are also good at room temperature: In this case, just leave them in the plastic and wrap in the nori right before eating so the nori stays crisp.
OTHER FILLINGS: Umeboshi (pitted or not), katsuobushi mixed with soy sauce, and steamed cod eggs are all good substitutes for the salmon. My favorite, however (to which I am fairly addicted), is line-caught canned tuna smashed with pasteurized mayonnaise and a splash of rice vinegar to taste (finely chopped green onion is also nice but optional).
VARIATION: When Christopher was little, I started making him what I called “onigiri dango” for some reason (dango are usually round balls, but these were cigar-shaped). I cut the nori into 4 pieces, spread a little rice on the rough side, sprinkled it with salt, and rolled it up straight (not like a cone). This style is very easy for small children to eat and also readily portable if you pop them in a plastic container or wrap in plastic. Add a little filling, and they will be even better!

Years ago my friends and I often went to a yakitori restaurant on Friday nights and, after eating our fill of the various barbecued meats on a stick, we would order yaki onigiri (grilled rice balls) to finish off the night. Sitting at the counter, sometimes the smoke drifts your way, but you can also talk to the master and observe his cooking techniques. I was always mesmerized by how long it took the rice balls to become thoroughly crusty and how patient the master was with the process. He did not just grill the two flat sides of the onigiri; he also grilled each of the three narrow widths of the triangular form. Finally, he brushed the onigiri with soy sauce and cooked them just a tad more—I suggest using miso because it’s a little easier to handle.
miso-grilled rice balls MAKES 8 TO 10
MISO YAKI ONIGIRI
4 cups (1000 cc) Plain Rice
About 3 tablespoons organic miso
4 to 5 sheets nori, cut in half
Make the rice balls following the method for Salty Salmon Rice Balls, but omit the salmon and the salt.
Cook the onigiri on both sides over a low-ember charcoal fire or on a mesh rack set directly over the lowest flame of a gas stove. Rubber-tipped tongs are useful turning implements, but the real key to making great yaki onigiri is patience. Wait until each side has formed a thick crust before turning (turn too soon and you risk the whole thing falling apart).
Once the onigiri are well crisped, smear about ½ teaspoon miso on both sides (only on the crusty areas) and sear just a bit more to seal. Set the cooked yaki onigiri in the center top portion of a half-sheet of nori, fold the bottom portion up over the onigiri, tuck in the side flaps, and eat hot.
On the eve of my wedding I went with my two closest friends, Aino and Kinuyo, to a fugu (blowfish) restaurant to commemorate the last night before being married. I remember that night vividly for several reasons. Despite the high-ticket meal, I was nervous about not eating or drinking too much lest any excess pounds or fatigue show up on my wedding photos (or render my tight wedding kimono even more constricting than it already was). I had not planned on drinking alcohol but could not resist a few sips of sake in which broiled fugu fins had been warmed. The handling of fugu is strictly controlled in Japan, and the master of the restaurant was required to undergo rigorous training and certification before being allowed to serve the potentially lethal fish. The broiled fins released a trace amount of poison into the sake, just enough to titillate (and make our tongues pleasantly numb) as we flirted on the edge of danger. I also remember the gorgeous plate of sashimi that the master arranged in the shape of a chrysanthemum, but I will never forget the ojiya he served after we finished our pot of fugu nabe. He skimmed out the last lingering vegetable bits and fish bones, scooped in some cooked rice, and simmered the whole affair for several minutes. A small bowl of the rice simmered in savory fugu broth was all we needed before heading back out into that icy December night.
rice simmered in broth SERVES 4
OJIYA
1 cup (250 cc) leftover cooked Plain Rice
3 cups (750 cc) strained stock left over from a nabe (one-pot dish) or homemade stock
2 tablespoons finely chopped green onion
1 tablespoon roughly crumbled nori
Soy sauce or sea salt
Add the rice to the hot stock and simmer over medium heat, stirring occasionally until the savory gruel is creamy (the amounts are flexible—“about” is good enough). It will take 15 minutes or so, depending on the amount of rice and stock and the level of the heat.
Serve in small bowls with a sprinkling of chopped green onion and nori. Season with soy sauce or salt to taste. Eat with a spoon.
RATIO: rice : water—1 : 3
VARIATION: The one time I ever used powdered chicken stock is when I made ojiya for the boys when they were sick (with a raw egg stirred into the hot rice after taking the pot off the heat). My supply of powdered stock dwindled, however, and I never replaced it. So when Matthew came down with a cold and requested ojiya, I discovered that I could make a beautifully spare, soothing ojiya by simmering a small amount of cooked rice and water (1 : 3) with a heaping tablespoon of shaved katsuobushi in a small pan over medium-low heat, stirring. Once the rice was creamy, I dropped in a pitted umeboshi, torn into pieces, and served it with a sprinkling of snipped nori threads and a few drops of soy sauce. Matthew ate that ojiya for breakfast, lunch, and dinner over the course of three days. I guess it was good.
When Kanchan cooked the first soba dinner at Chez Panisse, he served mushroom rice made from local hedgehog mushrooms and Tadaaki’s rice (brought from Japan). The cooks fashioned the cooked mushroom rice into torpedo-shaped rice balls and served them at room temperature with seared, shrub-raised beef. There are so many beautiful mushrooms, unique to each locale, that I would just use what grows near you rather than trying to force the recipe by using imported Japanese mushrooms.
mushroom rice SERVES 4 TO 6
KINOKO NO TAKIKOMI GOHAN
2 cups (500 cc) Japanese-style short-grain rice
1 tablespoon sake
2 tablespoons soy sauce
1 cup (250 cc) local, flavorful mushrooms, roughly chopped
2 tablespoons roughly crumbled nori
A few sprigs fresh sansho leaves, picked off the stem (optional)
Wash the rice as described in the method for Plain Rice and drain. Add 2 cups (500 cc) cold water, and let sit for 30 minutes. Before cooking, remove 3 tablespoons of the soaking liquid and replace with the sake and soy sauce. Stir in the mushrooms to distribute evenly. Cook according to the directions for Plain Rice.
When done, let rest 5 minutes, aerate with chopsticks, and serve in small rice bowls sprinkled with the crumbled nori and a few sansho leaves, if using. Alternatively, form into triangular rice balls (onigiri), cover with plastic wrap, and eat later (wrapped in nori). Avoid refrigeration.
VARIATION: Depending on the mushrooms (such as large ones like shiitake), you could slice them into ¼-inch (6-mm) pieces instead of chopping them. In this case, however, I would cut the stems off and chop those separately rather than leaving them intact (shiitake stems are tasty but woody, so I always remove them from the caps).

RICE CROPPING