TOFU AND DAIZU: SOYBEANS
TOFU AND VEGETABLE “CROQUETTES”
STIR-FRIED OKARA AND VEGETABLES
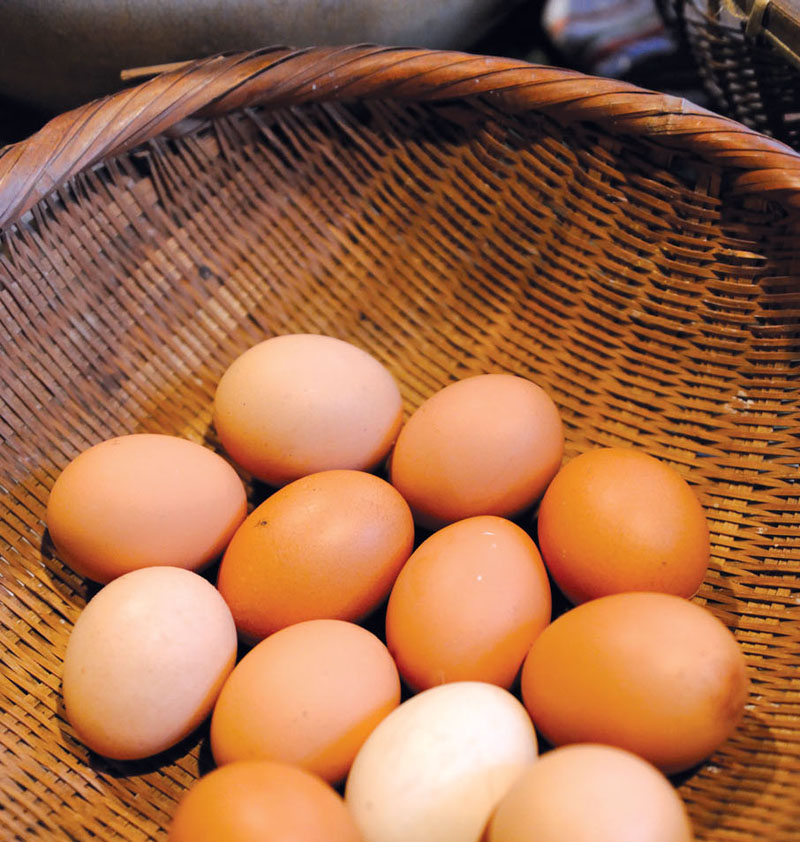
TAMAGO: EGGS
EGG CUSTARD SQUARES WITH CRAB AND SPINACH
EGG CUSTARD POTS WITH ASPARAGUS AND PEAS
EGG CUSTARD WITH FLOWERING MUSTARD IN SOUR ORANGE HALVES
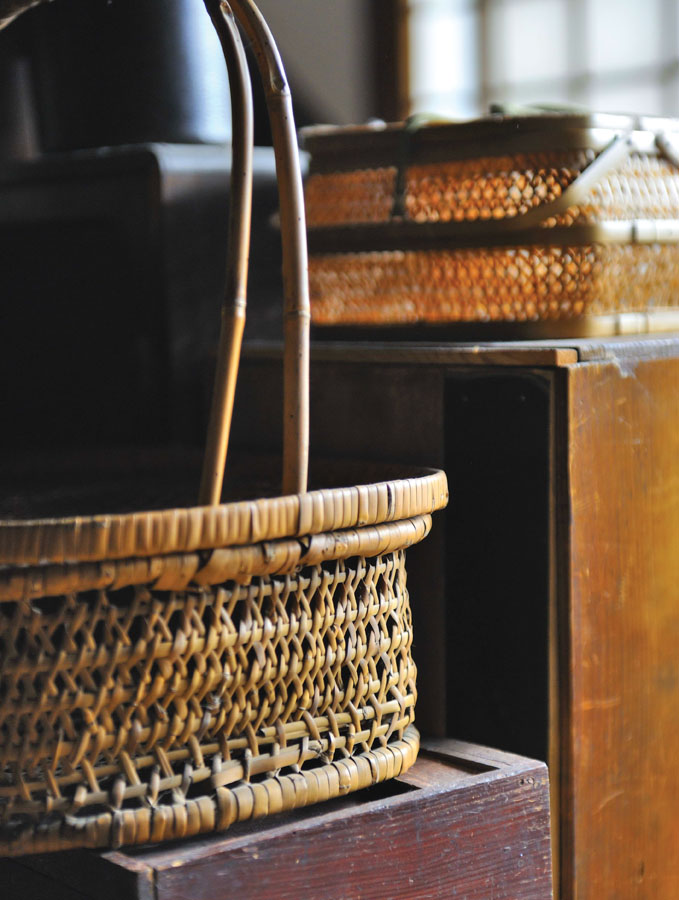
JAPANESE TOFU

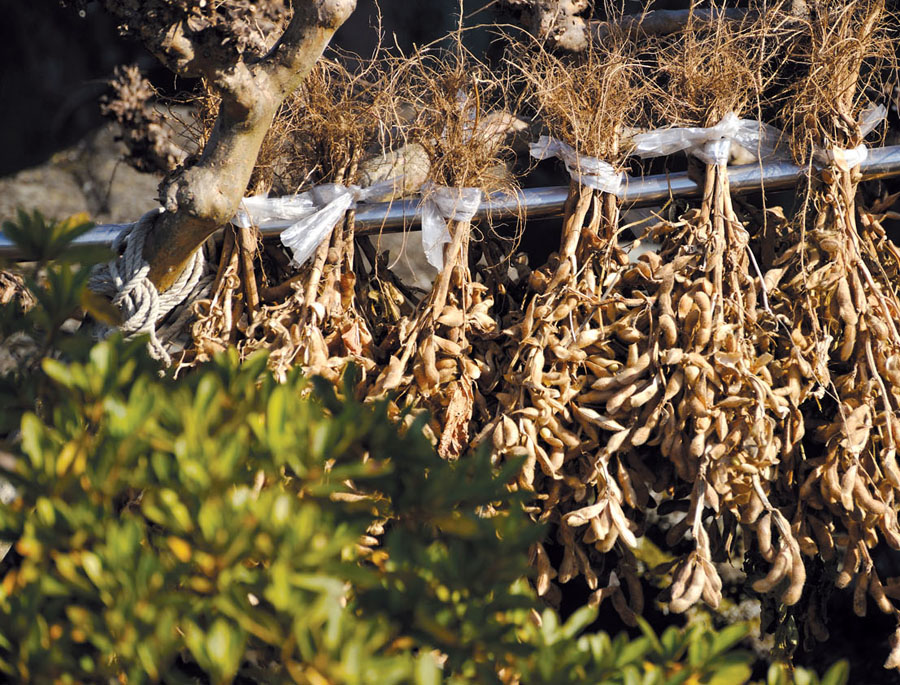

Years ago, Tadaaki made tofu, and at the time it seemed to make quite the mess. That image stuck with me, so I was hesitant to dive into a tofu-making project the summer I was writing this book. A visit from my pal, Rachael Hutchins (of La Fuji Mama blog), and an e-mail from good friend Sylvan Mishima Brackett of Peko-Peko Japanese Catering convinced me to bite the bullet. Tadaaki kindly ordered a couple of wooden tofu forms for me on the Internet (see Resources), and, when I opened them up, I was assailed by the aroma of cut cypress and was thus galvanized to set up my tofu-making operation immediately. Touching and smelling the forms (and admiring how beautifully designed they were) spurred me on to embark on a process I had previously thought daunting but that ended up being surprisingly painless. And the tofu was excellent. Tofu is only as good as the soybeans and water you use, so keep that in mind.
homemade tofu MAKES 4 BLOCKS
TEZUKURI TOFU
1⅔ cups (300 g) small, flavorful dried soybeans
2½ teaspoons liquid nigari (or powdered, dissolved in ¼ cup/50 cc hot water)
2 wooden tofu forms (optional but recommended)
Soak the soybeans in 3 times their amount of the best-quality water you can find (5 cups/1200 cc) for about 8 to 9 hours in summer, 15 hours in spring, or 20 hours in winter. Soak time relates to ambient temperature. (Warm days need a shorter soak than cold days.)
Scoop one-third of the soybeans and soaking water into a blender, process on high speed for 2 minutes, and pour into a large mixing bowl. Repeat until all the beans have been processed. Bring 5½ cups (1300 cc) best-quality water to a boil over high heat in a medium-large, thick, well-insulated pot (such as cast-iron enamel). Add the ground soybean mixture and bring almost to a boil, stirring constantly, to ensure the bottom does not scorch.
Remove from the heat source and let the foam subside naturally (if it doesn’t after about 10 or 15 minutes, proceed to the next step). Heat again slowly over low heat for 8 to 10 minutes.
While the soybean mixture is heating, set a fine-mesh strainer over a medium- to large-sized mixing bowl. Line the strainer with clean muslin cheesecloth. After the 8 to 10 minutes have elapsed, pour the hot soybean mixture through the muslin-lined cheesecloth. Twist up the free ends to squeeze out the excess liquid and let cool a bit for easier handling.
Wait about 10 or 15 minutes, then squeeze the muslin bundle to get the last remnants of liquid out of the solids. In the bowl you will have fresh soy milk ready to use for making tofu and in the muslin cloth you will have sparkling white fresh okara (soybean pulp). Transfer the okara to a plastic container and continue with your tofu-making operation. (Once cool, use okara immediately, or up to 2 days after, if kept chilled in the fridge. Otherwise, freeze for later use.) Stir-Fried Okara and Vegetables is the most common use of okara, but it also acts as a softening agent that sucks up excess fat when presimmering pork belly.
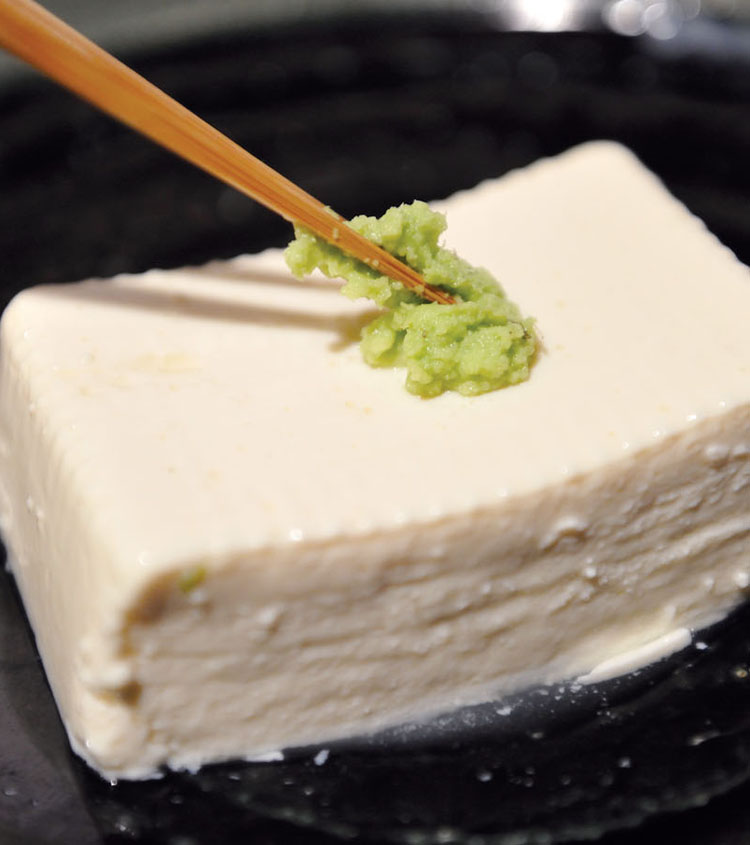
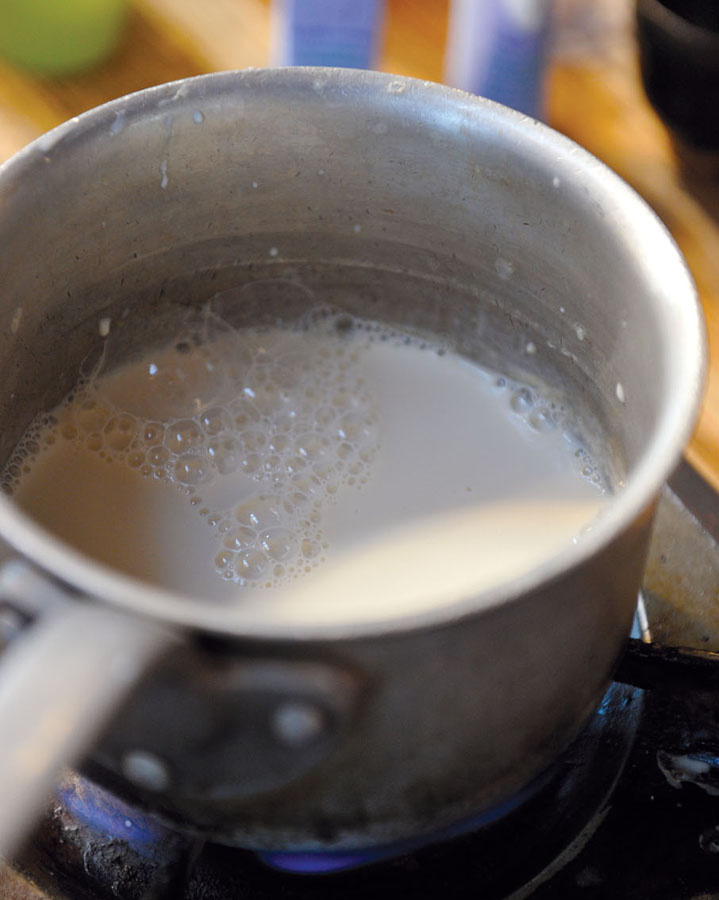
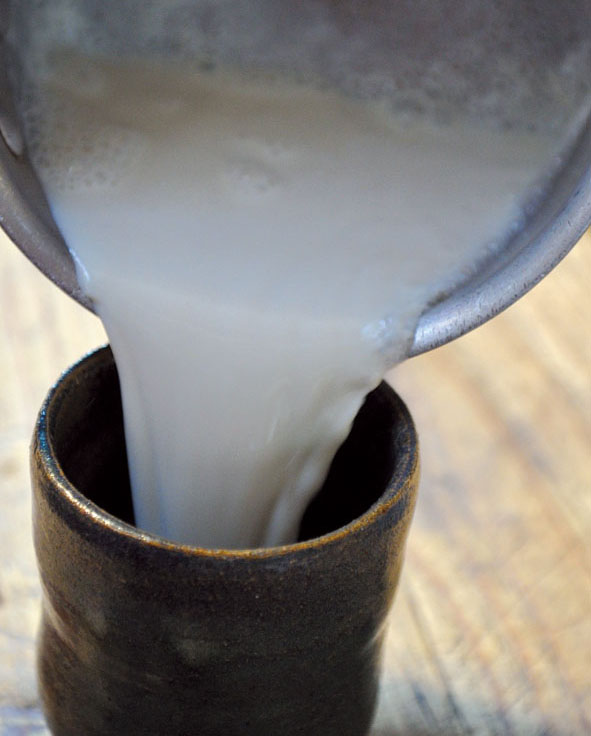
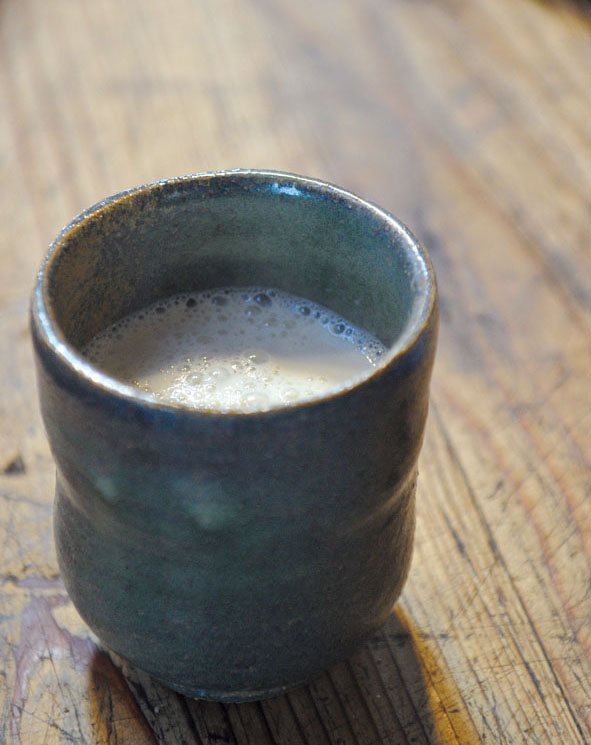
Rinse your heavy pot and pour in the freshly made soy milk you have just produced. Warm over low heat until the mixture reaches 175˚F (80˚C)—this will take up to 1 hour (or more), so bide your time. The skin that forms on top of the soy milk is yuba and can be harvested by catching it up, slipping a chopstick held horizontal to the surface of the soy milk—a bit tricky. The delicate yuba skin is rolled together and eaten with a dash of soy sauce or salt and dab of fresh wasabi, if you have it.
While the soy milk is heating, take out a large bowl, a flat wooden spoon, and the nigari. Once the soy milk reaches the desired temperature, pour it into the bowl. Dip the flat wooden spoon into the center of the bowl, rest the spoon against the bottom of the bowl, and pour the nigari against the spoon. Slowly stir the soy milk, making 2 wide revolutions ONLY, and pull the wooden spoon straight up out of the coagulating soy milk (so not to disturb the soft curds already forming).
Drape the tofu forms with the muslin cloths included with the kit and set the forms in a shallow pan. After 15 minutes, gently ladle in the coagulated soy milk, taking care not to disturb the curds. Fold the muslin cloth over the tofu on all sides to enclose, set the wooden top on the curds, and place a weight of about 1 to 1¾ pounds (500 to 800 g) on each. Let the tofu sit for 15 minutes, then remove the weights, gently lift the muslin-wrapped tofu out of their forms, and slip (unwrapped) into best-quality cold water for 30 minutes.
Unwrap the tofu from the muslin while still submerged in the water and carefully slide the cloth out. Dip your knife directly into the water and cut each tofu in half to form 4 blocks of about 10.5 ounces (300 g) each. Store the tofu in the fridge submerged in water in a plastic container. It will keep for several days.
VARIATION: Another form, such as a round sieve, can be used with some degree of success, though it will not be quite as aesthetically pleasing. In this case you would use two medium-sized sieves lined with muslin in place of the two rectangular forms. Most people might be tempted to go this route, but the satisfaction will not be as great as when using real tofu forms. And consequently, you may just give up on making homemade tofu. As in many Japanese things, making blocks of homemade tofu does not require much hands-on time, just patience while it soaks, slowly heats, and drains.
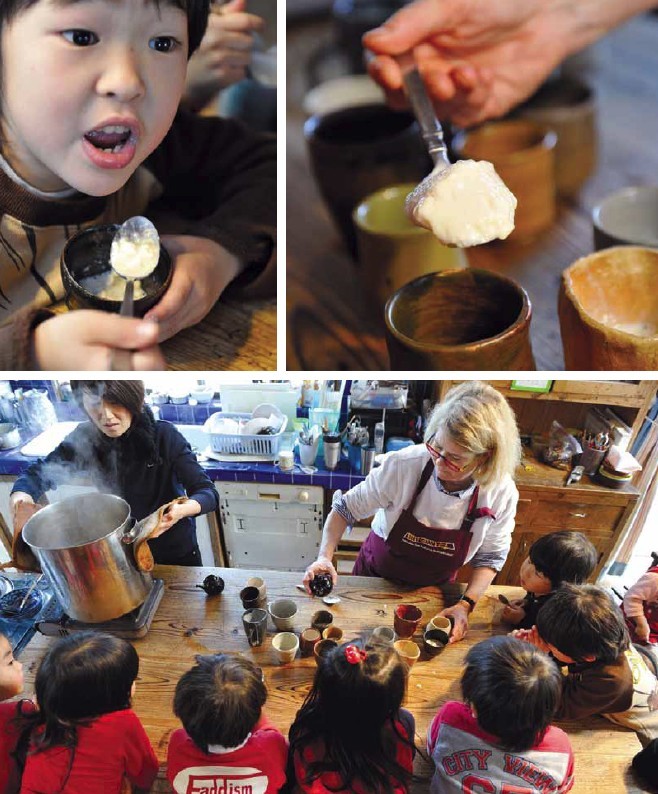
One summer a few years ago, we decided to make lunches for the SSU! kids during the summer camps instead of having them bring their own from home. Summer is extremely busy for me because of the rampant weeds in the field demanding my attention and because I try to be a teacher for the camps (though I have since decided to leave that to younger, more energetic staff members or my son Christopher). The first time doing anything takes a bit of mind adjusting, and I had to scramble to think up some easy cold meals my assistant could put together during the camps. The farm stand down the street sells Yamaki tofu, usuage (thin deep-fried tofu sheets), and natto, and so my tofu lunch was born. I call it tofu composé in the spirit of salade composée (composed salad). This is a wildly popular lunch at my school, though perhaps not strictly orthodox Japanese.
tofu composé SERVES 4
TOFU COMPOZEI
A seasonal Japanese salad of your choice with Miso Vinaigrette
2 blocks best-quality tofu (each about 10.5 ounces/300 g)
1 (3-ounce/80-g) package natto (optional)
4 Half-Boiled Eggs, halved
Sea salt
Japanese Mayonnaise (optional)
Grilled Tofu Pouches with Ginger and Scallions (optional)
About ⅓-inch (1-cm) knob ginger, peeled and grated
1 thin scallion (including whites), finely chopped
⅛ cup (30 cc) large katsuobushi flakes (hanakatsuo)
Organic soy sauce
Make the Japanese salad of your choice. I like to use julienned celery or carrots, or just plain lettuce—usually dressed with miso vinaigrette. (Since you are already using soy sauce on the tofu I would avoid a soy sauce dressing, but it’s not out of the question.)
Remove the tofu from their tubs, slice each one in half, then each half into quarters, and set a quartered half-block of tofu in the middle of each of four dinner plates. The tofu is positioned in the center in order to keep the soy sauce pooled up and leave space for the other components of the plate that should be placed around the perimeter.
If using, dump the natto into a medium-sized soup bowl and whip with chopsticks to create a creamy mass of beans encased in sticky threads. Add the enclosed flavor packets (most likely dashi with soy sauce and a little mustard) and mix well to incorporate. Do your best to scrape a quarter of the natto on each plate.
Set 2 egg halves on each plate. Pinch a little sea salt over the eggs and add a dollop of homemade mayonnaise between the halves, if you are using it.
If you have located some good-tasting usuage (tofu pouches), by all means use (and garnish at the same time as the tofu). Dab some grated ginger on the tofu pieces; sprinkle with chopped scallions, katsuobushi flakes, and drizzle with soy sauce. Strew a little chopped scallions over the eggs and natto for color and flavor pop.
Serve the prepared salad on the plate in the (hopefully) remaining free spot.
NATTO

To understand ganmodoki (especially if you have never eaten one or even seen one), imagine tofu that has been squeezed to express excess water. Into that tofu you have perhaps added some finely chopped or very finely julienned pieces of mild but aromatic vegetables, maybe some chopped mushroom or softened konbu left over from making dashi . . . and a bit of salt. To bind this mixture, you can add some “mountain yam” (yama imo) ground into a viscous mass on a metal or ceramic-toothed grater (oroshigane or oroshiki). But to keep this simple, you need to understand that you can forgo all of the extra ingredients and fashion ganmodoki from squeezed tofu. From there commence. Pound up some aromatics and mix into the tofu. Or add some ground roasted sesame seed. Experiment—but first get the squeezing, shaping, and frying technique down. Also, the yama imo does help bind, so if possible, try to track that down at a Japanese grocery store or Asian farmers’ market.
tofu and vegetable “croquettes” Makes 9
GANMODOKI
2 (10.5-ounce/300-g) pieces Japanese-style “cotton” tofu
1 small (3 ounce/90 g) carrot, scrubbed
2 tablespoons (⅝-inch/1½-cm long) slivered konbu left over from making dashi (or soaked in sake)
2 tablespoons finely chopped burdock root (gobo) or 2 tablespoons finely chopped shimeji mushrooms
2 tablespoons grated yama imo (optional)
½ teaspoon sea salt
Rapeseed oil for deep-frying
FOR SERVING
1⅔ cup (400 cc) Tempura Dipping Sauce
Place the tofu on a cutting board propped up on one end, angled into the kitchen sink for draining. Lay another chopping board or plate on top of the tofu to press out excess water for 1 hour. Squeeze the tofu by small handfuls and drop into a medium-sized mixing bowl.
Add the chopped carrot, dashi- or sake-softened konbu, gobo or shimeji, grated yama imo, if using, and salt to the tofu and mix well by squeezing the mixture with your hands to amalgamate. Smooth into small (about 2¾-inch/7-cm-diameter) patties with cupped hands.
Line a cookie sheet with thick sheets of newspaper, cover with paper towels, and set next to the burner where you will be frying. Heat 2 inches (10 cm) of oil in a wide, deep saucepan over medium-high heat until hot but not smoking. When the oil is ready, gently slide 4 or 5 tofu patties, one by one, into the oil and deep-fry slowly until golden brown and buoyant. The oil bubbles will be quite lively at first but will subside (thus signaling that excess moisture has left the ganmodoki—about 6 minutes). Skim the cooked ganmodoki out of the bubbling oil and drain on the paper towel–lined newspapers.
These are absolutely delicious hot but also good the next day recrisped in a small amount of rapeseed oil, covered, over low heat. Serve the ganmodoki in a saucer with a small ladle of tempura dipping sauce (ten tsuyu) spooned over.
VARIATION: I also like ganmodoki drizzled with a little soy sauce, grated ginger, and finely chopped scallions.
I became close friends with the local tofu shop family soon after I arrived in Japan and visited the shop every day to buy tofu. The mother of the family, Mitsu-san, gave me cooking advice, all the while giggling shyly with her hand held up to her mouth. To this day, she remains one of the kindest and most giving persons I have ever met in Japan (or anywhere). Mitsu-san handed me a bag of okara one day and tried to explain how I should prepare it. I (sort of) understood. It was a big bag, so I ended up with enough unohana to last me a week. After this daunting experience, I didn’t make it again until there were family members around to help me eat it. Some of the older Japanese farm women love to make a very sweet version of unohana and serve it to guests with green tea. I prefer my version because it is not too wet or too sweet, and the vegetable-to-okara ratio is higher than usual.
stir-fried okara and vegetables SERVES 4
UNOHANA
⅔ pound (300 g) soybean pulp (okara)
4 tablespoons rapeseed oil
1 small to medium carrot (4½ ounces/120 g), scrubbed and julienned
¼ small burdock root (gobo) (3½ ounces/90 g), scrubbed and julienned
½ negi (Japanese leeks) or 2 thick scallions (white part with a little green), julienned
3 tablespoons Tosajoyu or soy sauce
1 tablespoon sake
Sea salt, optional
Parch the okara in a dry wok or large frying pan over low heat, stirring with a flat wooden spoon, until dry and fluffy (about 3 minutes).
Wipe the pan clean and heat the oil in it over medium heat. Throw in the julienned carrot and gobo. Stir continuously with a flat wooden spoon for a few minutes until the vegetables are just starting to get soft. At this point, add the julienned negi or scallions and continue stir-frying for a couple of minutes more to wilt the negi.
Add the soy sauce and sake, and stir-fry over low heat for a couple of minutes more to let the vegetables soak up some of the soy sauce flavor. Dump in the parched okara and toss to blend. Turn the stir-fried okara and vegetables into a medium-sized bowl and serve with a sprinkling of salt, if needed. It can also be refrigerated overnight and eaten as a chilled side dish or as an interesting addition to a bento lunch.
VARIATION: If you prefer a wetter style of unohana, you could add a cup or so (300 cc) of dashi to the stir-fried okara and vegetables at the end and simmer over low heat, stirring occasionally, for an additional 15 minutes.
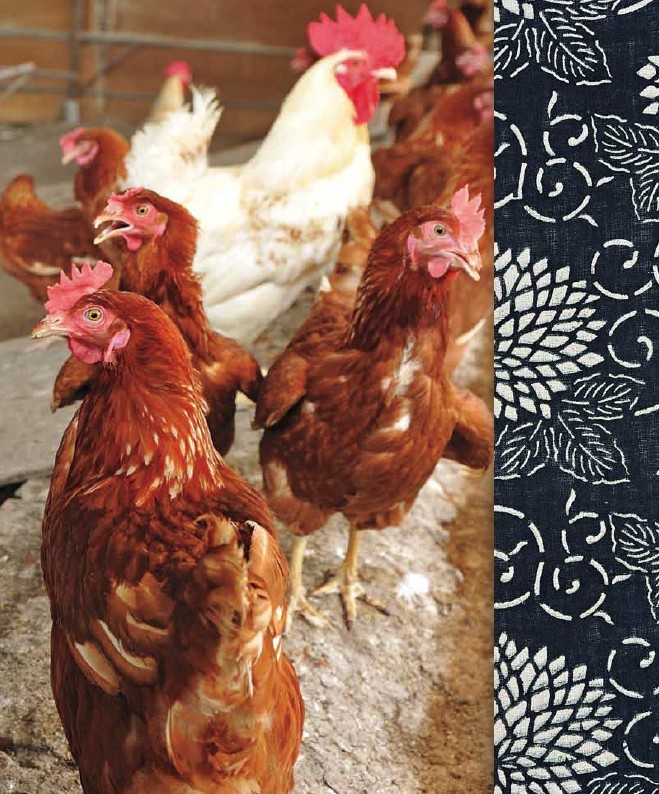
In the West, it’s a given that eggs and bread go well together, but I’d have to say that rice goes even better. When I first came to Japan, I tried not to eat any Western food and owned only chopsticks. I drank green tea with my breakfast instead of coffee and ate rice with eggs. I had not eaten much rice growing up, so was struck by how well the eggs went with the rice. After a bowl of rice with an egg (cooked or not), my body felt clean inside. The hot rice cooks the egg just a smidge, but essentially it is raw, so do not attempt this method unless you are able to buy your eggs directly from a local farmer. Knowing your egg source and how the chickens live assures you that the eggs can be safely eaten uncooked without qualms.
raw egg on hot rice SERVES 4
TAMAGO-KAKE GOHAN
2 cups (500 g) cooked Japanese rice (hot!)
4 very fresh large farm eggs, at room temperature
Organic soy sauce
For each serving, scoop about ½ cup (125 cc) or more rice into a small bowl. Break the egg over the steaming grains and splash in a little organic soy sauce. Mix with chopsticks. Eat every grain of rice. Lick the bowl if you like.
VARIATION: If you don’t find the idea of eating raw eggs appealing, you can make a couple of Japanese-style fried eggs to eat on top of the rice. Heat a teaspoon or two of rapeseed or sesame oil in a small frying pan over high heat with 1 small dried chile torn into 3 pieces. Break 2 farm-fresh eggs into the hot oil, reduce the heat to low, cover, and cook until the white is set but the yolks are still runny. Loosen the eggs from the pan with a spatula and set on top of a small bowl of rice. Drizzle with soy sauce and eat for breakfast (or lunch).

FARM EGGS
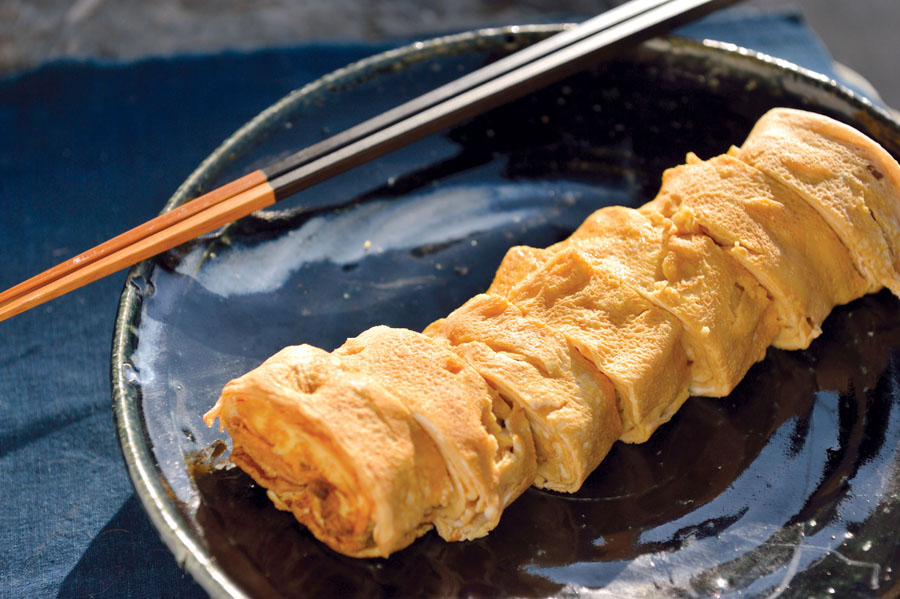
The Japanese name for this omelette translates as “rolled egg with dashi,” but we don’t use dashi. Our eggs are so good alone, they don’t need much more than a touch of soy sauce and sugar to heighten their natural sweetness. Restaurants do not always have access to the freshest farm ingredients, so some dashi is used to help mellow the flavors of food. Farm households have boldly flavorful food at their fingertips, thus don’t need to fiddle so much coaxing out the so-called umami, that ephemeral taste sought after these days in the cooking world.
A rectangular Japanese egg pan makes this recipe easier, but it isn’t essential.
rolled egg “omelette” SERVES 4
DASHI-MAKI TAMAGO
6 medium-small eggs, at room temperature
1 tablespoon organic soy sauce
½ tablespoon organic granulated sugar
Rapeseed oil
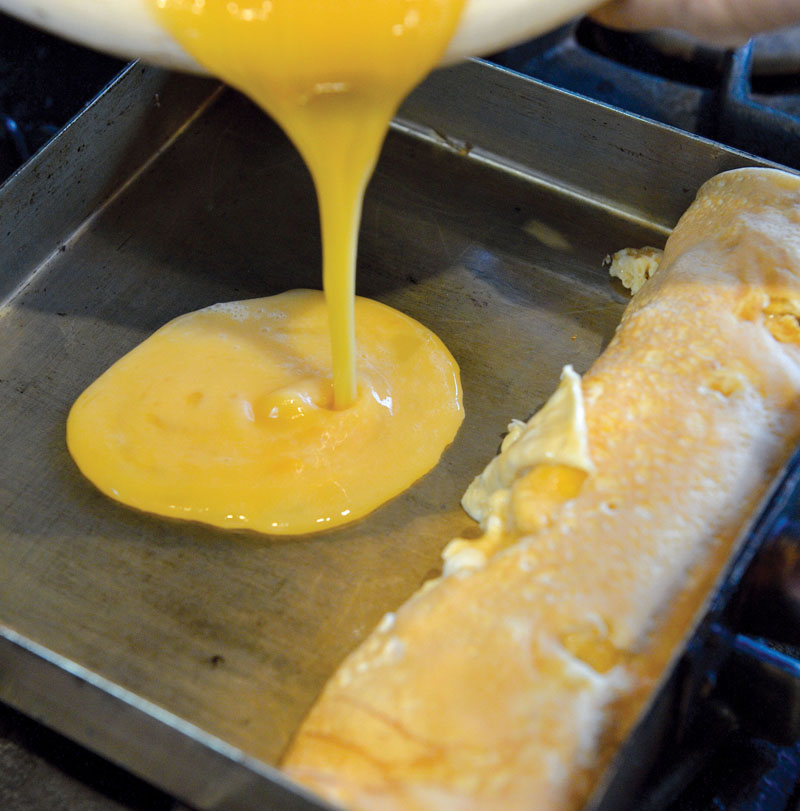
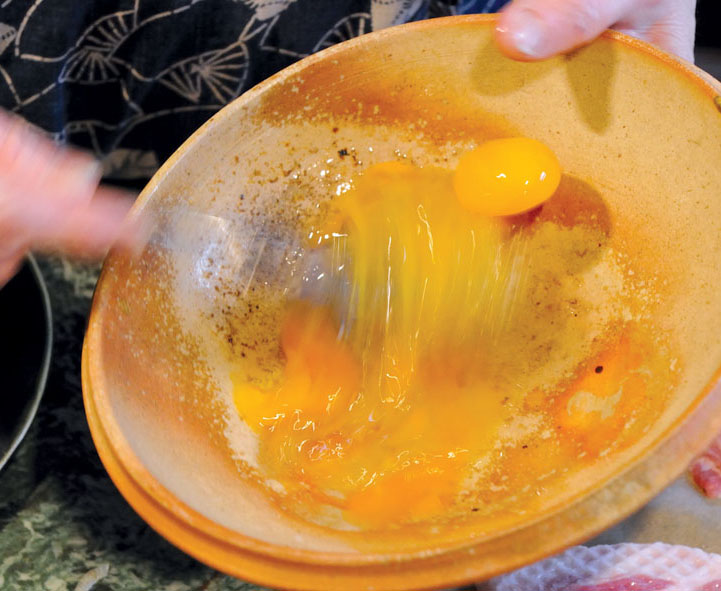
Briskly whisk the eggs, soy sauce, and sugar in a small bowl with chopsticks.
Heat a rectangular Japanese egg pan over medium-high heat. Pour a little oil on a folded-up paper towel so it seeps into the middle of the folds but is not saturated. Wipe the pan with oil. Give the eggs a quick mix to freshen and redistribute the sugar and soy sauce, then pour one-fourth of the mixture into the pan, tilting the pan to cover all the free surfaces of the bottom with egg. When the egg is set on the bottom but still runny on top, tip the pan toward you and gently roll the egg in the direction of the handle, using your chopsticks. This takes practice, so hang in there. You will get it.
The idea is to keep building up the egg roll with about three more additions of egg mixture. The first roll will provide the core around which the second semirunny egg layer will be rolled. This will in turn create a pleasing circular pattern in the cooked omelette.
Rub the pan with the paper towel swab, making sure to get the portion under the omelette roll still in the pan. Leaving the first rolled omelette in the pan, pour another one-fourth of the egg mixture (stirred once with your chopsticks before using) into the oiled pan and tip the pan to cover the whole bottom surface of the pan evenly. Be sure to lift up the cooked roll of egg to allow the raw egg mixture to run underneath it.
When the bottom is set but the top is still runny, roll the cooked egg away from you so that it gathers up the semicooked egg layer on its rolling path. Repeat these steps two more times with the remaining one-fourth portions of the egg mixture.
Dashi-maki tamago is often eaten with grated and squeezed daikon drizzled with soy sauce. We don’t; our eggs are just too good on their own.
VARIATION: You can make a rough approximation of the above rolled omelette by using a large, well-seasoned frying pan. In this case, you should add the egg mixture all at once after wiping the pan generously with oil and cook over medium-high heat. Use a heatproof rubber spatula or flat wooden spoon to nudge the egg mixture into a mass in the center of the pan while rolling and tipping the pan to let the raw egg mixture run to the outside. When the egg is about three-quarters of the way cooked, roll the omelette to one corner, tip the pan toward the flame, and gently brown the surface. The key here is not to overcook the egg—the inside should be runny like a French omelette. It may not end up a traditional dashi-maki tamago, but we ate these slightly sweet soy sauce–flavored omelettes for lunch often when we were first married and didn’t have anything planned. Some pickles and a bowl of rice complete the meal.

This very thin egg “pancake” is useful and almost needs no recipe. We use the thick ribbons in Country Sushi Rolls, whereas thin threads are pretty strewn on salads, hot rice, or even on top of sushi rice in a bento box along with pickled things that keep well at room temperature.
golden egg ribbons Makes one pancake
USUYAKI TAMAGO
1 large egg, at room temperature
Rapeseed or sesame oil
Whisk the eggs lightly with a fork or chopsticks but do not overbeat.
Heat an 8-inch (20-cm) large round well-seasoned (or nonstick) frying pan over high heat. Pour a little oil on a folded piece of paper towel and rub the entire surface of the pan, even going up the sides.
Pour the eggs into the pan, lift it off the heat, and roll/rotate the pan so the mixture covers the entire bottom surface. Try not to go up the sides, because you will end up with lacy edges. This action is similar to making a crêpe, but the egg “pancake” should be slightly thicker than a crêpe for ease of handling. Flip the egg onto a cutting board and cut into ¾-inch (4-cm) wide ribbons or cool, roll, and slice into very thin threads.
The thick ribbons can be used to stuff sushi rolls, and the thin threads to garnish salads or bento box meals.
We order tamago dofu every time we go to Soba Ro or Soba Ra, our favorite restaurants here in Japan. Kanchan, the chef-owner, uses Tadaaki’s eggs, so that of course contributes doubly to our enjoyment of the dish. The name tamago dofu (“egg tofu”) refers to its square tofu blocklike shape and delicate texture. We love this dish so much that we make it at home—especially in the winter during the holidays, when we can find some decent crab. It may not be Dungeness crab, but nonetheless works well with this savory egg custard preparation. I also recommend doubling the recipe and making two.
egg custard squares with crab and spinach SERVES 4
KANI NO TAMAGO DOFU
4 large eggs, at room temperature
¾ cup (150 cc) Hot Noodle Broth, cooled
½ cup (125 cc) very small enoki mushrooms
½ cup (125 cc) blanched, squeezed spinach leaves
½ cup (125 cc) fresh crabmeat
¾ cup (150 cc) Noodle Dipping Sauce
Smoothly line an 8 by 4-inch (20 by 10-cm) loaf pan with aluminum foil. Fill a wide, deep saucepan or wok one-third full of water and bring to a simmer. Set a steamer basket on top of the simmering water.
Beat the eggs in a medium-sized bowl with chopsticks or a whisk until amalgamated but not frothy. Stir in the cooled hot noodle broth and pour through a fine-mesh strainer into a clean bowl. (Kanchan strains the mixture three times, but at home once is enough!)
Place the enoki mushrooms in a strainer and pour hot water over them to cook slightly, then squeeze out the excess water with your hands. Roughly chop the spinach leaves and strew in the bottom of the loaf pan. Sprinkle in the crab and enoki on top of the spinach.
Pour the egg mixture into the pan and place in the steamer. Steam over low heat, covered, for 30 minutes, or until set. Test by jiggling the pan a little or inserting a bamboo skewer into the center of the savory custard.
This can be eaten hot, but it is easier to serve cold (and we prefer it cool and slippery). Cool to room temperature, then chill at least half a day. Chill the noodle dipping sauce as well.
Cut into 8 squares and serve each person 2 squares on a small saucer with a spoonful or so of the cold noodle dipping sauce. Encourage people to pick up their saucers at the end and drink the “soup.”
VARIATION: Substitute any mild mushroom for the enoki, any blanched squeezed greens for the spinach, or shredded chicken for the crab. Omit the crab for a vegetarian version.
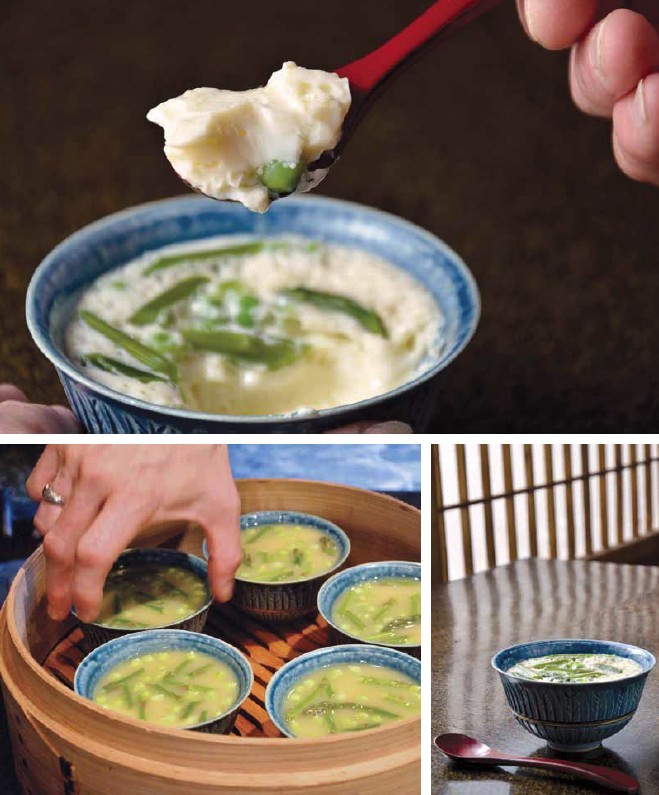
I have always had a great fondness for chawan mushi, but for many years did not make it often since I felt constrained by the idea of the one ginkgo nut, the one little piece of chicken, and the mitsuba sprig. I often prefer vegetarian versions because the chicken doesn’t always add much to the equation, and the ginkgo nut . . . well, who really has ginkgo nuts hanging around. . . . Chawan mushi should be served immediately, steaming hot, but it is also refreshingly tasty served chilled the next day if you omit the asparagus.
egg custard pots with asparagus and peas SERVES 4
ASPARA TO GURIIN PISU NO CHAWAN MUSHI
1 teaspoon sea salt
1⅓ cups (300 cc) Dashi
3 large or 4 small eggs, at room temperature
2 teaspoons sake
2 or 3 thin stalks asparagus
2 tablespoons freshly shelled green peas
Zest of 1 small yuzu or half a Meyer lemon, slivered (optional)
Sprinkle the salt over the dashi and warm slowly to dissolve the salt. Let cool or use warm, but it should not be hot. Break the eggs into a medium-sized bowl and gently whisk with a fork to homogenize the whites and yolks. Whisk in the dashi and sake lightly to avoid creating foam. Pour through a fine-mesh strainer into a clean bowl.
Break the hard bottoms off the asparagus stalks by grasping both ends gently in either hand and bending the stalks to allow their natural breaking point. Slice diagonally into ½-inch (12-mm) pieces. Drop about 1 tablespoon of the cut asparagus into each of 5 chawan mushi pots or Japanese-style handleless teacups (that hold about ¾ cup/180 cc). Distribute the fresh peas evenly into each cup and portion out the dashi-flavored egg mixture among the cups by pouring a bit at a time into each one. Leave at least 20 percent of the cup unfilled, as the custard will puff up a bit.
Place the custard-filled cups in a bamboo or metal steamer set over a large pan of simmering water. Steam over low heat for 15 minutes, or until set. Garnish with a speck of slivered yuzu zest if you like. Serve immediately because the green of the asparagus will slowly leach into the pristine custard.
VARIATION: Substitute any small pieces of crisp seasonal vegetables (such as green beans) in place of the asparagus and peas. Mushrooms can also add an earthy note.
Using citrus shells is a little tricky, but the presentation is worth a bit of uncertainty in the cooking process. This is a gorgeous dish that can be prepped ahead of time and cooked at the last minute.
egg custard with flowering mustard in sour orange halves SERVES 4
NANOHANA NO NATSUMIKAN CHAWAN MUSHI
1 (2-ounce/60-g) chicken breast filet (sasami)
1 teaspoon sea salt
1⅓ cups (300 cc) Dashi
3 large or 4 small eggs, at room temperature
1½ teaspoons mirin
5 sour oranges (natsumikan, daidai, amanatsu, or Seville)
12 (1-inch/2.5-cm) sprigs flowering mustard or tender rapini
Sprinkle the chicken breast filet with ¼ teaspoon of salt, and drop into a heavy resealable plastic bag. Press out the excess air, seal, and refrigerate for at least an hour if not overnight.
Add the remaining ¾ teaspoon of salt to the dashi in a small saucepan. Warm slowly over low heat to dissolve the salt. Let cool or use warm, but it should not be hot. Break the eggs into a medium-sized bowl and gently whisk with a fork to homogenize the whites and yolks. Whisk in the dashi and mirin lightly to avoid creating foam. Pour through a fine-mesh strainer into a clean bowl. Finely grate the zest of 1 sour orange directly into the custard and stir.
Slice the tops off the 4 other oranges and scoop out the pulp and juice into a bowl. Strain and use for something else. Leave a thin layer of pulp so the egg custard will not be in direct contact with the bitter white pith.
Cut the chicken breast filet into ½-inch (12-mm) pieces and distribute evenly among the 4 prepared sour orange shells. Nestle 3 flowering mustard sprigs in with the chicken pieces.
Place the custard-filled citrus halves in a bamboo or metal steamer set over a large pan of simmering water. Portion out the egg mixture among the halves by pouring a bit at a time into each one. Since the citrus halves are porous, you can fill them to the top.
Steam over low heat for 30 minutes or until set.
Serve immediately on a pottery plate with a small wooden or lacquer spoon.
VARIATION: Substitute any small pieces of crisp green vegetables or blanched greens in place of the mustard flowers. Omit the chicken filet for a vegetarian version.

