WALLS & CEILINGS
BASEMENTS: INSULATING
Insulating basements is a tricky topic. In colder climates, insulation is necessary for the successful creation of a livable basement room. But the practice is fraught with pitfalls that can cause a host of problems. But here are two pieces of advice that are certain:
• The exterior wall is a far better location for new insulation than the interior foundation walls.
• Never insulate a wall that is not dry and well drained.
Almost all of the issues surrounding basement wall insulation have to do with moisture and water vapor. How these issues affect your plans will depend a great deal on your climate, as well as on the specific characteristics of your house, your building site, and whether or not your home was built with foundation drains and a pumping system.
Until recently, basements most often were insulated from the inside because it is easier, faster, and cheaper. A typical installation would be to attach furring strips (2 × 2, 2 × 3, or 2 × 4) to the foundation wall at standard wall stud spacing, and then fill in between the strips with fiberglass insulation batts. A sheet plastic vapor barrier would then be stapled over the insulated wall prior to hanging wallcoverings (usually wallboard or paneling). Experience has shown this model to be a poor method, very frequently leading to moisture buildup within the wall that encourages mold growth and has a negative impact on the indoor air quality. The building materials also tend to fail prematurely from the sustained moisture presence.
If your basement plans require that you insulate the foundation walls, make certain that the walls are dry and that any moisture problems are corrected (see pages 18 to 23). Then, look first at the exterior. Because it is often unnecessary to insulate the full height of the wall, you may find that an exterior apron insulating approach is easier than you imagined (see pages 14 to 15). If your circumstances absolutely require that you insulate inside, use insulating products such as extruded polystyrene or foil-faced isocyanurate that do not absorb water or provide food for mold. You should also keep the wall isolated from the insulation: attach the insulation first, seal it, and then construct a stud wall that has no direct contact with the concrete or concrete block wall (see pages 16 to 17).
Install insulation on the exterior of the wall, not the interior, whenever possible. Exterior insulation results in a warm wall that will have less of a problem with condensation. The wall also can breathe and dry out more easily if the interior side has no vapor retarder.
 HOW TO INSULATE BASEMENTS
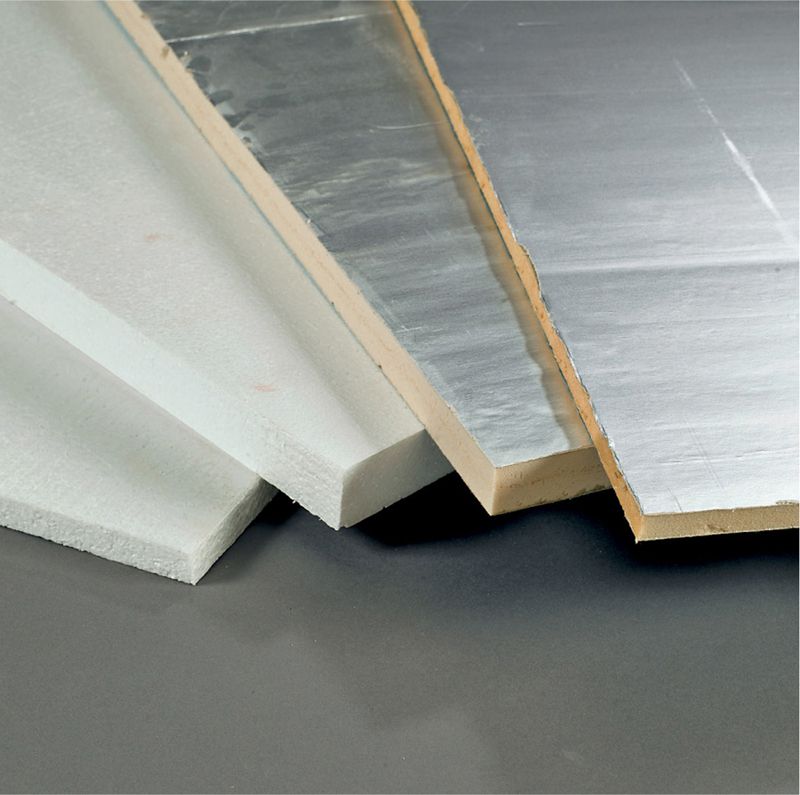
Install rigid foam insulation in basements, both on the exterior and the interior. Extruded polystyrene (sometimes called beadboard) is an economical choice for larger areas, and it forms its own vapor retarding layer when properly installed and sealed. High-density polystyrene and isocyanruate are denser insulation boards with higher R-values. Isocyanurate usually has one or two foil faces. It is used to seal rim joists but is a good choice for any basement wall location.
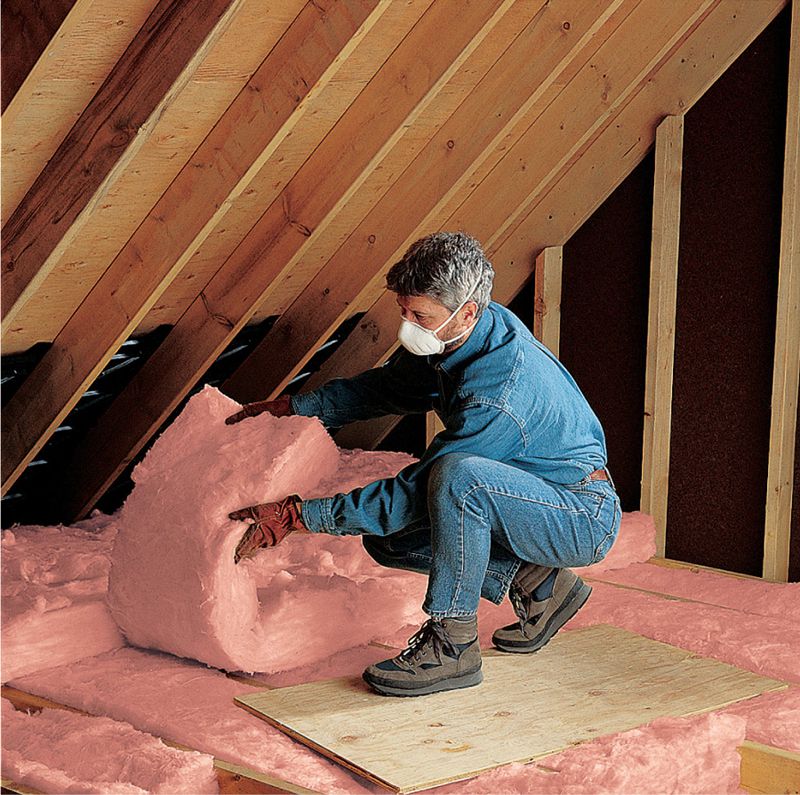
Improve insulation and thermal seals in attics and other parts of your house to keep basements warmer in winter. By reducing the amount of warm air that escapes through the roof, you will reduce the amount of cold air that is drawn in through the basement walls to replace the air.
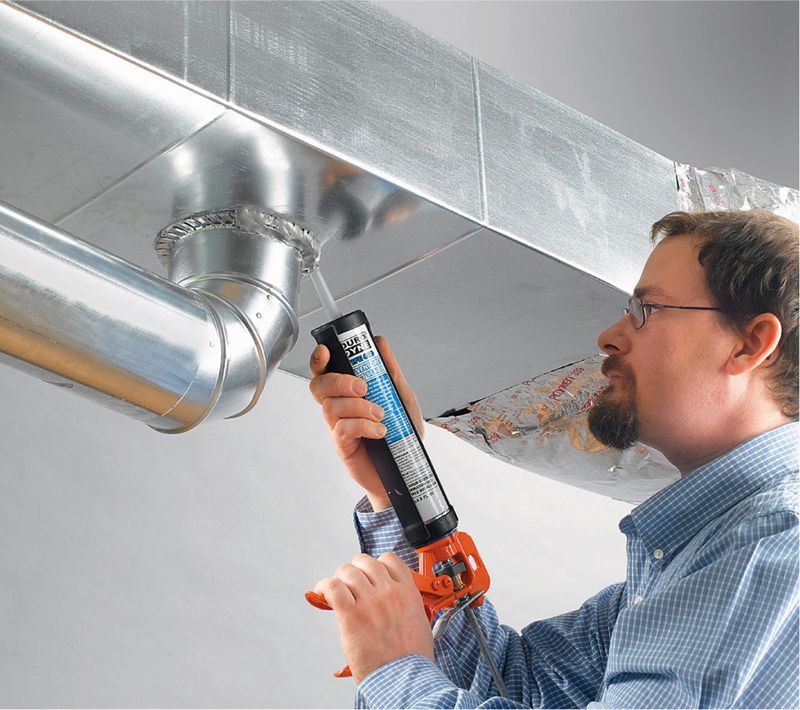
Seal furnace ducts to reduce air leakage. Use a combination of UL 181-rated duct tape (foil tape) and duct mastic. If cold-air return ducts leak, for example, they will draw air from the basement into the air supply system. As with heat loss through the attic, this will cause fresh cold air to enter the basement and lower the ambient temperature.
INSULATION SOLUTION: EXTERIOR APRON INSULATION
Insulate foundation walls on the exterior side (and not the interior) whenever you can. The easiest way to accomplish this is by installing insulation in the apron area only, so you do not have to excavate all the way to the bottom of the wall. By adding a layer of horizontal insulation in the bottom of the trench, you can realize at least 70 percent of the energy savings of insulating the whole wall, while limiting your digging to 18 inches down and 24 inches out.
Because you will be adding width to the foundation wall by installing exterior insulation, you will need to install flashing to cover the top of the insulation layer and whatever protective wall surface you cover it with. For the project shown here, the insulation is covered with panelized veneer siding over 1-inch-thick rigid foam insulation boards. For extra protection, coat the cleaned walls with a layer of bituminous coating before installing the insulation boards.
Apron insulation is an easy and effective way to enhance comfort in your basement without causing any major moisture issues.
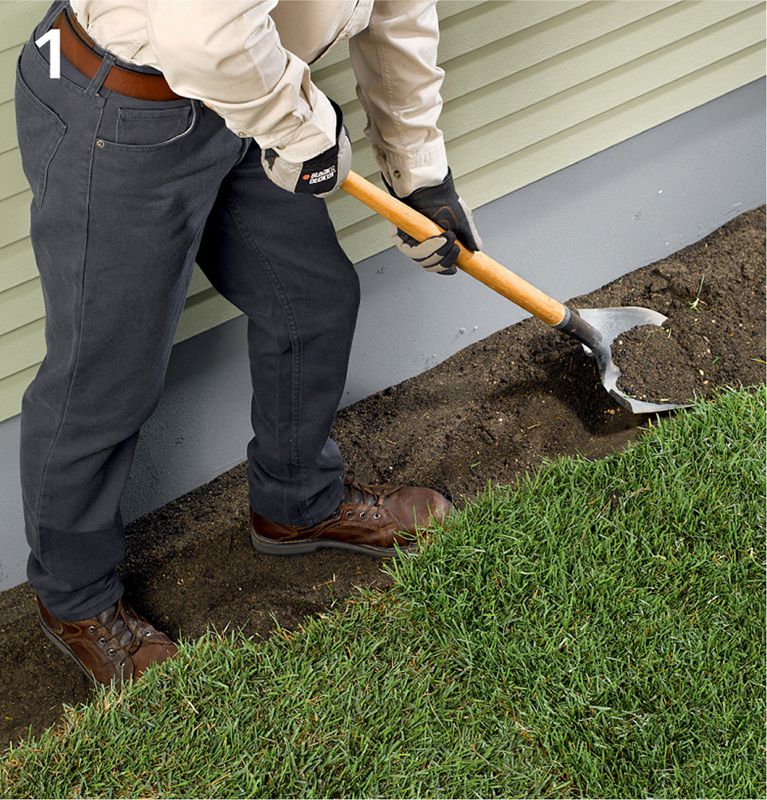
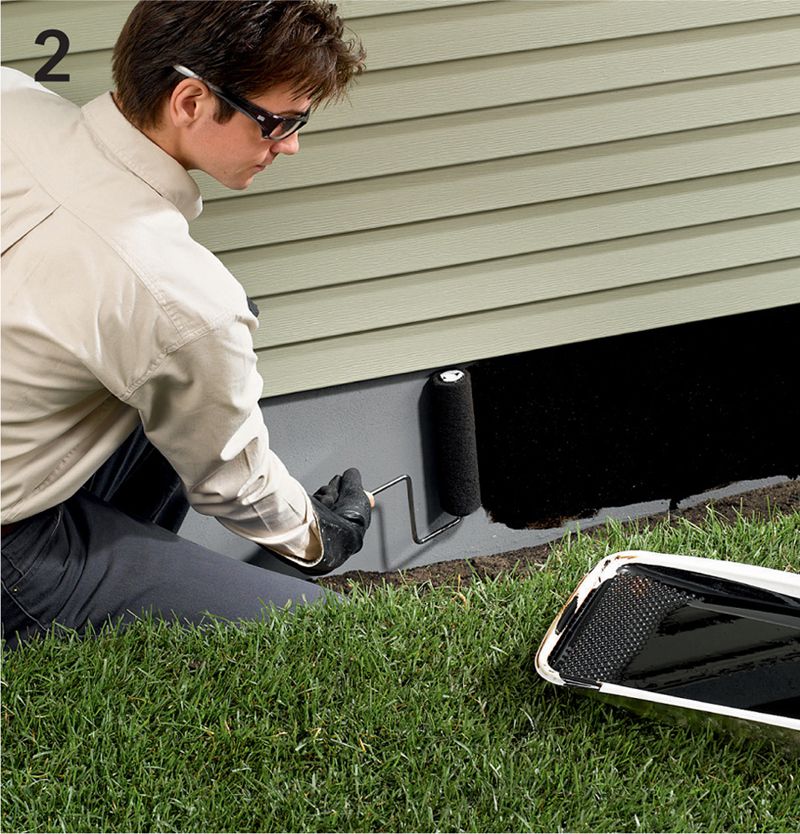
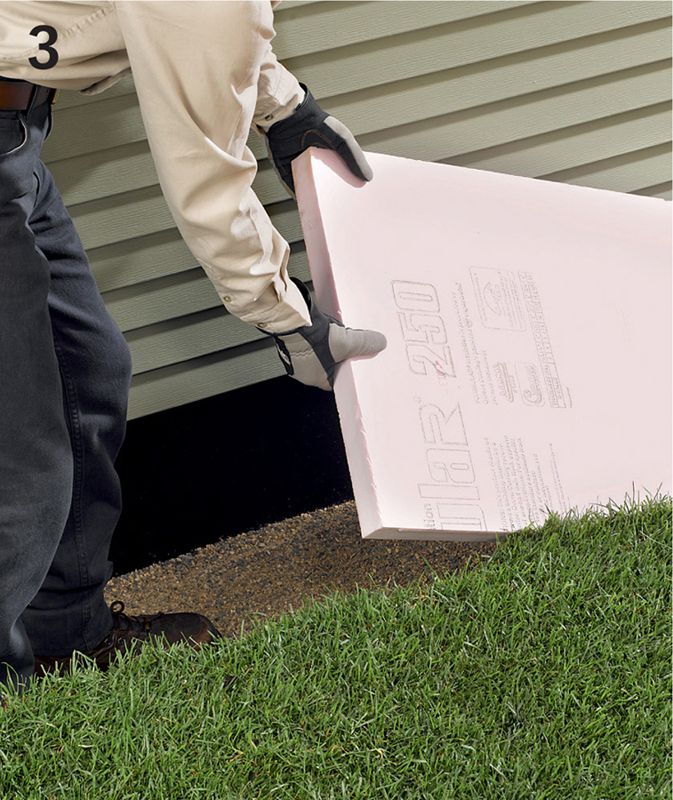
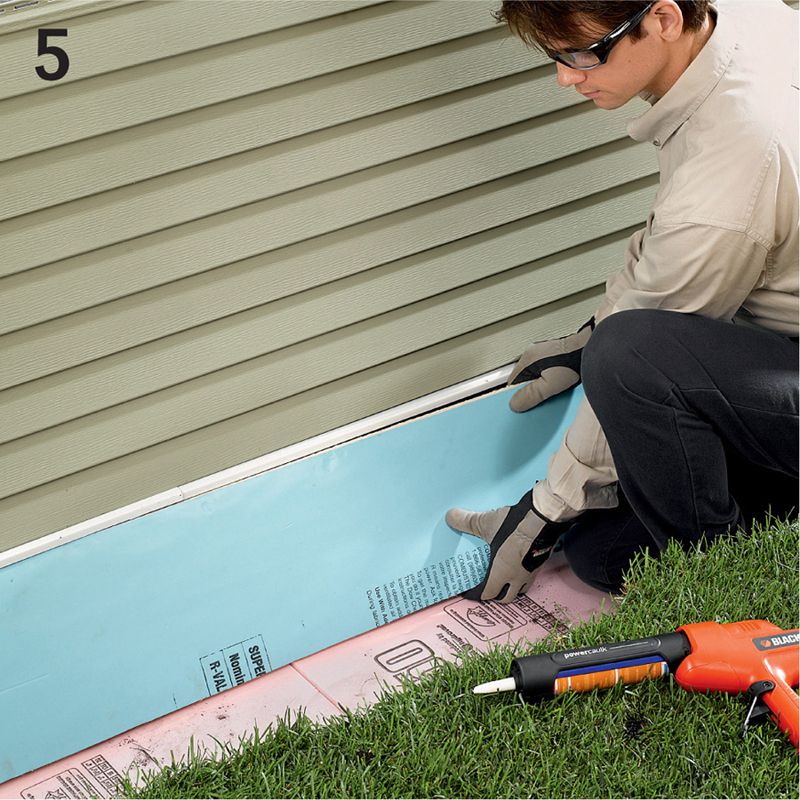
HOW TO INSTALL APRON INSULATION
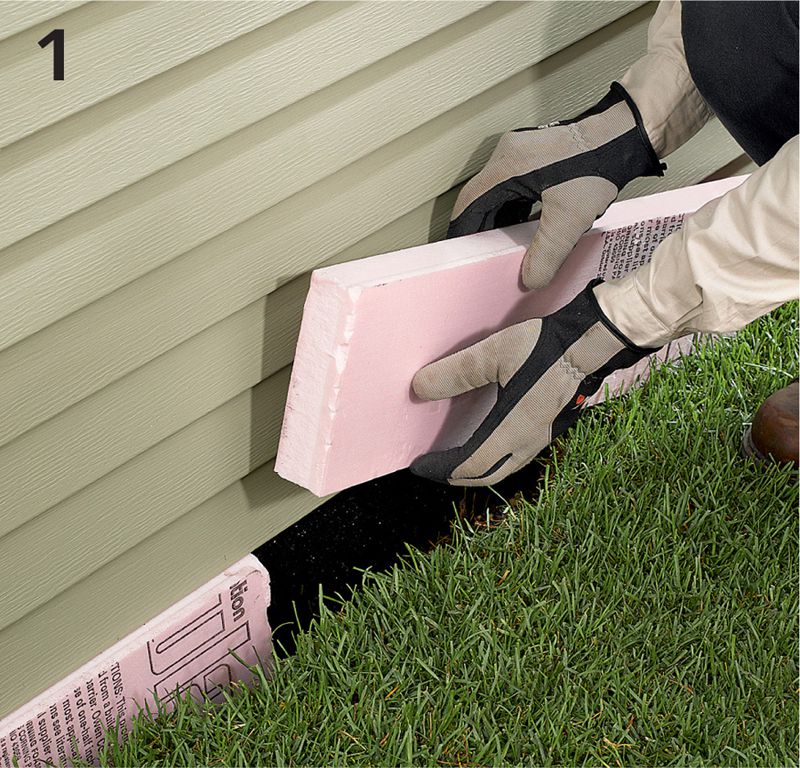
Dig an 18 × 24" wide trench next to the wall being insulated. Make sure to have your local utilities company flag any lines that may be in the area first.
Coat the wall with a layer of bituminous coating once you have cleaned it with a hose or pressure washer. The coating simply creates another layer of moisture protection for the basement and can be skipped if you wish.
Line the trench with a 2"-thick layer of coarse sand, and then strips of rigid foam insulation. The sand should slope away from the house slightly, and the insulation strips should butt up against the foundation wall.
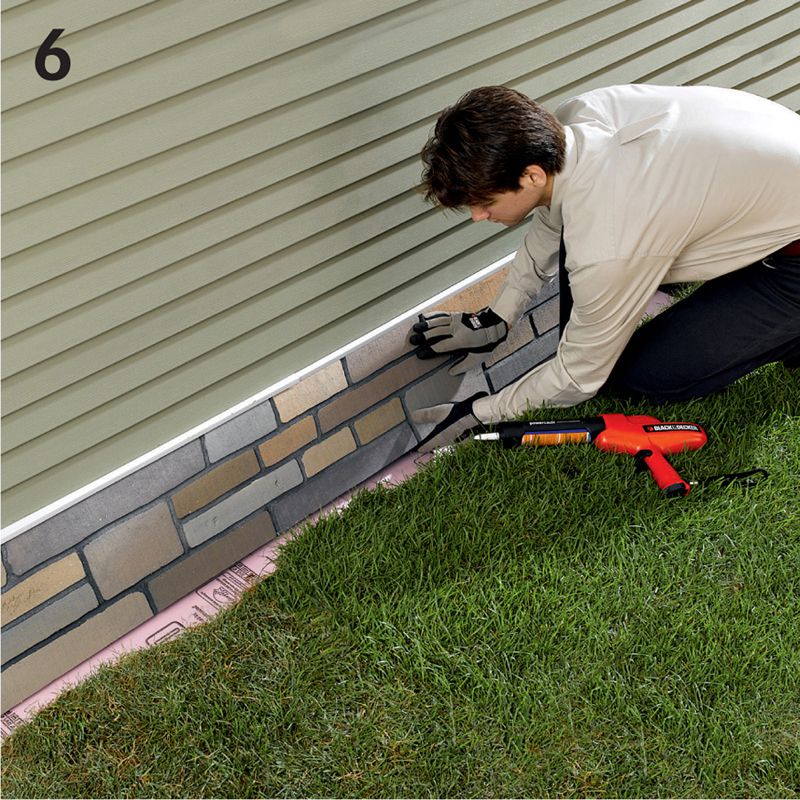
Install drip edge flashing to protect the tops of the insulation board and new siding. Pry back the bottom edge of the siding slightly and slip the flashing flange up underneath the siding. The flashing should extend out far enough to cover both layers of new material (at least 1 1/2 to 2").
Bond strips of rigid foam insulation board to the foundation wall using a panel adhesive that is compatible with foam. Press the tops of the boards up against the drip edge flashing. When all the boards are installed, tape over butted seams with insulation tape.
Install siding or another protective layer over the insulation. Here, 2 x 4 ft. faux stone panels are being used. Once the panels are in place, backfill the trench with dirt or gravel. Make sure to maintain minimum slopes for runoff at grade.
INSULATION SOLUTION FOR DRY WALLS: INTERIOR WALL INSULATION
As a general rule, avoid insulating the interior side of your basement walls. It is best to leave breathing space for the concrete or block so moisture that enters through the walls is not trapped. If your exterior basement walls meet the definition of a dry wall (see page 13) however, adding some interior insulation can increase the comfort level in your basement. If you are building a stud wall for hanging wallcovering materials, you can insulate between the studs with rigid foam—do not use fiberglass batts and do not install a vapor barrier. If you are building a stud wall, it’s a good idea to keep the wall away from the basement wall so there is an air channel between the two.
Interior insulation can be installed if your foundation walls meet the conditions for dry walls (see page 13). It is important to keep the framed wall isolated from the basement wall with a seamless layer of rigid insulation board.
HOW TO INSULATE AN INTERIOR BASEMENT WALL
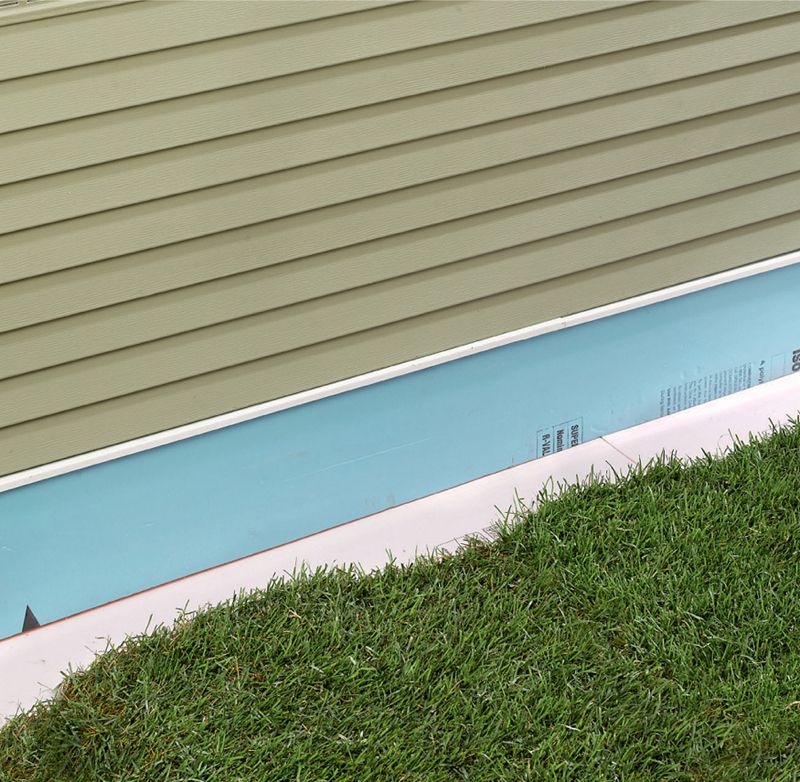
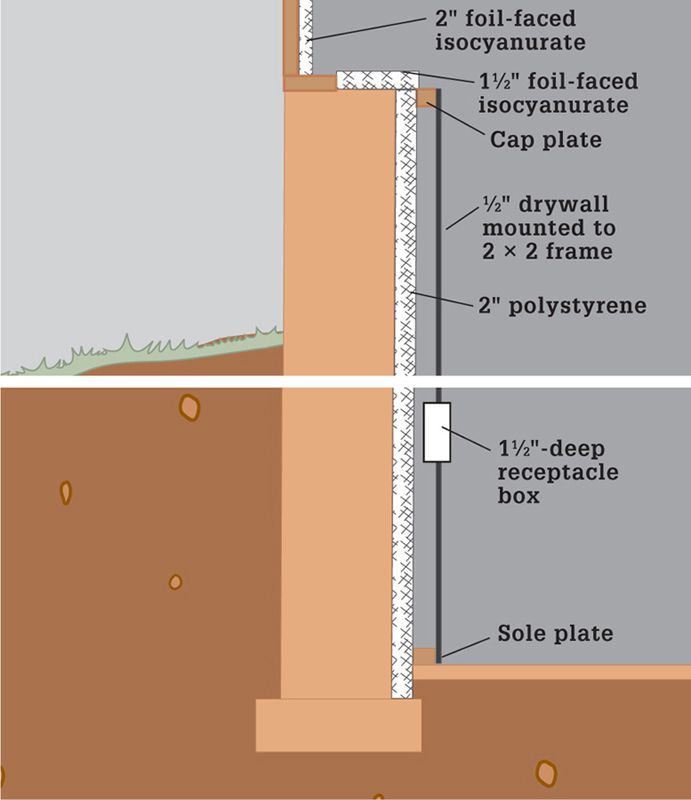
Begin on the exterior wall by digging a trench and installing a 2"-thick rigid foam insulation board up to the bottom of the siding and down at least 6" below grade. The main purpose of this insulation is to inhibit convection and air transfer in the wall above grade. See pages 14 to 15 for more information on how to use flashing and siding to conceal and protect the insulation board.
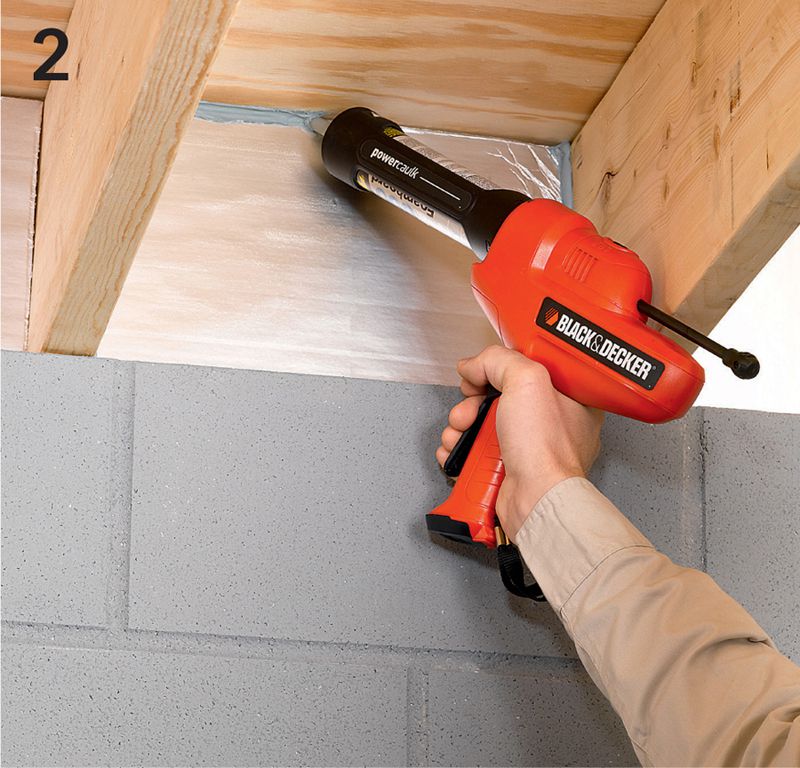
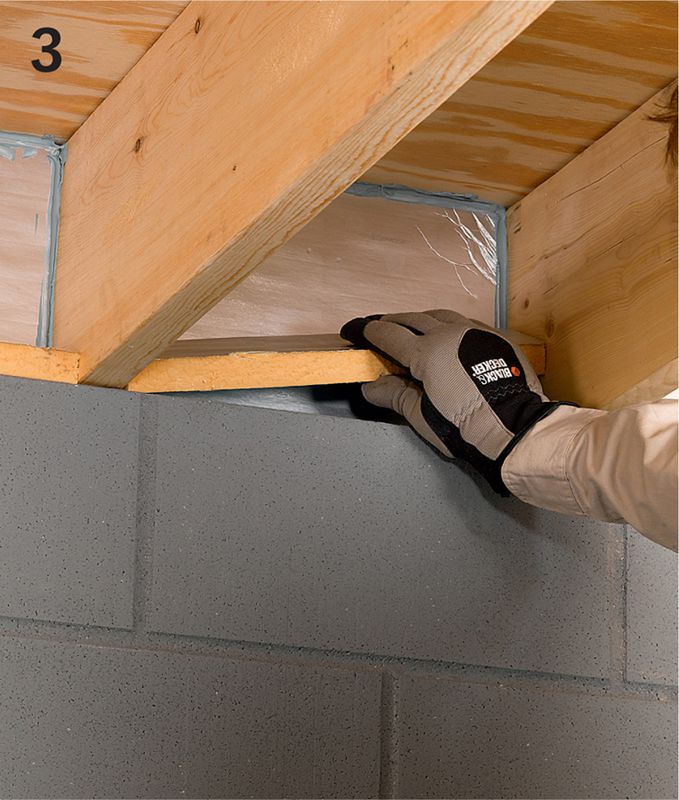
Insulate the rim joist with strips of 2"-thick isocyanurate rigid insulation with foil facing. Be sure the insulation you purchase is rated for interior exposure (exterior products can produce bad vapors). Use adhesive to bond the insulation to the rim joist, and then caulk around all the edges with acoustic sealant.
Seal and insulate the top of the foundation wall, if it is exposed, with strips of 1/2"-thick, foil-faced isocyanurate insulation. Install the strips using the same type of adhesive and caulk you used for the rim joist insulation.
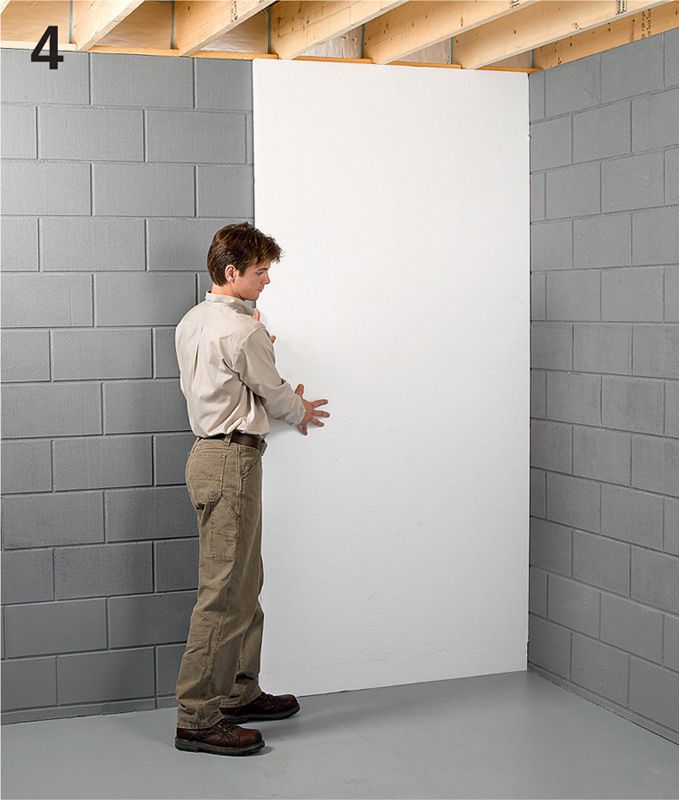
Attach sheets of 2"-thick extruded polystyrene insulation to the wall from the floor to the top of the wall. Make sure to clean the wall thoroughly and let it dry completely before installing the insulation.
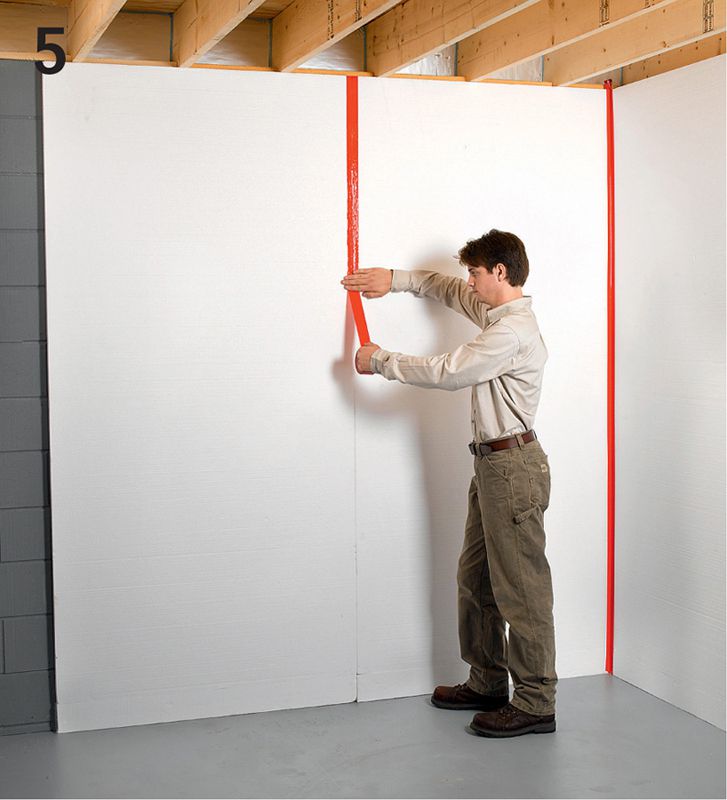
Seal the gaps between the insulation boards with insulation vapor barrier tape. Do not caulk gaps between the insulation boards and the floor.
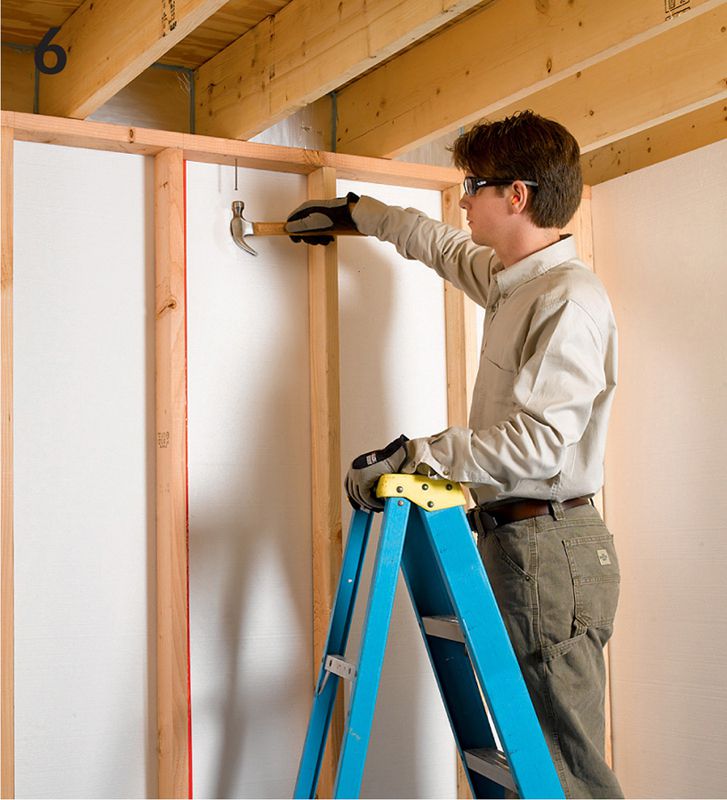
Install a stud wall by fastening the cap plate to the ceiling joists and the sole plate to the floor. If you have space, allow an air channel between the studs and the insulation. Do not install a vapor barrier.