Tip 
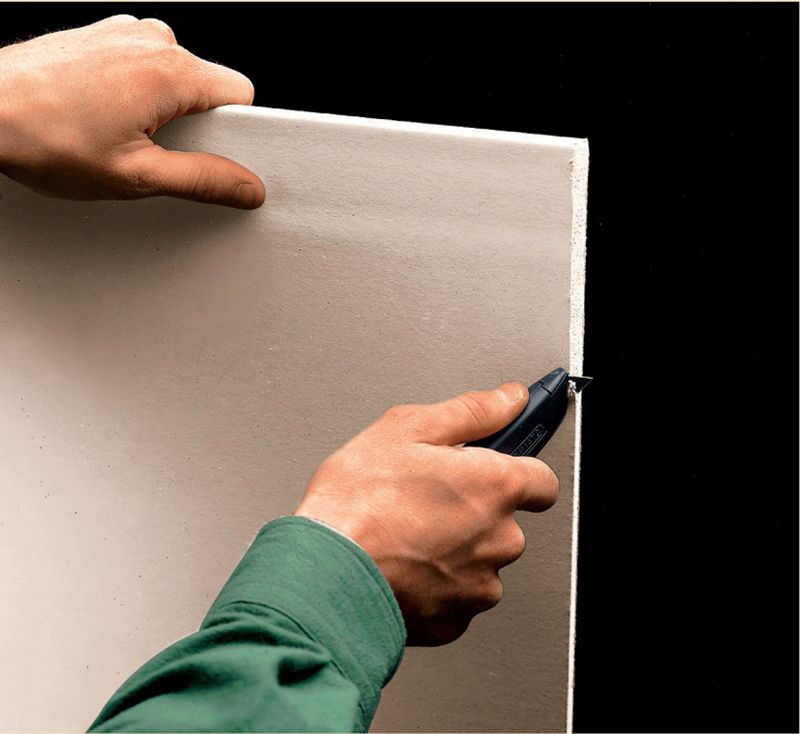
Where untapered panel ends will be butted together, bevel-cut the outside edges of each panel at 45°, removing about 1/8" of material. This helps prevent the paper from creating a ridge along the seam. Peel off any loose paper from the edge.
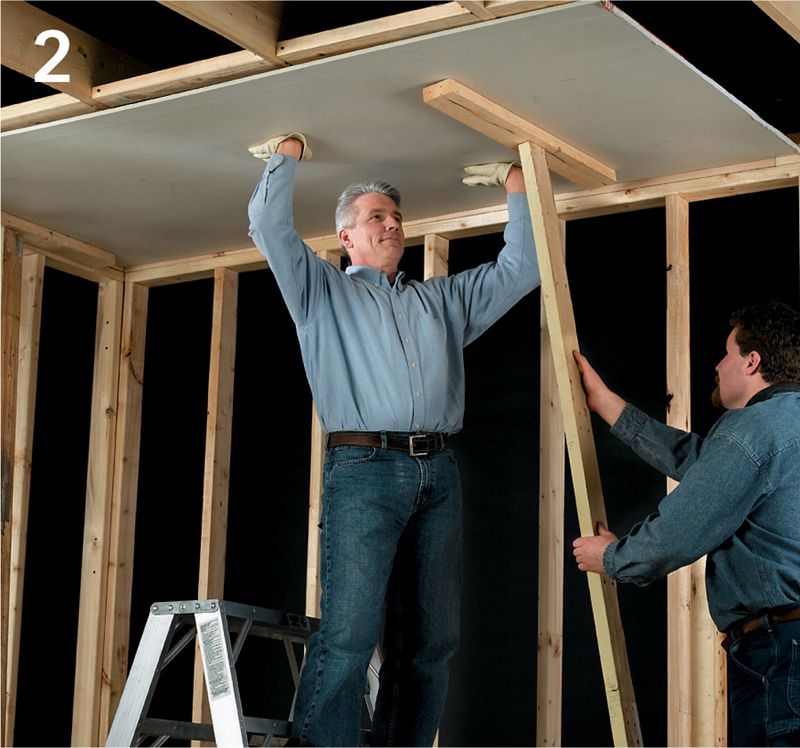
Hanging drywall is a project that can be completed quickly and easily with a little preplanning and a helping hand.
If you’re installing drywall on both the ceilings and the walls, do the ceilings first so the wall panels add extra support for the ceiling panels. When it comes time to install the walls, hang all full panels first, then measure and cut the remaining pieces about 1/8" too small to allow for easy fit.
In nearly every installation, you’ll deal with corners. For standard 90° corners, panels most often can butt against one another. But other corners, such as those lacking adequate nailing surfaces or ones that are prone to cracking, may require the use of drywall clips or specialty beads.
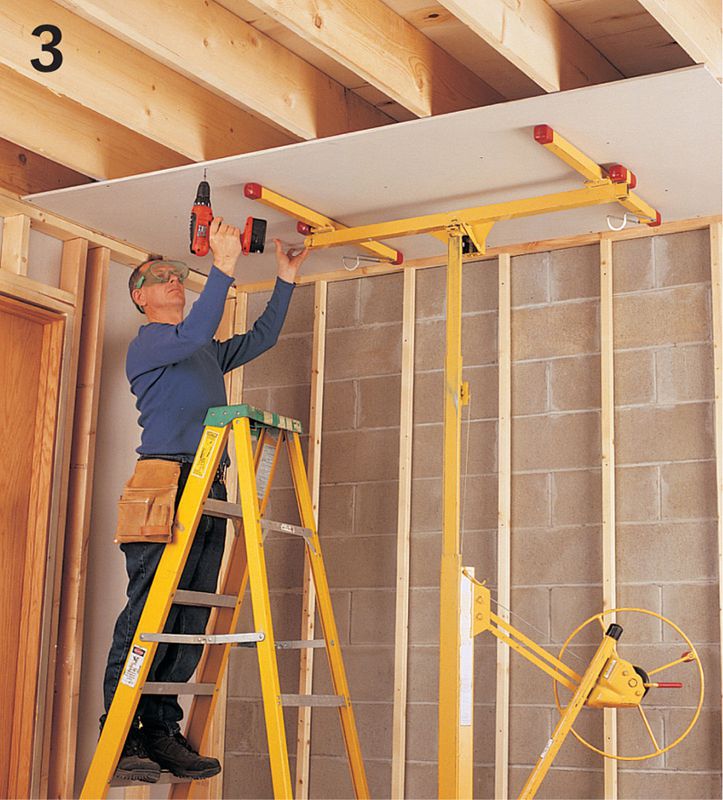
Drywall is heavy. While it’s possible to hang drywall by yourself, work with a helper whenever possible. A panel lift is also a time and back saver, simplifying installation to ceilings and the upper portion of walls. If you don’t want to rent a panel lift, you can make a pair of T-braces, called “deadmen” (see page 112) to hold ceiling panels tight against framing for fastening.
Tip
Where untapered panel ends will be butted together, bevel-cut the outside edges of each panel at 45°, removing about 1/8" of material. This helps prevent the paper from creating a ridge along the seam. Peel off any loose paper from the edge.
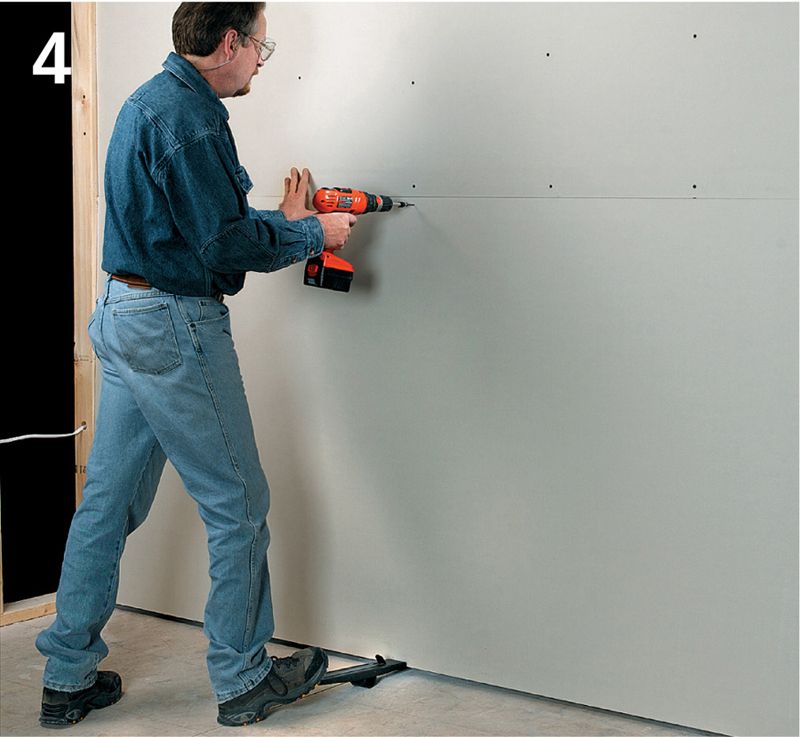
Use a panel lifter to position drywall for fastening. Slide the front end of the lifter beneath the panel edge, then rock backward with your foot to raise the panel into place.
Tools & Materials 
Work gloves
Eye and ear protection
T-square
Utility knife
Screwgun or drill
Panel lift
Chalk line
Drywall panels
Drywall screws
Deadmen
Ladders
Metal flashing
Self-tapping steel screws
Drywall clips
 HOW TO INSTALL DRYWALL ON FLAT CEILINGS
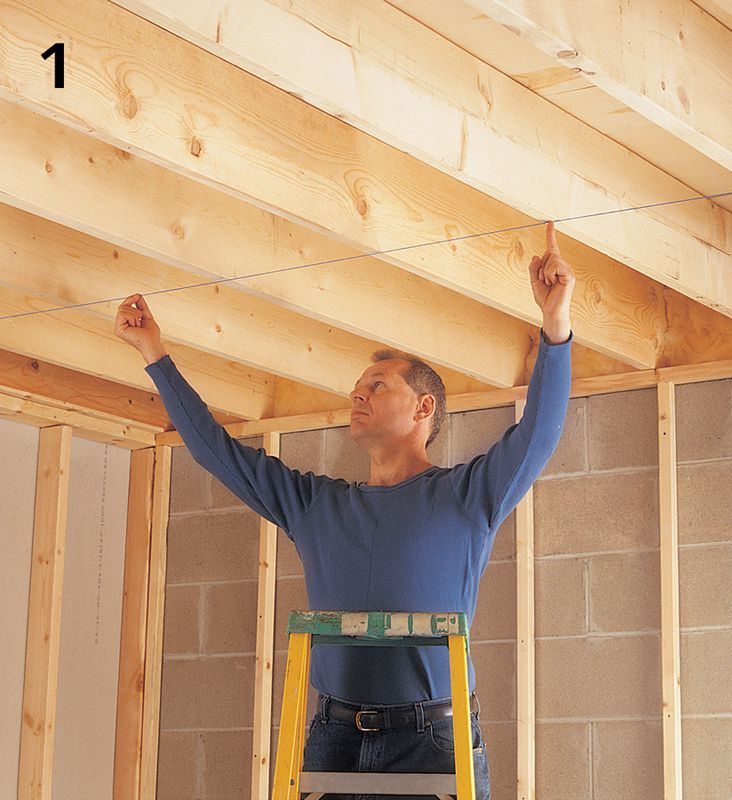
Snap a chalk line perpendicular to the joists, 48 1/8" from the starting wall.
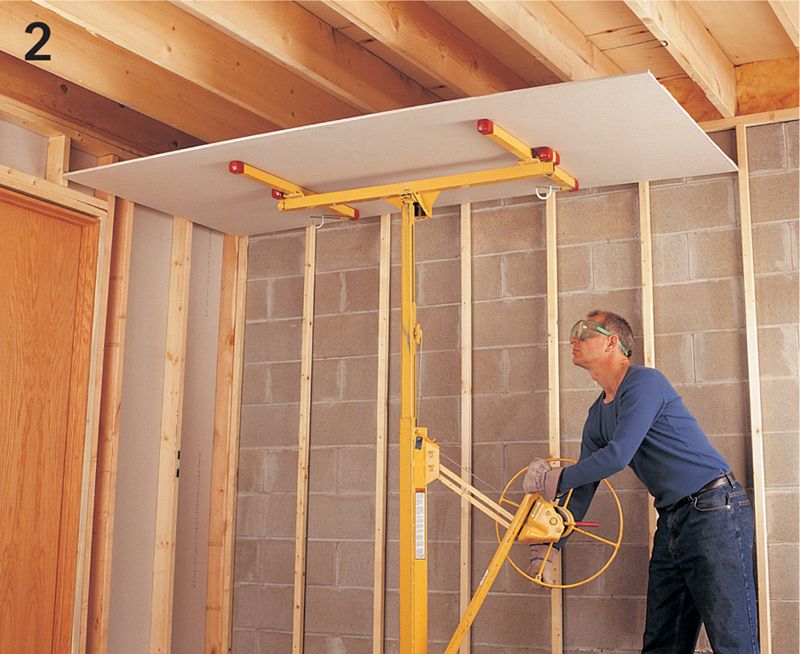
Measure to make sure the first panel will break on the center of a joist. If necessary, cut the panel on the end that abuts the side wall so the panel breaks on the next farthest joist. Load the panel onto a rented panel lift, or use a helper, and lift the panel flat against the joists.
Position the panel with the leading edge on the chalk line and the end centered on a joist. Fasten the panel with appropriately sized screws.

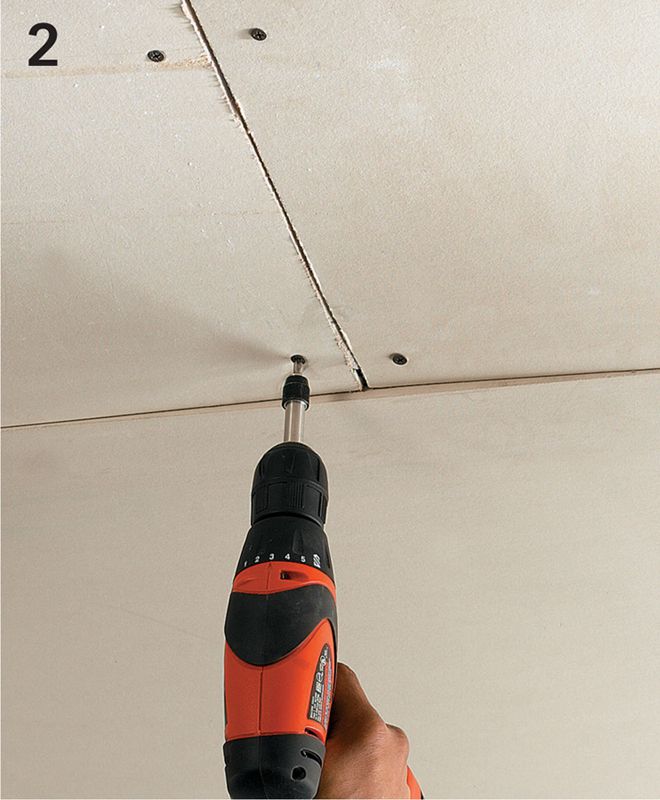
After the first row of panels is installed, begin the next row with a half-panel. This ensures that the butted end joints will be staggered between rows.
HOW TO INSTALL CEILING PANELS USING DEADMEN
Construct two 2 × 4 deadmen. Lean one against the wall where the panel will be installed, with the top arm a couple inches below the joists. Have a helper assist in lifting the panel and placing the lead edge on the arm. Angle the deadman to pin the panel flush against the joists, but don’t use so much pressure you risk damage to the panel.
As the helper supports the panel, use the other deadman to hoist the panel against the joists 24" from the back end. Place ladders at each deadman location and adjust the panel’s position by loosening the braces with one hand and moving the panel with the other. Replace the braces and fasten the panel to the framing.
Setting Your Clutch
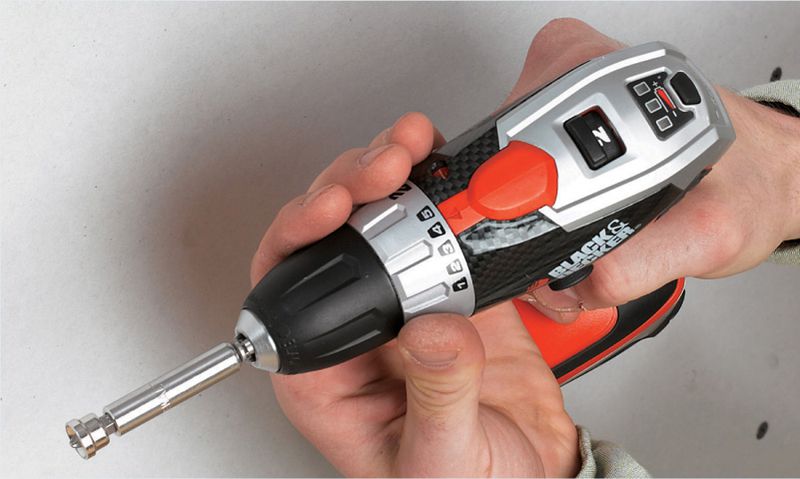
Professional drywallers drive hundreds, even thousands, of screws per day. Consequently, they invest in pro-quality screwdriving equipment, often with self-feeding coils of screws for rapid-fire work. For DIYers, this equipment can be rented—and may be worth the investment for a very large project. But in most cases a decent quality cordless drill/driver will do nicely. If the drill/driver has a clutch (and most do these days), so much the better. Essentially, a clutch stops the drill’s chuck from spinning when the screw encounters a specific amount of resistance. This prevents overdriving of the screw, which is especially important when drywalling (you want to avoid driving the screw far enough into the drywall to break the surface paper). But for the clutch to work properly you need to make sure it is set to the appropriate level of sensitivity. A drill/driver normally has several settings indicated on a shroud or ring near the drill chuck. The highest setting is used for drilling. Basically, the clutch won’t disengage the chuck unless it encounters so much resistance that the drill could be damaged. On the lowest setting, the drill will disengage when it encounters only very slight resistance, as when completing driving a screw into drywall. Before you start driving any drywall screws, test your clutch setting by driving a screw into a piece of scrap drywall and a 2 × 4. Reset the clutch as needed until it stops driving the moment the screwhead becomes countersunk, creating a very slight dimple. Having the clutch set correctly ensures that your fasteners will have maximum holding power with just enough of a surrounding dimple to give the joint compound a place to go.
 INSTALLING FLOATING CEILING JOINTS
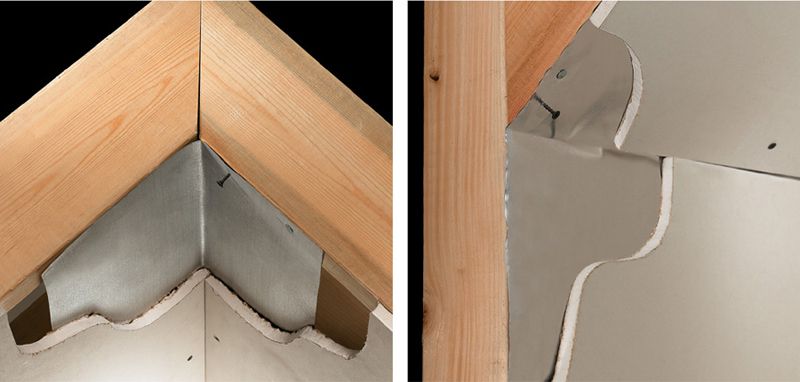
Use metal flashing to prevent cracks along the peak of pitched and cathedral ceilings (left) and the angle between pitched ceilings and sidewalls (right). For both applications, cut metal flashing 16" wide and to the length of the joint, then bend it lengthwise to match the angle of the peak or corner. Fasten flashing to the framing on one side only, then fasten the panels on that side to the framing. However, fasten the panels at the unfastened side to the flashing only, using self-tapping steel screws. Drive the first row of screws into the framing not less than 12" from the “floating” edge of the panels. Note: Flexible vinyl bead can also be used for corners prone to cracking.
Bending Flashing
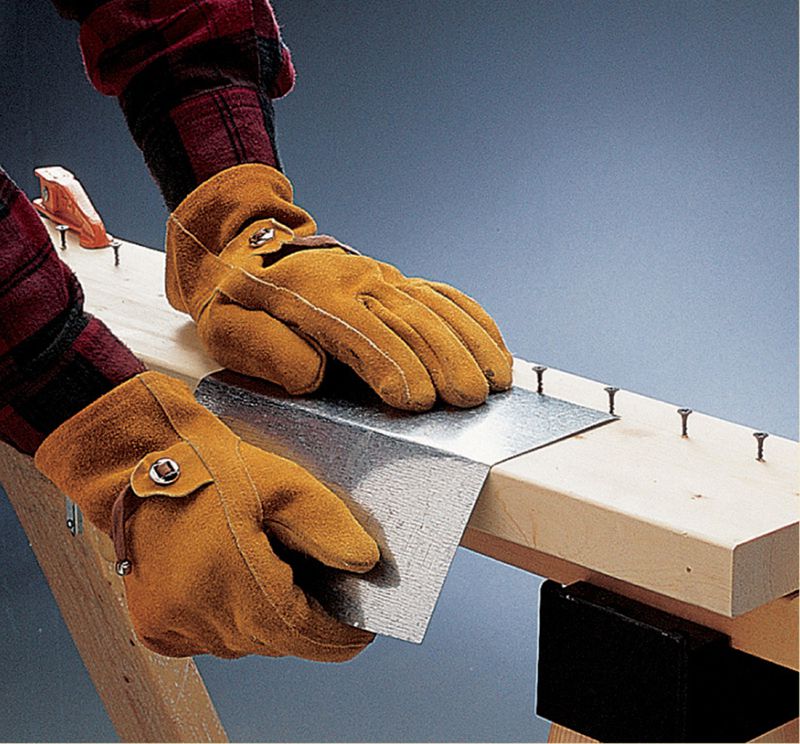
To bend flashing, make a bending jig by driving screws into a piece of wood, creating a space one-half the width of the flashing when measured from the edge of the board. Clamp the bending jig to a work surface. Lay a piece of flashing flat on the board and bend it over the edge.
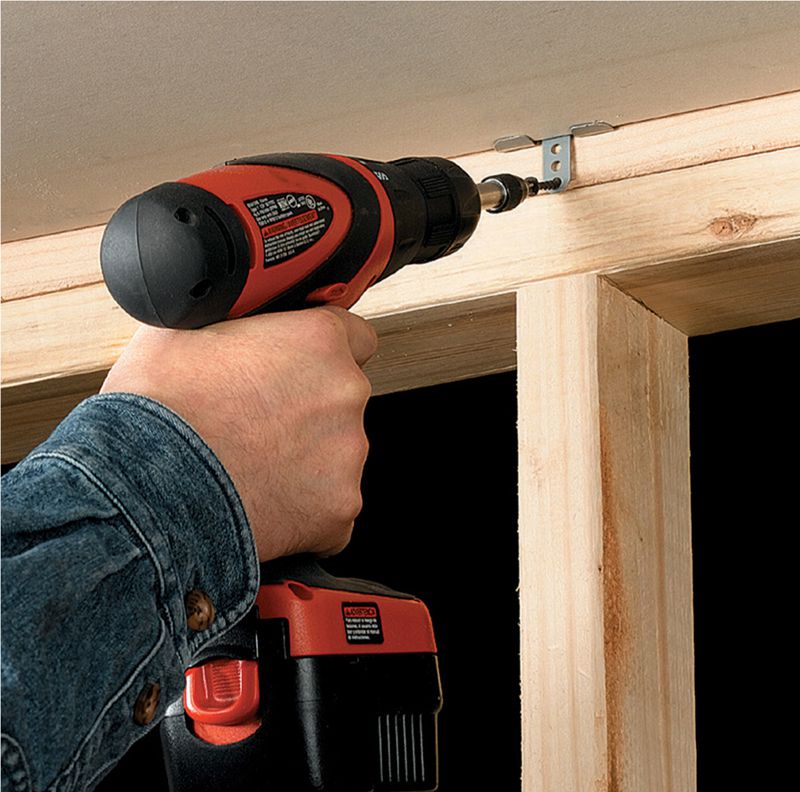
For a ceiling with trusses, use drywall clips to eliminate cracks caused by “truss uplift,” the seasonal shifting caused by weather changes. Slip clips on the edge of the panel prior to installation, then fasten the clips to the top plate. Fasten the panel to the trusses not less than 18" from the edge of the panel.
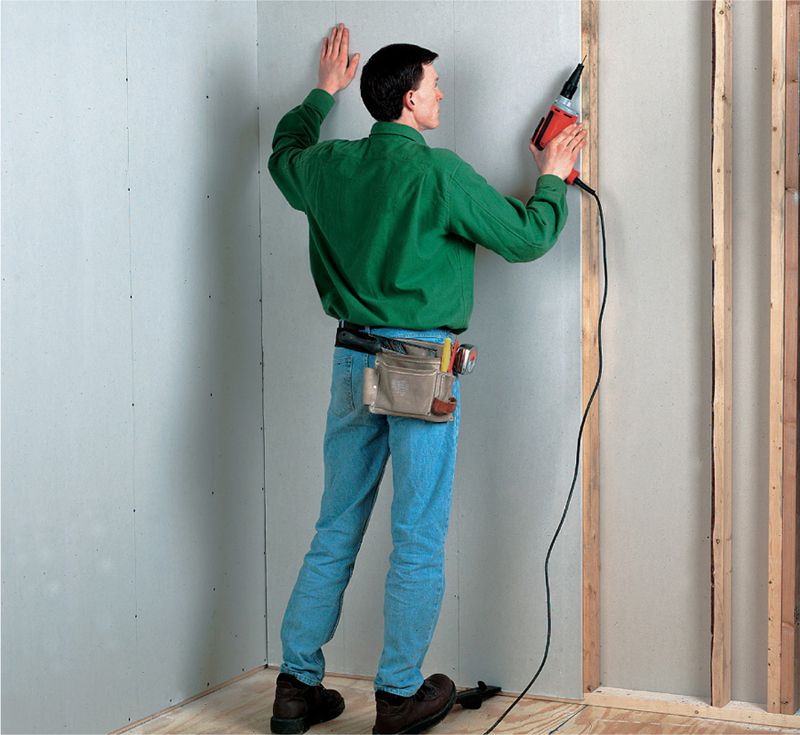
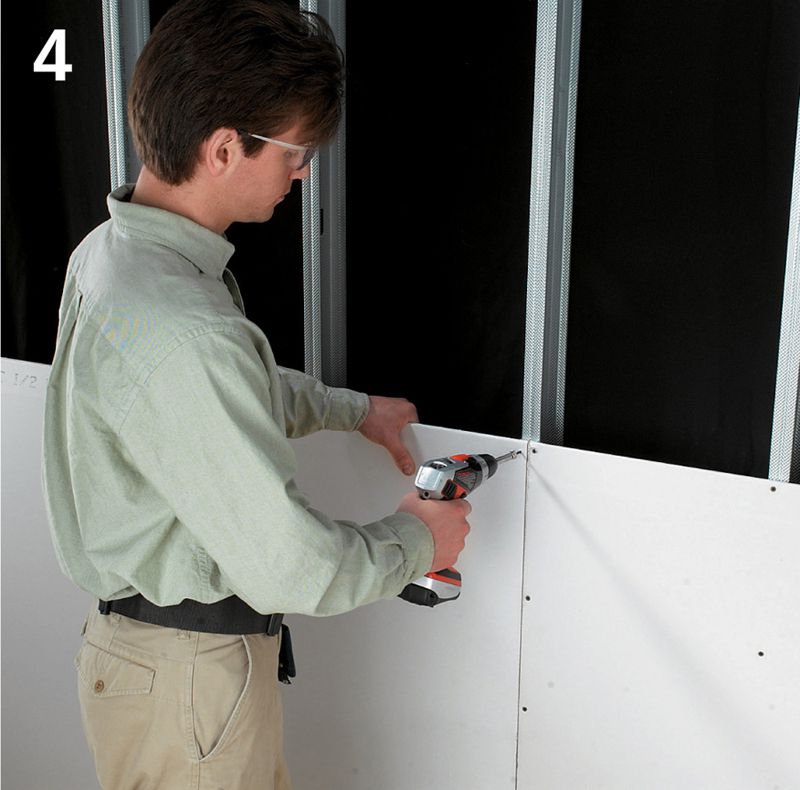
HOW TO INSTALL DRYWALL ON WOOD-FRAMED WALLS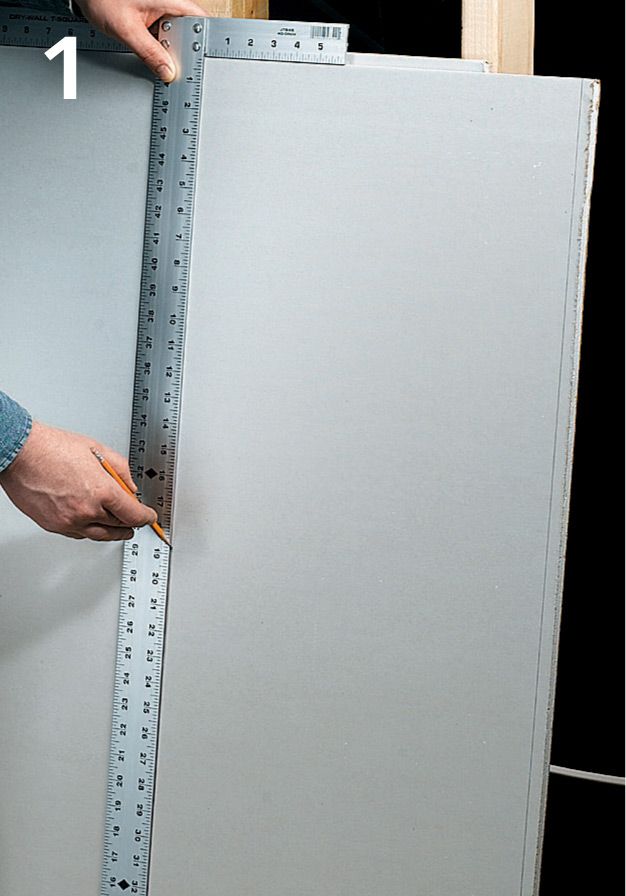
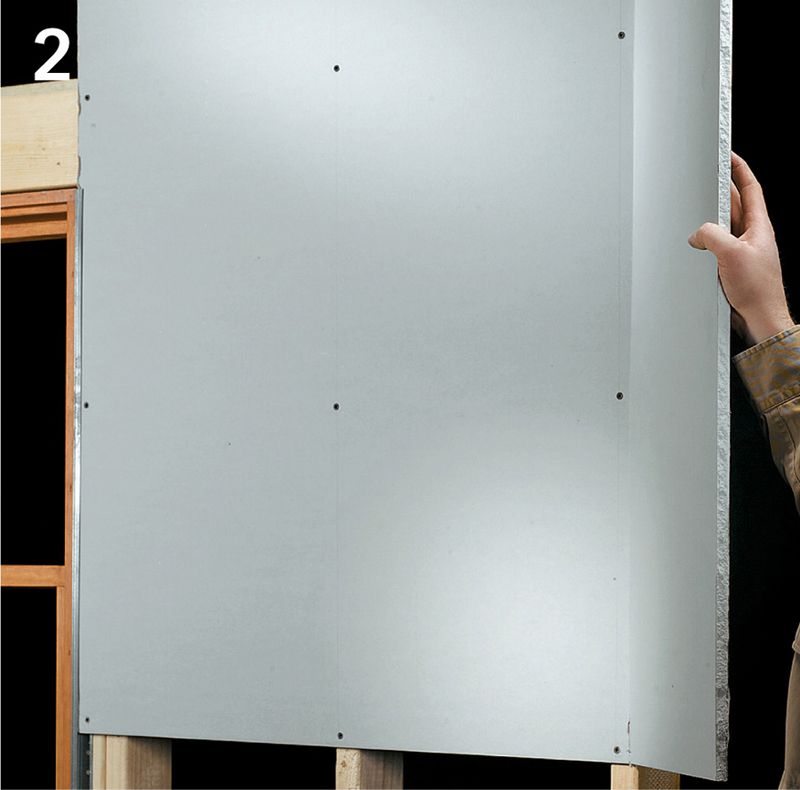
Measure from the wall end or corner to make sure the first panel will break on the center of the stud. If necessary, trim the sheet on the side or end that will be placed in the corner. Mark the stud centers on the panel face and pre-drive screws at each location along the top edge to facilitate fastening. Apply adhesive to the studs, if necessary.
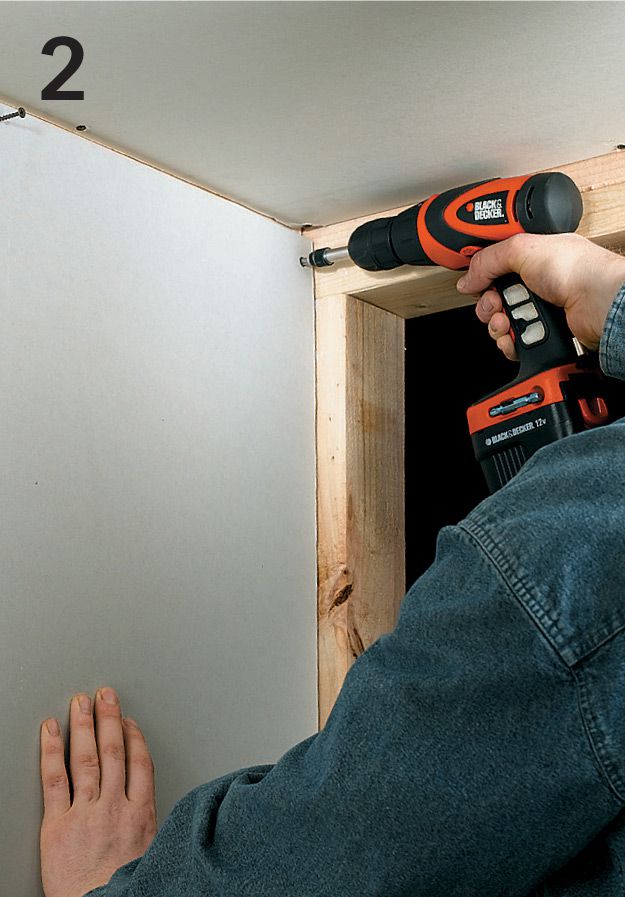
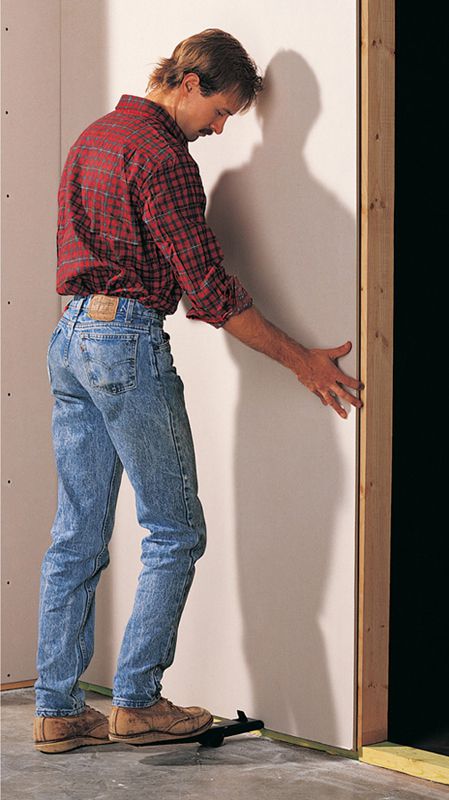
With a helper or a drywall lifter, hoist the first panel tight against the ceiling, making sure the side edge is centered on a stud. Push the panel flat against the framing and drive the starter screws to secure the panel. Make any cutouts, then fasten the field of the panel.
Measure, cut, and install the remaining panels along the upper wall. Bevel panel ends slightly, leaving a 1/8" gap between them at the joint. Butt joints can also be installed using back blocking to create a recess (see page 119).
Measure, cut, and install the bottom row, butting the panels tight to the upper row and leaving a 1/2" gap at the floor. Secure to the framing along the top edge using the starter screws, then make all cutouts before fastening the rest of the panel.
Variation: When installing drywall vertically, cut each panel so it’s 1/2" shorter than the ceiling height to allow for expansion. (The gap will be covered by base molding.) Avoid placing tapered edges at outside corners, which makes them difficult to finish.
INSTALLING DRYWALL AT INSIDE CORNERS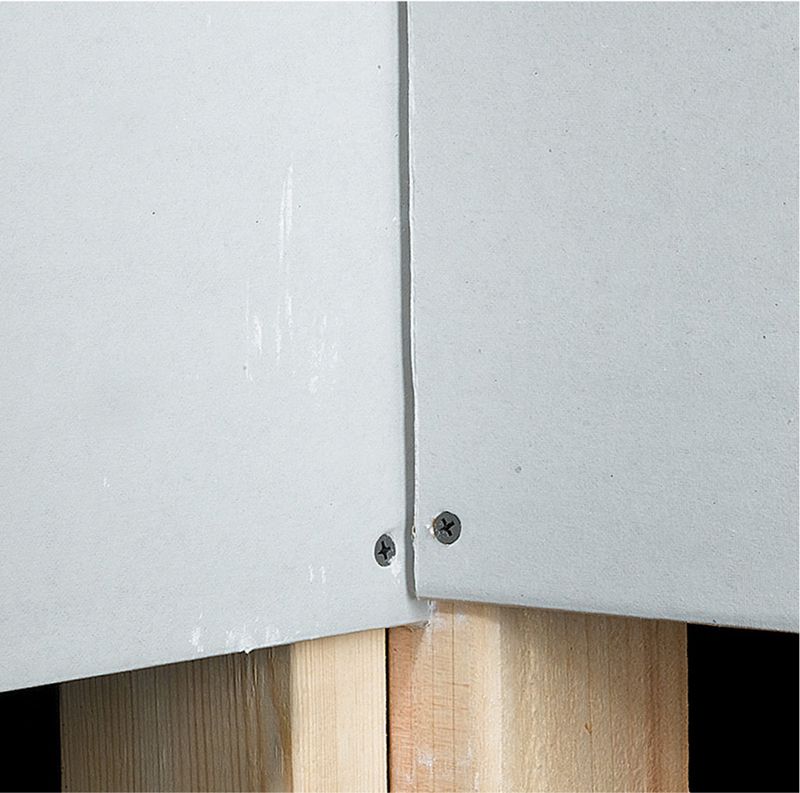
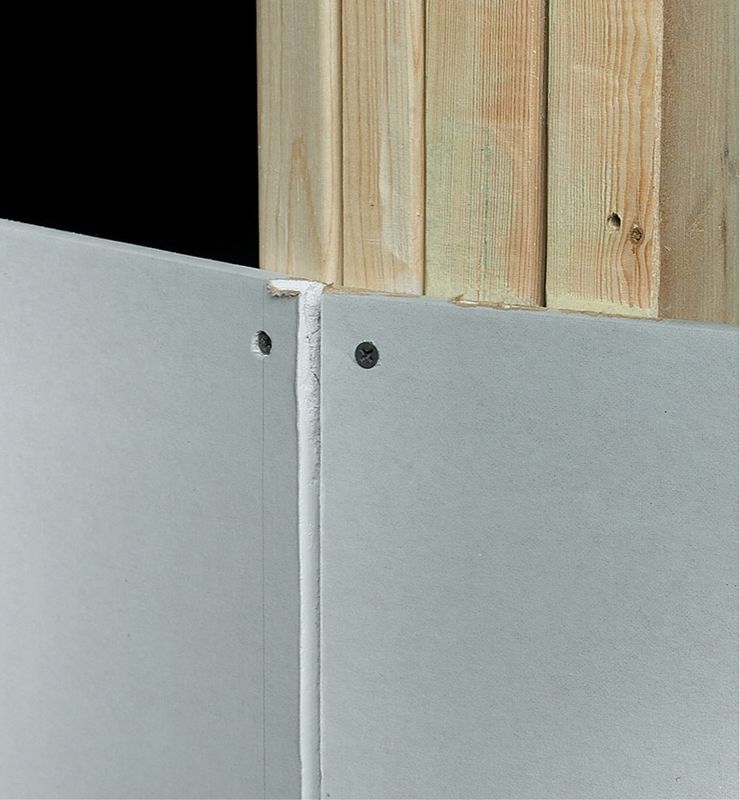
Standard 90° inside corners are installed with the first panel butted against the framing and the adjacent panel butted against the first. The screw spacing remains the same as on a flat wall.
Use a “floating corner” to reduce the chances of popped fasteners and cracks. Install the first panel, fastening only to within one stud bay of the corner. Push the leading edge of the adjacent panel against the first to support the unfastened edge. Fasten the second panel normally, including the corner.
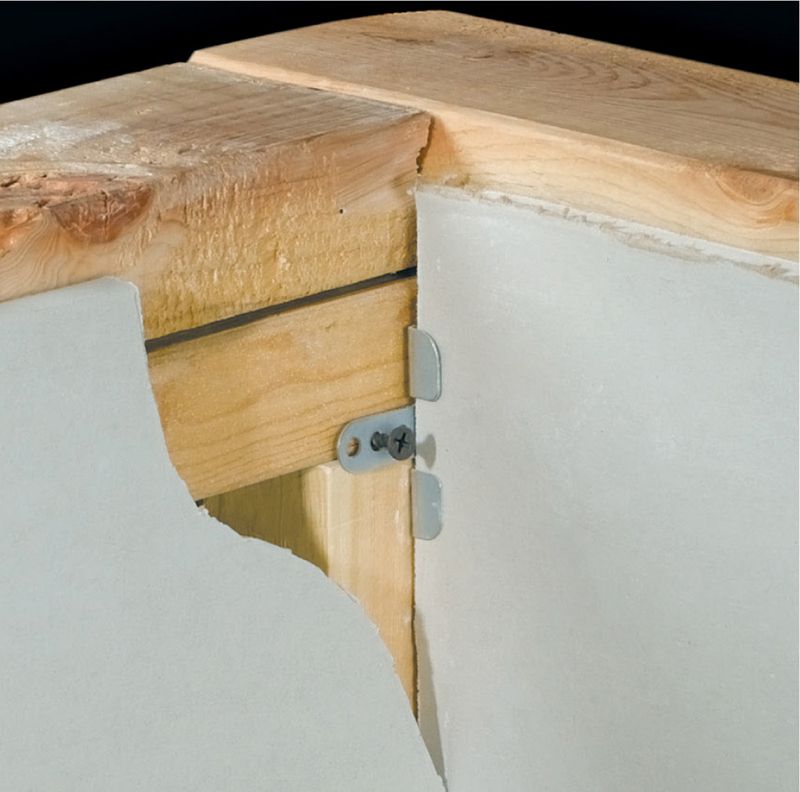
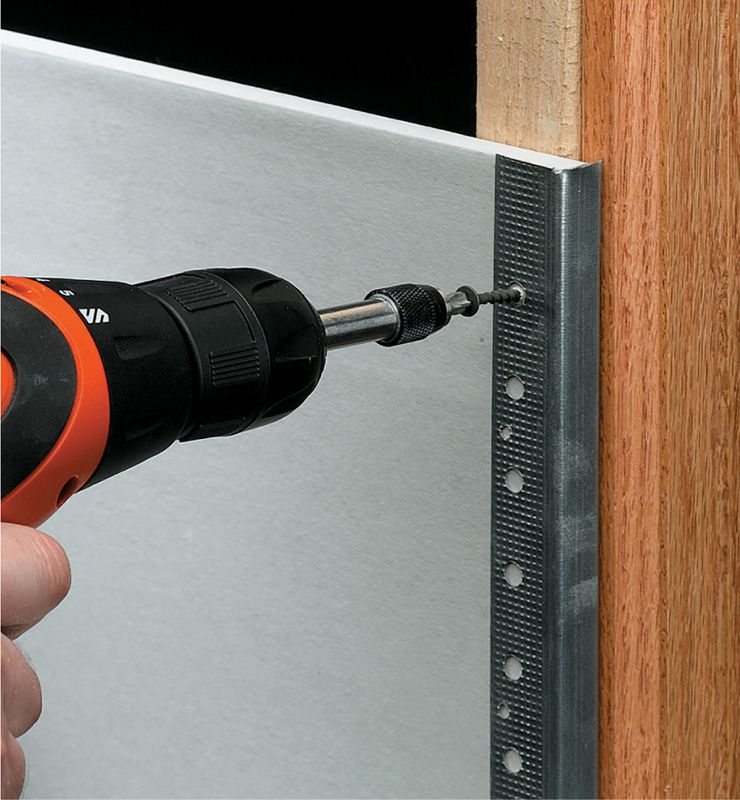
Drywall clips can be used at corners that lack an adequate nailing surface, allowing two panels to be secured to the same stud. Slide clips onto the leading edge of the first panel, with the metal nailing flange outward. Install the panel, fastening the flange to the stud on the adjacent wall with drywall screws. Install the adjacent panel normally.
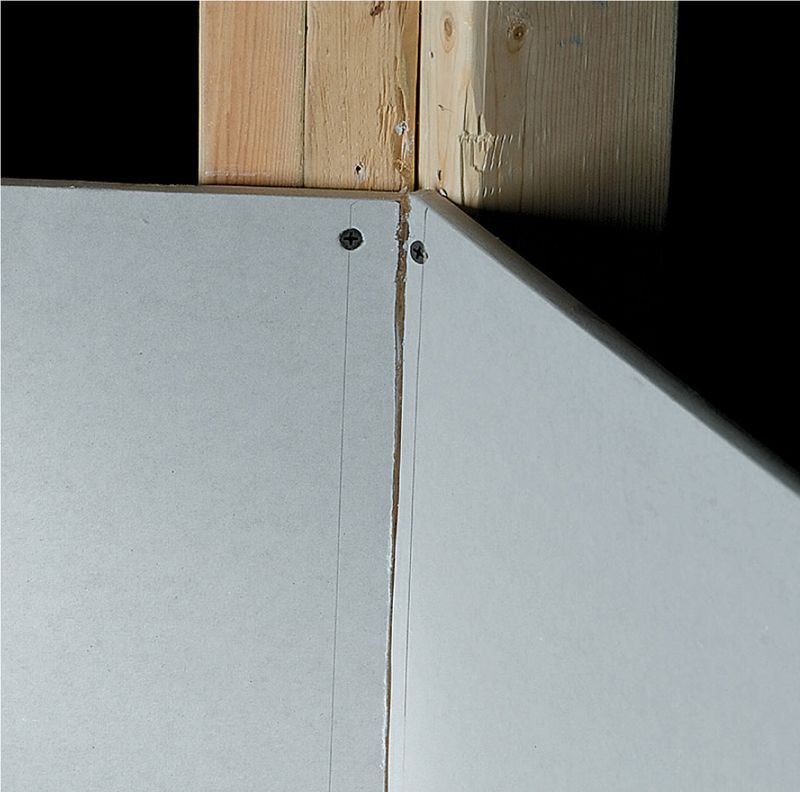
For off-angle corners, do not overlap panel ends. Install so the panel ends meet at the corner with a 1/8" gap between them.
INSTALLING DRYWALL AT OUTSIDE CORNERS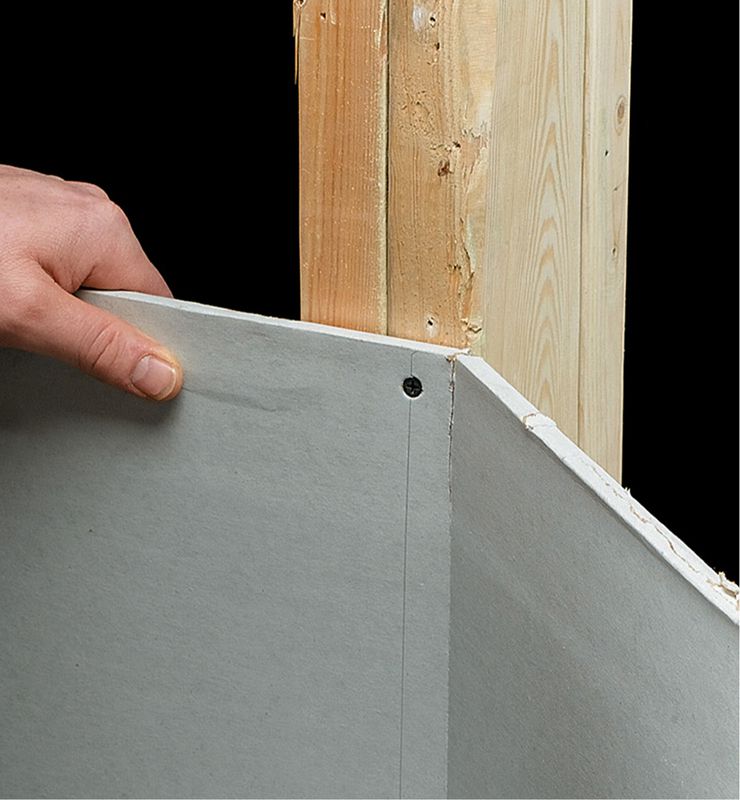
At outside corners, run panels long so they extend past the corner framing. Fasten the panel in place, then score the backside and snap cut to remove the waste piece.
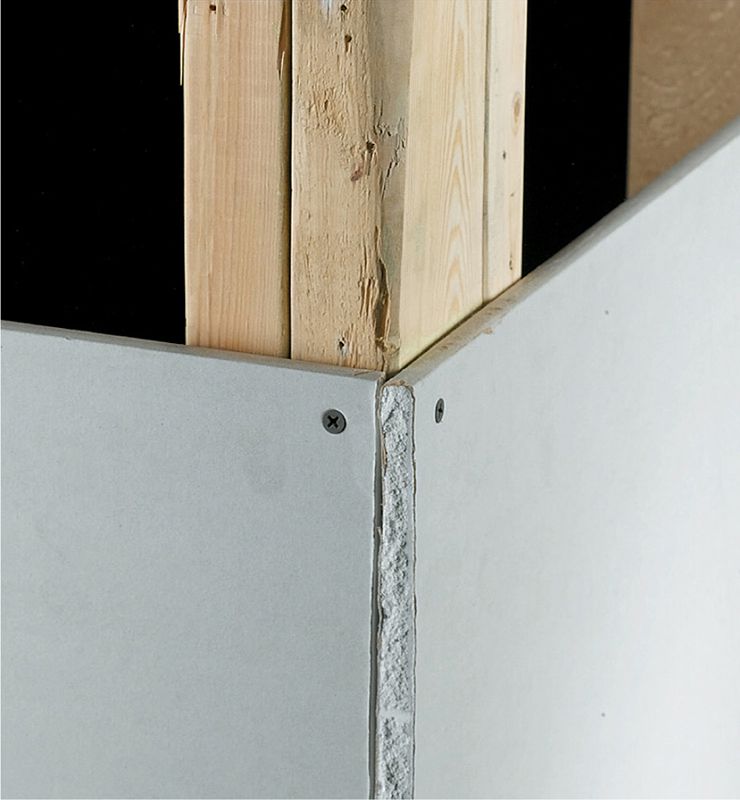
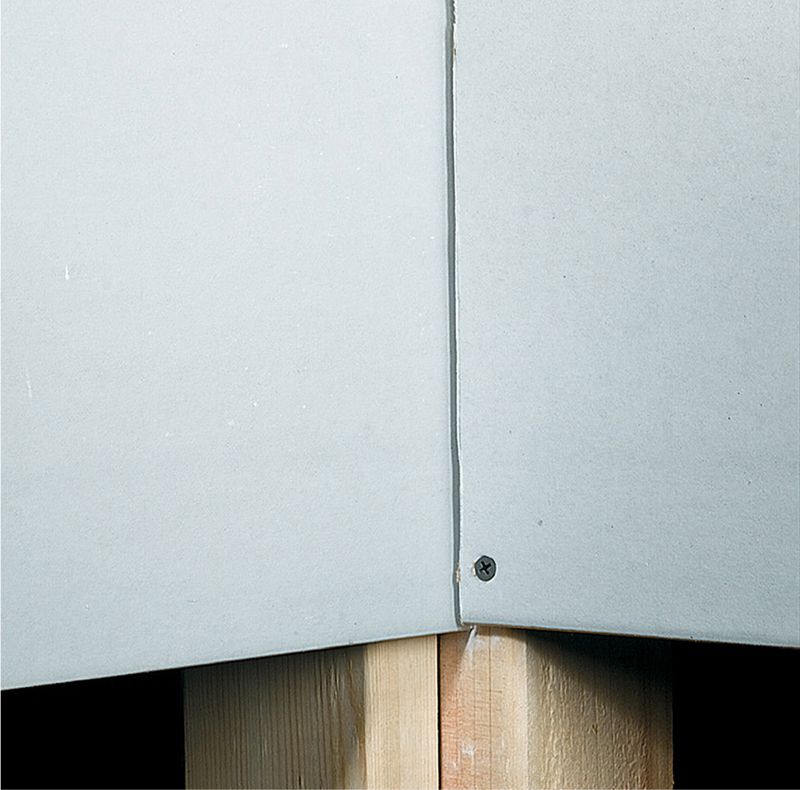
For standard 90° outside corners, install the first panel so the outside edge is flush with the framing, then install the adjacent panel so it overlaps the end of the first panel.
For off-angle corners or corners where bullnose bead will be installed, do not overlap panel ends. Install each panel so it’s leading edge breaks 1/8" from the outside edge of the framing. Note: Bullnose beads with a slight radius may require a larger reveal.
For drywall that abuts a finished edge, such as paneling or wood trim, install panels 1/8" from the finished surface, then install a an L-bead to cover the exposed edge (see page 101).
HOW TO INSTALL DRYWALL ABUTTING A FINISHED SURFACE
Cut the J-bead (see page 124) to size, then position it flush against the finished surface. Fasten it to the adjacent framing with drywall screws. Note: Make sure to install J-bead that matches the thickness of your drywall.
Cut a piece of drywall to size, but let the end run long for final trimming. Slide the end of the drywall into the J-bead until it fits snugly, then fasten the panel to the framing. Score the backside flush with the face of the wall, then snap cut to remove the waste.
INSTALLING DRYWALL ON GABLE WALLS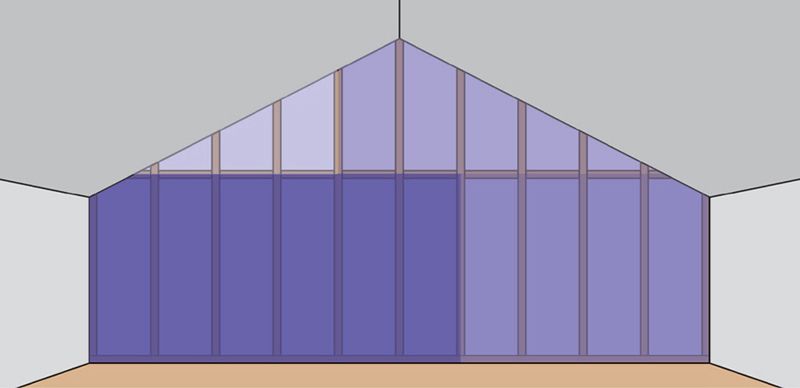
Gables and cathedral ceilings present unique challenges when installing drywall. A few pointers that will help you be successful include: use as many of the panel’s factory edges as possible; test-fit each piece directly on the wall; do not force pieces into place, but trim edges as needed instead; install pieces horizontally, with 2 × 4 blocking between the framing member; align horizontal seams, but not vertical seams—stagger these to minimize any twisting in the framing members.
HOW TO INSTALL DRYWALL ON METAL STUD WALLS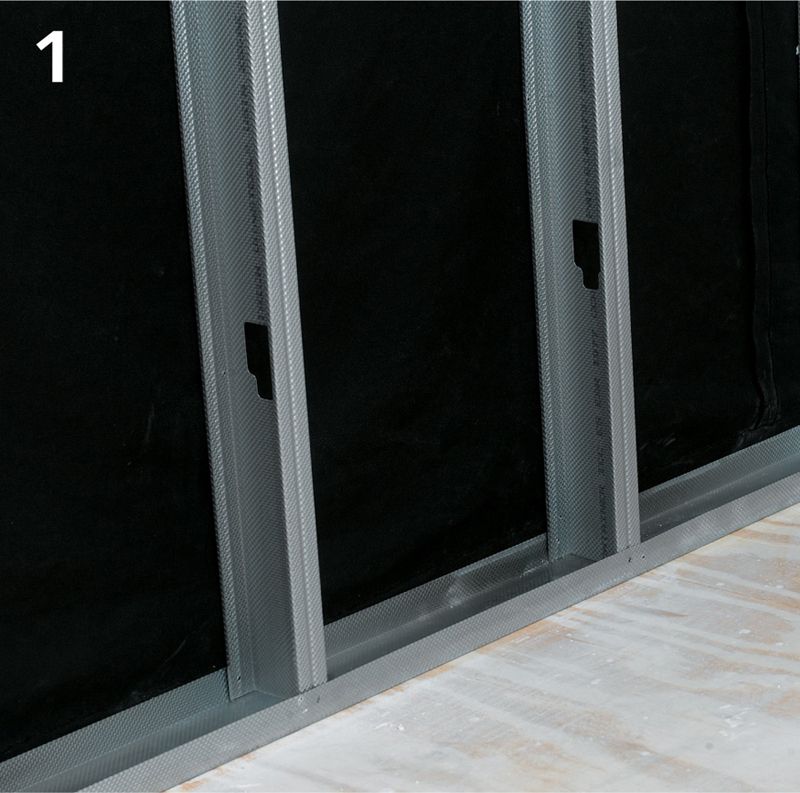
Metal stud walls in residential construction are generally created with C-shaped 20- to 25-gauge steel studs that are secured at the top and bottom with flanged tracks. If the wall is built correctly, all of the open sides of the C-shaped studs will face in the same direction. Before you begin installing drywall, note which direction the open sides are on.
Begin installing drywall panels in the corner of the room that’s closer to the open sides of the metal studs. The first panel should fall midway across a stud, coming from the direction of the open side. Attaching the panel this way will stabilize it; if you install the panel so the free end of the stud flange is loose, it may flex when you attach the drywall screws.
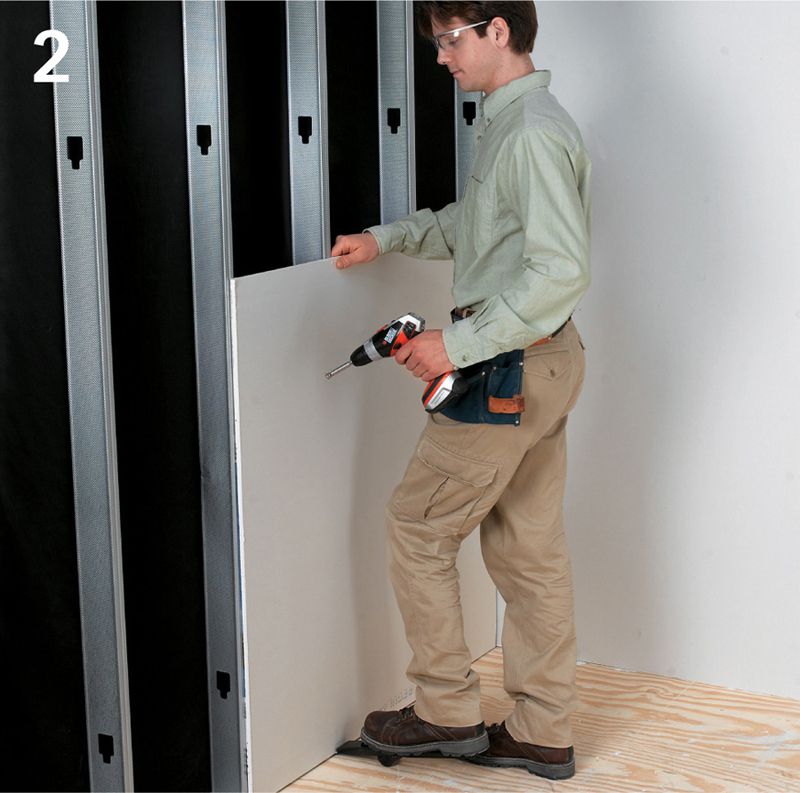
Screw the first panel at each corner using Type S drywall screws (1" is recommended for 1/2" drywall). These screws have a fairly sharp point that can penetrate the light-gauge metal flanges of the steel studs. As when attaching drywall to wood framing, take care not to overdrive the screws—they tend to take off rather aggressively once they engage in the metal.
Install the second drywall panel, leaving a slight gap at the joint. The new panel should be crossing the closed side of the C-shaped stud. Continue working in this direction until the wall is covered. Taping and seaming are done the same way as for wood framing.
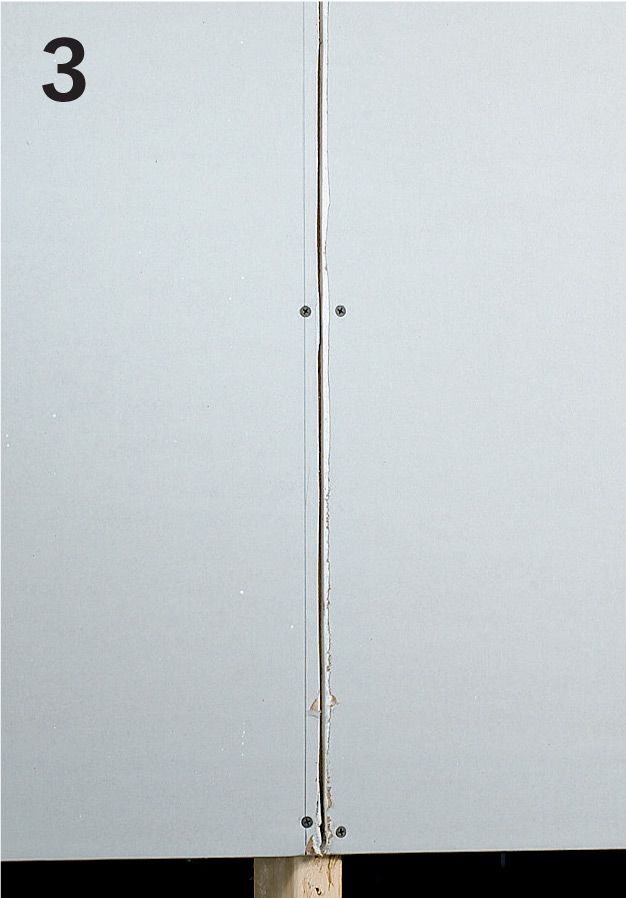
INSTALLING BACK BLOCKERSNo matter how good a job you do installing and finishing a butt joint, there’s always a chance it’ll be visible, even after a coat of paint or layer of wallcovering. Drywall panels can expand and contract as the temperature and humidity in your home changes, causing butted panel ends to push outward and create ridges. While ridging eventually stops (up to a year after installation), you can install back blocking to help prevent the problem before it even starts.
Back blocking creates a recessed butt joint by slightly bending panel ends into the bay between framing members, where they are secured to a floating blocking device with drywall screws. The result is a recessed joint that approximates a tapered joint and can be finished just as easily using standard techniques. And because the joint floats between framing members, it’s unlikely to crack or ridge. Back blocking can be used for both walls and ceilings.
Although commercial back blockers are available, you can easily make your own back blocker by attaching narrow strips of 1/4" hardboard to the edges of a 6 to 10" wide strip of 3/4" plywood. When placed behind a drywall butt joint, the hardboard strips will create a thin space, into which the edges of the drywall will be deflected when it’s screwed to the back blocker. The instructions below show a homemade back blocker in use.
Tools & Materials
Work gloves
Eye and ear protection
Screwgun or 3/8" drill
Tape measure
Drywall screws
3/4 × 10 × 48" plywood
1/4 × 3/4 × 48" hardboard
HOW TO INSTALL A BACK BLOCKER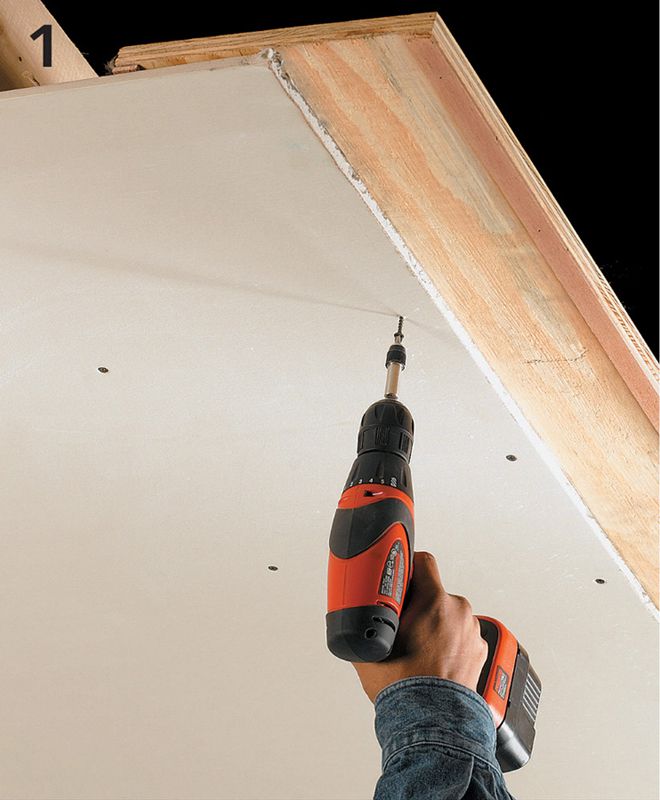
Hang the first drywall panel so the end breaks midway between the framing members. Position the back blocker behind the panel so the end covers half of the wood center strip, then fasten every 6" along the end.
Install the second panel so it butts against the first panel. Fasten the end of the second panel to the back blocker with drywall screws every 6". The screws will pull the end of the panel into the blocker, creating the recessed joint.