WALLS & CEILINGS
STEEL STUDS: FRAMING WITH
Steel framing is quickly becoming a popular alternative to wood in residential construction due to the rising cost of wood and the advantages that steel offers. Steel framing is fireproof, insect proof, highly rot resistant, and lightweight. But the most significant advantage is that steel, unlike lumber, is always perfectly uniform and straight.
Steel studs and tracks (or plates) are commonly available at home centers and lumberyards in nominal widths comparable to their wooden counterparts: 1 5/8" (2 × 2), 2 1/2" (2 × 3), 3 5/8" (2 × 4), and 5 1/2" (2 × 6). Although 25-gauge (or 18-mil) and 20-gauge (or 33-mil) steel framing is suitable for most non-load-bearing partition walls and soffits that will be covered with wallboard, 20-gauge results in a somewhat sturdier wall. Use 20-gauge studs for walls that will receive cementboard.
With a few exceptions, the layout and framing methods used for a steel-frame partition wall are the same as those used for a wood-frame wall. For more information on framing partition walls, see pages 196 to 201; for help with framing soffits, see pages 421 to 422.
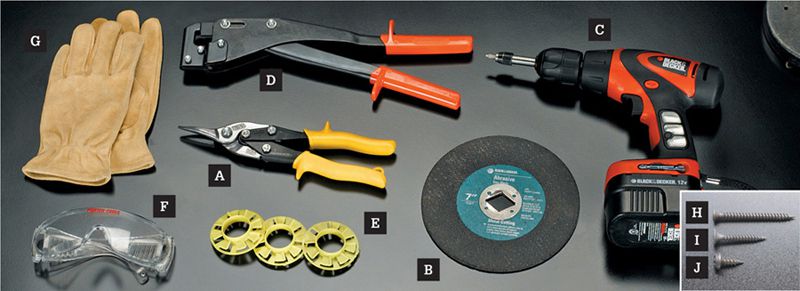
Here are a few tips for working with steel:
• Steel framing is fastened together with screws, not nails. Attach steel tracks to existing wood framing using long drywall screws.
• Even pressure and slow drill speed make it easy to start screws. Drive the screws down tight, but be careful not to strip the steel. Don’t use drill-point screws with 25-gauge steel, which can strip easily.
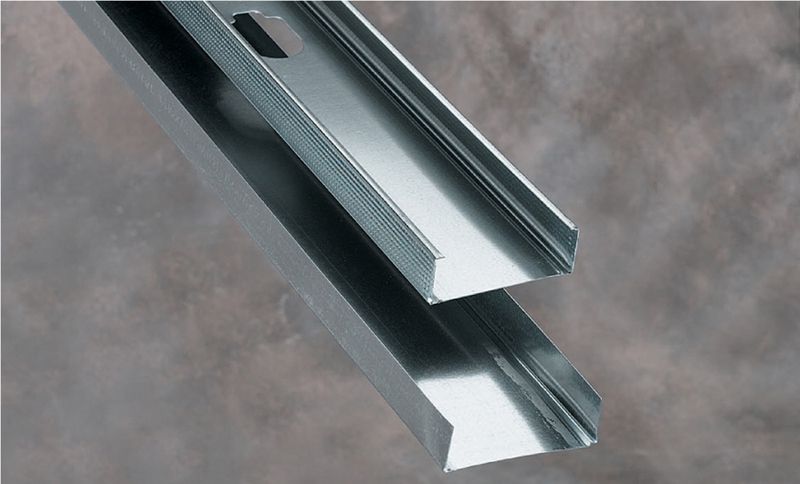
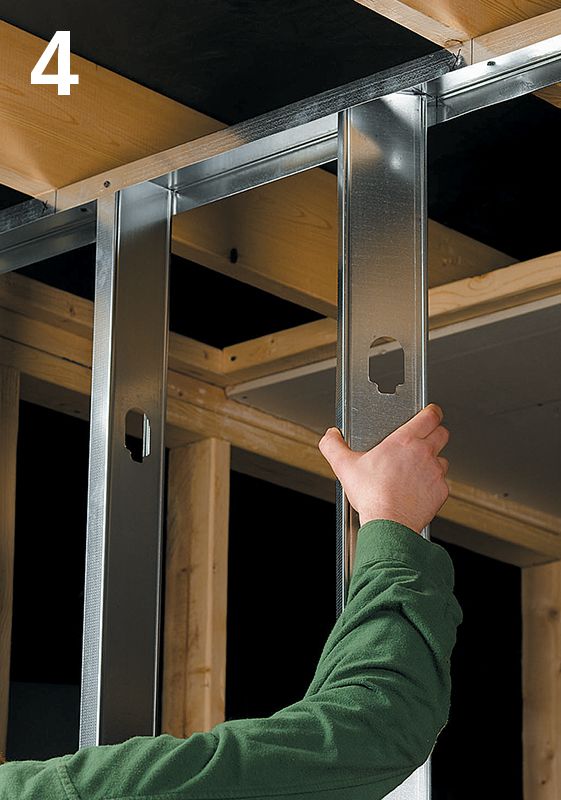
• Most steel studs have punch-outs for running plumbing and electrical lines through the framing. Cut the studs to length from the same end to keep the punch-outs lined up.
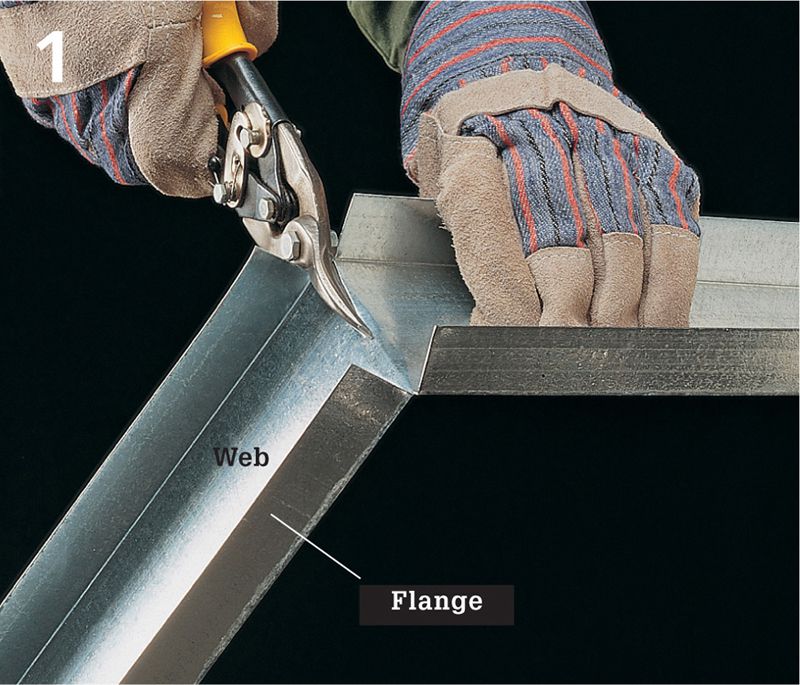
• The hand-cut edges of steel framing are very sharp; wear heavy gloves when handling them.
• To provide support for electrical receptacle boxes, use boxes with special bracing for steel studs, or fasten boxes to wood framing installed between the studs.
• Use 16"-wide batts for insulating between steel studs. The added width allows for a friction fit, whereas standard batts would slide down.
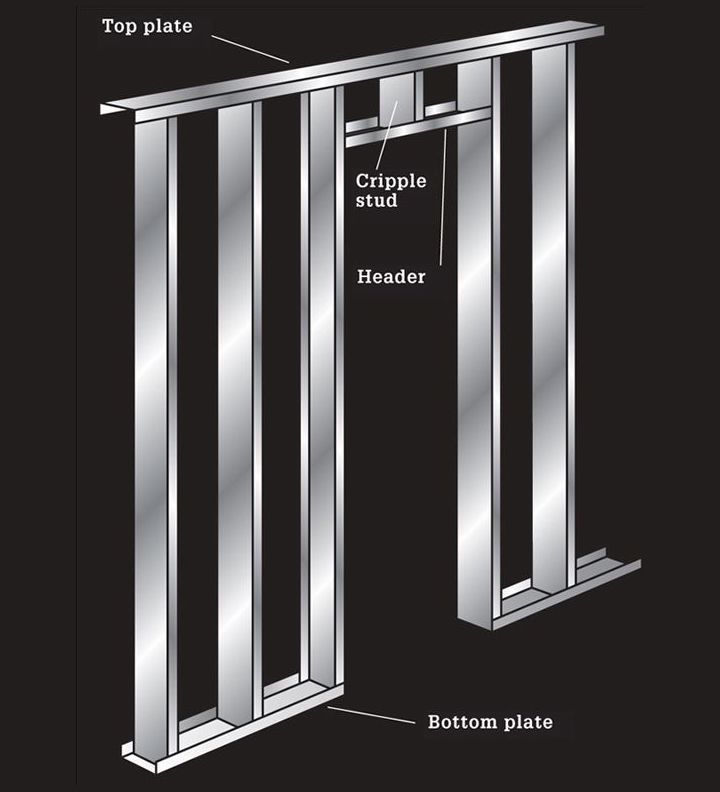
Steel framing, when coupled with wallboard, creates a rigid wall system as solid and strong as wood-framed walls. Steel track is used to create plates, headers, and sills. Steel studs are installed so the open side faces in the same direction, except at door, window, or other openings. The punch-outs in studs are for running utility lines through the framing.
Steel studs and tracks have the same basic structure—a web that spans two flange sides—however, studs also contain a 1/4" lip to improve their rigidity.
 HOW TO FRAME WALLS WITH STEEL STUDS
Mark the wall location on the floor or ceiling, following the same procedure used for a wood-frame wall. Cut the top and bottom tracks to length with aviation snips. Cut through the side flanges first, then bend the waste piece back and cut across the web. Use a marker to lay out the tracks with 16" on-center spacing.
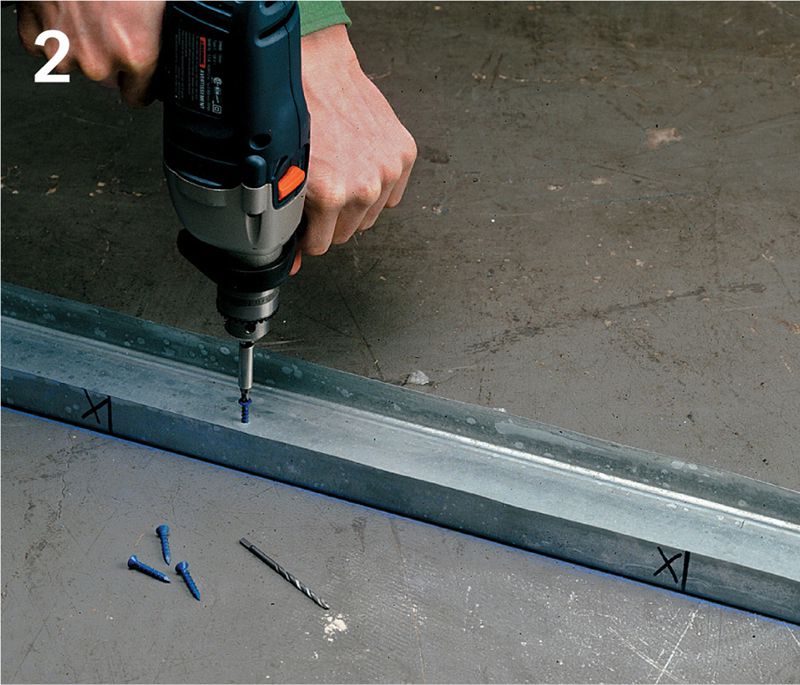
Fasten the bottom track to the floor. For wood floors, use 2" coarse-thread drywall screws. For concrete floors, pin the track down with a powder-actuated nailer (see pages 330 to 331), or use 1 1/4" masonry screw. Drill pilot holes for screws using a masonry bit. Drive a fastener at each end of the track, then every 24" in between.
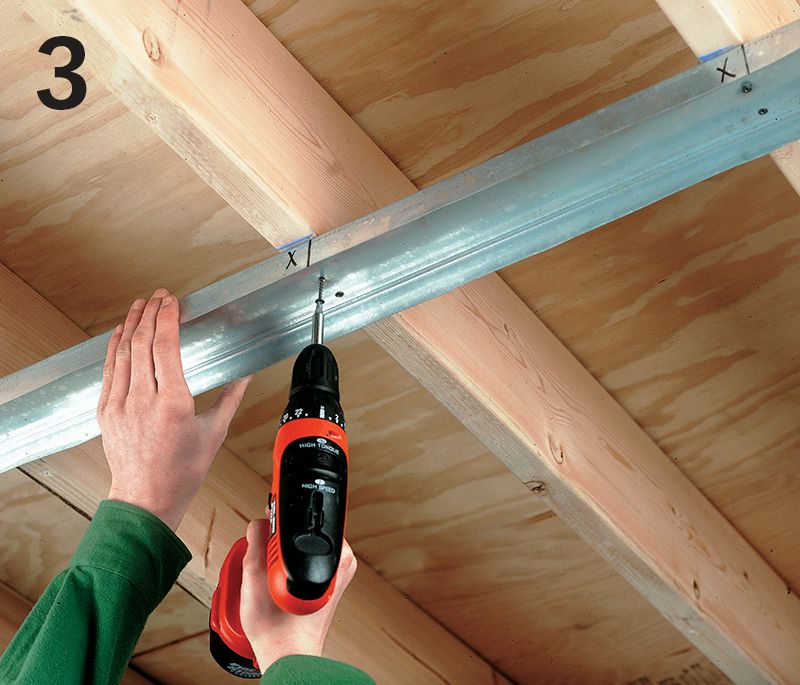
Plumb up from the bottom track with a plumb bob to position the top track. Fasten the top track to the ceiling joists with 1 5/8" drywall screws. Drive two screws at each joist location.
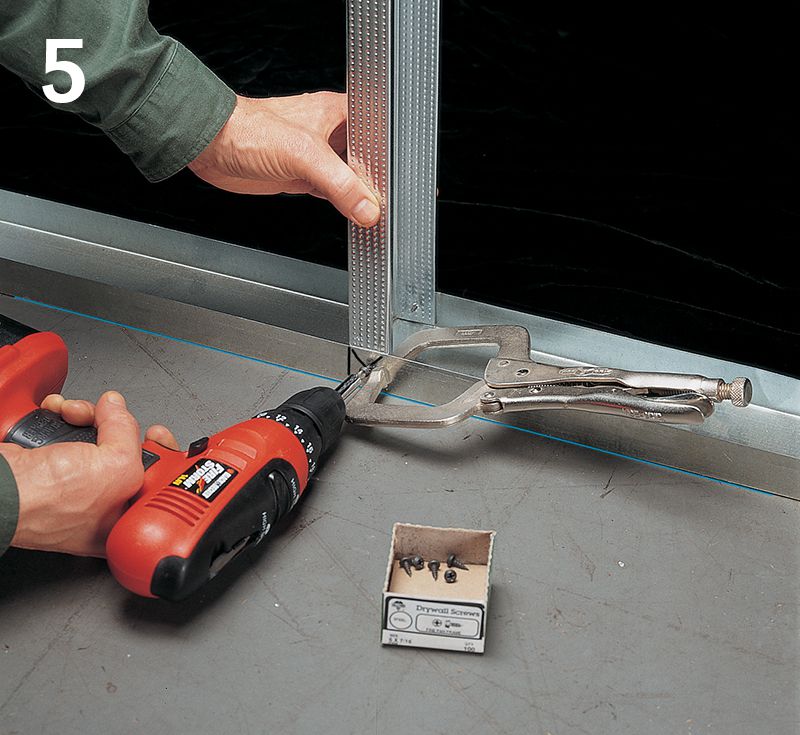
At the first stud location, measure between the tracks and cut a stud to length. Insert the stud into the tracks at a slight angle and twist into place. Note: Cut all subsequent studs from the same end so the punch-outs align.
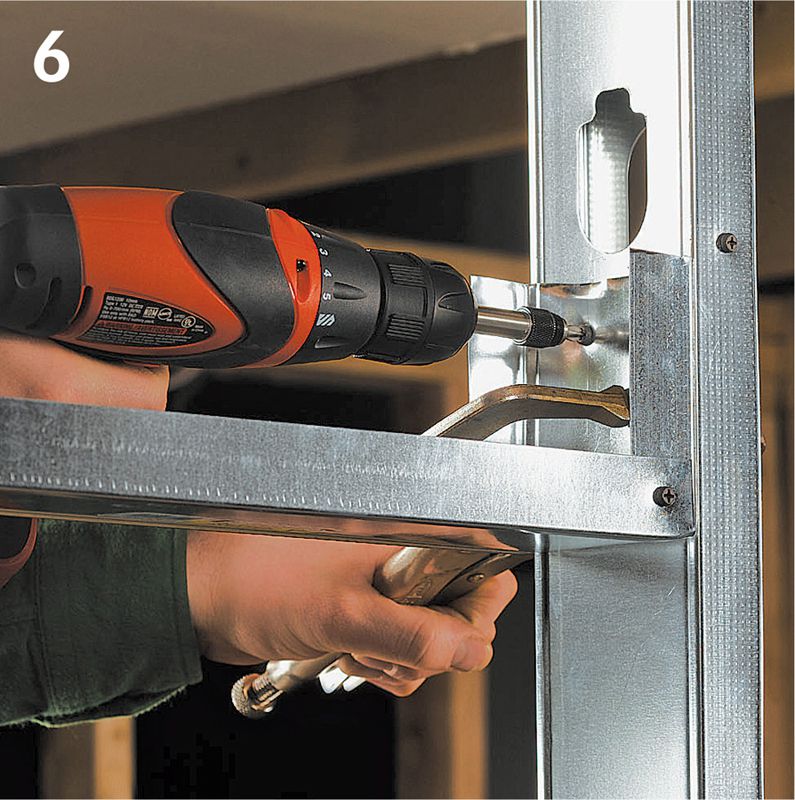
Clamp the stud flange to the track with C-clamp pliers and drive a 7/16" Type S panhead screw through the tracks into the stud. Drive one screw on each side at both ends of the stud. Install remaining studs so the open sides face the same direction (except at door-frame studs).
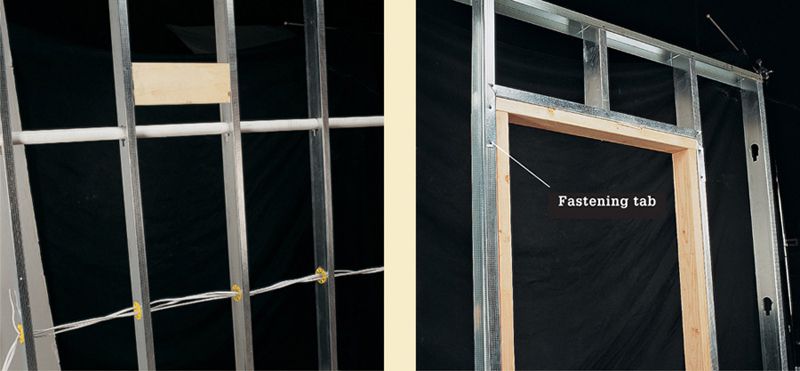
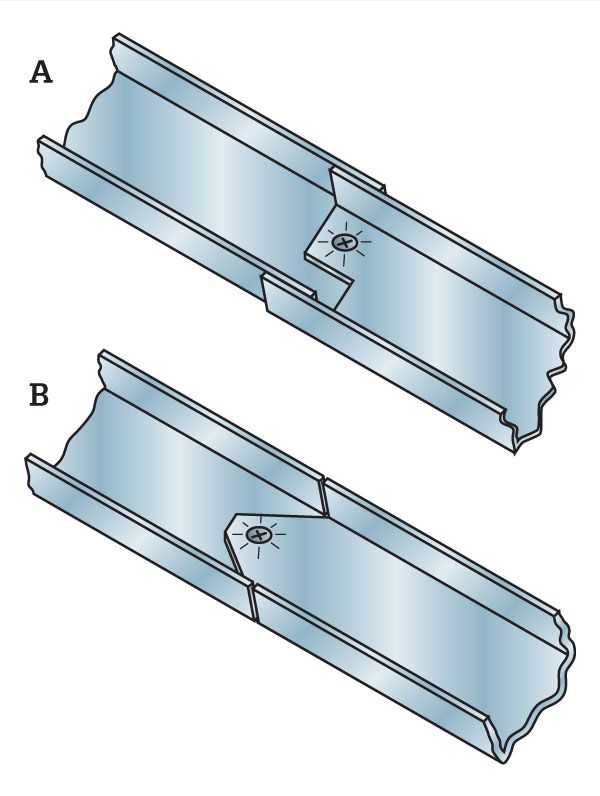
To install a door header, cut the track 8" longer than the opening. Measure in 4" at each end, cut the flanges at an angle toward the mark, then bend down the ends at 90°. Fasten the header in place with three screws at each stud—two through the fastening tab and one through the overlapping flange.
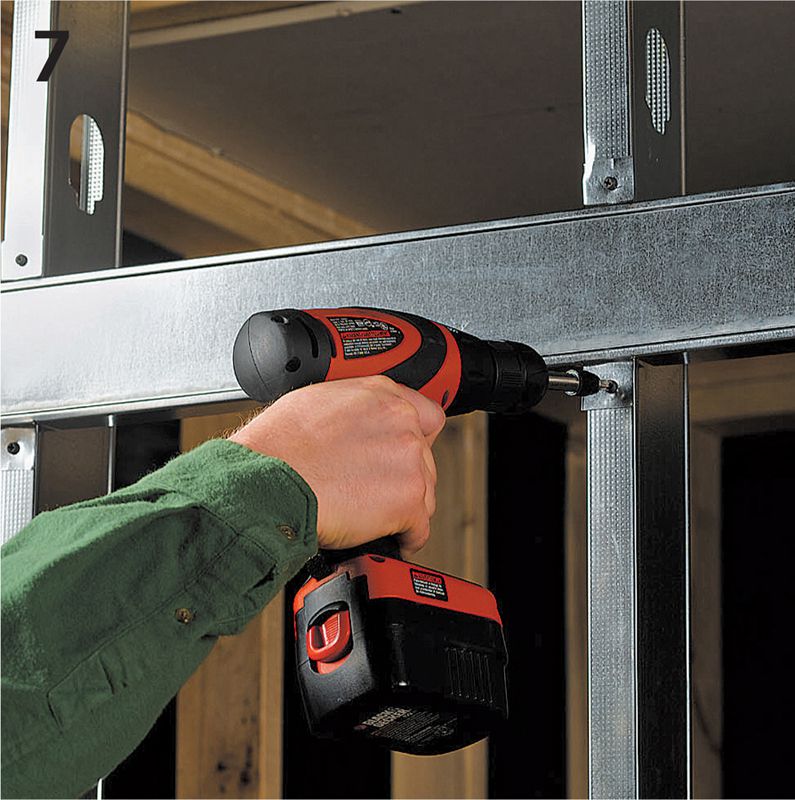
To provide running blocking for cabinets, wainscoting, or other fixtures, snap a chalk line across the face of the studs at the desired height, hold a track level at the line, then notch the flanges of the track to bypass the studs. Fasten the track in place with two screws at each stud location.