HOW TO…
• Launch the Browser app
• Scroll, zoom, and navigate from page to page
• Enjoy full Flash features on the Galaxy Tab
• Open multiple web pages at once
• Surf secretly with Incognito tabs
• Create and use bookmarks
• Go back to a web page in your history or a most-visited page
• Search for information
• Download files
• Choose custom settings for the Browser
• Use other web browsers
The Galaxy Tab’s screen is a good size for browsing the Web and reading web pages—especially when you turn the Galaxy Tab sideways and view the screen in landscape mode. In this chapter, I’ll show you how to browse the Web on the Galaxy Tab using the built-in Browser app.
If you’ve used a web browser on any kind of computer (desktop, laptop, tablet, or smartphone), you’ll grasp the basics of the Browser app in no time: Opening web pages, following hyperlinks, and moving back and forward along the list of pages you’ve visited works in much the same way as in most other web browsers. You’ll also quickly learn how to open multiple web pages at the same time and move among them, mark pages you want to return to with bookmarks, and navigate through your browsing history.
The Browser app comes with default settings that work pretty well when you’re getting started—but soon enough you’ll likely want to change some of them. So in the second half of the chapter, I take you through the settings the Browser offers, tell you what each setting does, and recommend choices for the most important settings. Dip into this section of the chapter when you’re ready to improve your browsing experience. At the very least, you’ll almost certainly want to change your home page from the page the Browser comes set to access each time you launch it. You may also want to protect your privacy by deleting your browsing history, preventing web sites from learning your location, or even tossing all your cookies if some of them seem to have gone bad.
At the end of the chapter, I’ll mention four other web browsers that you may want to use to supplement or replace the Browser app.
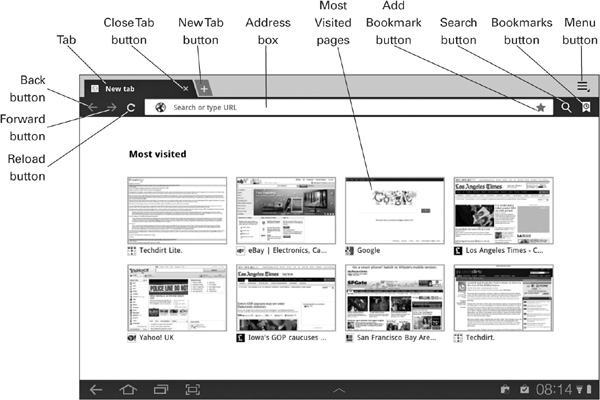
To start browsing the Web, launch the Browser by tapping the Browser button at the bottom of the home screen. Assuming the Galaxy Tab has an Internet connection, the Browser displays your Most Visited page, which is shown in Figure 7-1 with the Browser’s toolbar buttons and other items labeled.
FIGURE 7-1 From the Most Visited page, you can quickly go back to a web page you’ve visited before.
Two quick things here. First, some localizations of the Galaxy Tab call the Browser button the Web button—so look for a Web button on the home screen if you don’t see a Browser button. Second, the Most Visited page comes with some default web sites at first. The sites you visit most frequently replace these default sites as you use the Browser.

Instead of using the Most Visited page, you can make the Browser app display a single home page if you prefer. And you can change that home page to any web page you want to see. See the sections “Set Your Home Page” and “Choose Labs Settings,” both later in this chapter, for details.
To go to one of your most-visited web pages, tap its icon on the Most Visited screen. Tap one of the icons now to go to a page, even if the Most Visited page is still showing its default pages rather than pages you’re actually interested in.
With the Browser open, you’re ready to start browsing. In this section, you’ll learn how to scroll around a web page, zoom in and out, and navigate from one page to another.
Most web pages are larger than the Galaxy Tab’s screen can display at a readable size, so you’ll need to scroll around to see the parts you want. To scroll, drag your finger up, down, or across the screen. The Browser scrolls in the direction you drag.
You can zoom in as needed to display part of a web page at a larger size, or zoom out so that you can see more of a page at once:
• Zoom in Place your thumb and finger (or two fingers) on the screen, and then move them apart—“pinching out,” as it were.
• Zoom out Place your thumb and finger (or two fingers) apart on the screen, and then move them together.

You can also zoom in by double-tapping the screen, and zoom out by double-tapping again. The Browser zooms automatically to a degree of zoom that seems to fit; you may need to adjust the zoom manually by placing two fingers on the screen and pinching them together or moving them apart.
The easiest way to move from one web page to another is by following a hyperlink on the current page. Tap the hyperlink to open the linked web page in place of the current page.
A hyperlink may appear as text in a different color, underlined text (in the same color or a different color), as an icon (such as an arrow), or as a picture.
After you’ve moved to another page, you can tap the Back button on the toolbar to move back to the previous page. Tap the Back button again to go further back if you’ve browsed more than two pages. And after tapping the Back button one or more times, you can tap the Forward button to move forward again.
You can also go back to the previous page by tapping the Back button below the display. This works as long as there are previous pages to go back to. After that, you’ll find yourself back at the home screen.
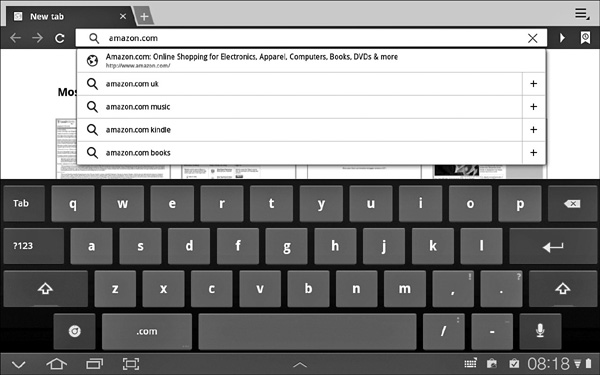
When you know the web address, or Uniform Resource Locator (URL), for the web site you want to go to, you can enter it in the Address box. Tap the Address box to place the insertion point there, and then start typing the address. If the suggestions list that appears below the Address box (see Figure 7-2) shows the URL you want to visit, tap it to go to the site.
FIGURE 7-2 The suggestions list below the Address box shows possible URLs and search terms as you type.
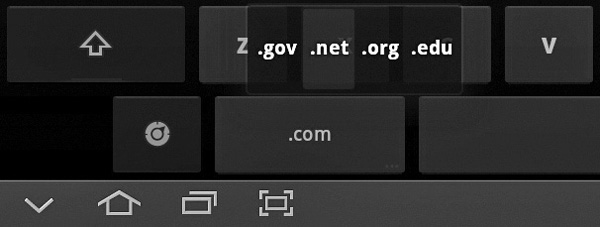
If you end up typing in the whole URL, tap the .com button to quickly enter the .com domain, or tap and hold down the .com button to display a pop-up panel of other domains (as shown here), then tap the domain you want.
To paste a URL into the Address box, tap and hold in the Address box. Then tap the Paste button on the Text Selection toolbar that appears at the top of the screen.
When you’re free to announce your web destinations aloud, you can speak a URL or search term. Follow these steps:
1. Tap the Address box to select it. The Browser automatically selects the URL in the Address box and displays the onscreen keyboard.
2. Tap the Microphone button to display the Speak Now dialog box (shown here). The location of the microphone button varies depending on which onscreen keyboard you’re using.
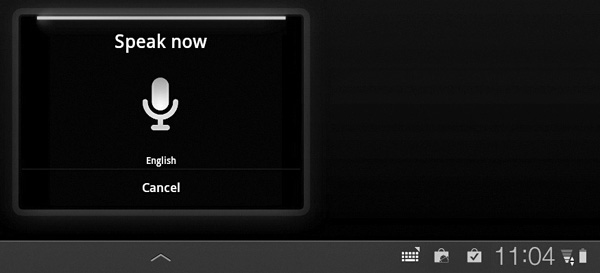
3. Speak the search term or the URL, and then wait while the Galaxy Tab thinks about it.
4. If one of the search results is what you want, tap it to open that web page.
Enjoy Full Flash Features on the Galaxy Tab
One of the Browser’s strengths is that it supports Adobe Systems’ Flash technology, which many web sites use to present active content. (By contrast, Apple’s iPad doesn’t support Flash at this writing, and so cannot fully display many web pages.)
To make the Browser capable of running all Flash features, you may need to install the Flash Player app on your Galaxy Tab. From the home screen, tap the Apps button, and then see if the Flash Player icon appears on the Apps screen. If so, Flash Player is installed, and you’re all set to view Flash content.
If the Flash Player app doesn’t appear on the Apps screen, tap the Market icon to launch the Market app. Search Android Market for “flash player,” and then follow through the steps for downloading and installing the latest version of the Flash Player app.
Opening a single web page at a time is fine for lightweight browsing, but often you’ll want to keep one web page open while you open another page. You can do this easily by using the Browser app’s tabs.
At first, the Browser app starts you off with a single tab, as you saw in Figure 7-1, earlier in this chapter. You can open another tab at any time by tapping the New Tab button, the button with a + sign to the right of the last tab that’s open (see Figure 7-3).
FIGURE 7-3 Tap the + button to the right of the rightmost tab to open a new tab. Tap the Close Tab button (the × button) on the current tab to close the tab.
When you open a new tab, the Browser app shows your Most Visited page in it. You can tap one of the icons on that page to open the corresponding web page in the new tab, or tap in the Address box and enter the URL for another page.
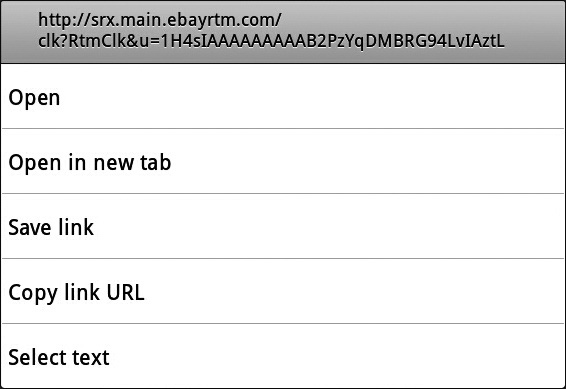
You can also open a new tab from a hyperlink on a page that’s already open. Instead of tapping the link to open it in the same page, tap and hold the link to display the dialog box shown here, then tap the Open In New Tab button.
You can also go to a page on the new tab by using a bookmark, as discussed later in this chapter.
To display a different tab, tap it.
To close the current tab, tap the Close Tab button (the × button) at the right side of the tab.
After you open a handful of tabs, the leftmost tabs disappear off the left edge of the Galaxy Tab’s screen. To display them again, tap your finger on whichever tab is displayed on the left side of the screen and drag it to the right, scrolling the tab bar across.
Surf Secretly with Incognito Tabs
When you don’t want a particular web page to show up in your history, you can use the Browser app’s Incognito feature. By opening a page in an Incognito tab, you prevent it from appearing in your history. You also prevent the page from leaving permanent cookies on the Galaxy Tab.
To open an Incognito tab, tap the Menu button, and then tap the New Incognito Tab item on the menu panel. The tab opens with a screen of information about Incognito browsing and an extra Incognito symbol on the tab itself to enable you to identify your Incognito tabs easily. Once the tab is open, you can go to a web site by using the usual techniques discussed in the main text.
When you find a web page that you want to be able to return to, create a bookmark for it. You can then go back to it easily at any point without having to remember or type the address. To keep your bookmarks in order and make them easy to find, you can organize them into different folders.
To create a bookmark, follow these steps:
1. Go to the web page you want to bookmark.
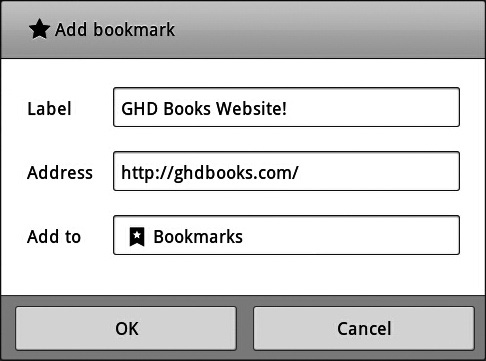
2. Tap the Add Bookmark (star icon) button to display the Add Bookmark dialog box (see Figure 7-4).
FIGURE 7-4 Use the Add Bookmark dialog box to create a bookmark for a web page you want to be able to access again quickly.
3. In the Label text box, type the name you want to give the bookmark. The Galaxy Tab suggests the page’s title, but you’ll often want to type something shorter, more descriptive, or both.
4. If you want to put the bookmark in the folder currently shown in the Add To drop-down list, skip this step. Otherwise, tap the Add To drop-down button to display the drop-down list, and then tap one of the items:
• Home Screen Tap this item to put the bookmark on the home screen. You can then open the bookmarked web page by tapping the icon on the home screen. This is great for sites you visit frequently.
• Bookmarks Tap this item to put the bookmark at the top level. This gives you quick access to the bookmark, but you’ll want to put only your most important bookmarks here—otherwise, it gets crowded.
• Other Folder Tap this item to display the list of subfolders in the Bookmarks dialog box, as shown on the left in the next illustration. (To create a new subfolder, tap the New Subfolder button, the + button in the upper-right corner. Then type the subfolder name in the text box that appears, as shown on the right in the next illustration, and tap the OK button.) Tap the subfolder you want to put the bookmark in, and if necessary tap another subfolder within that subfolder. When you’ve opened the right subfolder, tap the OK button.

5. Tap the OK button to close the Add Bookmark dialog box.
To go to a bookmark, follow these steps:
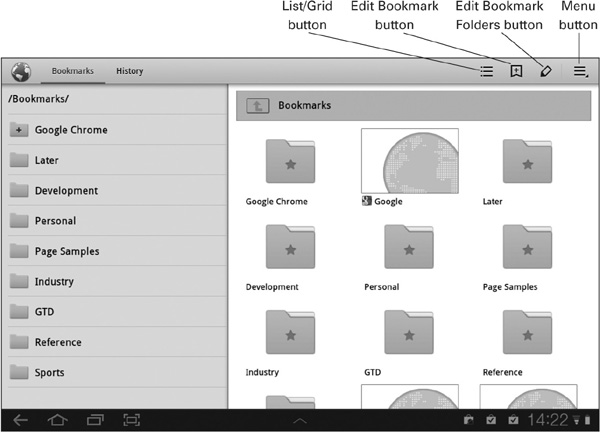
1. In the Browser, tap the Bookmarks button to display the Bookmarks screen (see Figure 7-5).
FIGURE 7-5 From the Bookmarks screen, you can quickly go to a bookmark, add a new bookmark, or edit an existing bookmark.
2. If the bookmark appears directly on the screen, tap it. If not, tap the folder that contains it, then tap the bookmark in the folder. The Browser hides the Bookmarks screen and displays the web page associated with the bookmark.
As you collect bookmarks, you’ll probably need to organize them into different folders. To do so, follow these steps:
1. In the Browser, tap the Bookmarks button to display the Bookmarks screen.
2. If the bookmark is in a folder rather than directly on the screen, tap the folder to open it.
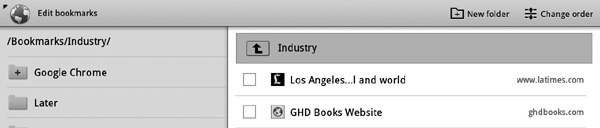
3. Tap the Edit Bookmark button. The Browser displays a list of the bookmarks in the folder, as shown here.
4. Tap the bookmark you want to move. The Browser displays the bookmark’s details in the Edit Bookmarks dialog box.
5. Open the Add To drop-down list, and then tap the appropriate item:
• Home Screen Tap this item to put the bookmark on the home screen.
• Bookmarks Tap this item to put the bookmark at the top level.
• Other Folder Tap this item to display the list of subfolders, tap the subfolder to which you want to move the bookmark, and then tap the OK button. You can create a new subfolder by tapping the New Subfolder button (the + button in the upper-right corner), typing the name, and then tapping the OK button.
When you’ve opened the Edit Bookmarks dialog box, you can also change the bookmark’s name if you want.
6. Tap the OK button to close the Edit Bookmark dialog box.
When you no longer need a bookmark, delete it. Follow these steps:
1. In the Browser, tap the Bookmarks button to display the Bookmarks screen.
2. If the bookmark is in a folder rather than directly on the screen, tap the folder to open it.
3. Tap the Edit Bookmark button. The Browser displays a list of the bookmarks in the folder.
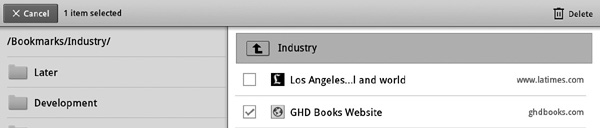
4. Tap to select the check box for each bookmark you want to delete. As soon as you select a check box, a Delete button appears on the toolbar at the top of the screen, as shown here.
5. Tap the Delete button. The Browser displays the Delete dialog box (shown here).
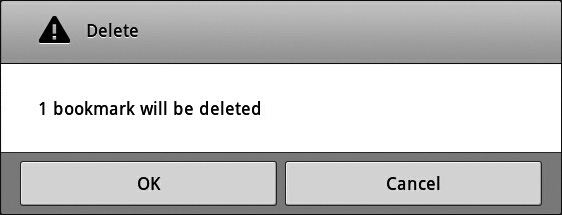
6. Tap the OK button.
As you browse the Web, the Browser automatically stores the list of web pages you visit. You can use this list, which is called your history, to quickly go back to sites you visited before (and perhaps didn’t bookmark). The Browser also tracks the web pages you visit most often, adding them to the Most Visited page, which gives you another handy way of identifying and accessing useful or amusing pages.
To go back to a web page in your history, follow these steps:
1. In the Browser, tap the Bookmarks button to display the Bookmarks screen.
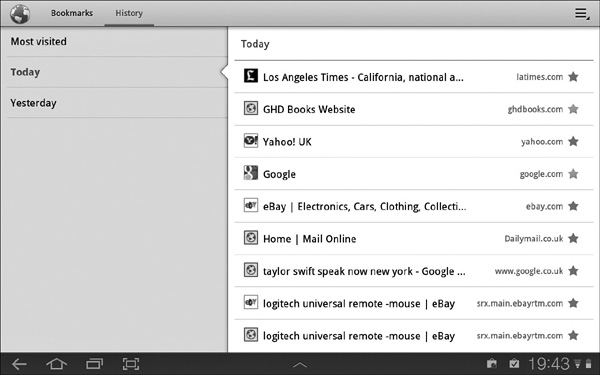
2. In the upper-left corner of the screen, tap the History button to display the History screen (shown in Figure 7-6). A gold star to the right of a history item indicates you’ve bookmarked the page already.
FIGURE 7-6 The History screen gives you instant access to all the web pages you’ve browsed recently, even if you haven’t bookmarked them.
3. In the left column, click the category you want to see: Most Visited, Today, Yesterday, or another category, such as Last 7 Days or Last Month. The History screen displays the list of sites visited.
The categories in the left column of the History screen change depending on which history is available. For example, when you’re starting out with the Browser app, you won’t see the Last 7 Days category or the Last Month category.
4. Tap the button for the web page you want to visit.
To go back to one of the pages you’ve visited most, display the History screen as described in the previous list, tap the Most Visited button, and then tap the page you want to display. Alternatively, with any web page open in the Browser, tap the New Tab button to open a new tab, which automatically displays the icons for your Most Visited pages, then tap the icon for the page you want to display.
If you don’t want other users of your Galaxy Tab to be able to see which web pages you’ve visited, you can clear your history by tapping the Menu button and then tapping the Clear History item on the menu panel. In the Clear dialog box that opens, tap the OK button.
To get the most out of the Web, you’ll often need to search for information. To find the web pages you want, you usually use a search engine such as Google, Yahoo!, or Bing. To find a particular piece of information on a web page you’ve opened, you can search within that page.
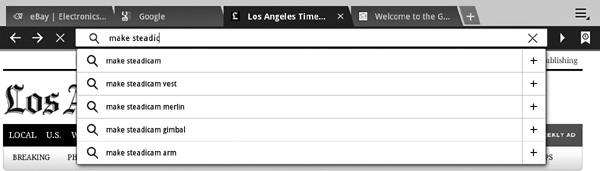
To search using Google, you don’t need to display the Google web page in the Browser—all you need to do is tap the Address box, and then type in your search terms. The Browser searches Google and displays results, as shown in Figure 7-7. Tap the result you want to display.
FIGURE 7-7 To find pages on the Web, search directly from the Address box.
To search for information using a search engine other than Google, display that search engine’s web page in the Browser app. For example, to use Yahoo!, go to the www.yahoo.com web page. You can then enter your search terms and get the results.
You can also change the Browser app’s default search engine from Google to Yahoo! or Bing. I’ll show you how to do this later in this chapter.
To find a particular word or phrase on the current web page, follow these steps:
1. Tap the Menu button to display the menu panel.
2. Tap the Find On Page item to display the Find On Page controls, shown here.

3. Type (or paste) the search term in the text box. The Browser shows the number of matches and scrolls the page (if necessary) enough to highlight the first match.
4. Tap the Forward button or Back button to move among the matches. When you tap one of these buttons, the Browser hides the keyboard and selects the next match or previous match.
5. Tap the × Cancel button in the upper-left corner of the screen when you’ve finished using the Find On Page controls.
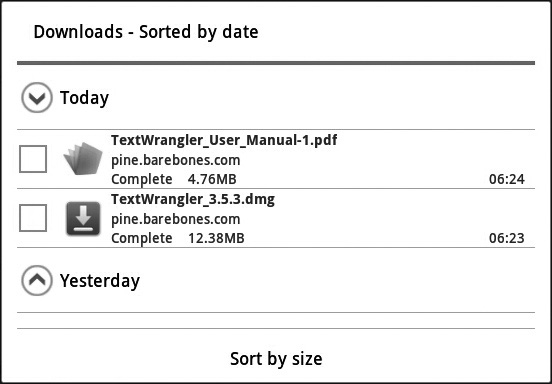
When you tap the link to start downloading a file, the Browser briefly displays a Starting Download message onscreen. If you want to control or stop the download, tap the Menu button to display the menu panel, and then tap the Downloads button to display the Downloads dialog box (shown here).
From the Downloads dialog box, you can take the following actions:
• Open the downloaded file Once the download finishes, tap the file’s button to open it in a suitable app. If the Complete Action Using dialog box opens, as shown here, tap the button for the app you want to use. (If you always want to use this app, tap to select the Use By Default For This Action check box before tapping the app’s button.)

If the Galaxy Tab doesn’t have a suitable app to open the downloaded file, you’ll get no reaction when you tap the file to try to open it.
• Cancel the download Tap to select the check box to the left of the file’s listing, and then tap the Cancel button in the upper-left corner of the screen.
• Remove the listing of the downloaded file Tap to select the check box to the left of the file’s listing, and then tap the Delete button in the upper-right corner of the screen.
• Sort the files by size or by date To switch to sorting by size, tap the Sort By Size button at the bottom of the Downloads dialog box. To switch back to sorting by date, tap the Sort By Date button that replaces the Sort By Size button.
• Close the Downloads dialog box Tap the Back button, or simply tap in the Browser window outside the Downloads dialog box.
If you use the Browser a lot, spend a few minutes choosing custom settings to make the Browser work your way. The Browser has a large number of settings that let you make major adjustments to the way it works. In particular, you may want to change the default zoom level and switch the home page to a page of your choosing rather than your carrier’s choosing.
To start configuring settings for the Browser, open the Browser’s Settings screen. Follow these steps:
1. Launch the Browser if it’s not running, or switch to it if it is running.
2. Tap the Menu button to display the menu panel.
3. Tap the Settings item to display the Settings screen.
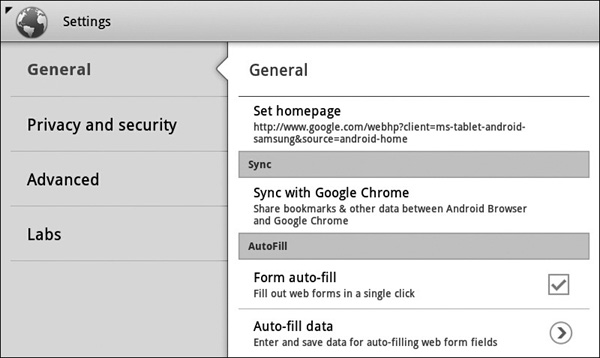
The Settings screen contains four separate categories—General, Privacy and Security, Advanced, and Labs—which you navigate among by tapping the categories in the list on the left. Figure 7-8 shows the General category of settings.
FIGURE 7-8 In the General category of the Settings screen for the Browser, you can set your home page, choose sync options, and control AutoFill.
Start by tapping the General category to display its contents, and then choose settings as described in the following sections.
To set your home page, follow these steps:
1. Tap the Set Homepage button at the top of the General category in Settings to display the Set Homepage dialog box (shown here).
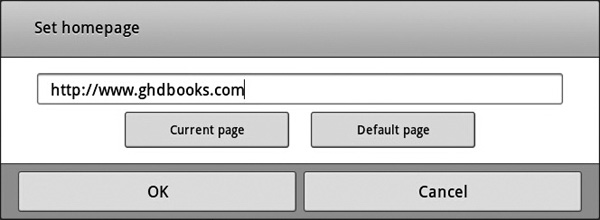
2. Enter the URL of the web page in the text box in one of these ways:
• Type the URL.
• If you’ve navigated to the page you want in the Browser, tap the Current Page button.
• If you’ve copied the page’s URL, tap in the text box, and then tap the Paste button that appears on the toolbar.
• If you want to go back to the Browser app’s default page, tap the Default Page button.
3. Tap the OK button. The Set Homepage dialog box closes, and the Set Homepage readout in the General category shows the page you chose.
If you use the Google Chrome web browser on your computer, you can set the Browser app on the Galaxy Tab to sync your bookmarks and other data with Google Chrome. This is a handy way of getting your bookmarks from your computer to the Galaxy Tab.
To set up sync with Google Chrome, tap the Sync With Google Chrome button in the General category in Settings, and then follow the prompts for selecting the account (as shown here) and performing the sync.

If you’ve created bookmarks on the Galaxy Tab, the Browser prompts you to choose between adding them to your Google Account and deleting them. Normally, you’ll want to select the Add Bookmarks To Google Account option button, but if the bookmarks are duplicates of ones your Google Account already contains, select the Delete Bookmarks option button instead.
The Browser app’s AutoFill feature can automatically fill in standard data, such as your name and address, in forms for you. Once you’ve set it up with the right information, AutoFill can save you plenty of time and typing.
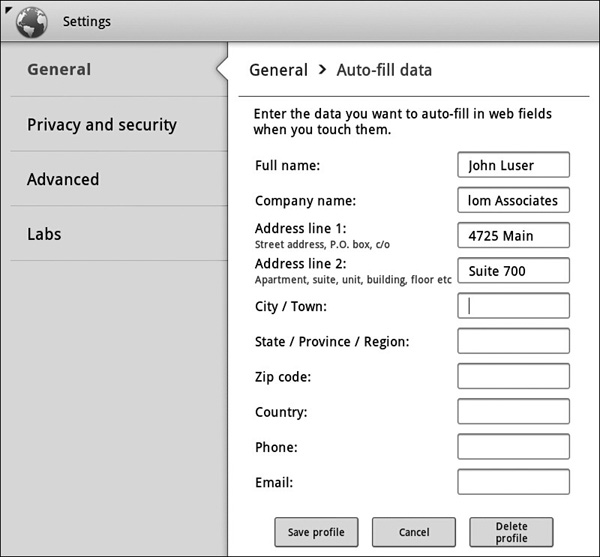
If you want to use AutoFill, select the Form Auto-Fill check box in the AutoFill area of the General category in Settings. Then tap the Auto-Fill Data button to display the Auto-Fill Data screen (see Figure 7-9), type the data you want to use, and then tap the Save Profile button.
FIGURE 7-9 On the Auto-Fill Data screen, enter the name and address data you want the Browser app to automatically enter in web forms for you, and then tap the Save Profile button.
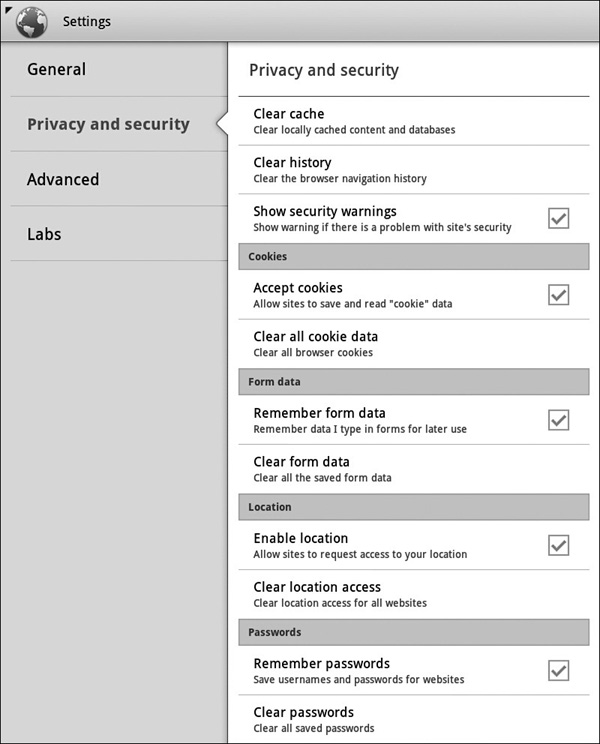
Next, tap the Privacy And Security category on the left of the Settings screen to display its settings (see Figure 7-10).
FIGURE 7-10 In the Privacy And Security category, choose which data you will let the Browser app store about you. From here, you can clear the cache, history, cookies, form data, location access, and saved passwords.
At the top of the Privacy And Security category, you can choose these three settings:
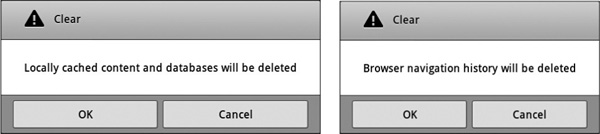
• Clear Cache To clear the information that the Galaxy Tab has stored in its cache, tap this button, and then tap the OK button in the Clear dialog box that opens (shown on the left in the next illustration). The cache is an area of memory in which the Browser app stores information that it may need to access quickly in the future. Caching information helps speed up web browsing, so it’s usually a good idea to leave the cache information on your Galaxy Tab. But the cache may contain confidential or otherwise sensitive information—which is why you may want to clear it for safety.
• Clear History When you want to get rid of the details of the web sites you’ve visited, tap the Clear History button. In the Clear dialog box that opens (shown on the right in the next illustration), tap the OK button.
• Show Security Warnings Select this check box if you want the Browser to display a warning if it detects a problem with the security of a web site you’re visiting. This is almost always a good idea.

Which Privacy Settings Should You Worry About?
The Web is wonderful, but when you browse it, you leave traces both on the sites you visit and on the Galaxy Tab. These are the three main types of information you need to worry about:
• History Like most web browsers, the Galaxy Tab’s Browser keeps a list of the web pages you visit so as to help you return to them quickly. This list is called your history. You can clear your history when you don’t want someone else who uses your Galaxy Tab to be able to see the sites you’ve visited—for example, because you accidentally visited an embarrassing site.
• Cookies A cookie is a small text file stored on your computer (in this case, the Galaxy Tab) that helps a site track the pages you visit—for example, so that it can maintain for you a shopping cart or a list of products you’ve browsed. You can clear cookie data when you want all web sites to forget who you are—for example, because you’ve accessed some sites that you want to forget you. If you clear cookies, next time you visit any site on which you have an account (for example, Amazon.com or eBay), you’ll need to enter your login details again.
• Location As you learned in Chapter 2, the Galaxy Tab can determine its location either by consulting the Global Positioning System satellites or by feeling out known wireless networks around you. If you choose, the Galaxy Tab can make your location available to web sites—for example, so that a search engine can give you results that are geographically close to you. Giving your location to web sites raises privacy concerns, so you may prefer to set the Browser to not provide location information automatically; you can then provide the location information manually only when you need location-specific search results.
In the Cookies section of the Privacy And Security category, choose settings to control how the Browser app handles cookies:
• Accept Cookies Select this check box if you want sites to be able to save cookies on the Galaxy Tab. Cookies can infringe your privacy, but many sites don’t work correctly without cookies, so you’ll probably want the Browser to accept them.
• Clear All Cookie Data When you want to get rid of the details of the cookies stored on the Galaxy Tab, tap this button, and then tap the OK button in the Clear dialog box that opens.
In the Form Data section of the Privacy And Security category, choose settings to control how the Browser app handles form data:
• Remember Form Data Select this check box if you want the Browser to store data you enter in forms on web pages so that it can provide that data for you automatically next time you visit that site. For example, the Browser can offer to store your address so that it can fill it in automatically for you in the future.
• Clear Form Data If you want to get rid of form data the Browser has stored, tap this button, and then tap the OK button in the Clear dialog box that opens. Next time you visit any site for which the Browser had stored form data, you’ll need to enter the data again.
In the Location section of the Privacy And Security category, choose settings to control how the Browser app handles requests from apps for your location:
• Enable Location Select this check box if you want web sites to be able to request your location from the Browser app. By giving web sites access to your location, you can get more targeted search results. But you may prefer to turn off this feature and provide your location manually only when it is necessary (for example, when you need to find the best Chinese restaurant in your ZIP code).
• Clear Location Access If you want to prevent web sites you’ve previously allowed to request your location from requesting it again automatically, tap this button, and then tap the OK button in the Clear dialog box that opens.
In the Passwords section of the Privacy And Security category, choose settings to control whether the Browser app stores your user names and passwords:
• Remember Passwords Select this check box if you want the Browser to remember user names and passwords you enter for sites so that it can provide them automatically next time you visit. Saving the user names and passwords like this saves time and effort, but it means that anyone who commandeers your Galaxy Tab can masquerade as you.
• Clear Passwords To make the Browser get rid of all the passwords it has saved, tap this button, and then tap the OK button in the Clear dialog box that opens.
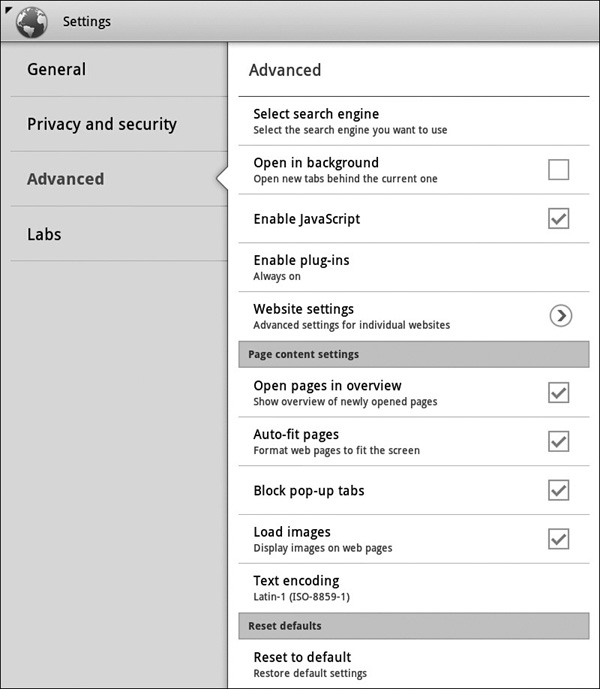
Next, tap the Advanced category on the left of the Settings screen to display its settings (see Figure 7-11). You can then choose settings as discussed in the following subsections.
FIGURE 7-11 In the Advanced category of the Settings screen, you can choose your search engine and other assorted settings, select page content settings, or reset the Browser app to its default settings.
The upper part of the Advanced category contains these five settings:
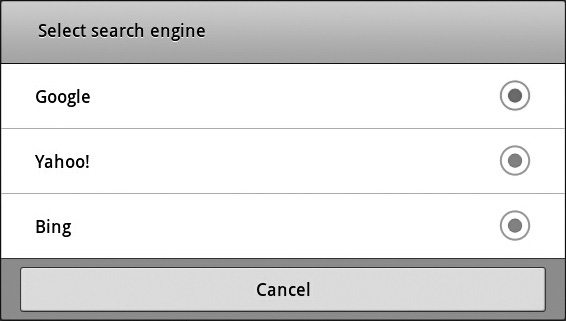
• Select Search Engine The Galaxy Tab typically comes set to use Google as its search engine. If you prefer to use Yahoo! or Bing instead, tap the Select Search Engine button, and then tap the appropriate option button in the Select Search Engine dialog box (shown here).
• Open In Background Select this check box if you want each new tab to open behind the current page rather than in front of it. This setting is good for going to a news site, opening a bunch of other pages from its links, and then reading them in turn.
• Enable JavaScript Select this check box if you want the Browser to be able to run scripts written in the JavaScript scripting language. Many web pages use JavaScript to implement functionality, such as showing updated information, so normally you want to use JavaScript. The downside to running JavaScript is that a malicious web site can use a script to attack your computer. Because the Galaxy Tab runs the Android operating system rather than Windows (which is the main target of malicious hackers), you’re fairly safe enabling JavaScript—but not entirely safe.
• Enable Plug-Ins To change which plug-ins the Browser runs, tap this button. In the Enable Plug-Ins dialog box (shown here), tap the appropriate option button:
• Always On Tap this option button if you want to enable every plug-in.

• On Demand Tap this option button if you want the Browser to block plug-ins but allow you to run the ones you want. The Browser displays a placeholder—a box containing a downward-pointing arrow—to indicate a plug-in. Tap this button to enable all the plug-ins on the page. This setting enables you to check out a web page without running its plug-ins, so it can help you avoid plug-ins that are malicious or that take huge amounts of memory.
• Off Tap this option button when you want to turn plug-ins off and not have the option of turning them on for a page.
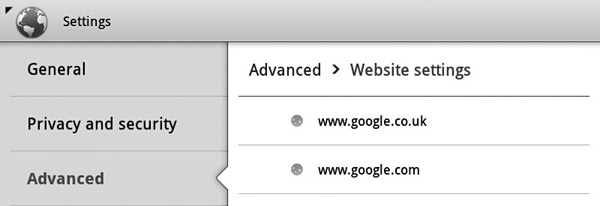
• Website Settings When you need to change the settings for a particular web site, tap this button, and then work on the Website Settings screen (the top part of which is shown here). From here, tap a web site to display your options for configuring it, and then tap the appropriate button. For example, tap the Clear Location Access button to prevent the web site from accessing your location, or tap the Clear Stored Data button to delete the data the web site has stored on the Galaxy Tab.
In the Page Content Settings area of the Advanced category, you can choose the following settings:
• Open Pages In Overview Select this check box if you want the Browser to open a page in Overview mode, in which it fits the web page to the screen, rather than zooming in. Overview mode is usually useful, because it lets you see more of the page at once and choose the part you want to focus on.
• Auto-Fit Pages Select this check box if you want the Browser to automatically resize web pages to fit the screen. Web pages come in all shapes and sizes, and this feature doesn’t always work as well as you’d want it to, but it’s well worth trying. If Auto-Fit Pages doesn’t get the page to a suitable size, you can change the zoom by pinching in or out or by double-tapping.
• Block Pop-Up Tabs Select this check box to try to prevent web sites from displaying pop-up windows. Pop-up windows are often used for displaying content most people wouldn’t normally summon up (such as discount medications, mail order brides, and specialist publications), so suppressing them is usually a good idea. But if you go to a bona fide web site that uses pop-up windows to display extra information about products, you may need to clear the Block Pop-Up Tabs check box to allow the site to work correctly.
• Load Images Select this check box if you want the Browser to load pictures automatically when it displays a web page. Normally, you’ll want to do this, but if you have a really slow Internet connection, you may want to turn pictures off to make pages display more quickly.
• Text Encoding If a page appears to have weird characters, you may be able to fix the problem by tapping this button, and then tapping the option button for the appropriate character set in the Text Encoding dialog box. But usually you’ll find that the default settings work well.
At the bottom of the Advanced category is the Reset Defaults section, which contains just one control—the Reset To Default button.
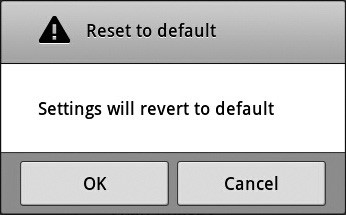
If you want to return the Browser to its default settings, tap the Reset To Default button, and then tap the OK button in the Reset To Default dialog box (shown here). You may want to do this if you’ve changed settings and gotten unsatisfactory results, but you’re not sure which setting is causing the problem.
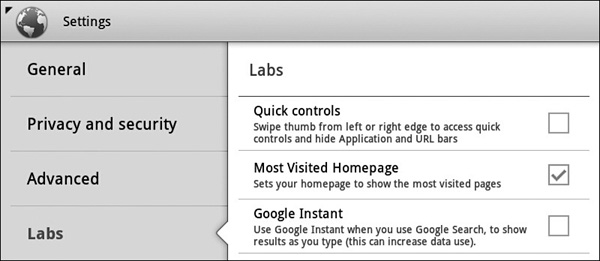
Finally, tap the Labs category to display the settings it contains. These settings may vary depending on which build of Android your Galaxy Tab is using, but you will typically find settings such as those shown in Figure 7-12:
FIGURE 7-12 In the Labs category on the Settings screen, you can turn various experimental settings on or off.
• Quick Controls Select this check box to turn on the Quick Controls feature, which lets you swipe your thumb to hide the Browser’s toolbar and URL bar and instead navigate with pop-up controls that appear on the screen. You can see these pop-up controls on the right side of the screen in Figure 7-13.
FIGURE 7-13 The Quick Controls feature removes the Browser’s toolbar and URL bar and provides pop-up controls for navigation.
Use Other Web Browsers
The Galaxy Tab’s Browser app works well for standard web browsing, but you may want to try other browsers as well or instead. You can find a good selection of browsers on Android Market for free. At this writing, these are the four best browsers—but if none of these suits you, try searching for others:
• Skyfire Skyfire is a neatly built browser that features strong integration with Facebook. Skyfire can grab much of its data from a proxy server, which can help you reduce the rate at which you munch your way through a limited data plan.
• Firefox Firefox is the Android version of the web browser that is currently challenging Internet Explorer. Among other tricks, Firefox can synchronize bookmarks and other information with your desktop computer, which helps make the Galaxy Tab behave more like an extension of your desktop computer rather than a separate computer.
• Dolphin Browser HD Dolphin Browser HD features a tabbed interface, in which you can open multiple pages, each on a different tab. You may find tabs easier to navigate than the separate windows that the Browser uses.
• opera Mobile Opera Mobile is a powerful browser that includes Facebook integration. If you’ve used and liked the PC or Mac version of Opera, you’ll want to try Opera Mobile.
• Most Visited Homepage Select this check box to make the Browser app show your Most Visited page in place of the home page you’ve set in General settings.
• Google Instant Select this check box to have Google Search deliver results as you type. This feature can save you time, but on a 3G Galaxy Tab it may increase your usage of wireless data—so keep an eye on your plan.
When you finish choosing settings on the Settings screen, tap the Back button to return to the Browser window and resume browsing.