14
Troubleshoot and Update the Galaxy Tab
HOW TO…
• Deal with an app that has crashed
• Force close an app
• Recover from operating system crashes
• Restart when the Galaxy Tab stops responding to the touch screen
• Back up your data and settings
• Restore the Galaxy Tab from a backup on your PC
• Reinstall the Kies driver on your PC
• Restore the Galaxy Tab to factory settings
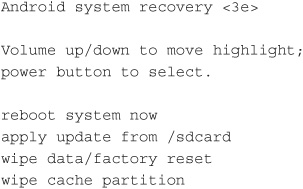
• Restore the Galaxy Tab to factory settings if Android won’t load
• Update the Galaxy Tab’s firmware to the latest version
• Avoid causing problems with the firmware upgrade
In this chapter, I’ll show you how to troubleshoot problems you’re likely to run into with the Galaxy Tab. We’ll start by looking at how to deal with app crashes, then move on to operating system crashes and touch-screen sulkiness before covering backup and restoration—including how to restore the Galaxy Tab to its factory settings when things go seriously awry.
You’ll also learn how to keep the Galaxy Tab in good shape by installing firmware updates.
Deal with an App That Has Crashed
When an app crashes, it may simply disappear from view; it may spread digital detritus all over the screen; or it may simply keep displaying whichever screen you were on, and resolutely refuse to acknowledge button taps.
If the app is still visible, follow these steps to close it:
1. Tap and hold the Home button until the Task Manager dialog box appears on the screen with the Active Applications tab at the front (see Figure 14-1). This screen shows a list of all the apps that are running.
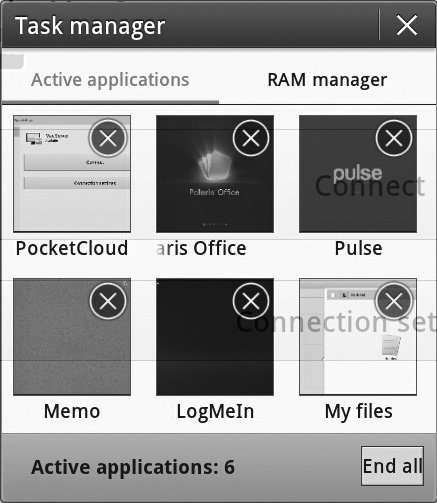
FIGURE 14-1 On the Active Applications tab in the Task Manager dialog box, tap the × button for the app you want to close.
2. Tap the × button for the app you want to close.
3. When you finish closing apps, tap the × button in the upper-right corner of the Task Manager dialog box to close it.

From the Active Applications tab in the Task Manager, you can also end all the running apps by tapping the End All button. Normally, you don’t need to do this, but it may sometimes become necessary.
Recover from Operating System Crashes
Normally the Galaxy Tab’s operating system, which is called Android, runs smoothly and stably for days or weeks on end. But if Android crashes, you’ll need to shut the Galaxy Tab down to recover.
Before shutting down the Galaxy Tab, make sure that Android has crashed rather than just taken a timeout—you may find that the Galaxy Tab has stopped responding for a moment while Android knocks some misbehaving chunk of code on the head and heaves it overboard, so give the Galaxy Tab a few seconds to start responding to your caresses again. If you’re not getting a response from the main part of the touch screen, try tapping the Home button. If that works, you should be back in business—or you should at least be able to open the Task Manager and end any apps that seem to be causing problems.
If you get no response to the Home button, press and hold down the power button until the Tablet Options dialog box (shown here) appears. Tap the Power Off button to display the Power Off dialog box, then tap the OK button to power the Galaxy Tab down.
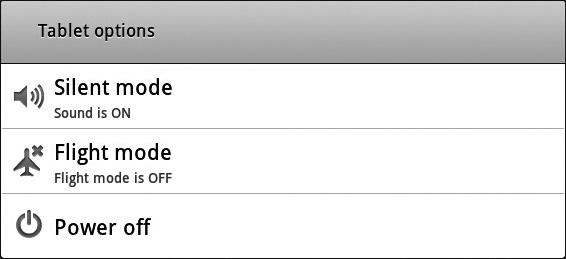
If the Tablet Options dialog box doesn’t appear, keep holding down the power button for a few more seconds until the Galaxy Tab shuts down.
Whichever way you shut the Galaxy Tab down, give it a few seconds to contemplate the meaning of nothingness while you savor your potency. Then press and hold down the power button for a couple of seconds until the Galaxy Tab logo appears on the screen and the device starts booting.
Restart When the Galaxy Tab Stops Responding to the Touch Screen
If the Galaxy Tab responds only slowly or jerkily to the touch screen, the problem may be that your fingers are too cold or dirty to give the screen the electrical sensations it spends its whole life longing for. Assess your fingers for ice or grime, strip off any offending substance, and try again.

Because the Galaxy Tab’s screen is designed to respond to fingers, you can’t use the screen with full-fingered gloves on, though fingerless gloves or gloves with the thumb and trigger finger free work pretty well. But if you need to use the Galaxy Tab in conditions severe enough to freeze your fingertips, you may be able to use a jerky-style smoked sausage instead. This tip comes from South Korea, where the ambient temperature can be even frostier than the diplomatic relations with its northern neighbor.
If the Galaxy Tab stops responding to the touch screen altogether, you’ll usually need to restart it. Use the technique described earlier in this chapter. A restart normally clears minor bugs that have cropped up.
If you’ve managed to break the touch screen, take the Galaxy Tab to a service center.
As I mentioned in Chapter 1, arming the Galaxy Tab’s screen with a screen protector is usually a good idea. But you have to get the right kind of screen protector. If your screen protector is thick enough to prevent the Galaxy Tab from reading your taps accurately, junk the screen protector and get a more sensitive one. You can get standard screen protectors from eBay for a dollar or two, but you may prefer to go with heavier-duty ones such as those made by Zagg (www.zagg.com).
Back Up Your Data and Settings
Like most tablet computers, the Galaxy Tab is designed to be your constant companion through daily life (but perhaps not share your shower or your bed) and to take its ration of life’s daily knocks.
In case you damage or lose the Galaxy Tab, you’ll want to back up your settings and your data so that you can restore them to the Galaxy Tab when you repair or replace it.
To keep your settings safe, you can set the Galaxy Tab to back them up to Google’s servers and to automatically restore them as needed. To keep your data safe, you can back it up to your PC using Kies.
Android Market automatically keeps a list of the apps you’ve installed on the Galaxy Tab. You can reinstall the apps you’ve purchased without paying for them again.
Back Up Your Settings and Data to Google’s Servers
To keep your Galaxy Tab’s settings protected, back them up to Google’s servers like this:
1. From the home screen, tap the notifications area to display the notifications panel.
2. Tap the Settings button to display the Settings screen.
3. Tap the Privacy button to display the Privacy screen (shown here).
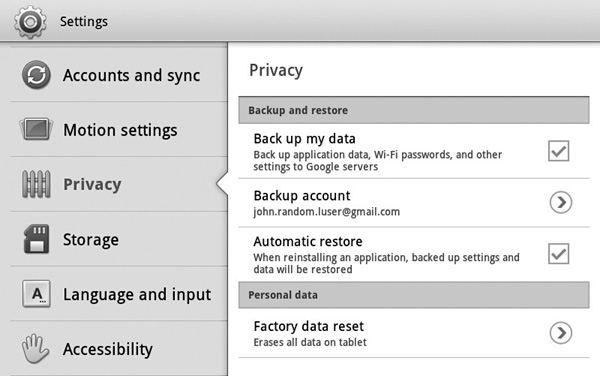
4. In the Backup And Restore area, select the Back Up My Data check box.
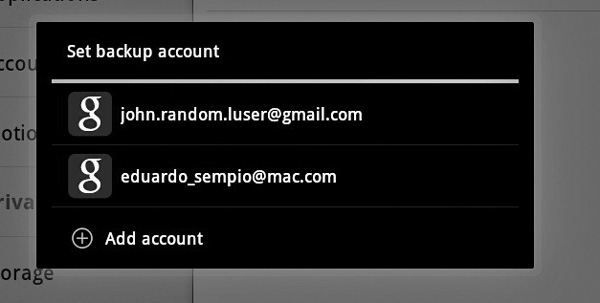
5. Look at the Backup Account button. If the readout shows a different account than the one you want to use, tap the Backup Account button to display the Set Backup Account dialog box (shown here), and then tap the account to use. If the account doesn’t appear in the Set Backup Account dialog box, tap the Add Account button and follow the steps to add it.
6. While you’re on the Privacy screen, select the Automatic Restore check box as well. This setting makes the Galaxy Tab automatically restore your backed-up settings and data when you restore an app.
Back Up the Galaxy Tab to Your PC
To keep your data safe, back it up to your PC using Kies so that you can restore it when you need to.
At this writing, Kies for the Mac doesn’t provide backup and restore features.
It’s a good idea to back up regularly as a matter of course—daily, weekly, or however frequently you can manage consistently. But you should also back up immediately before you perform any heavy-duty troubleshooting moves, such as restoring the Galaxy Tab to factory settings (as discussed in the next section).
To back up the Galaxy Tab to your PC, follow these steps:
1. Connect the Galaxy Tab to your PC.
2. Launch Kies if it doesn’t automatically launch itself.
3. Wait for the Galaxy Tab’s item to appear in the Connected Devices list at the top of the left pane in the Kies window.
4. If Kies doesn’t automatically select the Galaxy Tab’s item in the Connected Devices list, click the Galaxy Tab’s item to display the control screens.
5. Click the Back Up/Restore tab to display the Back Up/Restore screen (see Figure 14-2).
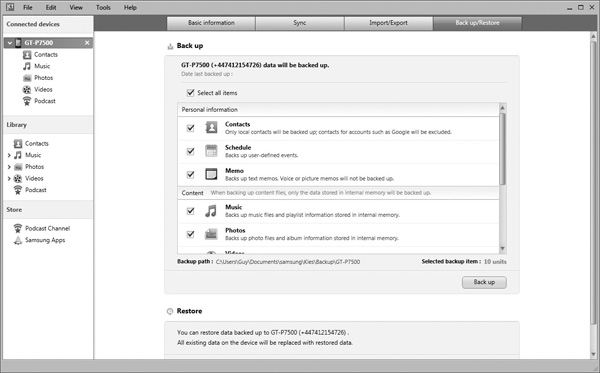
FIGURE 14-2 On the Back Up/Restore screen in Kies, select the check box for each item you want to back up. Select the Select All Items check box if you want to back up everything.
6. In the Back Up box, select the check box for each item you want to back up. Kies divides the data into three categories:
• Personal Information Select the Contacts check box, the Schedule check box, and the Memo check box, as needed.
• Content Select the Music check box, the Photos check box, the Videos check box, and the Miscellaneous Content Files check box, as needed.

If you keep many songs, photos, and videos on your Galaxy Tab, backing them up will take a long time and plenty of disk space. If you have put these files on your Galaxy Tab by copying them from your computer, and the original files are still on your computer, you may prefer not to back up the files from the Galaxy Tab, because you can easily put them back on the Galaxy Tab from the computer if necessary.
• Account Information And Settings Select the Preferences And Ringtones check box, the Network Settings And Bookmarks check box, and the Email Account Information check box, as needed.
7. Click the Back Up button to start the backup running. Kies displays the Data Backup dialog box with a progress readout (see Figure 14-3) as it creates the backup.
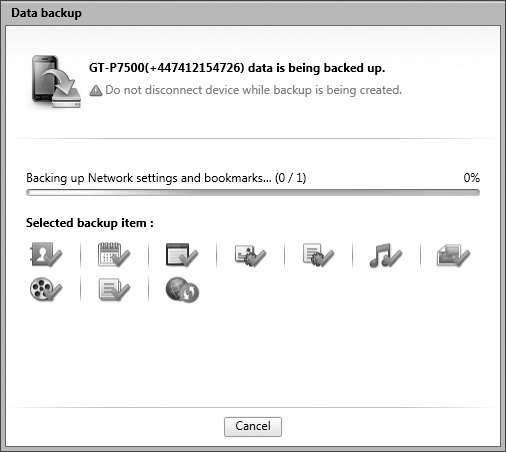
FIGURE 14-3 The Data Backup dialog box shows you the progress of the backup.
8. When the Data Backup dialog box shows the message Backup Completed, click the Complete button to close the dialog box.
9. You can now unplug the Galaxy Tab from your PC and start using it.
Restore the Galaxy Tab from a Backup on Your PC
To restore the Galaxy Tab from a backup on your PC, follow these steps:
1. Connect the Galaxy Tab to your PC.
2. Launch Kies if it doesn’t automatically launch itself.
3. Wait for the Galaxy Tab’s item to appear in the Connected Devices list at the top of the left pane in the Kies window.
4. If Kies doesn’t automatically select the Galaxy Tab’s item in the Connected Devices list, click the Galaxy Tab’s item to display the control screens.
5. Click the Back Up/Restore tab to display the Back Up/Restore screen (shown in Figure 14-2, earlier in this chapter).
6. In the Restore box, click the Restore button. Kies displays the Restore Data dialog box (see Figure 14-4).
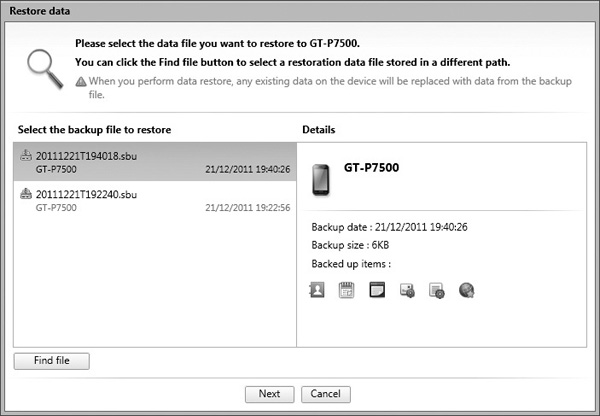
FIGURE 14-4 In the Restore Data dialog box, choose the backup from which you want to restore the Galaxy Tab.
7. In the Select The Backup File To Restore list box, click the backup file you want to use. The files are identified by their date and time—for example, 20111221T194018.sbu is from 7:40:18 P.M. on December 21, 2011—and by the Galaxy Tab’s model number (which can be useful if you sync multiple Samsung devices with Kies). When you click the backup, its details appear in the Details box on the right, where they’re easier to read.
8. Look at the Details box and make sure the backup’s details look right.
If you’ve put your backups somewhere other than where Kies is looking for them, click the Find File button in the Restore Data dialog box, use the Open dialog box to select the backup file, and then click the Open button.
9. Click the Next button to start the restore process. The Restore Data dialog box displays the Please Select Items And Types Of Memory To Restore screen (see Figure 14-5).
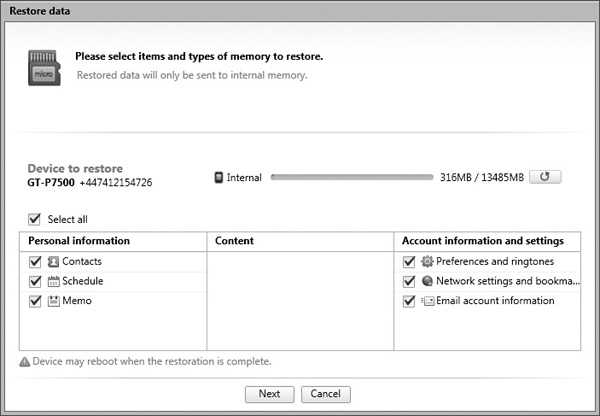
FIGURE 14-5 On the Please Select Items And Types Of Memory To Restore screen of the Restore Data dialog box, select the check box for each item you want to restore.
10. Select the check box for each type of data you want to restore. If you want to select all the check boxes immediately, select the Select All check box. (You can also clear the Select All check box to clear all the other check boxes.)
11. Click the Next button to start the restore operation running. The Restore Data dialog box shows you its progress (see Figure 14-6).
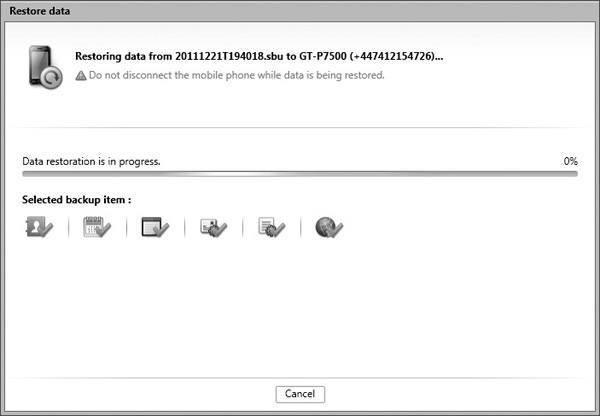
FIGURE 14-6 The Restore Data dialog box keeps you up to date with the progress of the restore operation.
Be prepared for the restore operation to take a while, especially if the backup contains lots of music, photos, and videos. Don’t disconnect the Galaxy Tab until the backup is complete—doing so can mess up your data.
12. When the Restore Data dialog box shows that the restore operation is complete, click the Complete button. The Restore Data dialog box closes.
At this point, your Galaxy Tab may restart to refresh its memories of what’s loaded on it. If you see a mysterious dialog box such as the BnR dialog box shown here saying that the connection to your Galaxy Tab has been lost, just click the OK button and wait for the Galaxy Tab to find its feet again.

Restore the Galaxy Tab to Factory Settings
When things go so wrong with the Galaxy Tab that restarting it doesn’t help, you may need to restore the device to factory settings. Make sure you’ve backed up the Galaxy Tab before restoring the device, because this is a serious move. Restoring to factory settings deletes the following data from the Galaxy Tab:
• Your Google account
• Your system and app data and settings
• All the apps you’ve downloaded
Restoring the Galaxy Tab to factory settings doesn’t delete the Galaxy Tab’s system software and its bundled apps. This is because the Galaxy Tab installs a fresh copy of the system software and bundled apps from its ROM storage.
To restore the Galaxy Tab to factory settings, follow these steps:
1. From the home screen, tap the notifications area to display the notifications panel.
2. Tap the Settings button to display the Settings screen.
3. Tap the Privacy button to display the Privacy screen.
4. In the Personal Data area, tap the Factory Data Reset button to display the first Factory Data Reset screen (see Figure 14-7), which shows a sober list of what you’re about to erase.
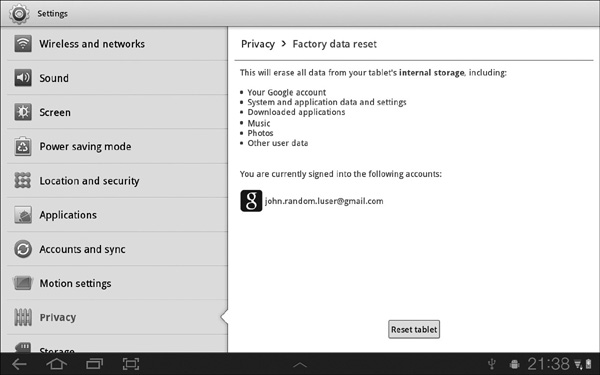
FIGURE 14-7 On the first Factory Data Reset screen, tap the Reset Tablet button.
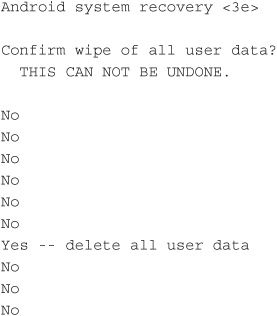
5. Tap the Reset Tablet button. The Galaxy Tab displays the Confirm Reset screen (shown here), which displays a more excitable warning.
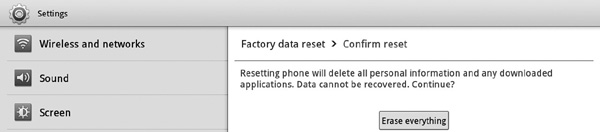
6. Tap the Erase Everything button if you’re sure you want to proceed. (If not, tap the Back button a few times to step out of the Factory Data Reset zone.)
After resetting the Galaxy Tab to factory settings, you’ll need to go through the initial setup routine as described in Chapter 1.
Update the Galaxy Tab’s Firmware
To keep the Galaxy Tab running as fast, smoothly, and stably as possible, it’s a good idea to install any firmware updates Samsung releases for the device. We’ll look at the process first on the Galaxy Tab, then on Windows, and finally on the Mac.
Update the Galaxy Tab Without Using a PC or Mac
To update the Galaxy Tab’s firmware without using a PC or Mac, follow these steps:
1. Tap the Home button to display the home screen.
If you have a 3G-capable Galaxy Tab, make sure it’s connected to a wireless network before running Software Update. Downloading updates over 3G can eat through your data plan quickly, so use Wi-Fi for updates.
2. Tap the notifications area to display the notifications panel.
3. Tap the Settings button to display the Settings screen.
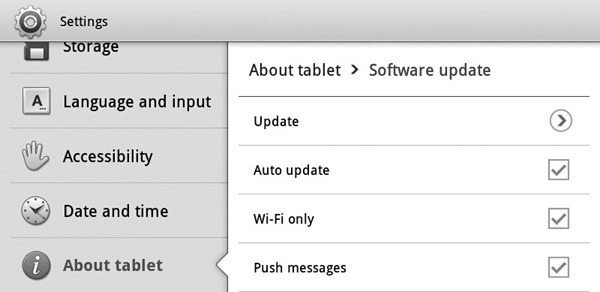
4. Tap the About Tablet button at the bottom of the left pane to display the About Tablet screen.
5. Tap the Software Update button to display the Software Update screen (shown here).
If you haven’t yet set up a Samsung account on the Galaxy Tab, you’ll need to accept the Samsung Account agreement and then sign in with an existing account or sign up for a new account. You can then use Software Update.
6. Tap the Update button to display the Software Update dialog box (shown here).
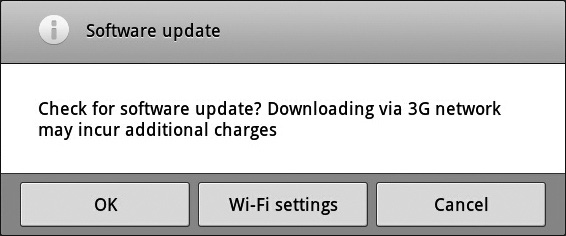
7. Click the OK button. The Galaxy Tab checks for updates.
8. If any updates are available, follow the prompts for installing them. If no updates are available, the Galaxy Tab displays a dialog box saying so; click the OK button, and go back to your work or play.
Update the Galaxy Tab’s Firmware on Windows
When an update is available, and you’ve connected the Galaxy Tab to your PC, Kies displays the Samsung Kies: A New Firmware Version Is Available dialog box (see Figure 14-8) to notify you, so all you have to do is click the Update button.
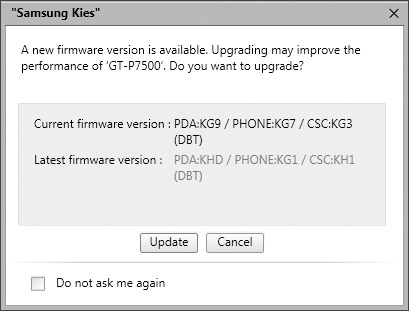
FIGURE 14-8 Click the Update button in the Samsung Kies: A New Firmware Version Is Available dialog box to start the process of updating the firmware.
Updating the Galaxy Tab’s firmware can take up to two hours, especially if your Internet connection isn’t rugged, windswept, and handsome or if Samsung’s servers are suffering a surfeit of Internet connections that do match that description. So you may need to put off the update until a convenient time.
When you do click the Update button, Kies displays the Firmware Upgrade dialog box (see Figure 14-9).
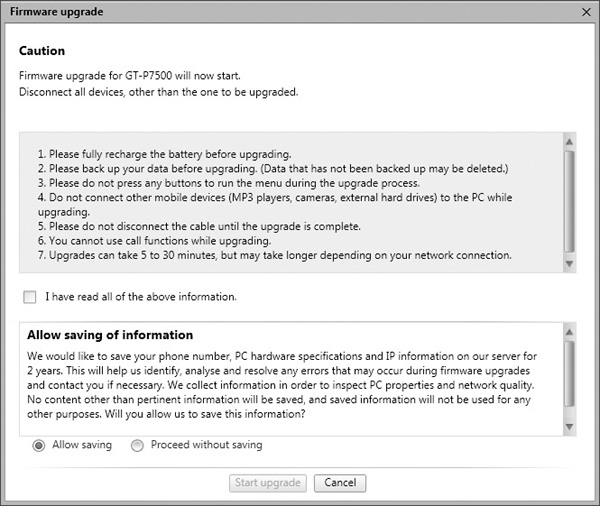
FIGURE 14-9 In the Firmware Upgrade dialog box, read the warnings, select the I Have Read All Of The Above Information check box, and choose whether to allow Samsung to save your phone number, IP address, and PC hardware specifications. Then click the Start Upgrade button.
Read the warnings, and then select the I Have Read All Of The Above Information check box. In the Allow Saving Of Information box at the bottom of the Firmware Upgrade dialog box, read the details of the information Samsung would like to save about your PC, and then select the Allow Saving option button or the Proceed Without Saving option button, as needed.
Click the Start Upgrade button when you’re ready to run the upgrade.
Next, the updater displays the Data Backup: Back Up Data dialog box (see Figure 14-10), which lets you choose which data to back up.
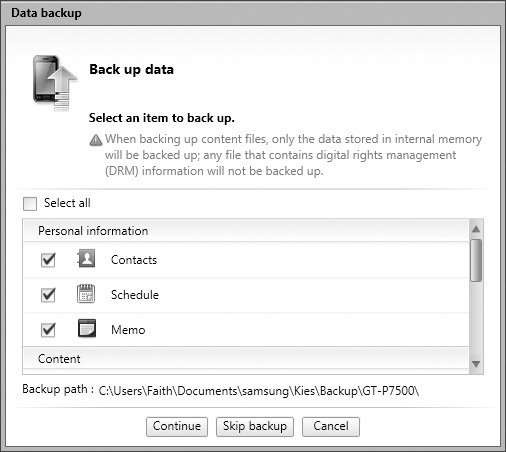
FIGURE 14-10 In the Data Backup: Back Up Data dialog box, choose which items to back up before the upgrade. Normally, you’ll want to back up everything.
If your Galaxy Tab contains no data that you care about, you can click the Skip Backup button here. But normally it’s best to select the check box for each item you want to back up (or select the Select All check box to select all the other check boxes in one move), and then click the Continue button. You can also click the Cancel button if you want to cancel the upgrade—for example, because you want to transfer data from the Galaxy Tab to another computer.
Once the backup is going, it takes a few minutes—enough for a couple of Facebook updates if you’re quick. When the backup is complete, Kies displays the Backup Completed dialog box (see Figure 14-11), and you need to click the Proceed With The Upgrade button to proceed with the firmware upgrade.
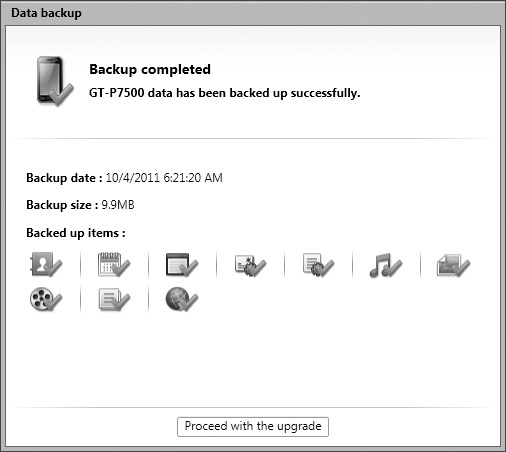
FIGURE 14-11 Click the Proceed With The Upgrade button in the Data Backup: Backup Completed dialog box to move along.
Next, Kies displays the Prepare For Firmware Upgrade dialog box (see Figure 14-12), reminding you not to disconnect the cable that connects the Galaxy Tab to your PC. Smile benignly and wait while Kies downloads the firmware upgrade components from Samsung’s servers.
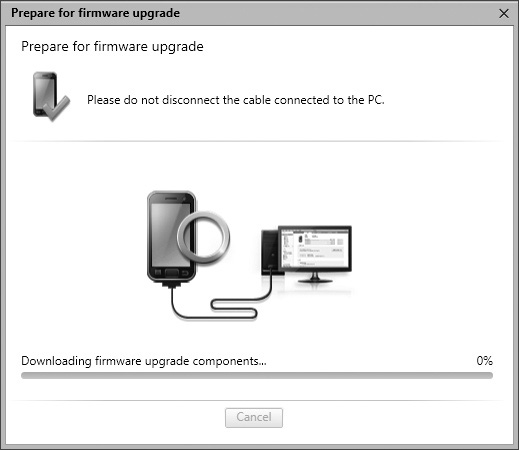
FIGURE 14-12 Kies warns you not to disconnect the Galaxy Tab while it downloads the firmware upgrade.
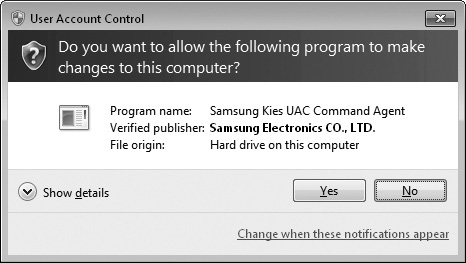
After Kies finishes downloading the installer, it runs the firmware update. Unless you’ve turned off Windows’ protective User Account Control feature, User Account Control then pops up a warning dialog box (as shown here) to make sure you want to run the Samsung Kies UAC Command Agent. Click the Yes button to proceed.
Kies then prepares the upgrade and installs it, displaying the Firmware Upgrade: Firmware Upgrade Progress readout as it does so (see Figure 14-13). This too takes a while—and don’t even think about disconnecting the Galaxy Tab from the PC until the update is finished, Kies has restored your data, and you see the Galaxy Tab’s screen again. Interrupting the update can “brick” the Galaxy Tab, turning it into an expensive paperweight with no way back to functionality.
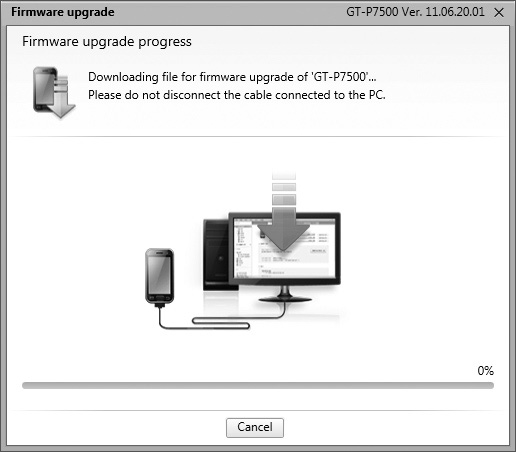
FIGURE 14-13 Kies displays its progress as it updates the Galaxy Tab’s firmware.
Update the Galaxy Tab’s Firmware on the Mac
When an update is available, and you’ve connected the Galaxy Tab to your Mac, Kies displays the Samsung Kies: A New Firmware Version Is Available dialog box (see Figure 14-14) to let you know.

FIGURE 14-14 Click the Update button in the Samsung Kies: A New Firmware Version Is Available dialog box to start the process of updating the firmware.
To go ahead with the update, click the Update button. Kies then displays the first Firmware Upgrade dialog box (see Figure 14-15), which makes sure you know how you should prepare for the update. See the sidebar titled “Avoid Causing Problems with the Firmware Upgrade,” earlier in this chapter, for some do’s and don’ts.

FIGURE 14-15 In this Firmware Upgrade dialog box, read the warnings, select the I Have Read All Of The Above Information check box, and choose whether to allow Samsung to save your phone number, IP address, and “PC hardware specifications”—in other words, your Mac’s details. Then click the Start Upgrade button.
At this writing, the Mac OS X version of the Firmware Update software hogs the focus on the Mac: Immediately after you click another app to activate it, the Firmware Update app grabs the focus back. This means that you can’t get anything done on your Mac while the update is running.
Read the warnings, and then select the I Have Read All Of The Above Information check box. In the Allow Saving Of Information box at the bottom of the Firmware Upgrade dialog box, read the details of the information Samsung would like to save about your Mac (which Kies refers to as a “PC”), and then select the Allow Saving option button or the Proceed Without Saving option button, as needed.
When you click the Start Upgrade button to begin the upgrade, Kies displays the next Firmware Upgrade dialog box (see Figure 14-16), which shows a progress readout as Kies downloads the file for the firmware upgrade. Depending on the speed of your Internet connection and how busy Samsung’s servers are, this may take a while. It’s a good idea to allow at least half an hour.

FIGURE 14-16 This Firmware Upgrade dialog box shows you Kies’s progress downloading the file for the firmware update.
On finishing the download, Kies starts to install the update across the USB cable. This also takes a while. Again, the Firmware Upgrade dialog box keeps you informed about the progress (see Figure 14-17).
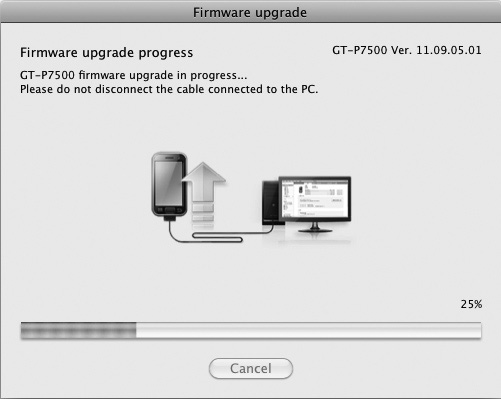
FIGURE 14-17 This Firmware Upgrade dialog box shows you how the process of installing the firmware on the Galaxy Tab is going.
When the firmware upgrade is complete, the Firmware Upgrade dialog box tells you so, as shown in Figure 14-18. This dialog box also tells you to take two actions:
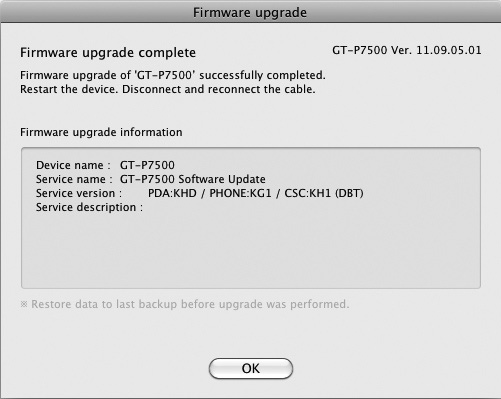
FIGURE 14-18 When the firmware upgrade finishes, you may need to restart the Galaxy Tab and then disconnect and reconnect its USB cable.
• Restart the Galaxy Tab You’ll normally find the Galaxy Tab restarts itself automatically after the firmware upgrade finishes. This restart may take longer than usual, because during the restart and boot process, Android needs to shuffle some of the new files into place. So let the Galaxy Tab restart completely, even if restarting takes several minutes. Don’t restart the Galaxy Tab manually unless you’re sure it has hung—for example, it has been unresponsive for 15 minutes.
• Disconnect and reconnect the USB cable After the Galaxy Tab has finished restarting, disconnect the USB cable, wait a few seconds, and then reconnect it.