
PUTTING-UP PARTIES
PUTTING ON A PUTTING-UP PARTY
BY VIRGINIA WILLIS

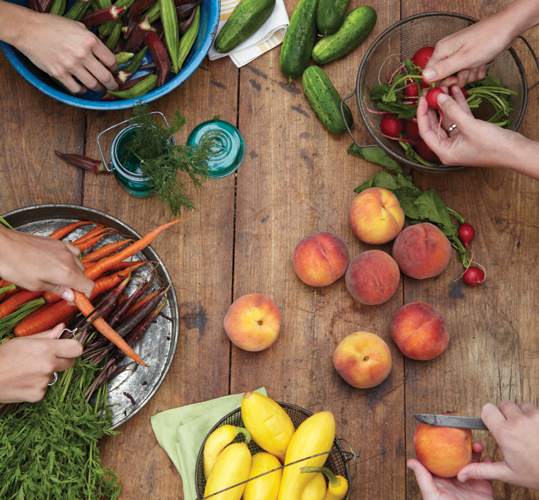
Imagine the ultimate DIY event: a joyful gathering of friends making delicious and beautiful food from scratch. The scent of fresh dill and hard spices hangs in the air, and brightly colored fruits and vegetables fill the tables. The soundtrack for this shindig? Glass jars clinking in a sink full of sudsy water. The tinny staccato of metal bowls being stacked. Giggles and laughter punctuated by the timer bell. Everyone leaves with a collection of preserves to stash or share. Just thinking about a putting-up party makes me smile. Many hands make light work, but the main reason I love a putting-up party? It makes canning downright fun.
Once upon a time, it was all hands on deck to “put up” food during harvest. I remember my grandparents, aunts, and mother working together in a steamy kitchen late into the night, prepping vegetables for the jar or the freezer. In my youth, no one escaped a canning session when the garden came in. Everyone was roped into shelling peas, shucking corn, and snapping beans. It was hard work, but what satisfaction! When we were done, Mason jars of peach jam, blackberry preserves, green beans, pickles, pears, and chowchow stood in neat lines, like soldiers, on the wooden basement shelves.
Those memories are precious to me now. I’m fairly certain that my love of food and cooking took root in our simple country kitchen. Mama taught me to blanch green vegetables before placing them in containers so they would freeze better and not to squeeze the jelly bag so as to not make the jelly cloudy. I relish the passing-down of kitchen traditions and recipes like my grandmother’s bread-and-butter pickles and my mother’s Scuppernong jelly.
It might sound like I was born with a candy thermometer in one hand and a Mason jar in the other, but canning wasn’t always easy for me. Yes, I grew up with canning and preserving. Yes, I am now a professional chef. But as a teenager, I didn’t fully enjoy canning. And in Mama’s kitchen I was a mere prep cook, several steps removed from the chef and truly terrified of the pressure canner. My preserving breakthrough occurred not during my formative years in Georgia but one summer in France, when I attended École de Cuisine La Varenne. The culinary school’s director, Anne Willan, assumed that a Southerner like me would already know all about canning and preserving. I had barely tied on an apron when she pointed me in the direction of the garden and sent me to the cellar for a case of jars. (Gulp!) My first batches were nerve-wracking. Would the jelly set? Would the pickles be too soft? But one success led to another, and one evening near the end of summer I had a revelation. I was preparing dinner for a party of 20 and comfortably putting up cherry jelly at the same time when it hit me: Canning and preserving truly are not that hard.
I look at preserving now as an important cooking skill, one I pull out not just in August but whenever it makes sense, even if it’s just a couple of jars. If I’m going out of town and have too much in the fridge, I’ll see what I can freeze, pickle, bottle, or jar instead of tossing out. If a friend with a prolific fig tree offers me some, I preserve whatever I can’t eat before they’ll spoil. Putting up also just feels like a natural part of good eating. “Foodie” or not, who doesn’t crave local foods and the vibrant flavors captured when you preserve them in their prime?
Finding time for the kind of mass canning my family did is difficult. But a putting-up party with a few food-loving friends feels like a manageable, small-batch version of that worthwhile tradition. As a grown-up, I think of these canning sessions less as chores and more like dinner parties with dividends.
THE BIG IDEA
Simply put, putting-up parties are social events with a practical side: You invite some friends to your home and ask each to bring the ingredients for one canning or preserving recipe. You spend a few hours catching up, putting up, and messing up just one kitchen. Everyone leaves with a variety of goodies to enjoy at home or share with family and friends.
It’s faster and more fun to can several recipes with friends than to make them all on your own. Because there’s some multitasking involved in canning—timing the steps just right so you get hot food in hot jars—it often goes smoother and faster with another set of hands. And isn’t it nice to have someone to chat with while you ponder life and peel the peaches?
Putting-up parties introduce new recipes and unique flavors to your repertoire. You get to make and sample several recipes and find the ones you like best, while sharing the cost and effort with your friends. And, instead of canning all day to get 20 jars of the same thing (and perhaps more than you’re likely to use up in a year), you leave with several different items to enjoy.
Summer is the prime time of year for preserving, but you can host a putting-up party or find something to can in any season. Spring yields pickled asparagus and strawberry jam. Summer overflows with fruits and vegetables to pickle. Fall brings apples and pears for jellies and fruit butters. Even cold winter months offer opportunities: making marmalades from onions or transforming lemons into limoncello. In fact, when it’s cooler outside it’s often more enjoyable to be in a warm kitchen with others.
THE PLAN
Speaking of cool, there’s something to be said for starting the party early in the day. While it always depends on everyone’s schedule, I think a weekend event makes the most sense. Jams and pickles require some prep. Green beans need to be washed and trimmed; plums need to be pitted; strawberries need to be hulled. You want to make sure that you have plenty of time to complete the steps and enjoy yourselves.
The number of people to invite? That will depend on your comfort level and the size and outfitting of your kitchen. Canning doesn’t require a fancy, gourmet kitchen, but there are practical considerations like the size of the sink and the number of burners on the stove-top. You will need plenty of kitchen counter and table space for people to work. You can extend the kitchen to other workspaces, such as a table on the porch or a card table in the backyard. If you’re completely new to canning and preserving, I suggest you start small: two to four friends and two to four recipes.
The key to a putting-up party, or any party really, is to make a plan and tackle it a little at a time. Because I’m comfortable with canning, I tend to be less scripted about such things. (I’m likely to make a plan at the farmers’ market and just call a few friends on the way home.) However, until you get the hang of it, you might want to start plotting your putting-up party up to a month ahead. Here’s a step-by-step schedule to get you there.
Four Weeks Out
 Invite some friends. Mail, email, social media, and phone invites are all acceptable, but RSVPs are a must. Ask guests to note any food allergies or dietary restrictions with their RSVP.
Three Weeks Out
Plan a snacks menu and discuss with your RSVP’d guests what to preserve; gather your snacks recipes with an eye toward those that can be prepared in advance, or even frozen, with just simple warming and quick assembly on the day of your putting-up party. Note how far in advance each recipe can be prepared.
Make a shopping list for the snacks menu.
Line up any additional help you may need; consider hiring a high school student for baby-sitting or to help with cleanup.
Two Weeks Out
See what’s in season and finalize your list of items to put up.
Make sure you have the necessary gear for preserving (see the handy list or the pictures) and serving dishes for refreshments. Coordinate with guests who are bringing ingredients, any additional equipment, and jars. Procure aprons for the guests—or ask each to bring one.
Create a music playlist. Mellow background tunes help keep the atmosphere light. Have a little fun with it!
Assemble or purchase a first-aid kit—just in case. Consider burn cream or an aloe plant, bandages, alcohol, and antibiotic cream.
One Week Out
Clean the kitchen thoroughly, so it will need only a quick once-over before your putting-up party.
Review the preserving recipes to make sure you’re clear on anything that might need to be done ahead such as draining juice to make jelly.
Arrange the furniture as needed for the party. Clear the dining room table and cover it with a tablecloth to use as a prep station. (Hardware stores have durable canvas drop cloths that are inexpensive and offer excellent table protection. Oilcloths and plastic tablecloths also work nicely when you’re working with vegetables and fruits that stain such as beets, berries, and plums.)
Three Days Out
Do a first round of grocery shopping and cooking, and prepare any snacks that can be made ahead.
Remove any unnecessary kitchen appliances to clear as much space as possible.
Set up a cleanup station—a box of coarse kosher salt, club soda, and a couple of kitchen towels in case a spill occurs.
Designate a place for purses and overcoats.
Finish grocery shopping and make a schedule for cooking any remaining snacks.
One Day Out
Pull out the plates and utensils, and set up a drink station. If it’s a morning party, think about coffee and stir-ins like milk, sugar, and sweetener.
Chill anything you will serve cold, such as lemonade or white wine.
Finish as much of the cooking and prepping for the snacks you’ll serve. That will leave you and your guests free to focus on preserving and catching up.
Move any frozen dishes from the freezer to the refrigerator to thaw overnight.
Give your house and kitchen a final cleaning. Empty the trash and the compost bin, and make sure they’re easy to find.
Day of the Putting-Up Party
Finish any last-minute cooking for the snacks.
Set up stations with cutting boards, peelers, colanders, and other equipment.
Fill canning pots with water and set them on the stove.
About 30 minutes before guests arrive, set out snacks (wrapped in plastic to ensure freshness) and beverages.
Turn on the music.
After guests arrive, divide the tasks to make things efficient. Put one person in charge of each recipe, perhaps. Or ask one to peel and slice, another to wash and sterilize jars, and another to set up a station near the stove for filling jars. Let others pitch in as needed.
THE GEAR

I think “share the work, share the fun” is the best approach. Consider treating this party like a cookie swap or potluck. Ask everyone to bring the produce or the main ingredient (and jars if they have them) for one recipe. As the host, you will supply snacks; basic supplies such as vinegar, sugar, canning-and-pickling salt, and labels; kitchen essentials such as cutting boards, knives, peelers, and stainless steel bowls; and basic canning equipment, including:
A canning pot and rack: This is an extra-large pot, often enameled, with a rack that holds the jars for boiling-water canning. Ball makes an affordable kit.
Canning jars, lids, and bands: These are available at hardware, grocery, and kitchen-supply stores. Two popular producers of the standard glass Mason jar are Ball and Kerr, and these brands are typically the most affordable. More expensive European jars include clamp-and-gasket types from Weck, Leifheit, and Bormioli Rocco, and glass terrines from Le Parfait. Glass jars are available in half-cup, half-pint, pint, and quart sizes. They are either regular or widemouthed, a reference to the size of the jar opening. Make certain to select the right bands and lids for your jars. Mason jars may be reused, as long as they are free of cracks and chips. (Don’t use emptied mayonnaise or store-bought jelly and condiment jars, as they aren’t designed for reuse.) Screwtop bands can be reused as long as they are not rusted. Lids should be used only once.
Canning tongs: Lowering the jars in and out of the hot water while keeping them upright can be tricky, but canning tongs are coated with rubber and curved to hug the jars, making lifting them in and out of hot water a breeze.
Ladles and glass measuring cups: These work best for transferring hot liquids from saucepan to jar. Heat-resistant glass measuring cups do double duty, helping you measure and pour the right amount.
Widemouthed funnel: The extra-wide mouth helps keep jar rims clean.
A few other items are nice but not essential:
Magnetic lid wand: This long plastic tool, sometimes part of a canning kit, has a magnet on the end that makes applying canning lids to the jars easy. If you don’t have one, just use standard kitchen tongs.
Cooling racks: Placing hot jars directly on cold counters can crack the jars and damage countertops. Cooling racks act as a heat buffer. You can use folded towels, baking sheets, or wooden cutting boards too.
Electric teakettle: These boil water quickly without occupying a burner—awfully nice when you’re out of stove and need more water in the canning pot.
WHAT TO PUT UP

My family canned and preserved produce because they had an abundance of cucumbers, tomatoes, or peaches. For some gardeners (and their neighbors), that's still true. But for many today, it’s a different story. When you’re paying $6 a pound for heirloom tomatoes at an urban farmers’ market, you want to think carefully about what to put up.
Start by talking to your invitees and seeing what’s in season. For the best flavor (and often the best price), you’ll want to use the freshest and most bountiful produce available.
If you’re not sure what grows when in your area, check seasonal produce calendars to help you plan ahead, or ask the farmers at your local markets what’s going to be good a few weeks out.
Look through this cookbook for inspiration, and consider the time and effort involved in each recipe. Jam and pickle recipes tend to be short and sweet. Jellies and marmalades may require more time for fruit to be juiced or for citrus rinds to steep.
Aim for a variety of flavors so that everyone will have a well-rounded box of goodies to take home: a fruit jam or jelly, a pickle, an infused liquor, a vegetable relish. Consider using a variety of preserving techniques—refrigerator, freezer, and boiling-water canning—to help stretch the amount you can do in a small kitchen in one day.
Dedicate some recipes to the canning pot, but don’t forget about the microwave, the food processor, or even the liquor cabinet. Refrigerator and freezer preserves tend to come together more quickly than boiling-water processed recipes.
Keep it simple, settling on two to four recipes per party. Though it’s tempting to add to your list when you see beautiful figs at the farmers’ market, if they’re not in your plan, save them for another day.
Depending on the complexity of the recipes you and your guests choose, you might even do just one or two recipes and make multiple batches of each. There’s no shame in keeping it small and in saying: “This Saturday, we’ll be making Mixed Berry Jam and Pickled Okra. Y’all come!”
Worth noting: Not all recipes double or triple well. A single batch of marmalade may take roughly an hour to cook down; a triple batch of marmalade may take roughly forever to cook down. It’s best to actually make separate batches rather than just multiplying the ingredient amounts and proceeding in the same pot.
SNACKS FOR THE PUTTER-UPPERS
Since your kitchen will be full and busy, you want to make sure to prepare foods for your fellow canners before they arrive.
Make snacks and nibbles ahead to keep it simple. Consider recipes that require few utensils or that can be eaten out of hand. You’ll have enough dishes to do when your kitchen is in canning mode!
Opt for small plates and snacks, not a big meal. Think grazing. Set up a simple buffet and take a dedicated break to eat while the jars cool or the jelly bag hangs.
Turn the page for seasonal menu ideas for what to preserve and what to serve.
SPRING
Putting-Up Party

WHAT TO PUT UP
Strawberry-Rhubarb Freezer Jam
Pickled Japanese Turnips with Shiso
Pickled Rainbow Carrots with Coriander
WHAT TO SERVE
Ginger ale
Green salad
Caramelized Onion and Bacon Quiche
CARAMELIZED ONION AND BACON QUICHE
To make this delicious quiche up to two days ahead, cool completely, cover, and store in the refrigerator. On the day of the party, reheat it in a 350° oven for 30 minutes.
Makes: 8 servings
Hands-on time: 45 min.
Total time: 2 hours
1 (14.1-oz.) package refrigerated piecrusts
3 large sweet onions, sliced (about 1½ lb.)
2 Tbsp. olive oil
½ cup chopped fresh flat-leaf parsley
6 cooked bacon slices, crumbled
2 cups (8 oz.) shredded Gruyère cheese
1½ cups half-and-half
4 large eggs
½ tsp. salt
¼ tsp. freshly ground pepper
¼ tsp. ground nutmeg
1. Preheat oven to 425°. Unroll piecrusts; stack on a lightly greased surface. Roll stacked piecrusts into a 12-inch circle. Fit piecrust into a 10-inch deep-dish tart pan with removable bottom; press into fluted edges. Trim off excess piecrust along edges. Line piecrust with aluminum foil or parchment paper, and fill with pie weights or dried beans. Place pan on a foil-lined baking sheet. Bake 12 minutes. Remove weights and foil, and bake 8 more minutes. Cool completely on baking sheet on a wire rack (about 15 minutes). Reduce oven temperature to 350°.
2. Meanwhile, cook onions in hot oil in a large skillet over medium-high heat, stirring often, 15 to 20 minutes or until onions are caramel colored. Remove from heat, and stir in parsley and bacon. Place half of onion mixture in tart shell, and top with half of cheese; repeat with remaining onion mixture and cheese.
3. Whisk together half-and-half and next 4 ingredients; pour over cheese.
4. Bake at 350° for 40 to 45 minutes or until set. Cool on baking sheet on a wire rack 15 minutes before serving.
STRAWBERRY SHORTCAKES
The tasty little cakes at the base of this scrumptious dessert can be made a day ahead. So can the strawberry mixture, as long as you chill it. Wait to whip the cream, though, and don’t assemble the shortcakes until you’re nearly ready to serve them.
Makes: 8 servings
Hands-on time: 25 min.
Total time: 3 hours
2 (16-oz.) containers fresh strawberries, quartered
¾ cup sugar, divided
¼ tsp. almond extract (optional)
1 cup whipping cream
2 Tbsp. sugar
2¾ cups all-purpose flour
4 tsp. baking powder
¾ cup cold butter, cut up
2 large eggs, lightly beaten
1 (8-oz.) container sour cream
1 tsp. vanilla extract
Fresh mint sprigs
1. Combine strawberries, ½ cup sugar, and, if desired, almond extract. Cover berry mixture, and let stand 2 hours.
2. Beat whipping cream at medium speed with an electric mixer until foamy; gradually add 2 Tbsp. sugar, beating until soft peaks form. Cover and chill up to 2 hours.
3. Preheat oven to 450°. Combine flour, remaining ¼ cup sugar, and baking powder in a large bowl; cut butter into flour mixture with a pastry blender or two forks until crumbly. Whisk together eggs, sour cream, and vanilla until blended; add to flour mixture, stirring just until dry ingredients are moistened. Drop dough by lightly greased ⅓ cupfuls onto a lightly greased baking sheet. (Coat cup with vegetable cooking spray after each drop.) Bake at 450° for 12 to 15 minutes or until golden. Cool completely (about 20 minutes).
4. Split shortcakes in half horizontally. Spoon about ½ cup berry mixture onto each shortcake bottom; top each with a rounded Tbsp. chilled whipped cream, and cover with tops. Serve with remaining whipped cream, and top with fresh mint sprigs.
SUMMER
Putting-Up Party
WHAT TO PUT UP*
Blackberry-Black Pepper Spread
Microwave Nectarine-Ginger Preserves
WHAT TO SERVE
Meat and cheese platter with baguette slices
* When tomatoes are at their peak, you might want to devote an entire day to Mediterranean-Style Tomatoes, Chunky Marinara Sauce with Red Wine, Heirloom Tomato Chutney, and Microwave Tomato-Peach Preserves. Your pantry and pocketbook will thank you the rest of the year.
FRESH BASIL LEMONADE
Steeping lemon zest and fresh herbs in the simple syrup at the base of this drink gives it a little something extra.
Makes: 2½ qt.
Hands-on time: 5 min.
Total time: 20 min.
½ cup water
1½ cups sugar
1 Tbsp. lemon zest (about 2 lemons)
3 (4-inch) basil sprigs
1½ cups fresh lemon juice (about 13 lemons)
7 cups ice water
1. Bring ½ cup water to a boil in a medium saucepan. Stir in sugar and lemon zest, stirring until sugar is dissolved; remove from heat. Bruise basil sprigs with the back of a knife; stir into mixture, cover, and steep 10 minutes.
2. Remove and discard herb sprigs. Pour mixture into a pitcher. Stir in lemon juice and ice water. Serve over ice.
TOMATO-CUCUMBER SALAD
No Southern spread is complete without this simple summery salad. You can use halved grape or cherry tomatoes in place of the vine-ripened tomatoes.
Makes: 8 servings
Hands-on time: 10 min.
Total time: 10 min.
2 seedless cucumbers, sliced
1 small onion, thinly sliced
4 cups small, vine-ripened tomatoes, cut into quarters
½ cup olive oil-and-vinegar dressing
1 tsp. lemon zest
2 Tbsp. lemon juice
Salt and pepper to taste
1. Stir together cucumber, onion, and tomatoes. Add oil-and-vinegar dressing, lemon zest, lemon juice, and salt and pepper to taste. Toss to coat.
BLACKBERRY-LEMON SQUARES
Makes: 2 dozen
Hands-on time: 30 min.
Total time: 2 hours, 25 min.
2¼ cups all-purpose flour, divided
½ cup powdered sugar
1 cup cold butter, cut into pieces
4 large eggs
2 cups granulated sugar, divided
2 tsp. lemon zest
½ cup fresh lemon juice
1 tsp. baking powder
¼ tsp. salt
2 cups fresh blackberries
Powdered sugar
1. Preheat oven to 350°. Line bottom and sides of a 13- x 9-inch pan with heavy-duty aluminum foil, allowing 2 to 3 inches to extend over sides; lightly grease foil.
2. Pulse 2 cups flour, ½ cup powdered sugar, and 1 cup butter in a food processor 5 to 6 times or until mixture is crumbly. Press mixture onto bottom of prepared pan. Bake at 350° on lower oven rack one-third up from bottom of oven 25 minutes or just until golden brown.
3. Whisk together eggs, 1½ cups sugar, lemon zest, and lemon juice in a large bowl until blended. Combine baking powder, salt, and remaining ¼ cup flour; whisk into egg mixture until blended. Pour lemon mixture into prepared crust.
4. Pulse 2 cups blackberries and remaining ½ cup granulated sugar in a food processor 3 to 4 times or until blended. Transfer mixture to a small saucepan. Cook over medium-low heat, stirring often, 5 to 6 minutes or until thoroughly heated. Pour through a fine wire-mesh strainer into a bowl, gently pressing blackberry mixture with back of a spoon; discard solids. Drizzle blackberry syrup over lemon mixture in pan.
5. Bake at 350° on middle oven rack 30 to 35 minutes or until filling is set. Let cool in pan on a wire rack 30 minutes. Lift from pan onto wire rack, using foil sides as handles, and let cool 30 minutes or until completely cool. Remove foil, and cut into 24 (2-inch) squares; sprinkle with powdered sugar.
NOTE: The fresh blackberry mixture floats to the top of the lemony base, adding brilliant color to these luscious two-tone fruit bars. You can reserve the blackberry solids and stir them into yogurt, lemonade, or mojitos for added flavor and color.
FALL
Putting-Up Party
WHAT TO PUT UP
Honeycrisp Apple-Cranberry Conserve
WHAT TO SERVE
Apple cider
Coleslaw
SOUTHERN-STYLE CUBANS
Here’s a smoky spin on a classic sub. Pick up sliced pork from your favorite barbecue restaurant. Assemble, press, and chill the big sandwich the day before. Heat and cut into individual portions the day of the party.
Makes: 6 to 8 servings
Hands-on time: 30 min.
Total time: 4 hours, 35 min.
¾ cup mayonnaise
2 Tbsp. Creole mustard
2 Tbsp. sweet-hot pickle relish
1 canned chipotle pepper in adobo sauce, chopped
1 Tbsp. chopped fresh flat-leaf parsley
½ tsp. lemon zest
2 tsp. fresh lemon juice
⅛ tsp. salt
⅛ tsp. pepper
1 (12-oz.) French bread loaf
1 lb. sliced barbecued pork without sauce
4 (1-oz.) provolone cheese slices
1 cup sweet-hot pickle slices or ½ cup Hot-and-Sweet Freezer Pickle Relish
1. Stir together mayonnaise and next 8 ingredients in a small bowl.
2. Cut French bread loaf in half horizontally; scoop out soft bread from center of each half, leaving a ½-inch-thick shell to make filling the sandwich easier. (Reserve soft bread for another use.) Spread inside of bread shells with mayonnaise mixture. Layer bottom shell with barbecued pork, provolone cheese slices, and sweet-hot pickle slices. Top with remaining bread shell. Flatten sandwich slightly; cut in half crosswise. Wrap halves tightly in plastic wrap; set on a baking sheet, and chill under a weighted baking sheet 4 to 12 hours.
3. Remove plastic wrap. Cook sandwich halves in a hot lightly greased cast-iron skillet or panini press until bread is toasted and cheese is melted (about 5 minutes per side). Cut each half crosswise into 3 or 4 smaller sandwiches.
PEAR-BLUE CHEESE TART
The sweet and musky flavor of Scuppernong grapes is the perfect foil for fall flavors such as blue cheese and walnuts. Not to worry, though: You can use prepared jelly for the glaze if you haven’t gotten around to canning your own yet.
Makes: 8 to 10 servings
Hands-on time: 12 min.
Total time: 40 min.
1 (17.3-oz.) package frozen puff pastry sheets, thawed
1 large egg
⅓ cup Scuppernong Jelly or prepared grape or apple jelly, divided
1 firm, ripe Barlett pear, peeled and thinly sliced
½ cup (2 oz.) crumbled blue cheese
½ cup chopped walnuts
1. Preheat oven to 400°. Roll 1 pastry sheet into a 12-inch square on a lightly floured surface; place on an ungreased baking sheet. Roll remaining pastry sheet into a 12-inch square. Cut 4 (12- x 1-inch) strips from pastry, reserving remaining pastry for another use.
2. Whisk together egg and 1 Tbsp. water. Brush edges of pastry square with egg mixture. Place dough strips along outer edges of pastry square, pressing gently to form a border. Brush border with egg mixture. Prick bottom of tart with a fork. Bake at 400° for 10 minutes or until lightly browned.
3. Place jelly in a microwave-safe bowl. Cover and microwave at HIGH 30 seconds; stir until jelly melts.
4. Arrange pear slices on bottom of dough, overlapping slightly. Brush ¼ cup melted jelly over pear slices. Sprinkle pear with blue cheese and walnuts. Drizzle remaining jelly over top. Bake at 400° for 18 minutes or until crust is browned and pear is crisp-tender. Serve warm.
WINTER
Putting-Up Party
WHAT TO PUT UP
Asian-Style Carrot and Daikon Pickles
WHAT TO SERVE
Coffee or hot cocoa
Hot Roast Beef Party Sandwiches
ROASTED ROOT VEGETABLE SALAD
A hot oven makes these sweet potatoes, parsnips, and beets extra sweet. Roast them (separately, so the beets don’t stain everything red), and make the dressing up to two days ahead. On party day, simply toss them with dressing, and serve them over arugula.
Makes: 6 to 8 servings
Hands-on time: 30 min.
Total time: 1 hour, 30 min.
2 large sweet potatoes (about 1½ lb.)
4 large parsnips (about 1 lb.)
6 medium beets (about 1½ lb.)
3 Tbsp. olive oil, divided
1¾ tsp. salt, divided
1 tsp. pepper, divided
½ cup bottled olive oil- and-vinegar dressing
1 Tbsp. chopped fresh parsley
1 Tbsp. refrigerated horseradish
1 tsp. Dijon mustard
Fresh arugula
1. Preheat oven to 400°. Peel sweet potatoes, and cut into ¾-inch cubes. Peel parsnips, and cut into ½-inch slices. Peel beets, and cut into ½-inch-thick wedges.
2. Toss sweet potatoes and parsnips with 2 Tbsp. olive oil in a large bowl; place in a single layer in a lightly greased 15- x 10-inch jelly-roll pan. Sprinkle with 1¼ tsp. salt and ½ tsp. pepper.
3. Toss beets with remaining 1 Tbsp. olive oil; arrange beets in a single layer on a separate aluminum foil-lined 15- x 10-inch jelly-roll pan. Sprinkle with remaining ½ tsp. salt and ½ tsp. pepper.
4. Bake at 400° for 40 to 45 minutes or just until tender. Let cool completely (about 20 minutes).
5. Meanwhile, whisk together dressing and next 3 ingredients. Place vegetables in a large bowl, and drizzle with desired amount of dressing; toss gently to coat. Serve at room temperature or chilled over arugula with any remaining dressing.
HOT ROAST BEEF PARTY SANDWICHES
To make these casual, three-bite sandwiches ahead, prepare as directed through Step 3, and freeze up to a month. Take out as much as you need for the party a day ahead, thaw it overnight in the refrigerator, and bake as directed in Step 4 on party day.
Makes: 12 to 16 servings
Hands-on time: 26 min.
Total time: 56 min.
½ cup finely chopped walnuts
2 (9¼-oz.) packages dinner rolls
⅔ cup peach preserves
½ cup mustard-mayonnaise blend
¾ lb. thinly sliced deli roast beef, chopped
½ lb. thinly sliced Havarti cheese
Salt and pepper (optional)
1. Preheat oven to 325°.
2. Heat walnuts in a small nonstick skillet over medium-low heat, stirring often, 5 to 6 minutes or until lightly toasted and fragrant.
3. Remove rolls from packages. (Do not separate rolls.) Cut rolls in half horizontally, creating 1 top and 1 bottom per package. Spread preserves on cut sides of top of rolls; sprinkle with walnuts. Spread mustard-mayonnaise blend on cut sides of bottom of rolls; top with roast beef and cheese. Sprinkle with salt and pepper, if desired. Cover with top halves of rolls, preserves sides down, and wrap in aluminum foil.
4. Bake at 325° for 30 minutes or until cheese is melted. Slice into individual sandwiches. Serve immediately.
THUMBPRINT COOKIES
Strawberry and peach jams make beautiful jewel-colored fillings for these nutty, buttery cookies, but you can use any jam or preserves you like.
Makes: 3½ dozen for the table
Hands-on time: 35 min.
Total time: 2 hours, 5 min.
1 cup butter, softened
¾ cup sugar
2 large eggs, separated
1 tsp. almond extract
2 cups all-purpose flour
¼ tsp. salt
1¼ cups finely chopped pecans
¼ cup strawberry jam
¼ cup peach jam
1. Beat butter at medium speed with an electric mixer until creamy; gradually add sugar, beating well. Add egg yolks and almond extract, beating until blended.
2. Combine flour and salt; add to butter mixture, beating at low speed until blended. Cover and chill dough 1 hour.
3. Preheat oven to 350°. Shape dough into 1-inch balls. Lightly beat egg whites. Dip each dough ball in egg white; roll in pecans. Place 2 inches apart on ungreased baking sheets. Press thumb in each dough ball to make an indentation.
4. Bake at 350° for 15 minutes. Cool 1 minute on baking sheets, and remove to wire racks to cool completely. Press centers again with thumb while cookies are still warm; fill center of each cookie with jam.
SHARING WHAT YOU’VE BOTTLED AND CANNED
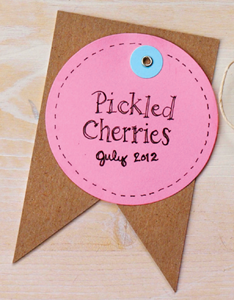
LABELS When the putting-up party is over, you’ll have jars aplenty to enjoy with your family or to share with others. I like to save several for thank-you and hostess gifts.s Handmade food takes time, one of life’s most precious commodities, which makes each jar a thoughtful gift in its own right, or a smart way to add personality to a gift basket.

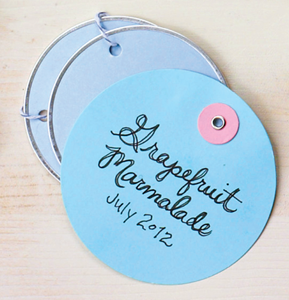
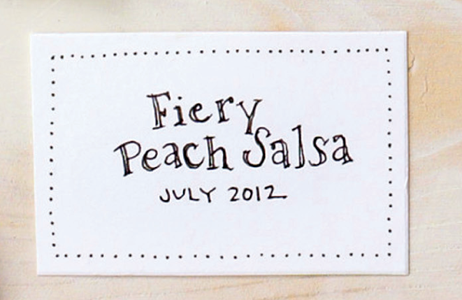
Whether they’re going to Grandma’s house or to your pantry, jars should be labeled as soon as they’re cool to avoid later confusion. (Mint Jelly and Tart Basil Jelly look an awful lot alike. So too, to the untrained eye, do Strawberry-Basil Jam and Strawberry-Port Jam.) At a minimum, each label should include the recipe title and the date prepared. A use-by date and the name of the person who made the preserves are also nice when they’re going to someone else’s house.
Place labels on the sides of the jars or on top of the lids. If the label’s only temporary, and you’re planning something fancier later, stick it on the bottom of the jar to avoid gunking up the sides.
You can use the simple labels that are included with some canning jars, plain old masking tape, or even a permanent marker on the top of the lid to identify what’s in the jar. Practical and pretty needn’t be mutually exclusive. Neat label options abound. Here are a few I like:
Avery Labels with Downloadable Patterns: These plain self-adhesive labels come in printer-sized sheets and have a smooth paper backing that can be removed easily. They can be customized on a home laser or inkjet printer with downloadable designs. Etsy.com and other online sites offer a wide selection of fun patterns, from retro to modern, country to chic.

Gummed Labels: Widely available in office and art supply stores, these are plain or preprinted with a decorative border. You can use a stamp and inkpad to decorate your own. If you’re hand-lettering them, be sure to use permanent marker or nonsmudging ink.
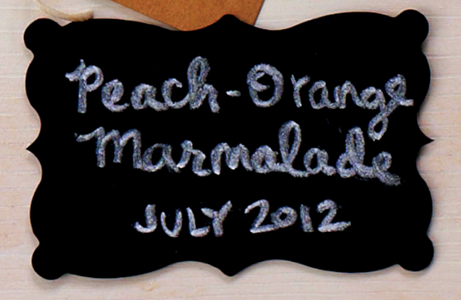
Chalkboard Labels: These attractive vinyl labels have a gummed backing and chalkboard-like surface that makes them reusable. Just write on them with chalk or a white nail pencil, wipe with a moist cloth or towel, and write on them again. If you’re worried about the label getting wet and washing off, you can also use a white ink pen for a more permanent label.

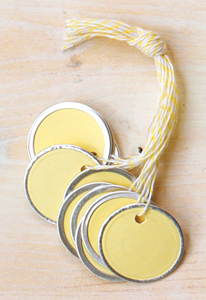
GIFT TAGS & OTHER DECORATIONS A few years ago, I received a jar of delicious marmalade during the holidays and unfortunately lost the gift tag in the hustle and bustle of the season. I didn’t know who to thank—or how soon to use it. That’s why I find tied-on tags less than ideal for conveying the recipe name, the date prepared, and the name of the cook. I think that belongs on the jar.
Still, a gift tag has its advantages. It can gussy up the jar and add extra information (such as holiday wishes) for the recipient. Gift tags are excellent places to put short recipes or practical suggestions for how to use what’s in the jar.
Look for ready-made tags online and in office supply or arts and crafts stores, or make your own with squares of scrapbooking paper or recycled cardstock. Use a hole puncher to make a clean hole, and tie on tags with ribbon or string. If you want to go one further, accessorize with any of the following:
Cloth Caps: Gingham, burlap, or simple cloth can be placed over the lid and tied on with string or secured with the metal band for a sweet presentation. To make a cloth cover, cut a square or circle of fabric long enough to skirt the top of the jar. Be sure to choose fabric that will complement the color of your preserved goods. Use pinking shears to minimize fraying. Lay the cloth over the lid, and secure with the metal band or twine.
Paper: Wax paper, tissue paper, or a combination of both also can pretty up a jar. Unscrew the lid ring. Cut circles of paper 2 inches larger in diameter than the ring. Place the paper on top of the sealed lid, and screw the lid ring over the paper to secure it.
Add-ons: Herb sprigs, cinnamon sticks, and star anise are lovely natural additions to little jars. You can attach them with twine, string, or ribbon. To avoid confusion, only decorate with ingredients that are actually used in the preserved recipe. Small spoons, spreaders, or buttons also make decorative tie-ons.

PACKING UP

At the end of a putting-up party, the putting-up-your-feet part of the day, when the kitchen is clean, and it’s time to say good-bye to your preserving pals, everyone will need to safely, smartly transport their precious cargo home.
It’s important to let any hot jars cool before you move them and keep the jars upright until they are fully sealed. A broken jar of hot jelly is a burn, a cut, or both waiting to happen. And jostling any just-pickled item can interfere with its seal. Next-day delivery or pickups may be necessary.
But what to put them in? If you’ve saved the boxes the jars were sold in, and you have boxes for everyone, you’ve got it made. But you might need to consider other options. Here are some green suggestions to help with the end-of-party takeaway:
Reduce, reuse, recycle—and rethink! Use old shoeboxes, and wrap the jars in newspaper to prevent them from clanking and possibly cracking.
Reusable wine bags and cartons with dividers are perfect for transporting a half-dozen pint jars.
Handled shopping bags with sturdy bottoms, like those from upscale clothing stores, are excellent for transporting jars. Just be sure to use newspaper or kitchen towels to keep the jars from knocking together or tipping over in the bag.
Inexpensive wicker baskets and hat boxes, available at thrift and craft supply stores, work nicely.
Planning more putting-up parties? Consider investing in vintage-style wire milk bottle carriers. They are sturdy, stylish, and reusable. Look for them online, at flea markets, and in antiques and retro housewares stores.
Even if this sounds daunting now, you’re bound to crave seasonal sessions with friends throughout the year after you’ve gotten one putting-up party under your belt. With the basic gear on hand and a taste for canning in your system, you’ll spot opportunities for preserving each season.
Trust me, the more you do it, the more natural it’ll seem. Before you know it, you too may be making jelly right along with dinner, turning extra summer squash into pickles instead of compost before you leave on vacation, or calling up friends with a hatched-at-the-market plan for an impromptu “jam” session. Here’s wishing you your own breakthrough moment.
Southern Living contributing editor Virginia Willis is an Atlanta-based food writer, a professionally trained chef, and author of the cookbook Basic to Brilliant, Y'all: 150 Refined Southern Recipes and Ways to Dress Them Up for Company (Ten Speed Press, 2011).