Sometimes when I walk into my kitchen and smell the scents of baking or a soup simmering on the old stove, memories rise inside me like the clouds of meringue on my grandmother’s Heavenly Pie. I’m a child again, and I can close my eyes and see myself ensconced on a stool in my grandma’s joyful kitchen. She prided herself on the shelves of “put by” food and the ability to make a great meal out of whatever was at hand, with enough left over to share with an unexpected guest.
My grandmother’s well-scrubbed and organized domain turned into pure chaos whenever I arrived to “help” cook. She never minded the mess or scolded me when I stuck my thumb through an egg and dropped bits of shell into the batter. What I most remember about our cooking together is that we laughed, tasted, licked spoons and bowls, and then dug our fingers into the sides of freshly iced cakes as if we were both five and being naughty together.
Along the way, I learned the basics of making orange marmalade, scrambling the perfect egg, rolling a pie crust (albeit patchy), and an array of other accomplishments. I got acquainted with herbs, dried and candied our homegrown figs, and dodged the eccentricities of frightening pressure cookers, which always seemed ready to explode.
When my grandchildren ventured into the kitchen and began to work with me, I felt the tug of the invisible thread of continuity. No matter what disaster occurred, we adjusted and worked through the mess. No matter what flopped, flipped, dribbled, splattered, or sprayed, we triumphed, and because the kids weren’t taken to task for minor problems, every experience gave them more self-confidence and skill.
For this chapter, I chose an array of simple comfort-food recipes to make with and for your grandchildren. Some of them were family favorites, but all of them are definitely granny-style, kid-friendly, fun, quirky, and downright memorable. What child wouldn’t love cookie-cutter animal farm pancakes, beans in a blanket, or bird nests filled with tiny candy eggs?
Before your grandchild arrives, stock an easy-to-access (kid height) drawer or shelf with an array of child-sized tools, an apron, oven mitts, and mini cupcake liners. Include an assortment of toppings, such as dragees and sprinkles in a multitude of shapes—hearts, stars, and animals. Buy whimsical pastas, like animals or letters of the alphabet. I guarantee that when you unveil these tools and treats your young chef will be ready to roll up his sleeves and get busy.
A recent study published by Newcastle University, European Union, found that organic wheat, tomatoes, lettuce, and cabbage have up to 40 percent more essential vitamins and minerals than conventionally grown crops.
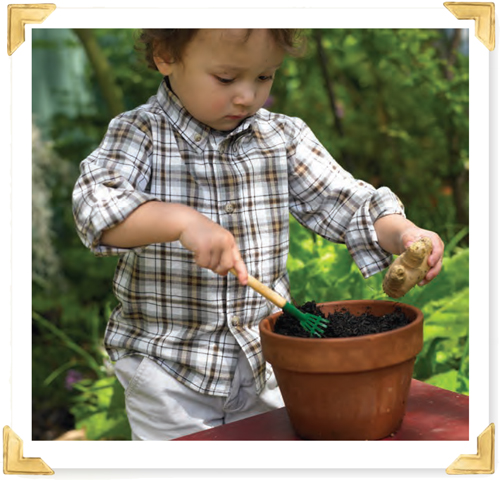
Introduce your grandchild to your local farmers market. It is beautiful and lively, and it connects children to the farmers or gardeners who grow great produce. It also educates them about good, healthy food, where it comes from, and how it is grown. They will learn that, if the produce is organic, it is safe, tasty, filled with nutrients, and good for them.
Before you go to the grocery store or farmers market, sit down at your kitchen table and get your grandchild’s thoughts about what foods are favorites and what would be fun to cook. Pick a meal you would like to make together and list the ingredients you’ll need.
At the market, let your child be part of the process of choosing. Examine produce and ask how the fruit or veggies look. Point out things that are right or wrong with the food and how to tell if something is ripe, check expiration dates, and don’t be afraid to ask questions of the growers.
When you return home, put away the groceries and wash the produce together. These seemingly mundane chores can be interesting for a child who is happy just to be working alongside you. At the same time, he will become familiar with stocking a kitchen and preparing for cooking.

Here are some simple things you can do to make your grandchild’s cooking experiences safe, fun, and easy.
 Provide your grandchild with an apron. All kids love wearing them.
Tuck a hand towel into the chef’s waistband for easy cleanup.
Arrange a work area that is scaled to your child’s height. Use only a child-safe stepstool (available online and in cooking and toy stores).
Cover the table with newspaper or a spill-resistant tablecloth or painter’s drop cloth.
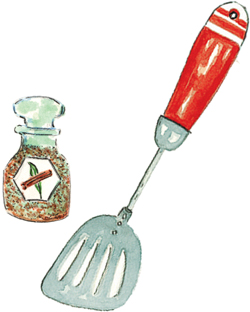
Keep a basket, box, or drawer filled with child-friendly kitchen items, like a small spatula, whisk, rolling pin, cookie cutters (without handles) for pancakes and potatoes, pizza wheel, blunt kitchen shears, muffin tins, cake pans, measuring cups, measuring spoons, unbreakable mixing bowls, bread knife for spreading and cutting soft foods, and small cooking pots.
Use a safe, handheld immersion blender—it’s lightweight and saves on cleanup because you blend in the same container you use for preparing. My granddaughter calls the blender “the magic wand” because of all the amazing tasks it accomplishes.
Many cooking projects can be done in a portable electric frying pan or a small toaster oven set on the worktable. Explain that these appliances should never be touched or used unless you are in the room.

Preparing for “Restaurant Night at Home.”
Before you begin cooking together, talk about basic kitchen safety. Explain that a child can’t use knives without supervision or turn on appliances or a stove without Granny nearby. And always follow these safety measures:
1. Wash hands with warm, soapy water before doing any prep work and after handling meats, raw eggs, or unwashed fruits or vegetables.
2. Roll up sleeves or wear short sleeves to prevent accidents.
3. Band or tie long hair so that it doesn’t interfere with cooking or vision.
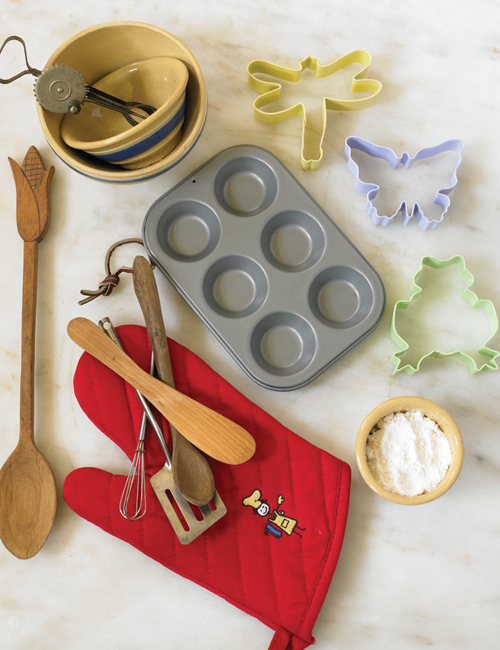
Keep a supply of child-sized cooking tools, pans, and bowls on hand.
To cut down on the time it takes for a youngster to do the hands-on work of cooking, I prechop items and have them lined up on the worktable ready for little fingers. As a child gets older and has better motor skills, these tasks will be safer and come more easily. Choose easy recipes to cook together and don’t expect your youngster to help you cook an entire meal. One project, such as scrambled eggs, may be all that a child can handle. And that’s a big accomplishment! Before you start, make sure everything is “at the ready.”
Clear your work area.
Read the recipe out loud.
Check the recipe to see if you need to preheat the oven. If so, do it now.
Ask your grandchild to help you locate the ingredients in a recipe and move them to your setup area. Some of the items may be too high or out of reach, but you can find them and pass them to your helper.
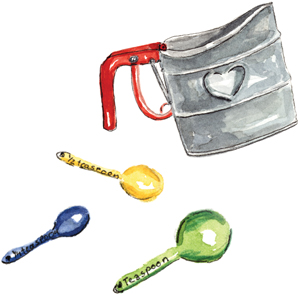
Take out measuring cups, spoons, sifters, and any other tools you’ll be using.
Set up a line of bowls for each ingredient needed.
Measure ingredients and put them in the bowls in the order in which they will be used. Grown-up chefs refer to this time-saver as mise-en-place, which simply means “everything in its place.” By teaching your grandchild this time-saving strategy, you’ve saved hours of time in his future kitchen.
Let your grandchild do any necessary measuring, both with spoons and cups. Teach your helper how to do a level spoonful by using a knife edge to scrape extra ingredients off the top of the cup or spoon. This experience is a great math lesson and helps develop coordination and self-confidence.

Breakfast is my family’s favorite meal, and why not? Fresh fruit, drifts of airy scrambled eggs, crunchy granny-ola, and pancakes—just thinking of these foods makes my mouth water. Set your table with real napkins, a small vase of flowers, good plates, and glasses. Take your time eating, talking, and celebrating the perfect beginning to a new day.
I’ve never met a child who doesn’t love fresh fruit smoothies. They’re a great breakfast substitute when your grandchild isn’t in the mood for a full-on breakfast. They’re quick, easy, and filled with vitamins, minerals, and antioxidants.
Makes 1 smoothie.
Ingredients
¼ cup sliced banana (about half a banana)
¼ cup berries or chopped fruit such as pineapple, peaches, kiwi, or mango
½ cup low-fat vanilla yogurt or child’s favorite flavor (plain can make smoothie sour), frozen yogurt, or frozen juice concentrate for thickeners
¼ cup skim milk, soy milk, rice milk, or apple juice
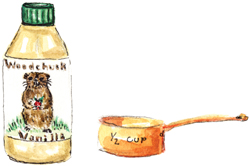
½ teaspoon pure vanilla extract (optional, but divine)
Tools
Measuring cups and spoons
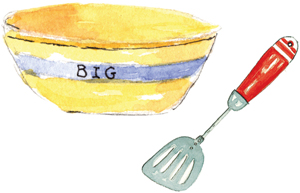
Big bowl
Immersion blender
• Toss the fruit into the bowl, and add the thickener of choice.
• Put the immersion blender into the bowl, turn it on low. Then as your helper gets used to it, turn up the speed.
• Turn off the blender, add the liquid (milk, soy, etc.) and the vanilla extract, and puree on high until the ingredients are combined and the smoothie is the consistency you want.

Most children are aficionados of the Dr. Seuss books, and this is a great way to entice them to cook their own version of green eggs and ham and get them to eat it, too. Read the story of Green Eggs and Ham aloud while your grandchild enjoys this breakfast (children of all ages love this book).
One of the first foods my granddaughter Sara May learned to make was perfectly scrambled eggs. The secrets to her success? A child-sized iron skillet, sweet butter, and the deft swirl of a kid-sized spatula.
Makes 1 serving.
Ingredients
2 large eggs
Natural green food coloring (always use the natural, available at health food stores)
2 teaspoons butter
¼ cup ham or vegetarian ham
Tiny pinch of salt and pepper
Tools
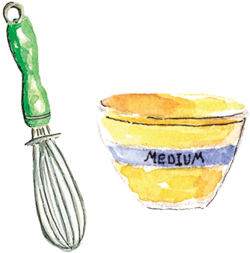
Medium bowl
Whisk
Child-sized spatula
Small nonstick or seasoned frying pan
• Show your grandchild how to give the side of an egg a good firm tap on a flat, hard surface (a countertop is perfect).
• Hold the cracked egg and use two thumbs to open it and drop it into the bowl. If a piece of eggshell gets into the bowl, just use a large piece of eggshell to remove it.
• Whisk the egg, and add a few drops of the natural food coloring. Keep whisking until the color is blended.
• Place the frying pan on medium heat, and after half a minute, drop in the butter and spread it around the pan.
• Drop small pieces of ham or vegetarian ham into the hot butter.
• Slowly pour the eggs into the pan (away from the child), and let the mixture sit for 15 seconds.
• Gently scrape the spatula across the bottom of the pan and away from the chef.
• Scrape again, and stir until fluffy curds form.
• Remove the pan from the stove, and immediately slip the green eggs onto your grandchild’s plate. (If you leave eggs in pan, they will continue cooking and become rubbery.)
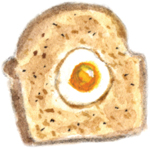
Whenever I tired of scrambled eggs, my grandmother thrilled me with this simple, fun-to-create breakfast. Here it is in rebus form.
Give your grandchild some  , a
, a  and a slice of
  . Butter both sides of
  . Use a
  or glass to cut a
  in the center of the . Heat a
  on medium. Drop in some , lay the
  and the in the pan, and fry them for a minute. Flip the over. Crack a large
  and gently slip it into the hole. Cook to desired doneness. Set the cutout (frog) on top of the fried egg, and serve immediately. Ribbit!
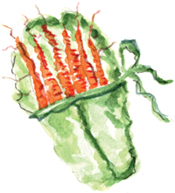
I’m crazy about cookie cutters, and I’m always looking for new and unusual shapes. My grandkids love them too, not only for cookies, but also for clay crafts and for making our custom pancakes. Use handleless cutters to make the filling and flipping easier for your child.
Make your pancake batter from scratch or from a good commercial mix. Whichever you do, keep your grandchild involved every step of the way, from measuring and mixing to ladling and flipping.
To help move the pancake process along, premake the dry ingredients, and store the mix in a glass jar with your grandchild’s name on it. That way she can reach into the cupboard, pull out her own homemade mix, and add the rest of the ingredients.
Granny’s Homemade Pancake Mix
7½ cups all-purpose or unbleached flour
¼ cup baking powder
1⅓ tablespoons salt
⅔ cup sugar
• Stir all ingredients thoroughly. Store the mix in an airtight container in a cool place.
Makes 12 to 14 pancakes depending on the size of your cookie cutters.
Ingredients
2½ cups homemade pancake mix (above)
2 large eggs
2 cups milk
½ stick butter, melted (warm, not hot), plus 1 tablespoon butter
3 teaspoons pure vanilla extract
Spray cooking oil
1 cup fresh or frozen berries (see Note)
Pure maple syrup
Tools
Big bowl
Small bowl
Whisk
Big wooden spoon
Small ladle
Animal cookie cutters
Frying pan (I love a seasoned iron skillet for this recipe)
Spatula (child-sized)
• Pour the homemade pancake mix into a big bowl.
• Lightly whisk the eggs in a small bowl.
• Add the milk to the eggs and whisk. Then slowly add the melted butter.
• Add the vanilla to the egg mixture, and whisk.
• Slowly add the moist ingredients to the dry mix, and stir just until combined. Don’t overstir—a bit lumpy is fine! If batter is too thick, add water one teaspoon at a time.
• Spray the inside of the cookie cutters with cooking oil.
• Set the frying pan on high heat for about 1 minute, then turn the heat down to medium and wait another minute.
• Place 1 tablespoon of the unsalted butter (or a tiny bit of cooking oil) in the pan.
• Arrange the cookie cutters in the pan—don’t crowd them. Let your helper use the ladle to half fill each cookie cutter with batter. Don’t fill to the top, as the batter will double and overflow. (I love the careful ladling done by my grandchildren, who fill every nook and stop at just the right time.)
• As the pancakes cook, ask your grandchild to look for the tiny craters that will form on the pancakes, signaling that it’s time to flip them.
• Quickly slide a spatula under each cookie cutter and flip it. Cook for another 1 to 2 minutes.
• Remove pancakes from cutters. Serve hot, or keep a single layer of the pancakes on a cookie sheet in a 200-degree oven till ready to serve. Sooner is better than later.
Note: Some people like to mix berries or cut fruit into the pancakes, but my grandkids like the berries over the top. I mix a couple of cups of fresh berries with a cup of pure maple syrup and heat it slightly. Yummy!
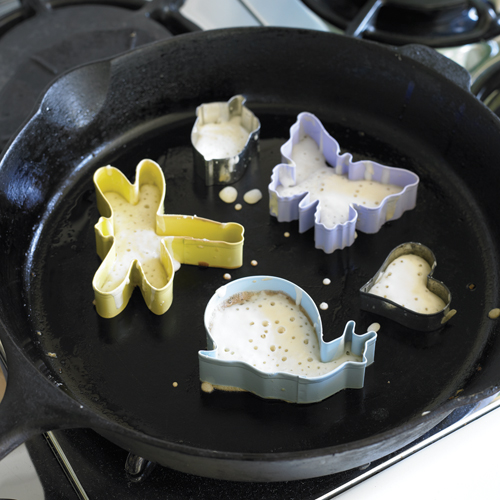
Cookie cutters make forming and flipping pancakes easy.
We call our flamboyant breakfast extravaganza “Fluffy Clouds.” Other cooks know them as “Dutch Babies,” but whatever you call them, they’re delicious. The clouds are easy to make and beautifully fluffy when you remove them from the oven. There is something quirky about these that children love. Let your granchild sift a “snowstorm” of powdered sugar over the top.
Makes 4 to 6 clouds.
Ingredients
6 large eggs, room temperature
1½ cups milk, room temperature
1 cup bread flour, sifted (which gives you the most puff for your buck)
3 tablespoons granulated sugar
1 teaspoon pure vanilla extract
½ teaspoon ground cinnamon
6 tablespoons butter, melted
1 teaspoon lemon zest
Confectioners’ sugar for dusting the clouds
Big bowl
Measuring cups and spoons
Sifter
Immersion blender
10- to 12-inch frying pan or a 9-by-13-inch baking pan (about 2 to 3 inches deep)
Grater
Small bowls
• Position a rack in the center of the oven, and preheat the oven to 425°F.
• In a big bowl, beat the eggs until frothy and light. Slowly add the milk, sifted flour (this is a chore your grandchild will love), granulated sugar, vanilla, and cinnamon. Continue blending for about 1½ minutes.
• Preheat your pan in the oven for a couple of minutes.
• Pull out the oven rack, and pour the melted butter into the pan, making sure to cover the entire bottom of the pan.
• Quickly pour the batter into the pan, and slide the rack into the oven. DON’T OPEN the oven door until your cloud has baked 25 minutes. Open and close the door gently or the cloud will flop.
• Bake for 25 to 30 minutes, until the cloud rises and is a light golden color.
• While the cloud is baking, finely grate the lemon zest into a small bowl.
• Quickly but gently remove your cloud from the oven. Immediately have your grandchild dust the top with a sifting of confectioners’ sugar and a sprinkling of lemon zest.
• Serve hot with one of the following toppings.
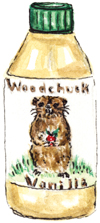
Whenever my grandmother and I baked together, I was in charge of measuring and adding the vanilla—my favorite ingredient—to the recipe. Before she put the bottle of vanilla back into the cooling cupboard, she always dabbed a little behind my ears and on my wrists for a sweet perfume—a tradition I carry on to this day.
While the clouds are baking, line up small bowls on the table and fill them with toppings such as berries, applesauce, sliced peaches, sliced bananas, and pecan pieces. Let your child choose and top with any or all.
Years ago, I visited author Molly Chappellet at her home in the Napa Valley, and she shared this recipe. I love it because it not only involves your grandchild in the making of the biscuits, but also turns the process into an occasion for berry picking and picnicking. The biscuits are great to make when wild blackberries are in season. You can also use fresh strawberries, jam, or a frozen berry mixture that is heated.
Makes 4 to 6 large biscuits.
Ingredients
2 cups sifted cake flour
2½ teaspoons baking powder
1 teaspoon salt
½ stick cold butter (the real stuff, never margarine)
¼ cup shortening, chilled
18 tablespoons buttermilk (This equals 1 cup plus 2 tablespoons, but children love counting, and counting this many tablespoons of buttermilk turns into fun for them.)
2 cups berries
Heavy cream (optional)
Tools
Sifter
Measuring cups and spoons
Big bowl
Two butter knives
Lightly floured breadboard
Biscuit cutter (2 inch) or a small glass
Cookie sheet, greased
• Place a rack in middle of the oven. Preheat oven to 400°F.
• Show your grandchild how to sift the dry ingredients together into a big bowl and then how to use two knives to cut cold butter and shortening into the dry ingredients. We call this method “lobstering,” because it resembles the way a lobster uses its two front claws. Don’t overwork it; the mixture should resemble small peas. Your grandchild should gradually add the 18 tablespoons of buttermilk while you stir the mixture gently until the dough is mixed through.
• Turn your sticky dough onto your prepared breadboard. Quickly pat the dough into a round that is about ½ inch thick. (You could roll it, but a child will love the quick patting process.)
• Cut the biscuits with the cutter (or a glass).
• Place biscuits about 1 inch apart on a greased cookie sheet.
• Bake until a soft, golden brown, about 10 to 12 minutes.
• Let cool for 5 minutes. Slice the giant biscuits in half, scoop on the berries, and pour a thick coating of cream inside. Yum!
Ahhh lunch, time to pause together to refuel with simple foods and ideas for the rest of a busy day. Keep it simple and dip into some “Super Snacks” for extra go-power.
My early dislike of the taste and texture of cheese led to this simple sandwich, inspired by Johanna Spyri’s book Heidi. Heidi lived in the Swiss Alps with her grandfather, who fed her thick crusts of bread with chunks of cheese toasted on an iron fork over an open fire. I tried my own version of this on a coat hanger when I was young, and managed to drop every bit of cheese into the fire before I could get it onto the bread. Thank goodness for broilers.
Warning: Please don’t try this recipe in a microwave oven; the cheese turns into a sheet of rubber.
Ingredients
Slices of hearty bread, such as sourdough or whole wheat
Butter, room temperature
Honey mustard (optional, but tasty)
A good melting cheese such as mozzarella, Muenster, Cheddar, Jarlsberg, fontina, Gruyère, or Monterey Jack, sliced
Grown-ups like the addition of grated Parmesan cheese
Tools
Bread knife
Cookie sheet
Grater
• Set the broiler tray in the middle position and turn on the broiler.
• Place the slices of bread on the cookie sheet. For special occasions (like Valentine’s Day), I use big heart-shaped cookie cutters to make specially shaped Heidis.
• Let your grandchild spread the soft butter onto the bread.
• Slide the buttered bread under the broiler, and cook for about 1 minute.
• Move the cookie sheet to your work area. (The cookie sheet is HOT, so use caution.) Let your helper place thin slices of the cheese onto the bread until it is completely covered. Spread with a little honey mustard if you like.
• Slide the cookie sheet under the broiler, keep the oven door ajar so you can watch, and broil for about 2 minutes or until cheese starts to bubble.
• Open the broiler, sprinkle a bit of the Parmesan over the bubbling cheese, and cook for about 30 seconds with the door ajar again. Grandma should remove the Heidis from the cookie sheet. Serve hot with a bowl of tomato soup or the following Alphabet Soup.
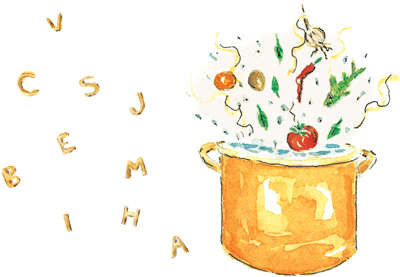
When I serve alphabet soup, it sometimes gets cold before my grandkids get around to sipping it. They love to fish through the broth and lift out letters to spell their names or their friends’ names or special words they are studying in school. They’re so entranced by the soup they actually eat the veggies without even knowing it.
Since you’ll be working with a big pot of HOT ingredients, spend your time together preparing and measuring everything, setting up the ingredients, and setting the table. Teach your helper never to reach over a hot pot or to touch the stove top.
Serves 4.
Ingredients
1 cup sliced carrots
½ cup sliced celery
1 cup diced onion
1 tablespoon olive oil
1 tablespoon butter
2 cloves garlic
1 cup fresh spinach leaves
1 one-quart box vegetable, chicken, or beef broth
1 cup water
½ cup alphabet pasta
1 teaspoon dried oregano or mixed Italian herbs
Salt and pepper
Parmesan cheese, grated (optional)
Tools
Cutting board
Knife (grown-up does the cutting)
Measuring cups and spoons
Big soup pot or Dutch oven
• Granny does the prep work for this recipe since it involves a lot of knife work. You’ll need to slice carrots into thin coins, slice the celery, and dice the onion. Turn on the burner under the soup pot. Add the olive oil and the butter and stir. Add the carrots, celery, and onion to the pot.
Then, your grandchild can help:
• Whack the garlic cloves with a can, roll the can over the cloves to moosh them, peel off the skins, and toss the cloves into the pot.
• Tear the spinach into small pieces.
• Add the broth and water to the soup pot. Turn burner heat to medium and cook the soup (without a lid) for about 10 minutes.
• Add the alphabet pasta and the torn spinach, and cook another 8 minutes.
• Season with oregano or Italian seasoning.
• Add salt and pepper to taste.
• When serving, top with a light dusting of Parmesan cheese, if desired.
Who knew you could make a fruit soup? And eat it cold? You and your grandchild can change the star of this soup depending on what fruit is in season. I’ve used blueberries fresh from the woods, luscious strawberries, and peaches. Whatever you choose, it will be delicious.
Makes 4 small servings.
Ingredients
1½ cups cream (you may substitute soy milk or rice milk)
1½ cups orange juice
½ cup yogurt
1 tablespoon sugar or honey
1½ cups fresh or frozen berries
Chunks of fresh fruit, for topping
Ground nutmeg or cinnamon, for topping
Tools
Big bowl
Immersion blender
Ladle Small bowls
• Pour ingredients (except toppings) into a big bowl.
• Blend with the immersion blender until items are thoroughly combined, with no lumps remaining. The soup will be the glorious color of your fruit.
• Chill in the refrigerator for about 2 hours.
• Serve in individual bowls, topped with chunks of fruit dusted with nutmeg or cinnamon.
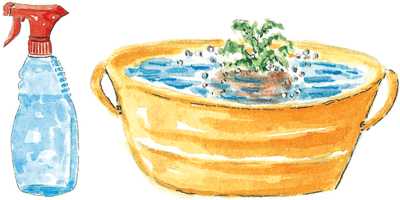
All fruits and veggies must be washed before they’re eaten. Polishing them on your jeans’ leg just doesn’t do the job! The agricultural and environmental scientists at Tennessee State University recommend that cooks cut off both the stem and blossom end of the fruit. Mix 3 parts of water with 1 part of white vinegar in a clean spray bottle. Drench produce with the vinegar spray, and then rinse under running water. Fruits and veggies that are not smooth (like cauliflower, broccoli, etc.) may need to be soaked in the vinegar water, then rinsed.
Sometimes the best munchies are the unplanned kind, where you and your grandchild pick some things from the garden or pluck them from your refrigerator and assemble them into snacks and, believe it or not, food art. The simple act of working together to create food that is sculptural, pictorial, funny, and tasty is an unforgettable experience for a child.
Ingredients
Fresh vegetables and fruits
Cream cheese (to use as glue)
Tools
Bamboo skewers
Toothpicks
Paring knife
Small cookie cutters to cut shapes out of melons
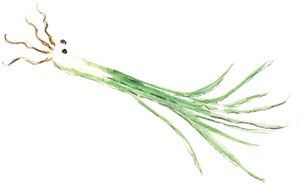
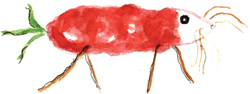
Green onion squid.
Radish dog.
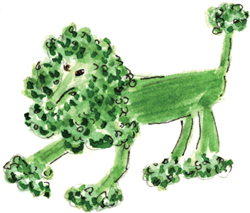
Broccoli poodle.
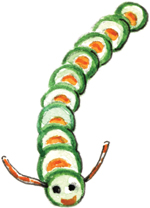
Caterpillar assembled from sliced cucumbers and carrot coins with celery antennae.

Bell pepper basket.

Plate face with toast eyebrows and nose, egg eyes, and bacon mouth.
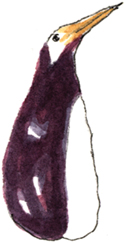
Partially peeled eggplant penguin.
Two peapods grasshopper.
 Keep a supply of Popsicle sticks on hand, and encourage your grandchild to make fresh fruit “yummies” for snacks. Use whole strawberries, chunks of banana (which taste like ice cream when frozen), cubed peaches, peeled kiwi, whole apricots (pits removed), and cut mangos. Poke the Popsicle sticks into the fruit, immediately wrap them in plastic, and freeze. These “yummies” make a refreshing (and healthy) treat on a hot summer’s day.
I refused to eat celery when I was a kid, but when my grandmother stuffed it with peanut butter, dropped a few raisins on top, and called it “ants on a log,” it was my favorite snack. Simple, healthy, and fun—just what kids want.
Combine 2 or 3 cups of Granny-ola (see recipe) with more dried fruits, carob chips (these taste and look like chocolate), some salty pretzels and nuts, sesame sticks, and soy nuts. Mix them together and package them in snack-sized bags to carry along on your outdoor explorations.
Grape marbles are one of my favorite hot-weather snacks. Bite into them and they explode with a juicy, refreshing flavor. Freeze whole bunches of grapes (don’t worry about wrapping them). Use them as a snack or as a substitute for ice cubes in a fruity drink.
Strawberry bugs are ALMOST too adorable to eat, but kids will enjoy devouring them, usually head first. Hull strawberries and poke a blueberry into the wide end with a short piece of toothpick to make the head. Use another toothpick to pierce the sides of the berry with six holes. Stick a tiny sliver of celery into each hole to make the legs.
Hollow out the center of a cantaloupe, small watermelon, or honeydew melon and set aside. In a medium bowl, blend 1 cup of raspberry yogurt with ½ cup of soft cream cheese and 3 teaspoons of lemon juice. Stir in some frozen raspberries and chill. Fill the melon with the fruit mixture, and dip into it with fruit slices or carrot sticks.
With a pizza wheel, cut a package of soft tortillas into pie-shaped wedges (stack the tortillas three deep to speed things up). Spread them in a single layer on a greased cookie sheet, and lightly spray with cooking oil. Bake wedges in a 350°F oven for 7 to 10 minutes (watch closely or they’ll singe) until crispy. Remove chips from the oven and lightly dust them with cinnamon and sugar.
Find the tiniest carrots available, clean them, and store them in a container in the refrigerator. Label the container FAERIE FINGERS, and watch how they disappear whenever it is snack time.
Prepare popcorn, and store it in individual sealed sandwich-sized bags in your cupboard. Pull it out whenever your grandchild wants a quick bite to eat.

This may sound like a party for girls, but I’ve found that most little boys respond to the magic and mystery of tiny foods made by the faeries. I’ve included some of my menu favorites as a suggestion, but I encourage you to make up your own. Ask your grandchild for his ideas about what kinds of foods the faeries would eat, and then experiment together. Keep things simple and accessible, think small and whimsical, and then make your own variation of the faeries’ picnic. This is a fun process, so enjoy every step.
Find a small basket, line it with a piece of fabric, tuck the picnic inside, and tie the fabric closed with a piece of ribbon. Stow the picnic basket and food in a cool place until you “discover” the gift from the faeries and go outside for a picnic.
Remove the crusts from bread, and use a small heart- or star-shaped cookie cutter to create your sandwiches. You can fill the sandwiches with whatever your grandchild enjoys, but I like to spread a thin layer of sweet butter on the bread, sprinkle lightly with sugar, and top with a confetti of the colorful petals (always unsprayed flowers) of roses, violas, Johnny-jump-ups, carnations, dianthus, or lilacs.
Thinly slice an apple and quickly dunk each piece into lemon juice to keep it from discoloring. Smear peanut butter on one slice and top with another.
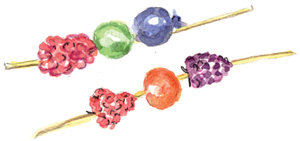
Faeries love to eat their fruits fresh-picked and strung on a twig, but for safety’s sake, your faerie fruit will be strung along pieces of uncooked spaghetti. Break the spaghetti into short sections and pierce the fruit, alternating among strawberries, melon, grapes, blueberries, and raspberries. Don’t use bananas, which will quickly discolor.
Find the tiniest carrots available. Fold a lettuce leaf inward to form a little pocket. Tuck in a line of baby carrots; tie the pouch closed with raffia or a strappy chive spear. Leave the little tips of the carrots showing at the top of the pocket.
You’ll need a container of your grandchild’s favorite flavored yogurt. Suspend a cheesecloth-lined strainer or colander over an open bowl in the refrigerator. Add yogurt and tiny pieces of raspberry, blueberry, strawberry, and pecans, and let it drip overnight or until it is firm. Stuff the cheese-like mixture into a washed hollyhock bloom (keep cool).

Buy a refrigerated, premade pie crust (okay, do it from scratch if you want), and unroll it onto a work surface. Use a small, round cookie or pastry cutter to create mini pie crusts. Crimp the edges lightly and sprinkle with cinnamon and sugar and transfer to a cookie sheet. Bake at suggested temperature, but check often as they burn quickly. Remove button pie crusts from the oven, let cool, and fill with fresh fruit or jam. Drop a dollop of whipped cream on top and finish with a tiny mint leaf.

Fill an ice cube tray with hot water from the tap. Drop a small blossom of lilac, viola, borage, Johnny-jump-up, or rose petal into each section of the tray. Freeze. Make lemonade and add a blend of berries to give it zing. Drop in some flower ice cubes.

I love sharing dinners with my grandchildren, and I try to make our meals special occasions. It gives us a chance to work together in the kitchen, set and decorate the table, light the candles, and hold hands and share why we are grateful. Oh, and let’s not forget the most important part of a family meal: everybody talks and we always laugh a lot. Recently I learned that having breakfast for dinner is my grandchildren’s favorite treat. For them, a serving of waffles, eggs, and other breakfast foods is better than going to the fanciest restaurant in town. See here for some great kid-friendly breakfast recipes.
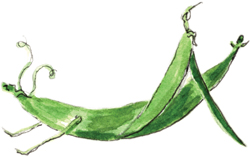
No matter how finicky my grandchildren are about food, there are certain things that are accepted without question, like these Beans in a Blanket. I don’t know if they would like them as much if I referred to them as burritos, but “beans in a blanket” definitely wins them over. You and your grandchild can set up the ingredients and work assembly-line style at putting them together. Of course, this dish is also finger food, which seems to hold extra appeal for the under-12 set.
Makes 4 to 6 tortillas.
Ingredients
1 package tortillas (see Note)
1 cup Monterey Jack and Cheddar cheeses, grated together
3 tomatoes
1 head lettuce
1 can red kidney, black, or refried beans
1 jar salsa or mild taco sauce
Tools
Aluminum foil
Grater
Cutting board
Knife
Small bowls (five)
Small pan
• Wrap the tortillas in aluminum foil and warm them in a 250°F oven while you prepare the ingredients. Supervise the grating of the cheeses while you dice the tomatoes and your helper tears the lettuce. Transfer the prepared vegetables and cheeses plus the salsa into individual bowls and line them up on the counter or table.
• Place the beans in a pan and heat slowly over medium heat. Keep an eye on them because they burn quickly.
• Remove the tortillas from the oven and set them on the cutting board or work space.
• Remove the beans from the stove top, transfer them to a bowl, and place them near the toppings. Unwrap the foil and put a tortilla on a plate.
• Spread beans on one side of the tortilla. Spoon lettuce, tomatoes, and cheese on top of the beans.
• Roll the tortilla into a snake shape, and dot it with taco sauce. Repeat for the rest of the tortillas. Dig in!
Note: Many markets (especially health food stores) sell colorful tortillas made from spinach, tomatillos, squash, etc. These add even more lively color and nutrients to Beans in a Blanket.

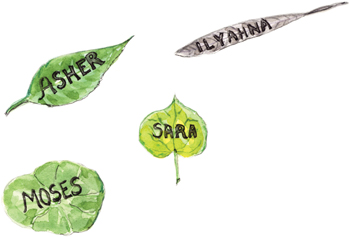
Supply your grandchild with leathery leaves to make place cards for the dinner table. Use acrylic paint or markers (you can buy silver and gold markers) to write the name of each person.
Is mac and cheese a phase that every child goes through? For a while, when one of my grandchildren visited, she would only eat mac and cheese. I’ve learned to always have the ingredients in my pantry. This make-and-serve version doesn’t require any baking—which is great if you have a hungry child. Let your grandchild measure, grate, and whisk the ingredients.
Serves 4 to 6.
Ingredients
2 teaspoons salt
½ pound dry elbow macaroni or any dry pasta in whimsical shapes, such as animals, stars, etc.
2 tablespoons unsalted butter
1½ tablespoons unbleached flour
1 cup milk
½ pound Cheddar cheese (you can mix in Monterey Jack cheese too)
½ cup grated Parmesan cheese
Tools
Large pot
Grater
Colander
Skillet
Whisk
Spoon
• Start your pot for the macaroni with two quarts of water, add salt, and bring to a rolling boil. Add the macaroni to the boiling water and cook according to directions, usually 6 or 7 minutes. Stir occasionally. Don’t overcook the pasta!
• Pour the macaroni into a colander and drain it in your sink.
• While the pasta cooks, prepare the cheese sauce. Put the skillet on medium heat, drop in the butter, and slowly sprinkle in the flour, whisking continually.
• Add the milk and whisk constantly until the mixture thickens slightly.
• Add the Cheddar cheese to the mixture and stir for a couple of minutes until cheese is melted.
• Turn off the heat under the cheese sauce and move the skillet to a cool burner.
• Add the macaroni to the cheese sauce, sprinkle with the Parmesan cheese, and stir.
Note: If you feel you must bake this, butter a 9-by-13-inch pan, pour in your mac and cheese, top with another half cup of grated Cheddar cheese, add some seasoned bread crumbs if you want a crunch. Bake for half an hour at 350°F.
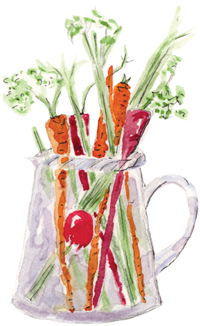
The best way to slip vegetables under your grandchild’s veggie radar is to give them center stage on your table. Clean and slice celery, red and yellow bell peppers, carrots, and tiny “trees” of broccoli. Tuck them into a small vase filled with cold water, and set them within reach of your grandchild. Fill small bowls with ranch or other favorite dressings and dip into them.
Whenever you suggest something unexpected and out of the ordinary, you can count on your grandchild’s eager participation. Restaurant night at home will stir up a whirlwind of ideas. Think of the possibilities: hand-decorated menus, custom-made place mats, the chance for you to be served by your grandchild, and memories that will last a lifetime.
 Set aside some time to figure out a simple, easy menu for an Italian spaghetti dinner. Print it legibly for your grandchild, and supply him with paper, markers, and whatever is necessary to hand-make menus for everyone.
Scan or copy the tricolored Italian flag, and print out copies to be used as place mats.
Open a full-sized sheet of newspaper, and cut a head-sized hole at the fold to make a drip-stopping spaghetti bib. Set the table with candles, a bouquet, real dishes and wineglasses, which you can fill with sparkling water or fruit juice, and big (preferably checkered) napkins.
Play Italian music.
Show your grandchild how to serve food to the guests. Drape a towel over his arm, carry dishes to each person, and unfurl napkins onto the diners’ laps.
Buy fresh Parmesan cheese and let your grandchild grate it onto each person’s plate of spaghetti.
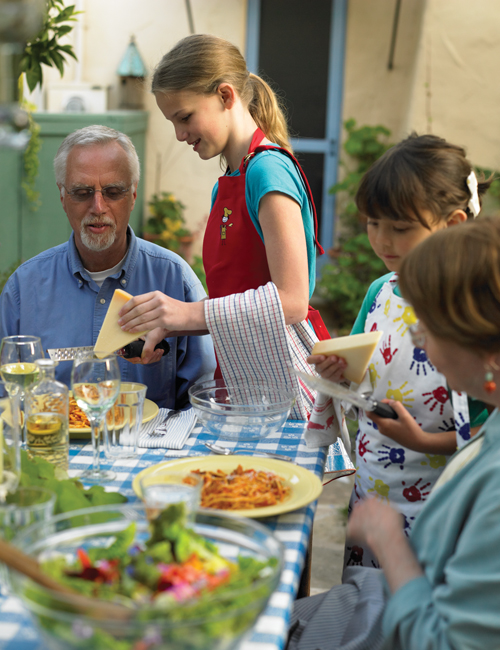
Even a simple grating job will give your grand a sense of accomplishment.
Yummy roasted vegetable tomato sauce will be easy for you and your grandchild to prepare and won’t entail the use of big, heavy pots. Most of your time will be spent carefully chopping the ingredients, which, when roasted, are rich, complex, and incredibly tasty. You can make this sauce the day before Restaurant Night and reheat it as your pasta is cooking. The flavor just gets better the second time around.
Enough for 1 pound of spaghetti.
Ingredients
Extra-virgin olive oil to coat the baking sheet and drizzle on veggies
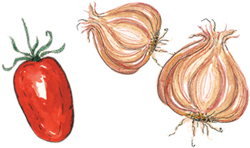
2 onions
1 head garlic, separated into cloves and peeled
2 stalks celery
2 carrots
2 pounds fresh Roma tomatoes (about 16 tomatoes), cut into chunks (see here for growing your own)
1 can (28 ounce) of crushed whole tomatoes (Italian Romas have more taste)
Fresh or dried parsley, oregano, and rosemary to be sprinkled over the top of the sauce
Sea salt and pepper to taste
Tools
Baking sheet (unlike a cookie sheet, this has rolled sides)
Knives
Big bowl
Spatula
Immersion blender
• Preheat the oven to 425°F.
• Prepare the baking sheet with a drizzle of the olive oil.
• Set up a workstation at your child’s height and allow your helper to cut alongside you with a serrated bread knife (firm tomatoes are easy for them to cut in halves and quarters).
• Cut the fresh vegetables into small chunks so they cook uniformly, and toss them into the bowl.
• Drizzle the vegetables with the olive oil and sprinkle them with about 2 teaspoons of sea salt. Then show your grandchild how to use his hands to toss and mix the veggies until they are thoroughly coated with oil and salt.
• Help your grandchild transfer the vegetables onto the baking sheet in a single layer. Don’t crowd them or they’ll steam rather than roast.
• Roast for 15 minutes, then stir and flip the vegetables.
• Roast for another 15 minutes and stir vegetables again. Spoon the crushed tomatoes over the vegetables.
• Your helper can sprinkle oregano, rosemary, and parsley over the vegetables.
• Continue roasting for another 15 minutes.
• Remove from the oven and transfer the vegetables to the big bowl.
• Use the immersion blender to mix the vegetables into a saucelike consistency. Season to taste.
If you grew a spaghetti squash (see here) or found one at your market, now is the time to bake it. Preheat oven to 375°F and show your helper how to poke holes in the skin with a sharp fork or paring knife, so the steam can vent. Roast for about 1½ hours. Remove squash from the oven, cut it in half, and scoop out the seeds. Use your “lobstering” technique with two forks to lift the strands out of the squash. Drizzle the spaghetti squash with olive oil or butter and top with sauce.
If you’re making store-bought pasta:
Serves 6 to 8.
Ingredients
2 quarts cold water
2 teaspoons sea salt
1 pound spaghetti
Fresh Parmesan cheese
Roasted Tomato Sauce (see recipe)
Tools
Large pot
Big wooden spoon
Grater
Colander
• In a large pot, bring the cold water to a rolling boil, add the salt, and stir.
• Holding the spaghetti in your hand, run it through cold water, then slowly add it to the boiling water. Stir for a minute and cook according to the directions on the package.
• To taste for doneness—and the grandkids will love this—remove a couple of strands of spaghetti from the boiling water with a long wooden spoon, and toss it at a kitchen cabinet door. If it sticks, it’s done.
• Your grandchild can grate the Parmesan cheese while you finish the spaghetti.
• Drain the spaghetti in a colander in the sink, but first reserve a couple of tablespoons of the good, thick cooking water and add it to the sauce for flavor. Quickly transfer your cooked spaghetti to a warm serving bowl, pour on enough sauce to coat the noodles, and toss. Add more sauce, if needed, or put the remaining sauce in a gravy boat or bowl for diners to serve themselves.
Yum. Everything is cooked; the kitchen smells great; the windows are steamed up.
Now you can light the candles, sit down, and enjoy a great Italian restaurant-at-home. And don’t forget the wonderful grandchild servers. Tips are in order!

My grandmothers never heard me say, “Please pass the salad.” A chunk of pale, tasteless iceberg lettuce dolloped with Thousand Island dressing was what I accepted as salad. Just as an iceberg sank the Titanic, so iceberg sank my interest in salads. It wasn’t until college, when I began to study the history of gardens, that I learned it was once common for a “sallet” to contain up to 35 ingredients—none of them lackluster and tasteless like my old nemesis.
Take a walk with your grandchild through the produce department of a grocery store or a farmers market, and look at the varieties of lettuce and fresh greens that are available. The colors, textures, and tastes are amazing. Arugula has a rich nutty or peppery taste, sweet mâche melts in your mouth, kale crunches and has a bit of a bite to it, young leaves of deer tongue taste buttery and mild—the choices are endless! So no excuse, step up to the produce with your tote bags and buy something that is new to you. Try different, tasty dressings your grandchild might enjoy, like ranch or homemade honey mustard. Once you and your grandchild start composing beautiful salads together, you’ll never be satisfied with boring iceberg again.
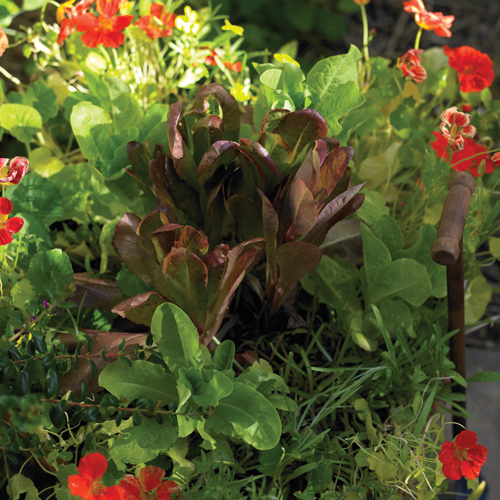
A few packets of seeds (the last great bargain) yielded this container of lettuces, herbs, and edible flowers.
Throw a Salad Bar Party for grandkids and their friends, family, and neighbors. Encourage your guests to bring along a favorite lettuce, fruit, or veggie topping or dressing. Set up your serving table a few hours before your guests arrive, and decorate it with a big “bouquet” of cabbage or lettuce and assorted vegetables. Wait until the last minute to set out your serving bowls of ingredients.
Cover your dining table with brown kraft wrapping paper instead of a traditional tablecloth. Provide small buckets or terra-cotta pots of crayons for each grandchild and friend. Ask them to do their best artistry on the paper and to sign each work. You’ll be amazed by what they’ll create.
Premake a few unusual salads to set the tone. Form a cup of lettuce leaves to resemble a nest, trim it with sprouts, and nestle some radishes inside. Cut a red or yellow bell pepper into horizontal rings and stick endive or romaine inside the ring for a “stand-up” salad.
I’ll bet you’ll be able to entice even the most vegetable-challenged children to partake in the offerings of a salad bar if they’re allowed to make their own choices, construct their own work of edible art, and fill their plates with whatever they want.
Offer at least six different kinds of greens and cabbage or kale. Set up a separate bowl for each variety and provide serving forks or tongs.
Mound an array of ingredients and toppings (see suggestions) in little bowls and on platters, and provide spoons for serving.
Offer a variety of salad dressings, from creamy French and ranch to homemade oil and vinegar, in easy-to-pour containers.
Stack salad bowls, forks, and napkins at one end of the table.
Hands-on is always the best teacher.
 Greens of all kinds
Sprouts
Veggies such as carrots, celery, pieces of broccoli, scallions, edamame
Fruits, such as tomatoes, avocados, dried cranberries, apple slices, raspberries, grapes
Nut toppings (Make sure to label them in case any of your guests have allergies.)
Grated, cubed, and sliced cheeses
A few herbs that go great with greens, such as basil, chives, cilantro, and dill
Edible flowers (see here)
Croutons (see recipe)
Sea salt (fine grain)
Pepper
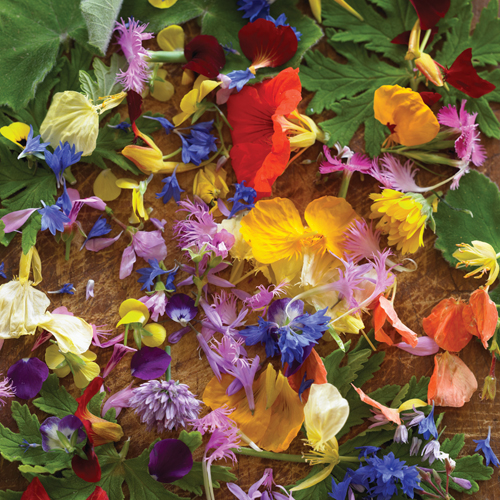
Edible flowers add color, taste, and zing to your salads.
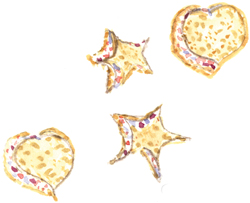
Tiny cookie cutters are perfect for making a child’s version of croutons. Use a dense day-old bread or sourdough for best results.
• Preheat the oven to 350°F.
• Spread unsalted butter on both sides of the bread.
• Cut out a variety of whimsical shapes.
• Heat a skillet on low, and add two parts unsalted butter to one part olive oil.
• Gently drop the tiny cutouts into the skillet, stir, flip, and toss till coated.
• Spread the croutons on a cookie sheet, put in oven, and bake until golden.

As far as my grandchildren are concerned (and probably yours too), dessert should be served first. Although they may be “too full to eat another bite,” somehow there is always room for dessert. I’ll admit that I am a bit lax when it comes to enforcing the rules about cleaning a plate before the grand finale. I figure I feed them veggies and fruits during the day. Reality can set back in when they return home—I exercise my grandmotherly privilege of treating them to uncommon delights when they visit.
My granddaughter Sara May announced one afternoon that she wanted to bake something. We didn’t have much time left together and so I turned to the four-ingredient peanut butter cookie recipe shared with me by Great-Granny Aggie Goettie. This recipe couldn’t be simpler, and Sara crowed with pride when she read the recipe and did everything (except removing the hot cookie sheet from the oven) on her own. In less than half an hour, we had three dozen small peanut butter cookies cooling on a wire rack.
Sara’s description of them—“Perfect, crunchy, better than peanut butter candies.”
Makes 36 small cookies.
Ingredients
1 teaspoon baking soda
1 cup sugar
1 cup peanut butter (we love crunchy, but you might prefer smooth)
1 large egg, lightly beaten
Tools
Medium bowl
Teaspoon
Big bowl
Wooden spoon
Small whisk
Tablespoon
Cookie sheet, greased with spray oil
Fork
2 small bowls
Spatula
Cooling rack
• Preheat the oven to 325°F.
• In a medium bowl, let your grandchild stir together the baking soda and sugar.
• In a big bowl, mix the peanut butter and dry ingredients. Your helper can lightly beat an egg in a small bowl, and then add it to the peanut butter mixture. Stir the cookie dough until it is blended.
• Use a tablespoon to drop the peanut butter mixture onto the greased cookie sheet (leave about 1½ inches between).
• Show your helper how to dip a fork into a bowl of water and make a criss-cross pattern on top of each cookie.
• Bake for 10 to 12 minutes. Transfer the cookies to a rack to cool.
These feather-light cookies are not only tasty, but also beautiful and whimsical. I am on the lookout year-round for candies that look like eggs. During holidays and summer, I find candy eggs that are blue with speckles, and I sometimes use the traditional wedding favor eggs, almonds coated in pastel colored sugar. When I make little hummingbird nests, I use tiny jelly beans.
Makes 36 nests.
Ingredients
34 large marshmallows
½ cup unsalted butter
1 teaspoon pure vanilla
4 cups cornflakes
¼ cup toasted coconut
Candy eggs
Tools
Large saucepan
Measuring cups and spoons
Big spoon
Teaspoon
Muffin pan
Baking sheet covered with waxed paper or parchment
• In a large saucepan, stir the marshmallows and the butter together over medium heat.
• Add the vanilla to the melted marshmallow mixture and stir. Remove from heat.
• Fold in the cornflakes and the lightly toasted coconut, and mix.
• Drop 1 teaspoonful of the mixture into each cup of a greased muffin pan. Show your grandchild how to form a small nest by carefully sticking thumbs into the ball and pinching gently around the edges to make a cup shape.
• Remove once they’re formed and place on a baking sheet. Nestle a pair of small, colored candy eggs inside each one.
• Cover with plastic wrap and let harden overnight on the countertop.
• Store nests in a single layer in a tightly covered container.
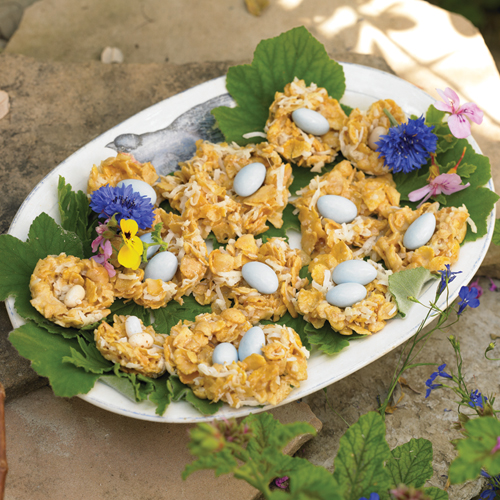
These chewy nests are easy for the youngest chefs to make.
This child-friendly recipe was given to me by my dear pal Mary Rae Means, aka Gramma Gimmy. The treat is a favorite not only for little kids, but also for the big ones who flock around their own mugs of this rich and easy minicake.
Yields 1 12-ounce mug or 2 servings.
Ingredients
4 tablespoons flour
4 tablespoons sugar
2 tablespoons unsweetened cocoa powder
1 large egg, beaten
3 tablespoons milk
3 tablespoons walnut or coconut oil
½ teaspoon pure vanilla extract
3 tablespoons chocolate chips (optional)
Vanilla ice cream, to top
Tools
Measuring spoons
Small bowl
Tablespoon
Medium bowl
Fork
Large microwavable mug (about 12 ounces)
• Let your grandchild dump the flour, sugar, and cocoa into a small bowl and stir to mix well. Next, mix the egg, milk, oil, vanilla, and chocolate chips (if used) in a medium bowl.
• Fold the dry ingredients into the liquid, add chips and mix thoroughly.
• Pour the chocolate mixture into a microwave-safe mug.
• Microwave on high for 3 minutes. The ingredients will rise up and double in size like a soufflé, but they won’t spill over the edge of the mug.
• Use pot holders to carefully remove the hot mug from microwave. Scoop it out into two bowls and top it with vanilla ice cream. Dig in.

This scrumptious cake is the simplest one you will ever bake. I turn to it whenever my grandchildren are in the mood for baking—and you will too. They’ll only need to “dump” ingredients into the cake pan.
Makes 12 servings.
Ingredients
1 can crushed pineapple, with juice
1 can cherry pie filling (or other pie filling, if you prefer)
1 box yellow cake mix
1½ sticks unsalted butter, melted
1 cup pecan pieces, sliced almonds, or walnuts, finely chopped
Whipped cream
Tools
9-by-13-inch cake pan
Big spoon
• Preheat the oven to 375°F (350°F if you’re baking in a glass pan).
• Have kids pour the undrained pineapple and pie filling into the pan and mix with spoon.
• Sprinkle the yellow cake mix evenly over the fruit layer.
• Drizzle the melted butter over the top of the cake mix, making sure to drizzle along the edges to keep the cake from sticking while baking. Sprinkle the nuts over the top.
• Bake for 30 to 35 minutes. The cake is done when the edges pull away from the sides of the pan and are slightly crisp.
• Remove the cake from the oven and cool on a rack for about 20 minutes.
• Serve warm, topped with whipped cream.
Variation: You can substitute an apple pie filling, and a spice cake mix for the yellow mix. It’s a yummy choice for an autumn meal.
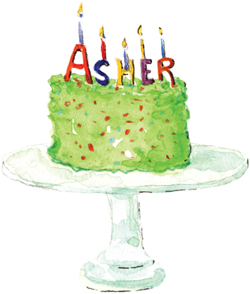
When my grandson Asher turned five, we worked together on a boxed yellow cake for his birthday. Although he loved doing the mixing, he wasn’t happy with the “boring color.” He wanted green, his all-time favorite. So now whenever we whip up a cake together for a birthday, the honored grandchild chooses his or her favorite color for the frosting and the cake.
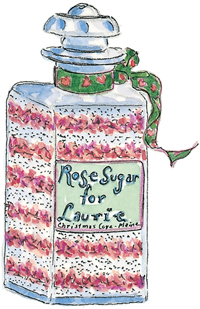
Pour a thin layer of sugar into a jar. Have your grandchild add a thin layer of fragrant (unsprayed) rose petals on top of the sugar. Repeat this process until the jar is full of alternating layers. Store covered and use for cooking and teas.
Slice a vanilla bean down the center, cut it into short lengths, and bury the pieces in a jar of sugar. Store with the lid on, and when you need a special sugar for cooking or tea, it will be ready.
Pour a handful of dried lavender or rose blossoms into a blender or food processor and pulse them until they are powdery. Add the flower powder to a jar of sugar and shake to blend. This sugar is excellent for custards and ice creams.
Many of the scented pelargoniums (called geraniums) have aromatic leaves that lend themselves to cooking. In a jar, alternate layers of fresh leaves with sugar. Cap tightly.
Japanese children carry their lunches to school in a small, compartmentalized container called a bento box. Portions of rice, fish, fruit, noodles, and vegetables, just the right size for finicky eaters, are tucked into each section. Nowadays, the bento box lunches have turned into works of art. Parents interested in getting their youngsters to eat an array of healthy offerings arrange them into compositions called kyaraben or charaben, which means “character food.”
Their food creations include animals, characters from cartoons, movies, and television, musical instruments, landscapes, houses, cars, portraits, insects, and the alphabet—the only limit is imagination. Practice doing fun food projects with your grandchild. You don’t need to buy a bento box; just do it on a plate or platter and enjoy every minute of creating it.
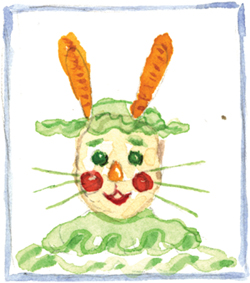
Molded rice head, carrot ears, tangerine nose, lettuce leaves hat and collar, red pepper lips, half apple cheeks, and celery whiskers.
What could be more earth and child friendly than cooking in a Sunshine Kitchen? No worry about hot electrical elements, no gas or propane, no charcoal, wood, or matches, no fancy equipment—just a bright, sunny day and a few hours of play or patience. You and your grandchild will be rewarded with a great meal you created together in harmony with nature. What better way to teach her about the endless possibilities of harnessing solar power?

The optimum time to cook is on bright, clear, sunny days between the hours of 8 a.m. and 3 p.m. Choose a flat, sunny area that is protected from the wind, face the open solar oven toward the sun, and keep the shadow of the lid behind the food. To “preheat,” set your oven in the sunshine about a half hour before placing food inside. As the sun moves through the sky, you may have to move your cooker slightly to keep the box and lid in full sun. Food cooked in a solar oven is heated from the top down, the opposite of how our indoor ovens work, and it takes twice as long.
Don’t worry about overcooking; just put your food in the cooker in the morning and leave it till late afternoon.

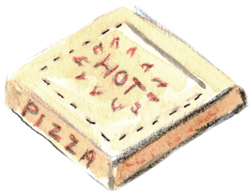
Save that used corrugated cardboard pizza box to make your own solar oven. You’ll be able to sun-dry fruits and tomatoes, and make campfire-style s’mores, melted cheese sandwiches, nachos, English muffin mini pizzas, cookies, biscuits, and other baked treats. This oven should heat to about 275°F on a sunny day.
A sheet of acrylic glass or Plexiglas, slightly smaller than the lid but bigger than the flap you’ll be cutting. You can find these in hardware stores, craft stores, and home improvement stores.
Pizza box of corrugated cardboard (use the largest pizza box for a bigger cooking area)
Marker pen
Ruler
Box cutter (Granny should do the cutting)
Heavy-duty aluminum foil
Scissors
Glue
Black construction paper from a craft or art store
Duct tape
Nail
String
1. Center your sheet of plastic on the lid of the box and trace its outline on the box with a marker.
2. Remove the plastic and draw another outline about 1 inch inside the first.
3. Use the box cutter to cut three sides of the inner line. Leave the back side (nearest the hinge) uncut.
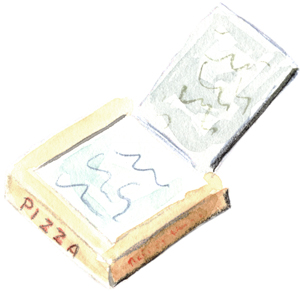
4. Lift the cut portion and crease along the uncut line to form a flap.
5. Close the flap and open the box lid to expose the inside.
6. Cut a piece of aluminum foil to the exact size of the inside bottom of the box, and glue it in place.
7. Tape a piece of heavy black paper over the foil to absorb the heat.
8. Cut another piece of aluminum foil to the size of the flap.
9. Carefully glue the foil to the underside of the flap and press it smooth. When foil is wrinkled, the reflected light bounces off in many directions.

10. Open the box lid, place the plastic on the underside of the lid, covering the flap opening, and tape it to the lid along all four sides. This helps retain the heat.
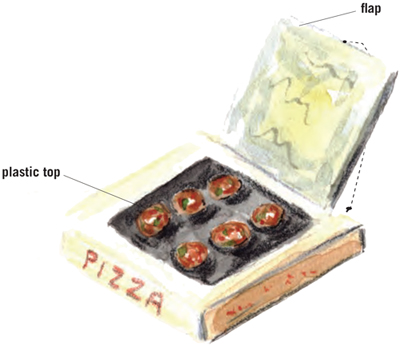
11. Poke a nail into the back side of the oven. Tape one end of the string to the top edge of the flap. Open the flap and run the other end of the string around the nail. Use the string to adjust the angle of the flap to catch the sun’s rays. Tie the string to the protruding nail.
My granddaughter Sara looked at her first English muffin and immediately identified it as a moon. The name stuck, and now our simple little solar pizzas are always called moons.
Ingredients
English muffins
Olive oil
A jar of pizza sauce
Shredded cheeses
Toppings, such as diced pineapples and sliced bell peppers
Tools
A dark cookie sheet to fit inside the pizza box oven
Tablespoon
• Split the moon-shaped muffins apart and place them on the cookie sheet. Drizzle on a small amount of olive oil. Spread 1 tablespoon of pizza sauce onto each muffin. Sprinkle shredded cheeses across the top of the pizza sauce and finish them with the toppings of your choice.
• Set the cookie sheet inside the pizza box oven. Close the oven lid. Situate the flap so that the sun hits the muffins.
• Bake till the cheeses are melted.

Moon pizzas can bake while your grandchild plays outdoors.
What could be better for breakfast than a crunchy bowl of cereal baked in your own solar oven? I’ve tasted lots of store-bought mixtures, but nothing rivals homemade. I think the children in your life will agree. Jazz up the Granny-ola by adding dried fruit toppings or by mixing it with flavored yogurt instead of milk.
Makes 4 servings.
Ingredients
4 tablespoons vegetable oil
4 tablespoons honey or maple syrup
1 teaspoon pure vanilla extract
1 cup old-fashioned, rolled oats
½ cup sliced almonds
¼ cup light brown sugar, firmly packed
¼ teaspoon salt
½ teaspoon cinnamon powder
½ cup dried apple pieces, cranberries, or raisins
Tools
Measuring cups and spoons
Small bowl
Big spoon
Plastic wrap
Big bowl
Dark cookie sheet (must be dark so it will absorb heat)
Spatula
• Pour vegetable oil, honey or syrup, and vanilla into the small bowl and stir gently. Cover the bowl tightly with plastic wrap and set it in the sun until ingredients warm.
• Mix oats, almonds, brown sugar, salt, cinnamon, and dried fruit in the big bowl. Pour the warm oil, honey, and vanilla over your mixture and stir with a big spoon till well mixed.
• Spoon a thin layer (thick layers won’t bake) of the mixture onto the dark cookie sheet. Slip the cookie sheet into the pizza box oven. Close the window lid. Face the oven toward the sun. After 2 hours, stir and turn the ingredients with the spatula to toast evenly. Cover with lid and continue baking. You can’t overcook this mix.
• Remove from the oven, cool, and store in a container with a tight-fitting lid.
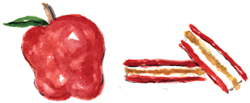
Grandmother Lovejoy was passionate about cooked apples, and she passed that passion on to me. For this recipe, you will want to use tart, firm cooking apples, such as Rome Beauty, Gala, Fuji, Jonagold, McIntosh, Pippin, Northern Spy, Granny Smith, or Winesap. This treat is great topped with a dollop of ice cream or whipped cream.
¾ cup light brown sugar
1 teaspoon cinnamon
1 teaspoon pure vanilla extract
½ cup chopped pecans and/or raisins
2 apples
1 tablespoon butter
Tools
Medium bowl
Dark cookie sheet
Melon scooper
Teaspoon
• Pour ½ cup sugar into the bowl. Add the cinnamon, vanilla, and chopped nuts or raisins. Your grandchild can finger-mix the ingredients together.
• Cut the apples in half so that they will fit into your pizza oven when the lid is closed. Use a melon scooper to remove the core and seeds, but don’t poke through the skin or the filling and juices will drain out.
• Fill the center of each apple half with the mixture. Top the filled apples with a small pat of butter, and sprinkle some of the remaining brown sugar over them.
• Bake in your pizza box oven till the apple is soft and the brown sugar has formed a crunchy crust.
The first time Sue served me bananas baked in their skins I couldn’t believe my taste buds. The heavenly texture, aroma, and taste of a baked banana is indescribable. When the bananas are thoroughly baked, they’ll turn black, which signals pure perfection. Kids will be delighted at how good the “burnt” bananas taste.
Ingredients
Ripe yellow (not black or green) bananas
Vanilla ice cream
Sprinkles, chopped nuts, and/or chocolate chips
Tools
Dark cookie sheet
Oven mitt
• Preheat your solar oven and lay your unpeeled bananas onto the cookie sheet.
• Bananas should bake until they turn black, about half an hour. Remove them, slit the skin (take care, they’ll be hot), spoon on some ice cream, and add the toppings of your choice.
“Tell me and I’ll forget;
Show me and I may remember;
Involve me and I’ll understand.”
Chinese Proverb