
My grandmother’s garden was a source of wonder and joy. Nearly every day, we explored the yard together and picked whatever was ripe and ready to be preserved or eaten fresh. Like most kids, I wasn’t particularly thrilled about tasting something as strange-looking as a “Brown Turkey” fig or an alligator-skinned avocado. But, because they grew in Grandmother’s garden and because she tasted them gleefully and offered me a bite, well, I couldn’t resist.
Her garden was a good size, but separated into small beds that skirted fruit trees and long, narrow beds that flanked pathways and hugged walls. Pots, huddled companionably together near the porch and patio, provided an endless trial area for growing vegetables, flowers, and herbs. It was in the small beds and container areas that I learned the basics of plant care—call it Tending 101.
I wanted my grandchildren to think of my garden as magical too—full of opportunities, tastes, sights, and scents that would lodge themselves in their hearts. I didn’t want a garden to mean work. I wanted a garden to be synonymous with joy.
Most of us probably don’t have the time or space my grandmother had so many years ago. To make gardening simpler for modern, time-challenged grandmothers, I suggest using half barrels and other large containers. They are small spaces to weed, watch, and water, and provide an up-close-and-personal gardening experience. I love the daily intimate connection a child can have with a half barrel, bushel basket, hay bale, or container of plants. No pest, bloom, fruit, or flower will escape notice, especially if that child has an interested grown-up to share the experience.
Take time together and plant a Snack Pot of carrots, radishes, and snow peas to feast on all summer long. Reach deep into the soil of your Tater Tots tub and tug out some of the fresh little potatoes for cooking. “Cut-and-come again” greens sound like what they are—harvest your salad fixings and they’ll regrow again and again. Grow and bake some mini pumpkins in-the-shell or spaghetti squash for an Italian Restaurant Night. Experiment with new spices and herbs, and taste, taste, taste. More than great food comes out of a healthy garden and a life-filled kitchen. As poet Amber Coverdale Sumrall wrote, “You know the most delectable miracles that take place in the kitchen are born when the heart is well fed.”
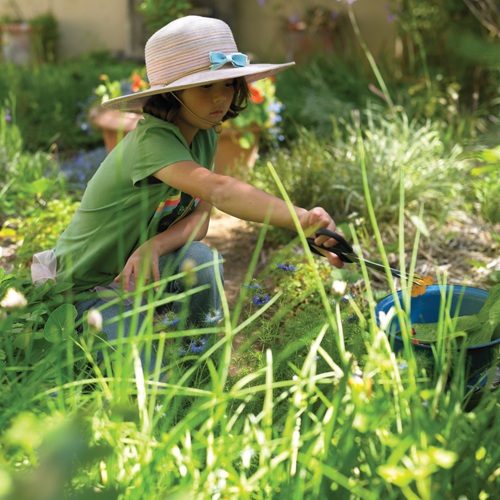
Harvesting herbs, lettuce, and edible flowers is almost as much fun as eating them.
It’s time to let the special child in your life know that the best snacks don’t come from a carton or bag, but straight from the earth. I’ve found that the veggies my grandchildren will not eat from a plate are a treasured commodity outdoors in the garden. The raised containers bring the yummy foods right up to a tot’s height, impossible to ignore. They can swoop past a pot, stop, survey what is available, and pluck a snack that is fresh, tasty, and shhhh, don’t tell them, healthy.
I always choose plants for Snack Pots that are easy to grow (a must for children) and have high nutritional benefits like proteins, amino acids, fiber, antioxidants, and vitamins—sort of a counterbalance to the foods youngsters often like to consume.
Once your child becomes used to the idea of fresh-snacking, he may start to consider many other options for the containers.
 Plant It!
You will need three large pots, wooden boxes, or half barrels with drainage holes to hold the goodies in the snack garden.

Everything tastes better fresh from the garden—even things kids don’t normally eat.
Top billing in your snacking garden goes to your crop of lofty and delicious snow peas, which need a sturdy trellis to climb.
Choose a big container and locate it in full sun. Place your trellis at the back of the pot. Snow peas thrive in cool weather and can be planted in early spring. Sow the seeds 1 inch deep and 3 to 4 inches apart at the base of the trellis, and mulch lightly. Water with a sprinkler or fine spray from your hose nozzle to avoid dislodging the seeds.
When the snow peas are up and climbing, explain to your helpers that their crop will do best when watered regularly. And, the more they pick and eat, the more the peas will grow. So encourage them to snack on the tasty pods whenever they’re outside playing. The tender young shoots, tendrils, and leaves are yummy too.
To prolong your harvest, plant more snow peas every two weeks until summer becomes hot and the peas begin to wither. Sow more seeds in late summer for a tasty autumn crop.
Skirt your pot of snow peas with some mouthwateringly delicious strawberries, which are always a favorite of children. Strawberries flourish in the loose, rich soil of a container, but you will need to keep the soil evenly moist for them to do their best.
Get a head start on the harvest by buying strawberry plants in 4- to 6-inch pots. Choose a mixture of June-bearing and everbearing plants, which will produce throughout the summer. Tuck them along the border of the container about 6 inches apart. Water gently.
Once your berries start producing, pick, pick, pick, and fertilize them twice a month.
Tiny alpine strawberries, or as my grandchildren refer to them, “faerie berries,” will thrive in even a small bucket filled with good soil and produce thimble-sized berries for months. Try ‘Alexandria,’ ‘Baron Solemacher,’ or ‘Semperflorens,’ or whichever varieties are available locally. You can start these from seed or 4-inch plants. Split the clumps of berries and set them into the soil at crown height.
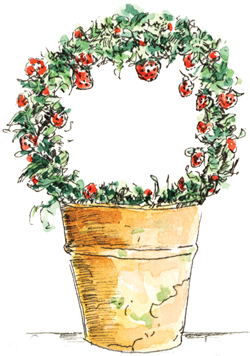
A circle of faerie berries grows on a moss-covered wire frame.
I couldn’t stand store-bought tomatoes when I was a child, but when I ran through the pathways of Grandmother’s garden, I always gorged on her cherry tomatoes. The taste of the sweet, sun-warmed fruit is deeply entwined in my garden memories. What would summer be without tomatoes?
Try some of the tiny, indeterminate (they produce throughout the growing season) tomatoes, such as ‘Tomatoberry’ (strawberry shaped), ‘Red Grape,’ ‘Yellow Pear,’ ‘Sun Gold,’ and pastel ‘Jolly Pink.’ They produce for months on end, till the first frosts of autumn stop them cold. Just keep picking. Choose young plants that look robust, are bright green, and have a stocky, compact shape (not leggy).
 Plant It!
In the world of tomatoes, a half barrel would be perfect for a threesome of the hearty plants. (See Preparing Your Pots.) You’ll need lots and lots of sun for a healthy and prolific snacking tomato. Don’t plant your young tomatoes outdoors until days are warm and soil temperatures are 75 to 80 degrees. Let your child dig holes two times wider and deeper than the root ball of the tomato seedlings you will be transplanting.
Have your grandchild spread his index and middle fingers, allowing the tomato’s stem and leaves to poke down through them. Gently turn the seedlings upside down and tap the bottom of the pot to loosen soil. Slowly slide the plant out of the pot. The spread fingers will keep the tomato from falling.
Set the plant into the hole, and cover the stem of the tomato until only the top two pairs of leaves poke through the soil. Burying your plant deeply will encourage lots of healthy roots to grow from each of the buried nodes. Your young plant will grow strong and tall and will be able to withstand winds and the heavy load it will bear when it starts producing. You may wish to plant only one tomato plant in your snacking pot, but if you’re adding others, allow at least 12 inches between them.
Tomatoes need a sturdy support. I like to use stout branches or bamboo stakes, but you can buy a tomato cage from a garden center. Tomatoes are also hearty feeders, so you’ll need to douse them with a liquid fish emulsion and kelp fertilizer twice a month. I always mulch around my container-grown tomatoes to keep them moist and free of weeds. One good way to get your grandchild to water the plants deeply is to ask him to count to twenty slowly as he floods the containers. Show your child how to pinch (not cut or pull) the small suckers that form in the V of a tomato’s short side branches. These little guys are all show and no go. They’ll never produce fruit, but they will use a lot of the tomato’s energy to produce foliage. Pinch them out! Also pinch off the growing tips of the tomato branches if they become unruly.
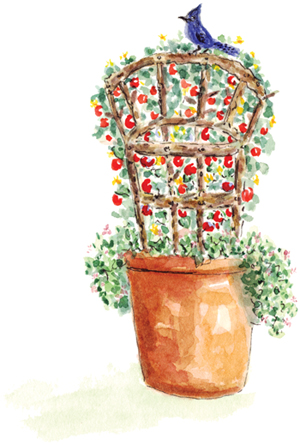
A rustic trellis, made with driftwood, supports a heavy crop of cherry tomatoes.
Sweet carrots and radishes straight from the soil, washed with cool, clear water, and popped into a little mouth—what could be better? When I planted my first children’s Teaching Garden at my community gardens in Cambria, California, I included big pots of radishes and carrots. I kept seeding them successively so that the 4-H girls and classes of grammar school kids could have them available for snacking any time they craved them, which was often.
With my grandchildren, I don’t plant the usual radishes and carrots commonly found in a grocery store, but special ones of many shapes and colors—pastel radishes, radishes that when sliced look just like a piece of ripe watermelon, and two-toned carrots in purple and orange. I want snack treats that nurture a child’s soul as well as body.
“For optimum health, scientists say, eat a rainbow of colors. Your plate should look like a box of Crayolas.” —Janice Horowitz
 Plant It!
To prepare your pot, see here.
Give your child a kitchen fork that is slightly bent at the tip and show him how to “rake” the soil in the pot lightly, making mini fork-sized furrows, which are the perfect depth for both carrot and radish seeds.
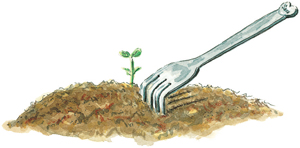
Rake little furrows for planting seeds with a bent kitchen fork.
Always check the information on the back of seed packets, which will give you planting guidelines and tell you how long it takes your snack crops to mature. But you don’t have to wait (and most kids won’t) to harvest. Even the tiniest baby carrots and radishes can be tugged out and nibbled. (Just remember to always wash produce.)
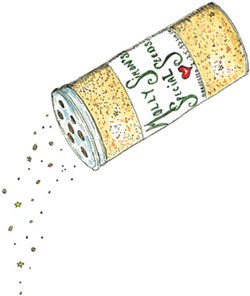
To make planting tiny seeds easier for little hands, pour clean sand and seeds into a grated cheese container or spice jar with a shaker top. Fill another shaker-top jar with some of your dry, bagged potting soil. Now have your child shake the container of seeds and sand onto the soil. Use the second container to top the seeds with a thin layer of soil and let your child pat them gently into the ground. Water with a fine spray from a hose or a rose-head watering can. Do it gently so that the seeds are not unearthed.
You should have radishes sprouting within 5 days. They’ll pop through the crust of soil and make breaking into the light a little easier for the carrots, which take a longer time to germinate. As your child picks from the pots, sow more seeds to keep the snacks coming.
Radishes don’t like hot weather, and when it hits, they become bitter and hot. Retire the radishes’ planting spot in the pot, top it with new soil, and replant them at the end of summer.
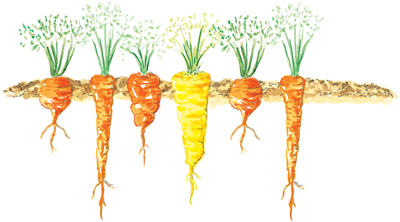
When it comes to carrots, children inevitably love the minis—perhaps it is the almost faerie-like aspect of something they usually see in a much larger size. Plant the seeds of ‘Little Fingers,’ which have a sweet flavor and reach only 3 to 4 inches, or ‘Cosmic Purple,’ which, you guessed it, have a deep purple skin paired with a rich orange interior and a spicy-sweet taste. ‘Minicor’ is tasty from the time it is the size of a matchstick till it reaches the girth of a five-year-old’s fingers.
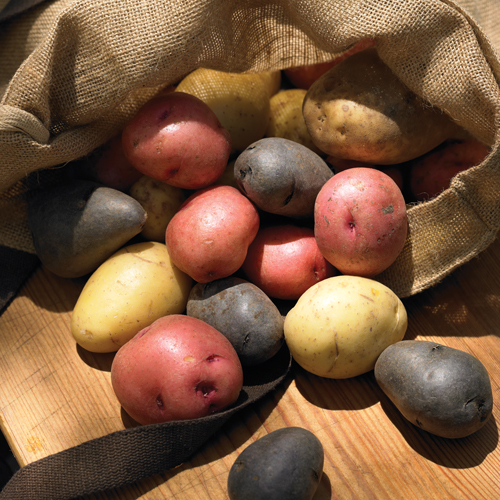
‘Cranberry Red,’ ‘Easter Egg,’ ‘Yukon Gold,’ ‘Rose Finn,’ ‘Swedish Peanut,’ ‘Blue’—the world of potatoes isn’t just brown and boring; it is a rainbow of color and a symphony of tastes. You can find an amazing array of potato varieties in online catalogs and garden centers. Once your child harvests a homegrown basket of spuds, you will all experience a sampling of Potato Heaven.
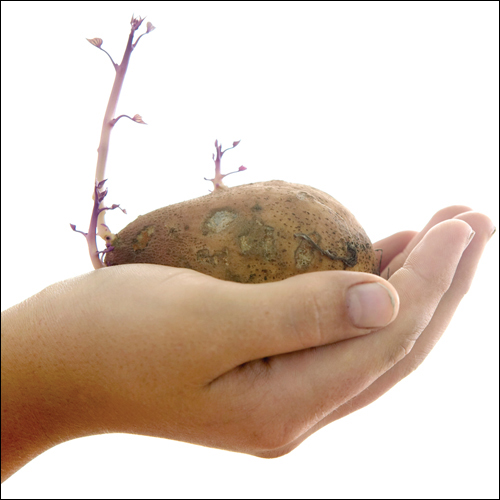
If you are visiting a grocery store and find some great potatoes you want to grow, go ahead and buy them. Many store-bought potatoes are treated with a growth inhibitor to keep them from sprouting. Scrub the potatoes gently with a soft brush, dry them, and cut out about a 1½-inch piece that sports at least two “eyes” (growth buds). Set the pieces into separate sections of an egg carton (they can be sprouted with or without soil), and ask your grandchild to check on the potatoes daily to see if the eyes have sprouted.
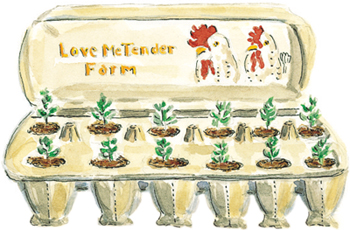
Egg cartons make perfect sprouting cradles.
 Plant It!
Half barrels are perfect containers for a good-sized crop of potatoes. Fill your pot about a quarter full of bagged soil mixed with aged, bagged manure. Place the pot in an area that gets six hours of sunlight, preferably a morning sun site. Set your sprouted potatoes “eyes to the sky” or seed potatoes about 6 inches apart on top of the soil, and cover them with a scant inch of soil, which will make them emerge quickly. Water gently when planted, and check daily to make sure the soil is moist, but not sopping wet.
Don’t worry about your soil level being too low; you will continue to add layers of soil to the pot each time the potato vines grow 5 to 6 inches. Mound the soil and some manure over the potatoes, leaving about 2 inches of the vine uncovered each time. Within a few weeks, the first star-shaped blooms will appear, and soon your crop of potatoes will begin to fatten below the soil.
If you and your grandchild are curious about what is happening underground, just stick your hands into the soil and feel for the tiny tubers, your own buried treasure. You can pull out a few and cook them, but you won’t do your real harvest till the potato vine withers and dies in the fall.
When it is time to harvest, you can reach in and pull out potatoes, or use a garden fork to lift them out. Dry the potatoes on a tarp or newspaper in a dark, dry area (never let eating potatoes sit in the light, or toxins will form). Store the potatoes in a dark, cool closet, cellar, or container, but NEVER in the refrigerator.
I haven’t met many children who aren’t crazy about mashed, or as my son used to say, “smashed,” potatoes, but just in case your child is the exception, once he grows and cooks his own, he will be a potato missionary.
I always work with my grandchild as a potato mashing team. I prefer to use a wire masher, rather than electric beaters, to keep the potatoes cloud-soft and never gluey. Using yogurt in the potatoes makes them creamy, delectable, and almost effortless.
Makes volcanoes for 4.
Ingredients
1½ pounds potatoes (Yukon Golds make super mashers)
2 tablespoons unsalted butter
2 tablespoons half-and-half or milk
2 tablespoons plain low-fat yogurt
Salt and pepper to taste
1 to 1½ cups good melting cheese (Muenster, Cheddar, Monterey Jack)
Ketchup in a squeeze bottle
Preheat oven to 350°F.
Show your child how to clean potatoes with a small scrub brush. Granny should be the one to cut the potatoes into chunks of the same size so they will cook evenly.
Fill a large pot with enough water to cover the potatoes and bring to a boil. Cook potatoes about 15 to 20 minutes until fork tender.
Heat the butter and milk till warm.
Remove the cooked potatoes from the stove and drain over a colander in the sink. Pour the drained potatoes back into the original cooking pot.
Mix the warmed milk and butter into the yogurt and slowly pour the mixture into the potatoes as your child mashes. Let him use an ice cream scoop to mound the potatoes into small volcanoes on a lightly oiled cookie sheet. Use a spoon to make holes in the top (the craters).
Sprinkle the crater and sides of the volcanoes with grated cheese. Slip the cookie sheet into the preheated oven for a few minutes until the cheese melts. Quickly squirt thin threads of ketchup (lava) into the crater and down the side of the volcano. Eat them while they’re hot.

Scoop three different sized balls of mashed potato to form the snowman’s body. Use fruits, a tiny carrot, and red bell pepper for features, celery for arms, and a cracker for a hat.
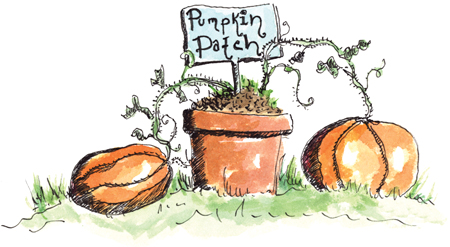
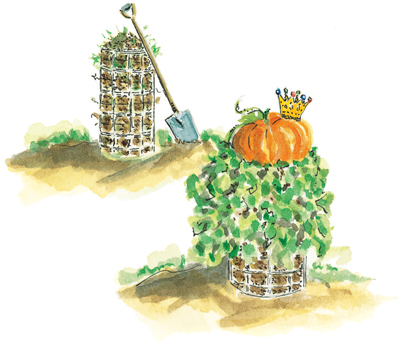
Don’t let anyone tell you that you can’t grow pumpkins in pots. I’ve grown the ‘Rouge Vif d’Etampes’ (aka ‘Cinderella’s Carriage’) in a big half barrel filled with rich soil. I also have had great success with mini pumpkins in large terra-cotta pots, half barrels, and a trash can. My best pumpkin ever, a queen-sized beauty, grew in our compost bin (okay, that was an accident, but a fabulous one).
In late spring, many garden centers offer a variety of young pumpkin plants in 4- to 6-inch pots. As soon as your soil warms and all danger of frost is past, you can plant these outdoors in containers appropriate to the mature size of the pumpkins. Big pumpkin = big pot.
 Plant It!
Choose half barrels or big pots for your large pumpkins. Limit yourself to only one of the large variety of pumpkins per pot. Smaller varieties of pumpkins will thrive in containers at least 12 to 14 inches across. I sometimes grow the tiny ones in an old wheelbarrow or child’s wagon.
Late spring or early summer is the time to plant seeds. Most varieties take between 80 and 120 days to mature. Plant each seed in a yogurt cup or small pot (with drainage holes, of course) filled with bagged potting soil. Water the seeds and set them outdoors in a sunny spot. Keep the soil moist, but not soggy. When the vines have at least two sets of true leaves (the first leaves to pop up are smooth and oval, and the second set of leaves are true leaves), you can plant them into their containers, which must be in full sun.
Fill the container as described here, but make a mound of soil in the center of the pot. Gently water the mound of soil, and tuck in two plants per mound. Pat the soil around the pumpkins and water again thoroughly. Fertilize monthly with fish emulsion and kelp. If you are planting miniature pumpkins, place a sturdy trellis in the back of the container. The plants will clamber up and over a trellis, and the pumpkins will dangle from the vines like a collection of holiday ornaments.
As long as the pumpkins have plenty of food, water (they are always thirsty), and sunshine, they will thrive. Water at the base of the vine or use a soaker hose, but try not to do any overhead watering or fungus and mildew may develop.
In late July, go out to the pumpkin patch and have your child scratch his name into the tender skin of the green globes (if he’s too young to write, you should scratch his name, as well as the names of his siblings and other grandchildren—one name per globe). As the pumpkins swell, the names will grow, and at the beginning of October, the brilliant red-orange superstars of the garden can be claimed by their proud namesake owners.
In autumn, test the pumpkins for ripeness. Knock on one and listen for the hollow thunk that signals that it’s ready to be picked. Push against the skin; it should feel taut and hard. Use clippers to harvest pumpkins, and be sure to leave a few inches of the vine attached, which will help keep them from rotting. If you want your pumpkins to last, cure them in a cool, dry area for 2 to 3 weeks.

After the pumpkins are “engraved” with your grandchild’s name, the writing will harden and rise like a tough scar.
Every pleasure is magnified when kids are allowed to enjoy themselves with their friends. This goes especially for pumpkin carving. A great way to reward the industrious carvers is with these pumpkin seed treats.
Crunchy toasted pumpkin seeds burst with flavor and nutrients, and they are high in vitamins, minerals, protein, and fiber. They have a sweetish, nutty taste, and add great texture and crunch to every dish. (I add them as a topping to soups, salads, casseroles, rice and quinoa dishes, and even breakfast cereal.) They’re at their best fresh from the oven dusted lightly with salt.
Ingredients
Fresh pumpkin seeds
Olive or canola oil (spray cans make this easier for kids)
Sea or kosher salt (light dusting)
Help your youngster cut the top off a ripe pumpkin and use an ice-cream scoop to remove the seeds. Put the seeds, which will be gooey and sometimes stringy, into a colander. Run water over them and let your grandchild moosh them around till they’re free of strings and flesh.
Spread the seeds on a parchment-paper-lined cookie sheet and let them sit until dry. Once they’re dry, spray them lightly with olive oil and sprinkle them with salt. Slide the cookie sheet into the oven set at 200°F. After half an hour, use a spatula to move the seeds around, and roast them for another half hour until golden, but not dark (they get bitter if they burn).
Remove the seeds from the oven and let them cool. Store in a jar in the refrigerator.
If you grow tiny pumpkins like ‘Munchkin’ or the white ‘Baby Boo,’ you and your grandchild can quickly bake them for individual desserts for your family and friends. The flesh of these charming little self-contained dishes is delicious when enhanced with the tang of oranges and the sweetness of maple syrup tinged with vanilla.
Ingredients for 1 Pumpkin
One mini-pumpkin per person (with stem)
Pinch of grated nutmeg (I recommend that you grate whole nutmeg seeds. Children love this task.)
Pinch of ground cinnamon
Sea salt
2 teaspoons fresh orange juice and a pinch of zest
¼ teaspoon vanilla (pure vanilla extract imparts the best flavor)
½ teaspoon maple syrup
Dab of unsalted butter
Fresh whipped cream or ice cream
On the day of your gathering, cut the pumpkin stems to about 1 inch. Gently slice off the top of your minis (about half of the way down) and let your grandchild scoop out the seeds and any strings.
Preheat oven to 350°F. Place the pumpkins on a parchment- or foil-covered cookie sheet. Let your helper sprinkle nutmeg, cinnamon, and sea salt into each pumpkin. Spoon in orange juice, vanilla, and a pinch of orange zest. Drizzle maple syrup inside each one and put a dab of butter on top. Put a square of parchment or foil atop each pumpkin (otherwise the top might fall inside), then replace the cut top.
Bake about 40 to 50 minutes. Remove from the oven, lift the tops, and let them rest for about 10 minutes. Fill each pumpkin with whipped cream or ice cream and a light drizzle of maple syrup. Yum!
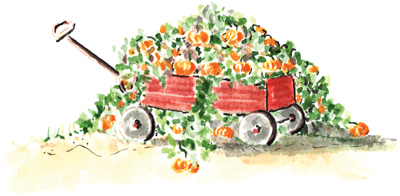
A child’s wagon makes a perfect planter for mini pumpkins.
Italian food. Just writing those two words makes my mouth water. When I was young and Nonie or Grandmother would promise me “any food I wanted for my birthday,” I always chose Italian. Ummm, luscious sauce flecked with garlic, specks of oregano, and a sprinkling of freshly ground Parmesan cheese.
When you and your grandchild grow some of the ingredients for your Italian Restaurant Night menu (See Restaurant Night at Home), you’ll be amazed by the rich aroma, taste, and texture of your meal.
 Prepare Your Pots!
You’ll need a couple of half barrels to grow your own ingredients for tasty Italian dinners. Give your youngster a feeling of immediate success by buying small, robust tomato plants from a garden center. Don’t plant them outdoors until all danger of frost is past and nighttime temperatures are above 55°F. (See planting directions for tomatoes here.)
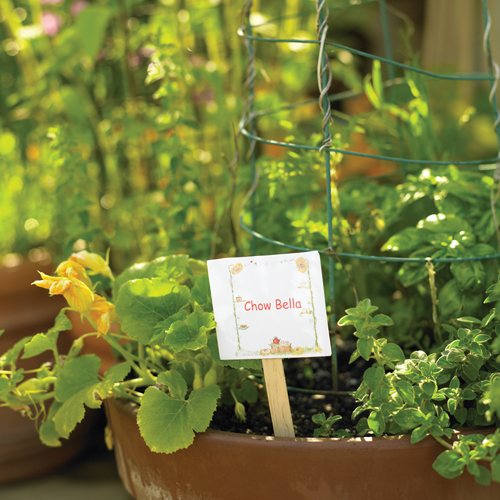
Spaghetti squash, oregano, basil, and plum tomatoes are snuggled companionably together in a huge pot filled with rich, bagged potting soil.
Not all tomatoes are created equal. The small tomatoes described here are great for snacking but not for cooking. At the nursery, guide your grandchild to a Roma or paste tomato known to make great sauce. I usually choose the ‘San Marzano,’ ‘Juliet,’ ‘Viva Italia,’ ‘Roma,’ ‘Giant Paste,’ ‘Italian Giant Red Pear,’ or ‘Amish Paste.’ To open your child’s eyes to the diverse array of tomatoes available (over 14,000 varieties), look in catalogs and online at the Seed Savers Exchange website, www.seedsavers.org. The site boasts over 70 varieties of weird and wonderful tomato choices in a kaleidoscope of colors. Buy some early producers like ‘Beaverlodge Plum’ (this is especially important if your grandchild is around only in the early summer), then add some later varieties. Catalogs and nursery labels will tell you whether you have an early or late-maturing variety.
Help your youngster plant the tomatoes deep into the soil and learn how to care for them (see here).
What will your grandchild say when you tell him that you’re going to plant some homegrown spaghetti? Plant spaghetti? Spaghetti grows? Not all spaghetti grows, but the big yellow vegetable marrow called golden macaroni or spaghetti squash is a spaghetti that grows and grows and grows.
You’ll need a big pot for this one big plant (if your pot is big enough, you can include other plants). Set the pot in full sun, and give the squash some room to roam. The vine will spill over the sides of the barrel and start to meander. If the vine starts to take over your yard, cut it back.
Don’t try to rush Mother Nature. Your squash won’t be happy if it’s planted during cold weather. Wait until the days warm and the nights stay above 50°F. Fill the container with bagged potting soil. Scoop extra soil into a mound in the center of the pot. Help your child nestle one or two spaghetti squash seedlings into the mound and water thoroughly. If you’re planting seeds, tuck two or three seeds into the mound about 1 inch deep. Try the variety called ‘Orangetti’ for brilliant flesh high in carotene, or ‘Stripetti,’ a spaghetti squash that will keep for months. Water as needed.
Squash are greedy feeders and will need a dose of natural fertilizer monthly. Your squash should turn from a buff color to a bright golden yellow when it is ripe (this takes about 88 days), and the skin will be too tough to pierce with a fingernail. (See recipe for how to prepare and serve this spaghetti squash.)
Tomato sauce is tomato sauce. But tomato sauce with a sprinkling of homegrown herbs, like basil, oregano, and garlic, will open up a new world of tastes.
If you slowly ease your child into the habit of going outdoors to pick fresh herbs to add to meals, which is a chore they’ll love, you’ll give a gift of taste that will span a lifetime of eating.
When your nights warm to about 50°F, visit your local garden center and buy some small pots of basil plants (see Preparing Your Pots). You can grow all kinds of flavors of basil, from cinnamon and lemon to clove and licorice, but for cooking Italian sauces, the old favorite, sweet basil, still tops the list.
Space the plants about 6 to 8 inches apart. Settle them into the soil at the same height as the pot they came in. Basil thrives and becomes bushy and compact when it is regularly trimmed for cooking and fed monthly with a high-nitrogen, natural plant food.
Add basil leaves not only to your spaghetti sauces, but also to salads, summer plates of tomatoes drizzled with olive oil and vinegar, and sandwiches, salsas, and your own homemade vinegar.

Fino verde basil has small leaves and a big punch of flavor.
Take your grandchild for a visit to your local farmers market or grocery store and choose some plump, firm heads of organic garlic to plant. Before planting, let your youngster separate the cloves, but leave the papery peel intact. Use a pencil to poke holes in the soil about 2 inches deep for each clove. Show your grandchild the top and bottom of the clove (top is pointed, bottom is blunt) and have her place the cloves with the bottom down, and then cover them with soil. You can plant garlic throughout the container because its knitting-needle green leaves are not pushy and it will thrive snuggled in a pot among your other herbs.
Don’t worry about harvesting your garlic bulbs, which take months to mature. Instead, make a habit of clipping the tender green tops for cooking. You can also use the tiny green bulbs, but you’ll need to replant cloves as you use the bulbs. The green garlic is a subtle and tasty addition to sauces when added in the last few minutes of cooking.
Visit the herb trays at your local garden center and show your youngster how to release the scent of oregano by rubbing the leaves. It might smell familiar since it’s the taste of a good pizza sauce.
Your oregano will be happy planted near the edge of your container. Oregano thrives when cut regularly and watered only as needed.
For many years, it was difficult to buy any but the most common lettuces and greens, but that has all changed. Now a world of possibilities exists when planning and planting a small, child-friendly salad garden in your own backyard. A container salad garden is one of the quickest, easiest, first, and last of the year to produce delicious ingredients for your meals.
 Plant It!
Half barrels or big pots will work well for salad greens, but remember a wide surface area is a must for your garden to fill out. (See Preparing Your Pots.)
Make a spring visit to your local garden center with your youngster and cruise through the seed racks and the vegetable section to find lettuces, herbs, edible flowers, and greens of interest. I’ll have to admit that the choices are often made because of names. What child could resist a lettuce called Deer Tongue, Red Giant, Sweet Valentine, ‘Little Gem,’ or Firecracker, or kale and chard with names like Lark’s Tongue, Ragged Jack, Pot of Gold, and Scarlet Charlotte? Tuck in seeds or plants of edible flowers and herbs such as borage, dill, calendula, Johnny-jump-up, dianthus, and nasturtium to jazz up your salads’ colors and tastes. (See greens and edible flowers on pages 163.)
Instead of needing full sun like most vegetables, lettuce and greens will thrive in the dappled shade of a tree or under a tepee of vines. Place your salad garden close to a water source. The surest way to ruin a crop of greens, or make them bitter, is to overheat them or deprive them of water. The soil should be moist but not soggy, keep your child’s watering can filled, sitting nearby, and ready for action.
Give your greens and herbs room to show their stuff. Help your grandchild plant them at least 8 inches apart, and set the tallest plants at the back of the container. After tucking the plants into their holes, backfill any open space around the root-ball with bagged potting soil or compost. Water your plants into their new homes. Go outside with your youngster daily to make sure the newcomers are moist.

Buckets, half barrels, and pots of greens nestle outside the kitchen door.
With these fabulous greens, you’ll be able to host a Salad Bar Party (see A Kids’ Salad Bar Party) and share them with your friends and family.
Always rinse greens after cutting them. Let your grandchild cull any damaged or wilted leaves and then spin them dry. Tuck them into a pillowcase or dish towel, gently roll it closed, and put in the refrigerator’s crisper drawer. Use as soon as possible.
If you are sowing seeds rather than planting pots of salad greens, simply follow the directions on the back of the seed packet, which will tell you when and how deep to plant the seeds. Sift some bagged potting soil in a light layer over the seeds. Water them gently.
Within just a couple of weeks after planting nursery stock or about a month after planting from seed, you’ll be able to start some cut-and-come-again harvesting. Trim about one-third of the lettuce leaves off gently with blunt, child-friendly scissors. Your salad fixings will regrow and can be harvested a couple more times before the plants need replacing.
When seedlings first appear, you’ll need to thin them if they’re too crowded in your container. (They should be at least 2 to 3 inches apart.) A young gardener sometimes feels like a plant parent, and thinning plants can be traumatic. Explain that plants need room to grow successfully. The easiest way to remove extra plants from the garden without disturbing the roots of other plants is to use small scissors or clippers to snip them.

Viola, dianthus, bachelor’s button, chive blooms, and nasturtiums add color and taste to any salad.
“What’s old is new again” is an apt adage for dedicated gardener Rose Marie McGee’s bountiful kitchen garden, a rainbow of lettuces and greens planted in wheat straw bales. Imagine a container that will not only nourish crop after crop of healthy plants, but also break down and nourish the soil of your garden.

Take your grandchild (and a truck or station wagon) to a local feed store, farm supply store, or farm stand and buy a bale (or two or ten) of wheat straw. I like wheat versus hay and alfalfa because it doesn’t harbor lots of weeds.
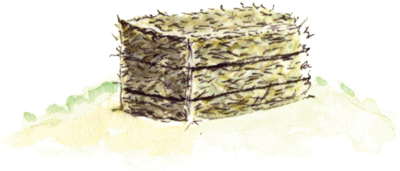
Decide where you want to put your bale garden (remember greens will do fine in dappled shade). Lay your bale on its long side and keep the baling wire or twine intact; don’t cut it off or your bale will collapse. (This is the only instance when I go for synthetic binding, which will last through many seasons.)
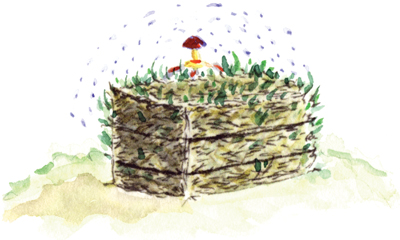
Scratch deeply into the upper (planting) surface of the bale with a garden fork to break it apart so that water can soak in. Set a sprinkler near or on top of the bale and water it until it is soaked, but don’t even think about planting. Your wet bale will heat up (part of the process of decomposition) and would injure fragile young roots. Water again in a few days and soak it thoroughly. Let your bale sit for another week and moisten it daily.
If you see a few little shoots of green wheat sprouting after the watering, just tug them out and throw them onto the compost pile.
After your week of waiting, let your youngster use a child-sized garden fork to scratch into the planting surface of the bale. (Although you already did this chore, your child needs to feel like a part of this process.)
Dig some planting holes, fill the holes with bagged potting soil, and water the entire top of the bale deeply. (If you’re putting in seeds, don’t dig planting holes. Just add a 3- to 4-inch layer of bagged soil to the top of the bale and let your helper water it thoroughly.)
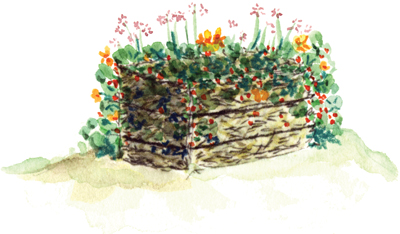
Plant your bale with a medley of edible flowers and herbs such as borage, nasturtium, chives, chervil, cilantro, and dill. Your plants will thrive throughout the summer and into the fall. Interplant with your favorite selection of lettuces and greens, which are at their best in cool weather from mid-spring to early summer and again in the fall. Sow successive crops of lettuce two weeks apart to lengthen their harvest season.
Check moisture level (see here) and water your plants as needed, but never let the bale dry out completely. Run a simple drip line around the planting area or keep it watered with a sprinkler, and, of course, let your child water the plants as needed.
“It took me four years to paint like Raphael, but a lifetime to paint like a child.”
Pablo Picasso
