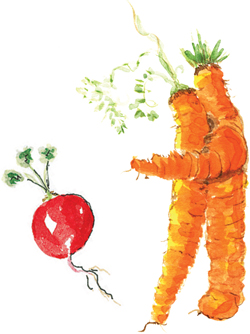

My grandmother’s kitchen was not just a kitchen—it was a science lab, greenhouse, herb room, bakery, confectioner’s workshop, art studio, and much more. The kitchen was the soul of my grandmother’s house where magic happened every day with commonplace ingredients. Carrot top forests sprouted on the sunny windowsills. Avocado pits suspended by toothpicks over water struck out tentative roots, then split and pushed their green shoots into view. Sweet potato vines sitting in old canning jars of water looped around windows and scrambled across the top of the refrigerator and into the pantry. In spring, egg cartons of tomato seedlings, whose seeds were saved from our salads, thrived in the breakfast nook, and spindly grapefruit, lemon, and orange trees, started from seed in old tin cans, poked through the soil and leaned toward the light.
Grandmother and I tried to grow everything. Some seeds and cuttings were a heart-lifting success, others didn’t work, but for me, the thrill was in the experiment. I found it amazing that something normally overlooked or thrown away could be coaxed into life. If a plant failed to thrive, no problem! It became part of the cycle of life. From the kitchen to the compost pile, back into the garden, and maybe, somewhere down the line, into the kitchen again, where the whole experiment could start over.
Now it is your turn to introduce your grandchild to the simple joy of growing plants from leftovers. You’ll open little eyes to the miracle, something I call the “possibility factor,” that is inside every seed, root, cutting, and pit. You may not harvest peanuts or a pineapple this time around, but you will share the wonder and excitement that happens when a child realizes that with just a bit of love, water, and light, he can coax life from the most unlikely scraps.
Part of the joy of these projects is that they’re done indoors, which is perfect for grandmothers who live in an apartment, condo, or townhome. You and your grandchild will be in close daily contact with the “friends” that the plants become, and can easily tend them and watch their daily progress. The magic of life will unfold right on your windowsill or kitchen table.
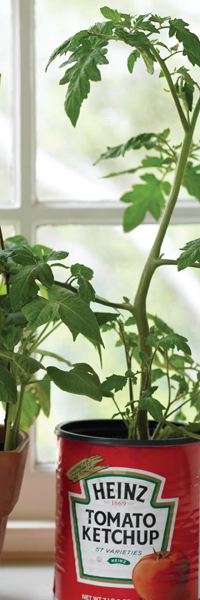
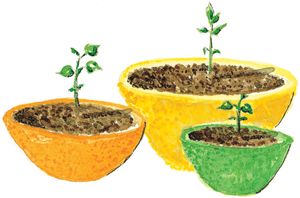
Tomato seedlings are nursed along in recycled citrus shells, then transplanted to recycled containers.
Scout your house for anything that can be used as a container for your indoor garden. Use old milk jugs, fruit juice bottles, yogurt and cottage cheese containers, egg cartons, empty rinds of oranges and grapefruits, wooden boxes, canning jars, big coffee or tomato cans, trays, crockery—any container that will hold soil. Remember to poke holes in the bottom for drainage.
TUCK saucers and trays underneath your plants so that overflows don’t damage your furniture. Saucers should be filled with an inch of gravel or pebbles. Pour water into the gravel until almost covered. This will provide humidity for your garbage plants, but not let them become waterlogged.

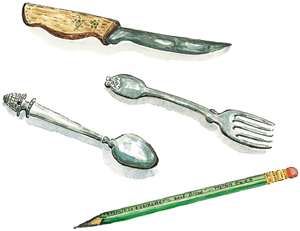
KEEP a cup of old cutlery, some chopsticks, and a pencil near your indoor garden to use as handy work tools. Till the soil with a fork and turn the soil with a spoon. Use a knife to lift plants, and a pencil or chopsticks to poke planting holes into the soil.
RECYCLE a spray bottle, clean it thoroughly, and fill it with water. Let the kids mist the plants in their garbage garden daily. The spray will keep plants moist and helps to discourage some pesky pests such as spider mites. Your grandchild will LOVE doing this.

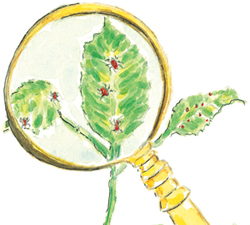
STOW a magnifying glass near your garbage garden so kids can be detectives. If a plant shows signs of illness or wilts even though it has been watered, have them pull out their magnifier and look closely at the tops and undersides of the leaves for signs of insects.
Your indoor garbage garden plants need to be lightly fed once they begin to grow. Treat them monthly to a dose of natural fertilizer, which will slowly release nutrients to the growing plants.
Your garbage garden plants will thrive in a sunny southern window or under artificial lighting such as a Gro-Light. An architect’s lamp, shown here, with a common incandescent bulb of 60 to 100 watts works well, but situate it at least 30 inches above the plants. Fluorescent tubes or bulbs provide great lighting and should be hung about 20 inches above your plants. HID bulbs, which have three times the output of fluorescent lights, will furnish enough lumens to satisfy a grouping of your light-loving garbage garden plants.
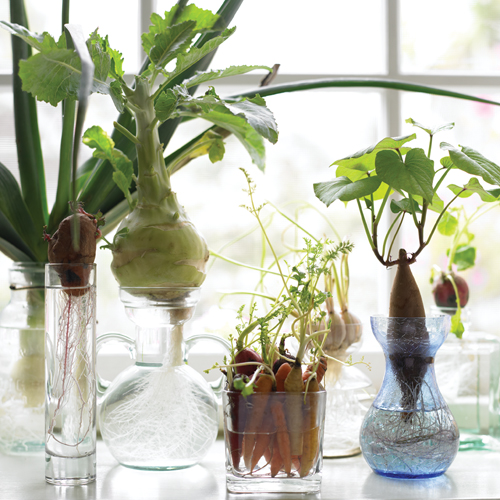
A leek, beet, kohlrabi, carrots, garlic, sweet potato, and a radish thrive on a kitchen windowsill.

Below are a few of the easiest plants for your kitchen adventures, but don’t be afraid to try anything. Think of each project as a challenge. Some of them may fail, but you’ll learn something about each seed and plant and what they need to stay alive.
The bulging bag of 15-bean soup sat on the counter and awaited its watery fate. I picked it up, showed it to my granddaughter, and said, “We can cook it all for soup, OR we can rescue a few of them and plant them in our garbage garden.”
“Rescue,” Sara said, and so we did. She poured out a handful and dropped them into a bowl of water. The floaters were losers, no longer viable for planting but fine for soup. The sinkers still had plenty of life left inside them, enough to burst into green finery in just a few days.
Sara pulled her wooden stool up to the sink, filled the colander with the beans we were going to plant, and ran a stream of warm water over them. The project was already a success as far as she was concerned. Whenever children get to puddle around in water, whether it is from a faucet, a hose, or a watering can, the water part is the thing that most enthralls them.
I pried her away from the sink and covered the farm table with newspaper so she could work with the beans and the soil. I handed her some spoons, and she shoveled the soil into yogurt containers, pushed too many beans deeply (too deeply) into them, and doused them with warm water. Instead of correcting the planting depth or the number of beans she planted, I let it go till she left for the day. What could be more discouraging for a child than to have their work undone as soon as it is finished?
Sara watered her beans daily and on the fifth morning she discovered little curls of green popping through the soil. “I’m a bean mother!” she shouted joyfully.

A handful of dried soup beans quickly turns into a lush indoor garden.
Soak your beans to ensure that they are still viable. Like Sara, your grandchild will love this job. Poke drainage holes in the bottom of a recycled pudding, yogurt, or cottage cheese container and fill it with bagged potting soil. Show your child how to tuck the plump beans about 1 inch into the soil and have her water thoroughly. Then let her do the rest. Set the pot on a saucer or a tray filled with gravel and add water to the top of the gravel to ensure that your future crop has plenty of humidity. Set the future bean vines in a brightly lit area or a sunny window. Oh, and don’t forget to add your child’s homemade plant labels (see sidebar)—it’s so easy to lose track of what is planted where.
Part of the joy of gardening indoors is the daily, intimate contact with the plants. Kids can check on them whenever they visit, water them when the top inch of soil is dry, and note on a calendar or in a journal when the first green shoots appear.
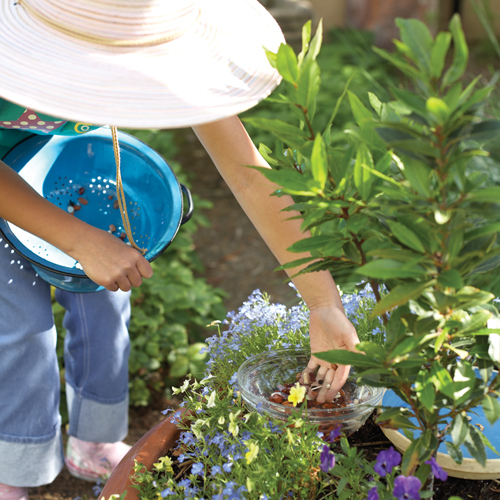
The extras that didn’t make it into the indoor bean soup garden were planted outdoors.
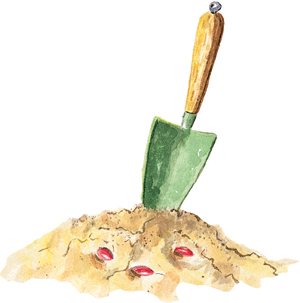
Once the beans have grown three pairs of leaves, you can transplant them into a larger container that has a drainage hole. Lay a piece of nylon or screen over the hole, and then fill the pot with bagged potting soil. Because your beans want something to climb, poke five stakes (at least 18 inches tall) into the soil around the edge of the container. (You can use twigs from the backyard or buy bamboo stakes at a nursery.) Tie the stakes together at the top to form a mini tepee. Plant some of your bean sprouts at the base of each stake, and they’ll twine their way to the top. Others will spill over the side of the container and form a curtain of greenery.
Sometimes carving pumpkins on Halloween caused some contradictory feelings in my grandchildren. We were happy for the fun we had making goofy-looking faces, but sad because we knew that by the end of the night the pumpkin would be a goner, partially collapsed from the heat of the candle and destined for the compost heap the next day.
To alleviate pumpkin anxiety, we rescued their seeds and tried to grow them indoors, and the experiment was a success. First, we sprouted some in paper towels and others in cups, then we planted the sprouted seeds in pots and let the vines meander freely over our table.
Use ice cream scoops to dig out the seeds inside the Halloween pumpkins. Run water over the seeds, moosh them around in a colander or sieve, and spread them in a single layer on paper towels to dry.
Fill a 4- to 6-inch-wide container (don’t forget the drainage holes) with bagged potting soil. Mound the soil in the center of your pot. Plant a couple of seeds about 1½ inches deep and water gently. Set the pot under a Gro-Light, Vita-Lite, or a bright incandescent bulb, or in a sunny, warm area such as a south- or west-facing window. They’ll do best with ten hours of light a day.
Feed your hungry pumpkins with a weak or half solution of natural fertilizer every couple of weeks. Pumpkins are greedy eaters. Some people treat their pumpkins like babies and give them an occasional drink of milk.
Soon your pumpkins will thrust out their prickly stems and leaves. When the flowers appear, your grandchild will need to play the role of a bee and become a human pollinator. Male and female flowers will be on the same vine; the male flowers have a cargo of golden pollen (find the pollen grains with your magnifying glass), and the female flower has a round caboose behind the blossom. Have your child use a cotton swab or paintbrush to lift some of the pollen from the male, and transfer it to the open bloom of the female. Within days, the fruit of the pumpkins will begin to fatten. Because you want to concentrate growth in only one or two pumpkins per vine, pinch off other female flowers before they begin to grow.
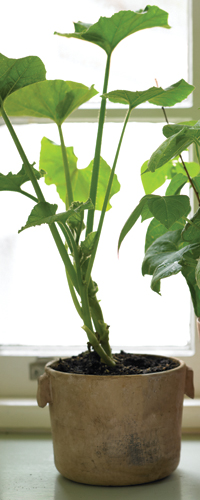
After starting our pumpkin seeds in paper cups, we transplanted them into recycled pots.
I remember sitting in Grandmother’s cozy breakfast nook and wrestling with a half grapefruit full of slippery seeds. They were bitter, and they made it difficult to get a good bite of pure fruit without their unwelcome taste.
I didn’t understand why these little inconveniences were necessary until the day Grandmother put a coffee can full of soil on the table in front of me, pointed to the seeds, and said, “We’re going to grow a tree.” Who was she trying to fool? I knew there was no way that a tree would grow from a tiny thing that was normally dumped into the garbage.
I spit a few of the slimy seeds into the old enamel colander, rinsed them under a stream of water, and nudged the seeds into the moist soil. Every day we checked on them, watered them when the soil was dry, and looked for a sign of life. In a few weeks, I had three tiny grapefruit trees poking through the soil. Two of the trees rotted, but one remained and grew and grew until it was about 2 feet tall.
Have your child save some seeds from an orange or from any member of the citrus family. Rinse the seeds and soak them in a cup of warm water overnight. Fill a pot or recycled container (4 inches wide) with bagged potting soil.
Plant the soaked seeds two to a container and about ½ inch deep, and be sure to label them.
Water thoroughly and set the containers in a tray or saucer filled with some gravel and water.
Place the tray in a sunny spot.
Teach your child how to do the soil test by poking his finger down about 1 inch into the soil to see if it is moist. He should do this every few days to make sure the soil is still wet. When it is dry, it’s time to water.
Once the seedlings sprout, make a point of checking their growth and health, and measure the trees monthly. Jot the growth in a journal or onto a kitchen garden calendar.
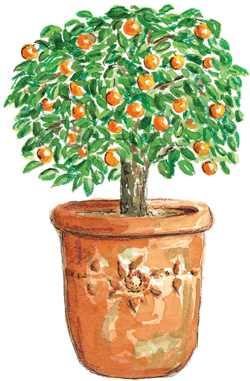
This citrus was started from a seed many years ago and now is a part of our family.
Warning: Children with peanut allergies should not attempt to grow these.
Although they’re called peanuts, they aren’t nuts; they’re legumes and related to peas and beans. Unlike nuts, they don’t have a hard shell but a soft one called a pod. The peanut doesn’t grow above the ground; it develops underground in the darkness and cover of the soil. Peanuts are so easy to grow that even the jays that frequent my garden plant them successfully. Sometimes when I walk outdoors, it seems as though they’re trying to turn my yard into a peanut farm.
I grew my first peanut plants indoors in a small plastic container filled with loosely packed white yarn. After it grew about one month, I transferred the peanut plant to a hanging container filled with bagged potting soil mixed with sand. Within days, the peanut flaunted new oval leaves and looked as imposing as the finest plants in my indoor garden. None of my visitors could believe that my beautiful plant was a common peanut, the same one used to make their favorite spread, peanut butter.
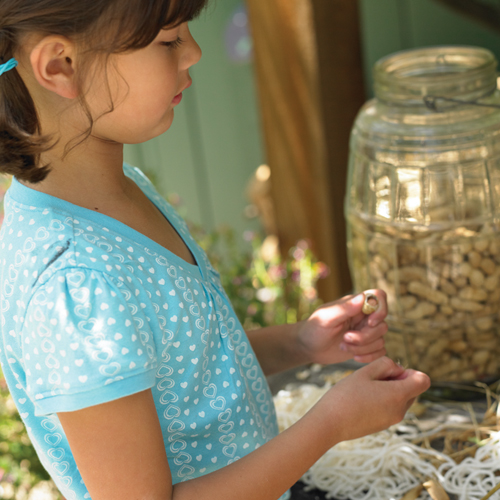
Sara splits open a peanut shell and picks out whole peanuts to plant in a bowl filled with moist white yarn.
To help your child watch the underground magic happen, fill a fishbowl with pieces of light-colored yarn and wet it thoroughly. Have your grandchild open a peanut shell and pick out the two or three peanuts and drop them into the wet yarn. Cover the container of peanuts and yarn with plastic wrap and set it in a bright, warm spot. Lift the plastic wrap daily and check the yarn to make sure it is wet. You should see the peanut begin to root and grow within a few days. Remove the plastic after the peanut develops leaves and keep the yarn moist.
Three weeks after planting, the peanuts are flourishing and will soon flower.
You can also plant your peanuts directly into the soil. Poke drainage holes in the bottom of a large container that is at least 10 to 12 inches wide and add a 1-inch layer of gravel. Fill the pot with bagged soil mixed with sand. Pick out two or three peanuts from a peanut shell and tuck them into the soil about 1 or 2 inches deep and at least 3 inches apart.
Keep the soil moist, and set the container in a sunny or brightly lit, warm area with southern or western exposure. Don’t forget to perch the pot atop a tray or saucer filled with gravel and water. Usually within a week, you’ll see the buds and leaves poking through the ground. Water as needed and turn the peanut plant daily so that it doesn’t lean toward the sun.
Peanut flowers open at night, are self-fertilized before sunrise, and shrivel by the afternoon. You and your youngster will need to look for the small, pealike, yellow blossoms early each morning before they begin to fade or use a flashlight to check on them during the night. Point out how the small leaflets fold together in pairs so that the plant appears to be sleeping.
Once your peanut flowers wilt, they will fall off, and a tiny shoot will grow toward the soil. After the shoot, which is called a peg, enters the soil, it will turn sideways and begin to form a peanut shell. A few weeks after the blooms nestle into the soil, let your child reach gently into the ground to check on the peanut’s progress. Although your youngster may not stay with you long enough to harvest the peanuts, you can take a picture of the plant as you pull it, and send your grandchild his very own homegrown peanuts.
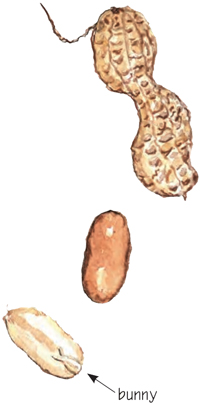
Carefully break a peanut in half and ask your grandchild to search for the tiny bunny hidden inside.
My grandchildren and I think it is miraculous that you can take a couple of pounds of potatoes, cut them into pieces (making sure there is an eye in each piece), and turn them into hundreds of potatoes. That’s enough potatoes to make potato soup, scalloped potatoes, roasted potatoes, baked potatoes, french fries, and more. Only 2 pounds of potatoes can turn into over 50 pounds of food.
If you open your cupboard and find that, YIKES, some form of alien being has sprouted and is sending tentacles out into the world, you’re lucky. You’ve found potatoes that may be past their prime for cooking, but they’re ready to be planted. Don’t waste them; use them as seed potatoes and plant them.
I like to use organically grown potatoes, especially when children are handling them, because potatoes are one of the most heavily sprayed crops.
Involve younger kids who can’t safely handle a knife by showing them how to locate the eyes, and then let them circle the eye with a marking pen. Granny should cut the potatoes into 1½-inch pieces that contain at least one, but preferably two eyes.
Let your child fill a tall container with drainage holes (gallon milk jugs or juice containers work well) with bagged potting soil, and tuck the small pieces or sprouts into the soil about 2 inches deep with the eye facing up. To help you both remember, just say, “Eyes to the sky.” Cover the potato pieces with soil and water them. Set the container in a sunny area, and water only when the top inch of soil dries out.
Check every day for the first signs of green. Once the potato breaks through the soil, it quickly becomes a sprawling and exuberant kitchen plant starred with pale bluish-purple flowers that were once used to decorate lady’s hats.
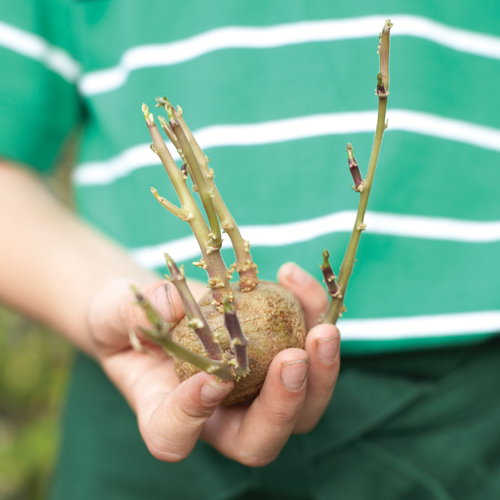
This sprouted potato is no good for cooking, but it can be cut into small pieces and planted.
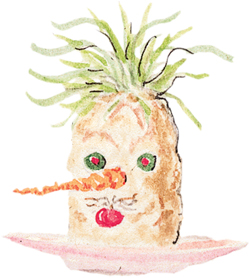
Select a firm potato and cut off one end to provide a flat base. With a melon ball scooper, lift out a bit of the potato’s top to form a slight hole.
Use acrylic paint or food-grade paint or markers (commonly stocked in craft stores) to give the potato a face. Some children love to do family portraits. Use toothpicks to attach raisin eyes, circles of red bell pepper for a mouth, cauliflower florets for little ears—you get the picture.
Fill the hole at the top of the potato with a wet cotton ball.
Sprinkle the wheat berries (see here) onto the cotton ball and press them slightly.
Set the potato on a saucer and water daily. Within a few days, the potato head portrait will sprout bright green hair.
Note: If you want to transplant your potatoes and grow them outdoors, see the directions in “Kids in the Garden” chapter.
Grandmother Lovejoy’s kitchen and living room were always adorned with the trailing vines of sweet potatoes. Her luxuriant plants, which were sometimes 20 feet long, sprang from a variety of containers filled with water and a tangle of roots. One of her most famous vines began its travels in the kitchen and ended up on the far side of the living room after traversing bookcases, a buffet, windowsills, and a mantel.
Sweet potatoes, which aren’t true potatoes, are the thickened roots of a tropical vine related to morning glories. They’re one of the first things I tried to grow indoors, and they were so successful that I once had three or four growing at a time.
Take your child to your local farmers market or grocery store to choose a firm sweet potato. Just in case the sweet potato has been treated with a growth inhibitor, scrub the skin gently with a vegetable brush.
Poke three or four toothpicks into the bottom third (pointed end) of the vegetable, and suspend it over a jar. Fill the jar with water until the bottom of the tuber sits in the water.
I’ve started the tubers in a brightly lit and a dark area, and each worked equally well.
Check the tuber daily to make sure that the water doesn’t evaporate. Soon a few thin white roots will appear, and within days the jar will be crowded with roots and the sweet potato crowned with a stubble of green. Keep a tape measure close by to measure and record growth in a journal.
If the sweet potato’s water becomes murky and a bit stinky, you’ll need to give it a totally fresh drink. Help your child set the container in the sink directly under the faucet. Turn the cool water on low and run it into the jar until the water is clear.
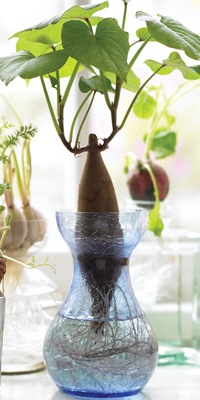
A narrow-mouthed jar or forcing vase makes a great “starter home” for an exuberant sweet potato vine.
As a child, I only knew pineapple from a can. When I finally tasted fresh pineapple, newly sliced from an enormous, prickly specimen, well, I thought I had just bitten into a slice of Heaven. It’s easy to understand why the pineapple is sometimes referred to as the princess of fruits.
Mother Nature is so amazing; I still can’t believe that we can eat a fresh pineapple until there is nothing left but its crown of stiff spines, which we can plant and grow into another elegant pineapple plant. It wasn’t until my friend Lee Taylor, a professor emeritus in horticulture at Michigan State University, explained the only “sure” way to get a crown to take root that I was able to grow one. His method is different from what most books describe, but if you follow Lee’s lead (see following), your child will be successful every time.
Cruise the fruit section of your grocery store and select two firm, fresh pineapples—one as an insurance policy and teaching (and eating) tool, the other for actual hands-on planting. Hold the “princess” in your hands and give the fruit the sniff test. A mature pineapple should have a mouthwateringly sweet fragrance, be a rich golden color, and a leaf should pull out easily.
Contrary to what you’ll hear, pineapple crowns shouldn’t be cut off the top of the fruit. Set your pineapple on a table at child height, and use your extra pineapple as a visual aid. Show your helper how to grasp the base of the crown, and then twist it quickly, and yank off the top. You’ll end up with a tuft of stiff leaves atop a pointed nub of yellow pineapple flesh. Pull off any flesh to prevent rotting, and tug off three or four leaves from the bottom. Use a sharp knife to make some thin, horizontal cuts in the stem until you see a circle of little brown spots, which will someday be roots. Stop cutting! Set the pineapple aside for a couple of days to dry, then put it into a jar of water until roots develop.
Choose a large, porous (to prevent rot) terra-cotta container at least 8 inches wide, and 7 to 8 inches deep for your pineapple’s first pot, pour in a layer of gravel, and fill with bagged potting soil. Let your grandchild set the rooted pineapple crown in the middle of the container, brush soil around the base until the fruit nub and roots are covered, and water it until liquid starts draining from the bottom of the pot.
Set the pot on a saucer filled with gravel and ½ inch of water. Place the pineapple in a warm, sunny room with a temperature of 60 degrees and above. Make a ritual of checking the pineapple together to look for growth. Have your grandchild stick a finger into the soil, and if it is dry, water until the excess drains through and into the saucer of gravel.
This isn’t a plant that will flower and produce fruit in a short period of time. A big part of the joy of this project is the anticipation of life to come and the miracle that from a stiff bristle of leaves an exotic and beautiful plant will be born and will be a part of your family for many years. If you keep your pineapple watered, fed, and in a warm and sunny spot, someday your child may discover spiky rosettes of pineapple bloom, and soon, some delicious, homegrown fruit.
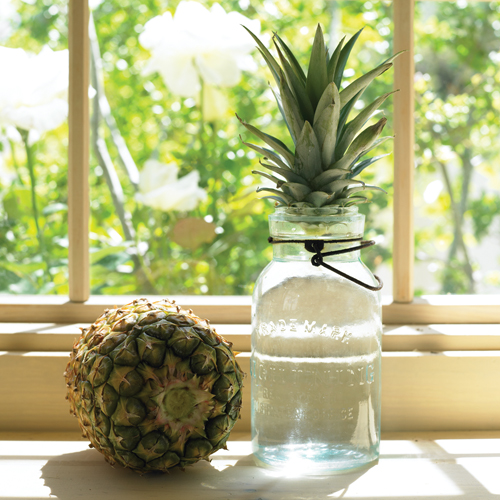
Keep the base of the pineapple submerged and within a couple of weeks, threads of white roots will be visible.
Until I saw a tray of vibrant green wheat growing like a mini lawn on a French tabletop, I considered wheat berries to be ingredients for baked goods, health drinks, or food for cats and dogs who love to graze on the tender stalks.
Because wheat berries are some of the speediest seeds to sprout indoors, they make an almost guaranteed-to-succeed project for even the youngest child. These seeds are a celebration of life, and they should be used frequently and in many different ways.
Select a shallow tray, plant saucer, or a plastic lidded container like the ones salad greens come in. Clean the container, and poke some drainage holes into the bottom, then fill it with an inch of soil, moss, or cotton batting.
Wet the planting surface thoroughly, scatter seeds across the top in a single layer, and cover with a thin layer of soil. Keep the medium moist, and the seeds will sprout in less than a week.
Have your grandchild “write” his name in a tray of soil with a pencil or twig. Drop the wheat berry seeds inside the shallow pencil furrow, pat soil over the top, and water with a light sprinkling.
In just a few days, the child’s name will erupt through the soil in thin green lines. Keep the sprouts watered and in a sunny spot, and the namesake display will last for weeks.
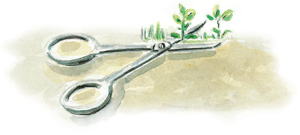
Note: You can trim the tops with scissors if the sprouts begin to droop.

A fresh tray of wheat berries will need a gentle sprinkle of water daily.
One evening, my young son complained about us “hurting” carrots, leeks, garlic, and beets when we cooked them. I told him that we could choose a few for a reprieve, and that we would give them a second chance at life. Little did I know what a life lesson they would teach us.
We picked out some firm beets that still sported their greens, a handful of carrots with tops, a plump head of garlic, and a pair of tall, fat leeks. We trimmed the tops off the veggies and slid them into some recycled milk jugs filled with bagged potting soil, and Noah gave them each a drink.
We were used to sprouting carrot tops on our windowsill—even that was miracle enough for us—but nothing prepared us for the surprise that these veggies provided. For the first few days after planting, they looked wilted and on their way to the worm bin. But after only a week, they began to flaunt their new green headdresses.
The beet greens flourished, the carrots looked like a feathery jungle, and the garlic produced an endless procession of tasty leaves that we continually cut and used in cooking, but the biggest surprise was the leek. It soared skyward and one day burst into a huge bloom that resembled Fourth of July fireworks. All this showy pizzazz from a few vegetables once destined for dinner.
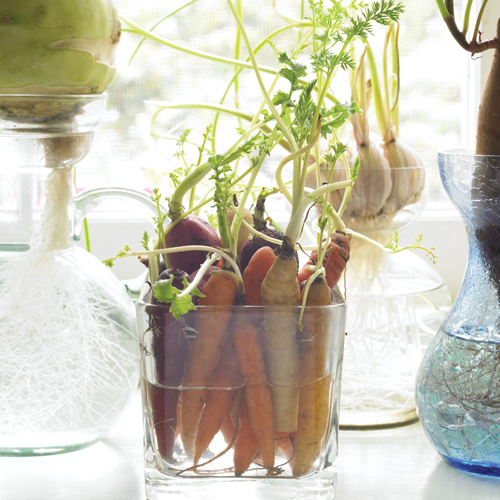
Even without soil, these plants—kohlrabi, carrots, and garlic—will sprout and grow to amazing heights.
Find a clear plastic container (juice bottles work well once you snip off the neck) and poke drainage holes in the bottom. Fill with soil and set your planter in a pebble-filled saucer or plate to capture water overflow.
Wrap the container with black paper, and tape it closed so that no light can reach the soil. Plant your whole, firm vegetables in the soil close to the side of the peek-a-boo planter. Water gently. When the vegetables begin to sport new growth, lift the sleeve of paper and take a peek at the roots. See if you can spy on the underground happenings.
Note: You can trim your beet leaves and add them to a pot of steamed vegetables or soup. They’re a tasty and healthful green. You may also want to transplant the beets outdoors if they outgrow their indoor garbage garden home.
The next time you buy a fresh “hand” of ginger for cooking, pick up a couple of extras for your child to plant. Half fill a 6-inch-wide by 8-inch-deep pot with soil. Choose a “hand” that is about 3 inches long and have your child lay it horizontally (like it’s taking a nap) on the soil. Top it with 3 inches of soil. Water and cover with a plastic bag till you see the first green leaves. Transplant to a 10- or 12-inch-wide pot, keep it warm and watered, and you’ll have a beautiful indoor ginger plant that will produce “hands” you can harvest and use in cooking.
Moses helps plant a ginger “hand.”
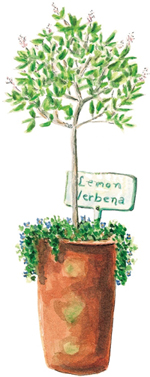
Herbs, when watered faithfully (but never left standing in water), are an almost foolproof plant for your grandchild to grow indoors. Rosemary, thyme, sage, oregano, anise hyssop, lemon verbena, basil, mint, marjoram, monarda, lavender, pineapple sage, bay, and a host of edible, scented pelargoniums will root readily and adapt to an indoor lifestyle.
Slide out that crisper drawer in your fridge and give some of your herbs a second chance at life. Remove the herbs and spread them on a plate. Pick through them and choose which ones to plant. Feel the herbs and make sure they are supple and still have life within; you don’t want to set your youngster up for failure.
Fill clean pots, cans, or jugs (making sure you have drainage holes) with potting soil and have your child water them until the soil is drenched. Use your pencil dibber to poke a hole about 2 inches deep in the center of the potting mix. Make a clean cut at the base of each herb stem and let your helper pick off the bottom leaves or needles, stand the herb in the hole, backfill with soil, and tamp it down gently.
Water once more, and set the herb pots on a gravel-filled tray in a brightly lit southern or western exposure (away from the direct blast of a heater or air conditioner).
Remember to do the finger poke test to see if your plants need moisture, and water only when the top inch of the soil is dry. Have your helper turn the pots once a week so cuttings don’t lean in one direction. (This is a great way to illustrate and talk about heliotropism, the phenomenon of plants turning toward the sun.) When your herbs are growing strongly, transplant them to a pot just slightly larger than the current one. (Small plants in large pots are doomed because the soil stays soggy and drowns the plant roots.) Feed with a weak solution of fish emulsion and kelp (keep fertilizer off leaves).
Once your herbs are established, make a tradition of having mini harvests from your plants for cooking or for drying and preserving. Show your child how to use a pair of small scissors to trim off leaves and flowers, and spread them to dry on newspaper or a screen in a warm, dark area. Take time daily to check on the drying herbs together. When the leaves or needles feel papery, they’re finished and ready to be stored in a lidded tin or a glass container away from sunlight and heat. Have your grandchild make a handmade label for the jar and put his “Grown by _______” on it.
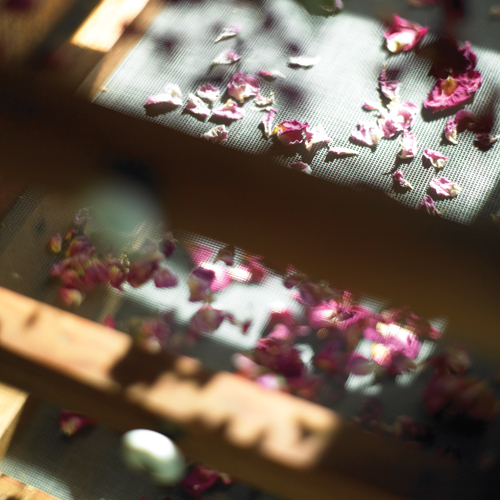
Scented pelargonium, dianthus, and rose petals dry on a screen. After drying, the petals will be used for salad toppings, decorating cakes, and pudding.
“The hands-on experience of gardening and cooking teaches children the value and pleasure of good food almost effortlessly.”
Alice Waters
The Art of Simple Food
