As explained earlier, editing a component is different from editing a group in that the changes you make to a component change every instance of that component. You've got lots of window components in your house, so they present an opportunity to see this principle in action:
Right-click (or Control-click) any one of the windows in your model and then choose Edit Component.
The window component opens for editing. The rest of the model fades. As an alternative, you can double-click a component to open it for editing.
If you have set View → Hide Rest of Model, then all you see is a single window component. For this example, it's best if you can see the rest of the model, so change your view, at least for a moment.
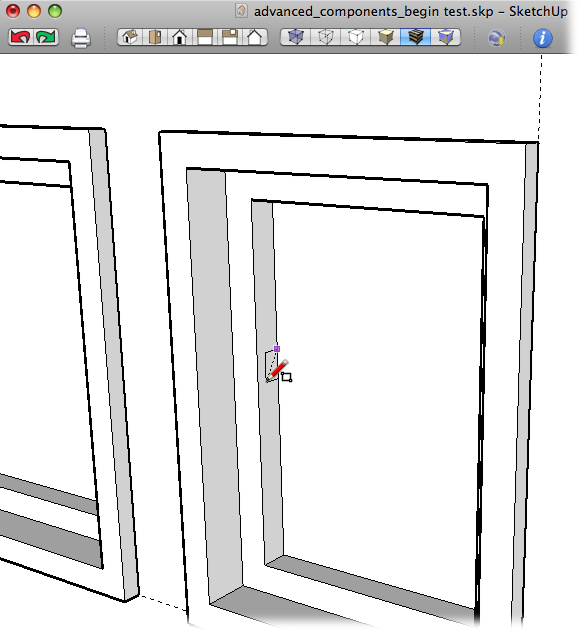
Zoom in to a close-up view of the window component (Figure 9-21).
You can use several handy zoom tools. If you have a scroll wheel on your mouse, that may be the easiest. You can also click with the Zoom (Z) tool, or drag with the Zoom Window tool.
With the Rectangle (R) tool, draw a small rectangle on the middle of the window's frame.
Make the rectangle about half the height of the frame, so it can serve as a horizontal piece of sash, as shown in Figure 9-21.
With Push/Pull (P), pull the rectangle and then click the frame on the other side of the window.
Notice that as you make changes to the open component, all the other components change at the same time.
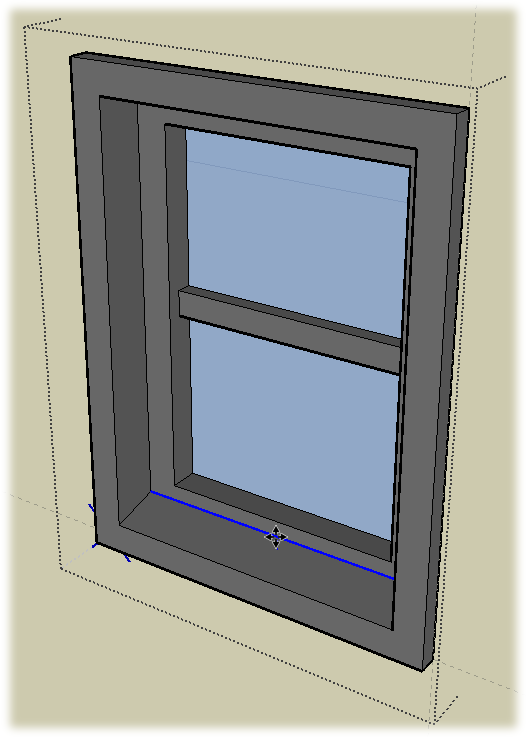
With the Move (M) tool, select the edge where the windowsill meets the window frame, and then pull the edge up in the blue direction (Figure 9-22).
You're creating a slope for the windowsill. That should help it to drain water when the storms hit SketchUp land.
Open the Materials window (Window → Materials), and change the color of the windowpane to a blue translucent color. Change the color of the frame to gray or some other color of your choice.
The technique for applying colors is different for Windows (Applying Colors and Materials (Windows)) and Mac (Applying Colors and Materials (Mac)).
When you're happy with the modifications, click outside of the component or choose Edit → Close Group/Component.
The window component closes and all the instances of the window component reflect the changes just made.
The changes made to the windows look fine all the way around the sides of the house, but there's a problem with the two windows that serve as skylights. They're sure to catch water and, once they do that, they're sure to leak. Some modifications are in order; however, because the skylights are instances of the window component, any changes you make will affect the other windows. The solution? Before you make your changes, make the two skylight windows unique. Here are the steps:
Right-click (or Control-click) the roof, and then choose Edit Group from the shortcut menu.
You need to open the roof group for editing before you can make changes to the skylights.
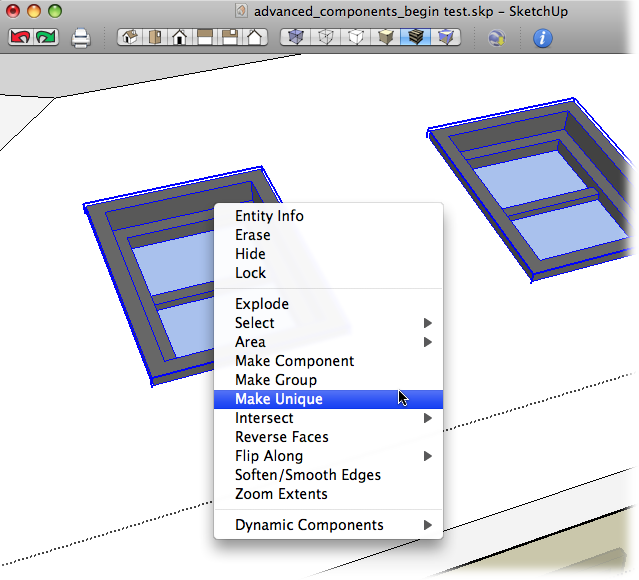
With the Select (space bar) tool, click the first skylight and then Shift-click on the second.
Both skylight components are selected, and they show the selection highlight.
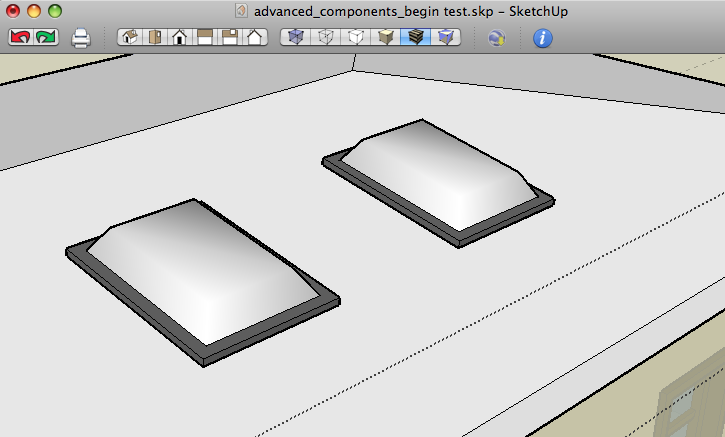
Right-click one of the window components, and then choose Make Unique from the shortcut menu (Figure 9-23).
The two skylight windows are no longer instances of the window component. Look in the Components window (Window → Components), and you see the original window component, named "window". A second component is called "window#1". That's the name SketchUp gives the new component it created as a result of the Make Unique command.
Double-click one of the window#1 components to open it for editing.
The component opens and the rest of the model is grayed out. Changes that you make to this component appear in the other skylight but not in the other window components.
With the Line tool, trace the inside edges of the window frame from corner to corner.
One line may be all it takes for the face of the window to fill in.
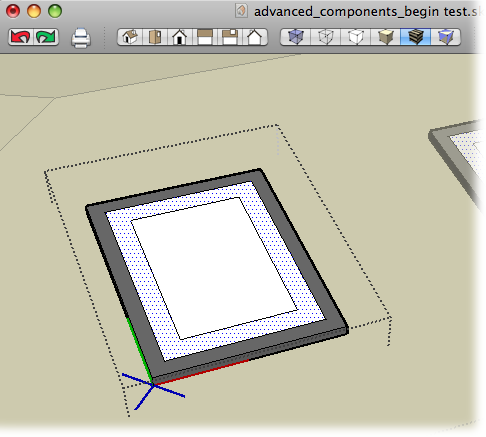
Using the Offset (F) tool, click the edge of the window frame, and begin to move in toward the center of the window. Type 4 and then press Enter (Return on a Mac).
A new inset face appears in the center of the window, as shown in Figure 9-24.
Choose the Move tool and click the inside face. Then press and release the Alt key (⌘ on the Mac) and pull up the inside face.
Pull the surface up so that it creates the kind of bubble shape you see on skylights.
The Alt (⌘) key toggles auto-fold, so SketchUp creates the necessary folds to distort the face of the windowpane. Double-diamonds appear on the Move cursor when it's in auto-fold mode. If you have trouble pulling the window up along the blue axis, press and release the up arrow.
Choose the Eraser tool. Then press and hold Ctrl (Option), and click the lines in the skylight "glass."
Ctrl (Option) smoothes the edges as you click them, which gives the skylight glass a nice curved effect (Figure 9-25).
Tip
Want to unsmooth an edge? Use the Eraser tool and press Shift+Crtl (Shift-Option) as you click edges that were previously smoothed.
Figure 9-25. By using the smooth option (Ctrl in Windows, Option on a Mac) with the Eraser tool, you can create a curved skylight for the roof. With the curved glass, the skylights look like they'll be waterproof when the next big storm comes along.
Note
To follow SketchUp best practices with this model, remove the extra faces and edges in the window#1 component. The easiest way to do so is to right-click the curved glass and choose Hide from the pop-up menu. Then go to work with the Eraser (E), erasing the leftover window frame and panes. You have lots of edges to dispose of, but be careful not to erase the outside frame that's used in the skylight. When you're done erasing unneeded geometry, go to Edit → Unhide → Last and the skylight glass reappears.
Choose Edit → Close Group/Component twice.
First you close the window#1 component. The repeated command closes the roof group. As an alternative, you can click outside of the components in the modeling window. Once all the components are closed, you no longer see dotted lines surrounding the groups or components.
At this point the house model is beginning to show a little character. To dress it up even more, you can continue adding premade components. The next sections focus on more techniques for working with and managing your components.
When you use the Make Unique command, SketchUp keeps the original name and adds numbers. That's enough detail to identify the new component in the Components window, but "window#1" isn't a very accurate name for your newly created skylight. To change the name and description, open the Components window (Window → Components). Click window#1 and then, at the top of the window, type the name and description you want to use for your component, as shown in Figure 9-26.
