Picnic Pleasers
A picnic is the most fun way of all to entertain and certainly the one that’s most appealing to families with young children. For those intimidated by dinner parties or lunches, it’s also an unfussy way to reciprocate other people’s hospitality. So, here we turn our attention to more casual entertaining in the form of a vintage-inspired picnic.
On the Menu
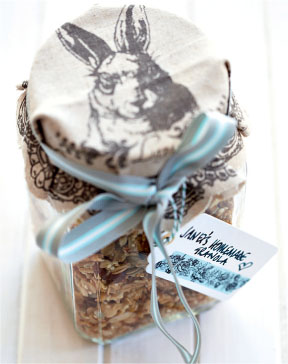
Home-made granola
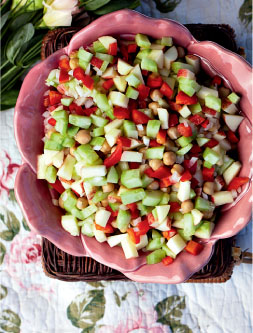
Joan’s refreshing summer salad
Home-made Scotch eggs
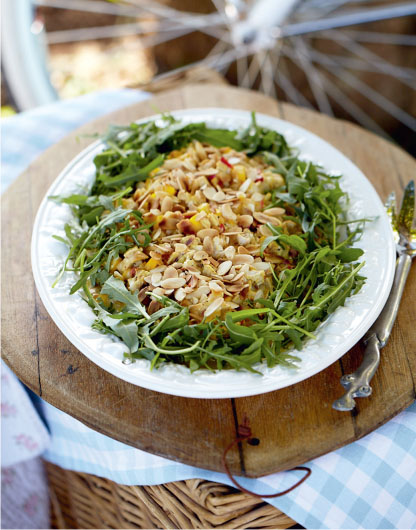
Chicken and mango salad with toasted almonds and a fruity curry dressing
Crunchy broccoli salad with a balsamic glaze
Mushroom, bacon and herb quiche
Rustic Italian antipasti picnic loaf
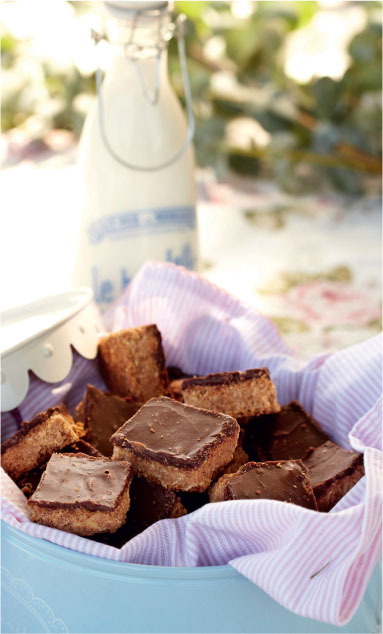
Crunchy oat and chocolate biscuits
Refreshing pineapple mousse
Decadent picnic
Chicken and mango salad with toasted almonds and a fruity curry dressing
Roasted Mediterranean vegetable quiche
Warm phyllo parcels with Brie and cranberry or fig preserve
Vanilla cupcakes with limoncello-flavoured buttercream icing
Swiss chocolate mousse cake
Summer picnic
Home-made Scotch eggs, served with couscous and/or Joan’s refreshing summer salad
Cheese mousse with preserved figs, served with baguette
Swedish-inspired spiced apple cake
Crunchy oat and chocolate biscuits
An English picnic tea
Individual mushroom, bacon and herb quiches
Rolled-up asparagus sandwiches tied with chives
Angel food cake
Mum’s never-go-wrong chocolate profiteroles
Picnic brunch
Home-made granola
Roasted sweet potato and butternut with feta quiche
A selection of croissants with jam, cheese and butter
Chocolate and coffee cake, with chocolate ganache
Christmas-inspired picnic
Roasted red pepper roulade
Slices of Honey- and port-glazed gammon with couscous and Joan’s refreshing summer salad
Chocolate mince pies
Christmas Gugelhopf with chocolate, orange and cranberries
Romantic picnic
Blue cheese crème brûlée, served with warm sliced baguette
Salmon and cucumber mousse, served with a selection of savoury biscuits
Home-made Scotch eggs
Crunchy broccoli salad with a balsamic glaze
Ultimate white chocolate cake
Finding the perfect picnic spot
In South Africa we’re fortunate to have a whole range of venues to choose from, be it beach, dam, park, botanic garden, river, bushveld or tranquil country spot. But it could even simply be a shady patch in your garden. Just in case, if at the eleventh hour the weather doesn’t play along, be sure to have other venue options up your sleeve – and use your imagination!
Even if you might have to resort to your verandah or sitting in front of your fireplace (a roaring fire is perfect for kids to toast marshmallows), it’s amazing how a picnic rug spread with an assortment of tempting goodies still manages to capture that special ambience. And your children won’t feel let down and disappointed.
Casual though a picnic is, it’s still important to be organised ahead of time so that there’s little or nothing left to do at the event itself. You can easily make most of the food a day or two in advance, so that on the day you are packed and ready to go.
Picnic packing check list

- Serving plates and platters
- Plates and bowls for eating
- Glasses and mugs
- Cutlery: forks, knives, spoons, teaspoons, bread knife, utility knife and/or cheese knife, serving utensils
- Paper serviettes or cloth napkins
- Damp cloth or moist handwipes (wet wipes)
- Paper towel
- Bottle opener/corkscrew and bottle cooler
- Insect repellent and suntan cream
- Candle/s or lamps and a torch if it is likely to get dark
- Firelighters or matches and firewood to make a fire
- Braai utensils (grid, tongs, etc.)
- Containers, foil or packets for leftovers
- Packets or bin liners for refuse
- Picnic blanket and/or fold-up chairs and table
- Ice bricks or ice cubes
Food and drink items
- All savoury items for the picnic
- All sweet or dessert items for the picnic
- Flask with filter coffee or hot water for tea or instant coffee
- Milk
- Sugar
- Salt and pepper
- Salad dressing and condiments
- Butter
- Wine
- Juice/water/soft drinks
- Breads, baguettes and/or bread rolls
- Cheese platter and fruit
- Chips, dips or pâté
Becoming organised

Decide on your menu and draw up a list of ingredients that you will require, dividing this by where and when they are to be purchased.
Plan of action and countdown

Even though a picnic really does not require much planning or preparation in advance, you may choose to make a couple of items ahead of time because you’re expecting a large number of people to join you, or you know you’ll be rushed or stressed before the day.
| 1–4 weeks before the picnic |
| |
If you are ordering a quiche, cake, cupcakes or biscuits, place your order for these items. |
| |
Make and freeze the Mushroom, bacon and herb quiche (page 110). |
| 10 days before the picnic |
| |
Make the Crunchy oat and chocolate biscuits (page 112) and store in an airtight container with greaseproof paper between the layers. |
| 3–5 days before the picnic |
| |
Purchase drinks and organise ice (if required). Put drinks in the fridge to chill. |
| |
Make Home-made granola (page 106); when cooled, place in airtight containers. |
| |
Make the Mushroom, bacon and herb quiche (page 110) (if you haven’t already made and frozen it in advance). |
| 2 days before the picnic |
| |
Check that you have all the ingredients for the items on your menu, including salads or herbs for garnishing. |
| The day before the picnic |
| |
Make the Rustic Italian antipasti picnic loaf (page 111), wrap in clingfilm and place in the fridge. |
| |
Make the Refreshing pineapple mousse (page 113). |
| |
Prepare the ingredients for the Chicken and mango salad with toasted almonds (page 108), but keep the fruity curry dressing separate. (Assemble and dress just before serving.) |
| |
Make Joan’s refreshing summer salad (page 106). |
| |
Prepare the Home-made Scotch eggs (page 107), ready to be fried the next day. |
| |
Defrost the Mushroom, bacon and herb quiche (this should be done at least 3 hours before). |
| |
Prepare the ingredients for the Crunchy broccoli salad with a balsamic glaze (page 109) (assemble and dress just before serving). |
| |
Go through your picnic packing list to ensure that you have everything that you will need. |
| About an hour before setting off |
| |
Heat the quiches (this takes about 30 minutes at 180°C; if reheating from frozen, allow for extra heating time). |
| |
Fry the Home-made Scotch eggs. |
| |
Pack in the salads and dressings. |
Home-made granola (toasted muesli)
When we were growing up my mum used to produce trays of home-made, freshly baked granola or muesli. We could not wait for it to cool down before we devoured it. Delicious straight off the oven trays, it was even nicer with milk (turning a lovely brown colour from the honey in the granola and yummy to drink on its own). Double the recipe if you want extra. Now I make it for my own children. They love it just as much as we did all those years ago.
- 340g rolled oats
- 75g sunflower seeds
- 80ml sesame seeds
- 75g slivered almonds or chopped hazelnuts
- 80ml desiccated coconut
- 125ml sunflower oil
- 80ml good quality honey
- 75g raisins or dried cranberries
- Preheat the oven to 170°C. Line a large baking sheet with baking paper.
- Combine all the ingredients, except the raisins or cranberries. Sprinkle the mixture onto the prepared baking sheet and bake, stirring often, until golden-brown (20–25 minutes). Do not leave the muesli unattended as it can burn easily.
- Remove from the oven and leave to cool on the sheet (break up the granola a little as it will harden as it cools). Mix in the raisins or cranberries and store in an airtight container or jar.
Serves 6
Note: You can add a further 50g of seeds such as flax, linseed and pumpkin. For variety, add vanilla or orange extract to the wet ingredients before combining and baking. For a decadent muesli, add some chocolate or yoghurt chips.
Joan’s refreshing summer salad
There’s an interesting story to this recipe, originating with my late Aunt Joan, who was very proud of it. While on a diet, she wondered what she could concoct from the ‘legitimate’ ingredients in her kitchen and came up with the following refreshingly different salad. When Sainsbury’s in the UK were looking for new salad ideas, Joan’s daughter Lauren suggested they try her mom’s recipe. They did – and soon after were selling the salad in the store.
- 1 × 400g can chickpeas, drained and rinsed
- 1 English cucumber, peeled and finely chopped (deseed if you intend to keep the salad for more than a couple of hours)
- 1 red pepper (or 1⁄2 red and 1⁄2 yellow, ideally for colour), deseeded and finely diced
- 2 medium apples (Golden Delicious or firm red apples), diced
- 15–30ml fresh lemon juice (for squeezing over apple to prevent discoloration)
- 1⁄2 small onion, finely chopped (optional)
- 30ml mayonnaise*
- salt and freshly ground black pepper to taste
* If you’re watching your calories, substitute normal mayonnaise with a reduced-fat version.
- Simply mix all the ingredients together.
- Store in the fridge until required.
Serves 6
Home-made Scotch eggs
I remember these fondly from my childhood … they were a drive-in movie treat. My mum used to cook these strange brown balls at home and, in the car, still warm, she’d slice them in half to reveal the surprise boiled egg inside – my brothers and I would gobble them down in the back seat. This revelation seriously dates me since my own children don’t have a clue as to what a drive-in is! Yet Scotch eggs conjure up wonderful, happy memories. Here I share my mum’s recipe with you.

- 10 good quality sausages (±625g), casings removed
- 15ml chopped fresh parsley
- 5ml finely chopped fresh sage
- 2 spring onions, very finely chopped (optional)
- salt and freshly ground black pepper, to taste
- 1 egg, lightly whisked for binding
- 5 boiled eggs, peeled (don’t peel them till they are firm)
- ±100g cake flour seasoned with salt and freshly ground black pepper
- ± 150g bread- or cornflake crumbs
- oil for frying
- Combine the sausage meat, herbs, spring onions (if using), seasoning and lightly whisked egg.
- Roll each boiled egg in the flour to coat it. Wrap some of the sausage mixture evenly around each egg. Wet your hands to make this a little less sticky.
- Roll each Scotch egg in the crumbs.*
- Fry gently until golden-brown, turning to ensure an even colouring all round. This will take 8–10 minutes. Drain on paper towel.
- Just before serving, slice each one in half to reveal the egg; sprinkle with salt. Scotch eggs are delicious served hot or cold.
Makes 10 half-eggs
* You can prepare Scotch eggs up to this point the night before, refrigerate them, and fry the next day.
Chicken and mango salad with toasted almonds
The salad dressing is somewhat vintage in inspiration yet it’s passed the test of time and, no matter how often I make it, I still love it. The toasted almonds are essential to the taste and presentation of this salad, which makes a perfect accompaniment to a Mushroom and bacon quiche (page 110). Serve them together for a light lunch with friends.
- 4–6 poached chicken breasts, sliced*
- 1⁄2 red pepper, deseeded and finely diced
- 1⁄2 yellow pepper, deseeded and finely diced
- 1⁄2 small–medium onion, finely diced
- 1 large mango, diced but not too small (or 1 × 410g can peach slices)
- salt and freshly ground pepper, to taste
- salad leaves for serving
- ±60–80g toasted flaked almonds for serving
Fruity curry dressing
- 125ml good quality mayonnaise
- 5–10ml curry powder (or to taste)
- ±30ml peach chutney
- 15–30ml peach or mango juice (or syrup from the can of peaches)
- Place the sliced chicken in a bowl with the diced peppers, onion and mango or peach slices and mix well. Season with salt and freshly ground black pepper.
- Mix together the ingredients for the dressing, adding enough fruit juice or syrup to get a pouring consistency. Season to taste.
- Just before serving, pour the dressing over the chicken and toss well.
- To serve, place some salad leaves on a platter, top with the dressed chicken salad and sprinkle over the toasted flaked almonds.
Serves 4
* To poach the chicken, place a bay leaf, some chopped carrot, celery and onion and a bouquet garni into a pan of water. Add the chicken breasts and simmer until just done. Leave in the poaching liquid until cool, then slice into chunks.
Crunchy broccoli salad with a balsamic glaze
This is a simple yet delicious salad that my husband often likes to make. You can prepare the ingredients in advance, but dress the salad just before serving. This salad is best served at room temperature, so it is perfect for a picnic.

- 1 punnet (± 230g) tender-stem broccoli florets
- 4–6 rashers bacon (or pancetta), cooked and diced
- 50g pecan nuts, chopped
- 100g feta cheese, crumbled
- balsamic glaze
- olive oil
- salt and freshly ground black pepper, to taste
- Blanch the broccoli by steaming it for a couple of minutes, then plunging it into ice-cold water. Drain well.
- Arrange the broccoli on a serving platter and sprinkle over bits of crispy bacon, pecan nuts and feta cheese.
- Drizzle with balsamic glaze and olive oil, and season with salt and black pepper.
Serves 4–6
My stand-by quiche recipe
This faithful recipe is versatile, freezes beautifully and tastes as if it’s just been baked when reheated. It’s always the first thing that people are drawn to – in fact, I’ve had a few ladies enrol at my baking classes just to learn how to make it. The recipe can be made into individual quiches (simply place the pastry into non-stick muffin trays, chill in the fridge, then fill and bake). They are equally popular on the tea table or as canapés for a cocktail party.

Cheese pastry
- 155g cake flour
- 90g cold butter, cut into smallish cubes
- 60g Cheddar cheese, grated
- 30–45ml cold water
- Preheat the oven to 190°C.
- Process the flour and butter in a food processor for about 15 seconds, until crumbly. Alternatively, use your fingers to rub the butter into the flour.
- Add the cheese and water. Process in short bursts until the mixture comes together. Add a little extra water if necessary.
- Turn out the dough onto a floured surface and gather into a ball. Cover with clingfilm and refrigerate for at least 30 minutes.
- Roll out the dough to fit a 22cm diameter pastry case and place in the fridge to rest for 10–20 minutes before baking.
- Line with paper and fill with baking beans. Bake the pastry case blind for about 10 minutes until the edges are just starting to colour. Remove the paper and baking beans and bake for a further 10 minutes until the base is firm and dried out slightly.
Basic quiche custard
- 3 eggs
- 250ml cream (or half milk, half cream)
- salt and freshly ground black pepper
- 15ml chopped fresh mixed herbs (e.g. rosemary, parsley, thyme)
- ± 75g grated cheese, e.g. mature Cheddar
- paprika for sprinkling
- Preheat the oven to 180°C.
- Whisk the eggs and milk or cream lightly together, add seasoning and herbs, then pour over the filling of your choice (see below for suggestions).
- Sprinkle over some grated cheese and a little paprika, then bake for approximately 40 minutes.
Filling variations
- Roasted Mediterranean vegetables drizzled with olive oil (bake for about 45 minutes until just tender)
- Roasted sweet potato and butternut with feta
- Freshly grated courgettes
- Roasted butternut, Gorgonzola (or any blue cheese) and cherry tomatoes
- Roasted vegetables with Red onion marmalade (page 47)
- Mushroom and bacon: fry 200g chopped bacon or pancetta in a little olive oil, and sauté a punnet of sliced mushrooms with 1–2 cloves garlic. Combine, then add to the basic quiche custard in the recipe.
Serves 8
Rustic Italian antipasti picnic loaf
In Europe, this is a popular choice for a picnic, and has huge visual appeal when you cut out a slice. It can be made several hours ahead of the picnic or even the night before.

- 1 round artisan loaf of bread, about 23cm in diameter
- ±20ml basil pesto or ± 60g cream cheese
- baby spinach leaves to line the base of the loaf (optional)
- ±250g buffalo mozzarella, sliced into rounds
- a choice of Italian cold meats e.g. salami, Parma ham, mortadella, coppa
- a selection of roasted vegetables e.g. roasted red and yellow bell peppers, roasted beetroot, grilled aubergine and preserved artichoke hearts (drained)
- ripe tomatoes or baby rosa tomatoes, sliced
- a handful of basil leaves
- seasoning to taste
- balsamic glaze (optional)
- Cut out a lid from the top of the bread (reserve this for later). Scoop out some of the centre of the loaf (use for making croutons or breadcrumbs). Don’t scoop out too much, or the loaf will fall apart.
- Spread some basil pesto or cream cheese over the bottom of the hollowed-out loaf.
- Layer the various ingredients, starting with those that are firmer and have less moisture (such as the spinach or cheese) to prevent the base from becoming too soft or soggy. Season each layer.
- Top the final layer with pesto or a little balsamic glaze.
- Replace the lid and wrap the loaf firmly with clingfilm. You can use a can or two to weigh it down slightly. Serve it 4–6 hours later, cutting into thick slices.
Serves 4–6
Crunchy oat and chocolate biscuits
This is an adaptation of an old recipe from Bredasdorp in the southern Cape. My family always asks me to make a batch for padkos whenever we set off for a picnic or holiday.
Crunchy oat biscuits
- 230g butter (preferably unsalted) or margarine
- 100g granulated white sugar
- 120g desiccated coconut
- 40g rolled oats
- 210g cake flour
- pinch of salt
- 15ml cocoa powder
- 8ml baking powder
- Preheat the oven to 180°C.
- Melt the butter, add the sugar, and stir to combine.
- Stir in the coconut and oats, then sift in the flour, salt, cocoa powder and baking powder. Combine well and knead a little.
- Press mixture firmly into a 22cm greased or greaseproof paper-lined square tin; use the back of a spoon (or potato masher) to level the mixture.
- Bake for 20–30 minutes then remove from the oven. Pour over the chocolate topping while the biscuit base is still warm.
Chocolate topping
- ± 45ml milk
- 15ml butter (salted or unsalted)
- 260g icing sugar, sifted
- 30ml cocoa powder
- 5ml vanilla extract
- Combine all the ingredients in a saucepan and bring to the boil, stirring, then remove from the heat.
- Pour the hot topping over the baked biscuit crust, tilting the pan so that the chocolate coats the surface.*
- While the crust is still warm, cut the biscuit into squares, but leave them to cool and set completely before removing from the pan.
Makes ± 18
* If the mixture is too thick to pour, add a bit more milk. You can substitute chocolate ganache (page 186) for this topping.
Refreshing pineapple mousse
Given the retro feel of our picnic theme, this is another of my mum’s recipes that alludes to an era of relaxed living and leisurely picnics. She has always received high praise for this mousse and, surprisingly, it’s economical to make. You can serve it in your best glass pudding bowl for a lunch or dinner party, but for our picnic I’ve chosen to use 250ml glass jars. Sometimes I spread a layer of custard over the mousse before topping it with whipped cream to make it extra yummy.

- 1 large or 2 small pineapples
- 250ml water
- 30–45ml granulated white sugar (to taste)
- 30ml custard powder, mixed with a little cold water *
- 2 × 80g packets pineapple jelly powder
- ±500ml boiling water and 250ml cold water (to make up jelly) **
- 3 egg whites, whisked until just stiff
- ±500ml home-made or good quality custard (optional)
- 250ml cream, whipped
- Grate the pineapple and place it in a saucepan. Cover with the water, add sugar to taste and bring to the boil. Leave to simmer for about 5 minutes.
- Remove the saucepan from the heat and gently stir in the custard powder and water mixture. Place the liquid back on the stove and stir until it thickens.
- Make up the jelly powder with the water**, making sure that the jelly powder is thoroughly dissolved.
- Add the grated pineapple to the jelly mixture. Leave to cool, then place in the fridge.
- When the mixture is almost set, beat the egg whites until very stiff and fold them into the pineapple mixture. Decant into 6–8 jars (or a glass bowl) and place in the fridge to set.
- Once set, pour over a layer of custard, and top with a layer of whipped cream.
Serves 6–8
* If you don’t mix the custard powder in cold water first, the mixture will be lumpy once the custard powder encounters heat.
** Typically for 2 packets of jelly you’d use 4 cups of water (2 boiling, 2 cold). For this recipe, you should deduct the cup of water that is added to the pineapple, and use 3 cups of water to make up 2 packets of jelly (2 boiling, 1 cold).


