Chapter 7. Historical Reenactment
In Kerbal Space Program, you can re-create real-life space missions with a pretty good degree of accuracy. Historical reenactments are a lot of fun, and you’ll often learn some space history along the way. In this chapter, we’ll be re-creating some important firsts: the first satellite, the first person in space, the first space docking, the first soft landing and first crewed landing on the moon, and the first lunar rover.
For these missions, we won’t be using any mods — no custom parts and no autopilot. This has two consequences: because we’re using only the built-in rocket parts provided by KSP, the ships won’t look entirely the same, but they’ll come close enough. Second, the lack of an autopilot means that these missions will actually be slightly harder to fly than the initial missions. To be fair, though, the original missions had to deal with actual rockets and explosive fuel, so that evens the score a little.
Additionally, every mission that we’re re-creating in this chapter included science gear, which was brought along to serve the mission’s goal of discovery. We won’t be including these in our re-creations: our goal will be re-creating the look and behavior of the vessels, but not necessarily the science or the innards.
With all of these caveats in mind, let’s press on!
Note
We flew all of these missions in Normal difficulty, and using the game’s Sandbox mode, which means you don’t have to worry about the cost of your ships or the capabilities of the Space Center. If you’re just starting out, we recommend using the Sandbox mode as well, but if you want an additional challenge, try it in Career mode.
For an even more realistic and challenging approach, try flying these missions with realism mods installed! See Chapter 12 for more information.
Sputnik 1 (First Satellite in Orbit)
The first reenactment that we’ll do is Sputnik 1 : the first orbital satellite.
The idea to launch a satellite into orbit was kicked around among scientists for a long time, but Sputnik didn’t really start until the mid-1950s. Soviet rocket engineer and spacecraft designer Sergei Korolev proposed the idea to the Minister of Defense Industries in 1954, saying that orbital satellites were inevitable given that rockets were a thing now.
Korolev had an interesting career. He was originally an ICBM designer and ended up doing a lot of foundational work in rocketry. He designed a large number of rockets for the USSR, including the Sputnik series of satellites. He was actually never personally identified as the lead designer, because the USSR feared that the United States would assassinate him; he was just referred to in official media as Glavny Konstruktor : the “Chief Designer.”
Design
Sputnik ’s design was very simple: the satellite was two hemispheres joined together, with four antennae sticking out of it. Inside the ball was a battery, some scientific instruments that detected temperature and air pressure, and the transmission gear.
The goal of the mission was to have the satellite up there in a reasonably stable orbit, continuously beeping for as long as the batteries held out. The batteries were designed to last two weeks and ended up lasting just over three.
Sputnik didn’t actually do very much, once it was up in orbit — it just beeped. The beeping was as much for science and status as it was for showing off to the United States; the volume and duration of the beeps encoded temperature and pressure.
In addition to designing the satellite, the USSR also had to design a rocket that was capable of putting it up there. The satellite was launched on the Sputnik rocket, which was based on the design of the R-7, the world’s first intercontinental ballistic missile, which Korolev worked on.
Re-creating Sputnik in KSP
KSP comes with a spherical probe core called Stayputnik, which is perfect for re-creating Sputnik . The Stayputnik contains a probe core, as well as a battery.
For looks, we’ll also add the four antennae that were attached to the back of Sputnik . These will be Communutron 16s, which need to be aiming backward. To match the look of the real Sputnik satellite, follow these steps:
- Start with a Stayputnik Mk 1 sphere (see Figure 7-1
).
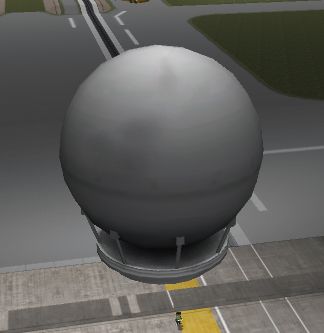
Figure 7-1. The base part: a Stayputnik Mk 1 control pod
- Add a single Communutron 16 antenna to the equator of the sphere (see Figure 7-2
).
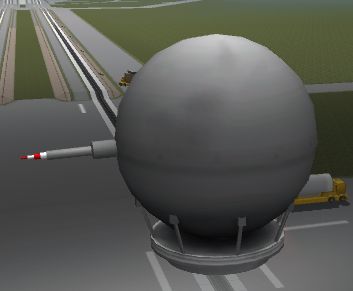
Figure 7-2. Attaching the first Communutron 16 antenna to the side of the sphere
- Right-click the antenna, and choose Extend. The antenna will extend to its full length (see Figure 7-3
).
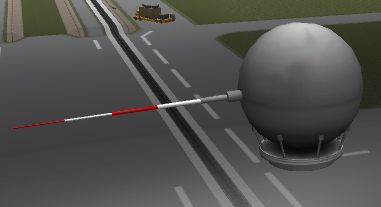
Figure 7-3. Extending the antenna
- Increase the Symmetry mode to 4, either by clicking on the Symmetry Mode button at the lower left or by pressing X.
- Click the antenna, and you’ll notice that you’re now moving four antennae at once. Attach all four back onto the equator (see Figure 7-4
).
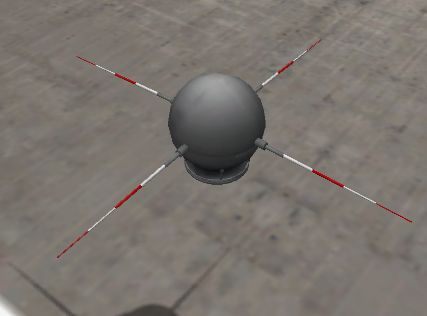
Figure 7-4. Placing four extended antennae
- Enter the Rotate mode, either by clicking on the Rotate button or by pressing 3.
- Click on any of the four antennae, and drag the red ring to rotate them to aim downward. All four antennae will rotate at the same time (see Figure 7-5
).
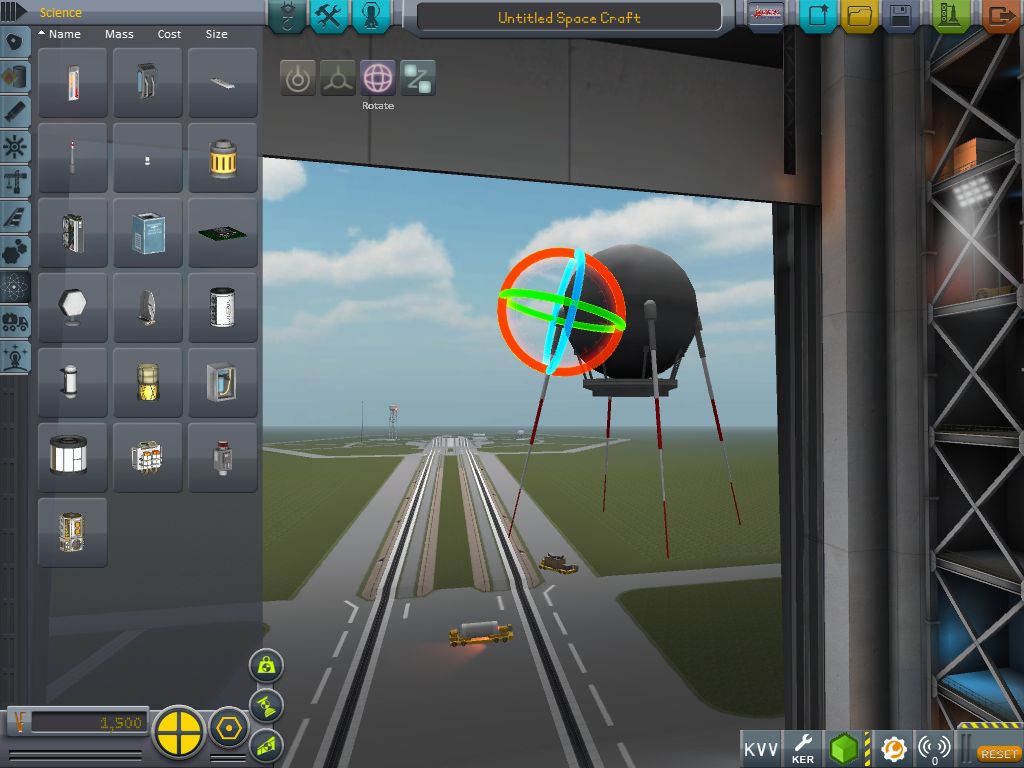
Figure 7-5. Rotating the antennae
Note
If you mess up your rotation, don’t worry. Just press the space bar to reset any part’s rotation.
You’re all done! Your satellite should now look very Sputnik -y (see Figure 7-6 ).
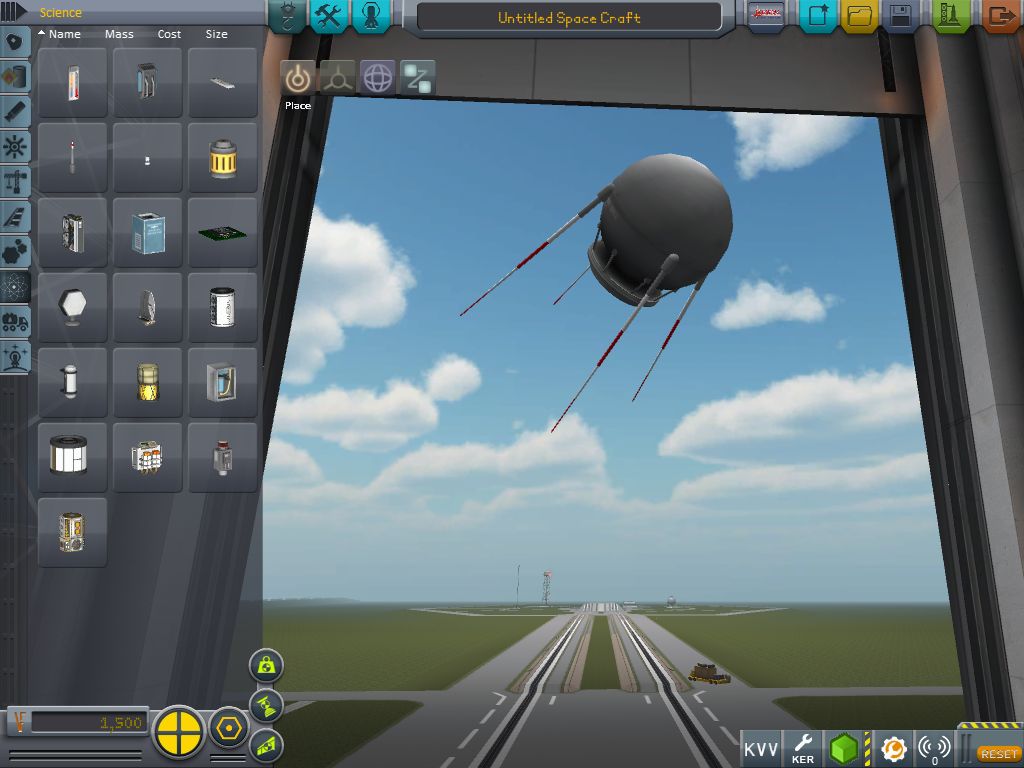
Figure 7-6. The final Sputnik satellite
There’s one last thing we need to add in order to be able to properly control the probe core on its way up — a small reaction wheel underneath the Stayputnik so that you can angle the ship on its ascent.
It’s now time to build the rocket that will carry the probe to orbit.
Sputnik was under some pretty harsh battery requirements: it had a fixed battery life, and so will this. Stayputnik only has 10 units of energy, and your reaction wheels will consume it quickly! Watch it carefully!
The Sputnik rocket has five engines: one in the center, plus four boosters strapped to the side (see Figure 7-7 ).
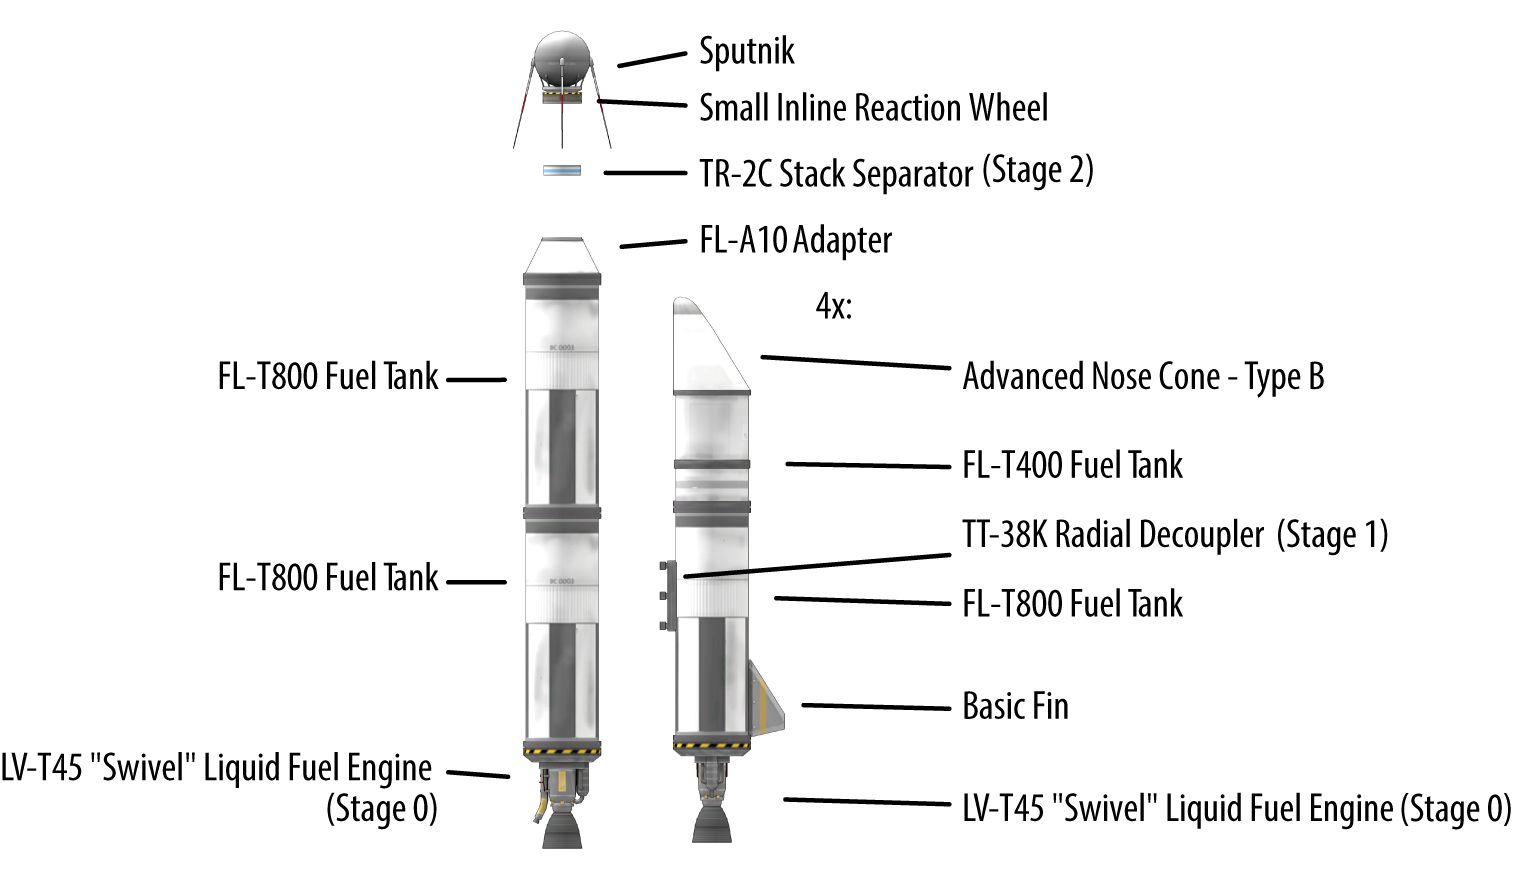
Figure 7-7. The Sputnik rocket
Launch
Launching Sputnik is very straightforward. Following the instructions in “Launching” , launch your rocket upward, and turn east by 10 degrees immediately after launching (see Figure 7-8 ).
If you start to heat up too much on the way out, reduce your throttle a little. Cut your engines once your apoapsis is at 80 km.
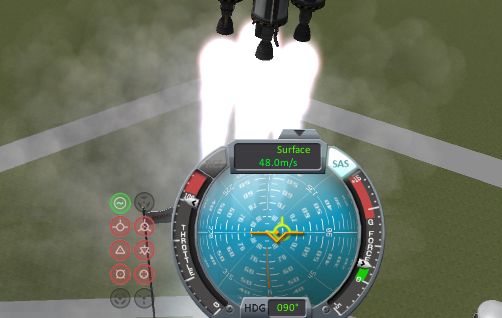
Figure 7-8. Aiming 10 degrees east after launching
Note
Sputnik is a very lightweight craft, so your apoapsis will reach 80 km quickly. You’ll stop your burn while you’re still in reasonably thick atmosphere, which means that drag will begin pulling your apoapsis down quite fast. You might need to do small burns to maintain your apoapsis at 80 km.
Once your apoapsis is high enough, add a maneuver node that thrusts prograde in order to circularize.
Warning
The Stayputnik probe core only contains 10 units of electricity, which will slowly drain over time, and turning your craft using the reaction wheels will drain this even faster. Your engines will generate power when burning, but when they’re off, you’re draining power. You can conserve some power by turning off SAS, by pressing T, until you need it again.
Once you run out of power, you can’t do anything at all — no staging, no turning, no nothing. Keep an eye on your electricity levels!
Your first stage will run out during the circularization burn; detach it, and continue the burn. Once you’ve circularized, detach the satellite (see Figure 7-9 ).
Congrats! It won’t last long on battery power, but you’ve put a beeping sphere in orbit.
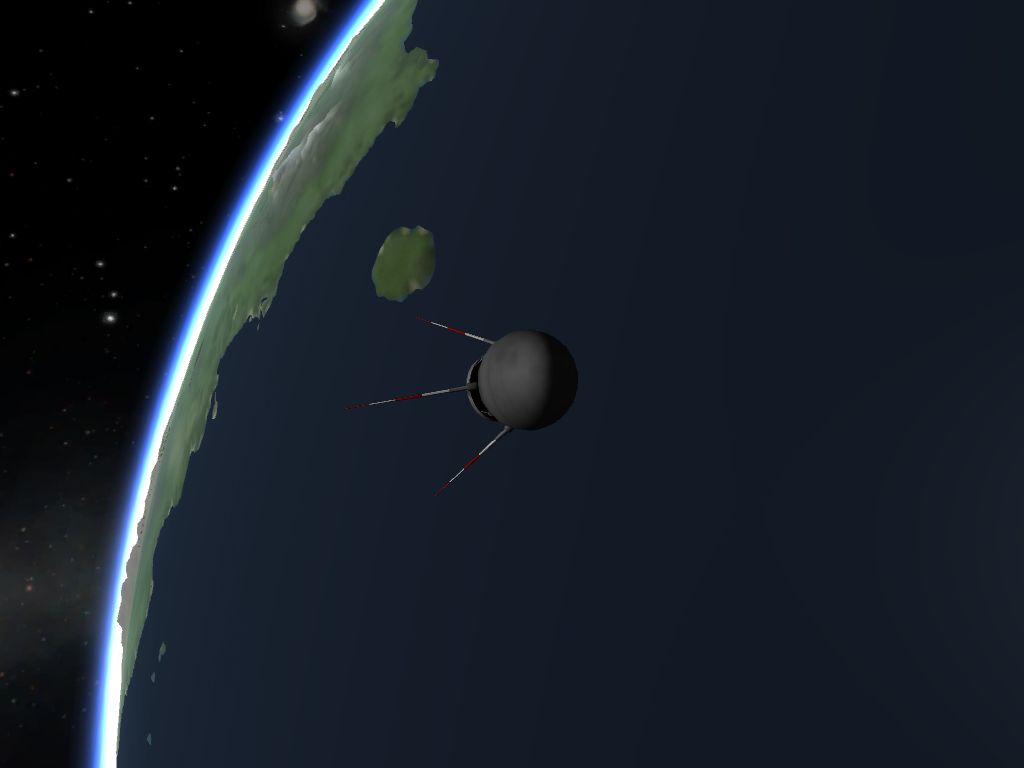
Figure 7-9. Sputnik in orbit
Aftermath
Sputnik 1 was launched on October 4, 1957. It reached its low orbit successfully and began transmitting exactly as designed.
It didn’t take long for the rest of the world to notice Sputnik . Its simple beeping was easily detectable by amateur radio operators, and word spread quickly, causing a “Sputnik crisis”: given that the USSR had demonstrated that it had the capability to put objects in orbit, might it not put weapons up there?
Sputnik is credited with beginning the Space Race: a period of intense competition between the United States and the USSR, in which both countries attempted to one-up each other in a race to establish superiority in space. Over the next several decades, the United States and the USSR would launch more and more complex missions into space, culminating in the Apollo missions, the launch of the Mir and Skylab space stations, and eventually the International Space Station.
In the shorter term, the USSR launched two follow-up missions to Sputnik 1 :
- Sputnik 2 carried the first living creature into orbit: Laika the dog. Laika was fitted with medical sensors and launched in a satellite very similar to the initial Sputnik probe. Laika did not survive the mission; there was never any plan to de-orbit the capsule, and she died of overheating several hours after reaching orbit.
- Sputnik 3 was designed to carry a large number of sensors, in order to gather more detailed information about environmental conditions in space. It was a partial success: many of the sensors worked, but the tape drive inside the satellite failed, which resulted in the satellite failing to map the Van Allen radiation belts.
Vostok 1 (First Human Space Flight)
Vostok 1 was the first mission to carry a human being into orbit: the cosmonaut Yuri Gagarin.
Vostok 1 launched on April 12, 1961, and placed Gagarin in orbit. The spacecraft made a single complete orbit and then landed; the entire trip took 108 minutes, which makes it the shortest crewed space flight in history.
Design
Vostok 1 launched on a Vostok-K rocket from Baikonur, which was specifically designed to launch satellites. The Vostok-K rocket was very similar to the R-7 rocket, in that it consists of five engines: one in the center, with four boosters strapped to the side. The Vostok-K is so similar to the R-7 that you can effectively reuse your design from the earlier Sputnik mission.
The Vostok-3KA capsule, which actually carried Gagarin, carries just the bare essentials: the capsule in which the pilot sits, a parachute, and an engine used to de-orbit the craft once the orbit is complete.
Re-creating the Vostok 3KA in KSP
To re-create the Vostok 3KA, we’ll use an Mk1 Lander Can. Vostok 3KA had a spherical pod, but the can is as close as we can get without mods. The engine and its fuel tank can be quite small; you don’t need enough fuel to complete de-orbit, just enough to lower your periapsis to under 60 km. Once you do that, drag will take care of the rest.
The re-creation of the R-7 rocket used in the Sputnik re-creation is mostly good enough, but with a couple of additions: first, we’ll add the landing can, as well as a heat shield that will allow it to survive reentry, and a parachute to reduce the descent to survivable speeds. We’ll also include a tank of RCS fuel, as well as RCS thrusters, to help maneuver in space.
The additional weight at the top of the rocket can lead to some instability during early flight. To address this, add struts that connect from the boosters to the top of the rocket.
You can see a blueprint of the rocket in Figure 7-10 .
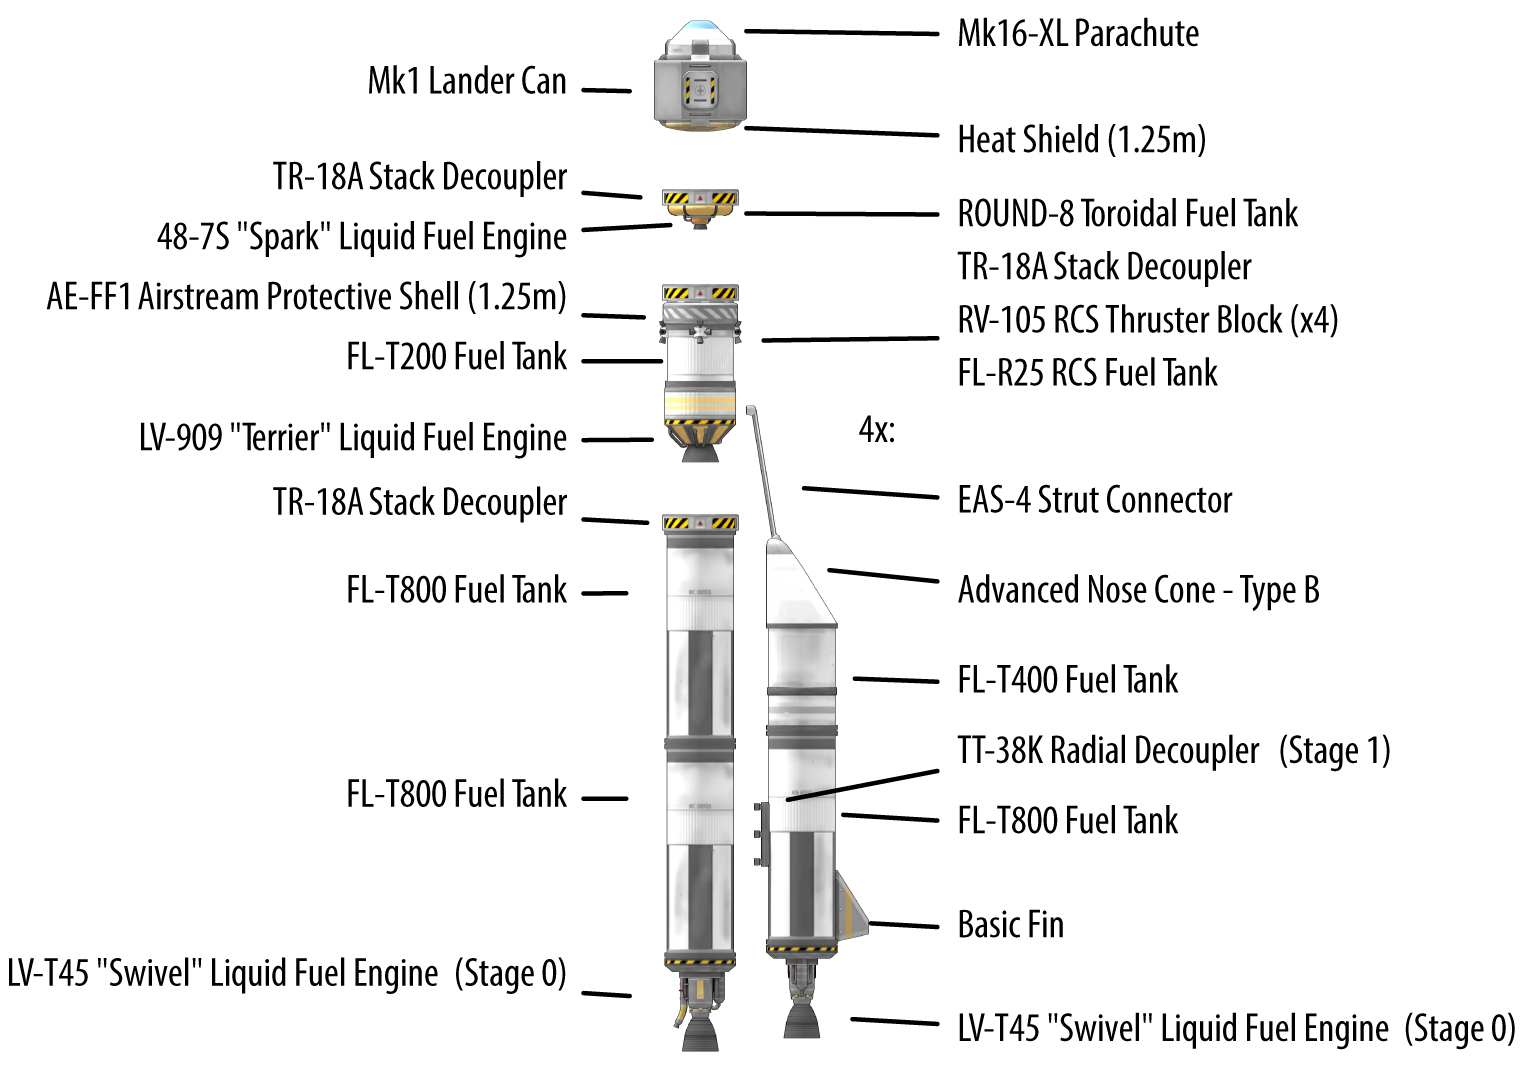
Figure 7-10. The Vostok-1 rocket
Note
Don’t forget to build the fairing around the capsule. Refer back to “Fairings” for information on how to work with the AE-FF1 Airstream Protective Shell.
Launch
Launching the Vostok probe is straightforward: launch and establish an orbit at 80 km (see Figure 7-11 ).
When you shut down the engines once your apoapsis reaches 80 km, use the RCS thrusters to stay stable — don’t forget to enable them by pressing the R key. Once you’re out of the atmosphere, right-click on the fairing and click Decouple to jettison the protective covering (see Figure 7-12 ).

Figure 7-11. Launching Vostok 1
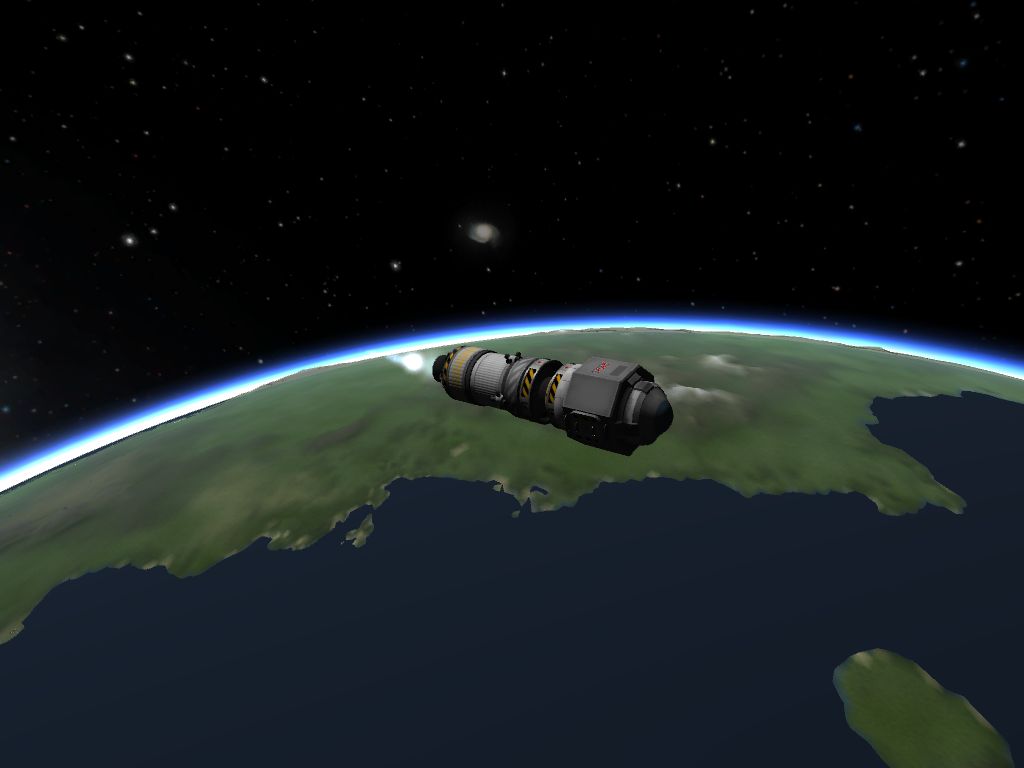
Figure 7-12. The Vostok on the way to orbit, after jettisoning the fairing
Once you reach orbit, detach the capsule from the rocket (see Figure 7-13 ). Congratulations: you’ve placed the first Kerbal in orbit!
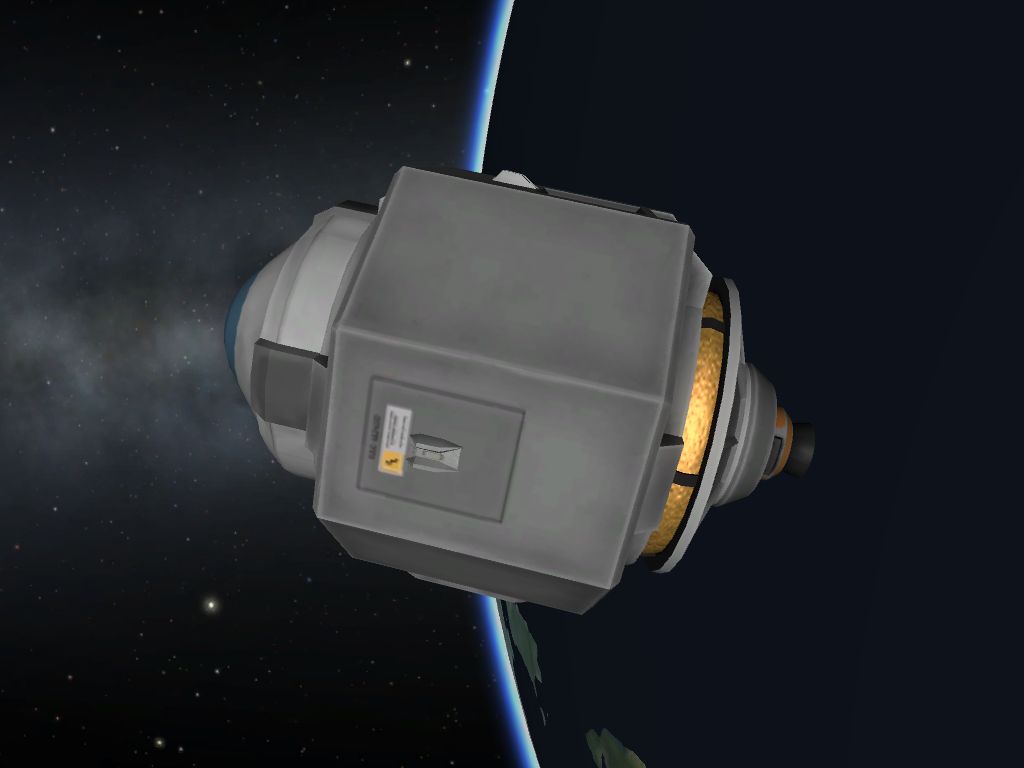
Figure 7-13. Vostok 1 in orbit
Don’t forget that the only source of electricity that you have on board is your engine. You can increase and decrease throttle even when you don’t have any power, but you won’t be able to roll the ship. Once you’re in orbit, set up your de-orbit maneuver and aim toward the marker well before the power runs out.
We want to touch the ground where the Kerbal Space Center is, and if Kerbin didn’t have an atmosphere this would be easy — just thrust retrograde at the opposite point of our orbit. However, the atmosphere will slow us down, which means we need to take that into account.
To land at the Kerbal Space Center, add a maneuver node that reduces periapsis to zero. You’ll know it’s at zero because the periapsis indicator vanishes; don’t go much below that.
Once you’ve created it, move the maneuver node so that the periapsis is just ahead of the Kerbal Space Center.
Execute the maneuver node and then decouple the engine, exposing the heat shield. Aim retrograde to make sure that the heat shield is aiming forward, so that it takes the full force.
You’ll reenter the atmosphere at high speed (see Figure 7-14 ). Once the reentry heating effects are gone, deploy your parachute.
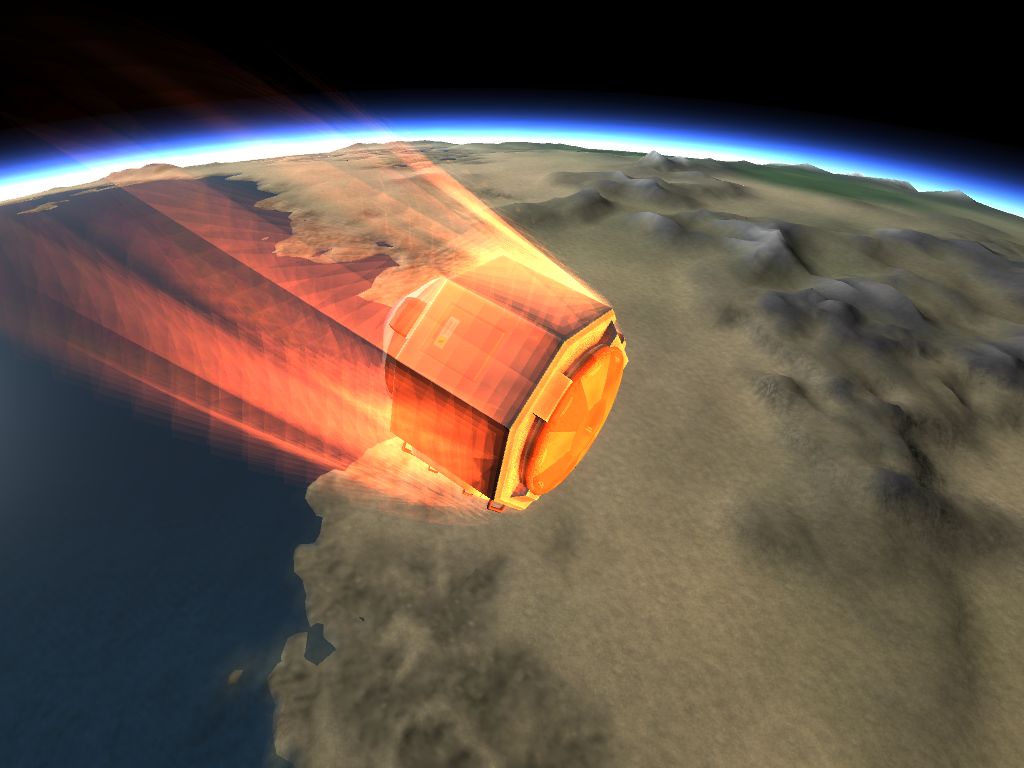
Figure 7-14. Vostok 1 reentering
In the real-life Vostok mission, Gagarin ejected from the spacecraft at an altitude of 7 km and floated down on his own, while the reentry pod landed separately using its own parachute. In KSP, you can’t attach parachutes to Kerbals, so if you want to re-create this, jump out of the capsule at a safe distance of about 300 meters (see Figure 7-15 ).
Tip
Your Kerbal can survive a fall of about 20 meters per second.
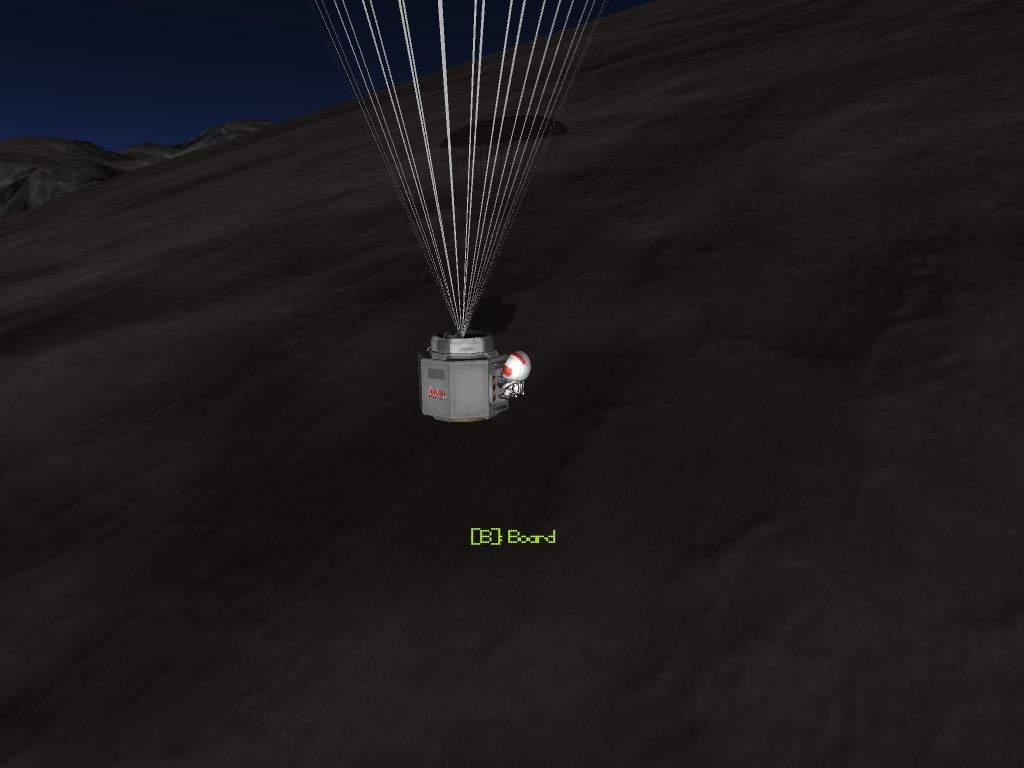
Figure 7-15. Jumping out!
Aftermath
Vostok 1 preceded the launches of the Vostok 2 and 3 missions. Whereas Vostok 1 carried people, Vostok 2 had military applications: it was a photo reconnaissance satellite, which took photos from orbit and then de-orbited. Vostok 2 was such a success that its design became the Zenit spy satellite. Over 500 Zenits were launched between 1961 and 1994, which makes it the single most launched spacecraft design to this day.
Vostok 3 was another human space flight, carrying Andriyan Nikolayev into space in order to test human endurance in orbit. Nikolayev spent four days in space: August 11–15, 1962.
Luna 9 (First Soft Landing of Probe on Moon)
Luna 9 was the first spacecraft to perform a soft landing on the moon — that is, it touched down gently instead of crashing into the moon’s surface and destroying itself.
The Luna program was a series of uncrewed spacecraft missions designed to investigate the moon, in preparation for a later lunar landing program. Between September 23, 1958, and August 9, 1976, a total of 44 spacecraft were launched that were aimed at the moon. Only 24 of these spacecraft were given a Luna number; the rest failed, either at launch or in low Earth orbit.
Luna 1 , the fourth rocket launched, was designed to impact the moon; it missed its target and flew past the moon, escaping into a heliocentric orbit (that is, orbiting the sun). Luna 2 successfully impacted the moon, providing detailed information about its composition, and Luna 3 was the first probe to send back photographs of the dark side of the moon.
From Luna 4 onward, the USSR began launching probes that were designed to achieve a soft landing, instead of impacting the surface. Luna 4 and 6 both missed the moon, and Luna 5 , 7 , and 8 impacted the surface.
Luna 9 , however, successfully soft-landed and transmitted the first photographs from the surface of the moon.
Design
The design of Luna 9 is rather clever. Rather than landing on struts or legs, the probe was designed to detach a gas-filled balloon once it got close enough to the moon’s surface. This balloon fell to the ground and bounced and rolled to a stop; it then opened up, revealing its sensors, camera, and transmitters.
Luna 9 ’s main component is actually very similar in shape to Sputnik 1 : it’s a ball, with four long antennae poking out of it.
Re-creating Luna in KSP
Unless you add them using mods, KSP doesn’t have air balloons, which means that the closest that we can come to Luna 9 ’s landing method is to simply detach the probe core and let it bounce. Fortunately, the components in KSP are quite tough, and they’ll survive a landing.
A key element in the design of Luna 9 in KSP is the battery. Luna 9 didn’t have any way of generating electricity on board and relied on its batteries. In KSP, certain engines can generate electricity, so you won’t be quite as constrained; however, you’ll still need to keep this restriction in mind.
You can see a blueprint of Luna 9 in Figure 7-16 .
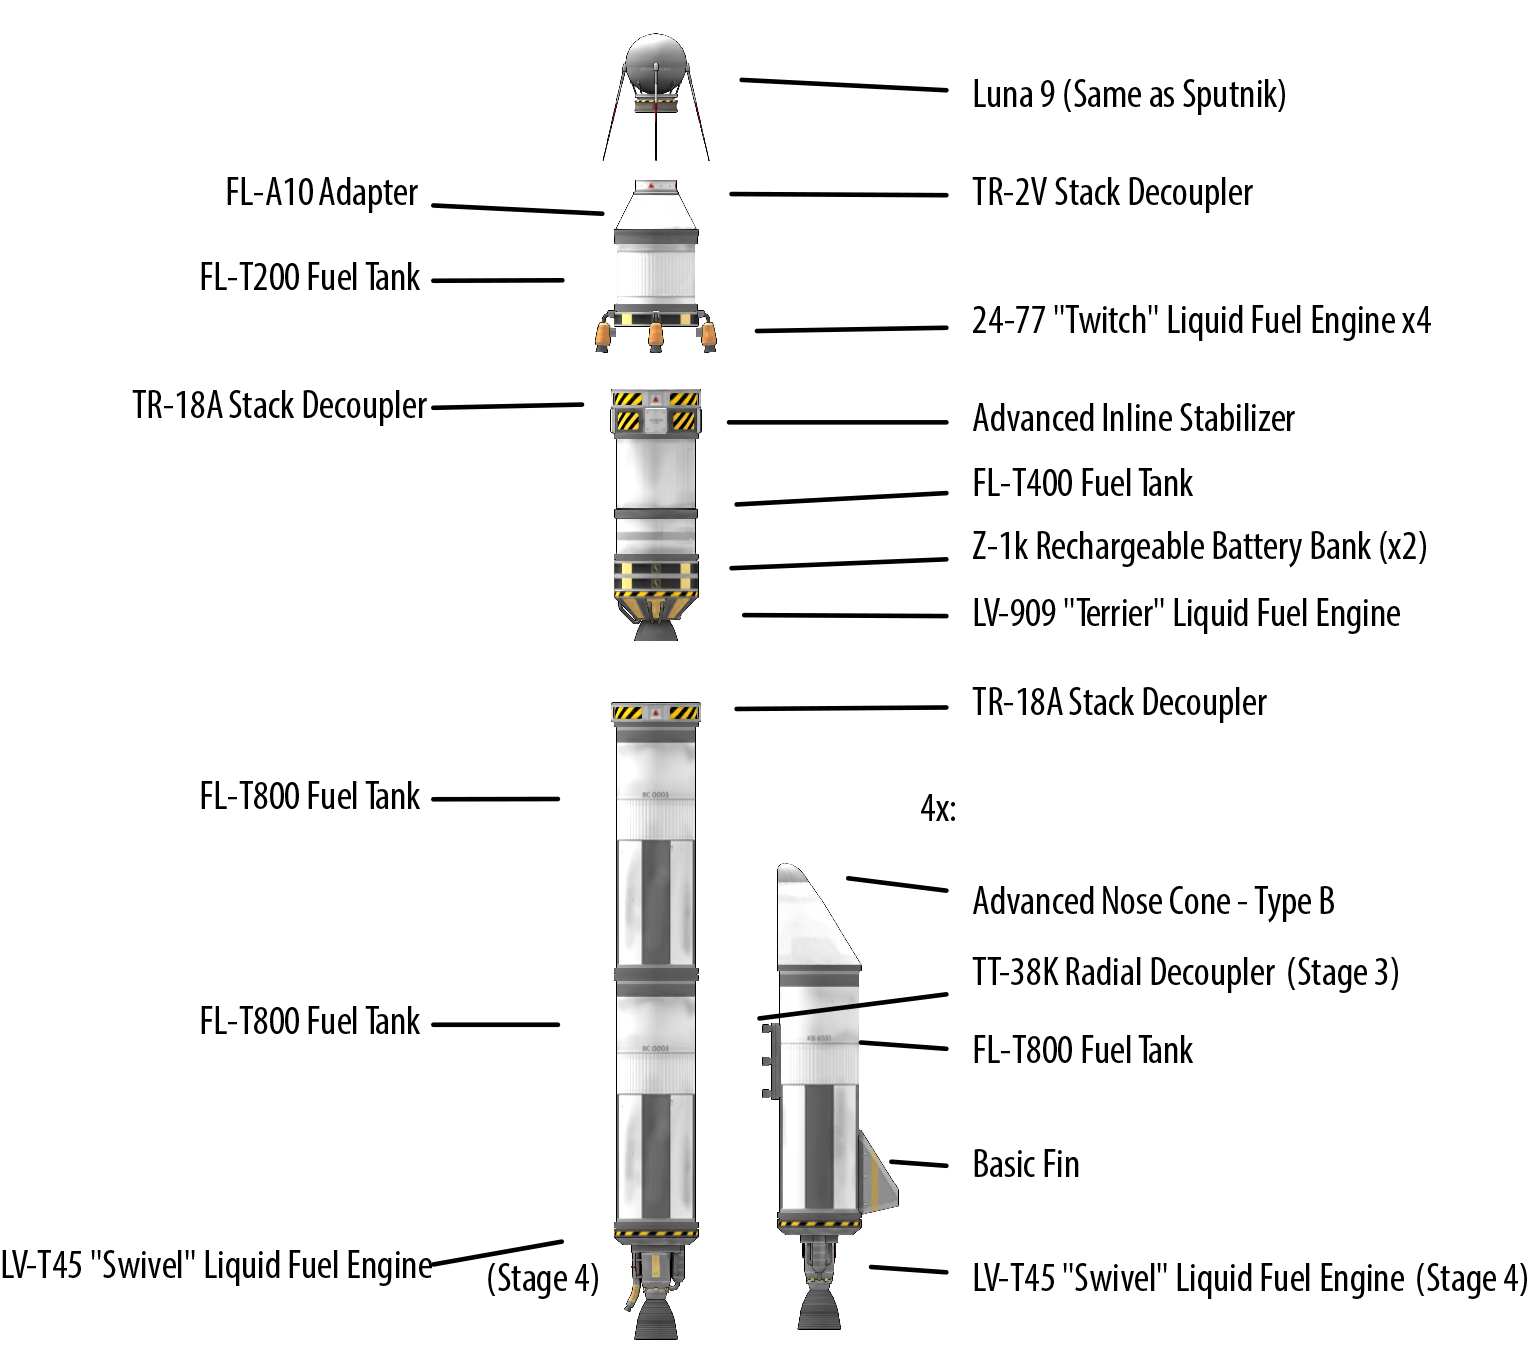
Figure 7-16. The blueprint of Luna 9
Launch
Start by launching Luna 9 to a standard orbit of 80 km.
Once you’ve achieved a stable orbit, create a maneuver node that thrusts forward. Continue dragging the prograde marker out until the planned orbit’s ellipse intersects Mun’s orbit. Once that’s done, drag the maneuver node around your current orbit until the planned orbit encounters Mun. Execute the maneuver, and you’ll be on your way to Mun.
Your goal is to create a trajectory that impacts Mun. While you’re in flight, create another maneuver node that makes the trajectory pass straight through Mun (see Figure 7-17 ). Execute the maneuver, and time-warp until you arrive.
You’ll now be descending toward Mun at a pretty fast speed (see Figure 7-18 ). Aim retrograde, and fire your rockets to slow yourself down — you’ll want to be traveling no faster than 100 m/s when you reach 4,000 m up. Gradually slow yourself down as you get closer to the surface.
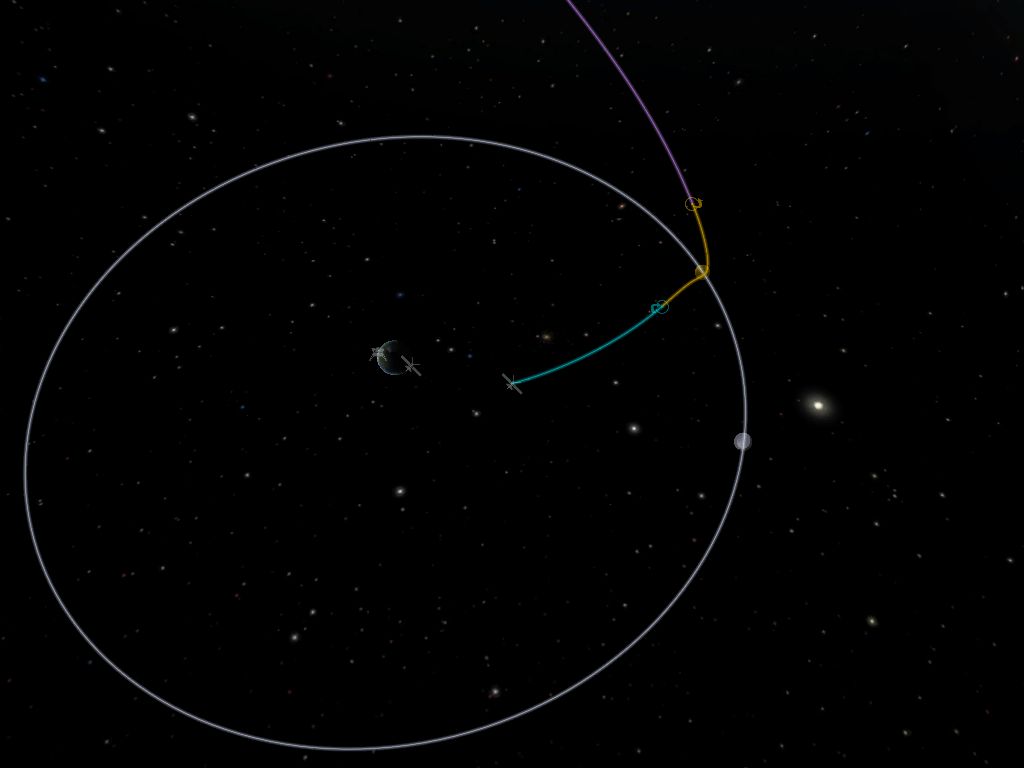
Figure 7-17. An impact trajectory with Mun. Even though the line appears to go out into space, notice that there’s no Pe icon near Mun. This indicates that the trajectory intersects Mun itself — in other words, the spacecraft will impact Mun’s surface.
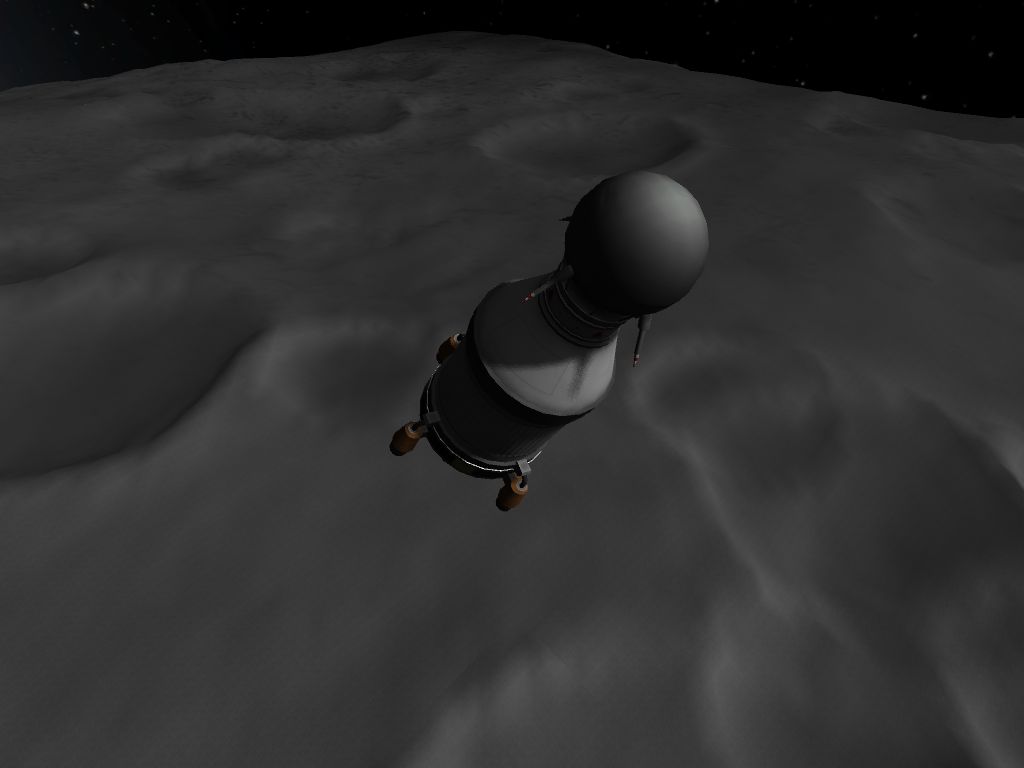
Figure 7-18. Descending to Mun
Finally, when your ship approaches the surface, reduce your speed to as close to zero as you can, and detach the final separator. The spherical Stayputnik will fall and bounce. You’ve just soft-landed on Mun!
Aftermath
Following Luna 9 , Luna 10 became the first artificial satellite of the moon and returned more imagery and data. The Luna program ran for another 10 years, and ran in parallel with the US Apollo missions. In fact, Apollo 11 took place at the same time as Luna 15 . Luna 15 , which was designed to land and recover lunar soil samples to return to Earth, impacted the moon while Neil Armstrong and Buzz Aldrin were on the surface.
Apollo 11 (First Crewed Moon Landing)
Apollo 11 is possibly the most famous space mission in history. Following John F. Kennedy’s declaration that the United States should land humans on the moon before the end of the 1960s, a series of missions began that culminated in Neil Armstrong, Buzz Aldrin, and Michael Collins flying to the moon in a three-part spacecraft on July 16, 1969.
After establishing an orbit around the moon, Armstrong and Aldrin detached from the main spacecraft, leaving Collins behind in the orbiting command module. They then flew down to a region of the moon known as the Sea of Tranquility. Armstrong, followed by Aldrin, walked around on the surface of the moon for just over two and a half hours, before flying back up to the command module and detaching and jettisoning the lunar module. The three then flew back to Earth, detaching the service module along the way, and reentered the atmosphere on July 24, 1969.
Design
The main spacecraft used in Apollo 11 featured three modules:
- The command module was the main cabin for the three astronauts, and was the only part of the spacecraft to return to Earth.
- The lunar module was the landing craft, which detached from the command module and flew down to the moon and then back up. The lunar module was designed to carry two crew (Armstrong and Aldrin), leaving the third (Collins) in orbit.
- The service module contained the main engines and fuel supply used to establish orbit around the moon and then return. The service module was jettisoned on the flight back to Earth.
The rocket used to launch Apollo 11 was the Saturn V , which remains to this date the largest and most powerful rocket ever built. In total, 13 Saturn V rockets were launched: 12 for the Apollo missions, and 1 for the launch of Skylab. The last launch of the Saturn V was on May 14, 1973.
Re-creating Apollo 11 in KSP
The Apollo landing craft is a little tricky. Following the original design, the lunar module will be positioned underneath the command and service modules (see Figure 7-19 ). This means that, as in the original mission, the lunar module will separate from the service module in flight; the command and service modules, still attached to each other, will then rotate around so that the command and lunar modules dock. This rearranged spacecraft will then allow the crew to transfer from the command module into the lunar module, detach, and fly down.
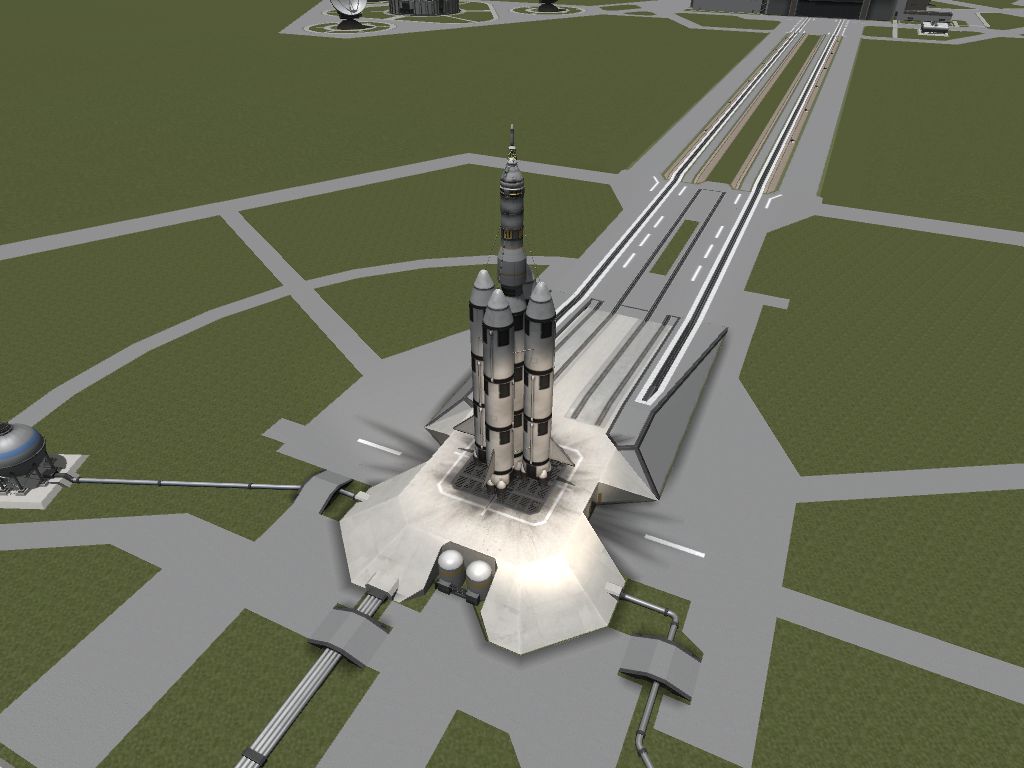
Figure 7-19. The Apollo 11 rocket
To re-create the powerful Saturn V , we’ll use the Kerbodyne rocket parts. These are the single biggest rockets in Kerbal Space Program and produce simply ridiculous amounts of thrust.
Tip
They’re so ridiculous, in fact, that you actually need much less rocket than the real-world Saturn V used: while the Saturn V had three stages, you can get away with just two.
When the lunar module returns to the command module, you’ll need to perform a docking maneuver (refer back to “Docking” for more information). This will require you to attach RCS thrusters to both the lunar module and the service module, as well as attach RCS fuel tanks to both. Don’t forget that in order to get maximum effectiveness out of your RCS thrusters, you’ll need to position them as close to the center of gravity of each module as possible.
You can see a blueprint of the rocket in Figures 7-20 and 7-21 .
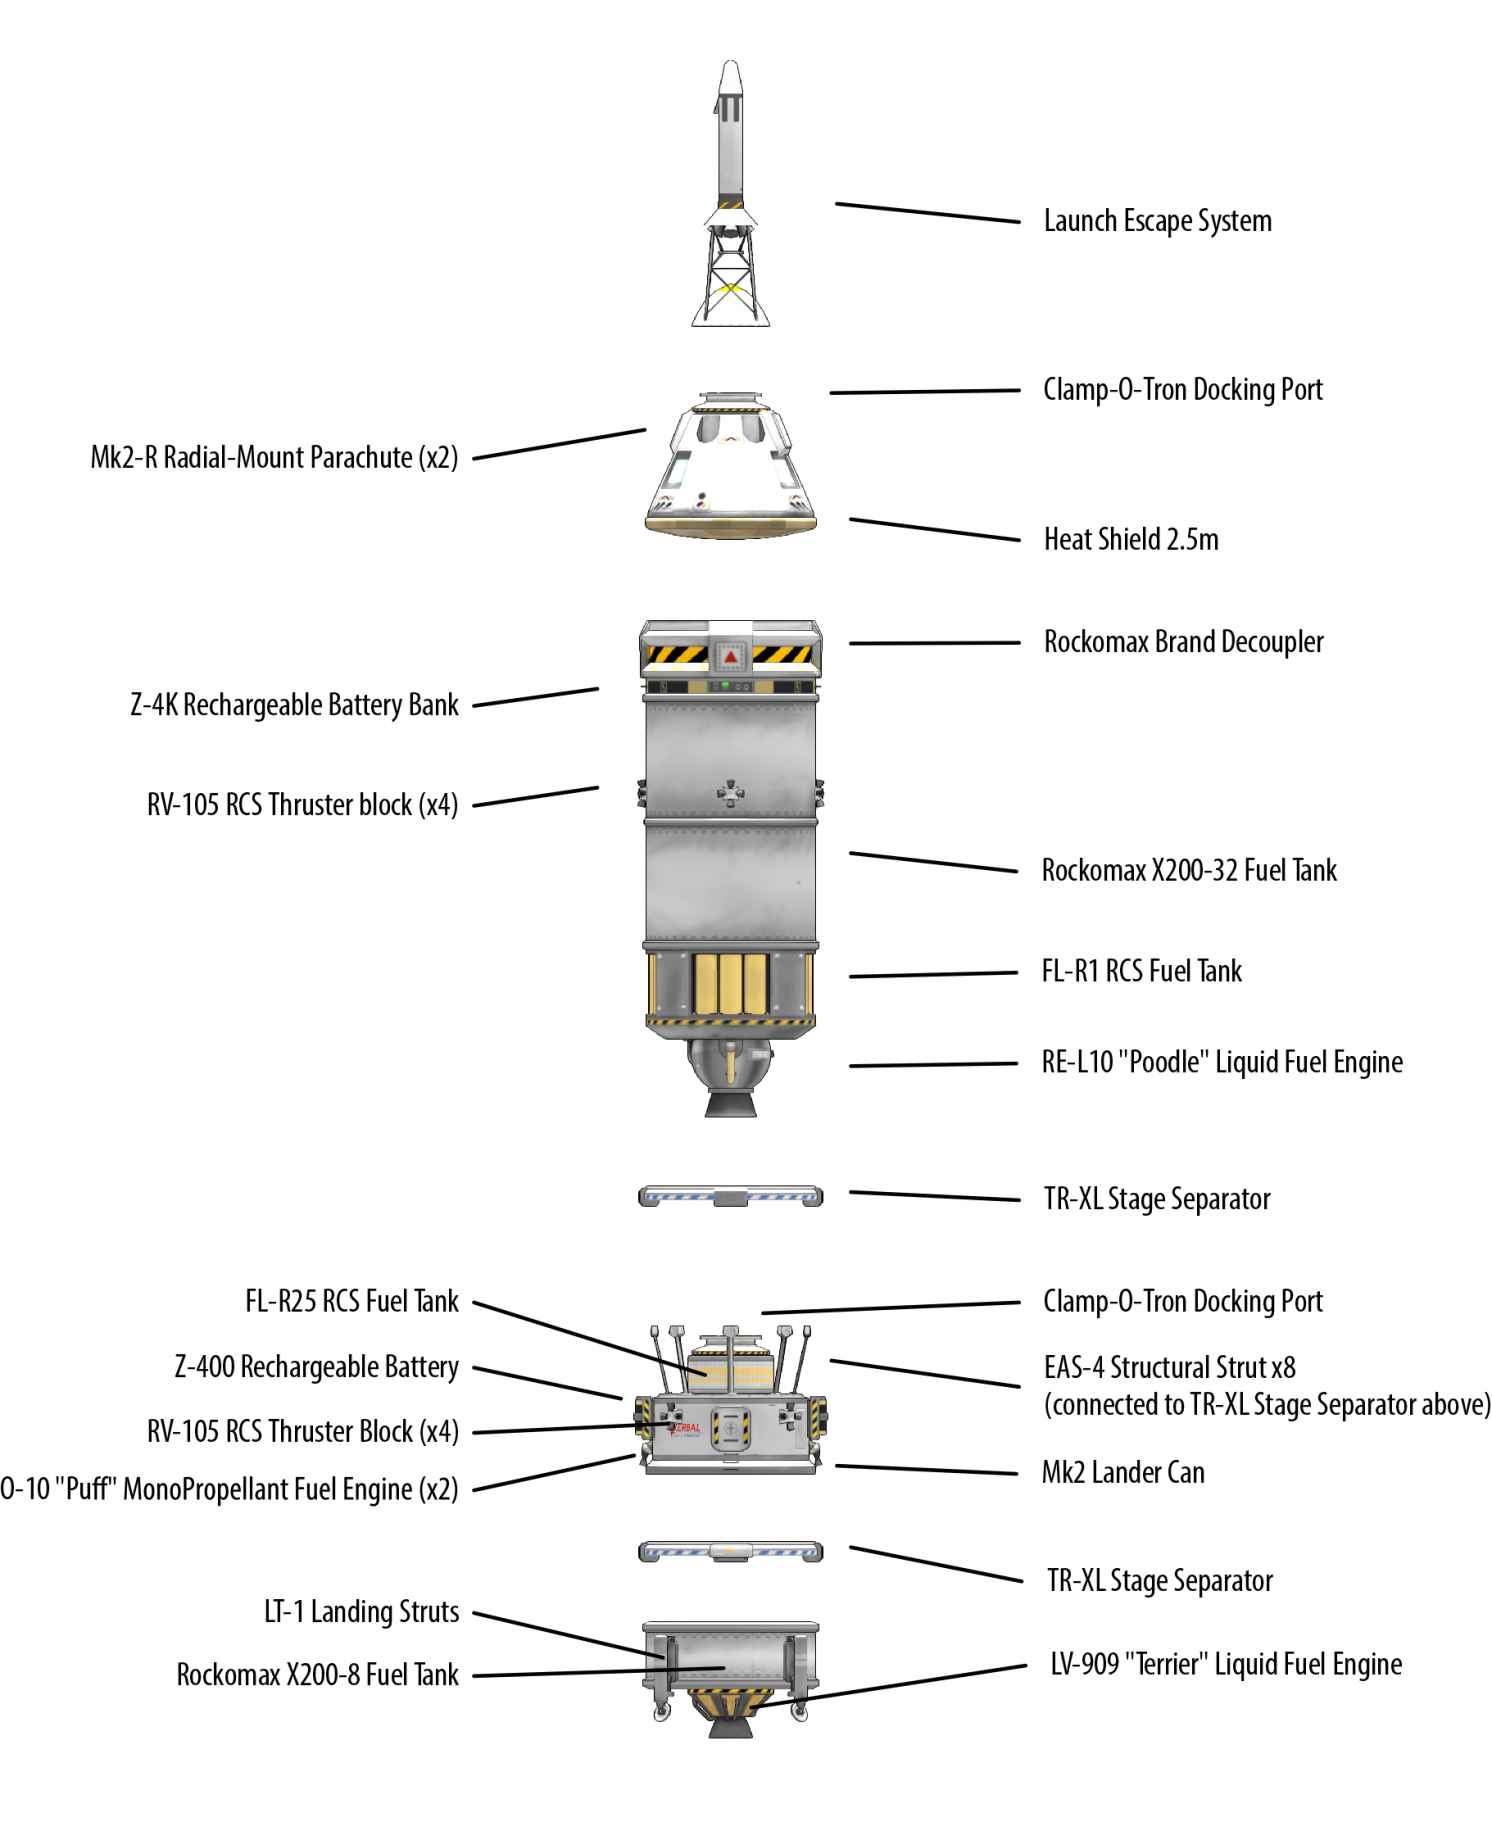
Figure 7-20. The Apollo 11 command module, service module, and lunar (Munar?) lander
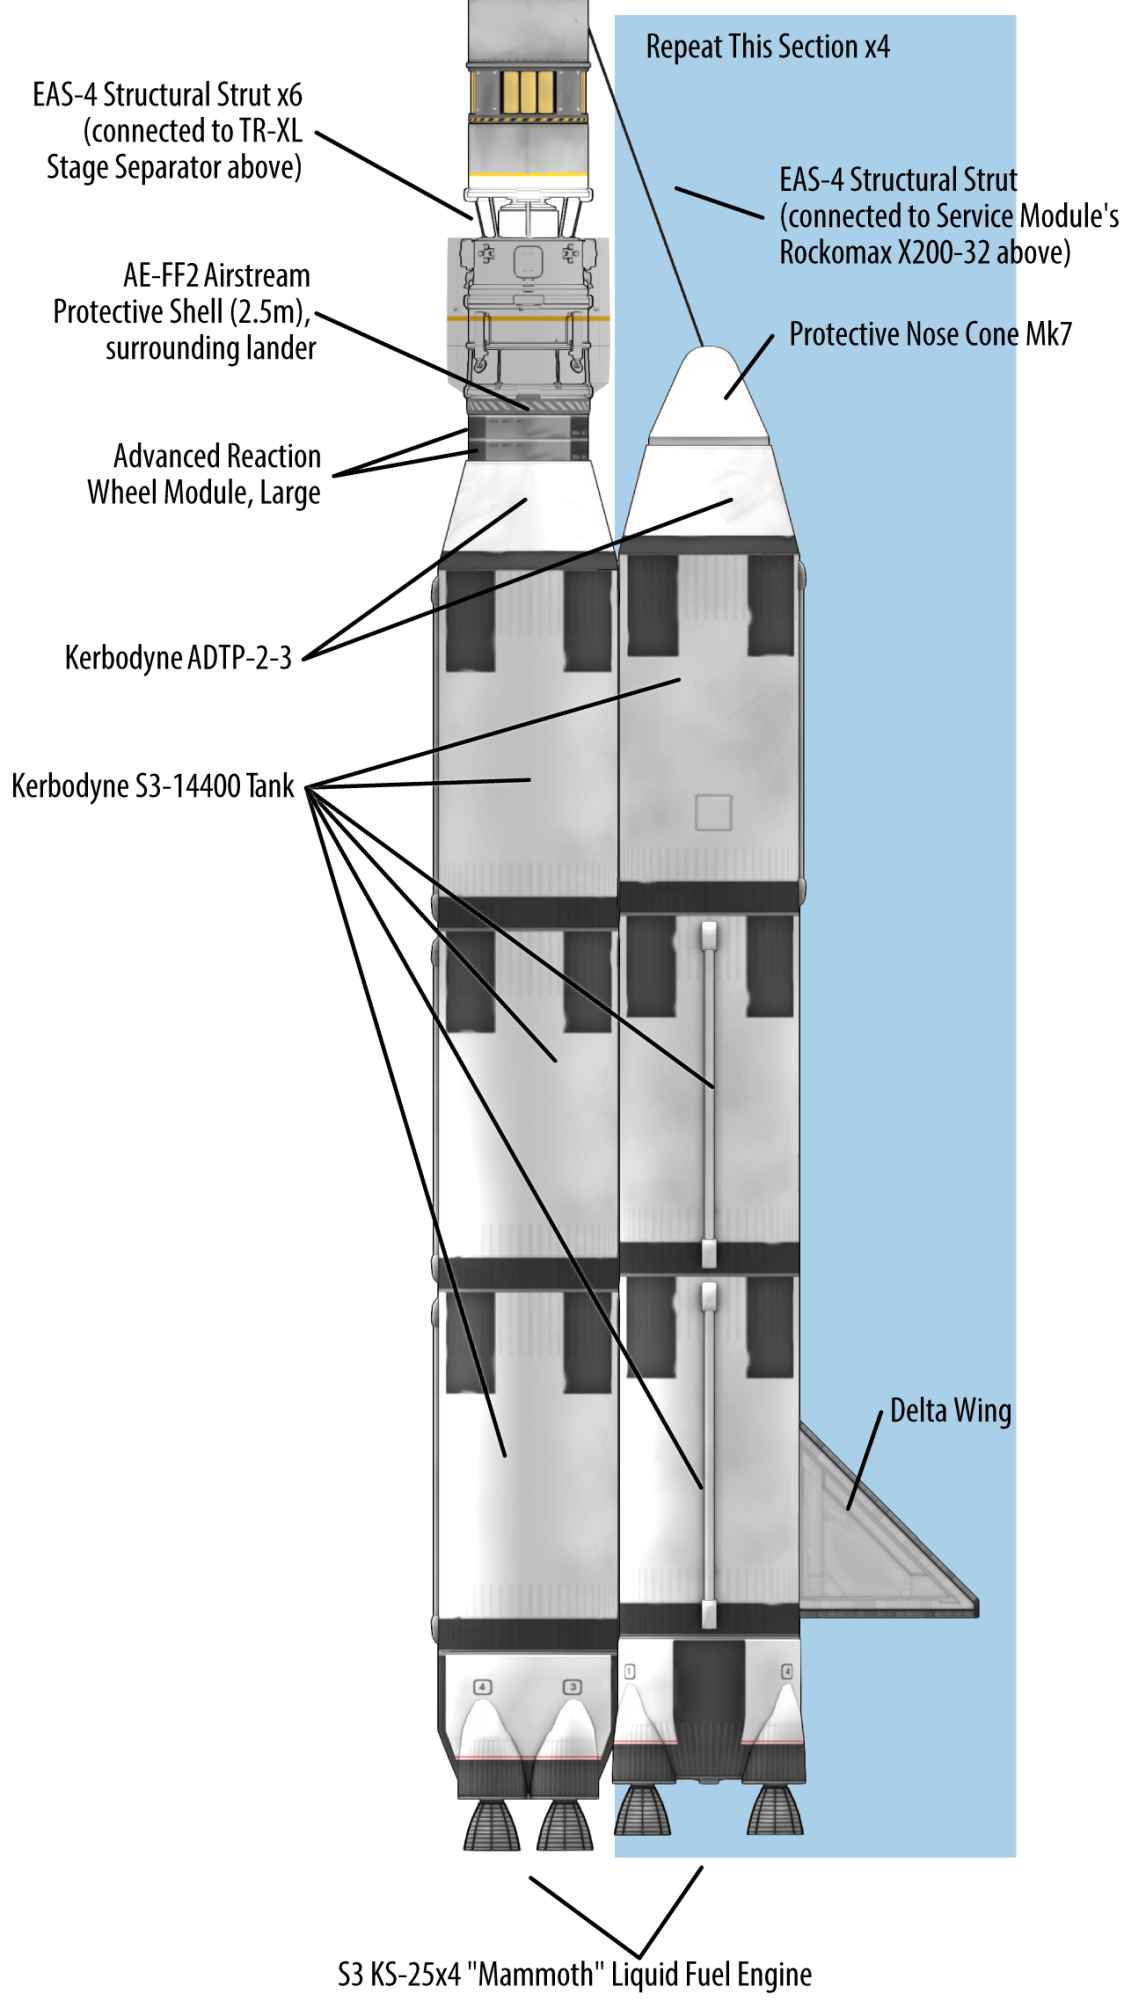
Figure 7-21. The Apollo 11 lifter, with the payload on top
This rocket is very, very large. It’s so massive, in fact, that it needs a little bit of additional structural support. You’ll notice that there are several struts used to connect the lander to the service module and to connect the lander to the main lifter below it; additionally, each of the four rockets around the side of the ship has a strut connecting it to the service module.
On top of this, we need to ensure that these four rockets don’t shake themselves apart on the way up. To stabilize the rocket, you’ll need to connect the top and bottom fuel tanks to the adjacent fuel tank, as shown in Figure 7-22 .
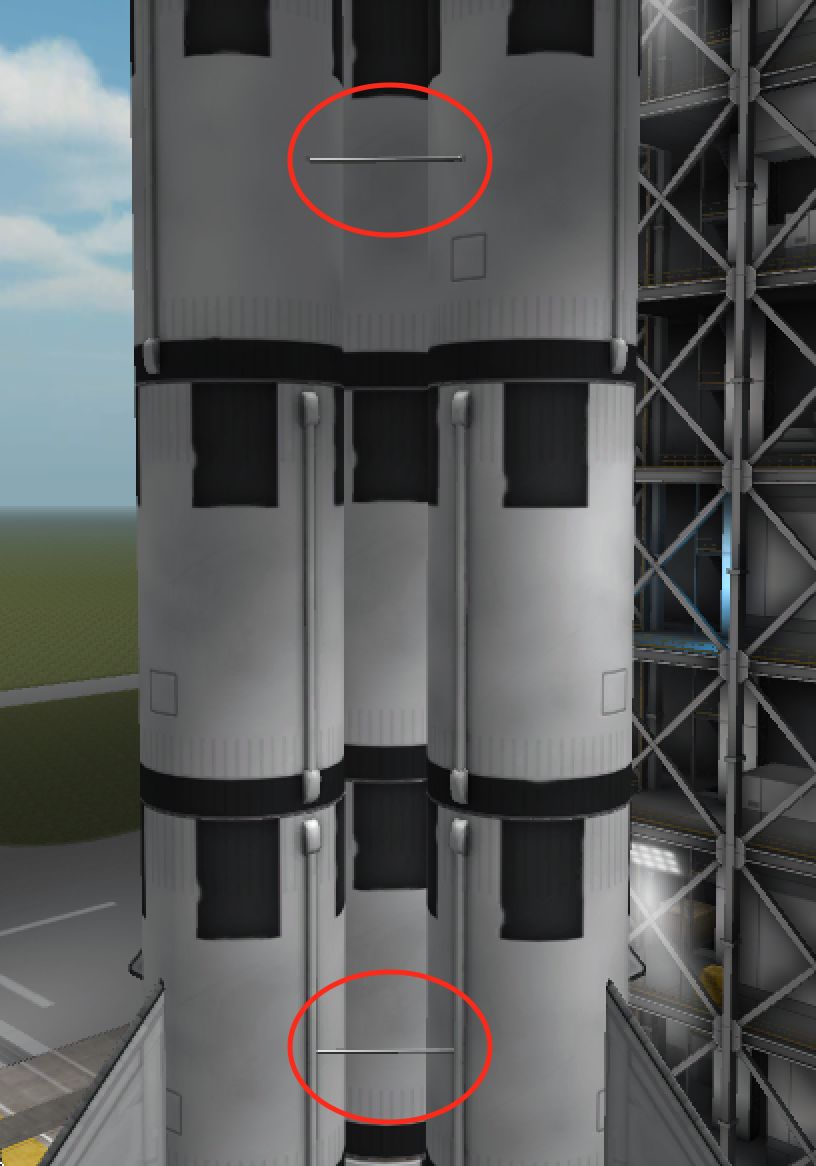
Figure 7-22. Additional struts are needed for structural support at the top and bottom of the rockets that surround the central rocket
Launch
Begin by launching the rocket and establishing a standard orbit at 80 km. Do your gravity turn very slowly and gradually — it’s a big rocket, and you don’t want to get torn apart by drag. You’ll expend your first stage on the way up, which is expected (see Figure 7-23 ).
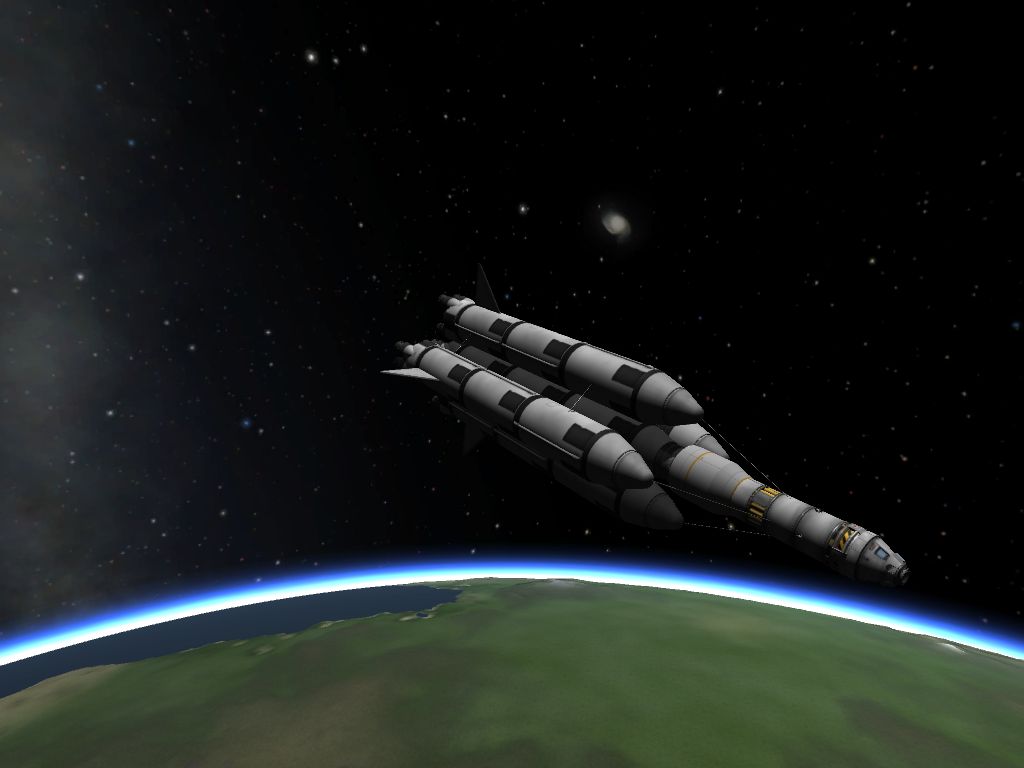
Figure 7-23. Arriving in Kerbin orbit
Rearranging the Ship
The original Apollo 11 mission performed its module rearrangement maneuver while in flight to the moon; however, if you prefer, you can do your maneuver in orbit above Kerbin.
Detach the lunar module from the second stage. Next, undock the lunar module from the bottom of the service module.
If they’re not on already, press the R key to turn on your RCS jets. Hold H to thrust forward a little, to create some space away from the lunar module. Hold N to thrust backward, and bring yourself to a stop.
Next, right-click on the docking port at the top of the lunar module, and click Set Target. This will mean that the target indicator will appear on the navball, so that you can aim correctly.
Rotate the ship so that you’re facing the lunar module. Next, switch to Docking mode, and dock the spacecraft with the lunar module (refer back to “Docking” if you need a reminder on the details). When you’re done, your ship should look like Figure 7-24 .
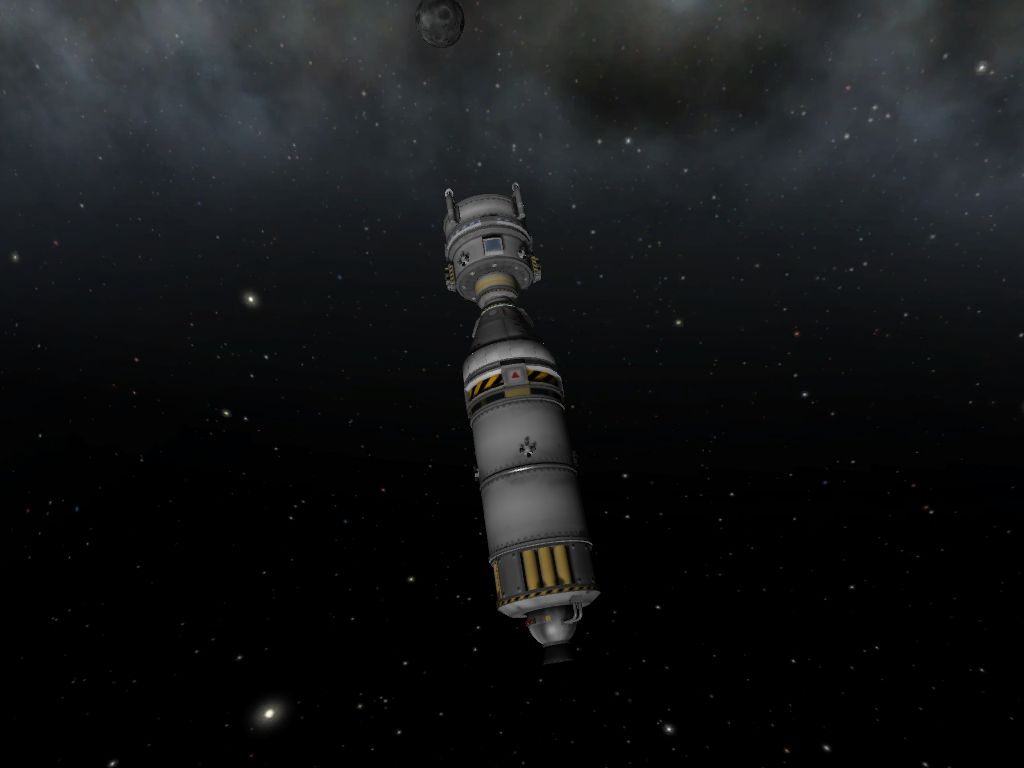
Figure 7-24. The rearranged spacecraft
It’s now time to transfer your crew into the lunar module. Find the crew hatch on the command module, and click it. The crew transfer window will appear. Click the Transfer button next to the first crew member you want to send down to Mun, and then click the lunar module. Repeat the process for the second crew member.
Landing on Mun
It’s time to head to Mun. Create a maneuver node that travels to Mun, just as you did for the Luna 9 mission. As you approach Mun, create another maneuver node that thrusts retrograde, in order to establish a circular orbit around Mun.
Warning
It’s very, very important to make your Munar orbit as circular as possible. Don’t forget that you’ll need to fly the lunar module back up to the command module, which means a rendezvous and dock. Elliptical orbits are much harder to rendezvous with.
Additionally, make sure your Munar orbit is going counter-clockwise — that is, it’s going from west to east. This will be important for docking later.
It really, really helps to do Mun landing during the day. Time-warp until the craft is on the side of Mun facing the sun. Being able to see where you’re landing is a huge plus, because Apollo 11 didn’t bring landing lights.
You’re now ready to head down to Mun! Right-click on the lunar module, and click Control From Here. Next, right-click on the docking port, and undock. Use the RCS jets to fly a little way away from the command module, and then aim retrograde and fire the main engine. Continue thrusting until your orbit looks like Figure 7-25 .
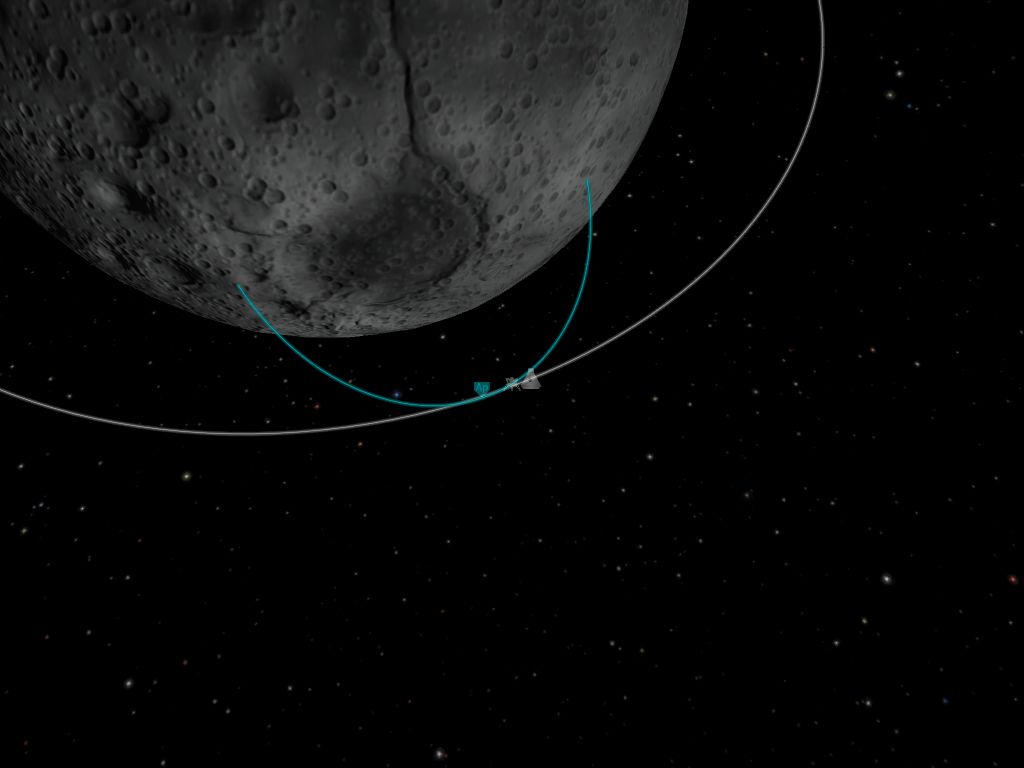
Figure 7-25. The descent trajectory
You’ll now be on a descent trajectory. Just as with Luna 9 , you don’t want to crash into Mun, so use your landing engine to reduce your speed (see Figure 7-26 ). Don’t forget to deploy your landing gear before landing by pressing G.
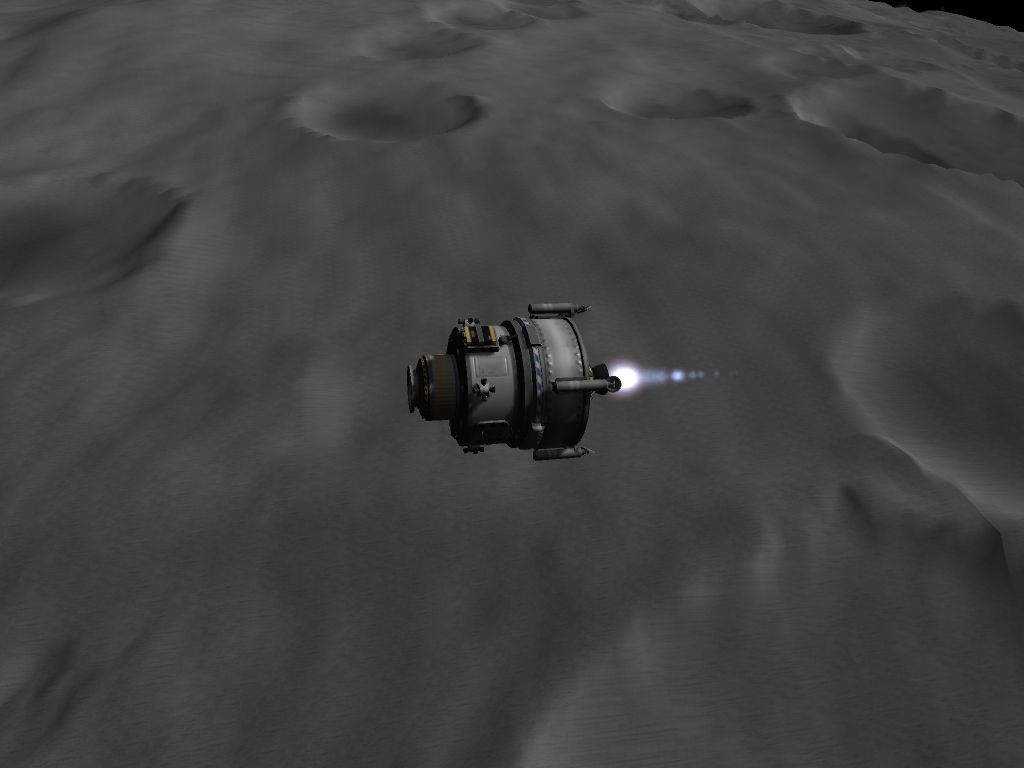
Figure 7-26. Apollo 11 on the way down to Mun
Finally, touch down on Mun! In the real world, Armstrong and Aldrin took a nap before setting out on their EVA, but you don’t have to — click the crew hatch, and click EVA on the first Kerbal to set foot on Mun.
Note
Don’t forget to deploy the ladder that you placed under the crew hatch, so that you can climb down with dignity instead of just falling down.
Walk around Mun, and take some photos for the folks back at home (see Figure 7-27 )!
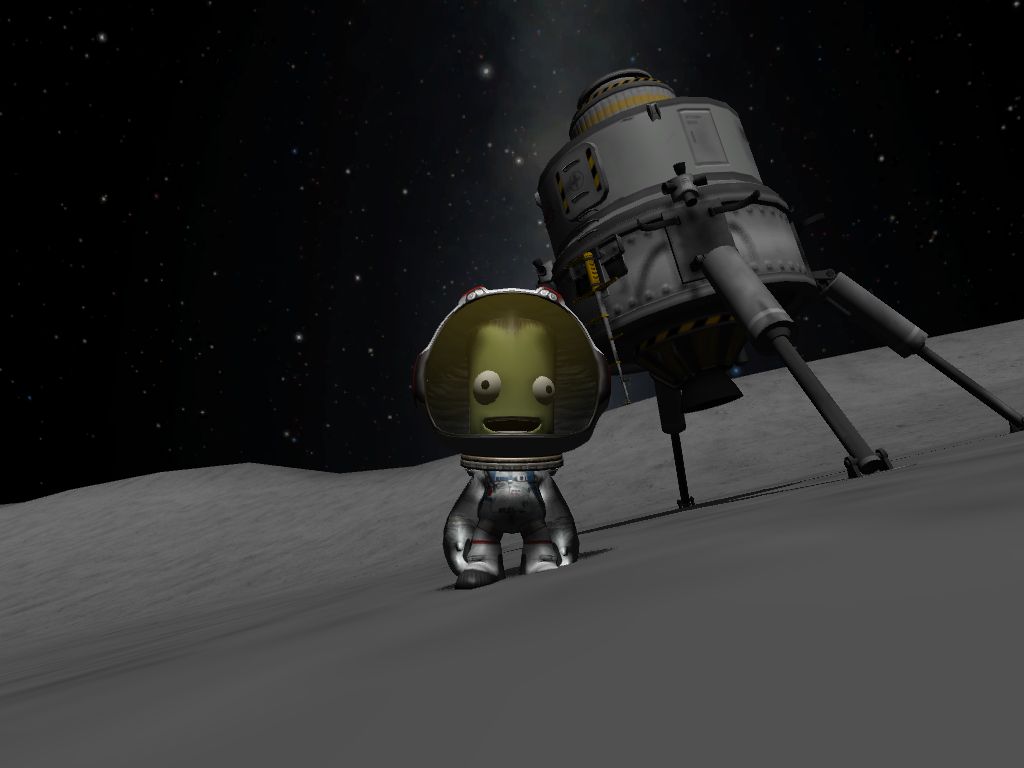
Figure 7-27. One small step for Jeb
Returning Home
Once you’re done messing about on Mun, it’s time to fly back up and rejoin your comrades in orbit.
Get everyone back into the lunar module, and start flying. Because there’s no atmosphere to deal with, you can start your gravity turn almost immediately. Start flying to the east, and establish a circular orbit underneath the command module’s orbit.
Note
It’s very important that there’s a decent altitude difference between the two orbits. If they’re too close, it will take a very long time for the two craft to catch up to each other.
You now need to rendezvous the two craft and dock them together. Follow the instructions in “Intercepting” , and dock the two craft (as shown in Figure 7-28 ). Once they’re docked, transfer your two crew from the lunar module into the command module, and then detach the lunar module. It’s time to come home.
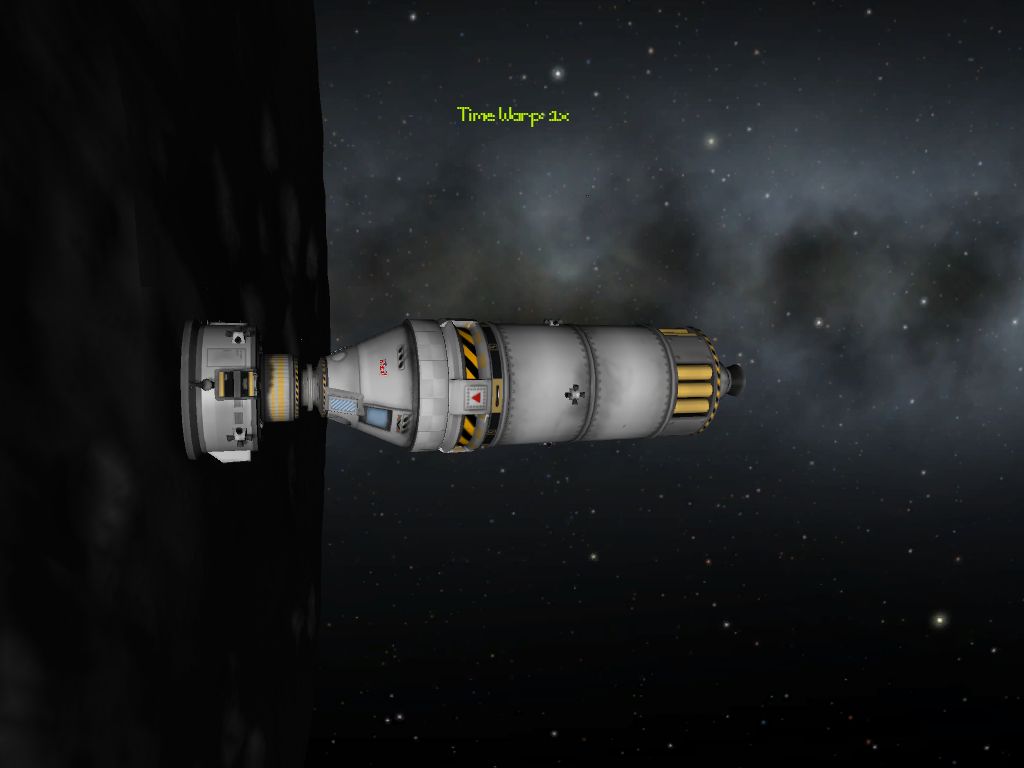
Figure 7-28. Docking the command module to the lunar module again
Create a maneuver node that takes you out of Munar orbit and toward Kerbin. Try to create a maneuver that brings your Kerbin periapsis below 60 km. Note that if your projected trajectory doesn’t display any periapsis at all, then you’ve got an impact trajectory (see Figure 7-29 ). This is totally fine!
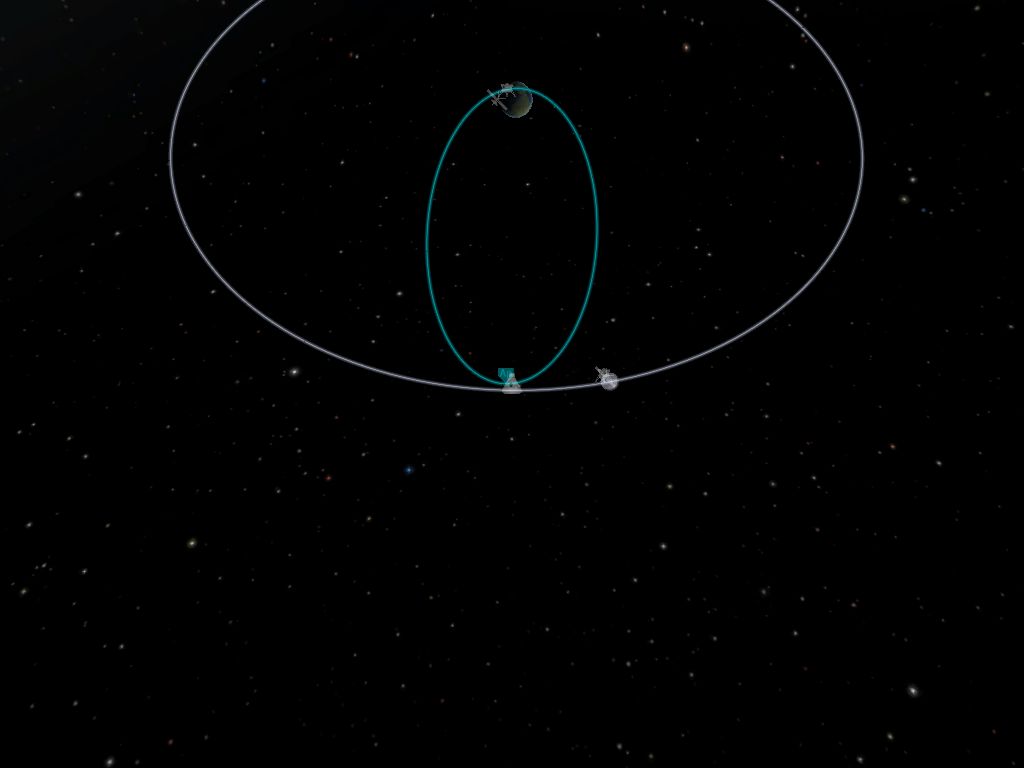
Figure 7-29. A Kerbin reentry trajectory
Finally, once your trajectory is set up, detach the service module. It won’t be needed anymore.
The last thing you need to do is to wait until you’re in Kerbin’s atmosphere and release your parachutes. Splash down, and celebrate your victory over Mun!
Aftermath
Apollo 11 splashed down in the Pacific Ocean just 24 km from the recovery ship USS Hornet . The three astronauts were immediately put into quarantine, due to the remote but possible chance of biological contamination. They were released on August 10, three weeks after they arrived.
Apollo 11 effectively ended the Space Race and established the United States as the dominant power in space. The United States would go on to launch another six Apollo missions, while the USSR would focus on its Luna probes. The last Apollo mission was Apollo 17 , in 1972. Humans have not returned to the moon since then.
Apollo 15 (First Lunar Rover)
Apollo 15 was the fourth of the Apollo missions that landed on the moon, and it was the first to bring a vehicle designed for travel on the surface: the lunar rover.
Design
The lunar rover was designed to be extremely lightweight and to fold up into a very small space. Its top speed was 8 kph, and it was capable of carrying two astronauts.
The final three Apollo missions — 15 , 16 , and 17 — all carried lunar rovers.
Re-creating Apollo 15 in KSP
Because it’s not possible to fold up objects in KSP without using mods to add new parts, the design of the lunar module will need to change. The rover itself is simple: two command seats, four wheels, a 1×1 plate, and a battery. It will need to be mounted to the underside of the lunar module, which means that the engines will need to be relocated to the sides (see Figure 7-30 ). As a result, you’ll need to remove the LV-909 engine that’s underneath the rocket; we suggest you add four 24-77 “Twitch” Liquid Fuel Engines around the side.
Tip
We’ll leave the design of the rover itself up to you. If you’re stuck for ideas on designing one, take a look at how the Duna Rover (see “The Duna Exploration Rover” ) is designed.
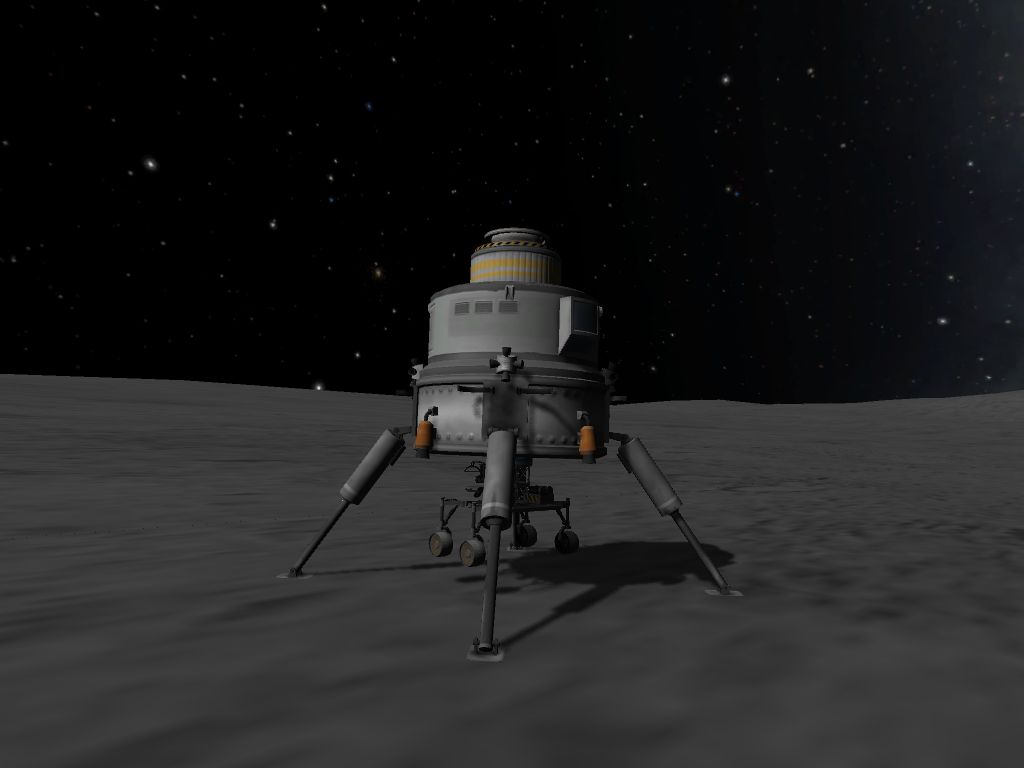
Figure 7-30. Apollo 15 on Mun, with the rover mounted to the underside
Launch
Apollo 15 is largely identical to Apollo 11 , with the only difference being that you’ll need to be more careful with your fuel on the way down. The rover doesn’t weigh much, but it is extra weight; additionally, the radial engines that replaced the LV-909 from Apollo 11 are less efficient, which means that you won’t have as much room for error.
Once you’re on Mun, don’t detach the rover until you’ve got a crew member already on board! Mun’s surface is very hilly, and even a small slope will cause the rover to roll away. You don’t want to have to chase it.
Aftermath
Three lunar rovers were flown to the moon, with a fourth built for the later-cancelled Apollo 18 . Because only the upper stages of the lunar module could return from the moon’s surface, the lunar rovers had to be abandoned.
Summary
In this chapter, we’ve explored some historical re-creations of important space flights. However, we’ve barely scratched the surface of the possible milestone flights that could be reenacted. Think about how you might re-create the following:
- Mir and Skylab, two of the most famous early space stations
- The Space Shuttle, designed to launch as a rocket and then land as a plane
- The International Space Station, launched and assembled module-by-module by multiple nations over more than a decade
We’ve been looking at real-world space flights in this chapter, but in the next, we’ll be turning our eye toward the fictional cosmos of Kerbal Space Program. Let’s go visit some of the Kerbol system’s planets.