
Figure 670: Data Binding Gradle Sync Message
To quote Rudyard Kipling:
East is East and West is West, and never the twain shall meet
In many programming environments, including classical Android development,
one could paraphrase Kipling as “models are models and views are views, and never
the twain shall meet, except by means of some controller or presenter or
something”. The result is a fair amount of code that populates views with
model-supplied data and updates those models as the user alters the data
in the views (e.g., types something in an EditText widget).
Data binding, in general, refers to frameworks or libraries designed to help simplify some of this data migration, where the definitions of the models and views can be used to automatically “bind” them without as much custom controller- or presenter-style logic.
Interest in data binding spiked in 2015, when Google released the first beta editions of data binding support via Android Studio, the Android Gradle Plugin, and a new data-binding support library.
This chapter explores Google’s data binding support and how to use it to simplify your Android app development.
This chapter requires that you have read the core chapters of this book.
In particular, the sample apps are based off of samples from
the chapter on Internet access. Also, some samples
use RecyclerView.
In this book, we have examined a few variations of a
sample app that retrieved the latest android questions from Stack
Overflow and displayed them in a ListView. Our QuestionsFragment
would populate a ListView or RecyclerView with the questions. For
example, here is a getView() implementation that uses Picasso to populate
a question:
    @Override
    public View getView(int position, View convertView, ViewGroup parent) {
      View row=super.getView(position, convertView, parent);
      Item item=getItem(position);
      ImageView icon=row.findViewById(R.id.icon);

      Picasso.with(getActivity()).load(item.owner.profileImage)
             .fit().centerCrop()
             .placeholder(R.drawable.owner_placeholder)
             .error(R.drawable.owner_error).into(icon);

      TextView title=row.findViewById(R.id.title);

      title.setText(Html.fromHtml(getItem(position).title));

      return(row);
    }
Some parts of this are clearly distinct for this application,
notably using Picasso to download the question asker’s avatar and
using Html.fromHtml() to handle HTML-style entities in the title.
However, the general process used here is fairly rote:
Data binding, as a general technique, aims to reduce that rote coding
by declaratively telling a framework how to pull data from model
objects (e.g., instances of Item) and pour that data into widgets
(e.g., ImageView and TextView).
With that in mind, let’s examine what it takes to convert this sample over to using Google’s data binding system.
The code samples shown in this section come from the
DataBinding/Basic
sample project.
Data binding only really works well with up-to-date versions of Android Studio (1.3 or higher) and the Android Gradle Plugin (1.5.0 or higher recommended).
The data binding system consists of two pieces: another plugin for Gradle, and a library that gets bundled with our app. However, we do not need to set those up manually. Instead, we simply tell the Android Gradle Plugin that we want data binding, and it adds the requisite plugin and library for us.
All we need is a small dataBinding closure, where we set the
enabled property to true:
apply plugin: 'com.android.application'

dependencies {
    implementation 'com.squareup.picasso:picasso:2.5.2'
    implementation 'com.squareup.retrofit2:converter-gson:2.3.0'
    implementation 'com.android.support:support-fragment:27.1.1'
}

android {
    compileSdkVersion 27
    buildToolsVersion '27.0.3'

    defaultConfig {
        minSdkVersion 15
        targetSdkVersion 27
        versionCode 1
        versionName "1.0"
    }

    dataBinding {
        enabled = true
    }
}
Once you do this, future times that you open this project in Android Studio may result in you getting a “Source folders generated at incorrect location” message:
Figure 670: Data Binding Gradle Sync Message
This is due to a bug that, in the fullness of time, may get fixed. However, the messages appear to be benign, and they should not cause any problems with your app.
The real fun begins with the layout for our ListView row. The original
edition of this layout resource was a typical LinearLayout with
an ImageView and TextView:
<?xml version="1.0" encoding="utf-8"?>
<LinearLayout xmlns:android="http://schemas.android.com/apk/res/android"
  android:layout_width="match_parent"
  android:layout_height="wrap_content"
  android:orientation="horizontal">

  <ImageView
    android:id="@+id/icon"
    android:layout_width="@dimen/icon"
    android:layout_height="@dimen/icon"
    android:layout_gravity="center_vertical"
    android:contentDescription="@string/icon"
    android:padding="8dip"/>

  <TextView
    android:id="@+id/title"
    android:layout_width="wrap_content"
    android:layout_height="wrap_content"
    android:textSize="20sp"
    android:layout_gravity="left|center_vertical"/>

</LinearLayout>
We need to make some changes to that in order to leverage data binding:
<?xml version="1.0" encoding="utf-8"?>
<layout xmlns:android="http://schemas.android.com/apk/res/android">

  <data>

    <variable
      name="item"
      type="com.commonsware.android.databind.basic.Item"/>
  </data>

  <LinearLayout
    android:layout_width="match_parent"
    android:layout_height="wrap_content"
    android:orientation="horizontal">

    <ImageView
      android:id="@+id/icon"
      android:layout_width="@dimen/icon"
      android:layout_height="@dimen/icon"
      android:layout_gravity="center_vertical"
      android:contentDescription="@string/icon"
      android:padding="8dip"/>

    <TextView
      android:id="@+id/title"
      android:layout_width="wrap_content"
      android:layout_height="wrap_content"
      android:layout_gravity="left|center_vertical"
      android:text="@{item.title}"
      android:textSize="20sp"/>

  </LinearLayout>
</layout>
First, the entire resource file gets wrapped in a <layout> element, on
which we can place the android namespace declaration.
That <layout> element then has two children. The second child is our
LinearLayout, representing the root View or ViewGroup for the resource.
The first child is a <data> element, and that is where we configure
how data binding should proceed when this layout resource gets used.
Specifically, the <variable> element indicates that we want to bind
data from an Item object into widgets defined in this layout.
Then, if you look at the TextView, you will see that it now has an
android:text attribute that the original layout resource lacked. More
importantly, the value for android:text is unusual: @{item.title}.
The @{} syntax indicates that rather than interpreting the value as a
plain string, or even a reference to a string resource, that the value
is really an expression, in a data binding expression language, that
should be computed at runtime to get the value to assign to the text of
the TextView.
In this case, the expression is item.value. item is the name given
to the Item object in the <variable> element. Any place where we
want to pull data from that Item object, we can use dot notation to
reference things on the item expression language variable.
item.value means “get the value from the item”. At runtime, the
data binding library will attempt to get this value either from a public
getter method (getValue()) or a public field (value) on the Item
class. The original project had a value field, but it was not public,
so the revised project marks the Item fields as public, so we can
use them in data binding:
package com.commonsware.android.databind.basic;

public class Item {
  public String title;
  public Owner owner;
  public String link;

  @Override
  public String toString() {
    return(title);
  }
}
As we will see in this chapter, the expression language used here is much more complex than simply referencing JavaBean-style properties on objects, but for now, this will suffice.
The layout configures one side of the binding: pulling data into widgets.
We still need to do some work to configure the other side of the binding:
supplying the source of that data. In the case of this example, we need
to provide the Item object for this layout resource.
That is handled via some modifications to the getView() method of
the ItemsAdapter from its original version:
    @Override
    public View getView(int position, View convertView, ViewGroup parent) {
      RowBinding rowBinding=
        DataBindingUtil.getBinding(convertView);

      if (rowBinding==null) {
        rowBinding=
          RowBinding.inflate(getActivity().getLayoutInflater(),
            parent, false);
      }

      Item item=getItem(position);
      ImageView icon=rowBinding.icon;

      rowBinding.setItem(item);

      Picasso.with(getActivity()).load(item.owner.profileImage)
             .fit().centerCrop()
             .placeholder(R.drawable.owner_placeholder)
             .error(R.drawable.owner_error).into(icon);

      return(rowBinding.getRoot());
    }
There are four changes here: we create the binding, provide the model
(Item) to the binding, retrieve other widgets from the binding, and
retrieve the root view of the layout.
When we use <layout> in a layout resource and set up the layout side
of the data binding system, the build system code-generates a Java
class associated with that layout file. The class name is derived from
the layout name, where names_like_this get converted into
NamesLikeThis and have Binding appended. So, since our layout resource
was row.xml, we get RowBinding. This is code-generated into a
databinding Java sub-package of the package name from the manifest.
Hence, the fully-qualified import statement for this class is:
import com.commonsware.android.databind.basic.databinding.RowBinding;
This is a subclass of ViewDataBinding, supplied by the databinding
library that is added to your project by enabling data binding in
your build.gradle file.
Creating an instance of the binding also inflates the associated layout. Your binding class has a number of factory methods for inflating the layout and creating the binding. These mirror other methods that you have used elsewhere:
setContentView(), taking an Activity and the layout resource ID
as parameters, inflates the layout, passes the result to setContentView()
on the Activity, and creates the bindinginflate(), with a variety of parameter list options, just inflates
the layout using a LayoutInflater, and creates the bindingHere, we use the three-parameter flavor of inflate(), which takes
a LayoutInflater (obtained from the hosting activity), the parent
container, and false. This mirrors the inflate() one would use
on LayoutInflater itself, except that it also gives us our binding.
Of course, this is a ListView, and so we have to deal with the
possibility that rows get recycled. The DataBindingUtil class has
a getBinding() method that returns the binding for a given root view
from the inflated layout — in this case, our convertView. So,
we try to get the existing binding first, then fall back to inflating
a new one if and only if that is necessary. Since getBinding()
properly handles null values for convertView, we do not need to check
for null ourselves explicitly.
The generated binding class will have setters for each <variable> in our
<data> element in the layout. Setter names are generated from the variable
names using standard JavaBean conventions, so our item variable becomes
setItem(). When we call setItem(), the data binding system will
use that Item object to populate our TextView, applying the binding
expression from our android:text attribute.
However, we did not do anything related to data binding for the ImageView
widget in the layout (though we will, later in this chapter). Hence, we
still need to manage that manually, getting Picasso to fetch the
avatar asynchronously and put it in the ImageView.
However, that implies that we have the ImageView. Normally, we would
call findViewById() on the inflated layout’s root View to obtain that.
However, our binding class has code-generated public fields on it
for each widget in the layout resource that has an android:id value
(at least for @id/... and @+id/... values). Our ImageView
has an android:id value of @+id/icon, and so the RowBinding
class has an icon field that holds our ImageView. We can simply
reference it, rather than doing the findViewById() lookup ourselves.
Since getView() is supposed to return the inflated layout’s root view,
we need some way to get that from the binding. Fortunately, ViewDataBinding
has a getRoot() method that our generated class inherits, so we can just
call that to get the value to return from getView().
Visually, this app is the same as before (though this version uses
Theme.Material on compatible devices). Functionally, the app is the
same as before. And, from a code complexity standpoint, the app is probably
worse than before, as we went through a lot of work just to avoid
calling findViewById() a couple of times and setText() once.
Hence, while the data binding system is nice, it really only adds value to larger projects, particularly those with complex layouts. By the end of this chapter, you should have a better sense for when data binding is useful and when it is overkill.
As we saw in the preceding example, much of the knowledge that we impart
into our app to power the data binding comes in the form of an extended
layout resource syntax. The last child of the root <layout> element
is what our layout resources used to hold: the View or ViewGroup
at the root of the view hierarchy of this layout. Other children of
<layout> configure the data binding behavior (and perhaps other features
in the future).
With that in mind, let’s explore a bit more about what you can do with
elements in the <layout>.
The preceding example lost one feature with respect to the sample app
that served as its starting point: handling HTML in titles. While Stack
Overflow does not serve HTML tags in question titles, it does serve
HTML entities in question titles. A question title of “Foo & Bar” would
come to us in the JSON as “Foo & Bar”. The examples in the chapter
on Internet access handle that via Html.fromHtml(). However, we do not
have that in our data binding.
One way to address this is to
add a getter-style method to Item that returns the title after
passing through Html.fromHtml(). For example, we could have a
getInterpretedTitle() or getTitleWithEntitiesFixed() or
getTitleAfterHavingRunItThroughHtmlFromHtml(). We would then refer
to that method in our android:text expression (e.g.,
@{item.interpretedTitle}).
However, this blurs
the line dividing the responsibilities of model objects and the UI
layer. The model itself does not care that the title has HTML entities
in it, and some ways of using that model data (e.g., displaying in a
WebView) might specifically need those HTML entities. The fact
that we need to convert those HTML entities is a UI responsibility, because
the UI chose to use a TextView, which does not handle
those entities automatically.
A fairly easy way to get our Html.fromHtml() logic back in would be
to apply it in the layout resource itself. It would be cool if we could
have our expression be @{Html.fromHtml(item.title)}, for example.
The good news is: that is eminently possible.
However, if you just used that syntax without other changes, the data
binding framework would complain that it does not know what Html
is. In effect, we need to teach the layout resource where to import
Html from.
To do that, we need to add [import type="android.text.Html"/] into
the <data> element of our layout resource. Now, the generated code
will contain that import statement and our references to Html
will resolve.
You can see that in the
DataBinding/Static
sample project. This is a clone of DataBinding/Basic with the two
changes (expression and <import> applied), giving us the following
layout resource:
<?xml version="1.0" encoding="utf-8"?>
<layout xmlns:android="http://schemas.android.com/apk/res/android">

  <data>

    <import type="android.text.Html"/>

    <variable
      name="item"
      type="com.commonsware.android.databind.basic.Item"/>
  </data>

  <LinearLayout
    android:layout_width="match_parent"
    android:layout_height="wrap_content"
    android:orientation="horizontal">

    <ImageView
      android:id="@+id/icon"
      android:layout_width="@dimen/icon"
      android:layout_height="@dimen/icon"
      android:layout_gravity="center_vertical"
      android:contentDescription="@string/icon"
      android:padding="8dip"/>

    <TextView
      android:id="@+id/title"
      android:layout_width="wrap_content"
      android:layout_height="wrap_content"
      android:layout_gravity="left|center_vertical"
      android:text="@{Html.fromHtml(item.title)}"
      android:textSize="20sp"/>

  </LinearLayout>
</layout>
If you run this version of the app, and it so happens that there is
a Stack Overflow question with an HTML entity in its title among the
recent questions, you will see that entity show up properly in the
ListView. On the other hand, if you run the previous sample, the HTML
entity will show up in HTML source form (e.g., & instead of &).
The rules for imports here are reminiscent of those of regular Java:
android.view.Menu and
com.myrestaurant.Menu)java.lang.String)As we saw in the preceding samples, you can have <variable> elements
representing objects that can be referenced by binding expressions.
The type attribute for the <variable> element can be:
item variable from the
examples<import> elementInteger)So, for example, instead of:
  <data>
    <variable
      name="item"
      type="com.commonsware.android.databind.basic.Item"/>
  </data>
we could have:
  <data>
    <import type="com.commonsware.android.databind.basic.Item"/>

    <variable
      name="item"
      type="Item"/>
  </data>
If you have different versions of the same layout in different resource
sets for different configurations (e.g., res/layout/ and res/layout-land/),
your <layout> element needs to be compatible between them. This
particularly holds true with respect to variables. If you define a
variable foo as a String in one version of the resource, you cannot
define foo to be a Restaurant in another version of the resource.
There is one binding class created for each layout resource, spanning
all of the different versions of that resource, and that class cannot
have two separate, conflicting definitions for the same variable.
To a basic approximation, the binding expression language that you can use in layout resources works just like its Java counterpart. If you can include it in a Java expression, you can include it in a binding expression. This not only covers your typical mathematical, logical, and string concatenation operations, but also:
@{((Location)(restaurant.location)).latitude})static methods on imported
classesstatic classes
that you have imported@{movie.actor<index>.fullName})if-style branching
(e.g., @{movie.isNew ? View.VISIBLE : View.GONE})The expression language contains a few conveniences that go beyond what you will see in standard Java.
One of these has already been mentioned: JavaBean-style accessor usage.
So, foo.bar will try to find a field named bar on the foo object.
If that is not found, foo.bar will try to find a getBar() method
on the foo object. This allows the model object to decide whether
or not to expose the data via a field or getter method; the binding
expression works with either.
If you have a variable that is a Map, you can use square-bracket
notation to
access the map by key, instead of having to call get().
If you try accessing a field or calling a method on null, you normally
would get a NullPointerException. The expression evaluator tries
to mitigate that:
null returns whatever
the default primitive value is (e.g., int and long values are 0)null returns null
Another way of working with null values is the ?? “null coalescing
operator”. In the expression foo ?? bar, the result is:
foo, if foo is not null
bar, if foo is null
This is useful when you want to replace some optional value with a default
when the optional value is null. For example, you might use
sub.expirationDate ?? @string/not_yet_subscribed to either show
the expiration date of some subscription, or pull in the value of a
string resource to use if there is no expiration date.
That example demonstrates yet another feature of the expression language: references to resources. In general, you reference them just as you would without the data binding system. So, these are equivalent:
android:text="@string/foo"android:text="@{@string/foo}"Of course, the power comes in when using those resources in actual
expressions, such as using a boolean resource with the ternary operator
(e.g., @{@boolean/i_can_haz_foo ? foo : bar}).
Note that a few resource types use different names in the binding
expressions, as the expression evaluator needs to know the data
type. So, for example, you normally reference array resources as
simply @array/name. In binding expressions, you replace @array with
a different symbol to indicate the type, such as @stringArray or
@intArray.
Of course, if all of this were simple, it wouldn’t be Android…
Numeric literals and null can be used in expressions easily enough.
String literals get interesting, as the standard Java " quotation
system runs afoul of the default XML " quotation system for attribute
values. Your options are:
android:text='@{foo["bar"]}')" entities for the string delimiter
(e.g., android:text="@{foo["bar"]}")Of the three, the latter one is your worst choice, in terms of readability.
Suppose that you want to have the android:text attribute of a TextView
hold a numeric value, pulled from a variable. You might try using something
like android:text="@{question.score}", where score is an int.
When you try it, you will crash at runtime, with an error indicating that
there is no resource with the ID of some hex value, where that hex value
happens to be your score.
That is because android:text supports strings or string resources.
The integer value for score will be interpreted as a reference to a
string resource, not converted into a string itself.
You then might try android:text="@{question.score.toString()}".
That fails to compile, if score is an int, as Java primitives do not
support methods, let alone toString().
The right solution is to use static methods on Integer to convert
the int into a string: android:text="@{Integer.toString(question.score)}"
Because this stuff appears in plain XML, you will need to escape any
[ or ] signs used in the expressions as < and >,
respectively, which is aggravating.
You cannot use the new operator to create objects. However, you are
welcome to call methods that happen to create new objects. So, in a pinch,
create yourself a factory method somewhere to create the object that
you were trying to instantiate via new. All things considered, though,
the more object instantiation you do in layout binding, the slower that
binding can become, particularly for oft-inflated layouts like rows in a
rapidly-scrolling list.
You do not have access to this or super, as these would be with
reference to the generated binding class itself.
Variables, and the fields or method results that you access on them,
can populate View properties, as we have seen so far in this chapter.
This is interesting, but it may not “move the needle” for you in terms
of adopting data binding. While there may be some minor code maintenance
benefit, it hardly seems worth it.
Where data binding really shines, though, is when the variables,
and the fields or method results that you access on them, are observable
objects (i.e., ones implementing android.databinding.Observable).
Then, not only do the expressions update your View properties when
the layout resources are inflated,
but also when the data changes. If you have observable models,
simply updating those model objects automatically propagates those
changes to any live View objects looking at those models.
For example, suppose that you are writing a to-do sort of checklist.
The user can tap a CheckBox widget to indicate that the particular task
is completed, and at that point you want to change the rendering of the
task overall in its RecyclerView row in addition to updating the model
object representing the task. Since the CheckBox is part
of that same row, bound to the model for the row, handling both the UI
updates and the model updates in the same OnClickListener may be
easy. However, what happens if you do not want to update the rendering
until the model change has been saved to the database or the network?
Now, some arbitrary number of milliseconds after OnClickListener
returns, you need to update some row of the RecyclerView… if there
happens to be a row pointing at this model object. After all, the user
might have scrolled, or even left this RecyclerView entirely, in which
case the original row should not be changed.
The obvious tradeoff is defining your model objects to use Observable.
The less-obvious tradeoff is in reorganizing your code to have
durable model objects, where operations like Web service calls update
those model objects in place, rather than replace those model objects
with brand-new instances. The latter approach breaks data binding in
general, but it is a much bigger problem when trying to update
your UI from those models.
The entire model object itself does not have to be Observable. Whatever
your binding expressions use, in terms of data, has to be
Observable. That could be individual fields, if you are willing
to publish those fields as Observable objects, such as by having
them be public final.
An easy way to make a field be Observable, if the field is a primitive
value (e.g., int), is to replace the field with the equivalent
Observable... class (e.g., ObservableInt):
public final ObservableInt score=new ObservableInt();
Your code can use get() and set() methods on the Observable...
primitive wrappers to get and set the primitive value itself. Calling
set() also notifies all registered observers that the data has changed,
and the data binding system uses that to find out that it needs to update
your UI.
While this may sound a bit clunky, Java developers have used this pattern
in other places. A common example are the Atomic... classes (e.g.,
AtomicInteger), that make modifying a primitive be guaranteed to be
atomic, when that value might be get and set on multiple parallel threads.
For non-primitive values, but where the entire value changes in unison,
you can use the generic ObservableField approach. In particular,
a String is not a primitive, yet it is immutable, so changing the
value means replacing the old String object with a new String
object. ObservableField lets you set up observable strings:
  public final ObservableField<String> title=
    new ObservableField<String>();
This only works when you are replacing the entire object with a new
object. So, for example, wrapping a Location in an ObservableField
only works if you change the location by replacing the Location, instead
of calling setLatitude() and setLongitude() on the existing
Location. Replacing the Location outright triggers ObservableField
to tell observers about the change. In contrast, ObservableField has
no way to know that you called a method on the wrapped object that changes
its state in a way that observers need to know about.
The data binding system ships with two Observable classes that are
collections.
One, ObservableArrayList, is fairly straightforward: it
lets you add and remove members of the list, and it informs observers
about those changes. Once again, it has no means of knowing if you
change the state of a given list member, only if you change the state
of the list itself.
The other is ObservableArrayMap. Android added the ArrayMap
class in API Level 19. Functionally, ArrayMap works like a HashMap,
as a collection of values accessed via keys, albeit with some additional
APIs for working with the contents by numerical index, as you see with
ArrayList. The implementation, though, trades off CPU time for memory
efficiency. ObservableArrayMap adds Observable characteristics, such
that changes to the contents of the ArrayMap are reported to observers.
You can create your own class implementing the Observable interface.
Most likely, you would do that by extending BaseObservable.
On the one hand, this does not have to be too complicated. For example,
here is the implementation of ObservableBoolean from the data binding
support library:
/*
 * Copyright (C) 2015 The Android Open Source Project
 *
 * Licensed under the Apache License, Version 2.0 (the "License");
 * you may not use this file except in compliance with the License.
 * You may obtain a copy of the License at
 *
 *      http://www.apache.org/licenses/LICENSE-2.0
 *
 * Unless required by applicable law or agreed to in writing, software
 * distributed under the License is distributed on an "AS IS" BASIS,
 * WITHOUT WARRANTIES OR CONDITIONS OF ANY KIND, either express or implied.
 * See the License for the specific language governing permissions and
 * limitations under the License.
 */
package android.databinding;
import android.os.Parcel;
import android.os.Parcelable;
import java.io.Serializable;
/**
 * An observable class that holds a primitive boolean.
 * <p>
 * Observable field classes may be used instead of creating an Observable object:
 * <pre><code>public class MyDataObject {
 *     public final ObservableBoolean isAdult = new ObservableBoolean();
 * }</code></pre>
 * Fields of this type should be declared final because bindings only detect changes in the
 * field's value, not of the field itself.
 * <p>
 * This class is parcelable and serializable but callbacks are ignored when the object is
 * parcelled / serialized. Unless you add custom callbacks, this will not be an issue because
 * data binding framework always re-registers callbacks when the view is bound.
 */
public class ObservableBoolean extends BaseObservable implements Parcelable, Serializable {
    static final long serialVersionUID = 1L;
    private boolean mValue;
    /**
     * Creates an ObservableBoolean with the given initial value.
     *
     * @param value the initial value for the ObservableBoolean
     */
    public ObservableBoolean(boolean value) {
        mValue = value;
    }
    /**
     * Creates an ObservableBoolean with the initial value of <code>false</code>.
     */
    public ObservableBoolean() {
    }
    /**
     * @return the stored value.
     */
    public boolean get() {
        return mValue;
    }
    /**
     * Set the stored value.
     */
    public void set(boolean value) {
        if (value != mValue) {
            mValue = value;
            notifyChange();
        }
    }
    @Override
    public int describeContents() {
        return 0;
    }
    @Override
    public void writeToParcel(Parcel dest, int flags) {
        dest.writeInt(mValue ? 1 : 0);
    }
    public static final Parcelable.Creator<ObservableBoolean> CREATOR
            = new Parcelable.Creator<ObservableBoolean>() {
        @Override
        public ObservableBoolean createFromParcel(Parcel source) {
            return new ObservableBoolean(source.readInt() == 1);
        }
        @Override
        public ObservableBoolean[] newArray(int size) {
            return new ObservableBoolean[size];
        }
    };
}
A lot of that code is dealing with making ObservableBoolean
be Parcelable. The key, from the standpoint of
BaseObservable, is the call to notifyChange() in the set() method.
This tells BaseObservable to tell all observers that stuff inside
this Observable changed, and if they are tied to this Observable,
they should go do something. Usually, “do something” will be to re-evaluate
a binding expression and update a property of a View, such as updating
the text of a TextView where a binding expression was used in
the android:text attribute.
However, creating more complex custom observables is not especially well documented, and so we will explore that more later in this chapter.
With all that behind us, let’s look at another rendition of the Stack Overflow sample.
There are lots of values that are published for questions via the Stack Exchange API, beyond the ones used so far. One is the score, representing the net of upvotes and downvotes on the question. Of the question properties that we had been using before, only the title has a chance of changing in real time, and that does not happen very often. On the other hand, scores are far more likely to change on the fly.
So, the
DataBinding/Scored
sample project starts from the DataBinding/Static project and adds
in support for the score property. It also makes the title and score
Observable and adds a refresh action bar item. Tapping that item will
update the data for the questions loaded in the app; any changes to titles
or scores will be reflected directly, without additional code, by updating
the models.
Of course, this sample app was not written with data binding in mind. While the previous two samples added on bits of data binding without significantly changing the app, this time we will have to take a chainsaw to our code to get what we want.
The specific problem we have to work around is the nature of our data model.
The previous versions of this sample would request the model objects
via Retrofit and then slap them into an adapter to show in the ListView.
From that point onward, the models were static — no code existed to
add new questions, modify existing questions, etc.
However, Retrofit is designed to create new model objects on every call to a Web service interface. So, if we call once to get the latest questions, and then make another call to get updated versions of those questions, we wind up with two separate collections of model objects.
If we were not trying to use data binding, we could take a “caveman” approach: just replace the contents of the adapter with the new model collection. This would work, albeit with some impacts on the user experience (e.g., perhaps scrolling the list back to the top).
However, with data binding, we are effectively tying our original data
model objects to our views more tightly. This means that when we get
a new set of model objects from Retrofit, we cannot use them directly.
Instead, we have to use them as a source of data, to be poured into
our original model objects. Through the Observable mechanism, we can
update the original models and not worry about the ListView rows, as data
binding will take care of that for us. But this does mean that we need
to have one “magic” set of model objects that represent the bound data,
distinct from any model objects representing updates to that data.
We could address the above problem by giving Item the ability to
update its state from another Item. Our original query to get the most
recent questions would create a collection of Item objects that would
be our “durable” model, the one that we bind our UI to. Later updates
that create new Item objects would be used solely to update the original
durable Item objects’ contents, not replace those objects.
But now we run into another problem: the Observable requirements
of the data binding system may run counter to requirements imposed elsewhere.
In the case of this sample, Item is being populated by Gson, after
Retrofit receives the JSON response from the server. Gson does not
know anything about ObservableField, ObservableInt, or any such things.
There are two main approaches for dealing with this problem:
ObservableField,
ObservableInt, etc. fields in the model. Most likely, this is the
right direction for long-term use, though it is conceivable that something
about Gson has irreconcilable differences with something about
observable elements.This revised edition of the sample takes the second approach. There is
a new model class, Question, which models a Stack Overflow question.
Our data binding will be applied to Question. Item is still there,
but it represents the response from the Stack Exchange Web service call.
Beyond dealing with the duality of Question and Item, we have two
more JSON properties from the Web service response that we need to track.
One is the score, as mentioned earlier. The other is the
question_id, a unique ID for the question. We need this in order
to be able to update an existing Question with data from a new Item,
when we retrieve updates for our models.
The easy part is getting the new data from Retrofit and Gson. We just
need to add two more fields to Item, for the score and question ID:
package com.commonsware.android.databind.basic;

import com.google.gson.annotations.SerializedName;

public class Item {
  String title;
  Owner owner;
  String link;
  int score;
  @SerializedName("question_id") String id;
}
In the case of the question ID, the JSON property is question_id.
In Java, we will use id instead, using Gson’s @SerializedName
annotation to teach Gson to fill question_id properties into the
id field.
We now also have a Question class that will be our observable, durable
data model:
package com.commonsware.android.databind.basic;

import android.databinding.ObservableField;
import android.databinding.ObservableInt;

public class Question {
  public final ObservableField<String> title=
    new ObservableField<String>();
  public final Owner owner;
  public final String link;
  public final ObservableInt score=new ObservableInt();
  public final String id;

  Question(Item item) {
    updateFromItem(item);
    owner=item.owner;
    link=item.link;
    id=item.id;
  }

  void updateFromItem(Item item) {
    title.set(item.title);
    score.set(item.score);
  }
}
It holds the same five values as does Item, except that title
and score are now Observable, via ObservableField and
ObservableInt, respectively. The owner, link, and id values
should be immutable, and we are not binding on them anyway, so keeping
them as ordinary fields is fine.
Question has a constructor and an updateFromItem() method that both
copy data from a Item into the Question. updateFromItem() handles
the two Observable fields, and we will use this when we eventually fetch
updates to the question. The constructor calls updateFromItem() plus
populates the three final non-observable fields.
QuestionsFragment now has a more apropos name, as we will have it
show the list of Question objects. Among other things, this requires
changes to QuestionsAdapter, to work off of Question objects instead
of Item objects:
  class QuestionsAdapter extends ArrayAdapter<Question> {
    QuestionsAdapter(List<Question> items) {
      super(getActivity(), R.layout.row, R.id.title, items);
    }

    @Override
    public View getView(int position, View convertView, ViewGroup parent) {
      RowBinding rowBinding=
        DataBindingUtil.getBinding(convertView);

      if (rowBinding==null) {
        rowBinding=
          RowBinding.inflate(getActivity().getLayoutInflater(),
            parent, false);
      }

      Question question=getItem(position);
      ImageView icon=rowBinding.icon;

      rowBinding.setQuestion(question);

      Picasso.with(getActivity()).load(question.owner.profileImage)
             .fit().centerCrop()
             .placeholder(R.drawable.owner_placeholder)
             .error(R.drawable.owner_error).into(icon);

      return(rowBinding.getRoot());
    }
  }
Similarly, the <variable> in row.xml needs to be a Question now:
<?xml version="1.0" encoding="utf-8"?>
<layout xmlns:android="http://schemas.android.com/apk/res/android">

  <data>

    <import type="android.text.Html"/>

    <variable
      name="question"
      type="com.commonsware.android.databind.basic.Question"/>
  </data>

  <LinearLayout
    android:layout_width="match_parent"
    android:layout_height="wrap_content"
    android:orientation="horizontal">

    <ImageView
      android:id="@+id/icon"
      android:layout_width="@dimen/icon"
      android:layout_height="@dimen/icon"
      android:layout_gravity="center_vertical"
      android:contentDescription="@string/icon"
      android:padding="8dip"/>

    <TextView
      android:id="@+id/title"
      android:layout_width="0dp"
      android:layout_height="wrap_content"
      android:layout_gravity="left|center_vertical"
      android:layout_weight="1"
      android:text="@{Html.fromHtml(question.title)}"
      android:textSize="20sp"/>

    <TextView
      android:id="@+id/score"
      android:layout_width="wrap_content"
      android:layout_height="wrap_content"
      android:layout_gravity="center_vertical"
      android:layout_marginLeft="8dp"
      android:layout_marginRight="8dp"
      android:text="@{Integer.toString(question.score)}"
      android:textSize="40sp"
      android:textStyle="bold"/>

  </LinearLayout>
</layout>
You will note that the binding expression for the score
TextView is @{Integer.toString(question.score)}. That is because
the score field on Question is an int, and by default, the data
binding system will think that is a reference to a string resource. We
have to convert the score into a String to get the results that we want.
We will see this more later in this chapter.
Of course, having a QuestionsAdapter that adapts Question object
only works if we have Question objects.
QuestionsFragment now holds onto two collections of Question objects:
an ArrayList in the order that we get them from the Web service API,
and a HashMap to find a Question object given its ID:
  private ArrayList<Question> questions
    =new ArrayList<Question>();
  private HashMap<String, Question> questionMap=
    new HashMap<String, Question>();
Our call to the questions() method on our StackOverflowInterface
still returns a collection of Item objects. In onCreateView(), where
we call questions(), we arrange to use those Item objects to create
the corresponding group of Question objects:
  @Override
  public View onCreateView(LayoutInflater inflater,
                           ViewGroup container,
                           Bundle savedInstanceState) {
    View result=
        super.onCreateView(inflater, container,
          savedInstanceState);

    so.questions("android").enqueue(new Callback<SOQuestions>() {
      @Override
      public void onResponse(Call<SOQuestions> call,
                             Response<SOQuestions> response) {
        for (Item item : response.body().items) {
          Question question=new Question(item);

          questions.add(question);
          questionMap.put(question.id, question);
        }

        setListAdapter(new QuestionsAdapter(questions));
      }

      @Override
      public void onFailure(Call<SOQuestions> call, Throwable t) {
        onError(t);
      }
    });

    return(result);
  }
That is sufficient to get our app to run again, showing the scores along with the question titles and asker avatars:
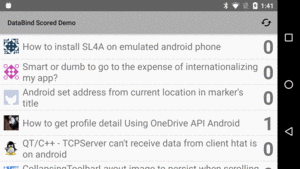
Figure 671: Stack Overflow Questions with Scores
However, we wanted to allow the user to refresh the data for these questions,
so we can see a score being updated in real time via the data binding
system. That requires a different call to the Stack Exchange API. It is
still /2.1/questions, but now we have an additional path segment, one
that takes a semi-colon-delimited list of question IDs. So, we add a new
@GET method to StackOverflowInterface for this:
package com.commonsware.android.databind.basic;

import retrofit2.Call;
import retrofit2.http.GET;
import retrofit2.http.Path;
import retrofit2.http.Query;

public interface StackOverflowInterface {
  @GET("/2.1/questions?order=desc&sort=creation&site=stackoverflow")
  Call<SOQuestions> questions(@Query("tagged") String tags);

  @GET("/2.1/questions/{ids}?site=stackoverflow")
  Call<SOQuestions> update(@Path("ids") String tags);
}
Note the use of @Path("ids") on the first parameter, corresponding
to the {ids} placeholder in the path expressed in the @GET annotation.
@Path("ids") says “the following parameter can be injected as a path
segment into the URL”, and {ids} indicates specifically where that
parameter’s value should go. Note, though, that it is a String, not a
String array or ArrayList of strings. That is because we do not have
a way to teach Retrofit how to concatenate a collection of strings into
a single path segment.
In addition, this sample now has a menu resource directory, with an
actions.xml resource in it, defining a single “refresh” menu item. The
QuestionsFragment opts into participating in the action bar and,
in onCreateOptionsMenu(), applies the actions menu resource. In
onOptionsItemSelected(), if the user chose our refresh menu item,
we call a private updateQuestions() method. This method needs to use
the new update() method on StackOverflowInterface to update our
collection of questions:
  private void updateQuestions() {
    ArrayList<String> idList=new ArrayList<String>();

    for (Question question : questions) {
      idList.add(question.id);
    }

    String ids=TextUtils.join(";", idList);

    so.update(ids).enqueue(new Callback<SOQuestions>() {
      @Override
      public void onResponse(Call<SOQuestions> call,
                             Response<SOQuestions> response) {
        for (Item item : response.body().items) {
          Question question=questionMap.get(item.id);

          if (question!=null) {
            question.updateFromItem(item);
          }
        }
      }

      @Override
      public void onFailure(Call<SOQuestions> call, Throwable t) {
        onError(t);
      }
    });
  }
We collect all of the question IDs, then use TextUtils.join() to give
us a single String with all the question IDs concatenated with
semicolons. That, in turn, is passed to update(). For each returned
Item, we find the corresponding Question in the HashMap and
update it with the new data from the Item.
What we do not do is touch our UI.
However, if you run the app, choose a good question out of the list
of questions, upvote the question, and refresh the list, you will see
the new score appear immediately after the refresh. The data binding
system handled that for us, without additional manual intervention on
our part.
So far, the focus has been on getting data from models into views. That is the most common scenario, as usually a subset of views accept user input, and plenty of user interfaces are read-only.
Plus, the original version of the data binding system only handled populating views from models.
But, in 2016, the data binding system was updated with “two-way binding”, where views can populate models, in addition to having models populate views. While this feature is presently undocumented, we have some limited information on how to make it work.
The change to the layout resources is very simple: use @= instead
of @: android:checked="@={question.expanded}".
This configures the attribute (the checked state of a CompoundButton)
with the initial value of the expanded property on a question
variable. It also updates the property if the user checks or unchecks
the CompoundButton.
To make this work, you cannot use a simple public field for the property.
It needs to either have a setter method (e.g., setExpanded()) or
be a public Observable field.
For example, the
DataBinding/TwoWay
sample project is a clone of the DataBinding/Scored sample
project from earlier in this chapter. However, now the Question will
track some local state, information not obtained from the Stack Exchange
API. Specifically, it will track a boolean value named expanded:
package com.commonsware.android.databind.basic;

import android.databinding.ObservableBoolean;
import android.databinding.ObservableField;
import android.databinding.ObservableInt;

public class Question {
  public final ObservableField<String> title=
    new ObservableField<String>();
  public final Owner owner;
  public final String link;
  public final ObservableInt score=new ObservableInt();
  public final String id;
  public ObservableBoolean expanded=new ObservableBoolean(true);

  Question(Item item) {
    updateFromItem(item);
    owner=item.owner;
    link=item.link;
    id=item.id;
  }

  void updateFromItem(Item item) {
    title.set(item.title);
    score.set(item.score);
  }
}
Our row layout resource now has a Switch widget, bound to the
expanded property using the @= syntax shown above:
<?xml version="1.0" encoding="utf-8"?>
<layout xmlns:android="http://schemas.android.com/apk/res/android"
  xmlns:app="http://schemas.android.com/apk/res-auto">

  <data>

    <import type="android.text.Html" />

    <variable
      name="question"
      type="com.commonsware.android.databind.basic.Question" />

    <variable
      name="controller"
      type="com.commonsware.android.databind.basic.QuestionController" />
  </data>

  <android.support.v7.widget.CardView xmlns:cardview="http://schemas.android.com/apk/res-auto"
    android:layout_width="match_parent"
    android:layout_height="wrap_content"
    android:layout_margin="4dp"
    cardview:cardCornerRadius="4dp">

    <LinearLayout
      android:id="@+id/row_content"
      android:layout_width="match_parent"
      android:layout_height="wrap_content"
      android:background="?android:attr/selectableItemBackground"
      android:gravity="center_vertical"
      android:onClick="@{()->controller.showQuestion(question)}"
      android:onTouch="@{(v,event)->controller.onTouch(v,event)}"
      android:orientation="horizontal">

      <Switch
        android:id="@+id/expanded"
        android:layout_width="wrap_content"
        android:layout_height="wrap_content"
        android:checked="@={question.expanded}" />

      <ImageView
        android:id="@+id/icon"
        android:layout_width="@dimen/icon"
        android:layout_height="@dimen/icon"
        android:layout_gravity="center_vertical"
        android:contentDescription="@string/icon"
        android:padding="8dip"
        app:error="@{@drawable/owner_error}"
        app:imageUrl="@{question.owner.profileImage}"
        app:placeholder="@{@drawable/owner_placeholder}" />

      <TextView
        android:id="@+id/title"
        android:layout_width="0dp"
        android:layout_height="wrap_content"
        android:layout_gravity="left|center_vertical"
        android:layout_weight="1"
        android:text="@{Html.fromHtml(question.title)}"
        android:textSize="20sp" />

      <TextView
        android:id="@+id/score"
        android:layout_width="wrap_content"
        android:layout_height="wrap_content"
        android:layout_gravity="center_vertical"
        android:layout_marginLeft="8dp"
        android:layout_marginRight="8dp"
        android:text="@{Integer.toString(question.score)}"
        android:textSize="40sp"
        android:textStyle="bold" />

    </LinearLayout>
  </android.support.v7.widget.CardView>
</layout>
If you run the sample project, all of the switches will be checked at
the outset, as we are defaulting expanded to true. If you uncheck
some of them, and scroll around, you will see that the checked/unchecked
state is handled properly, even though rows are being recycled along
the way. And we did not have to add any Java code, other than the new
property — in particular, neither our ViewHolder nor our Adapter
need to worry about the Switch.
There are a number of other “bells and whistles” that you can utilize in the data binding system.
The sample apps have been retrieving the ImageView widget for the
row from the RowBinding. Any View in the layout file that has an
android:id value will have a corresponding field in the ...Binding
generated class. So, for cases like the Picasso scenario, where we
cannot use data binding to populate the ImageView and have to resort
to classic bind-it-in-the-adapter logic, we do not have to do the
findViewById() call ourselves. Instead, we just access the field
in the binding class.
We have seen using a setter method to bind an object to a layout via
the generated binding class. In the sample apps, we have been calling
setItem() or setQuestion() to provide the model object to use
in binding expressions. If needed, though, there is also a corresponding
getter method (getItem(), getQuestion()) to retrieve the last-set
value.
We have seen the use of android:text with a binding expression, to
set the text for a TextView.
What really is going on is:
String, int).set...(), where the
... part is based on the name of the attribute (minus any namespace),
where the data type matches the data type of the expression result.
So, in the case where the binding expression generates a String
for an android:text attribute, the data binding system will look
for setText(String) on the widget, in our case a TextView.
If the binding expression were to return an int, instead, the data
binding system would look for setText(int). In the case of TextView,
that exists, and it is expecting the int to be a string resource.
That is why, in the Scored sample app, we needed to convert
the int to a String.Of course, this is just the simple scenario.
The data binding system maps attribute names to setters. But, what happens if you use an attribute name that does not actually exist?
Like the honey badger, the data binding system don’t care.
All the data binding system is doing is using the attribute name to try
to find an associated setter method. The fact that the attribute name
is not actually part of the LayoutInflater-supported XML structure
is irrelevant.
This means that you can use any attribute that maps to a setter method.
For example, ViewPager has no XML attributes of its own, beyond those it
inherits from View or ViewGroup. But, you are welcome to use
attributes like app:currentItem or app:pageMargin in your data binding-enhanced
layout resources (where app points to a custom namespace of yours).
LayoutInflater will parse them, but ViewPager will ignore them.
However, the data binding system will happily let you bind values to
them, triggering calls to setCurrentItem() and setPageMargin(),
respectively.
Hence, do not feel that you are limited to only those attributes that
are officially supported by LayoutInflater and the widgets. If
the data binding system can find a setter, you can use it.
However, there is one key limitation with these synthetic properties: the value has to be a binding expression. That is true even if you are not really evaluating much of an expression.
For example, this will not work:
<ImageView
  android:id="@+id/icon"
  android:layout_width="@dimen/icon"
  android:layout_height="@dimen/icon"
  android:layout_gravity="center_vertical"
  android:contentDescription="@string/icon"
  android:padding="8dip"
  app:error="@drawable/owner_error"
  app:imageUrl="@{question.owner.profileImage}"
  app:placeholder="@drawable/owner_placeholder"/>
Here, we have three synthetic properties, app:error, app:imageUrl,
and app:placeholder. Only app:imageUrl is using a binding
expression, and its use of one makes sense, as we are pulling in
data from a variable (question). The other two refer to drawables.
Ideally, this would work. In practice, it does not work, as the binding
system ignores the properties, and then Android complains that the
attribute is not recognized.
This, however, works:
<ImageView
  android:id="@+id/icon"
  android:layout_width="@dimen/icon"
  android:layout_height="@dimen/icon"
  android:layout_gravity="center_vertical"
  android:contentDescription="@string/icon"
  android:padding="8dip"
  app:error="@{@drawable/owner_error}"
  app:imageUrl="@{question.owner.profileImage}"
  app:placeholder="@{@drawable/owner_placeholder}"/>
Now, app:error and app:placeholder use binding expressions… that
happen to just return a drawable resource reference. This works, if
one of two things are true:
setError())
on ImageView, which in this case, there isn’t, orOf course, finding a setter may be a challenge. Frequently, the attribute
name and the setter name follow the described convention (android:foo
maps to setFoo()). Every now and then, though, the attribute name
and setter name differ.
For example, View has an android:fadeScrollbars attribute, used
to determine whether or not the scrollbars for a scrollable widget
should automatically fade out after a stable period when the widget
is not scrolling. However, the associated setter method is not
setFadeScrollbars(), but instead setScrollbarFadingEnabled().
By default, in theory,
the data binding system will not find the appropriate
setter for android:fadeScrollbars.
In practice, the documentation suggests that Google has already fixed up all of the standard attributes from Android framework classes. However, there may still be gaps, particularly in Android Support-supplied classes, let alone third-party widgets.
To overcome the mis-matched attribute/setter pair, you can teach
the data binding system how to find the setter for the attribute.
To do this, you are supposed to be able to define a class-level
@BindingMethods annotation, containing one or more @BindingMethod
annotations, which in turn map an attribute on a type to a setter
method name:
@BindingMethods({
  @BindingMethod(type = "android.view.View",
                 attribute = "android:fadeScrollbars",
                 method = "setScrollbarFadingEnabled"),
})
Sometimes, even that is insufficient. Perhaps the setter method takes additional parameters, even though in your case they could be simply hard-coded or pulled from elsewhere in the widget. Perhaps the “setter method” is not really setting a property, but arranging to do some work related to the property.
For example, so far, we have not been able to use data binding with
the ImageView. While the URL to the image is related to the
android:src attribute, android:src does not take a URL, and we want
to use Picasso to retrieve the image asynchronously anyway. Hence, we
have been stuck with configuring the ImageView “the old-fashioned way”
in getView(), by retrieving the ImageView and then telling Picasso
how to populate it.
However, the data binding system can handle this too, by defining a custom
@BindingAdapter.
Let’s take a look at the
DataBinding/Picasso
sample project. This starts with the Scored sample from before,
but now uses the data binding system to update the ImageView.
The ImageView XML from a little bit ago appears in our revised row.xml
layout resource:
<?xml version="1.0" encoding="utf-8"?>
<layout
  xmlns:android="http://schemas.android.com/apk/res/android"
  xmlns:app="http://schemas.android.com/apk/res-auto">

  <data>

    <import type="android.text.Html"/>

    <variable
      name="question"
      type="com.commonsware.android.databind.basic.Question"/>
  </data>

  <LinearLayout
    android:layout_width="match_parent"
    android:layout_height="wrap_content"
    android:orientation="horizontal">

    <ImageView
      android:id="@+id/icon"
      android:layout_width="@dimen/icon"
      android:layout_height="@dimen/icon"
      android:layout_gravity="center_vertical"
      android:contentDescription="@string/icon"
      android:padding="8dip"
      app:error="@{@drawable/owner_error}"
      app:imageUrl="@{question.owner.profileImage}"
      app:placeholder="@{@drawable/owner_placeholder}"/>

    <TextView
      android:id="@+id/title"
      android:layout_width="0dp"
      android:layout_height="wrap_content"
      android:layout_gravity="left|center_vertical"
      android:layout_weight="1"
      android:text="@{Html.fromHtml(question.title)}"
      android:textSize="20sp"/>

    <TextView
      android:id="@+id/score"
      android:layout_width="wrap_content"
      android:layout_height="wrap_content"
      android:layout_gravity="center_vertical"
      android:layout_marginLeft="8dp"
      android:layout_marginRight="8dp"
      android:text="@{Integer.toString(question.score)}"
      android:textSize="40sp"
      android:textStyle="bold"/>

  </LinearLayout>
</layout>
Here, we have three synthetic properties: attributes that are not really
part of ImageView, but that we are using with the help of the data
binding system.
To make that work, the data binding system has to know what to do with
those three values. ImageView lacks setters for those, and so in the
absence of anything else, the data binding system will trigger a compilation
error, complaining that it does not know what to do with the values we
have in the layout.
To make this work, we need a static method somewhere, with the
@BindingAdapter annotation. In this case, we have it defined on
QuestionsFragment:
  @BindingAdapter({"app:imageUrl", "app:placeholder", "app:error"})
  public static void bindImageView(ImageView iv,
                                   String url,
                                   Drawable placeholder,
                                   Drawable error) {
    Picasso.with(iv.getContext())
      .load(url)
      .fit()
      .centerCrop()
      .placeholder(placeholder)
      .error(error)
      .into(iv);
  }
The method name does not matter, so call it whatever will help remind
you of its role. It needs to return void, and take as parameters:
View type that the synthetic properties will appear on (in
this case, ImageView)@BindingAdapter annotationIn our case, app:placeholder and app:error are resolving to
Drawable resources, while app:imageUrl is resolving to a String.
This declaration teaches the data binding framework to call this method
any time it finds a View of the designated type (ImageView) with the
list of synthetic properties, instead of trying to find setter methods
for those properties. Since the <ImageView> element in our layout file
meets those criteria, the bindImageView() method will be called.
In that method, it is our job to do whatever it is that we need to do
to consume those synthetic property values and apply their results to the
supplied View. In this case, we have the snippet of Picasso code formerly
found in the getView() method. However, before, the values of the
drawables (placeholder and error) were hard-coded in Java. Now, they are
in the layout XML file, which is a bit more flexible, particularly if
we are using different layout resources for different configurations.
This means we can junk the last of the manual binding code from getView(),
leaving behind only the connection from our ArrayAdapter to the RowBinding:
  class QuestionsAdapter extends ArrayAdapter<Question> {
    QuestionsAdapter(List<Question> items) {
      super(getActivity(), R.layout.row, R.id.title, items);
    }

    @Override
    public View getView(int position, View convertView, ViewGroup parent) {
      RowBinding rowBinding=
        DataBindingUtil.getBinding(convertView);

      if (rowBinding==null) {
        rowBinding=
          RowBinding.inflate(getActivity().getLayoutInflater(),
            parent, false);
      }

      rowBinding.setQuestion(getItem(position));

      return(rowBinding.getRoot());
    }
  }
Note, though, that to make this sample work, we needed to make one other
change. app:imageUrl refers to the profileImage field on the Owner
class. Formerly, that was package-private, which means that the data
binding generated code could not access it. Instead, we had to make
it public:
package com.commonsware.android.databind.basic;

import com.google.gson.annotations.SerializedName;

public class Owner {
  public @SerializedName("profile_image") String profileImage;
}
As an additional feature, a binding adapter can receive not only the new
values for the properties, but the old ones as well (i.e., what had been
used for a previous binding). To make that work, you double up all of the
parameters, other than the View itself. First come the parameters that
will be the old values, then come the parameters that will be the new values.
If we wanted to use that in the sample shown in this section, we would have
needed seven total parameters:
  @BindingAdapter({"app:imageUrl", "app:placeholder", "app:error"})
  public static void bindImageView(ImageView iv,
                                   String oldUrl,
                                   Drawable oldPlaceholder,
                                   Drawable oldError,
                                   String newUrl,
                                   Drawable newPlaceholder,
                                   Drawable newError) {
    // do good stuff here
  }
For another example,
the chapter on advanced keyboard and mouse support demonstrates
a BindingAdapter to add a focusMode option
to layouts, for a more flexible alternative to the [requestFocus/] XML
element for controlling the widget that gets the focus.
Two-way binding works well in cases where the
way you store the data in the models lines up well with the getters
and setters of the associated widget. In the two-way binding example
presented earlier, a boolean field in the model
works well with the checked property
of a CompoundButton like a Switch, as CompoundButton has
an isChecked() method returning a boolean and a setChecked()
accepting a boolean.
A BindingAdapter allows you to create other mappings between data
types and properties, but only for the classic model->view binding.
To accomplish the same thing in the reverse direction, you wind up
creating an InverseBindingAdapter. As the name suggests, this serves
the same basic role as a BindingAdapter, but in the inverse direction,
taking data from the widget and preparing it for the model using custom
code. Here, the “preparing it for the model” means converting it into
a suitable data type for a setter, Observable field, etc. for your
model.
This is fairly unusual.
The example used in some places is “what if I
want to tie a float to an EditText?”. The InverseBindingAdapter
would look something like this:
@InverseBindingAdapter(attribute = "android:text")
public static float getFloat(EditText et) {
  try {
    return(Float.parseFloat(et.getText().toString()));
  }
  catch (NumberFormatException e) {
    return(0.0f); // because, um, what else can we do?
  }
}
The problem is if the user types in something that is not a valid
floating-point number, like snicklefritz. parseFloat() will fail
with a NumberFormatException. You should let the user know that their
data entry was invalid. However, two-way data binding does not support
this, with a default value (e.g., 0.0f) being handed to the model
instead.
So far, we have focused on binding expressions returning data that populates widgets, specifically by configuring how that widget looks.
But what about configuring how that widget behaves?
Whether this is a good idea is up for debate. On the one hand, it reduces the amount of boilerplate Java code necessary to wire up widgets. On the other hand, some might worry about a blurring of the lines separating views from things like controllers or presenters.
A 2016 update to the data binding system made it easier to set up these sorts of connections, though at the present time, this feature is undocumented.
In the beginning, there was android:onClick, and it was good.
You could add the android:onClick attribute to a view in your layout
resource XML, with a value of a method name in the activity that used
the layout. That method needed to be public, return void, and take
a View as a parameter — the same basic method signature as onClick()
of an OnClickListener. When the user clicked the view, the method
named in android:onClick would be called, without having to call
setOnClickListener() in Java with an OnClickListener implementation.
Over time, android:onClick faded in utility, as other things, such as
fragments, started being where we wanted the click events to go.
android:onClick could only call a method on the hosting activity,
not a method on an arbitrary other class. No other attributes were created
for other event handlers (long-click, touch, etc.), suggesting that this
was a one-off experiment that would fade into oblivion.
And it did fade… until 2016, when the data binding system brought back the concept.
For most events that you will care about with views, you can use a data binding expression to identify a method, on one of your variables, that will be called when the event is raised. Because this ties back to your variables, the method can be on any object that you inject into the binding, not just the activity.
It does make the syntax a bit more verbose. Instead of
android:onClick="doSomething", it becomes
android:onClick="@{controller::doSomething}",
where controller is some object that you want to respond to the
event (e.g., an MVC-style controller, an MVP-style presenter).
The methods referenced this way must have the same basic signature
as the corresponding listener methods, just implemented on a custom
class and with a custom name. So, for example, onLongClick() of
an OnLongClickListener needs to return a boolean, indicating whether
the event is consumed. If you use android:onLongClick to route
that event to some custom method, that method must also return a boolean.
Overall:
public
Those restrictions on the methods tied in via data binding expressions can be a pain. In particular, you have no way of passing additional information from bound variables into the method, since those would not be part of the standard event handling method parameters.
However, the data binding system has another option for tying in
event handlers: Java 8-style lambda expressions. So, you can have
android:onClick="@{()->controller::doSomething(thing)}",
where thing is some variable in your layout resource, or a view
(based on its android:id value), or the magic name context to provide
a Context. It could also involve expressions using any of those
as part of calculations (e.g., concatenating two strings).
You can also blend in parameters that are normally available to the
event, such as android:onClick="@{(v)->controller::doSomething(v, thing)}".
However, the argument list in the lambda function (the left-hand set of parentheses) either needs to be:
For example, the onCheckedChanged() method on OnCheckedChangeListener
for a CompoundButton takes two parameters: the View whose state
changed, and a boolean indicating the new state. You cannot have
android:onCheckedChanged="@{(state)->controller::heyNow(state, thing)}"
or
android:onCheckedChanged="@{(view)->controller::heyNow(view, thing)}".
Instead, if you want either of those, you need to declare both, then
just ignore the one that you do not need, such as
android:onCheckedChanged="@{(v, state)->controller::heyNow(state, thing)}".
Also, the method that you call still has to be public and still
has to return the proper return type based on the event (e.g., void
for onClick, boolean for onLongClick()).
With that in mind, the
DataBinding/RecyclerView
sample project demonstrates how this can work, along with how to use
the data binding system to populate a RecyclerView instead of an
AdapterView.
First, independent of data binding, we need to migrate the app over to
use RecyclerView. Along the way, we can also add in support for
CardView, to make the individual elements of the vertically-scrolling
list look like cards, complete with rounded corners, drop shadows, and
the like.
To that end, we add recyclerview-v7 and cardview-v7 to our roster
of dependencies in build.gradle:
dependencies {
    implementation 'org.greenrobot:eventbus:3.1.1'
    implementation 'com.squareup.picasso:picasso:2.5.2'
    implementation 'com.squareup.retrofit2:converter-gson:2.3.0'
    implementation 'com.android.support:recyclerview-v7:27.1.1'
    implementation 'com.android.support:cardview-v7:27.1.1'
    implementation 'com.android.support:support-v4:27.1.1'
Our previous samples had used ListFragment. We do not have a
RecyclerViewFragment given to us by the recyclerview-v7 library.
But, we can have our own, copied from one of the RecyclerView
sample projects:
package com.commonsware.android.databind.basic;

import android.os.Bundle;
import android.support.v4.app.Fragment;
import android.support.v7.widget.RecyclerView;
import android.view.LayoutInflater;
import android.view.View;
import android.view.ViewGroup;

public class RecyclerViewFragment extends Fragment {
  @Override
  public View onCreateView(LayoutInflater inflater, ViewGroup container,
                           Bundle savedInstanceState) {
    RecyclerView rv=new RecyclerView(getActivity());

    rv.setHasFixedSize(true);

    return(rv);
  }

  public void setAdapter(RecyclerView.Adapter adapter) {
    getRecyclerView().setAdapter(adapter);
  }

  public RecyclerView.Adapter getAdapter() {
    return(getRecyclerView().getAdapter());
  }

  public void setLayoutManager(RecyclerView.LayoutManager mgr) {
    getRecyclerView().setLayoutManager(mgr);
  }

  public RecyclerView getRecyclerView() {
    return((RecyclerView)getView());
  }
}
All this does is manage a RecyclerView on our behalf, including
allowing us to manipulate the adapter and the layout manager.
The revised QuestionsFragment now inherits from that
RecyclerViewFragment. We configure the RecyclerView in
onViewCreated(), mostly just using the code from before,
except that we also need to call setLayoutManager() to indicate
how we want the items to be laid out — in this case, opting for a
vertically-scrolling list:
  @Override
  public void onViewCreated(View view,
                            Bundle savedInstanceState) {
    super.onViewCreated(view, savedInstanceState);

    setLayoutManager(new LinearLayoutManager(getActivity()));

    so.questions("android").enqueue(new Callback<SOQuestions>() {
      @Override
      public void onResponse(Call<SOQuestions> call,
                             Response<SOQuestions> response) {
        for (Item item : response.body().items) {
          Question question=new Question(item);

          questions.add(question);
          questionMap.put(question.id, question);
        }

        setAdapter(new QuestionsAdapter(questions));
      }

      @Override
      public void onFailure(Call<SOQuestions> call, Throwable t) {
        onError(t);
      }
    });
  }
Our QuestionsAdapter also has to change, to be a RecyclerView.Adapter,
instead of an ArrayAdapter:
  class QuestionsAdapter
    extends RecyclerView.Adapter<QuestionController> {
    private final ArrayList<Question> questions;

    QuestionsAdapter(ArrayList<Question> questions) {
      this.questions=questions;
    }

    @Override
    public QuestionController onCreateViewHolder(ViewGroup parent,
                                                 int viewType) {
      RowBinding rowBinding=
        RowBinding.inflate(getActivity().getLayoutInflater(),
          parent, false);

      return(new QuestionController(rowBinding));
    }

    @Override
    public void onBindViewHolder(QuestionController holder,
                                 int position) {
      holder.bindModel(getItem(position));
    }

    @Override
    public int getItemCount() {
      return(questions.size());
    }

    Question getItem(int position) {
      return(questions.get(position));
    }
  }
We take in the roster of questions in the constructor and stash that
for later use. getItemCount() and getItem() simply access that
roster of questions. Data binding takes places in onCreateViewHolder(),
where we create the RowBinding and use that to set up a
QuestionController. QuestionController is a subclass of
RecyclerView.ViewHolder and serves as the local controller for the row
in our list — we will look at QuestionController in greater detail
shortly. onBindViewHolder() simply tells the QuestionController
to bind to the supplied Question model object.
RecyclerView.ViewHolder requires the root View for the row be supplied
to its constructor. So, in the QuestionController constructor, we call
getRoot() to get that View from the RowBinding and supply that,
along with stashing the RowBinding in a field:
  private final RowBinding rowBinding;

  public QuestionController(RowBinding rowBinding) {
    super(rowBinding.getRoot());

    this.rowBinding=rowBinding;
  }
And, in bindModel(), we use the RowBinding to bind our Question,
so the binding expressions will pull the title, score, and so forth into
our views:
  void bindModel(Question question) {
    rowBinding.setQuestion(question);
    rowBinding.setController(this);
    rowBinding.executePendingBindings();
  }
In a 2016 Google I|O presentation on data binding, Google engineers
recommend that if you use RecyclerView, as part of onBindViewHolder()
processing, that you call executePendingBindings() on the binding
(e.g., RowBinding in the case of this example). This forces the
data binding framework to get all of the bindings set up immediately,
rather than waiting until the natural time to do it.
In our case, we just tuck that call into the bindModel() method of
QuestionController, shown above.
You will notice that we also call a setController() method on the
RowBinding. This is in support of our event handling binding work, as
you will see next.
QuestionController has two event-related methods. One is onTouch(),
for handling the ripple effect on Android 5.0+:
  @Override
  public boolean onTouch(View v, MotionEvent event) {
    if (Build.VERSION.SDK_INT>=Build.VERSION_CODES.LOLLIPOP) {
      v
        .findViewById(R.id.row_content)
        .getBackground()
        .setHotspot(event.getX(), event.getY());
    }

    return(false);
  }
The other is showQuestion(), which, surprisingly enough, will be
called when we want to show the actual question:
  public void showQuestion(Question question) {
    EventBus.getDefault().post(new QuestionClickedEvent(question));
  }
It contains the EventBus logic to tell somebody to go show some
specified Question.
Those are tied into our app via the data binding framework:
    <LinearLayout
      android:id="@+id/row_content"
      android:layout_width="match_parent"
      android:layout_height="wrap_content"
      android:background="?android:attr/selectableItemBackground"
      android:onClick="@{()->controller.showQuestion(question)}"
      android:onTouch="@{controller::onTouch}"
      android:orientation="horizontal">
For android:onTouch, we use the method-reference approach, asking
the data binding framework to call onTouch() on our controller.
For android:onClick, we use the lambda expression approach,
calling showQuestion() on our controller, passing in the question
variable, so we have our Question to go show.
And that’s it. No other changes are needed to tie in these events, either
in the QuestionController or in the QuestionsAdapter.
The result of a binding expression gets cast to the data type expected by the setter, field, or binding adapter that the data binding system identified as being the one to use.
Hopefully, this works.
However, it is possible that you will need to change your binding
expression, such as in the case cited earlier in this chapter,
where android:text can accept an integer, but you wanted that integer
to be shown as text, not be a reference to a string resource.
In other cases, there may not be a clear match. Google’s documentation
cites the case where your binding expression returns the ID of a
color resource, but the setter takes a Drawable, such as is the case
with setBackground() on View.
One way of addressing this disparity is via a @BindingMethod. This
teaches the data binding system to use a different method for the
setter (e.g., setBackgroundColor()). However, this is always used
for that particular widget class and attribute combination. In the
particular case of the android:background attribute, there are a variety
of possible setters:
setBackground(Drawable)setBackgroundColor(int) (taking the actual color, not a color resource)setBackgroundDrawable(Drawable) (as setBackground(Drawable) is new to API Level 16)setBackgroundResource(int)You may not be in position to use one of these for android:background
exclusively.
Hence, another approach is to teach the data binding system how to convert
data from one type to another, using a @BindingConversion-annotated
static method:
@BindingConversion
public static ColorDrawable colorToDrawable(int color) {
   return new ColorDrawable(color);
}
As with binding adapters, the name of the method does not matter. What
matters is that it takes an int as input and returns a ColorDrawable.
The data binding system will take this into account and use it if it
has a case where the binding expression returned an int and it needs
a ColorDrawable… or a Drawable.
Here, though, we start to run into problems with Google’s insistence on
using int values everywhere. This colorToDrawable() conversion
method takes an int. That int could be a color. It could be a
color resource ID, or a string resource ID, or a layout resource ID,
or the score of a Stack Overflow question, or countless other things.
The depicted @BindingConversion, therefore, may not be especially
useful.
Another scenario for @BindingConversion is to be able to extract something
from deep inside a model without exposing the whole model structure as
public. For example,
the
DataBinding/Conversion
sample project uses a @BindingConversion to allow an Owner to be
turned into a String, by means of returning the profileImage value:
  @BindingConversion
  public static String ownerToString(Owner owner) {
    return(owner.profileImage);
  }
Once again, the method name does not matter; what matters is that this
conversion knows how to handle taking an Owner and returning a String.
Now, the app:imageUrl attribute in the ImageView in the layout can
refer to question.owner instead of question.owner.profileImage:
      <ImageView
        android:id="@+id/icon"
        android:layout_width="@dimen/icon"
        android:layout_height="@dimen/icon"
        android:layout_gravity="center_vertical"
        android:contentDescription="@string/icon"
        android:padding="8dip"
        app:error="@{@drawable/owner_error}"
        app:imageUrl="@{question.owner}"
        app:placeholder="@{@drawable/owner_placeholder}"/>
The original edition of the data binding system allowed you to create expressions based on variables and static methods. An update to data binding in 2016 added in “chained expressions”, where expressions can refer to attributes of other widgets in the same layout resource. While this feature is presently undocumented, the basics are straightforward enough: just refer to the widgets by ID.
For example, the
DataBinding/Chained
sample project is a clone of the DataBinding/TwoWay sample project
from earlier in the chapter. There, we added a Switch widget tied
to an expanded property on the Question model objects. The reason
for the name “expanded” was in preparation for the DataBinding/Chained
sample, where the visibility of the avatar icon and the score would be
toggled based on the Switch status.
The Switch has an android:id of expanded:
      <Switch
        android:id="@+id/expanded"
        android:layout_width="wrap_content"
        android:layout_height="wrap_content"
        android:checked="@={question.expanded}" />
The android:visibility of the icon ImageView now is set based
on a data binding expression, checking the checked state of the
expanded widget, using a ternary operator to convert that into
appropriate View values:
      <ImageView
        android:id="@+id/icon"
        android:layout_width="@dimen/icon"
        android:layout_height="@dimen/icon"
        android:layout_gravity="center_vertical"
        android:contentDescription="@string/icon"
        android:padding="8dip"
        android:visibility="@{expanded.checked ? View.VISIBLE : View.GONE}"
        app:error="@{@drawable/owner_error}"
        app:imageUrl="@{question.owner.profileImage}"
        app:placeholder="@{@drawable/owner_placeholder}" />
Note that this requires us to import View, to be able to reference
View.VISIBLE and View.GONE:
<import type="android.view.View" />
The score TextView could use the exact same expression as was used
for the icon ImageView. However, in this case, the visibility
of score depends upon the visibility of icon:
      <TextView
        android:id="@+id/score"
        android:layout_width="wrap_content"
        android:layout_height="wrap_content"
        android:layout_gravity="center_vertical"
        android:layout_marginLeft="8dp"
        android:layout_marginRight="8dp"
        android:text="@{Integer.toString(question.score)}"
        android:textSize="40sp"
        android:textStyle="bold"
        android:visibility="@{icon.visibility}" />
This way, if the rules for how we derive the visibility change,
all we need to do is change icon, leaving score alone.
Now, as the user toggles the Switch, the visibility of the icon
and the score toggles with it.
As noted earlier in this chapter, the binding class name for a layout
resource is determined automatically by default. The layout filename
is converted into a “Pascal case” rendition, then has Binding
appended (e.g., res/layout/foo_bar.xml becomes FooBarBinding).
This class goes in the .databinding sub-package under the base Java package
for your app, as defined in the package attribute in your <manifest>.
However, this may result in awkward Java class names. Or, perhaps you want
to have the classes be generated in some other Java package, for some reason.
You can use the class attribute on the <data> element to control
the actual Java class name used for the binding class.
This can come in one of three forms:
class="Foo" will name the binding class Foo and will place it
in the standard .databinding sub-packageclass=".Foo" will name the binding class Foo, but will place it
in the base package for your app (as defined in the package attribute),
instead of in the separate .databinding sub-packageclass="this.is.fully.qualified.Foo" will name the binding
class Foo and place it in the designated Java packageAndroid has supported <include> as a tag in layout resources since
Android 1.0. The tag takes a layout attribute, pointing to a layout
resource. The contents of the pointed-to layout resource are inserted
into the view hierarchy of the original resource. So, if we have:
<LinearLayout xmlns:android="http://schemas.android.com/apk/res/android"
    android:orientation="vertical"
    android:layout_width="match_parent"
    android:layout_height="match_parent">

    <include layout="@layout/foo"/>

    <!-- other widgets go here -->

</LinearLayout>
… then whatever is in the foo layout resource will be added to the
LinearLayout, ahead of any other widgets in that LinearLayout.
With the data binding system, you can pass variables from the outer layout to the included one, without having to somehow bind the variable yourself in the included layout from Java code:
<layout xmlns:android="http://schemas.android.com/apk/res/android"
        xmlns:bind="http://schemas.android.com/apk/res-auto">
  <data>
      <variable name="foo" type="com.thingy.Foo"/>
  </data>

  <LinearLayout xmlns:android="http://schemas.android.com/apk/res/android"
      android:orientation="vertical"
      android:layout_width="match_parent"
      android:layout_height="match_parent">

      <include layout="@layout/foo" bind:bar="@{foo}"/>

      <!-- other widgets go here -->

  </LinearLayout>
</layout>
Here, if the foo layout resource has a variable named bar, it
will be populated by evaluating the @{foo} binding expression, so
the foo resource can refer to bar in its own binding expressions.
What you want may not fit any of these patterns. In that case, you are going
to have to roll your own Observable implementation. The simplest way
to do that is to extend BaseObservable, which handles all of the
observer registration logic for you.
There are two types of changes for which you can notify observers:
ObservableField
Observable wrapper on some propertyFor example, you might have a Person class that has birthDate field,
of type Date, representing the date on which the person was born.
If you wanted to use that date in a binding expression, you could have
birthDate be public, or have a getBirthDate() that returned it.
If you wanted a binding expression to be updated when the birth date
changed (e.g., correcting a typo), you could have birthDate
be an ObservableField wrapped around a Date.
However, suppose what you really want to use in the binding expression
is the person’s age. It is easy enough for Person to calculate that,
based on the current date and birthDate. However, this would be awkward
to publish via an ObservableField, since there should not be an age
field — age is a derived value, not a stored value.
Instead, you could say that your getAge() method
publishes a simple int, and you will handle notifying observers whenever
the age changes, either due to a change in birthDate, or if the date
changed and it is now the person’s birthday.
On a BaseObserverable, you can annotate getter-style methods with
@Bindable. This tells the data binding framework that those methods
represent values that can be bound. Because BaseObservable implements
Observable, the data binding framework can call
addOnPropertyChangedCallback() to register an OnPropertyChangedCallback
to find out when @Bindable properties are changed.
To make that work, BaseObservable supplies a notifyPropertyChanged()
method. You can call this from the setter method or other place where
you are changing the value of the property, to let BaseObservable
know that the property changed. This, in turn, will let all
OnPropertyChangedCallback instances know about the change, which will
trigger the data binding framework to re-evaluate any binding expressions
tied to that property.
Unfortunately, this is broken in the 1.5.1 build of Android Studio and the 1.5.0 edition of the Android Gradle Plugin.
For example, here is a revised version of the Question model class
that has it use BaseObservable and notifyPropertyChanged():
package com.commonsware.android.databind.basic;

import android.databinding.BaseObservable;
import android.databinding.Bindable;
import com.commonsware.android.databind.basic.BR;

public class Question extends BaseObservable {
  private String title;
  private final Owner owner;
  private final String link;
  private int score;
  private final String id;

  Question(Item item) {
    updateFromItem(item);
    owner=item.owner;
    link=item.link;
    id=item.id;
  }

  @Bindable
  public String getTitle() {
    return(title);
  }

  @Bindable
  public Owner getOwner() {
    return(owner);
  }

  @Bindable
  public String getLink() {
    return(link);
  }

  @Bindable
  public int getScore() {
    return(score);
  }

  @Bindable
  public String getId() {
    return(id);
  }

  void updateFromItem(Item item) {
    this.title=item.title;
    this.score=item.score;

    notifyPropertyChanged(BR.title);
    notifyPropertyChanged(BR.score);
  }
}
Here, BR is a generated class. According to the documentation:
The
Bindableannotation generates an entry in theBRclass file during compilation. TheBRclass file will be generated in the module package.
Unfortunately, while this is all true, Android Studio does not recognize
any of the generated fields, and so while you can import BR,
BR.title and BR.score — the int values identifying those properties –
are not recognized and result in compile errors.
If the BaseObservable itself is what is used in the binding expression,
or if you want to use bindable properties and need to work around the BR
issue mentioned above, BaseObservable also offers notifyChange(),
indicating that all binding expressions tied to the BaseObservable
instance should be re-evaluated.
The
DataBinding/Observable
sample project is another variation of the sample project that we have
been analyzing in this chapter. This one has Question extend
BaseObservable. However, unlike the code snippet above, where we tried
using BR and notifyPropertyChanged(), here we just settle for
notifyChange():
package com.commonsware.android.databind.basic;

import android.databinding.BaseObservable;
import android.databinding.Bindable;
import android.databinding.ObservableField;
import android.databinding.ObservableInt;
import com.commonsware.android.databind.basic.BR;

public class Question extends BaseObservable {
  private String title;
  private final Owner owner;
  private final String link;
  private int score;
  private final String id;

  Question(Item item) {
    updateFromItem(item);
    owner=item.owner;
    link=item.link;
    id=item.id;
  }

  @Bindable
  public String getTitle() {
    return(title);
  }

  @Bindable
  public Owner getOwner() {
    return(owner);
  }

  @Bindable
  public String getLink() {
    return(link);
  }

  @Bindable
  public int getScore() {
    return(score);
  }

  @Bindable
  public String getId() {
    return(id);
  }

  void updateFromItem(Item item) {
    this.title=item.title;
    this.score=item.score;

    notifyChange();
  }
}
Even though we are storing title as a simple String and
score as a simple int, we can use them in binding expressions, because
their getters are @Bindable and we are notifying BaseObservable
when their values change.
Data binding will usually be used for things like the text of a TextView,
or the image shown in an ImageView. However, you are welcome to have
other things vary based upon binding expressions. For example, perhaps
you want a certain background color or color bar on a row in a list, based
upon some category associated with the model objects. You could use
data binding to set that color.
Lisa Wray pointed out another inventive use of data binding: custom fonts.
Historically, using a custom Typeface required Java code. That Java
code might be fairly limited, if you only need to update one TextView.
Or, that Java code might pull in a library like
Calligraphy to be able to
apply arbitrary fonts to arbitrary widgets from within layout files.
The data binding framework can handle that for you, if you create
a custom BindingAdapter for some synthetic property (e.g., wray:font).
In your layout, you would have wray:font attributes that name the
typeface that you want on relevant widgets (e.g., TextView):
<TextView
  wray:font="@{`MgOpenCosmetica.ttf`}"
  android:layout_width="wrap_content"
  android:layout_height="wrap_content"/>
The BindingAdapter would retrieve the Typeface
for that font name, then apply it to the associated widget:
@BindingAdapter({"wray:font"})
public static void setFont(TextView tv, String font){
  String assetPath="fonts/" + font;
  Typeface type=Typeface.createFromAsset(tv.getContext().getAssets(), assetPath);

  tv.setTypeface(type);
}
This particular implementation has performance issues, as it creates a
new Typeface object on every binding, which is inefficient. Lisa has
a complete sample app
that demonstrates caching the Typeface objects to reduce the performance
overhead.
It is likely that the Android community will come up with other interesting tricks for simplifying code using fancy data binding adapters, converters, and the like.