Figure 883: Project Structure Dialog, SDK Location Category
Eclipse, with the ADT plugin, had many structured editors and specialized dialogs for modifying Android project files and otherwise configuring Android project behavior.
Android Studio has fewer of those, and they are generally less critical. The editors and dialogs presented in this chapter can be useful, at least in some cases, but you do not need to use any of them to be able to create your Android projects. However, some may speed up your Android development a bit over working with bare resource and Gradle files.
Understanding this chapter requires that you have read the core chapters of this book, along with the chapter on Gradle and build variants.
The Project Structure dialog allows you to configure many aspects
of your build.gradle files from a tabbed property-style dialog, as
opposed to having to work with the Gradle scripts directly. On the
plus side, this can be easier. However, since Gradle is built on the
Groovy scripting language, build.gradle files are not simple XML or
JSON data structures. It remains to be seen how well the Project
Structure dialog will be able to handle complex Gradle scripts.
To access the Project Structure dialog, choose File > Project Structure from the main IDE menu.
The left-hand side lists major areas of the dialog; choosing one of those switches to that area’s form on the right.
The sections that follow outline each of the major areas and what you can configure in them.
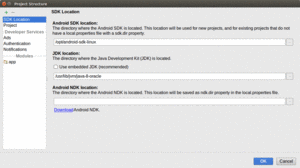
The Project Structure dialog opens up on the SDK Location area, where you can configure where your Android SDK is located, where your JDK is located, and where your NDK is located:
Figure 883: Project Structure Dialog, SDK Location Category
For new Android Studio 2.2+ installations, the default is for Android Studio to use a version of the Java JDK that ships with the IDE itself, in which case “Use embedded JDK (recommended)” will be checked.
Adjusting these in Project Settings affects this specific project. There is also File > Other Settings > Default Project Structure, where you can edit the default values to be used for new projects and projects that you import in the future.
The second entry in the Project Structure dialog category list is
“Project”. This allows you to configure four items found by default
in the build.gradle file in your project root or in the
gradle-wrapper.properties file:
implementation directives in your
module’s build.gradle file)
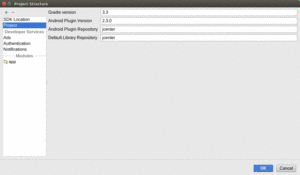
Figure 884: Project Structure Dialog, Project Settings Category
If you are using select portions of the Play Services SDK, the items under the “Developer Services” divider allow you to configure those portions. By default, they amount to checkboxes, to enable certain features:
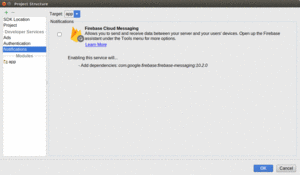
Figure 885: Project Structure Dialog, Notifications Category
Below the “Modules” divider in the category list on the left will come all of your modules. If you are not using modules, there will be a single entry in the category list with the same name as your project, as a quasi-module.
Clicking on a module will bring up a set of tabs on the right to edit various properties of that module, independently of any other module in your project. The following sections outline the contents of those tabs.
The first tab is labeled “Properties” and allows you to adjust various
top-level settings in your module’s build.gradle file.
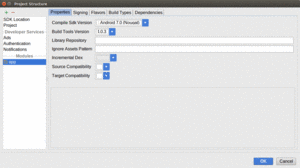
Figure 886: Project Structure Dialog, Module Category, Properties Tab
These include:
compileSdkVersion (“Compile Sdk Version” drop-down)buildToolsVersion (“Build Tools Version” drop-down)repositories closure (“Library Repository”)ignoreAssetsPattern property in aaptOptions
(“Ignore Assets Pattern”)incremental property in dexOptions
(“Incremental Dex”)sourceCompatibility in compileOptions
(“Source Compatibility”)targetCompatibility in compileOptions
(“Target Compatibility”)If your module’s build.gradle file has a signingConfigs closure, the
“Signing” tab will let you edit those signing configurations:
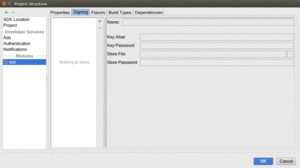
Figure 887: Project Structure Dialog, Module Category, Signing Tab
Each signing configuration that you have defined will appear in the list on the left side of the tab. On the right are fields for you to fill in the signing configuration name, the keystore file and key alias to use, and the passwords to use for accessing that file and alias.
The green plus (“+”) icon on the right side of the list lets you define a new signing configuration, while the red minus (“-”) icon lets you delete an existing signing configuration.
The “Flavors” tab starts off with a single “flavor”, representing
your build.gradle file’s defaultConfig settings. The green plus
icon next to the list of flavors lets you define a new flavor, while
the red minus icon lets you remove an existing flavor. Note that you
cannot remove defaultConfig, as it is defined by the Gradle for
Android plugin.
Figure 888: Project Structure Dialog, Module Category, Flavors Tab
On the right side of the tab, you can set or change the name of the
flavor, plus you can adjust various flavor (or defaultConfig)
settings, including:
minSdkVersion value (“Min Sdk Version” drop-down)applicationId (“Application Id”)targetSdkVersion value (“Target Sdk Version” drop-down )testInstrumentationRunner to use for instrumentation testing
(“Test Instrumentation Runner”)testApplicationId value for instrumentation testing (“Test
Application Id”)versionCode and versionName to use (“Version Code” and “Version Name”),
along with the suffix to apply to the version name (unique to this
product flavor)The “Build Types” tab allows you to adjust settings for the debug
and release build types. The green plus
icon next to the list of build types lets you define a new build type, while
the red minus icon lets you remove an existing build type. Note that you
cannot remove debug or release, as they are defined by Gradle.

Figure 889: Project Structure Dialog, Module Category, Build Types Tab
On the right side of the tab, you can set or change the name of the
build type, plus you can adjust various settings in your
buildTypes closure, including:
debuggable, to control if the app is considered
to be debuggable on production hardware (“Debuggable” drop-down)jniDebuggable flag (“Jni Debuggable”)renderscriptDebuggable flag (“Renderscript Debuggable”)renderscriptOptimLevel property (“Renderscript Optim Level”)minifyEnabled, to control whether the build process
should attempt to strip out unused code (“Minify Enabled” drop-down)pseudoLocalesEnabled flag (“Pseudo Locales Enabled”)applicationId (“Application Id Suffix”)versionName (“Version Name Suffix”)zipalign
(“Zip Align Enabled”)If your project has any defined dependencies in a dependencies closure,
these will appear in the “Dependencies” tab:
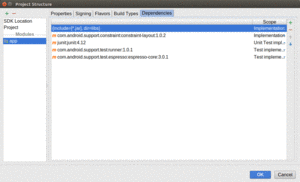
Figure 890: Project Structure Dialog, Module Category, Dependencies Tab
The tab is dominated by a two-column table, where the left column is the dependency itself. The right column is the “scope”, where the cell shows the current scope, and if you click on it, you get a drop-down list of available scopes:
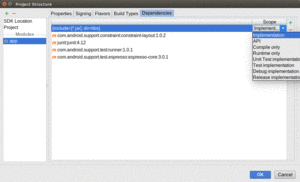
Figure 891: Dependencies Tab, Showing Scope Drop-Down
Those scopes include:
implementation dependencyandroidTestImplementation dependency (i.e., one to be used
only for instrumentation testing)testImplementation dependency (i.e., one to be used
only for unit testing)debugCompile dependency)compileOnly dependency (where the dependency is used only
at compile time and its contents are not packaged into the APK file)runtimeOnly dependency (where the dependency is not used at compile
time, but its contents are packaged into the APK file)The latter two scopes will be used infrequently.
If you click the green + button, you will be able to add a new dependency. A drop-down menu will let you choose between a library dependency (i.e., for an artifact in a repository), a file dependency, and a module dependency (i.e., to depend upon another module in your project).
Typically, you will be adding library dependencies. When you choose that option, another dialog appears to allow you to search for likely dependencies or type in the full dependency identifier (group ID:artifact ID:version).
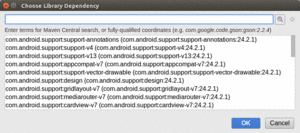
Figure 892: Choose Library Dependency Dialog, As Initially Launched
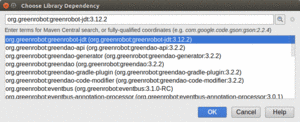
Figure 893: Choose Library Dependency Dialog, With Search Results for “greenrobot”
The red - icon in the same toolbar as the green + will remove a dependency, while the up and down arrows allow you to reorder the dependencies.
On Android Studio, if you open a file containing string resources, you will find a notification banner atop the editor, offering a way for you to “Edit translations for all locales in the translations editor”:

Figure 894: Notification Banner for Translations Editor
Clicking the “Open editor” link will open the Translations Editor. You can also get to this editor by right-clicking over the resource file in the Project or Android view on the left and choosing “Open Translation Editor” from the context menu.
For an un-translated project — such as one newly-created from the new-project wizard — when you open the Translations Editor, you will just see all of the existing strings:

Figure 895: Translations Editor, As Initially Opened
These are labeled as “default value” because, in this case, the
values are coming from the default resource set (res/values/strings.xml),
not some specific language translation.
You can edit an existing default value either by clicking on the cell containing the default value (e.g., clicking the “My Application” cell), or by clicking anywhere on the row and then editing the value in the “Default Value” field towards the bottom of the editor. Note that you cannot edit keys via this editor.
The right-hand column of the table has checkboxes, with a column heading
of “Untranslatable”. Checking one of those adds a translatable="false"
attribute to the <string> element in the XML. The IDE and related tools
can use this to not warn you that this string lacks translations. This
would be good for strings that you elected to put in string resources
yet are not user-facing and therefore do not need translation.
The + icon in the toolbar, when clicked, pops up a dialog where you can define a new string:

Figure 896: Translations Editor, New-String Dialog
Where the fun begins, though, is if you click the globe icon in the toolbar. This displays a drop-down list of languages:
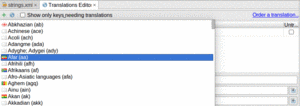
Figure 897: Translations Editor, Showing Languages Drop-Down List
Choosing a language has two main effects. First, it creates a corresponding
res/values-*/ directory for your chosen language. Second, it adds a
column to the Translations Editor for that language:
Figure 898: Spanish Strings in Resource File and Translations Editor
You can then click on a cell representing a word and its language, and fill in the translation in the form:

Figure 899: Translations Editor, Showing Spanish Translation
The icons to the right of the “Default Value” and “Translation” fields in the form simply pop up a dialog giving you a bit more room to type:
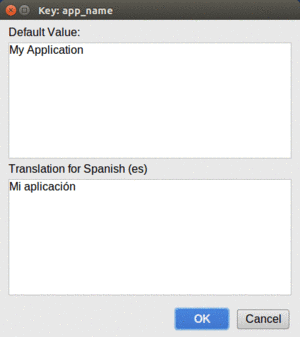
Figure 900: Translations Editor, Values Edit Dialog