Chapter 1. Installation and Optimization
Introduction
Every journey begins with a single step; with Snort, that step is installation. Snort is a powerful tool under the right conditions, and throughout this book, we fully intend to help you make the most of it. This chapter is dedicated to getting started: the steps required to install Snort onto your system, suggestions about how best to place your IDS sensors, and suggestions about how to connect it. If you already have a working installation, we still suggest skimming through this chapter to see if there are any ways you might be able to optimize your solution. I know someone who reads culinary cookbooks all the time, and yet rarely actually follows a recipe. Cookbooks are like that: they are a source of ideas—a way of trying combinations that you might not have considered before. But unless the recipe title appeals to you, there is no need to read it right away. Just remember that you’ve seen it; you can always come back later.
The recipes in this book are based on the latest stable version of Snort at the time of this writing: Version 2.2.x. We’re aware that 2.3.0 is under development; however, it is not stable enough to use. When appropriate, we address new features that are being incorporated into Version 2.3.0.
1.1. Installing Snort from Source on Unix
Solution
To install from source, download it from the Snort web site (http://www.snort.org). Uncompress, unpack, compile, and install by using the following commands:
tar xzf snort-2.2.0.tar.gz
cd snort-2.2.0
./configure
make
And then as root:
make install
Discussion
Installing from source is nearly as easy as installing from precompiled packages, and it works across all Unix platforms. There is also a lot more flexibility in the options you can choose. First of all, you need to download the latest source tar file from snort.org. At this point, if possible, you should ensure that the source has not been meddled with; you can do this by verifying the checksum given using the MD5 utilities.
[simon@frodo downloads]$ md5sum snort-2.2.x.tar.gz
6194278217e4e3f733b046256a31f0e6 *snort-2.2.x.tar.gz
The source is a tarred gzip file; to extract it, enter the following at a command prompt:
[simon@frodo downloads]$ gunzip snort-2.2.x.tar.gz
[simon@frodo downloads]$ tar -xvf snort-2.2.x.tar
You’ll then see the entire list of filenames scroll past as they are decompressed and extracted. This creates a directory structure under the current directory. In this case, with the base directory ./snort-2.2.0/. Change into this directory. At this point, if you wish to perform an ordinary installation, type the following:
[simon@frodo snort-2.2.x]$ ./configureThis will create the make file optimized for your architecture. There are a number of options that you can specify to configure. These are listed in Table 1-1. They include options for specifying switches for the compliers as well as turning on support for certain features.
For further information on these switches, you should read through the INSTALL file included in the /doc directory. Also in this file are some of the known issues and fixes for compilation on different Unix operating systems. The configure script may warn you of missing dependencies (other applications or utilities that are required by Snort). Download and install the required files from their respective web sites and rerun the configure command. In the many installations we’ve done, we can only recall coming across two missing prerequisites. These were libpcap, the library for performing packet capture on Linux systems, available for download from http://www.tcpdump.org, and Perl Compatible Regular Expressions (PCRE), available for download from http://www.pcre.org/.
Then you need to compile it using the make command:
[simon@frodo snort-2.2.0]$ makeNow go and get the hot beverage of your choice. This can take some time, even on a pretty fast machine. There are no test cases to run, so at this point, you need to run the install as root:
[root@frodo snort-2.2.0]# make installProvided at this point you see no error messages, your installation is complete.
Also ensure that the directory to which Snort writes logfiles exists and is writable by the user that Snort runs as. If Snort can’t write its logfiles, it will fail during any attempt to run it.
See Also
The INSTALL document in the /doc directory of Snort
1.2. Installing Snort Binaries on Linux
Solution
To install from an RPM, download the latest version of the RPM from the Snort web site (http://www.snort.org), then as root, type the following:
rpm -ivh snort-2.2.x-x.i386.rpmReplace the filename with the name of the latest version.
To install from a Debian package, download the latest version of the DEB package, then as root, type the following (replacing the filename with the name of the latest version):
dkpg -i snort-2.2.x.debDiscussion
IDS systems are critical on efficiency. The precompiled packages are easy and quick, but they fail to optimize the system to your exact hardware. If you start to hit performance related issues with your binary install, try recompiling from source, which may solve the problem.
Snort.org includes several Red Hat Package Manager (RPM)
distributions for download. RPMs are compatible with a number of other
Linux distributions (SuSE and Mandrake spring immediately to mind).
You have a choice of several RPMs, each with various options enabled.
Unless you know what you’re looking for, choose the plain
Snort-version.i386.rpm file. Download the RPM,
and then as root, execute the following command (The -ivh option means “install verbose
hash”):
[root@frodo root]# rpm -ivh snort-2.2.x-x.i386.rpm
Preparing...     ########################################### [100%]
   1:snort       ########################################### [100%]
The Debian packages are available from various sources online. You should choose a reputable source for your packages whenever possible. Once you have downloaded your Debian package, use the Debian package manager tool, dpkg, to install the packages.
root@frodo:/root# dpkg --install snort-2.2.x.deb1.3. Installing Snort on Solaris
Solution
To install Snort from a Solaris package, download the latest version of the libpcap and Snort packages from the Sunfreeware web site, http://www.sunfreeware.com, then as root, type the following (replacing the filename with the name of the latest version):
#gunzip libpcap-0.8.3-sol9-sparc-local.gz#gunzip snort-2.1.0-sol9-sparc-local.gz#pkgadd -d libpcap-0.8.3-sol9-sparc-local#pkgadd -d snort-2.1.0-sol9-sparc-local
Confirm the installation of each package by pressing Enter.
You may also need to install the PCRE library by using the following commands:
#gunzip pcre-4.5-sol9-sparc-local.gz#pkgadd -d pcre-4.5-sol9-sparc-local
You can also install Snort from source, which is the recommended method.
Discussion
Installing software from the Solaris packages is similar to installing from RPMs. Solaris packages can be downloaded from http://www.sunfreeware.com and from a variety of mirror sites. You can perform a web search on “sunfreeware” to find mirror sites, in the event that the main site is overloaded or unavailable. Make sure you download the correct package for your version of Solaris and the platform, Intel or Sparc. Note that packages tend to be behind in versions from the current source version. At the time of this writing, the latest Snort Solaris package version is Snort 2.1.0. For this reason, you should install Snort from the source code to ensure you are using an up-to-date version.
Prior to installing Snort, make sure you have the latest version of libpcap installed. You
can install libpcap from source code or from the Solaris package. To
install Solaris packages, you must have root privileges. Make sure you
are logged in as root or switch to root by typing su root. Snort is installed in the
/usr/local/bin directory; you
must make sure that directory is part of your PATH. You can verify the
installation by typing snort
and pressing Enter. You should see the Snort help information appear
on the screen.
In addition to the pkgadd
command, you can type pkginfo
to see a list of all installed packages. If the list is long,
pipe the command to more by typing pkginfo | more. Lastly, you can remove
Solaris packages by using the pkgrm command.
The following shows the process of adding the libpcap and Snort packages with pkgadd:
# pkgadd -d libpcap-0.8.3-sol9-sparc-local

The following packages are available:
  1  SMClpcap     libpcap
                  (sparc) 0.8.3

Select package(s) you wish to process (or 'all' to process
all packages). (default: all) [?,??,q]: <enter>

[output truncated]

# pkgadd -d snort-2.1.0-sol9-sparc-local

The following packages are available:
  1  SMCsnort     snort
                  (sparc) 2.1.0

Select package(s) you wish to process (or 'all' to process
all packages). (default: all) [?,??,q]: <enter>

Processing package instance <SMCsnort>
from </tmp/snort-2.1.0-sol9-sparc-local>

snort
(sparc) 2.1.0

[output truncated]1.4. Installing Snort on Windows
Solution
Before you install Snort, you must download and install the WinPcap driver:
Download the WinPcap driver from http://WinPcap.polito.it/install/default.htm. The latest stable version of WinPcap at the time of this writing is Version 3.0.
Double-click on the install file—WinPcap_3_0.exe, in this case—to launch the installation.
The Welcome to the Installation Wizard window appears. Click Next to continue.
You are presented with the license agreement. Click on the box labeled “Yes, I agree with all the terms of this license agreement,” and then click Next to continue.
The WinPcap installation status appears on the screen, and you are presented with the Readme Information window. Click Next to continue.
Last, you’ll see the Installation Complete window stating that WinPcap 3.0 has been successfully installed. Click OK to exit the installation.
Next, it is a good practice to reboot after installing the WinPcap drivers.
Now that WinPcap is installed, continue with the Snort installation:
Download the Snort executable file from http://www.snort.org/dl/binaries/win32. The latest stable version of Snort at the time of this writing is Version 2.2.0.
Double-click on the install file—snort-2_2_0.exe, in this case—to launch the installation.
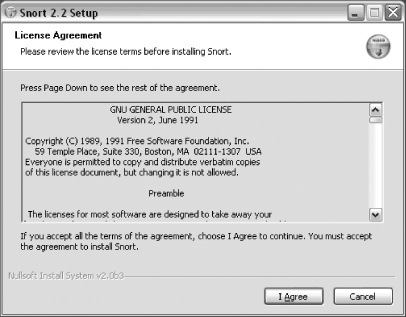
You are presented with the GNU General Public License agreement (Figure 1-1). Once you have read and accepted the terms of the agreement, click I Agree.
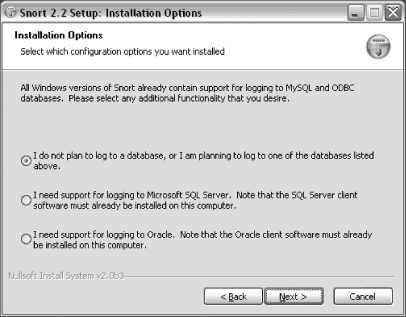
Next you must determine what type of database support you need (Figure 1-2). If you require support for Microsoft SQL Server or Oracle, you must have the necessary client software already installed on your computer. For basic installation in this example, accept the default and install Snort without SQL Server or Oracle database support. Click Next.
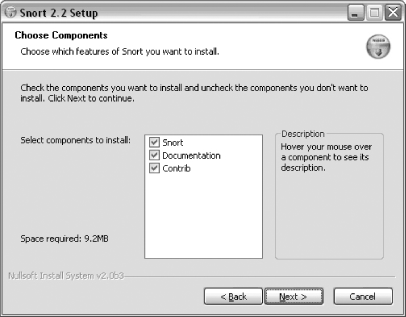
The next screen allows you to choose the Snort components that you wish to install (Figure 1-3). You can see the description by dragging your mouse over each component. By default, all components are selected. Click Next.
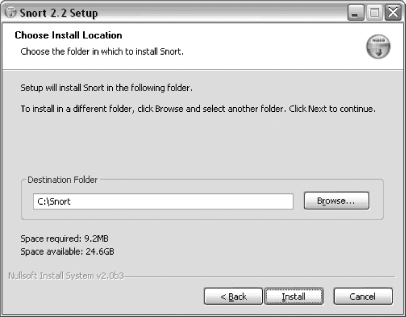
The next screen allows you to choose an install location for Snort (Figure 1-4). The default location is C:\Snort. You may select a different location by typing directly into the Destination Folder area, or by choosing Browse and selecting a location. Click Install.
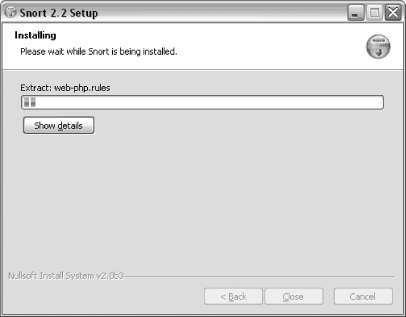
You now see the status of the Snort installation (Figure 1-5). You can click on Show Details to see more information for each file that is being installed.
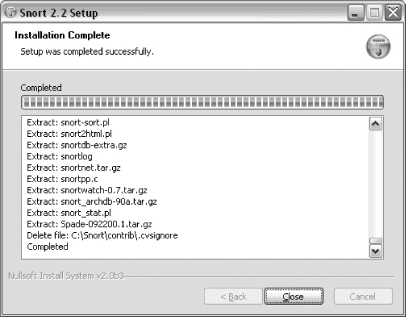
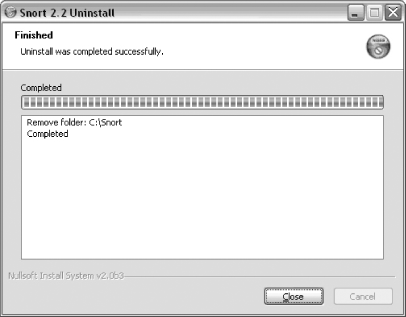
The installation status informs you when the installation is complete (Figure 1-6). If you would like to view the details of the installation, you may scroll through them in the status window or you can right-click on this window and choose Copy Details to Clipboard. This saves the complete details of the installation to a buffer. You may then open Notepad, or another text editor, and paste the results by choosing EditPaste or by typing Ctrl-V. Click Close in the Snort installation window to close the dialog box.
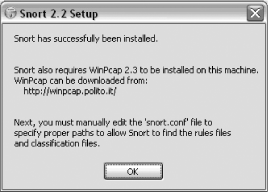
Last, you see a window that states that Snort was successfully installed (Figure 1-7). Click OK to close this window.
Discussion
Snort is available for Windows NT, 2000, and XP (but not Windows 98). It requires the free WinPcap driver to read network traffic off the wire. Snort Version 2.2.0 needs only a total of 9.2 MB to install (although you need much more to store logfiles).
The installation creates six subdirectories within the root C:\Snort directory: bin, contrib, doc, etc, log, and rules. It also installs the Uninstall.exe file under the root C:\Snort directory. The bin subdirectory contains the snort.exe executable and some DLL files. The contrib subdirectory contains various extra programs and contributed add-ons to Snort. The doc subdirectory holds the Snort manual, signature descriptions, and various installation and README files. The etc subdirectory holds various configuration files, including snort.conf. The log directory is empty, but is used later when Snort is running in packet logger mode. The rules subdirectory holds all the rules files that are activated via the snort.conf file.
Once Snort is installed, you can test it by running the Snort
executable. From the command-line prompt, change to the directory that
holds the Snort executable—C:\Snort\bin, in this case. Type snort -W to test that Snort is functioning
and it can access the WinPcap drivers. The output should be a list of
available network adapters on the computer, such as the
following:
C:\Snort\bin>snort -W

-*> Snort! <*-
Version 2.2.0-ODBC-MySQL-FlexRESP-WIN32 (Build 30)
By Martin Roesch (roesch@sourcefire.com, www.snort.org)
1.7-WIN32 Port By Michael Davis (mike@datanerds.net,
www.datanerds.net/~mike)
1.8 - 2.x WIN32 Port By Chris Reid
(chris.reid@codecraftconsultants.com)

Interface       Device          Description
-------------------------------------------
1 \Device\NPF_{28DE4D02-08E8-4AD3-9D6D-3CA34B7EF04F}
(Intel(R) PRO/Wireless LAN2100 3B Mini PCI Adapter
(Microsoft's Packet Scheduler) )
2 \Device\NPF_{D194BF1A-3F38-4B9B-ACAE-A33FC77A5FD8}
(VMware Virtual Ethernet Adapter)
3 \Device\NPF_{D16195CA-706E-4BC9-844A-98215EC5CC03}
(VMware Virtual Ethernet Adapter)
If the output does not include one or more adapters, you may need to reinstall or install a different version of WinPcap. It is a good practice to reboot after installing the WinPcap drivers. If you are installing a different version of WinPcap, first uninstall the previous version by using the C:\Program Files\WinPcap/Uninstall.exe program.
See Also
1.5. Uninstalling Snort from Windows
Solution
To uninstall Snort from your Windows operating system, you can follow these simple steps:
Use Windows Explorer to navigate to the Snort directory. Unless you specified otherwise, this is C:\Snort by default.
Double-click on the Uninstall.exe file to launch the uninstallation.
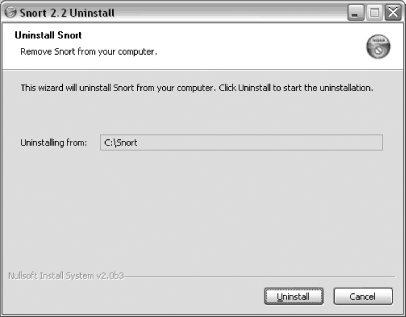
The Uninstall Snort window informs you of the Snort location that is to be uninstalled (Figure 1-8). Click Uninstall to continue.
If you have not installed Snort as a Windows service a window appears that states, “Snort not installed as a service.” Click OK to continue.
You see the progress of the Snort uninstall continue in the window. Once the uninstallation is complete, you see the Finished window stating that the “Uninstall was completed successfully” (Figure 1-9). Click Show Details to see the details of the uninstallation. Click Close to close this window.
You may also want to uninstall the WinPcap driver. If you are using other sniffers or packet-crafting programs such as Ethereal, Windump, or Nmap you will not want to uninstall WinPcap. The following can uninstall WinPcap:
Use Windows Explorer to navigate to the default WinPcap directory: C:\Program Files\WinPcap.
Double-click on the Uninstall.exe file to launch the uninstallation.
The WinPcap 3.0 uninstaller program launches, and Uninstall WinPcap 3.0 is selected. Click Next to continue.
The next window confirms that you want to uninstall WinPcap 3.0. Click Next to continue.
The WinPcap 3.0 uninstall begins, and you are presented with an Uninstall Succeeded window when it is complete. Click Finish to close the window.
Discussion
There are several reasons you may want to uninstall Snort. However, you do not need to uninstall a previous version of Snort to install a newer version. You can update your version of Snort by simply following the installation process for the new version.
See Also
1.6. Installing Snort on Mac OS X
Solution
You can install from source as detailed in “Installing Snort from Source on Unix.” For a binary installer, use HenWen, a Snort GUI for Mac OS X that comes with a precompiled Snort binary.
To install HenWen, download the disk image from http://seiru.home.comcast.net/henwen.html. Mount the disk image, and copy the files to your hard disk.
Discussion
You can either install from source through a terminal in the same way as in Recipe 1.1 (making use of sudo instead of actually becoming root), or you can install using HenWen.
HenWen (available from http://seiryu.home.comcast.net/henwen.html) is a GUI for Snort that includes a fully precompiled version of Snort, optimized to run on Mac OS X.
Installation of HenWen couldn’t be simpler. The download is a gzipped disk-image, so as soon as the download is complete, it automatically decompresses and mounts the disk image (see Figure 1-10).
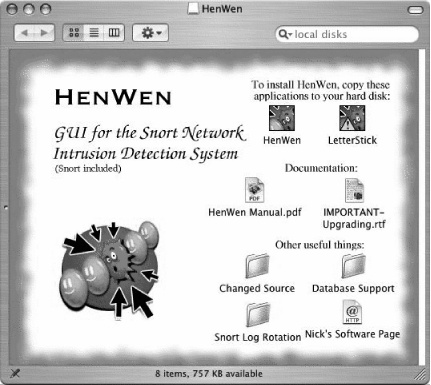
The remainder of the installation entails copying HenWen and LetterStick to a place on your hard disk. Use and configuration of HenWen is covered in depth in Chapter 5.
1.7. Uninstalling Snort from Linux
Solution
If you installed Snort using an RPM file, uninstalling is simple. First, determine the RPM installation name by typing the following:
[root@frodo root]# rpm -q snort
snort-2.2.0-1
Then use the RPM erase option:
[root@frodo root]# rpm -e snort-2.2.0-1All gone!
With the source version, it is just as simple (provided you kept your source tree) in the directory that contains the Makefile, as root type:
[root@frodo snort-2.2.0]# make uninstallAnd it automatically uninstalls.
Discussion
In earlier versions of Snort, there is no make uninstall command available, you should have
a look through the Makefile, which will tell you what files have been
installed where; it is then a matter of deleting them by hand.
Alternatively, if you had the foresight to install all of Snort
into a specified directory, rm -rf
is also a very effective method of removing all traces.
Don’t forget that if you have modified your startup scripts to start a Snort daemon, these need to be changed to reflect the removal of Snort.
If you have not kept your source around, you can install the
source, recompile it, and run make
install, followed by make
uninstall to uninstall.
1.8. Upgrading Snort on Linux
Solution
Before you carry out any of the following upgrade method, make a copy of any configuration files that you wish to retain.
If you are using RPM as the install method, use the upgrade switch.
[root@frodo root]# rpm -Uvh snort-2.2.0-1.i386.rpm
Preparing...       ########################################### [100%]
   1:snort         ########################################### [100%]
From source, you can just carry out a standard install. This will upgrade all necessary files.
Discussion
It is good to keep your installation up to date; Snort is maintained quite regularly, and past upgrades have fixed many problems, while also improving performance and functionality.
The previous upgrade method is not supposed to overwrite any modified configuration or rules files left in the normal locations (e.g., /etc/snort/snort.conf). However, it is good practice to ensure that you back up your snort.conf file and your rules files before you upgrade. You can then replace your edited versions after the binaries have been upgraded, should anything untoward happen.
1.9. Monitoring Multiple Network Interfaces
Solution
Use more than one instance of Snort, each monitoring a separate interface.
Combine your NICs into a single “bridged” unit.
Discussion
It is perfectly possible to run more than one instance of Snort. Using this method, you just assign a separate Snort process to watch each interface that you are interested in, each with its own configuration file.
The bridging option was primarily developed as a method to allow a Linux machine to act as a bridge between networks. It allows two network cards to be aggregated into a single entity. Before progressing down this route, consider reading the documentation available on the Sourceforge home page for the project, available here: http://bridge.sourceforge.net.
Assuming that bridging is built into your kernel, this is how you would go about implementing it. First, clear the IP addresses on the interfaces you are trying to bridge (you can use more than two):
[root@frodo root]#ifconfig eth0 0.0.0.0[root@frodo root]#ifconfig eth1 0.0.0.0
Use the bridging commands to create a bridge container:
[root@frodo root]# brctl addbr snort_bridgeAdd the interfaces to the container:
[root@frodo root]#brctl addif snort_bridge eth0[root@frodo root]#brctl addif snort_bridge eth1
Then bring the bridge online:
[root@frodo root]# ifconfig snort_bridge upTo make use of the bridge, include it as the interface argument to Snort:
[root@frodo root]# snort -v -i snort_bridge
Running in packet dump mode
Log directory = /var/log/snort
Initializing Network Interface snort_bridge
The options that you use really depend on the reasons for needing more than one port. If you are listening to more than one range of IP addresses, it makes sense to run an instance per IP range. However, if you are tapping a full duplex link or a link that is faster than the network cards (gigabit tapping with 100 MB cards, for example), using bridged networking is a better option.
See Also
Koziol, Jack. “Appendix A: Troubleshooting.” In Intrusion Detection with Snort. Indianapolis, IN: Sams, 2003.
1.10. Invisibly Tapping a Hub
Discussion
To make the cable, take a normal Ethernet cable and carefully split it somewhere along its length. Carefully extract the pin-one line (on most normal Ethernet cables, this will be white with an orange stripe), snip the line, and solder in a 22 pF capacitor.
You can turn off the IP address using ifconfig, but shutting down the IP address is only one step. It is possible to make a network card respond to protocols below the IP stack level. Protocols such as ARP and ICMP do not cease to function just because you have the IP address turned off; this could allow a skilled intruder to detect an otherwise hidden IDS.
If you are trying to keep things simple, remember that an IP address is not the only way to detect an IDS. Other aspects of the system may show an IDS, such as network traffic sending alerts, names of systems in DNS that either include IDS in the name or appear suspect, and the behavior of active response systems that indicate that something is listening.
See Also
Snort online documentation, “IDS Deployment Guides” (http://www.snort.org/docs/)
1.11. Invisibly Sniffing Between Two Network Points
Solution
Construct a passive tap.
Discussion
A passive tap is slightly more complex than the receive-only Ethernet cable. You require a four-port Ethernet housing, four category 5e modular snap-in jacks, and bit of category 5e cabling.
Take a small length of your cabling, strip off the outer coating, and separate the eight internal wires. Partially assemble the Ethernet housing by snapping the jacks into place.
Number the ports 1 to 4 from the left and the pins on each 1 to 8 from the left.
Starting with the orange wire from your separated cable, connect it to pin 1 in jack 1, and run it through pin 6 in jack 2 to pin 1 on jack 4.
Run the white wire with the orange stripe from pin 2 in jack 1 through pin 3 in jack 2 to pin 2 in jack 4.
Run the white wire with the green stripe from pin 3 on jack 1 through pin 3 on jack 3 to pin 3 on jack 4.
Run the white wire with the blue stripe from pin 4 on port 1 straight to pin 4 on port 4.
Run the solid blue wire straight from pin 5 on port 1 to pin 5 on port 5.
Run the solid green wire from pin 6 in port 1 through pin 6 in port 3 to pin 6 in port 4.
Run the solid brown wire from pin 7 in port 1 to pin 7 in port 4.
Run the white wire with the brown stripe from pin 8 in port 1 to pin 8 in port 4.
You can see an example in Figure 1-11.

Cut off any excess wire and seal up the Ethernet housing. Port 1 should be connected to the source at one side, and port 4 should be connected to the destination on the other side. Ports 2 and 3 will dump the traffic in each direction, respectively.
See Also
Snort online documentation, “IDS Deployment Guides” (http://www.snort.org/docs/)
1.12. Invisibly Sniffing 100 MB Ethernet
Solution
There are two ways to do this. Both require the use of the passive tap constructed in “Invisibly Sniffing Between Two Network Points.”
If you have a Snort machine with multiple network interfaces, combine their use into a full duplex dump using either of the ways outlined in “Monitoring Multiple Network Interfaces.” If your Snort machine has only one network interface, using the passive tap, run both lines to a small hub. Then from another port of the hub, run a cable to your IDS. This will combine and maybe even buffer the traffic for the IDS and give a full duplex connection.
Discussion
This tap would be useful across an uplink between two switches. It is invisible on the network, as it cannot transmit. This can also be used inline between hosts or between a switch and a host, narrowing down the traffic analyzed to only that going to and from a specific host.
You should also note that a 100 M hub is capable of handling only 100 M, whereas a 100 M switch may well be capable of handling 200 M duplex connections. This wouldn’t usually be a problem, as most networks won’t run anywhere near capacity, but you should consider the possibility of packet loss.
See Also
Snort online documentation, “IDS Deployment Guides” (http://www.snort.org/docs/)
1.13. Sniffing Gigabit Ethernet
Solution
There are several commercial applications available to help sniff traffic at high speed, such as load balancers, sniffing switches, and regenerative taps. Another option is to filter or limit the amount and type of traffic that your high-speed sensors have to analyze. Lastly, you could use several of the OS and libpcap sniffing modifications to help your sensors still function at those speeds.
Discussion
While there is no silver bullet for all networks, several networks that one of the authors has worked on monitor 1 to 2 GB networks. There are several things to consider when tasked with monitoring “GigE” networks.
Using a stock kernel is almost never an option. With every OS, there is a load of unneeded software that will affect the performance of the machine. For straight-out-of-the-box performance, any of the *BSD systems seem to be visibly far ahead of the stock Linux or System V systems at the higher speed.
Use tested and tried networking cards. With some NICs, you can “cheat” the network with such things as caching network traffic before passing it to the OS, filtering, and a modified libpcap built right into the card. The company is named endace (www.endace.com), and their product is a high-performance PCI NIC card.
Filtering. While you might want to capture full packet dumps from all traffic on your network, this might not be possible. For example, if all the users on your network are forced through a web proxy, you have logs of all web traffic anyhow. You don’t need to capture on those ports other than Snort alert packets. A policy-based IDS solution is sometimes perfect as one layer of your IDS architecture. This is discussed in detail in “Monitoring a Network using Policy-based IDS” in Chapter 7, but it just means that you ignore normal traffic and alarm on unusual traffic. For example, ignore all port 80 traffic to and from your web server, but alarm on any other port in use coming from the web server.
There is a modified version of libpcap from Los Alamos laboratories. This version was built to try to capture all traffic on a GigE network. It is actively under development, though only for Linux-based sensors.
Lastly, another option would be to use a caching/load-balancing system, such as a Top Layer Networks switch. However, whenever considering these products, you should test them before you buy them to make sure they do what you anticipate.
1.14. Tapping a Wireless Network
Solution
Snort itself is incapable of sniffing a wireless network. A possible workaround is to use a wireless switch, and use an uplink or span port on it to collect the data.
Discussion
It is advisable to use Snort to monitor the packets that come off your wireless network, because you have no physical control over who can and can’t connect to the network, making it a far more risky environment than your normal network. A good wireless switch will allow you to monitor all traffic through either an uplink port or a span port, and then you can use Snort in the same way as on a normal network.
There are other tools available on the Internet that allow you to sniff wireless connections:
- AirSnort (http://airsnort.shmoo.com/)
This is available from the above link, but despite having a similar name, it has nothing to do with Snort apart from being a packet sniffer.
- Snort-Wireless (http://www.wireless-snort.org/)
This set of patches for Snort allows Snort to natively sniff wireless networks.
See Also
AirSnort online docs (http://airsnort.shmoo.com/)
Snort-Wireless (http://www.snort-wireless.org/)
1.15. Positioning Your IDS Sensors
Solution
Ideally you would position a number of IDS sensors in different locations, each of which covers a particular area of threat within your organization.
Some locations you should consider:
Monitor any points of external access to the network (Internet, wireless, and VPN, for example).
Ideally, you want to monitor both sides of any filtering tool.
Monitor any DMZ area.
Ideally, you want to monitor both sides if any machines are multihomed.
Monitor any critical and/or vulnerable services (e.g., mail-, web-, and database- related services).
Monitor any internal network connections between subnets.
Monitor the internal network in general for internal problems.
Discussion
The following sections provide some case studies for you to consider.
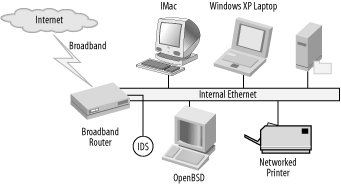
Small business (or geek at home)
The scenario shown in Figure 1-12 has one point of entry. It doesn’t contain many computers, and there are not a lot of complicated services running. The most traffic comes from file transfers, web access, and email. There is little to no risk of employee-related attack. The sensible way to monitor this network is to place the IDS to monitor inside the firewall at the point of access to the network. This will crop up potential issues that have passed through the firewall.
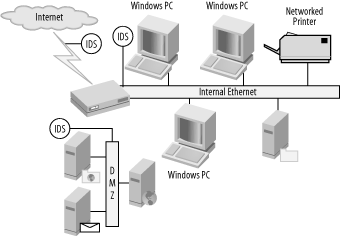
Medium-sized business
In a medium-sized network, there are several more places that are worth monitoring (see Figure 1-13). There should still be an IDS on the inner side of your firewall. In addition, you should monitor the demilitarized zone (DMZ) off your firewall. This area is the most at risk, as it is the most exposed. Often (and unadvisedly) machines in the DMZ have interfaces to the internal network. Any breach of these machines effectively circumvents any protection to the internal network provided by the firewall. This is where the external functions of the network usually lay, such as mail, the Web, FTP, and other servers that need to be accessible to the world at large. Within the network, as the size of the organization grows, it becomes prudent to monitor for inappropriate activity from within. Monitoring the use of key services, such as databases, and checking for abuse, will not only prevent an internal problem, but also back up the effectiveness of the IDS inside the firewall.
Larger organizations
As the size of the organization grows, so do the number of ways into and out of the network (see Figure 1-14). Large networks may have more servers running on the DMZ, multiple Internet connections for redundancy, wireless access points, and remote users with VPNs—all adding up to a huge amount of traffic and potential problems. IDS should be strategically placed so you can monitor as many of these systems as possible, if not all of them. You should place the IDS snesors on significant points in the network such as servers, mainframes, and routers. All in all, if breaking something would result in a problem for your business, you should be looking at it.
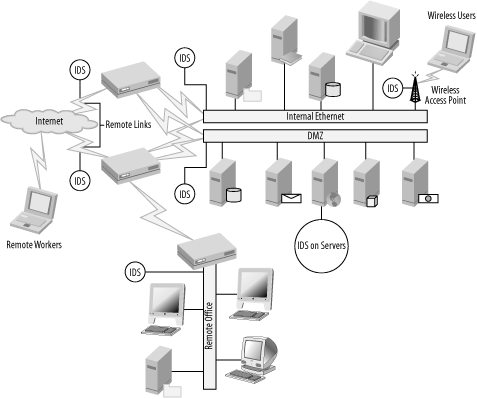
You may consider all this to be quite extreme, but it isn’t quite as bad as it seems. If you consider any medium to large organization, a significant number of the resources listed previously are in the same room. Linux-compatible gigabit Ethernet cards are available with up to six ports. Coupled with machines that have space for three or four PCI cards, you could have as many as 24 Ethernet ports (plus expansion modules can convert one PCI slot to 13 using an external enclosure). Using a single machine running multiple instances of Snort, you could do all of this easily in one room.
See Also
Caswell, Brian, et al. “Chapter 2.5: Using Snort on Your Network.” In Snort 2.0 Intrusion Detection. Rockland, MA: Syngress, 2003.
1.16. Capturing and Viewing Packets
Solution
To see the TCP and IP packet header information, use the -v option:
C:\Snort\bin>snort -vTo see application-layer headers, use the -d option. To see the data link-layer headers, use the -e option. You can use all three command-line options together:
C:\Snort\bin>snort -devDiscussion
Snort is an efficient and effective packet sniffer for capturing and viewing network traffic. The output follows a typical sniffer text format like TCPDump or Ethereal.
You can use Snort to view network traffic by providing the necessary command-line options. The simplest way is to provide the -v (verbose) command-line option. However, this shows you only the TCP and IP packet header information, as in the following:
C:\Snort\bin>snort -v
Running in packet dump mode
Log directory = log

Initializing Network Interface \Device\NPF_
{572FF0E6-9A1E-42B5-A2AF-A5A307B613EF}

        --=  = Initializing Snort =  =--
Initializing Output Plugins!
Decoding Ethernet on interface \Device\NPF_
{572FF0E6-9A1E-42B5-A2AF-A5A307B613EF}

        --=  = Initialization Complete =  =--

-*> Snort! <*-
Version 2.2.0-ODBC-MySQL-FlexRESP-WIN32 (Build 30)
By Martin Roesch (roesch@sourcefire.com, www.snort.org)
1.7-WIN32 Port By Michael Davis (mike@datanerds.net,
www.datanerds.net/~mike)
1.8 - 2.x WIN32 Port By Chris Reid
(chris.reid@codecraftconsultants.com)

09/14-11:16:50.213014 192.168.100.70:1051 -> 216.155.193.130:5050
TCP TTL:128 TOS:0x0 ID:39709 IpLen:20 DgmLen:60 DF
***AP*** Seq: 0xDA7FD499  Ack: 0x17EA2F6B  Win: 0x4121  TcpLen: 20
=+=+=+=+=+=+=+=+=+=+=+=+=+=+=+=+=+=+=+=+=+=+=+=+=+=+=+=+=+=+=+=+=+=+

09/14-11:16:50.231051 192.168.100.70:1052 -> 205.188.5.252:5190
TCP TTL:128 TOS:0x0 ID:39710 IpLen:20 DgmLen:46 DF
***AP*** Seq: 0xDA819839  Ack: 0xFC65B33A  Win: 0x422F  TcpLen: 20
=+=+=+=+=+=+=+=+=+=+=+=+=+=+=+=+=+=+=+=+=+=+=+=+=+=+=+=+=+=+=+=+=+=+
A better way to view network traffic uses the -d and -e command-line options along with the -v option. The -d option provides application-layer information and all network-layer headers (TCP, UDP, and ICMP). The -e option provides the data link-layer header information.
C:\Snort\bin>snort -dev
Running in packet dump mode
Log directory = log

Initializing Network Interface \Device\NPF_
{572FF0E6-9A1E-42B5-A2AF-A5A307B613EF}

        --=  = Initializing Snort =  =--
Initializing Output Plugins!
Decoding Ethernet on interface \Device\NPF_
{572FF0E6-9A1E-42B5-A2AF-A5A307B613EF}

        --=  = Initialization Complete =  =--

-*> Snort! <*-
Version 2.2.0-ODBC-MySQL-FlexRESP-WIN32 (Build 30)
By Martin Roesch (roesch@sourcefire.com, www.snort.org)
1.7-WIN32 Port By Michael Davis (mike@datanerds.net,
www.datanerds.net/~mike)
1.8 - 2.x WIN32 Port By Chris Reid
(chris.reid@codecraftconsultants.com)

09/14-11:31:11.087457 0:C:F1:11:D:66 -> 0:5:5D:ED:3B:C6 type:0x800
len:0x1B3
192.168.100.70:2381 -> 64.233.161.104:80 TCP TTL:128 TOS:0x0
ID:42992 IpLen:20 DgmLen:421 DF
***AP*** Seq: 0x65EF083A  Ack: 0xF49E57A  Win: 0x3EFC  TcpLen: 20
47 45 54 20 2F 69 6D 61 67 65 73 2F 6C 6F 67 6F  GET /images/logo
2E 67 69 66 20 48 54 54 50 2F 31 2E 31 0D 0A 41  .gif HTTP/1.1..A
63 63 65 70 74 3A 20 2A 2F 2A 0D 0A 52 65 66 65  ccept: */*..Refe
72 65 72 3A 20 68 74 74 70 3A 2F 2F 77 77 77 2E  rer: http://www.
67 6F 6F 67 6C 65 2E 63 6F 6D 2F 0D 0A 41 63 63  google.com/..Acc
65 70 74 2D 4C 61 6E 67 75 61 67 65 3A 20 65 6E  ept-Language: en
2D 75 73 0D 0A 41 63 63 65 70 74 2D 45 6E 63 6F  -us..Accept-Enco
64 69 6E 67 3A 20 67 7A 69 70 2C 20 64 65 66 6C  ding: gzip, defl
61 74 65 0D 0A 49 66 2D 4D 6F 64 69 66 69 65 64  ate..If-Modified
2D 53 69 6E 63 65 3A 20 4D 6F 6E 2C 20 32 32 20  -Since: Mon, 22
4D 61 72 20 32 30 30 34 20 32 33 3A 30 34 3A 32  Mar 2004 23:04:2
33 20 47 4D 54 0D 0A 55 73 65 72 2D 41 67 65 6E  3 GMT..User-Agen
74 3A 20 4D 6F 7A 69 6C 6C 61 2F 34 2E 30 20 28  t: Mozilla/4.0 (
63 6F 6D 70 61 74 69 62 6C 65 3B 20 4D 53 49 45  compatible; MSIE
20 36 2E 30 3B 20 57 69 6E 64 6F 77 73 20 4E 54   6.0; Windows NT
20 35 2E 30 29 0D 0A 48 6F 73 74 3A 20 77 77 77   5.0)..Host: www
2E 67 6F 6F 67 6C 65 2E 63 6F 6D 0D 0A 43 6F 6E  .google.com..Con
6E 65 63 74 69 6F 6E 3A 20 4B 65 65 70 2D 41 6C  nection: Keep-Al
69 76 65 0D 0A 43 6F 6F 6B 69 65 3A 20 50 52 45  ive..Cookie: PRE
46 3D 49 44 3D 31 63 36 37 35 33 39 62 31 35 61  F=ID=1c67539b15a
37 31 63 33 64 3A 54 4D 3D 31 30 37 38 38 34 39  71c3d:TM=1078849
32 34 30 3A 4C 4D 3D 31 30 37 38 38 34 39 34 36  240:LM=107884946
39 3A 54 42 3D 32 3A 53 3D 38 42 52 37 43 51 33  9:TB=2:S=8BR7CQ3
51 64 6C 45 78 51 68 79 6F 0D 0A 0D 0A           QdlExQhyo....

=+=+=+=+=+=+=+=+=+=+=+=+=+=+=+=+=+=+=+=+=+=+=+=+=+=+=+=+=+=+=+=+=+=+

09/14-11:31:11.111213 0:5:5D:ED:3B:C6 -> 0:C:F1:11:D:66 type:0x800
len:0xB5
64.233.161.104:80 -> 192.168.100.70:2381 TCP TTL:50 TOS:0x10
ID:19943 IpLen:20 DgmLen:167
***AP*** Seq: 0xF49E57A  Ack: 0x65EF09B7  Win: 0x4551  TcpLen: 20
48 54 54 50 2F 31 2E 31 20 33 30 34 20 4E 6F 74  HTTP/1.1 304 Not
20 4D 6F 64 69 66 69 65 64 0D 0A 43 6F 6E 74 65   Modified..Conte
6E 74 2D 54 79 70 65 3A 20 74 65 78 74 2F 68 74  nt-Type: text/ht
6D 6C 0D 0A 53 65 72 76 65 72 3A 20 47 57 53 2F  ml..Server: GWS/
32 2E 31 0D 0A 43 6F 6E 74 65 6E 74 2D 4C 65 6E  2.1..Content-Len
67 74 68 3A 20 30 0D 0A 44 61 74 65 3A 20 46 72  gth: 0..Date: Fr
69 2C 20 31 34 20 4D 61 79 20 32 30 30 34 20 31  i, 14 May 2004 1
35 3A 33 30 3A 33 34 20 47 4D 54 0D 0A 0D 0A     5:30:34 GMT....

=+=+=+=+=+=+=+=+=+=+=+=+=+=+=+=+=+=+=+=+=+=+=+=+=+=+=+=+=+=+=+=+=+=+
Once you are done viewing the packets displayed on your screen, you can type Ctrl-C to exit. You are provided with a summary of the packets that were collected. This includes a breakdown by protocol and actions.
=  =  =  =  =  =  =  =  =  =  =  =  =  =  =  =  =  =  =  =  =  =  =  =
Snort received 24 packets
    Analyzed: 24(100.000%)
    Dropped: 0(0.000%)
=  =  =  =  =  =  =  =  =  =  =  =  =  =  =  =  =  =  =  =  =  =  =  =
Breakdown by protocol:
    TCP: 20         (83.333%)
    UDP: 1          (4.167%)
   ICMP: 0          (0.000%)
    ARP: 3          (12.500%)
  EAPOL: 0          (0.000%)
   IPv6: 0          (0.000%)
    IPX: 0          (0.000%)
  OTHER: 0          (0.000%)
DISCARD: 0          (0.000%)
=  =  =  =  =  =  =  =  =  =  =  =  =  =  =  =  =  =  =  =  =  =  =  =
Action Stats:
ALERTS: 0
LOGGED: 0
PASSED: 0
=  =  =  =  =  =  =  =  =  =  =  =  =  =  =  =  =  =  =  =  =  =  =  =
pcap_loop: read error: PacketReceivePacket failed
Run time for packet processing was 36.766000 seconds
One word of caution: when capturing and viewing packets in real time, this can cause significant performance degradation of your system.
See Also
1.17. Logging Packets That Snort Captures
Solution
To log network traffic to a set of files and directories, use
the -l <directory> option:
C:\Snort\bin>snort -de -l c:\snort\logTo log network traffic relative to your home network, use the -h
<network> option:
C:\Snort\bin>snort -l c:\snort\log -h 192.168.100.0/24To log network traffic in binary format, use the -b option in conjunction with the -l option:
C:\Snort\bin>snort -l c:\snort\log -bTo specify a name for the binary logfile, use the -L
<name> option:
C:\Snort\bin>snort -l c:\snort\log -L testDiscussion
Snort can be used to log network traffic in a variety of ways.
By providing the necessary command-line options, you can log the data
to files sorted by directory or to a binary file. Network traffic can
be logged to a set of files and directories by using the -l
<directory> command-line option. You
must provide the name of the directory to which you wish to log the
data. For our example, we have used the default log directory
C:\Snort\log. If you wish to use
a different log directory, make sure it exists first, or Snort exits
with an error.
C:\Snort\bin>snort -de -l c:\snort\log
Running in packet logging mode
Log directory = c:\snort\log

Initializing Network Interface \Device\NPF_
{572FF0E6-9A1E-42B5-A2AF-A5A307B613EF}

        --=  = Initializing Snort =  =--
Initializing Output Plugins!
Decoding Ethernet on interface \Device\NPF_
{572FF0E6-9A1E-42B5-A2AF-A5A307B613EF}

        --=  = Initialization Complete =  =--

-*> Snort! <*-
Version 2.2.0-ODBC-MySQL-FlexRESP-WIN32 (Build 30)
By Martin Roesch (roesch@sourcefire.com, www.snort.org)
1.7-WIN32 Port By Michael Davis (mike@datanerds.net,
www.datanerds.net/~mike)
1.8 - 2.x WIN32 Port By Chris Reid
(chris.reid@codecraftconsultants.com)
You won’t see any data output on the screen when you are logging in this format, unless you also use the -v command-line option. Once you are through capturing data, you may exit the program by typing Ctrl-C. This displays the summary and statistics of the packets that have been captured. Change to the log directory and you’ll notice that one or more folders have been created and named by IP address. These folders contain text files of the logged data.
C:\Snort\log>dir
 Volume in drive C has no label.
 Volume Serial Number is 643C-4C37

 Directory of C:\Snort\log

09/14/2004  12:09p      <DIR>          .
09/14/2004  12:09p      <DIR>          ..
09/14/2004  12:13p      <DIR>          192.168.100.70
09/14/2004  12:13p      <DIR>          205.188.5.252
               0 File(s)              0 bytes
               4 Dir(s)  22,730,764,288 bytes free
Snort creates the logfiles within these directories according to session. The source and destination ports are part of the titles. They can be viewed at the command line or by using your favorite text viewer, such as Notepad.exe.
C:\Snort\log>cd 192.168.100.70C:\Snort\log\192.168.100.70>type TCP_3255-80.ids09/14-15:30:13.461210 0:C:F1:11:D:66 -> 0:5:5D:ED:3B:C6 type:0x800 len:0x3E 192.168.100.70:3255 -> 64.233.161.104:80 TCP TTL:128 TOS:0x0 ID:14364 IpLen:20 DgmLen:48 DF ******S* Seq: 0x3DE17A13 Ack: 0x0 Win: 0x4000 TcpLen: 28 TCP Options (4) => MSS: 1460 NOP NOP SackOK =+=+=+=+=+=+=+=+=+=+=+=+=+=+=+=+=+=+=+=+=+=+=+=+=+=+=+=+=+=+=+=+=+=+ 09/14-15:30:13.480385 0:5:5D:ED:3B:C6 -> 0:C:F1:11:D:66 type:0x800 len:0x3C 64.233.161.104:80 -> 192.168.100.70:3255 TCP TTL:242 TOS:0x0 ID:22049 IpLen:20 DgmLen:44 ***A**S* Seq: 0xEE155CFA Ack: 0x3DE17A14 Win: 0x1FFE TcpLen: 24 TCP Options (1) => MSS: 1460 =+=+=+=+=+=+=+=+=+=+=+=+=+=+=+=+=+=+=+=+=+=+=+=+=+=+=+=+=+=+=+=+=+=+ 09/14-15:30:13.480407 0:C:F1:11:D:66 -> 0:5:5D:ED:3B:C6 type:0x800 len:0x36 192.168.100.70:3255 -> 64.233.161.104:80 TCP TTL:128 TOS:0x0 ID:14366 IpLen:20 DgmLen:40 DF ***A**** Seq: 0x3DE17A14 Ack: 0xEE155CFB Win: 0x4470 TcpLen: 20 =+=+=+=+=+=+=+=+=+=+=+=+=+=+=+=+=+=+=+=+=+=+=+=+=+=+=+=+=+=+=+=+=+=+ 09/14-15:30:13.480853 0:C:F1:11:D:66 -> 0:5:5D:ED:3B:C6 type:0x800 len:0x151 192.168.100.70:3255 -> 64.233.161.104:80 TCP TTL:128 TOS:0x0 ID:14367 IpLen:20 DgmLen:323 DF ***AP*** Seq: 0x3DE17A14 Ack: 0xEE155CFB Win: 0x4470 TcpLen: 20 47 45 54 20 2F 20 48 54 54 50 2F 31 2E 31 0D 0A GET / HTTP/1.1.. 41 63 63 65 70 74 3A 20 2A 2F 2A 0D 0A 41 63 63 Accept: */*..Acc 65 70 74 2D 4C 61 6E 67 75 61 67 65 3A 20 65 6E ept-Language: en 2D 75 73 0D 0A 41 63 63 65 70 74 2D 45 6E 63 6F -us..Accept-Enco 64 69 6E 67 3A 20 67 7A 69 70 2C 20 64 65 66 6C ding: gzip, defl 61 74 65 0D 0A 55 73 65 72 2D 41 67 65 6E 74 3A ate..User-Agent: 20 4D 6F 7A 69 6C 6C 61 2F 34 2E 30 20 28 63 6F Mozilla/4.0 (co 6D 70 61 74 69 62 6C 65 3B 20 4D 53 49 45 20 36 mpatible; MSIE 6 2E 30 3B 20 57 69 6E 64 6F 77 73 20 4E 54 20 35 .0; Windows NT 5 2E 30 29 0D 0A 48 6F 73 74 3A 20 77 77 77 2E 67 .0)..Host: www.g 6F 6F 67 6C 65 2E 63 6F 6D 0D 0A 43 6F 6E 6E 65 oogle.com..Conne 63 74 69 6F 6E 3A 20 4B 65 65 70 2D 41 6C 69 76 ction: Keep-Aliv 65 0D 0A 43 6F 6F 6B 69 65 3A 20 50 52 45 46 3D e..Cookie: PREF= 49 44 3D 31 63 36 37 35 33 39 62 31 35 61 37 31 ID=1c67539b15a71 63 33 64 3A 54 4D 3D 31 30 37 38 38 34 39 32 34 c3d:TM=107884924 30 3A 4C 4D 3D 31 30 37 38 38 34 39 34 36 39 3A 0:LM=1078849469: 54 42 3D 32 3A 53 3D 38 42 52 37 43 51 33 51 64 TB=2:S=8BR7CQ3Qd 6C 45 78 51 68 79 6F 0D 0A 0D 0A lExQhyo.... =+=+=+=+=+=+=+=+=+=+=+=+=+=+=+=+=+=+=+=+=+=+=+=+=+=+=+=+=+=+=+=+=+=+
You can use the -h option to make sure your files are logged
relative to the home network. Snort logs packets from both the local
and remote computer IP addresses as directory names, depending on who
initiated the connection. You can use the -h
<network> command-line option to log
relative to the home network. This way, all directories are named
after the remote computer IP addresses. The following command
specifies that 192.168.100.0/24 is the home network.
C:\Snort\bin>snort -l c:\snort\log -h 192.168.100.0/24Another option, and a much faster one, is to log the data in binary log format. Other sniffers such as TCPDump and Ethereal can read data in this type of format. However, it is not readable by a text viewer. To log in binary format, you must use the -b command-line option in conjunction with -l. The -b option specifies that you wish to log the packets in binary format. You won’t see any data output on the screen when you are logging in binary format, unless you also use the -v command-line option. You don’t need to specify the -d or -e command-line options, because by default, the binary option logs the entire packet.
C:\Snort\bin>snort -l c:\snort\log -bThis command creates a file called snort.log.1084553605 in the C:\Snort\log directory. You can specify a
name for the logfile by using the -L
<name> option. When using the -L
option, you do not need to specify the -b option, because it
automatically logs in binary format.
C:\Snort\bin>snort -l c:\snort\log -L testThis command creates a file called test.1084554709 in the C:\Snort\log directory.
Keep in mind that logging network traffic consumes hard drive space. This is relative to how much traffic crosses the segment you are monitoring. Logging traffic can also create a heavy load on the CPU of the Snort system. Logging traffic in binary mode is great for high-speed networks and compact storage. Binary files can then be reviewed later using Snort, TCPDump, Ethereal, or other binary log compatible programs.
A common reason for using Snort is to capture and log only certain transactions—for instance, when a purchase is made over the web site. This is done in compliance with various laws, and is required for repudiation of online purchases and/or mouse-click agreements.
1.18. Running Snort to Detect Intrusions
Solution
To log traffic using the rules files in snort.conf, use the -c option:
C:\Snort\bin>snort -de -l c:\snort\log -c c:\snort\etc\snort.confTo log traffic with less output using fast alert mode, use the -A fast option:
C:\Snort\bin>snort -de -l c:\snort\log -c c:\snort\etc\snort.conf-A fast
Discussion
Snort can log certain subsets of network traffic so you don’t have to log every single packet. This is done by using the Snort rules file snort.conf. Snort inspects each packet and applies a set of rules to decide what action to take. For example, the packet may be ignored and passed, or logged, or an alert may be generated.
C:\Snort\bin>snort -de -l c:\snort\log -c c:\snort\etc\snort.confSnort displays information on the screen as it initializes the preprocessors. The default settings are used when no configurations or arguments are supplied. Packets that trigger a rule in the snort.conf file are logged in the C:\Snort\log directory under the source IP address directory, and also in the alert.ids file, such as the following:
[**] [1:1411:3] SNMP public access udp [**]
[Classification: Attempted Information Leak] [Priority: 2]
09/14-15:43:49.265790 0:C:F1:11:D:66 -> 0:5:5D:ED:3B:C6 type:0x800
len:0x77
192.168.100.70:1025 -> 192.168.130.36:161 UDP TTL:128 TOS:0x0
ID:14800 IpLen:20 DgmLen:105
Len: 77
[Xref => http://cve.mitre.org/cgi-bin/cvename.cgi?name=CAN-2002-0013]
[Xref => http://cve.mitre.org/cgi-bin/cvename.cgi?name=CAN-2002-0012]
[Xref => http://cve.mitre.org/cgi-bin/cvename.cgi?name=CAN-1999-0517]
By default, Snort logs in decoded ASCII format and uses full alerts. A full alert includes the alert message and the full packet header. Snort also includes other alert output options and logging methods. To produce less output, you can use the fast alert mode with the -A fast command-line option.
C:\Snort\bin>snort -de -l c:\snort\log -c c:\snort\etc\snort.conf-A fast
The output looks like the following:
09/14-16:15:09.058512  [**] [1:1411:3] SNMP public access udp [**]
[Classification: Attempted Information Leak] [Priority: 2] {UDP} 192.168.100.70:1025 ->
192.168.130.36:161
Using Snort as a network intrusion detection system (NIDS) takes full advantage of its features and capabilities. The snort.conf file comes configured with default settings and rules. However, it is beneficial to “tune” the settings and rules to your environment. This helps alleviate both false positives and false negatives, and creates a faster, more efficient IDS. One thing to note is that command-line logging options override any options specified in the configuration files.
See Also
1.19. Reading a Saved Capture File
Problem
You have a binary capture file that you want to read. For example, a file that was captured with Snort using the binary option, TCPDump, or Ethereal.
Solution
Use the -r <filename> option to
read a capture file, whether from Snort, TCPDump, Ethereal, or any
other program that creates a libpcap format file:
C:\Snort\bin>snort -dv -r c:\snort\log\snort.log.1085148255Discussion
Snort can read capture files that have been saved using the
libpcap format. Snort reads its own saved capture files, as well as
binary capture files from sniffer programs, such as TCPDump and
Ethereal. Snort reads capture files by using the -r
<filename> command-line option, which
puts it into playback mode. You must specify the logfile path and name
as a parameter to the -r option. The following is an example of
reading the binary file snort.log.1085148255:
C:\Snort\bin>snort -dv -r c:\snort\log\snort.log.1085148255The following command reads the binary file snort.log.1085148255 and logs all traffic in ASCII format in the appropriate directories:
C:\Snort\bin>snort -r c:\snort\log\snort.log.1085148255 -lc:\snort\log
The following command reads the binary file snort.log.108514825 and processes the traffic according to the parameters in the snort.conf file. It looks for any traffic that matches the signatures in the rules files:
C:\Snort\bin>snort -r c:\snort\log\snort.log.1085148255 -lc:\snort\log -c c:\snort\etc\snort.conf
The following command reads the binary file snort.log.1085148255 and displays only the TCP traffic to the screen:
C:\Snort\bin>snort -dv -r c:\snort\log\snort.log.1085148255 tcpWhen processing capture files, Snort can be used in any of its three modes; sniffer, packet logger, and NIDS. The first example displays the logfile packets to the screen. You can also choose to log them to ASCII files or run the file through the rules engine. You can also use the command-line filters to look for certain packets as you process the logfile, such as TCP packets.
1.20. Running Snort as a Linux Daemon
Problem
You run a Linux machine and you want to run Snort in the background, starting up at boot time.
Solution
Snort provides a daemon
mode to allow it to run in the background. This is activated by using
the -D switch.
[root@frodo rules]#snort -D -c /etc/snort/snort.conf -l/var/log/snort[root@frodo rules]#ps -ef | grep snortroot 10738 1 0 11:34 ? 00:00:00 snort -D -c /etc/snort/snort.conf -l /var/log/snortDiscussion
You’ll probably want to run Snort like this: starting at boot and running in the background. If you want to start Snort earlier in the boot sequence, consult your system documentation as to how to edit the boot scripts.
The exact methods for starting Snort at boot vary slightly from distribution to distribution. There are likely to be some slight differences between the exact methods of setting this up on each different Linux distribution. The simplest method, if your system supports it, is to modify the /etc/rc.d/rc.local script. This script runs after all the other init scripts on the system, so your system will be unmonitored between the start of network services and the start of Snort. Add a line similar to the following to your rc.local script:
/usr/local/bin/snort -D -c /etc/snort/snort.conf -l /var/log/snort
You must verify the locations that are relevant to your particular setup. There is an example Snort startup script in /snort-2.x.x/contrib./S99snort.
Running Snort as a daemon is useful only if you are getting good notification from Snort about potential intrusions; otherwise, you are effectively ignoring it. You should refer to the other recipes regarding alerting.
See Also
Gerg, Christopher and Kerry J. Cox (eds.). “Chapter 3.3: Command Line Options.” In Managing Security with Snort and IDS Tools. Sebastopol, CA: O’Reilly, 2004.
1.21. Running Snort as a Windows Service
Problem
You run a Windows machine, and you want to start Snort at boot time and run it as a Windows service.
Solution
To install Snort as a service, enter:
snort /SERVICE /INSTALL
To uninstall Snort as a service, enter:
snort /SERVICE /UNINSTALL
To see the state of Snort as a service, enter:
snort /SERVICE /SHOW
Discussion
Services tend to be used for core operating system functionality such as printing, logging, and so on. Running Snort as a service allows for automated starting and, just as importantly, monitoring and restarting in case of failure. It isn’t much good having an IDS if it isn’t on!
Snort includes three switches to control its use as a service:
/SERVICE /INSTALL
/SERIVCE /UNINSTALL
/SERVICE /SHOW
Go through the normal Windows installation and configuration.
Then, in the Snort directory, type snort
/SERVICE /INSTALL, followed by your usual parameters. For
example:
snort /SERVICE /INSTALL -de -c c:\snort\etc\snort.conf -l c:\snort\log -i1
You should get a response similar to:
[SNORT_SERVICE] Attempting to install the Snort service.
[SNORT_SERVICE] The full path to the Snort binary appears to be:
   C:\Snort\bin\snort /SERVICE
[SNORT_SERVICE] Successfully added registry keys to:
   \HKEY_LOCAL_MACHINE\SOFTWARE\Snort\
[SNORT_SERVICE] Successfully added the Snort service to the Services
database.
This installs Snort as a service; however, it doesn’t set the service to Automatic so that it starts on boot, and it doesn’t start the service either. You need to do both manually through the Windows Service manager. This is accessed through the Services shortcut under Administrative Tools in the Windows Control Panel. Scroll down the services list until you get to Snort, right-click, and then select Properties. Change the Startup type: from Manual to Automatic to get it to restart at boot, and click on the Start button under Service status to start it up immediately.
To check the status of a Snort service, and to see which options
it is being passed, you need to make use of the /SHOW switch.
C:\Snort\bin>snort /SERVICE /SHOWwhich should produce the following output:
Snort is currently configured to run as a Windows service using the
Following command-line parameters:
   -de -c c:\Snort\etc\snort.conf -l c:\snort\log -i1
And if you decide that you no longer wish for Snort to run as a
service, you can remove it by using the /UNINSTALL switch.
C:\Snort\bin>snort /SERVICE /UNINSTALLWhich gives the following output:
[SNORT_SERVICE] Attempting to uninstall the Snort service.
[SNORT_SERVICE] Successfully removed registry keys from:
   \HKEY_LOCAL_MACHINE\SOFTWARE\Snort\
[SNORT_SERVICE] Successfully removed the Snort service from the
Services database.
At this point, you should reboot to ensure that the service is properly removed.
To use the automated restarting features of services, you need to change the options that are under the Recovery tab in the Service Properties window that you managed to open earlier by right-clicking on the service. Here you can specify the action to be taken on the first, second, and subsequent failures of the service.
For further information on this, you should read the documentation for your version of Windows.
See Also
1.22. Capturing Without Putting the Interface into Promiscuous Mode
Problem
You want to capture and log packets without putting the interface into promiscuous mode. For example, you want to capture and log packets only for the system on which Snort is installed.
Solution
To disable promiscuous mode sniffing, use the -p command-line option:
C:\Snort\bin>snort -dev -pDiscussion
By default, Snort captures packets in promiscuous mode, meaning it logs all traffic on the network to which it is attached. Disabling promiscuous mode causes Snort to monitor only the traffic that is going to and from your Snort system. You can use the -p command-line option in any of Snort’s modes.
The following command captures packets in packet dump mode:
C:\Snort\bin>snort -dev -pThe following command captures packets in packet logger mode:
C:\Snort\bin>snort -de -l c:\snort\log -pThe following command captures packets in NIDS mode:
C:\Snort\bin>snort -de -l c:\snort\log -c c:\snort\etc\snort.conf -pThese commands capture only the packets heading to or from the Snort system for each of the Snort modes.
1.23. Reloading Snort Settings
Solution
Like many other Unix programs, sending a SIGHUP to Snort will
cause it to reread all its configuration files. You need to find out
the process ID of Snort and then send it a SIGHUP using the kill command.
[root@frodo rules]#ps -ef | grep snortroot 10738 1 0 11:34 ? 00:00:00 snort -D -c /etc/snort/snort.conf -l /var/log/snort [root@frodo rules]#kill -1 10738
Discussion
If you are running Snort as a daemon as discussed in “Running Snort as a Linux Daemon,” you need to start Snort with the full path to the executable so that it starts the right binary. Otherwise, someone could insert a compromised Snort binary in the local directory, which would execute instead.
You can, of course, reload all the Snort tables by killing the Snort process completely and starting it up again, although this will take much longer.
See Also
Snort Users Manual
1.24. Debugging Snort Rules
Solution
Isolate your rules, and test them one by one in a simple file by using the following syntax:
snort -i eth0 -n 1 -c filename
Discussion
This allows you to test each rule for correctness. Each rule should parse properly; Snort will exit after it receives one packet. Unfortunately, this only checks that the rule is correctly formed. It doesn’t ensure that your logic is right. If a rule isn’t doing what you are expecting it to, take it back to first principals:
Are you carrying out the right action (Pass, Log, Alert, Dynamic or Activate)?
Are you looking at the right protocol (TCP or UDP)?
Are you using only one protocol per rule?
Are you looking at the right source and destination addresses?
Are you looking at the right source and destination ports?
Is your rule running in the right direction (
->,<-, or<>)?Are you looking for the right thing?
Are you suppressing the rule anywhere?
Sometimes it might be wise to start from a clean sheet. The most persistent errors are the ones that you look over time and time again until you begin again, at which point they become obvious.
See Also
Snort Users Manual
1.25. Building a Distributed IDS (Plain Text)
Problem
You have to protect an organization’s network infrastructure. How do you protect it with your Snort sensors at remote locations or even within a single building? As you will see in other chapters, Snort data can be displayed in several formats, such as web (ACID) and Windows applications (SnortCenter). How do you get the data from multiple sensors into one of these formats for analysis?
Solution
The simple solution is to use Snort’s ability to log to a database. The function of logging to a database solves a couple of organization problems with IDS data, such as:
- Storage of network IDS data
A database can store about two to four million full events in a MySQL database, for example.
- Scalability
The database and events can grow from a small tower system to a complete storage array, if your organization can afford it.
We’re using the database output postprocessor of Snort for this functionality. This example uses MySQL just because of its popularity and wealth of documentation on setup. Then we are going to be setting up Snort to log to a web frontend of ACID.
In addition, feel free to edit your MySQL databases and tweak your IDS databases, as MySQL has an entirely GPL licensing system. For clarification, check the following: http://www.mysql.com/company/legal/licensing/opensource-license.html.
Discussion
This example uses MySQL for the database and modifies the Snort source code to enable native MySQL connections. However, there are other database formats supported by Snort, such as PostgreSQL, Oracle, and even Microsoft SQL.
All the database systems have their differences, and some may be easier or harder for people to use and install. However, before building your database backend, consider its size and support. Consider the size, because you need to gauge how large your database is likely to get. Two to four million records is the max for MySQL, while several hundred million is the Oracle limit. Consider support, because you want to choose a database for your core IDS backend that’s familiar to you and to other maintainers. Hardware and prices are another important consideration before you go call Oracle and Dell for your backends.
Client side
First, compile Snort on the sensor with database support.
./configure --with-mysql --your-other-options
Once built on the sensor, you need to configure the sensor’s snort.conf file. In this example, the following line goes in your snort.conf file on each sensor.
output database:  log, mysql, sensor_name=sensor_dmz dbname=aciddb
user=snort_acid password=acidrocks host=10.0.0.2
The use of the keyword log
versus alert is the difference
between having only the signature events going into your database
versus all events—even those that use only the log facility.
Server side
Build MySQL and Apache if you are going to display your events to a web frontend. The ACID frontend can be seen in almost every IDS shop on some workstation or large screen.
Compile MySQL with the following options if you are building from source code:
./configure  --with-mysqld-user=<default of "mysql">
--with-libwrap=<PATH/to/tcpwrappers If you want host restrictions>
--make
make install
The following is the Apache/SSL/PHP source build (some dependencies may need to be satisfied before the build will succeed):
#APACHE
./configure --prefix=/my/base/dir --enable-so --enable-ssl
--with-ssl=/path/to/ssl
#PHP (NEEDED FOR ACID TO WORK)
./configure --prefix=/path/to/apache/php
--with-apxs2=/path/to/apache/bin
--with-config-file-path=/path/to/apache/php --enable-sockets
--with-sockets
--with-mysql=/path/to/mysql --with-zlib --with-gd
We are going to skip the rest of the Apache setup for our database setup. The database now needs to be set up to use connections from the sensors. Let’s start and create our database to use for Snort with its user.
If you didn’t already create a user for MySQL to use, do so by using the following:
groupadd mysql
useradd -g mysql mysql
Create the default database from the MySQL source directory:
scripts/mysql_install_db
Change ownership of the database directory to the mysql user:
chown -R mysql /usr/local/var
chgrp -R mysql /usr/local/var
Copy the my-medium.cnf file out of the MySQL source directory to /usr/local:
cp support-files/my-medium.cnf /usr/local/var/my.cnf
Start the MySQL server in the background:
/usr/local/bin/mysqld_safe --user=mysql &
Log in to mysql:
/usr/local/bin/mysql
A good security practice is to require a password for the root MySQL user:
mysql>UPDATE user SET Password=PASSWORD('my_pass') WHEREusers='root';
Apply the changes:
mysql> FLUSH PRIVILEGES;Next, create the ACID database:
mysql>CREATE DATABASE<name>;
Create a user account for our sensors to use (unique for our sensors for the paranoid):
mysql>GRANT UPDATE,SELECT,INSERT on<name>.* TO sensoracid@<ip>IDENTIFIED BY 'sensorpassword';
Create a separate account for your web interface to use. This one has all privileges to help prune the database:
mysql>GRANT ALL PRIVILEGES on<name>.* TOwebfront@localhostIDENTIFIED BY 'webfrontpass';
Finally, restart the MySQL server with the new changes.
For more database tweaking, check out MySQL Reference Manual (O’Reilly) for more detailed MySQL information.
One word about the database output plug-in: as your sensors
grow, you’ll have geo-location considerations. Take a look at the
output line from the snort.conf file. There is a keyword
that’s not normally used: sensor_name. If you don’t use this keyword
in your conf file, when the sensor changes its hostname or can’t
find its DNS name, the sensor and its data appear in the database as
a new sensor. This can cause quite a bit of confusion on a large
network like an ISP.
See Also
Other database Snort implementations
Online (http://www.snort.org) resources for database options and changes
1.26. Building a Distributed IDS (Encrypted)
Problem
You have to protect an organization’s network infrastructure. How do you protect it with your Snort sensors at remote locations or even within a single building? As you will see in other chapters, Snort data can be displayed in several formats, such as web (ACID) and windows applications (SnortCenter). How do you get the data from multiple sensors into one of these formats for analysis in an encrypted, secure format?
Solution
The simple solution would be to use Snort’s ability to log to a database. The function of logging to a database solves a couple of organization problems with IDS data, such as:
- Storage of network IDS data
A database can store about two to four million full events in a MySQL database, for example.
- Scalability
The database and events can grow from a small tower system to a complete storage array, if your organization can afford it.
Client side
We’re using the database output postprocessor of Snort for this functionality. This example uses MySQL because of its popularity and the wealth of documentation on its setup.
Encryption only
If you are going to build Snort to communicate with an SSL
native MySQL database, you will need to modify the Snort source code
to get SSL native support. There is a one-line edit to the code to
make this change. Edit snort-
<version> /src/output-plugins/spo_database.c and
change the following line:
"if(mysql_real_connect(data->m_sock, data->shared->host, data->user,
data->password, data->shared->dbname, x, NULL, 0) =  = 0)"
to:
"if(mysql_real_connect(data->m_sock, data->shared->host, data->user,
data->password, data->shared->dbname, x, NULL, CLIENT_SSL) =  = 0)"
Then just compile Snort with MySQL support and any other options you choose.
Next, you’ll need to get a source build of MySQL, then compile the client only with SSL support.
./configure --without-server --with-vio --with-openssl=[dir]
 --with-openssl-libs=[dir] --with-openssl-includes=[dir]
Once the MySQL client is rebuilt on your sensor, compile Snort
as in the previous example, but change with-mysql to with-mysql=/path/to/mysql. Then place the
server’s keys on your sensor and insert them in the mysqls directory for MySQL to use. The
MySQL client looks for a my.cnf
file for any system changes it might need to use when the client is
used. The actual making of these keys will be placed in the server
configuration portion. For the majority of your MySQL configuration
options, copy the file my-medium.cnf from the support-files subdirectory of the
mysql distribution to either
/etc/my.cnf or /usr/local/var/my.cnf. Then append these
lines to your my.cnf
file:
[mysqld]
ssl-ca=/path/to/cacert.pem
ssl-cert=/path/to/server-cert.pem
ssl-key=/path/to/server-key.pem
That’s all that’s needed on the sensor side of the connection other than copying the three previously listed files from the server.
Server side
If you are going to display your events, ACID is in the stable of almost every IDS shop. Compile MySQL with SSL support if you are following the encryption portion of the client side.
MySQL source build:
./configure --with-vio --with-openssl=[dir] --with-openssl-libs=[dir]
--with-openssl-includes=[dir]
make
make install
The following is the Apache/SSL/PHP source build (some dependencies may need to be satisfied before the build will succeed):
#APACHE
./configure --prefix=/my/base/dir --enable-so --enable-ssl
--with-ssl=/path/to/ssl
#PHP (NEEDED FOR ACID TO WORK
./configure --prefix=/path/to/apache/php
--with-apxs2=/path/to/apache/bin
--with-config-file-path=/path/to/apache/php --enable-sockets
--with-sockets
--with-mysql=/path/to/mysql --with-zlib --with-gd
We are going to skip the rest of the Apache setup for our database setup. The database now needs to be set up to use SSL for its connections. Let’s start and create our database to use for Snort with its user.
If you didn’t already create a user for MySQL to use, do so using the following:
groupadd mysql
useradd -g mysql mysql
Create the default database from the MySQL source directory:
scripts/mysql_install_db
Change ownership of the database directory to the mysql user:
chown -R mysql /usr/local/var
chgrp -R mysql /usr/local/var
Copy the my-medium.cnf file out of the MySQL source directory to /usr/local:
cp support-files/my-medium.cnf /usr/local/var/my.cnf
Start the MySQL server in the background:
/usr/local/bin/mysqld_safe --user=mysql &
Log in to mysql:
/usr/local/bin/mysql
A good security practice is to require a password for the root MySQL user:
mysql>UPDATE user SET Password=PASSWORD('my_pass') WHEREusers='root';
Apply the changes:
mysql> FLUSH PRIVILEGES;Check that SSL was compiled into MySQL:
mysql> show variables LIKE 'have_openssl';If this shows anything other than YES, go back and recompile SSL, unless you
aren’t using encryption. Next create the ACID database:
mysql>CREATE DATABASE<name>;
Create a user account for our sensors to use (unique for our sensors for the paranoid):
mysql>GRANT UPDATE,SELECT,INSERT on<name>.* TO sensoracid@<ip>IDENTIFIED BY 'sensorpassword';# For the SSL encrypted folks mysql>GRANT UPDATE,SELECT,INSERT on <name>.* TO sensoracid@<ip>IDENTIFIED BY 'sensorpassword' REQUIRE SSL;
Create a separate account for your web interface to use. This one has all privileges to help prune the database:
mysql>GRANT ALL PRIVILEGES on<name>.* TOwebfront@localhostIDENTIFIED BY 'webfrontpass';
If you are using SSL encryption, you must build the OpenSSL certificates needed. The rest of the steps apply only if you are using SSL. Copy the files from the OpenSSL install directory to use:
cp /usr/local/ssl/openssl.conf ~/userX/SSL_MYSQL
cp -R /openssl-source/apps/demoCA ~/userX/SSL_MYSQL
cd ~/userX/SSL_MYSQL
Build your own Certificate Authority:
/usr/local/ssl/bin/openssl req -new -x509 -keyout cakey.pem -out
cacert.pem -config openssl.cnf
Build your server key and request:
/usr/local/ssl/bin/openssl req -new -keyout mysql-server-key.pem
-out mysql-server-req.pem -days 365 -config openssl.cnf
This is an optional step to remove security:
/usr/local/ssl/bin/openssl rsa -in mysql-server-key.pem -out
mysql-server-key.pem
Make a newcerts directory under demoCA:
mkdir demoCA/newcerts
Sign the server certificate with our new CA:
/usr/local/ssl/bin/openssl ca -policy policy_anything -out
mysql-server-cert.pem -config openssl.cnf -infiles
mysql-server-req.pem
Done! Now just copy the files to a directory for MySQL to use:
cp cacert.pem /usr/local/etc/SSL_MYSQL/
cp mysql-server-*.pem /usr/local/etc/SSL_MYSQL/
Tell MySQL to use them by appending these three lines to your my.cnf file:
[mysql]
ssl-ca=/usr/local/etc/SSL_MYSQL/cacert.pem
ssl-cert=/usr/local/etc/SSL_MYSQL/mysql-server-cert.pem
ssl-key=/usr/local/etc/SSL_MYSQL/mysql-server-key.pem
Finally, restart the MySQL server with the new changes.
For more database tweaking, check out MySQL Reference Manual (O’Reilly) for more detailed MySQL information.
In addition, feel free to edit your MySQL databases and tweak your IDS databases, as MySQL has an entirely GPL licensing system. For clarification, check the following: http://www.mysql.com/company/legal/licensing/opensource-license.html.
Discussion
This example uses MySQL for the database and to modifies the Snort source code to enable native MySQL connections. However, there are other database formats supported by Snort such as PostgreSQL, Oracle, and even Microsoft SQL.
All the database systems have their differences, and some may be easier or harder for people to use and install. However, before building your database backend, consider its size and support. Consider the size, because you need to gauge how large your database is likely to get. Two to four million records is the max for MySQL, while several hundred million is the Oracle limit. Consider support, because you want to choose a database for your core IDS backend that’s familiar to you and to other maintainers. Hardware and prices are another important consideration before you go call Oracle and Dell for your backends.
One word about the database output plug-in: as your sensors
grow, you’ll have geo-location considerations. Take a look at the
output line from the snort.conf file. There is a keyword that’s
not normally used: sensor_name. If
you don’t use this keyword in your conf file, when the sensor changes
hostname or can’t find its DNS name, the sensor and its data appear in
the database as a new sensor. This can cause quite a bit of confusion
on a large network like an ISP.
Another option for encrypting your sensor to database connections is the hack job of using Stunnel. Stunnel (www.stunnel.org) is tool that allows for SSL-encrypted connections. Stunnel was used to encrypt the connections between the MySQL database server and the sensors before MySQL supported native SSL connections. If you still want to use this method, it’s been fairly well documented in HOWTOs across the Internet. But for the quick and dirty setup, it would look like this.
On your database server, add the following line to your /etc/services file:
echo "mysqls 3307/tcp" >> /etc/services
Add the following line to your /etc/hosts.allow file:
mysqls:<sensor1_IP>
Block all other connections for the mysqls service by editing your /etc/hosts.deny file:
mysqls:ALL
Create an SSL certificate and PEM file for Stunnel to use:
/path/to/ssl/bin/openssl req -new -out <serverID>.pem
-keyout <serverID>.pem -nodes -x509 -days
On BSD systems, you must put your settings in a snort_stunnel.conf file:
Cert = <serverID>.pem
key = <serverID>.pem
[mysqls]
accept = 3307
connect = 3306
# If you want logging of the connections
#debug = 5 or 7
# depending on how much information you want logged
#output = <stunnel.log>
Start the Stunnel listener with your new config file:
stunnel snort_stunnel.conf
To configure the sensors, copy the serverID.pem file to each of your sensors. Append the same mysqls 3307/tcp to your sensor’s /etc/services file.
Create a "snort_sensor_stunnel.conf" file and edit it as follows:
Client = yes
# enables this machine to talk to the server listener
Cert = <serverID>.pem
key = <serverID>.pem
#debug = 5
#output = <stunnel_sensor.log>
[mysqls]
accept = 127.0.0.1:3306
connect = <server_IP>:3307
Start the Stunnel connection with:
stunnel sensor_stunnel.conf
Finally, configure Snort to use Stunnel:
output database: log, mysql, user=<db_user> pasword=<db_pass> sensor_name=<sensorID>
dbname=<ACID_db> host=127.0.0.1
A third option exists to use SSH’s support for port forwarding of connections through the SSH-encrypted tunnel. However, this option creates a considerable load on most networks and is subject to timeout issues on the connection. However, if you want to use it as your connection from database to sensor, a hub-and-spoke scenario might be most appropriate from a management perspective.
On the database server, start an SSH connection on each sensor with a remote port being forwarded. The following example uses port 3306/tcp for a MySQL solution:
ssh -R 3306:127.0.0.1:3306 -l <user_on_sensor> <sensor_ip>
Then on the Snort sensor, configure the snort.conf file much like the configuration for the Stunnel connection:
output database: log, mysql, user=<db_user> password=<db_user_pass>
sensor_name=<sensor_choice> dbname=<db_name> host=127.0.0.1
The keyword sensor_name is
important to add, because unless you are just monitoring one sensor,
it can quickly become unclear where
your IDS data is coming from.
See Also
Other database Snort implementations
Online (http://www.snort.org) resources for database options and changes