Chapter 5. Administrative Tools
Introduction
Your IDS is installed and configured, and it is happily generating logs and alerts, so now what do you do? One of the biggest issues with managing an IDS implementation is handling the potentially large numbers of alerts and logs. If your IDS is configured on a public network that receives a lot of traffic, you could potentially see thousands of alerts a day, from script kiddy scans to worms and other exploits. There are several Snort add-on tools that help you correlate and analyze Snort output data. You can find anything from full-fledged alert-management systems with web frontends to simple purpose-built scripts. This chapter explores some of the most popular tools for administering your Snort implementation: IDScenter, SnortCenter, ACID, SWATCH, Snortsnarf, Barnyard, IDS Policy Manager, HenWen, and Webmin. Some of the functionality for these tools overlaps. However, each has its own benefits and function. The good thing is that you can experiment with all of them to see which ones best suit your needs, because they are all free!
5.1. Managing Snort Sensors
Solution
Use SnortCenter or IDS Policy Manager to manage your distributed Snort sensors remotely.
Use IDScenter to manage a Windows Snort sensor locally.
Discussion
Managing numerous Snort sensors in a distributed environment via the command line and editing configuration files can sometimes be a tedious task. Fortunately, there are several GUI methods you can use to manage your Snort sensors efficiently.
SnortCenter manages remote sensors in a web-based client-server method. It is written in PHP and Perl. Both the management console and sensor agents can be installed on Unix and Windows. The management console allows you to build configuration files and then send them to the remote sensors. SnortCenter has several useful features, including: encryption of client-server traffic, authentication, the ability to push new configurations, and the ability to update and import new Snort signatures automatically.
IDS Policy Manger is also used to manage remote sensors in a distributed Snort environment. It is written in Visual Basic and runs on Windows NT, 2000, and XP. IDS Policy Manager is a graphical interface that allows you to manage rules and configuration files on remote Snort sensors. It can be used to manage both Unix and Windows sensors by using standard protocols. IDS Policy Manager has several useful features, including: the ability to merge new rules into existing rule files, the ability to update rules via the Web, and the ability to securely upload and download configuration changes via secure copy (scp).
IDScenter can be used to manage Windows Snort sensors locally via a graphical user interface. IDScenter provides full configuration and management of the Snort sensor, and includes many feature enhancements, such as configuration wizards, alert file monitoring, log rotation, integrated log viewer, and automatic program execution upon attack detection. However, since IDScenter runs only on the local sensor, it cannot be used to manage multiple remote sensors in a distributed environment.
5.2. Installing and Configuring IDScenter
Solution
Before installing IDScenter, follow the Recipe 1.4 recipe to install WinPcap and Snort.
Download the latest zipped version of IDScenter from the following site: http://www.engagesecurity.com/products/idscenter/. The latest stable version at the time of this writing is Version 1.1 RC4.
Unzip the installer and double-click the setup.exe file to start the installation.
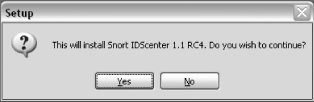
The first screen (Figure 5-1) states, “This will install Snort IDScenter 1.1 RC4. Do you wish to continue?” Click Yes.
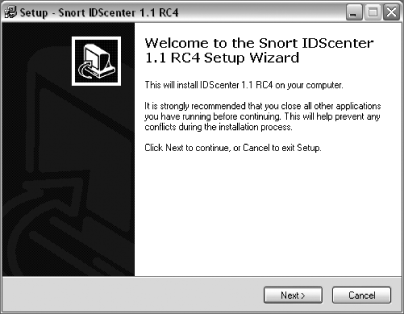
The next screen (Figure 5-2) welcomes you to the Snort IDScenter 1.1 RC4 Setup Wizard. Click Next to continue.
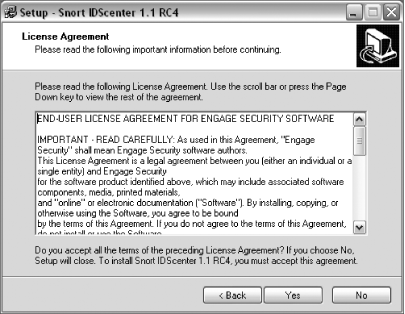
Read and accept the license agreement to continue (Figure 5-3). Click Yes to continue.
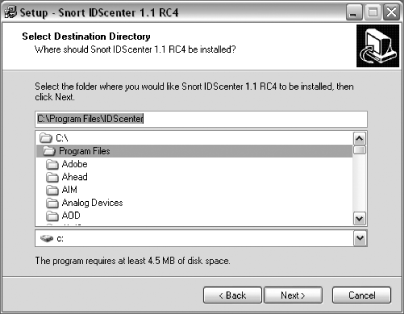
Select a destination directory for IDScenter (Figure 5-4). The default is C:\Program Files\IDScenter. Choose a directory, or accept the default and click Next to continue.
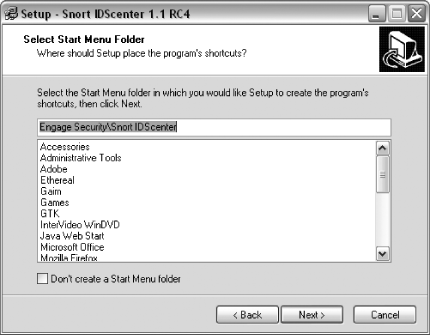
Select a Start Menu folder for IDScenter (Figure 5-5). The default is Engage Security\Snort IDScenter. Choose a folder or accept the default and click Next to continue.
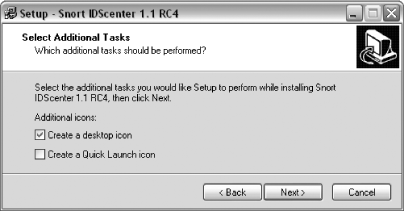
Select the additional tasks such as creating a desktop icon and creating a quick launch icon, and click Next to continue (Figure 5-6).
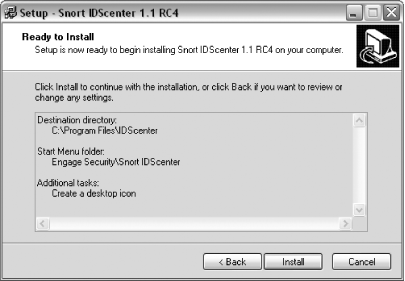
The Ready to Install window allows you to review your settings (Figure 5-7). If they are correct, click Install to being the installation. If they are incorrect, use the Back button to select the appropriate settings.
The install progress bar will appear and the application will install. However, even when it gets to 100 percent, the window will remain and you won’t be able to close it. This is because the IDScenter icon is now in the task tray and you must configure some initial settings before the installation completes. The following steps allow you to configure some basic settings:
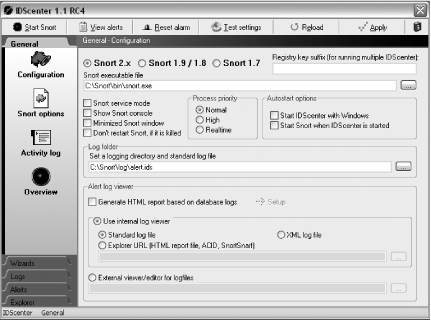
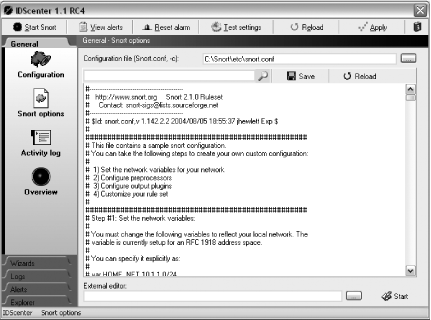
Double-click on the IDScenter icon in the system tray. This brings up the General Configuration screen (Figure 5-8).
First, select the location of the Snort executable file. Do this by typing in the location or browsing to the location. The default Snort installation places the executable in C:\Snort\bin\snort.exe.
Select a logging directory and standard logfile. The default Snort installation uses C:\Snort\log\alert.ids. On new installs, the alert.ids file won’t exist yet.
Click on the Snort Options icon on the left side of the window. Here you must import the snort.conf file (Figure 5-9). Do this by typing in the location or browsing to the location. The default Snort installation places the snort.conf file in C:\Snort\etc\snort.conf.
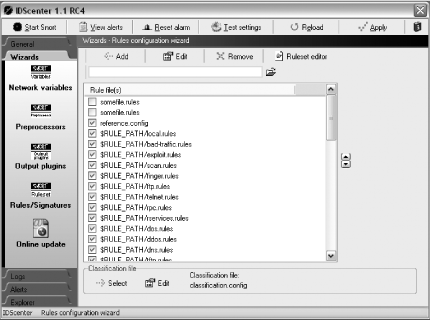
Click on the Wizards tab on the left side of the window. Then click on the Rules/Signatures icon. Here you must select the classification.config file to use (Figure 5-10). Click on the classification.config file under the Rule files list and then click Select at the bottom of the window. You should now see Classification file: classification.config.
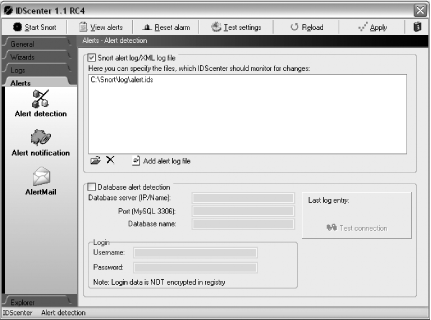
Click on the Alerts tab on the left side of the window. Then click on the Alert detection icon. Here you must specify the files that IDScenter monitors for changes (Figure 5-11). Click on Add alert log file to add the C:\Snort\log\alert.ids. You can also click on the open folder icon to add any other files that you want monitored.
Click on Apply in the top-right corner of the window. To make sure there aren’t any errors, click on the General tab on the left side of the window, and then click the Overview icon. There should not be any configuration errors, if there are, make the appropriate changes to fix them (Figure 5-12).
Once all errors are fixed, click on Test settings at the top of the window. A DOS window opens and runs the Snort executable with the configured parameters. It will alert you to any errors that it encounters. Press the Enter key to exit this screen. If you receive an error about the preprocessor, follow the directions in the next section of this recipe.
Close the IDScenter configuration screen, and then right-click on the IDScenter system tray icon and choose exit. (You may have to do this twice.) This will stop IDScenter and allow the setup process to complete.
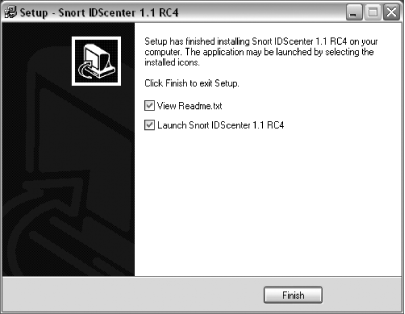
The final setup screen allows you to view the Readme.txt file and launch IDScenter (Figure 5-13). Click Finish to complete the installation.

Discussion
IDScenter is a nice graphical interface to use to manage your Windows Snort sensor. However, it is not updated regularly. The last update at the time of this writing was 4/8/2003, and it does have some bugs. For example, make sure you have a backup of the snort.conf file. IDScenter makes changes to the file and leaves some errors. After installing IDScenter, you will need to change the following two lines:
preprocessor http_inspect: global \
preprocessor http_inspect_server: server default \
To the following:
preprocessor http_inspect: global \
iis_unicode_map unicode.map 1252
preprocessor http_inspect_server: server default \
profile all ports { 80 8080 8180 } oversize_dir_length 500
When IDScenter changes the snort.conf file, it actually leaves out part of the http_inspect preprocessor configuration. To make the change, use an external editor such as Wordpad.exe to edit the snort.conf configuration file, and then reload the new configuration into IDScenter by clicking on the Reload button in the General, Snort Options area.
Once you have made the change, click Test Settings again and you should see “Snort successfully loaded all rules and checked all rule chains!” in the test console window.
5.3. Installing and Configuring SnortCenter
Solution
Follow the recipes Installing and Configuring MySQL (Recipe 2.11) and Configuring MySQL for Snort (Recipe 2.12) to prepare your Snort installation for SnortCenter. Also, follow the recipe for Installing Snort on Linux or Installing Snort on Windows to install your sensors.
First, install Apache. At the time of this writing, the current version is 2.0.50. Use the following commands to install Apache:
[root@localhost root]#tar zxvf httpd-2.0.50.tar.gz[root@localhost root]#cd httpd-2.0.50[root@localhost httpd-2.0.50]#./configure --prefix=/www --enable-so[root@localhost httpd-2.0.50]#make[root@localhost httpd-2.0.50]#make install[root@localhost httpd-2.0.50]#/www/bin/apachectl start
Next, check the system to make sure the web server is working by opening a web browser and entering your IP address or “localhost.” You should see the default Apache web page.
Next, upgrade to the latest version of libxml2. At the time of this writing, the current version is 2.6.0-1. Use the following commands to install libxml2:
[root@localhost httpd-2.0.50]#/www/bin/apachectl stop[root@localhost httpd-2.0.50]#cd ..[root@localhost root]#rpm -Uvh libxml2-devel-2.6.0-1.i386.rpm[root@localhost root]#rpm -Uvh libxml2-python-2.6.0-1.i386.rpm[root@localhost root]#rpm -Uvh libxml2-2.6.0-1.i386.rpm
Next, install PHP. At the time of this writing, the current version is 5.0.0. Use the following commands to install PHP:
[root@localhost root]#tar zxvf php-5.0.0.tar.gz[root@localhost root]#cd php-5.0.0[root@localhost php-5.0.0]#./configure --prefix=/www/php --with-apxs2= /www/bin/apxs --with-config-filepath=/www/php --enable-sockets--with-mysql=/usr/local/mysql --with-zlib-dir=/usr/local --with-gd[root@localhost php-5.0.0]#make[root@localhost php-5.0.0]#make install[root@localhost php-5.0.0]#cp php.ini-dist /www/php/php.ini
You must also make the following changes to the /www/conf/httpd.conf file:
[root@localhost php-5.0.0]#cd /www/conf[root@localhost conf]#vi httpd.conf
Change the line:
DirectoryIndex index.html index.html.var
to:
DirectoryIndex index.php index.html index.html.var
Also, add the following line under the AddType section:
AddType application/x-httpd-php .php
Next, make the following changes to create links for startup scripts so that the web server starts when you boot up in run levels 3 and 5 (run level 3 is full multiuser mode, and run level 5 is the X Window System):
[root@localhost conf]#cd /www/bin[root@localhost bin]#cp apachectl /etc/init.d/httpd[root@localhost bin]#cd /etc/rc3.d[root@localhost rc3.d]#ln -s ../init.d/httpd S85httpd[root@localhost rc3.d]#ln -s ../init.d/httpd K85httpd[root@localhost rc3.d]#cd /etc/rc5.d[root@localhost rc5.d]#ln -s ../init.d/httpd S85httpd[root@localhost rc5.d]#ln -s ../init.d/httpd K85httpd
Next, test the configuration with the following commands:
[root@localhost rc5.d]#cd /www/htdocs[root@localhost htdocs]#echo "<?php phpinfo(); ?>" > test.php[root@localhost htdocs]#/etc/rc5.d/S85httpd start
Open the web browser again and enter http://IPaddress/test.php or http://localhost/test.php. You should see a PHP table output of system information.
Next, install CURL with the following commands:
[root@localhost root]#tar zxvf curl-7.12.0.tar.gz[root@localhost root]#cd curl-7.12.0[root@localhost curl-7.12.0]#./configure[root@localhost curl-7.12.0]#make[root@localhost curl-7.12.0]#make install
Next, install the SnortCenter Management Console:
[root@localhost curl-7.12.0]#cd ..[root@localhost root]#tar zxvf snortcenter-v1.0-RC1.tar.gzthis creates a directory called www [root@localhost root]#cd www[root@localhost www]#cp -R * /www/htdocs
Next install adodb. At the time of this writing, the latest version is 4.5.1:
[root@localhost root]#tar zxvf adodb451.tgz[root@localhost root]#cp -R ./adodb/ /www/htdocs
Next, create the MySQL database:
[root@localhost root]# echo "CREATE DATABASE snortcenter;" | /usr/local/mysql/bin/mysql -u root -p
Enter password:
Make the following changes to the config.php file:
[root@localhost root]#cd /www/htdocs[root@localhost htdocs]#vi config.php
Change the line:
$hidden_key_num = "0";
to:
$hidden_key_num = "236785";
and:
$DB_password = "";
to:
$DB_password = "newpassword";
The database password is the one that you provided earlier when you installed MySQL.
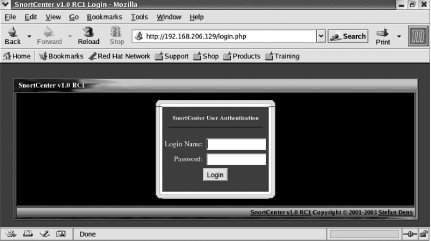
Next, create the database tables by simply opening the web browser and going to the IP address of your host http://IPaddress or http://localhost. The browser displays a list of tables that are created. The login screen appears in a few seconds, and you can now log in with the username admin and the password change (Figure 5-14). Make sure that you change your password once you log in.
Now you are ready to install the SnortCenter Sensor Agent. This can be installed on the same system as the SnortCenter Management Console, or on other distributed Snort sensors throughout the network. For this example, we are installing it on the same system for simplicity. This install assumes that Snort is already installed.
To provide encryption of the traffic from the SnortCenter
Management Console to the SnortCenter Sensor Agent, you must first
install Perl and OpenSSL from source. Installing from the RPMs causes
problems such as dependency issues and errors. Make sure that both are
compiled with the same compiler or you will receive an error when you
later install Net_SSLeay. The
current version of Perl at the time of this writing is 5.8.5. (Perl
5.8.6 is due to be released soon, but has not yet been tested with
SnortCenter.) Install Perl with the following commands:
[root@localhost root]#tar zxvf stable.tar.gz[root@localhost root]#cd perl-5.8.5/[root@localhost perl-5.8.5]#rm -f config.sh Policy.sh[root@localhost perl-5.8.5]#sh Configure -de[root@localhost perl-5.8.5]#make[root@localhost perl-5.8.5]#make test[root@localhost perl-5.8.5]#make install
The current version of OpenSSL at the time of this writing is 0.9.7d. Install it with the following commands:
[root@localhost root]#tar zxvf openssl-0.9.7d.tar.gz[root@localhost root]#cd openssl-0.9.7d[root@localhost openssl-0.9.7d]#./Configure[root@localhost openssl-0.9.7d]#make[root@localhost openssl-0.9.7d]#make install
Next, install the Net_SSLeay
Perl module. The current version at the time of this writing is 1.21.
Install it with the following commands:
[root@localhost root]#tar zxvf Net_SSLeay.pm-1.21.tar.gz[root@localhost root]#cd Net_SSLeay.pm-1.21[root@localhost Net_SSLeay.pm-1.21]#perl Makefile.PL[root@localhost Net_SSLeay.pm-1.21]#make[root@localhost Net_SSLeay.pm-1.21]#make install
Next, test the SSL install by using the following command:
[root@localhost Net_SSLeay.pm-1.21]# perl -e 'use Net::SSLeay'The SSL support that the Sensor Agent needs is properly installed if the command doesn’t output an error message.
Next, create the OpenSSL certificate for communications by using the following commands and entering the appropriate information:
[root@localhost Net_SSLeay.pm-1.21]#cd ..[root@localhost root]#openssl req -new -x509 -days 3650 -nodes -outsensor.pem -keyout sensor.pemGenerating a 1024 bit RSA private key ......++++++ ............................................++++++ writing new private key to 'sensor.pem' ----- You are about to be asked to enter information that will be Incorporated into your certificate request. What you are about to enter is what is called a Distinguished Name or a DN. There are quite a few fields but you can leave some blank For some fields there will be a default value, If you enter '.', the field will be left blank. ----- Country Name (2 letter code) [GB]:USState or Province Name (full name) [Berkshire]:DCLocality Name (eg, city) [Newbury]:DCOrganization Name (eg, company) [My Company Ltd]: Organizational Unit Name (eg, section) [ ]: Common Name (eg, your name or your server's hostname) [ ]:BuddhaEmail Address [ ]:
Next, install the Sensor Agent with the following commands:
[root@localhost root]#tar zxvf snortcenter-agent-v1.0-RC1.tar.gz[root@localhost root]#cd sensor
There is a bug in the setup.sh file that needs to be corrected
before setup is run. Edit the setup.sh file and remove the $ from the following line:
$perl -e 'use Net::SSLeay' >/dev/null 2>/dev/null
Then run the setup.sh configuration file and answer the questions (you may accept the defaults for most of them):
[root@localhost sensor]# ./setup.shNow both the SnortCenter Management Console and the SnortCenter Sensor Agent are installed. You will need to open the management console with a web browser by going to http://IPAddress or http://localhost (Figure 5-14). Next, log in and add your sensor to the management console.
Discussion
SnortCenter provides a web-based method to manage distributed
Snort sensors. It operates in a client-server mode where the
management console is used to build configuration files and then send
them to the remote sensors. There are several prerequisites that need
to be installed and configured before installing SnortCenter. Please
make sure that you have downloaded all of the following programs
before you begin: MySQL, Apache, libxml2, PHP, Curl, ADODB, Perl,
OpenSSL, SnortCenter Management Console, SnortCenter Sensor Agent, and
Net_SSLeay. The solution example
provides the necessary installation setups and configurations for
Red Hat 9.
5.4. Installing and Configuring Snortsnarf
Solution
Install Snortsnarf by using the following command:
[root@localhost root]# tar zxvf SnortSnarf-021111.1.tar.gzInstall the Time::ParseDate
Perl module by downloading it and compiling it manually, or by using
the following command:
[root@localhost root]#cd SnortSnarf-021111.1[root@localhost SnortSnarf-021111.1]#perl -MCPAN -e 'installTime::ParseDate'
Next, make a directory in which to store the module and copy the files:
[root@localhost SnortSnarf-021111.1]#mkdir ./include/SnortSnarf/Time[root@localhost SnortSnarf-021111.1]#cp /usr/lib/perl5/site_perl/5.8.0/Time/*.* ./include/SnortSnarf/Time
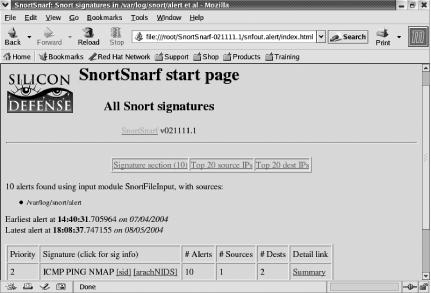
Next, you can run Snortsnarf to analyze your alerts file by using the following:
[root@localhost SnortSnarf-021111.1]#./snortsnarf.pl /var/log/snort/alert
The output will be created in the snfout.alert directory in your current
directory. Use a web browser to open the index.html file located within that
directory (Figure 5-15).
You may use the -d command-line
option to specify an output directory, such as your /www directory.
You can also run Snortsnarf to analyze alerts in a MySQL Snort database by using the following:
[root@localhost SnortSnarf-021111.1]# ./snortsnarf.pl snort@localhostThe database input is specified in the form user:passwd@dbname@host:port. The @dbname parameter is optional and defaults
to a database name of snort. The
:port parameter is also optional
and defaults to 3306. If you do not supply a password, you are
prompted to enter it.
Discussion
Snortsnarf is a Perl script that takes one or more Snort input sources and converts the information into web pages. You can use the Snort alert files or a MySQL Snort database as input sources. The following command will show usage and help information:
[root@localhost root]# ./snortsnarf.pl -usageTo use Snortsnarf to read alerts from a MySQL database, you will need to download and compile the DBI and MySQL Perl modules:
[root@localhost SnortSnarf]# perl -MCPAN -e 'install DBI'You must stop the MySQL database and restart it without grant tables. This starts the database so that the automatic script can log in as root without a password. Once you have completed the install for the MySQL Perl module, you must stop and restart the MySQL database.
[root@localhost SnortSnarf-021111.1]#/etc/init.d/mysql stop[root@localhost SnortSnarf-021111.1]#/usr/local/mysql/bin/mysqld_safe--skip-grant-tables &[root@localhost SnortSnarf-021111.1]#perl -MCPAN -e 'install Mysql'[root@localhost SnortSnarf-021111.1]#/etc/init.d/mysql stop[root@localhost SnortSnarf-021111.1]#/etc/init.d/mysql start
You can download the latest SnortDBInput module from http://www.bus.utexas.edu/services/cbacc/dbsupport/snortdbinput.
Save the SnortDBInput-version.pm
file to the directory /root/SnortSnarf-021111.1/include/SnortSnarf.
Next, use the following commands to replace the old SnortDBInput module:
[root@localhost SnortSnarf]#rm SnortDBInput.pmrm: remove regular file `SnortDBInput.pm'?y[root@localhost SnortSnarf]#mv SnortDBInput-0.3.pm SnortDBInput.pm
5.5. Running Snortsnarf Automatically
Solution
Move the Snortsnarf files to the appropriate location within your PATH as follows:
[root@localhost root]#cp /root/SnortSnarf-021111.1/include/* /usr/lib/perl5/site_perl/5.8.0[root@localhost root]#cp /root/SnortSnarf-021111.1/include/SnortSnarf/* /usr/lib/perl5/site_perl/5.8.0[root@localhost root]#cp /root/SnortSnarf-021111.1/snortsnarf.pl /etc
Edit the crontab by using the following command:
[root@localhost root]# crontab -eAdd the following entry to run Snortsnarf every 10 minutes and refresh the browser every 5 minutes:
*/10 * * * * /etc/snortsnarf.pl -d /var/log/www/snortsnarf
-refresh=300 /var/log/snort/alert
Discussion
It can be a tedious task to run the Snortsnarf command manually each time you want to look at your data. Creating the Snortsnarf cron job entry is an easy way to have Snortsnarf executed on a regular basis and have the browser refresh automatically, too. This way, you could have the browser open in your network operations center and be quickly alerted to new events.
5.6. Installing and Configuring ACID
Solution
Follow the recipes for Installing and Configuring MySQL (Recipe 2.11), Installing
Snort Binaries on Linux (Recipe
1.2), and Configuring MySQL for Snort (Recipe 2.12). Make sure when
you install Snort that you use the configure
--with-mysql=/usr/local/mysql option.
First, install Apache. At the time of this writing, the current version is 2.0.50. Use the following commands to install Apache:
[root@localhost root]#tar zxvf httpd-2.0.50.tar.gz[root@localhost root]#cd httpd-2.0.50[root@localhost httpd-2.0.50]#./configure --prefix=/www --enable-so[root@localhost httpd-2.0.50]#make[root@localhost httpd-2.0.50]#make install[root@localhost httpd-2.0.50]#/www/bin/apachectl start
Next, check the system to make sure the web server is working by opening a web browser and entering your IP address or “localhost.” You should see the default Apache web page.
Next, install PHP. You must install Version 4.3.8 because the current version, 5.0.0, does not work with ACID. Use the following commands to install PHP:
[root@localhost root]#tar zxvf php-4.3.8.tar.gz[root@localhost root]#cd php-4.3.8[root@localhost php-4.3.8]#./configure --prefix=/www/php --with-apxs2= /www/bin/apxs --with-config-filepath=/www/php --enable-sockets--with-mysql=/usr/local/mysql --with-zlib-dir=/usr/local --with-gd[root@localhost php-4.3.8]#make[root@localhost php-4.3.8]#make install[root@localhost php-4.3.8]#cp php.ini-dist /www/php/php.ini
Make the following changes to the /www/conf/httpd.conf file:
[root@localhost php-4.3.8]#cd /www/conf[root@localhost conf]#vi httpd.conf
Change the line:
DirectoryIndex index.html index.html.var
to:
DirectoryIndex index.php index.html index.html.var
Also, add the following line under the AddType section:
AddType application/x-httpd-php .php
Next, make the following changes to create links for startup scripts so that the web server starts when you boot up in run levels 3 and 5 (run level 3 is full multiuser mode, and run level 5 is the X Window System):
[root@localhost conf]#cd /www/bin[root@localhost bin]#cp apachectl /etc/init.d/httpd[root@localhost bin]#cd /etc/rc3.d[root@localhost rc3.d]#ln -s ../init.d/httpd S85httpd[root@localhost rc3.d]#ln -s ../init.d/httpd K85httpd[root@localhost rc3.d]#cd /etc/rc5.d[root@localhost rc5.d]#ln -s ../init.d/httpd S85httpd[root@localhost rc5.d]#ln -s ../init.d/httpd K85httpd
Next, test the configuration with the following commands:
[root@localhost rc5.d]#cd /www/htdocs[root@localhost htdocs]#echo "<?php phpinfo(); ?>" > test.php[root@localhost htdocs]#/etc/init.d/httpd stop[root@localhost htdocs]#/etc/init.d/httpd start
Open the web browser again and enter http://IPaddress/test.php or http://localhost/test.php. You should see a PHP table output of system information.
Next, install adodb. At the time of this writing, the latest version is 4.5.1:
[root@localhost root]#tar zxvf adodb451.tgz[root@localhost root]#cp -R ./adodb/ /www/htdocs
Next, install JPGraph. The current version at the time of this writing is 1.16. Use the following commands to install JPGraph:
[root@localhost root]#cp jpgraph-1.16.tar.gz /www/htdocs[root@localhost root]#cd /www/htdocs[root@localhost htdocs]#tar zxvf jpgraph-1.16.tar.gz[root@localhost htdocs]#rm -rf jpgraph-1.16.tar.gz
Now you are ready to install ACID. The current version at the time of this writing is 0.9.6b23. Use the following commands to install ACID:
[root@localhost htdocs]#cd /root[root@localhost root]#cp acid-0.9.6b23.tar.gz /www/htdocs[root@localhost root]#cd /www/htdocs[root@localhost htdocs]#tar zxvf acid-0.9.6b23.tar.gz[root@localhost htdocs]#rm -rf acid-0.9.6b23.tar.gz[root@localhost htdocs]#cd acid[root@localhost acid]#vi acid_conf.php
Next, you must make a few configuration changes. Make sure the /www/htdocs/acid/acid_conf.php file contains the following information:
$DBlib_path = "/www/htdocs/adodb";
/* Alert DB connection parameters
 *   - $alert_dbname   : MySQL database name of Snort alert DB
 *   - $alert_host     : host on which the DB is stored
 *   - $alert_port     : port on which to access the DB
 *   - $alert_user     : login to the database with this user
 *   - $alert_password : password of the DB user
 *
 *  This information can be gleaned from the Snort database
 *  output plugin configuration.
 */
$alert_dbname   = "snort";
$alert_host     = "localhost";
$alert_port     = "";
$alert_user     = "root";
$alert_password = "newpassword";
/* Archive DB connection parameters */
$archive_dbname   = "snort";
$archive_host     = "localhost";
$archive_port     = "";
$archive_user     = "root";
$archive_password = "newpassword";
$ChartLib_path = "/www/htdocs/jpgraph-1.16/src";
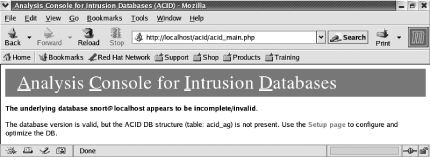
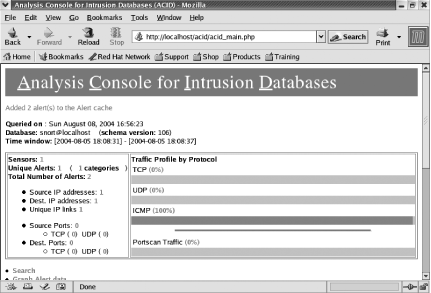
To continue with the configuration, open a web browser to http://localhost/acid/acid_main.php (Figure 5-16). Click on the Setup page link to continue (Figure 5-17).

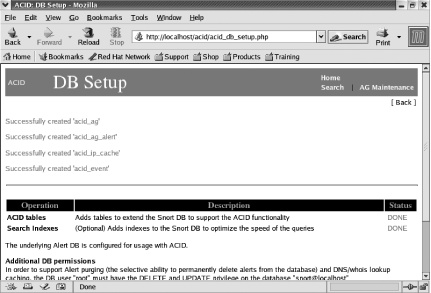
Next, click the button that says Create ACID AG. You now see that four tables were successfully created (Figure 5-18). Now when you go back to the main ACID page, it displays the Snort sensor statistics (Figure 5-19).
Discussion
The Analysis Console for Intrusion Databases (ACID) is a great tool to use for viewing, analyzing, and graphing your Snort logs. It is a PHP-based analysis engine that searches and processes your IDS database logs. Some of its features include a search engine, packet viewer, alert management, and graphing and statistics generation.
There are several prerequisites to installing ACID, including MySQL, Apache, PHP, ADODB, JPGraph, and Snort. The example provided installs ACID and its prerequisites on a default installation of Red Hat 9. When using other versions of Unix or Linux, you must download and install the appropriate prerequisites for your platform.
Keeping up with alerts and logs is one of the hardest parts of managing an IDS. Using a tool like ACID makes the IDS administrator’s job a lot easier. Its web frontend, ease of use, and features make it an invaluable tool to have for IDS data analysis.
5.7. Securing ACID
Solution
Use the htpasswd command to
create a password for the user acid.
Make sure you use a strong password:
[root@localhost root]#mkdir /www/passwords[root@localhost root]#/www/bin/htpasswd -c/www/passwords/passwords acidNew password: Re-Type new password: Adding password for user acid
Edit the /www/conf/httpd.conf file to include the following:
<Directory "/www/htdocs/acid">
AuthType Basic
AuthName "SnortIDS"
AuthUserFile /www/passwords/passwords
Require user acid
</Directory>
Now restart the web server with the following command:
[root@localhost root]# /etc/init.d/httpd restartThe next time you access your ACID page, you will be prompted for the username and password.
Discussion
Securing your ACID database from unauthorized access is a great idea. Besides intruders having the ability to access the system and potentially cover their tracks, it keeps other inquisitive users from tampering with the database. The usernames and passwords are stored in the /www/passwords/passwords file. Although the passwords are encrypted, it is always a good idea to harden your system and protect it behind a perimeter firewall. If you are not the only person administering this system, it is a good practice to create separate usernames and passwords for each administrator to maintain accountability. Another consideration for securing ACID is to use SSL for encrypting the communications, especially the password authentication.
See Also
5.8. Installing and Configuring Swatch
Solution
Install Swatch by using the following standard method of installing Perl modules:
[root@localhost root]#tar zxvf swatch-3.1.tar.gz[root@localhost root]#cd swatch-3.1[root@localhost swatch-3.1]#perl Makefile.PL[root@localhost swatch-3.1]#make[root@localhost swatch-3.1]#make test[root@localhost swatch-3.1]#make install[root@localhost swatch-3.1]#make realclean
Next, you can test that it is working by running both Snort and Swatch:
[root@localhost snort-2.1.3]#snort -l /var/log/snort -c./etc/snort.conf[root@localhost root]#swatch -t /var/log/snort/alertswatch: cannot read /root/.swatchrc swatch: using default configuration of: watchfor = /.*/ echo *** swatch version 3.1 (pid:20771) started at Fri Jul 2 07:20:46 EDT 2004 [**] [1:469:3] ICMP PING NMAP [**] [Classification: Attempted Information Leak] [Priority: 2] 07/02-07:21:01.673346 192.168.206.129 -> 192.168.100.5 ICMP TTL:37 TOS:0x0 ID:42715 IpLen:20 DgmLen:28 Type:8 Code:0 ID:56574 Seq:29086 ECHO [Xref => http://www.whitehats.com/info/IDS162]
Discussion
Swatch is known as the Simple Watcher of logfiles. It is a Perl program that monitors Snort alerts and creates automatic responses. Swatch can generate a system bell, print output to the screen, send an email, and run a script to perform other actions. These actions can be configured in the /.swatchrc file, such as the following:
watchfor /something_to_watch_for/
bell
echo normal
mail addresses=yourmail@youraddress.com,subject=Snort Alert!
exec some_script
The /.swatchrc file can
have multiple instances of the watchfor statement to watch for a variety of
alerts and then initiate the appropriate actions.
Swatch has dependencies on four other Perl modules: Date::Calc, Date::Parse, File::Tail, and Time::HiRes. On RedHat 9, we had to install
the following three dependencies:
[root@localhost root]#tar zxvf Date-Calc-5.3.tar.gz[root@localhost root]#cd Date-Calc-5.3[root@localhost Date-Calc-5.3]#perl Makefile.PL[root@localhost Date-Calc-5.3]#make[root@localhost Date-Calc-5.3]#make test[root@localhost Date-Calc-5.3]#make install[root@localhost Date-Calc-5.3]#make realclean[root@localhost root]#tar zxvf Time-HiRes-1.59.tar.gz[root@localhost Time-HiRes-1.59]#LC_ALL=C; export LC_ALL[root@localhost Time-HiRes-1.59]#perl Makefile.PL[root@localhost Time-HiRes-1.59]#make[root@localhost Time-HiRes-1.59]#make test[root@localhost Time-HiRes-1.59]#make install[root@localhost Time-HiRes-1.59]#make realclean[root@localhost root]#tar zxvf TimeDate-1.16.tar.gz[root@localhost root]#cd TimeDate-1.16[root@localhost TimeDate-1.16]#perl Makefile.PL[root@localhost TimeDate-1.16]#make[root@localhost TimeDate-1.16]#make test[root@localhost TimeDate-1.16]#make install[root@localhost TimeDate-1.16]#make realclean
If you also need File::Tail,
you can install it the same way by downloading and installing the
ftp://cpan.cse.msu.edu/modules/by-module/File/File-Tail-0.98.tar.gz
file. You can download Perl modules from ftp://cpan.cse.msu.edu/modules/by-module and
various other CPAN mirror sites.
To test the Swatch installation, first run Snort in NIDS mode to make sure it is generating alert messages. Then start Swatch with the target file of /var/log/snort/alert, or wherever your alerts that you would like to monitor are being logged. Next, run some event traffic such as an Nmap scan, and you should see the alerts showing on the screen. Notice that the example is just using the default configuration; you can configure the /root/.swatchrc file to monitor for specific keywords and generate various types of actions.
5.9. Installing and Configuring Barnyard
Solution
To install Barnyard, use the following commands:
[root@localhost root]#tar zxvf barnyard-0.2.0.tar.gz[root@localhost barnyard-0.2.0]#cd barnyard-0.2.0[root@localhost barnyard-0.2.0]#./configure[root@localhost barnyard-0.2.0]#make[root@localhost barnyard-0.2.0]#make install
Also, by default, Barnyard does not install with database support. If you plan on using the ACID database output plug-in, configure Barnyard with database support using the following MySQL option:
[root@localhost barnyard-0.2.0]# ./configure --enable-mysqlDiscussion
Barnyard is used to take the log processing load off of the
Snort engine. Barnyard processing is controlled by input processors
and output plug-ins. The input processors read information in from a
specified format and the output plug-ins write that information in a
variety of ways. Barnyard allows Snort to efficiently write data to
disk so it does not miss any network traffic. Barnyard then performs
the task of parsing binary data into various formats. Once Barnyard is
installed, you can see usage information by just typing barnyard:
[root@localhost barnyard-0.2.0]# barnyard5.10. Administering Snort with IDS Policy Manager
Solution
Install the IDS Policy Manager from Activeworx. This allows you to administer multiple Snort sensors.
Download the compressed zip file from the Activeworx web site (http://www.activeworx.org/downloads/). Decompress it and run the installation program (Figure 5-20). Click Next to continue.
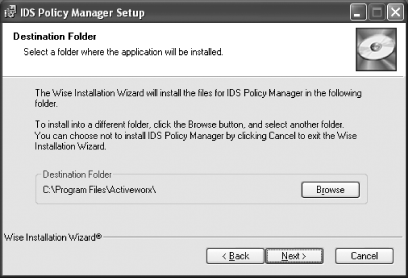
Accept the default installation directory or choose one of your own liking (Figure 5-21). Click Next.
Click Next to begin the installation (Figure 5-22).
Wait for the installation to complete (Figure 5-23).
Click Finish to complete the installation (Figure 5-24).


Discussion
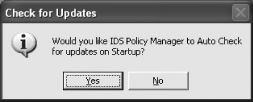
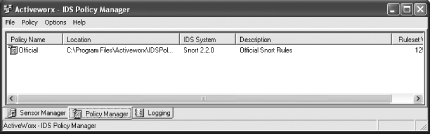
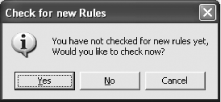
The IDS Policy Manager is designed to allow you to administer multiple Snort sensors. When you first start the application, it asks you if you want it to check for updates automatically (Figure 5-25).
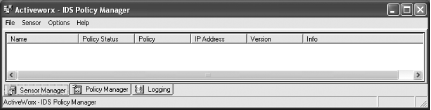
After you select Yes or No to the autocheck for updates, you see the main screen (Figure 5-26). The first time you run it, no sensors are set up in the Sensor Manager tab. There are also two other tabs: Policy Manager and Logging.
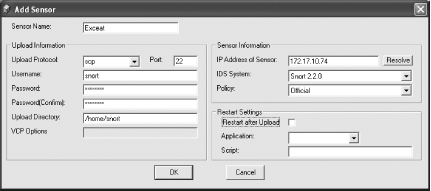
The first step is to add a Sensor. You do this by selecting Add from the Sensor menu (Figure 5-27). This starts a dialog for you to configure the sensor details (Figure 5-28). Enter the required details. The Sensor Name is for internal reference only, so call it something that makes sense to you. For the time being, set the Policy to Official. This is the only defined policy on the system at this point, and you can change it later, once you have defined more. Select the Restart after Upload checkbox if you want the sensor to be restarted after policy changes have been uploaded. Select the application that you wish to use to connect to the sensor to restart it, and enter the path to the restart script that you want to run in the Script box. Click OK to return to the main screen (Figure 5-29).

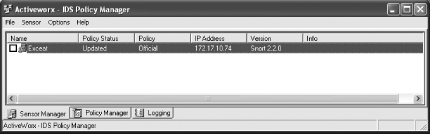
Once you have created your sensor, you can go on to create or edit the policy assigned to it. Click on the Policy Manager tab (Figure 5-30). Double-click on the name of the policy that you wish to edit, or select Add from the Policy menu. In this case, we are going to edit the Official policy. On the first running of the Policy Editor, you will be prompted to determine if you want to check for new rules (Figure 5-31). The IDS Policy Manager will automatically check for, and download, any new rules that are found and add them to the list (Figure 5-32). Within the Policy Editor, you can select which rules you wish to be part of your policy. This policy can then be propagated out to all sensors that are known about by the IDS Policy Manager. When you have chosen all that you require, select Save and Exit from the File menu.

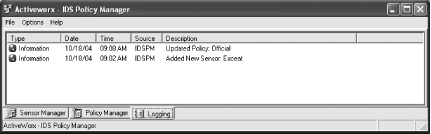
The Logging tab keeps track of all the actions that are carried out within the IDS Policy manager (Figure 5-33).
To update the policy across all the sensors within your network, first make the changes to the policy as required, save the changes, and then select all your sensors from the Sensor Manager by clicking the checkboxes next to their names. Then select the Sensor menu and select the Upload Policy to Sensor item. If you have selected the checkbox in the sensor configuration to restart the sensor, IDS Policy Manager will restart the sensor automatically; otherwise, select Restart Selected Sensors from the Sensor menu to do so.
Further information on the running of IDS Policy Manager can be found in the Help menu and from the Activeworx web site.
See Also
5.11. Integrating Snort with Webmin
Problem
You have already set up a Unix management system using Webmin. You would like to integrate Snort with this management system.
Solution
Download the Snort Webmin module from MSB Networks (available at: http://www.msbnetworks.net/snort). This allows you to configure, monitor, and maintain Snort from within Webmin.
Once you have downloaded the module, insert it into Webmin through the web interface by selecting the Webmin Configuration icon from the main screen (Figure 5-34).
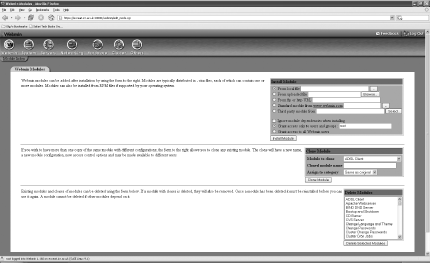
Select the Webmin Modules icon (Figure 5-35). This will show the information in the Webmin Modules (Figure 5-36).
In the Install Module box, select the From uploaded file radio button, and click the Browse button to navigate to the file that you downloaded.
Click the Install Module button. You will get a confirmation screen (Figure 5-37).


Discussion
Webmin is a web-based system-administration interface for Unix. It allows you to manage your Unix system and software—in this case, Snort. Once you have installed the Snort Webmin Module, you need to configure the various settings by clicking on the Snort IDS Admin link in the Install Module window, or by navigating to the plug-in through the Webmin interface. On first use, you are presented with a screen prompting for the details of your Snort installation (Figure 5-38). Note that Webmin can handle only the control of one Snort daemon running on the machine.

You need to set the full path to your Snort executable, the Snort configuration file, the rules directory, and the Snort PID file. Optionally, you can set the command to start Snort and set the URL to your ACID installation. Once you have filled in the information, click Save.
There are five main sections to the Webmin interface to Snort: Rulesets, Network Settings, PreProcessors, Alerts & Logging, and Edit Config File (Figure 5-39). Start in the Rulesets screen to select which rules you wish to enable. Note that changes will take effect only once you have restarted Snort. To facilitate this, there is a Restart Snort button at the bottom of this screen.
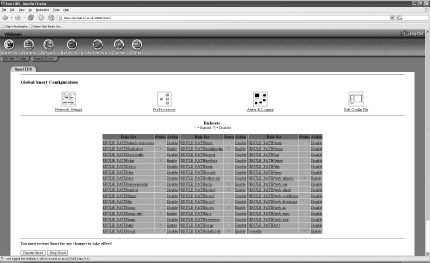
The Network Settings screen allows you to set the various network options, including your Home and External networks, various servers, and port selections (Figure 5-40).

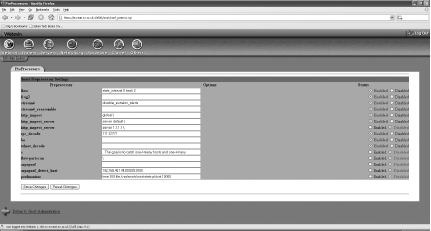
The PreProcessors screen allows you to enable and disable the various preprocessors, along with setting required options (Figure 5-41).
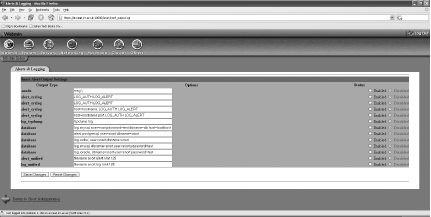
The Alerts & Logging screen allows you to enable, disable, and set the options on the assorted output plug-ins (Figure 5-42).
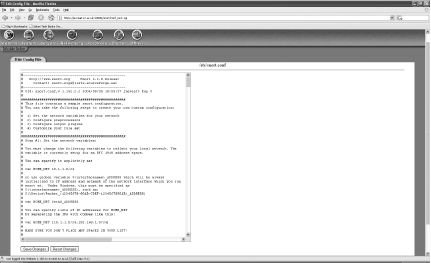
The final screen, Edit Config File, allows you to directly edit the Snort configuration file by hand (Figure 5-43).
In all the screens, you should set up Snort per your requirements, following the recommendations that we have provided in the other recipes in this book.
5.12. Administering Snort with HenWen
Solution
There are two possible ways to administer Snort on a Mac OS X machine, depending on the way you installed Snort. If you installed by compiling the source code, you would administer it the same as on any other Unix machine—by editing the configuration files directly. However, if you installed Snort by using the HenWen packages described in Chapter 1, you can use HenWen to carry out further administrative tasks.
Discussion
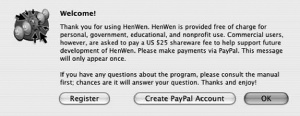
HenWen provides a GUI interface to most of the Snort configuration options. Once it is installed, double-click on the HenWen icon to bring up the interface. Each time it is run, you see the Welcome screen asking for registration. If you are going to be running HenWen within a commercial setting, you are obliged to pay the shareware fee to help fund further development; any other situation is free of cost (Figure 5-44).
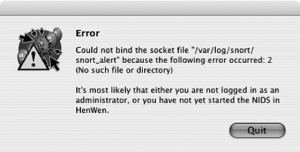
Clicking OK will bring up the Network configuration main screen (Figure 5-45). It may also bring up an error telling you that the Snort daemon is not running, which is fine, because it isn’t yet (Figure 5-46). The Quit button is somewhat misleading, as it doesn’t quit the application; it only closes the window.
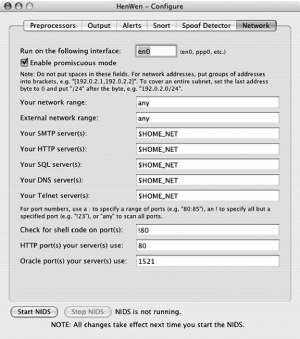
There are six main tabs in the HenWen interface: Preprocessors, Output, Alerts, Snort, Spoof Detector, and Network. As previously shown, you start in the Network tab. This screen defines the network properties of the Snort daemon. The first defined property is the interface on which Snort will listen, followed by a checkbox to determine whether the interface should be put into promiscuous mode. If you are only concerned about traffic to or from the host on which you are running, there is no need to make the card promiscuous; this will also increase the system’s efficiency. Also, today’s switched networks protect against promiscuous mode, so you will have to either make a setting change in the switch to allow it or use a hub or tap.
Next, you can specify values for your network, such as the ranges of the internal and external network, specific servers, and some port configuration options for specific services. You should set the details to reflect your configuration, as this will increase the efficiency of the Snort daemon, monitoring only relevant traffic, rather than all traffic.
At the very bottom of this tab are the Start NIDS and Stop NIDS buttons that allow you to start and stop the Snort daemon. If you make any configuration changes, you must stop and restart the daemon for those changes to take effect.
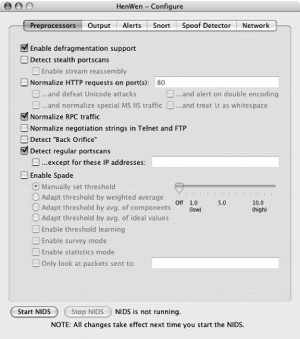
Starting at the other end of the tab list, we have the Preprocessors tab (Figure 5-47). Here, you can see options to set the preprocessors that are described in previous chapters, and also the settings for Spade, which HenWen contains precompiled. Read the other recipes on the preprocessors, and enable those that are appropriate to your environment. Remember though: each preprocessor enabled adds overhead on performance, so enable only those that you know you need. The default set is quite reasonable.
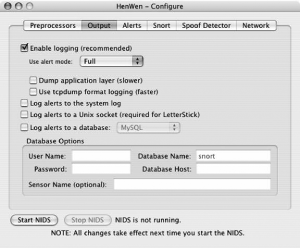
Next is the Output tab (see Figure 5-48). In this tab, you can alter your logging options, including setting up logging to a database. If you are going to use LetterStick for alerting, you’ll need to enable the Log alerts to a Unix socket checkbox here.
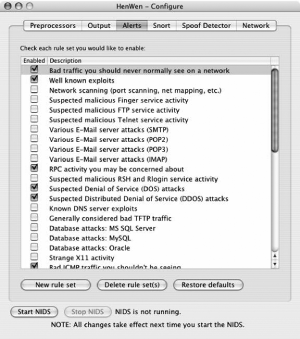
The next tab is Alerts. This is where you select the rules to be scanned against. You can add, delete, and edit rules here (Figure 5-49).
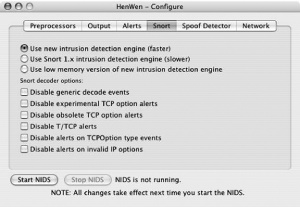
The Snort tab contains settings for Snort itself (Figure 5-50). You can select the detection engine to be used and set up the various decoder options.
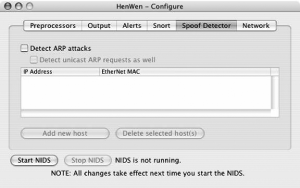
The final tab contains the settings for the Spoof Detector. This enables detection of ARP poisoning and spoofing attacks (Figure 5-51).
HenWen is very straightforward to use—it just provides an easy-to-use graphical interface to all the Snort options. You should refer to the remainder of the book and other reference sources to determine which options you need to use. Once you know, it becomes a matter of selecting a checkbox rather than editing the text configuration files.
5.13. Newbies Playing with Snort Using EagleX
Problem
You want to use Snort, ACID, MySQL, Apache, etc., but you either don’t have a *nix box or are more comfortable with the MS Windows platform. Can you run these applications without having to get a Unix guru to set it up for you?
Solution
A product called EagleX from Engage Security allows you to set all this up on a Windows machine with local only listeners and connections.
Discussion
This product is offered for free from Engage Security at the following site: http://www.engagesecurity.com/downloads/#eaglex. It is a single 16-MB file that includes the following:
Snort 2.01 Build 88
IDScenter 1.1 RC4
Apache 1.2.28
PHP 4.3.2
MySQL 3.23.55
ACID 0.9.6b23
JPGraph 1.9.1
Oinkmaster 0.8 Win32 (modificated; original script by Andreas Östling)
WinPCAP 3.0 final
As you can tell already, this is not kept up to date, so this should be used only as an educational tool. However, if you want to run the latest version of Snort, you can upgrade the Snort portion of EagleX once it is installed.
Installation is as simple as following the prompts. If you are lost during the installation, see the recipe Installing and Configuring IDScenter (Recipe 5.2), as this is the core of EagleX. If you have ACID questions, see the recipe Installing and Configuring ACID (Recipe 5.6).
To change EagleX to use a new version of Snort, download a copy of Snort for Windows from http://www.snort.org and follow these instructions:
Run the new version of Snort’s install program. It should default install to C:\Snort while the EagleX software was installed in C:\eaglex, unless you specified another location.
If you want to save the original configuration of Snort 2.0, just rename the C:\eaglex\snort directory to something else such as C:\eaglex\snort_eaglex.
Copy your new Snort 2.2.x directory into the EagleX directory:
copy C:\snort C:\eaglex"
Create a logs directory under the Snort directory.
mkdir C:\eaglex\snort\logs
Restart IDScenter and click Start Snort. Snort should now be running and capturing packets with the new Version 2.2.x.
Other EagleX components can also be upgraded to newer versions.