PICKLES, RELISHES, AND CHUTNEYS are like jewelry — they accessorize the meal, adding zest and interest to the main course. Chutneys and relishes are kissing cousins to conserves and preserves and go well with such spicy foods as meat curry and grilled chicken with Cajun seasoning. A sandwich is never just a sandwich if a homemade sweet pickle is on the side. Chicken salad and tuna salad take on entirely new characters with 2 tablespoons of artichoke relish added.
In colonial America, particularly in Pennsylvania Dutch country, making relishes, chutneys, and pickles preserved the extra fruits and vegetables from the harvest. By chopping the fruits and vegetables, adding vinegar, spices, and perhaps sugar as available, they mixed the ingredients together until everything was “pickled.” Commercially, as early as 1869, the H. J. Heinz Company bottled horseradish, at the time a great new convenience food.
Today, though the preserving processes have sometimes changed, we can count on enjoying our own concoctions of pesticide-free, additive-free condiments for a fraction of the cost of store-bought ones.
Pickles and relishes are, alas, a far cry from nutritious, but they serve a spicy purpose: making food that is nutritious even more appealing. Many favorite recipes are included here: refrigerator pickles; freezer pickles; fruit pickles; brined pickles; relishes and chutneys using cranberries, tomatoes, and peaches; and almost anything else you can imagine. I have also included recipes for low-salt, low-sugar pickles for people on special diets. Choose from among the four basic types:
Fresh-pack pickles. This kind of pickle is the least labor intensive. Essentially, the produce is pared, soaked, drained, packed, and processed with vinegar and spices. The vinegar, as well as the processing, acts as a preservative.
Fruit pickles. Fruit for pickling usually requires paring, then simmering in a sugar and vinegar syrup, packing, and processing.
Chutneys and relishes. These condiments are usually mixtures of fruits and vegetables, pared and cooked with vinegar and/or sugar, packed, and then processed.
Salt-cured or brined pickles. This method takes longer and requires daily tending and skimming of foam or scum as it forms. The vegetables are pared and soaked (or cured) in brine. The salty brine encourages fermentation and, therefore, acid levels become high enough to prevent spoilage. Pack and process in a boiling-water-bath canner as a recipe dictates.
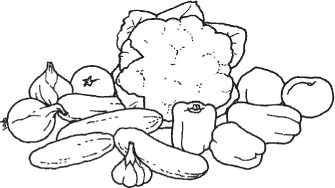
For the best pickles, relishes, and chutneys, start with the freshest produce: firm, ripe, and solid, with no yellowing or tough skins, and no damaged or moldy spots. Remove blossom ends and cut cucumbers from the vines rather than pulling them. It is a great rainy-day activity to put up pickles, but save the harvesting for a sunny day. Rain can drown the whole garden, waterlogging the cucumbers especially. Wait a day after a heavy rain to harvest. Handle the produce carefully to prevent bruising and wash it thoroughly, leaving no grit behind. Peaches and cucumbers especially need careful handling to prevent bruising.
Start with the best produce available.
Refrigerate the produce after picking and use it within 24 hours to ensure freshness and proper fermentation of pickles. To guarantee even pickling and cooking, it’s a good idea to use produce similar in size, whether it’s whole, chopped, or sliced.
Spices and herbs have finally taken their rightful place again as valued medicines and cosmetics, as well as for cooking. In the last 50 years, modern science seemed to replace the significance and usefulness of herbs and spices with technology and pharmacology. Thankfully, the current thinking seems to combine the science of medicine and the art of herbal knowledge.
The value of herbs and spices lies in more than their medicinal applications, of course. Who hasn’t smelled the strong perfume of fresh lemon balm when accidentally brushed against by the lawn mower? How about the essence of dried oregano wafting up to your nose when you open a jar of the season’s recently dried leaves? Herbs and spices have the power to evoke everything from strong memories of childhood to anticipation of just plain mouthwatering goodness.
To make sure your labors are worthwhile, always use fresh herbs and spices purchased or preserved especially for that season. Never use anything more than a year old when beginning any pickling project. When adding the flavors of spices and herbs, tie them in a cheesecloth bag, and unless otherwise noted in your pickling recipe, remove them when you’re packing the finished product. Leave spices and herbs in the jar only if the recipe specifies it. Leaving them in will darken the foodstuffs and intensify the flavor.
TIP
Remember to add the substituted honey to the syrup after boiling. Honey that has been boiled for long periods of time may break down and cause significant flavor changes.
Use granulated white sugar for making relishes, pickles, and chutneys unless your recipe states otherwise. Brown sugar darkens the finished product and significantly changes the flavor.
Light-colored or flavored honey can be substituted for sugar. Remember that honey has twice the sweetening power of sugar. After boiling the vinegar, taste your pickle syrup as you sweeten it with honey; you may need considerably less than you expect. Unlike with recipes for fruit spreads, you can alter the amount of sugar or honey in a pickle recipe because, generally speaking, the sugar does not act as a preservative but is included for taste.
Vinegar, referred to in the Bible, has been used for thousands of years in a variety of helpful ways. As well as a cosmetic, a healing tonic, and a skin preparation, it is also the main ingredient in pickling. The word “vinegar” is French in origin and means “sour wine.”
Actually, vinegar is made from any liquid that can be fermented into alcohol. Yeasts change the sugar in a liquid into alcohol. Afterward, bacteria present in the alcohol solution change the alcohol to acetic acid, the primary acid in vinegar.
Read labels carefully when buying vinegar. The best vinegars should be aged and should state this on the label. If it isn’t mentioned, it means it was made by an inferior process. Also stated on the label will be the percent acidity, which is essential to know when pickling food. Look for vinegars with at least 5 percent acidity for pickling.
While red wine, white wine, and cider vinegars work well for pickling, fancy salad vinegars, such as balsamic, are not appropriate for pickles, relishes, and chutneys because they don’t contain enough acetic acid. Cider vinegar can discolor or darken a light-colored vegetable like cauliflower, so you may wish to use another variety. Whatever kind of vinegar you choose, do not deviate from the amount specified in the recipe. Refer to chapter 7 (page 281) for more about vinegar.
TIP
The chemical interaction of vinegar or salt on metals can impart off flavors and discolor foodstuffs. Use only stainless steel or unblemished enamel for cooking pickling liquids.
Don’t overlook the quality of the other ingredients for pickling just because they are commonplace.
Water. Use only drinking-quality water. If it isn’t potable before pickling, it won’t be better after pickling. If your water is too hard and full of minerals, use bottled distilled water.
Salt. Salt-brined pickles rely on salt as a preservative. Canning salt is plain and pure, coarse or fine, and available in most supermarkets. Avoid using sea salt, solar salt, kosher salt, and iodized or table salt in pickling. (See chapter 1, page 11 for a discussion of salt in canning.) For those on sodium-restricted diets, fresh-pack method pickles are quick and salt-free or salted sparingly for taste only. These can be just as crisp and are good for people on low-salt diets.
Having all the equipment on hand and ready to use before you begin will make canning easier and help you feel more confident. If you have duplicates of kitchen equipment, keep them on the counter just in case you need them.
It’s great to be able to reach for a clean set of measuring spoons instead of fumbling in the drawer in the middle of a recipe. Be organized and read over your recipe and the list of equipment in the box on the previous page before your pickling session.
Never use aluminum, brass, or copper bowls, pots, or utensils for pickling because of the off flavors or discoloration of the food resulting from the chemical interactions of the metal with the vinegar or salt. Cooking pans should be made of stainless steel or unblemished enamel, and mixing bowls should be made of ceramic, glass, stainless steel, or enamel.
The same cleaning and sterilization rules and requirements for jars and lids that apply to other kinds of canning apply to pickling as well. All canning jars must be short enough for the water bath to cover them by 1 to 2 inches before the water boils. They need an additional 2 inches of “boiling room” at the top of the pot after the water begins to boil, so plan to use jars that are at least 4 inches shorter than the height of your canner.
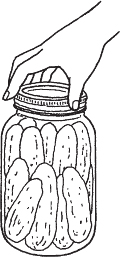
In pickling, as in other forms of canning, the screw ring holds the vacuum lid in place. Unlike the vacuum lid, a screw ring, kept in pristine condition, can be used year after year. Twenty-four hours after the pickling process, when the jars have cooled, remove the metal screw rings before you store your pickles in the pantry. Metal screw rings left on jars may rust. If a screw ring is stuck or stubborn, don’t force it and risk breaking the seal; rather, leave the ring in place.
Other canning jars include European varieties, which can be quite attractive. But for safety’s sake, don’t buy any of these unless they include specific processing instructions that meet USDA guidelines.
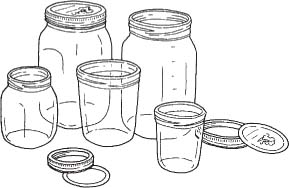
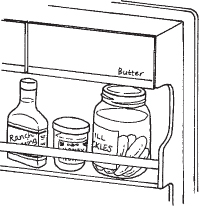
Appropriate jars for pickling
TIP
Under no circumstances should you tighten the screw ring further after processing, as this may break the canning seal.
Antique jars with porcelain-lined zinc caps, which require rubber rings, are available at flea markets, and you can purchase new rubber rings to fit them. However, rather than risk your hard work being foiled by jars not sealing, I recommend that you use these antique jars for dry storage for foods such as beans, pasta, and the like. The same goes for antique glass jars with bailed-wire seals. They look great, but use them for dry storage or short storage in the refrigerator for some of the fancy sauces or refrigerator jellies and pickles listed herein.
For a brining or fermenting process, use a clean stoneware widemouthed jar, sometimes called a crock. A less glamorous but practical choice would be a glass or nonporous plastic bowl. You will also need a clean plate, which must fit inside the container and press directly against the food. Use a clean, unopened glass jar of last year’s pickles — or any heavy, clean, nonmetallic object — to hold down the plate against the food in the crock.
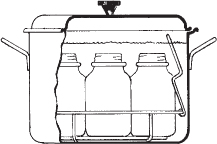
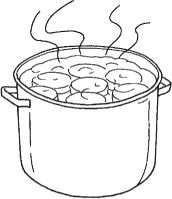
The boiling-water bath is the canning process used for pickling foods. Because of the high acidity level, foods that are pickled do not require the higher temperatures produced by the pressure-canning method to stay safe.
The boiling-water-bath method involves submerging the properly filled jars in a kettle of rapidly boiling water for a specified amount of time, ensuring that a vacuum forms inside the jar, thereby sealing the lids. See chapter 2 (page 27) for more information about this method of canning.
As noted in chapter 1, I recommend a new 21- or 33-quart boiling-water-bath canner with lid and jar rack.
A boiling-water-bath canner
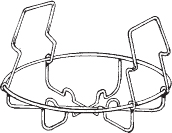
Wire rack for holding jars in a boiling-water-bath canner
The better ones are made of aluminum or porcelain-covered steel. The most expensive but durable ones are made of stainless steel. There are also many appropriate alternatives. Any large pot with a lid can be substituted as long as it is at least 4 inches higher than the jars — deep enough to allow 1 to 2 inches of water to cover the jars plus the 2 inches of boiling room. Use towels between the jars to prevent breakage during the canning process. You will need a wire rack for the bottom to hold jars away from the direct heat and to preven cracking. In lieu of a rack, connect metal screw rings with twist ties and place them on the bottom of the canner.
If the processing time will be longer than 10 minutes, wash the empty jars in the dishwasher or submerge them in hot, soapy water. Thoroughly rinse the jars after you remove them from the dishwasher or dishpan. No soapy residue can remain. Keep the jar lids hot in gently boiling water. If you are reusing screw rings, put them in the boiling water, too. You should always read the manufacturer’s instructions and follow them to the letter when washing and sterilizing jars for canning any kind of food.
For processing times less than 10 minutes, sterilize clean, prewashed jars. Fill the clean jars with hot water and lower them onto the rack in the water-filled pot, making sure that there is at least 1 inch of water above the rims of the jars. At sea level, the jars should boil for 10 minutes. At higher elevations, boil 1 additional minute for each 1,000 feet of altitude. Using the jar lifter, remove and pack the sterilized jars one by one. (Save the boiling water for the canning process.)
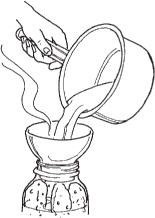
Immediately after you remove each sterilized jar from the boiling-water-bath canner, fill it with the relish, chutney, or other food to be pickled. A widemouthed funnel and ladle are invaluable for this stage. Be careful of drips when you remove the funnel from the filled jar. Drips, if not wiped off, can spoil the seal.
If you’re making pickles, be sure to pack the jar loosely enough for the liquid to circulate around the food, leaving the headspace indicated in the recipe. To get rid of bubbles that appear in the liquid, tap the side of the jar with a knife handle to help settle the contents. You can also run a clean plastic spatula along the sides in several places to help remove bubbles. Don’t stir, which creates more bubbles.
Use a thin, clean, wet dish towel pulled over your index finger to rub around the rim of each jar. It picks up the smallest drip of liquid, and you can feel the slightest chip on the rim as well. A wet paper towel works for this job, too. (If you find a flaw, either put the ingredients in a new sterilized jar or place the damaged jar in the refrigerator for immediate use.) Place the lid and metal screw ring on the jar and secure the ring to the jar. Then fill the next jar until all are filled and ready for processing. Be sure to observe the proper headspace called for in the recipe.
Because of their acidity, pickled foods never require the pressure-canning method of processing. Follow these guidelines for successful boiling-water-bath processed pickles. The information is based on a bulletin from North Carolina State University.
1. Fill the canner halfway with water.
2. Preheat the water to 200°F, a simmer with bubbles.
3. Load the filled jars, fitted with lids, into the canner rack and use the handles to lower the rack into the simmering water. Or fill the canner, one jar at a time, with a jar lifter.
4. Add boiling water, if needed, so that the water level is at least 1 to 2 inches above the jar tops.
5. Cover the canner with the lid.
6. Set a timer for the minutes required for processing the food and begin timing immediately. Be sure to adjust for altitude (page 40).
7. Adjust the heat setting to maintain a simmer throughout the processing schedule.
8. Add more boiling water, if needed, to maintain the water level above the jars.
9. When jars have been boiled for the recommended time, turn off the heat and remove the canner lid.
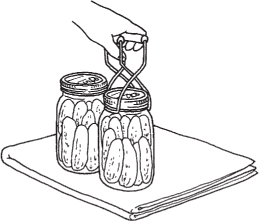
10. Using a jar lifter, remove the jars and place them on a towel, leaving at least 5 to 6 inches of space between the jars while they cool.
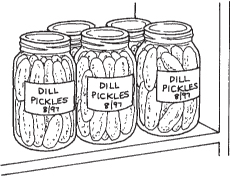
Storing home-canned foods requires just a shelf in a cool, dry, dark place. You can tuck canned pickles in all sorts of nooks and crannies in your house or apartment — just don’t forget where you stored them. Keep a location chart taped to the inside of a cabinet or pantry door. Mark the jars off the list as you use them. As with other canned goods, the best storage temperature is between 50 and 70°F. Store your newest batches of pickles toward the back of the shelf so you will use the oldest pickles first. Any jar kept for longer than 1 year is probably too old to eat.
Refrigerate homemade pickles after opening, just as you would store-bought pickles.
Enough can never be said about canning safety. Clostridium botulinum, the bacterium that causes botulism, grows in the absence of air, making the vacuum in a jar of canned food the ideal environment. Vinegar is a preservative, and botulism is less of a threat in pickles than in low-acid canned foods, but never bend the rules when spoilage is suspected. Clostridium botulinum is deadly. Never taste even a tiny bit of canned food you suspect may be spoiled.
First, check the seals after 12 to 24 hours. Use your thumbs to test the seal of the metal lid. Press hard on the center. If the lid does not move downward or “give,” your seal is intact. If a jar or two in the batch isn’t sealed, you can save it in the refrigerator and consume it over the next day or two.
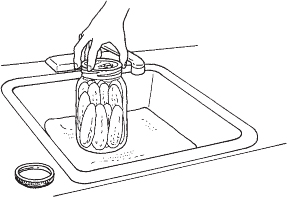
Another method is to try lifting your newly canned jar by its lid after the screw ring has been removed. Use the weight of the jar to test the weakness of the seal. (Protect yourself and the jar by doing this over the sink prepared with a towel to pad a possible fall.)
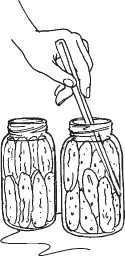
1. Scrub the cucumbers with a soft brush and slice off the blossom end.

2. Pack the cleaned cucumbers loosely in the sterilized jars.
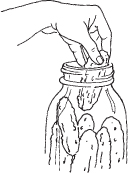
3. Using a widemouthed funnel, pour the hot brine over the cucumbers, allowing the proper headspace.
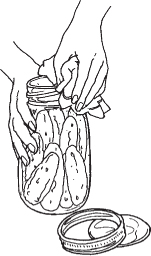
4. Using a nonmetallic spatula or wooden chopstick, press against the cucumbers to release all air bubbles.
5. Wipe the rim with a clean cloth to ensure a good seal.
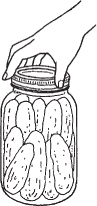
6. Place the lid on the jar and tighten the screw ring.
7. Preheat the water to 200°F, a simmer with bubbles. Place the filled jars in the preheated canner. Add more boiling water until it is 1 to 2 inches above the jars.
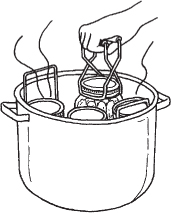
8. Process for the time and at the temperature given in the recipe. Add more boiling water, if necessary, to keep it 1 to 2 inches above the jars.
9. Remove the jars and place on a towel or rack to cool for 24 hours.
10. Remove the screw rings and test the seals. The center of the lid should be depressed. You can lift the jar by the lid and it should hold.
11. Wash the jars, label, and store unopened in a cool, dark place for at least 6 weeks before using.
Fresh-Pack Refrigerator Dill Pickles
Old-Fashioned Brined Dill Pickles
Green and Gold Refrigerator Pickles
Black-Eyed-Pea Refrigerator Relish
Pickled Mixed Vegetable Chunks
Baby Carrots with Honey and Dill
This is an old-fashioned favorite. Use these pickles to dress up a plain sandwich.
6 pounds (about 4 quarts) medium-sized cucumbers, scrubbed and sliced ⅛ inch thick
1½ cups (about 1 pound) peeled and sliced small white onions
2 cloves garlic
½ cup salt
Ice cubes
4½ cups sugar
2 tablespoons yellow mustard seeds
1½ teaspoons celery seeds
1½ teaspoons ground turmeric
3 cups distilled white vinegar
1. In a large mixing bowl, combine the cucumbers, onions, and garlic. Add the salt and mix thoroughly. Cover with ice cubes. Let stand for 3 hours.
2. Rinse well, thoroughly drain the mixture, and remove the garlic cloves.
3. Combine the sugar, mustard seeds, celery seeds, and turmeric; stir in the vinegar and heat to boiling in an 8-quart saucepan. Add the drained cucumber mixture and heat for 5 minutes.
4. Pour into sterilized jars, leaving ½ inch of headspace. Cap and seal.
5. Process for 10 minutes in a boiling-water-bath canner. Adjust for altitude (page 40), if necessary.
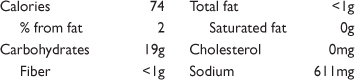
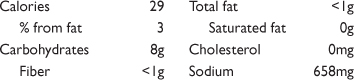
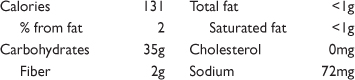
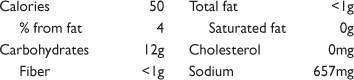
YIELD: 7 PINTS (FIFTY-SIX 2-OUNCE SERVINGS)
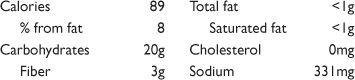
NUTRITION PER SERVING
Great for a small family, these pickles stay crisp for 6 weeks in the refrigerator if you can keep from eating them that long.
10–14 whole pickling cucumbers, approximately 2 inches long, scrubbed
3 sprigs dill
2 cloves garlic
½ cup fresh lemon juice
Cold water
1. Pack a sterilized jar with the cucumbers, dill, and garlic in alternating layers, leaving ¼ inch of headspace.
2. Pour the lemon juice over the cucumbers. Fill the jar with cold water.
3. Seal and refrigerate. These will keep for at least 6 weeks. Serve and enjoy!

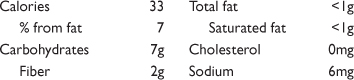
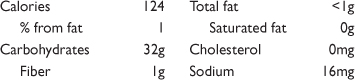
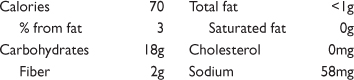
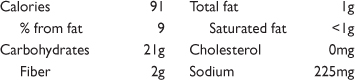
YIELD: 1 QUART (SIXTEEN 2-OUNCE SERVINGS)
NUTRITION PER SERVING
Here is another one of my favorites. While these pickles need to sit in the crock for 3 weeks, plan ahead, and maintaining these pickles will only take a few minutes each day. They’re worth it.
20 pounds (about ½ bushel) pickling cucumbers, 3-6 inches long, scrubbed
¾ cup mixed pickling spice
3 large bunches fresh dill weed
2½ cups cider vinegar
2½ gallons water
1¾ cups salt
10 cloves garlic
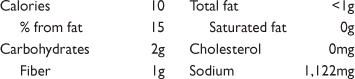
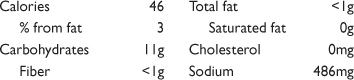
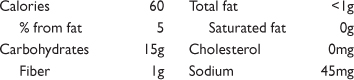
YIELD: 10 QUARTS (ONE HUNDRED SIXTY 2-OUNCE SERVINGS)
NUTRITION PER SERVING
1. In a 5-gallon crock, place half of the cucumbers, pickling spice, and dill, then layer again to within 3–4 inches of the top of the crock.
2. Mix the vinegar, water, and salt and pour over the cucumbers. Cover with a ceramic plate and place a heavy jar of last year’s pickles on it to weight down the cucumbers.
3. Make sure the cucumbers are completely under the brine. Cover the crock loosely with a clean towel.
4. Keep the pickles at room temperature (80–85°F). I use my laundry room sink for this purpose.
5. In about 3 days, begin skimming off the foam. Do not stir the pickles. Keep them completely covered with brine throughout this process.
6. Check daily, removing scum and foam. In 3 weeks the cucumbers should be an olive-green color. White spots inside the cucumbers will disappear when processed.
7. Pack the cucumbers in sterile quart jars. Add 1 clove of garlic to each jar and divide the dill sprigs evenly among the jars.
8. Strain the brine through a coffee filter into the jars, leaving ½ inch of headspace. Cap and seal.
9. Process for 15 minutes in a boiling-water-bath canner. Adjust for altitude (page 40), if necessary.
Note: Start timing the canning process as soon as the jars are put into the boiling water instead of waiting for the water to boil again. This will ensure a crisp, processed pickle without overcooking.
This is quick and easy and good for beginners and experienced cooks alike.
1 gallon (about 10–12 large) cucumbers, scrubbed and sliced
2 quarts distilled white vinegar
6 cups sugar
1 teaspoon whole mixed pickling spice
1 teaspoon salt (optional)
1. Place the cucumber slices in an 8-quart crock. Cover with the vinegar. Make sure the cucumbers are completely under the vinegar.
2. Cover the cucumbers with a ceramic plate and place a heavy jar of last year’s pickles on it to weight it down. Let stand for 24 hours.
3. Drain and discard the vinegar. Add the sugar, pickling spice, and salt (if using) to the cucumber slices.
4. Mix gently to allow the sugar to dissolve somewhat. After several hours, stir again. The pickles are ready to eat when all the sugar has dissolved.
5. Pack the pickles in sterile canning jars and refrigerate before eating. These will keep for 2 months in the refrigerator.
Note: This is an adaptation of the N.C. Agricultural Extension Service recipe.
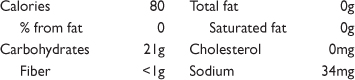
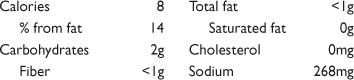
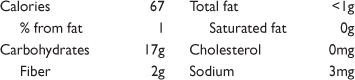
YIELD: 8 PINTS (SIXTY-FOUR 2-OUNCE SERVINGS)
NUTRITION PER SERVING
This recipe is best made in early fall, when cauliflower is plentiful but before frost nips the tomatoes, green peppers, and cucumbers. Enjoy it all winter as an accompaniment to meat or sandwiches.
1 head cauliflower, broken into florets (about 1 ½ quarts)
1 quart small white onions, peeled
1 quart small cucumbers, sliced
1 quart small green tomatoes
2 large green bell peppers, seeded and chopped (about 2 cups)
2 large red bell peppers, seeded and chopped (about 2 cups)
3 quarts cold water
½ cup pickling salt
2 quarts cider vinegar
1½ cups firmly packed light brown sugar
6 tablespoons prepared mustard
⅓ cup flour
2 tablespoons ground turmeric
1. Prepare the vegetables; place them in a large crock or a glass or ceramic bowl. Mix the water and salt, then pour over the vegetables. Cover; let stand for 24 hours.
2. Drain the brine from the vegetables, catching the vegetables in a colander and the solution in a saucepan. Heat the solution to boiling and pour over the vegetables in the colander. Drain.
3. Combine the vinegar, brown sugar, mustard, flour, and turmeric in a large nonreactive saucepan. Stir, then heat gradually, stirring constantly, until the mixture is thick and smooth. Add the vegetables and cook gently until they are tender but have not lost their individuality. Stir with a heavy wooden spoon to prevent scorching.
4. Pack into hot, clean quart jars, leaving ½ inch of headspace. Cap and seal.
5. Process in a boiling-water-bath canner for 10 minutes. Adjust for altitude (page 40), if necessary.
YIELD: 5 QUARTS (EIGHTY 2-OUNCE SERVINGS)
NUTRITION PER SERVING
A real old-fashioned classic, perfect with a turkey sandwich. As a child, my sister-in-law called this her “favorite green vegetable.”
3 tablespoons slaked lime*
2 quarts water
8 cups watermelon rind (1 large melon), peeled and cut into 1-inch squares
3 cups firmly packed brown sugar
2 cups white distilled vinegar
1 lemon, thinly sliced
1½ cinnamon sticks, 2–2½ inches long
1 teaspoon whole allspice
1 teaspoon whole cloves
2 drops all-natural green food coloring (optional)
1. In a large glass or ceramic bowl, add the lime to the water. Soak the peeled watermelon rind in the lime solution for 8 hours.
2. Drain, then rinse well and drain again.
3. In a large saucepan, simmer the rind in clear water until tender, about 20 minutes.
4. Meanwhile, make a syrup of the sugar, vinegar, lemon, and spices (tied in cheesecloth). Boil for 5 minutes in an 8-quart saucepan. Add the rind to the vinegar solution and cook until the rind is clear and thin, about 10 minutes.
5. Pack clean jars with the rind and pour hot liquid over each one, leaving ½ inch of headspace. Cap and seal.
6. Process for 10 minutes in a boiling-water-bath canner. Adjust for altitude (page 40), if necessary.
Note: Watermelon rind can be pared and stored in the refrigerator “as eaten” for up to 3 days. When you have accumulated 8 cups of rind, it’s time to pickle them.
YIELD: 3 PINTS (TWENTY-FOUR 2-OUNCE SERVINGS)
NUTRITION PER SERVING
Even after they’ve been thawed and stored in the refrigerator for up to a week, these pickles taste like Granny’s homemade ones, but they are a lot easier to make. This recipe is frequently requested by friends.
4 cups (about 12-14) pickling cucumbers, 3–4 inches long, washed, unpeeled, and thinly sliced
2 large onions, peeled and thinly sliced
1 tablespoon salt
1 cup sugar
½ cup cider vinegar
1 tablespoon whole white mustard seeds
½ teaspoon ground turmeric
1. Combine the cucumbers, onions, and salt in a glass or ceramic bowl. Let stand for 2–4 hours to extract the moisture.
2. Rinse and drain the vegetables well, blotting them with paper towels to absorb all the moisture.
3. Combine the remaining ingredients and mix well until the sugar dissolves completely, about 10 minutes. Stir in the cucumbers and onions.
4. Pour the cucumber mixture into clean freezer containers, leaving 1 inch of headspace for expansion. Cap and seal. These will keep for up to 1 year in the freezer.
5. To use, thaw for about 4 hours in the refrigerator. Serve chilled!
YIELD: 5 PINTS (TWENTY 4-OUNCE SERVINGS)
NUTRITION PER SERVING

These easy-to-make refrigerator pickles will disappear rapidly.
2 cups sugar
1 cup cider vinegar
3½ cups yellow summer squash, thinly sliced
3½ cups zucchini, thinly sliced
1 cup green bell peppers, finely chopped
1 cup red bell peppers, finely chopped
1 cup onions, thinly sliced
1 tablespoon dill seeds
1 tablespoon salt
1. Heat the sugar and vinegar in a nonreactive 4-quart saucepan until the sugar dissolves.
2. Add the remaining ingredients and chill overnight.
3. Transfer the vegetables to sterile quart canning jars. Cover with the vinegar mixture, cap, and seal. These will keep in the refrigerator for 2 months.
YIELD: 2 QUARTS (SIXTEEN 4-OUNCE SERVINGS)
NUTRITION PER SERVING

Not only is this good for what ails you and low in calories, but it’s also a mellow and delicious appetizer. “Crab boil” seasoning can be found in most grocery stores in the seafood section. I use Old Bay.
¾ cup distilled white vinegar
½ cup water
2 teaspoons coarse salt
⅛ teaspoon crab boil seasoning
6 large bulbs garlic, separated, blanched, and skinned
Zest of 1 lemon, peeled in one continuous spiral
1 dill head, or ½ teaspoon dill seeds
1 small whole red chile
1. In a saucepan, combine the vinegar, water, salt, and crab boil seasoning and bring to a boil. Add the garlic and let steep for 10 minutes over very low heat.
2. Line a clean 1-pint jar with the lemon zest and add the dill head and red chile.
3. Ladle in the garlic and enough liquid to cover. Cap and seal.
4. Cool at room temperature.
5. Allow the flavors to marry for 3–4 days before using. Refrigerate up to 4 weeks.
YIELD: 1 PINT (EIGHT 2-OUNCE SERVINGS)
NUTRITION PER SERVING
Low in calories and high in taste and nutrients, this recipe can be used as a salad base for mixed lettuces or eaten alone on toothpicks as an appetizer.
6 cups (about 2 pounds) Brussels sprouts
2½ cups vinegar
2½ cups water
3 tablespoons salt
1 teaspoon cayenne pepper
4 dill heads, or 2 teaspoons dill seeds
4 cloves garlic
1. Leave the Brussels sprouts whole but trim off old foliage. Boil them until tender. Drain and pack into clean jars.
2. Mix the vinegar, water, salt, and cayenne pepper in a heavy saucepan; boil for 5 minutes.
3. Pour the vinegar mixture over the Brussels sprouts, leaving ¼ inch of headspace.
4. Evenly distribute the dill heads and garlic among the jars.
5. Cap, seal, and process for 15 minutes in a boiling-water-bath canner.
YIELD: 4 PINTS (SIXTEEN ½-CUP SERVINGS)
NUTRITION PER SERVING

Pickle cauliflower in cool weather when it is plentiful. This recipe is easy to make and low in calories.
3 heads (about 10 pounds) cauliflower, washed and cut into small florets
8 cups distilled white vinegar
8 cups water
¼ cup salt
¼ cup yellow mustard seeds
12 cloves garlic
12 dill heads
12 small chiles
1. Steam the cauliflower florets over boiling water for 1 minute.
2. Simmer the vinegar, water, salt, and mustard seeds in a 5-quart saucepan for 5 minutes.
3. Pack each sterilized jar with 2 cloves of garlic, 2 dill heads, and 2 chiles. Pack the warm cauliflower in each jar, leaving ¼ inch of headspace.
4. Cover with the vinegar solution, leaving ¼ inch of headspace. Cap and seal.
5. Process for 15 minutes in a boiling-water-bath canner. Adjust for altitude (page 40), if necessary.
6. Store the jars for 3 weeks before using to allow the flavors to develop.
YIELD: 6 QUARTS (NINETY-SIX 2-OUNCE SERVINGS)
NUTRITION PER SERVING
Remember spring as you serve these on lettuce leaves in the middle of winter; garnish with hard-boiled egg slices and mustard mayonnaise.
3 cups distilled white vinegar
3 cups water
¼ cup sugar
2 teaspoons salt
3 pounds (about 8 cups) asparagus spears, washed and trimmed
4 cloves garlic, peeled
2 teaspoons pickling spice
12 whole black peppercorns
1. Combine the vinegar, water, sugar, and salt in a 2-quart saucepan and heat to a boil.
2. Pack the asparagus in two 1-quart jars, leaving ½ inch of headspace.
3. Divide the garlic, pickling spice, and peppercorns between the two jars. Pour the hot vinegar mixture over the asparagus, leaving ½ inch of headspace. Cap and seal.
4. Process for 20 minutes in a boiling-water-bath canner. Adjust for altitude (page 40), if necessary.
YIELD: 2 QUARTS (SIXTEEN 4-OUNCE SERVINGS)
NUTRITION PER SERVING

Colorful and delicious, this remarkable relish will delight your picnic guests.
3 quarts cucumbers, scrubbed and chopped
3 cups green bell peppers, seeded and chopped
3 cups red bell peppers, seeded and chopped
1 cup onions, chopped
8 cups water
4 cups ice cubes
¾ cup salt
4 teaspoons ground turmeric
4 teaspoons whole allspice
4 teaspoons yellow mustard seeds
1 tablespoon whole cloves
6 cups distilled white vinegar
2 cups sugar
1. In a 12-quart saucepan, combine the vegetables, water, ice, and salt; let stand for 4 hours. Drain and re-cover with fresh ice and water for 1 additional hour. Drain thoroughly.
2. Combine the spices in a cheesecloth bag. Place the spice bag, vinegar, and sugar in a nonreactive 4-quart saucepan and heat to boiling.
3. Pour the vinegar syrup over the vegetables and refrigerate for 24 hours.
4. Heat the mixture to boiling and ladle into sterile jars, leaving ½ inch of head-space. Cap and seal.
5. Process for 10 minutes in a boiling-water-bath canner. Adjust for altitude (page 40), if necessary.
Note: A food processor can be used to chop the vegetables in batches by pulsing the motor.
YIELD: 9 PINTS (SEVENTY-TWO 2-OUNCE SERVINGS)
NUTRITION PER SERVING

This recipe can serve as a garnish for the standard hamburgers and hot dogs, but it’s also delicious as a slaw with barbecue.
½ cup cider vinegar
½ cup water
⅓ cup sugar
1 tablespoon yellow mustard seeds
1½ teaspoons celery seeds
⅛ teaspoon cayenne pepper
6 medium tomatoes, chopped and drained
1 small head green cabbage, shredded
½ small head red cabbage, shredded
1 cup chopped dill pickles
1 large green bell pepper, seeded and chopped
1 large red onion, diced
1. Combine the vinegar, water, sugar, mustard seeds, celery seeds, and cayenne pepper in an 8-quart saucepan. Simmer, uncovered, for 5 minutes. Cool.
2. Add the remaining ingredients to the pan, cover, and refrigerate for 8 hours. Serve chilled. Keeps for 3–5 days in the refrigerator.
YIELD: 10 CUPS (TEN 1-CUP SERVINGS)
NUTRITION PER SERVING
Make a hot dog a festive occasion with this relish. It is easy to prepare and adds zest to any meat.
5 pounds sweet onions, chopped (about 10 cups)
2¼ cups distilled white vinegar
1 cup sugar
2 tablespoons celery seeds
2 tablespoons salt
1. Combine all the ingredients in a heavy 8-quart saucepan. Bring to a boil.
2. Reduce the heat and simmer for 10 minutes, stirring occasionally.
3. Ladle the relish into clean jars, leaving ½ inch of headspace.
4. Cap and seal.
5. Process for 10 minutes in a boiling-water-bath canner. Adjust for altitude (page 40), if necessary.
YIELD: 5 PINTS (FORTY 2-OUNCE SERVINGS)
NUTRITION PER SERVING

A quick version of Granny’s corn relish, this is a great favorite on hot dogs and hamburgers.
1½ cups distilled white vinegar, 5% acidity
¾ cup sugar
2¼ teaspoons salt
¾ teaspoon mustard seeds
¼ teaspoon celery seeds
¼ teaspoon Tabasco sauce
12 large ears corn, or about 8 cups corn kernels
1 small green bell pepper, seeded and chopped
1 small red bell pepper, seeded and chopped
3 scallions, sliced
1. Combine the vinegar, sugar, salt, mustard seeds, celery seeds, and Tabasco sauce in a heavy 8-quart nonreactive saucepan. Boil, uncovered, over medium heat for about 5 minutes.
2. Combine the vegetables. Distribute equally into four sterilized pint jars. Pour the vinegar mixture over the vegetables.
3. Cover tightly and refrigerate. Consume within 1 month. Delicious!
YIELD: 4 PINTS (THIRTY-TWO 2-OUNCE SERVINGS)
NUTRITION PER SERVING

In the South, black-eyed peas are traditionally served on New Year’s Day to bring good fortune. What a great New Year’s gift for friends! But don’t forget, this relish is delicious served all year long.
½ pound dried black beans, cooked until barely tender (al dente)
½ pound dried black-eyed peas, cooked until barely tender (al dente)
2 ears yellow corn, blanched, kernels removed
1 red bell pepper, seeded and finely chopped
½ red onion, finely chopped
½ yellow onion, finely chopped
½ orange, sectioned and seeded
2 scallions (including green tops), finely chopped
1. Combine all the ingredients in a 4-quart ceramic bowl. Pour the Simple Vinaigrette dressing over the warm vegetables.
2. Cover the bowl and refrigerate overnight.
3. Ladle the relish into 6 sterile canning jars. Cap and seal. This will keep for 3 days in the refrigerator.
1 cup extra-virgin olive oil
⅓ cup red wine vinegar
1 teaspoon chopped fresh parsley
1 teaspoon chopped fresh tarragon
¼ teaspoon dry mustard
¼ teaspoon salt
⅛ teaspoon freshly ground black pepper
YIELD: 3 PINTS (TWENTY-FOUR 2-OUNCE SERVINGS)
NUTRITION PER SERVING
This chutney can be heated and thickened with cornstarch to complement Chinese vegetables or rice.
16 cups slightly pink green tomatoes, cored and chopped
8 cups coarsely chopped green cabbage
2 cups coarsely chopped green bell peppers
1 cup chopped onion
½ cup salt
4½ cups cider vinegar
1½ cups firmly packed brown sugar
3 cloves garlic, peeled and sliced
2 tablespoons mustard seeds
4 teaspoons celery seeds
1 tablespoon prepared horseradish (not cream style)
1. In a large bowl, combine the tomatoes, cabbage, peppers, and onions.
2. Sprinkle the salt over the chopped vegetables and let stand for 4–5 hours.
3. Transfer the salted vegetables to a colander. Press them with the back of a broad spoon, removing as much moisture as possible. Drain well.
4. Combine the vinegar, sugar, garlic, spices, and horseradish. Simmer for 15 minutes in a heavy nonreactive 12-quart saucepan.
5. Add the drained vegetables to the saucepan and bring the mixture to a boil.
6. Pack into clean jars, leaving ¼ inch of headspace. Cap and seal.
7. Process for 10 minutes in a boiling-water-bath canner. Adjust for altitude (page 40), if necessary.
YIELD: 7 PINTS (FIFTY-SIX 2-OUNCE SERVINGS)
NUTRITION PER SERVING
Turn a plain sandwich into a feast with this mustard.
⅔ cup apple juice
⅔ cup red wine vinegar
½ cup dry mustard
⅓ cup water
¼ cup light mustard seeds
3 tablespoons chopped fresh basil
2 tablespoons minced shallots
2 tablespoons packed light brown sugar
1 teaspoon salt
¼ teapoon ground allspice
1. Combine the apple juice, vinegar, dry mustard, water, and mustard seeds in a glass or ceramic bowl and stir, mixing well.
2. Cover the bowl with plastic wrap and let stand for 4–6 hours, stirring occasionally.
3. Process the mixture in the bowl of a food processor until the mustard seeds are coarsely ground.
4. Cook the mixture in a double boiler over simmering water, adding the basil, shallots, sugar, salt, and allspice. Cook for 20–25 minutes. The mustard will thicken as it cooks.
5. Pour into sterile jars. Cap and seal.
6. Allow the flavors to marry for 2–3 days before using. Will keep in the refrigerator for 2–3 months unopened.
YIELD: FIVE ½-PINTS (FORTY 1-OUNCE SERVINGS)
NUTRITION PER SERVING

It wouldn’t be Thanksgiving without this relish on our table. But we love it with pork and ham as well.
½ cup white wine vinegar
1½ tablespoons sugar
3 cloves garlic, minced
2 teaspoons fresh ginger root, peeled and minced
½ teaspoon cayenne pepper
½ teaspoon yellow mustard seeds
¼ teaspoon salt
1 cup dark raisins
1 cup golden raisins
1. Heat the vinegar and sugar. Add the garlic, spices, and salt.
2. Pour the warm vinegar over the raisins in a 1-pint sterile canning jar.
3. Cap, seal, and refrigerate. Will keep for 3–5 days in the refrigerator.
YIELD: 1 PINT (EIGHT 2-OUNCE SERVINGS)
NUTRITION PER SERVING
This recipe is a perfect way to preserve the delicious taste of fresh pears while they are plentiful.
12½ pounds ripe pears, peeled, cored, and chopped
8 jalapeño chiles, seeded and chopped (wear rubber gloves)
6 green bell peppers, seeded and chopped
6 red bell peppers, seeded and chopped
6 medium onions, chopped
5 cups distilled white vinegar
5 cups sugar
1 tablespoon celery seeds
1 tablespoon salt
1. Combine all the ingredients in a heavy 10-quart saucepan. Mix well and bring to a boil. Reduce the heat.
2. Simmer, uncovered, for approximately 20–30 minutes, stirring frequently and being careful not to burn.
3. Ladle the hot relish into clean pint jars, leaving ½ inch of headspace. Cap and seal.
4. Process in a boiling-water-bath canner for 20 minutes. Adjust for altitude (page 40), if necessary.
Note: You may use the food processor to chop the fruit and vegetables in batches, pulsing the motor.
YIELD: 14 PINTS (ONE HUNDRED TWELVE 2-OUNCE SERVINGS)
NUTRITION PER SERVING
Try this chutney with poultry, pork, or lamb.
2 large oranges
2½ pounds rhubarb, washed and cut into 1-inch pieces
5½ cups firmly packed light brown sugar
4 cups cider vinegar
2 cups golden raisins
2 medium onions, peeled and chopped
1 tablespoon yellow mustard seeds
12 whole allspice berries
12 whole black peppercorns
1. Grate the zest from both oranges and set aside.
2. Halve and then section both oranges as you would a grapefruit, removing the white membranes. Place in a 2-quart bowl.
3. Chop the orange sections coarsely. Squeeze any remaining juices out of the orange halves into the chopped sections.
4. Combine the rhubarb, oranges, sugar, vinegar, raisins, and onions in a 4-quart saucepan.
5. Tie the spices in a cheesecloth bag and add to the pan. Slowly bring the mixture to a boil, stirring to dissolve the sugar.
6. Simmer uncovered until thick, about 1–1½ hours, being careful not to burn and stirring often. Remove the spice bag.
7. Ladle into hot, clean jars, leaving ¼ inch of headspace. Cap and seal.
8. Process for 10 minutes in a boiling-water-bath canner. Adjust for altitude (page 40), if necessary.
YIELD: EIGHT ½-PINTS (THIRTY-TWO 2-OUNCE SERVINGS)
NUTRITION PER SERVING

Baste grilling pork or chicken with this rich chutney during the last stages of cooking. Then serve the rest as a side dish. Delicious.
2½ cups (about 1 pound) red plums, washed, pitted, and chopped
¼ cup chopped red onion
¼ cup sugar
3 tablespoons golden raisins
3 tablespoons orange juice
2 tablespoons distilled white vinegar
2 cloves garlic, minced
½ teaspoon ground allspice
¼ teaspoon salt
1. Combine all the ingredients in a 2-quart saucepan with a lid. Bring to a boil, covered, then reduce the heat to medium. Simmer, covered, for 20–30 minutes.
2. Uncover and cook for 8–10 minutes longer, until the moisture disappears, being careful not to burn.
3. Pour into three ½-pint sterile canning jars, leaving ¼ inch of headspace. Cap; seal.
4. Refrigerate and consume within 1 week.
YIELD: THREE ½-PINTS (TWELVE 2-OUNCE SERVINGS)
NUTRITION PER SERVING
A variation on a theme, this cranberry sauce tastes fresh even after being frozen or refrigerated. Serve with lamb or turkey cutlets.
1 package (12 ounces) fresh cranberries, rinsed and picked over
¾ cup sugar
1 scallion, coarsely chopped
1 medium jalapeño chile, seeded and quartered (wear rubber gloves)
3 teaspoons fresh cilantro
¼ teaspoon ground cumin
1. Coarsely chop all the ingredients in a food processor, pulsing the motor.
2. Pour into three sterile 1-cup canning jars, leaving 1 inch of headspace.
3. Allow the flavors to develop in the refrigerator overnight. This will keep for 1 week in the refrigerator or 2 months in the freezer.
4. To use frozen cranberry sauce, thaw in the refrigerator.
Note: For a quick version of this recipe, combine one 16-ounce can of whole cranberry sauce with ½ cup of Five-Pepper Jelly (see page 228). Melt together in a saucepan over medium heat until combined. Cool, then serve. This will keep for 2 weeks in the refrigerator.
YIELD: THREE 3½-PINTS (TWELVE 2-OUNCE SERVINGS)
NUTRITION PER SERVING
A great accompaniment to all meats and sandwiches.
4 pounds pickling cucumbers, washed and thickly sliced
2 pounds small onions, peeled and quartered
4 cups celery, sliced into 1-inch pieces
2 cups carrots, peeled and thickly sliced
2 cups cauliflower florets
2 cups red bell peppers, cut into 1-inch pieces
Ice cubes
6 cups distilled white vinegar
3½ cups sugar
¼ cup salt (or more to taste)
¼ cup prepared mustard
3 tablespoons celery seeds
2 tablespoons yellow mustard seeds
½ teaspoon whole cloves
½ teaspoon ground turmeric
1. Combine the vegetables in an 8-quart ceramic bowl and cover with the ice cubes. Refrigerate for 4 hours.
2. Combine the vinegar, sugar, salt, mustard, seeds, and spices in a heavy 8-quart saucepan. Bring to a boil.
3. Drain the vegetables. Pack into sterile jars, leaving ½ inch of headspace.
4. Ladle the vinegar syrup over the vegetables, leaving ½ inch of headspace. Cap and seal.
5. Process for 10 minutes in a boiling-water-bath canner. Adjust for altitude (page 40), if necessary.
YIELD: 10 PINTS (EIGHTY 2-OUNCE SERVINGS)
NUTRITION PER SERVING
Try this with poultry or fish or as a low-calorie appetizer.
2 packages (1 pound each) peeled baby carrots (4 cups)
⅔ cup white wine vinegar
½ cup honey
2 tablespoons whole light mustard seeds
1 teaspoon salt
2 tablespoons minced fresh dill
1. Cook the carrots in a large pot of salted boiling water until tender but still crisp, about 5 minutes. Drain.
2. Combine the vinegar, honey, mustard seeds, and salt in a 2-quart bowl. Add the hot carrots to the vinegar mixture. Stir to cool.
3. Cover and store in the refrigerator for 3–5 days. Serve at room temperature sprinkled with the fresh dill.

YIELD: 5½ CUPS (ELEVEN ½-CUP SERVINGS)
NUTRITION PER SERVING
*Slaked lime, or pickling lime, is calcium hydroxide, which is found in health food and grocery stores.