Although all of us at Chanterelle love desserts, we don’t often indulge in them at staff meals. They’re mostly reserved for special occasions such as birthdays or holidays. Of course, there are those moments when we’re inspired by the sight of a basket of sublimely ripe blackberries crying out to become a tempting cobbler or a freshly baked crisp. And sometimes, when the Chanterelle kitchen has been especially busy, we simply feel the need to indulge in a reward for our hard work and extra effort. The desserts here are not particularly fancy, but they do rely on the highest-quality ingredients. After all, it makes no sense to bake a mouthwatering chocolate cake using mediocre chocolate, or to create a fabulous cobbler with flavorless fruits.
This dessert says “front of the house” more than it says “staff meal,” but it’s a favorite of mine. Easy to prepare, it keeps for a long time in the refrigerator and makes a good winter holiday dish, one that you can have ready in advance. The figs and prunes rest in a dark, luscious syrup until plump and deeply flavored. In a funny way, I think this is what holiday fruitcake wished it was. Serve the fruits in their aromatic syrup accompanied by crisp Tuiles (page 427) or vanilla ice cream. SERVES 12
1½ pounds dried figs
1½ pounds dried pitted prunes
10 black peppercorns
2 vanilla beans
1 bottle (750 ml) dry red wine, such as an inexpensive California or Chilean Merlot
1 cup ruby port
½ cup brandy
1 cup sugar, or more to taste
Zest of 1 lemon, removed with a vegetable peeler
Zest of 1 orange, removed with a vegetable peeler
3 star anise
1 cinnamon stick (3 inches)
1 whole nutmeg
Chopped walnuts, for serving
Unsweetened whipped cream, for serving
1. Place the figs and prunes in a large bowl and set aside.
2. Place the peppercorns between two pieces of waxed paper and coarsely crush with a heavy mallet or the flat side of a meat cleaver. Carefully split the vanilla beans lengthwise with a sharp paring knife.
3. Place the wine, port, brandy, 1 cup sugar, the lemon and orange zests, star anise, cinnamon stick, nutmeg, crushed peppercorns, and vanilla beans in a large, nonreactive pot. Bring to a boil over high heat and reduce the liquids by half, 15 to 20 minutes. The marinade will take on a slightly syrupy consistency.
4. Strain the marinade into a small bowl and taste. It should be sweet but not cloyingly so. If necessary, add more sugar, 1 tablespoon at a time, but keep in mind that the figs and prunes will also add sweetness.
5. Pour the syrupy marinade over the dried fruit and let marinate, covered, in the refrigerator for at least 2 days and up to 3 weeks.
6. To serve, place two or three of each of the dried fruits on a plate. Drizzle with syrup, then sprinkle with chopped walnuts and top with a dollop of whipped cream.

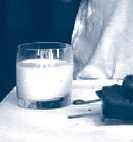
This easy, light dessert soup is a staff natural in the fall when cranberries are plentiful and festive feelings are running high. We like its tart-sweet flavor and usually serve it with a scoop of vanilla ice cream or lemon or orange sherbet midbowl, plus a few sugared cranberries on top for garnish. SERVES 4 TO 6
1 cinnamon stick (3 inches)
6 whole cloves
1 piece (1 inch) fresh ginger, peeled
4 long strips lemon zest, ½ inch wide
2½ cups sugar
2 cups water
2 packages (12 ounces each) fresh or frozen cranberries
3 tablespoons fresh lemon juice, or to taste
1. Place the cinnamon stick, cloves, ginger, and lemon zest in a cheesecloth square and tie together in a bundle.
2. Place 2 cups of the sugar, the spice bundle, and water in a medium-size, heavy saucepan and bring to a boil over medium-high heat. Boil, stirring constantly, to dissolve the sugar.
3. Add the cranberries and bring the mixture to a boil. Then reduce the heat to medium and cook until the berries begin to burst, 3 to 5 minutes. Remove the pan from the heat; you don’t want the soup to get too thick.
4. Place the remaining ½ cup sugar on a plate. Remove ¼ cup of the cranberries and roll them in the sugar to coat. Place the plate of sugared berries in the refrigerator to chill.
5. Let the remaining berries sit for 15 minutes, then strain them through a strainer lined with cheesecloth into a medium-size bowl. Press down on the berries as you strain them to release all their juices. Discard the pressed berries. You should have about 3 cups of juice. Taste and add lemon juice a tablespoon at a time to get just the right balance of flavors. Cover the bowl and refrigerate to chill the cranberry soup.
6. When you’re ready to serve, pour the soup into shallow bowls and garnish each serving with a few candied cranberries.
the emperor of ice cream
At Chanterelle there’s a lot of rushing around behind the scenes, but when we step through the kitchen door to greet our clients, boom!—everything changes—it’s showtime. No matter what, our job is to appear serene and friendly. This is far easier said than done on some days. And when we’re frazzled, the thing that’s guaranteed to calm us down and cool us off is ice cream. You cannot imagine how much we consume, and the same is true in many restaurants. Luckily, we have our own Emperor of Ice Cream, the garde-manger. It’s the garde-manger who’s responsible for cold or chilled foods, including desserts. For us, he or she is also the person with the scoop who obligingly indulges us. There’s nothing better than bypassing adulthood just long enough to enjoy a dish of ice cream.

Fresh, sweet litchis (or lychees) are available for such a short time during early summer that it’s not surprising many of us never have the opportunity to enjoy them. I always make a point of surprising Karen with fresh litchis when I see them in nearby Chinatown (she says she likes them better than flowers)! These small, succulent fruits with an easy-to-remove, reddish shell and a gel-like texture taste exotic. In fact, litchis are exotic, originally hailing from Asia.
Canned litchis, on the other hand, have lost their mystique. Still, they’re available year-round and not hard to find. This sorbet gives the canned litchi back its special quality. The substantial amount of lemon juice livens up the flavor, adding a sweet-tart balance. Eat it on its own or as a garnish for a fruit soup. MAKES 4 CUPS; SERVES 8
4 cups litchis with syrup (two 20-ounce cans; see Note)
¼ cup sugar
1 tablespoon fresh lemon juice, or more to taste
1. Purée the litchis in batches in a blender or food processor. Transfer each batch to a large bowl as it is puréed. Strain the puréed litchis through a fine sieve into another bowl.
2. Add the sugar and lemon juice and stir to blend. Taste and add more lemon juice if needed.
3. Transfer the litchi purée to an ice cream maker and freeze according to the manufacturer’s directions.
Note: If you can only find 15-ounce cans of litchis, buy three and measure out 4 cups. Any extras will taste delicious in a mixed fruit salad.
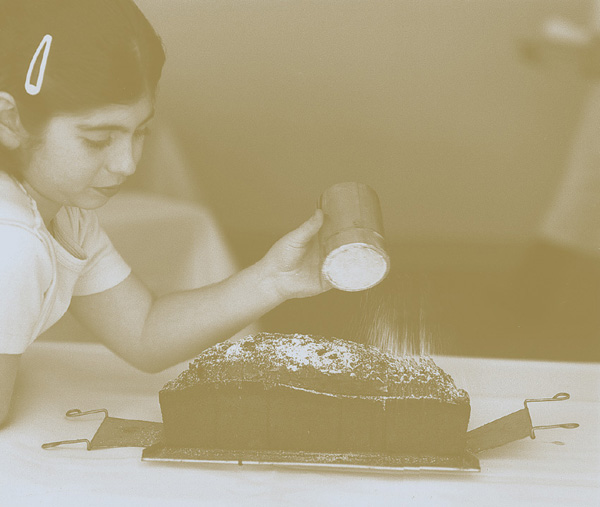
A rich pound cake is a perfect dessert. It’s easy to put together and needs no special attention while it bakes. You can serve it plain with cups of coffee or tea, and it will make a deliciously satisfying end to a meal. But dress up a pound cake for special occasions and it’s elegance personified. When company comes, dust it with confectioners’ sugar and serve slices topped with a berry compote (blueberries and blackberries are particularly appealing) or freshly poached peaches and whipped cream. If your guests are like any of us at the restaurant, the cake will be gone before the evening’s out. If there’s any left over for the morning, lightly toast slices and slather them with your favorite preserves. It’s a sweet way to start the day. MAKES 1 CAKE; SERVES 10
1½ cups (3 sticks) unsalted butter, at room temperature
1 package (8 ounces) Philadelphia brand cream cheese (see Note), at room temperature
3 cups sugar
6 large eggs
2 teaspoons pure vanilla extract
3 cups all-purpose flour
1 teaspoon salt
1. Preheat the oven to 325°F. Lightly butter a 10-inch tube pan, then line the bottom with parchment paper.
2. Place the butter and cream cheese in a large bowl and beat with a mixer on medium speed until smooth. Add the sugar, increase the speed to high, and beat until light and airy, 5 minutes. Add the eggs, one at a time, beating after each addition and scraping down the sides of the bowl with a rubber spatula as needed. Add the vanilla, then the flour and salt all at once. Beat just until incorporated.
3. Pour the batter into the prepared pan and shake lightly to even out the top. Bake until the cake is golden brown and a toothpick inserted in the cake comes out clean, 1¼ hours.
4. Place the pan on a cake rack and cool for 20 minutes, then remove the cake from the pan and let it cool completely. Serve at room temperature.
Note: I like Philadelphia cream cheese because it contains less water than other brands. You should be able to find it in your supermarket.
This is the Chanterelle staff’s “official” special-occasion cake; we usually whip one up for birthday celebrations or as a farewell treat for a departing staff member’s last meal with us. This flourless cake’s silky texture and deep, satisfying chocolate flavor belie the simplicity of its preparation. Hot from the oven, the cake is slightly puffed, but while cooling the center sinks a bit lower than the edges—hence, “fallen.”
A chocolate dessert is only as good as the chocolate used to make it, so buy the best you can. We use either Valrhona, an expensive premium-quality French chocolate preferred by many chefs and bakers, or Scharffen Berger, a wonderful American boutique chocolate. We usually make this cake with Valrhona’s Extra Bitter chocolate, which is actually a semisweet chocolate. Of course, another brand of semisweet chocolate may be used. However, since sweetness levels vary among brands, your cake may end up slightly sweeter. It will still be delicious. The next time you make the cake—and I believe you will make it many times—reduce the amount of sugar, if desired.
To serve, cut the cake into thin slices (it’s very rich). For an extraspecial dessert, set out a bowl of Crème Anglaise (page 425). Spoon some onto each plate, then place a slice of cake on top of the sauce. MAKES ONE 9-INCH CAKE
1 pound best-quality semisweet chocolate, preferably Valrhona Extra Bitter, coarsely chopped
1 cup (2 sticks) unsalted butter
9 large eggs, separated
¾ cup plus 1 tablespoon granulated sugar
Cocoa powder, for dusting the cake
Confectioners’ sugar, for dusting the cake
1. Preheat the oven to 300°F. Lightly butter and flour a 9-inch springform pan, then line the bottom with parchment paper.
2. Combine the chocolate and butter in the top of a double boiler and place over gently simmering water. When the mixture is almost completely melted, remove it from the heat. Stir with a wooden spoon until completely melted and blended together. Let cool to room temperature.
3. Combine the egg yolks and ¾ cup of the granulated sugar in a large bowl and beat with an electric mixer until light and thick enough to fall in ribbons from the mixer blades when they’re lifted, 4 to 5 minutes.
4. Combine the egg whites with the remaining 1 tablespoon granulated sugar in a medium-size bowl and beat until soft peaks form, about 3 minutes.
5. Gently fold one third of the cooled chocolate mixture into the egg-yolk mixture. Then gently fold one third of the egg whites into the yolk mixture. Repeat, adding the chocolate and egg-white mixtures alternately in thirds into the egg-yolk mixture, until all the ingredients are combined.
6. Carefully pour the batter into the springform pan and bake until the edges are firm and the center is puffed but still just a big jiggly, about 30 minutes. Be sure not to overbake the cake.
7. Cool the cake on a rack before unmolding. Then dust it with a layer of cocoa powder, followed by a layer of confectioners’ sugar, a second layer of cocoa, and a final layer of sugar. Serve in thin slices at room temperature.

A well-baked honey cake was beloved in my family, and when I was growing up my aunt was the baker supreme. We all looked forward to visits to her house and thick slices of the cake for dessert. I think this honey cake is better than my Aunt Fannie’s—and that’s saying something. Of course, when she reads this, she may well disagree. Still, I think the inviting aroma of the spices as the cake bakes and the added touch of a slightly crusty glaze at the end will win her over. MAKES 1 CAKE; SERVES 10
FOR THE CAKE:
1½ cups honey
¾ cup canola oil
1 cup strong brewed coffee
2 teaspoons vanilla extract
3½ cups all-purpose flour
2 teaspoons ground cinnamon
2 teaspoons ground ginger
1 teaspoon ground nutmeg
1 teaspoon ground coriander
1 teaspoon baking soda
1 teaspoon baking powder
½ teaspoon salt
3 large eggs
¾ cup sugar
FOR THE GLAZE:
¼ cup honey
2 tablespoons sugar
2 tablespoons unsalted butter
1. Preheat the oven to 350°F. Oil a 12-cup Bundt pan or 13 × 9-inch rectangular cake pan.
2. First, make the cake: Combine the honey, oil, coffee, and vanilla in a small saucepan and heat, stirring constantly, until the mixture is well blended. Remove it from the heat and let cool.
3. Place the flour, cinnamon, ginger, nutmeg, coriander, baking soda, baking powder, and salt in a large bowl and stir to blend.
4. Place the eggs and sugar in a medium-size bowl and beat with a mixer on medium speed until the mixture is pale yellow and very thick, 5 minutes.
5. Pour the honey mixture into the egg mixture and beat until well incorporated, 2 minutes. Stop the mixer occasionally and scrape down the sides of the bowl with a rubber spatula. Add the flour mixture all at once and beat until fully incorporated, 2 minutes more. Spread the batter evenly in the prepared pan and bake until the cake springs back when lightly touched with your finger and a toothpick inserted in the center comes out clean, 40 to 45 minutes. Cool in the pan for 5 minutes, then place the pan on a wire rack to cool for 20 minutes. Run a long, sharp knife around the edge of the cake and invert it onto a rack to cool while you prepare the glaze.
6. Place the honey, sugar, and butter in a small saucepan and bring to a boil over medium heat, stirring constantly. Remove the glaze from the heat.
7. To glaze the cake, place it on a serving platter. Use a fork to gently poke holes all over the top of the cake. Brush on the glaze, letting it seep into the holes and down the sides. Serve the cake at room temperature.
kids and cuisine
Children often eat at Chanterelle, especially older ones of around eleven or twelve. On the whole they’re very open-minded and curious about the menu, adventurously ordering squab, soft-shell crabs, foie gras, and other seemingly unlikely dishes. They tend to be incredibly well behaved, and I’m always struck by how appreciative they are of unfamiliar flavors. Of course, as a parent I know that kids go through food phases. For a while they’ll eat absolutely anything, then suddenly they become picky and reluctant to experiment. Right now our daughter, Sara, adores litchis and shellfish, and she frequently orders sushi on our family’s weekly visit to a Japanese restaurant. Our son, Jake, on the other hand, is a luncheonette kind of guy with a preference for simpler fare. His idea of a perfect meal away from home is pasta, bread and butter, apple juice, and pound cake.
Seeing kids with their parents at Chanterelle reminds me of my own childhood. My interest in food was sparked by eating out. I was around nine when our parents began taking my brother and me along with them to nice restaurants. From the beginning I loved every minute of it, though my brother was less entranced (I used to pay him a quarter to try something new). I relished having the opportunity to choose from a menu and to have anything I wanted to eat since, like most kids, at family meals we usually just ate what was put before us. Eating in a restaurant was a very special adventure. And I experienced the same pleasures at those dinners that our youngest Chanterelle patrons do today—a taste of the unknown, a chance to experiment, an introduction to intriguing new flavors and dishes.

I have a special fondness for baked-apple desserts, and this uncomplicated, homey-tasting one is a favorite. In the family tree of all-American desserts, crisps, cobblers, and crunches are cousins. The crumbly topping of this one includes oatmeal to give it a nice crispy texture with a pleasant toastiness. Apples are usually the fruit of choice. Use tart, crisp ones such as Cortland, Granny Smith, McIntosh, Mutsu, Northern Spy, or Winesap. The crunchy topping can be used with a variety of other fruits, including pears and berries. Crisps taste best served while still slightly warm from the oven, preferably with a scoop of ice cream alongside. SERVES 4 TO 6
6 medium-size tart, crisp apples (3 pounds total), cored, peeled, and diced
Juice of 1 lemon
1 tablespoon plus ½ cup granulated sugar
6 tablespoons (¾ stick) unsalted butter, at room temperature
½ cup (firmly packed) dark brown sugar
⅓ cup all-purpose flour
1 teaspoon ground cinnamon
Pinch of salt
A few grinds of black pepper
½ cup old-fashioned rolled oats (do not use instant oatmeal)
1. Preheat the oven to 375°F.
2. Place the apples in an 8-inch square baking dish. Toss with the lemon juice and 1 tablespoon of the granulated sugar. Set aside.
3. Place the butter, remaining ½ cup granulated sugar, and the brown sugar in a medium-size bowl. Cream with an electric mixer until the mixture is light brown and crumbly, 3 to 5 minutes. Add the flour, cinnamon, salt, and pepper and stir until thoroughly incorporated. Add the oats and stir until thoroughly incorporated. Scrape down the sides of the bowl as needed.
4. Sprinkle the topping over the apples to cover. Bake until the topping is lightly browned and the apples are heated through and bubbling, 35 to 45 minutes. Let cool slightly before serving.
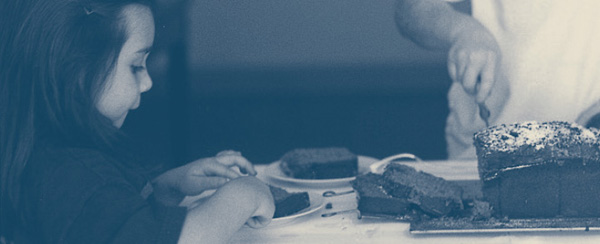
Brownies are greeted with universal delight by our staff. After all, nobody is ever too grown up to enjoy them. The addition of a pinch of black pepper, which enhances the flavor of the chocolate, was inspired by a famous Maida Heatter cookie recipe. Aside from using really good chocolate, the most important trick to making great brownies is always to slightly underbake them so they remain chewy in the middle. MAKES SIXTEEN 2-INCH-SQUARE BROWNIES
10 tablespoons (1¼ sticks) unsalted butter, cut into pieces
10 ounces best-quality bittersweet chocolate, broken into pieces
1 cup granulated sugar
½ cup (firmly packed) light brown sugar
5 large eggs
1 teaspoon vanilla extract
A few grinds of black pepper
¼ cup good-quality unsweetened cocoa powder
1½ cups all-purpose flour
1 cup walnuts or pecans, roughly chopped (optional)
1. Preheat the oven to 350°F. Lightly butter and flour an 8-inch square baking pan.
2. Combine the butter and chocolate in the top of a double boiler and place over gently simmering water. When the mixture is almost completely melted, remove it from the heat. Stir with a wooden spoon until both the butter and chocolate are completely melted and blended together. Pour the mixture into a medium-size bowl and let cool to room temperature.
3. Once the chocolate mixture is cool, add the granulated sugar, brown sugar, eggs, vanilla, and pepper and whisk well to combine.
4. Add the cocoa powder and stir until thoroughly incorporated. Add the flour ½ cup at a time, stirring well after each addition to thoroughly incorporate. Stir in the nuts, if desired. Then pour the batter into the prepared baking pan.
5. Bake until a toothpick inserted in the center of the brownies still has a light coating of batter on it when removed, but when inserted near the edge of the brownies comes out dry, 25 to 35 minutes. Let the brownies cool (the center will finish cooking to a nice chewiness), then cut them into squares to serve.
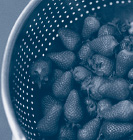
We indulge in this luscious dessert only once or twice a year at our staff meal, but it’s always memorable. At the height of the season, when plump, glossy blackberries are bursting with flavor, we prevail upon our pastry chef to bake this as a special treat. One good thing about a cobbler is its forgiving format—the berries need not be perfect, since they pretty much fall apart during baking anyway. Raspberries, strawberries, peaches, or plums may be used in place of the blackberries, or you could use a mixture of fruits and berries. On average, a pint yields 1½ to 2 cups berries, a pound of peaches yields about 2¾ cups sliced fruit, and a pound of plums yields around 3 cups sliced fruit.
Cobblers are best served warm from the oven accompanied by a scoop of vanilla ice cream or some unsweetened whipped cream. SERVES 4 TO 6
6 cups fresh blackberries (about 3 pints)
¼ cup sugar, plus more for sprinkling
1½ tablespoons cornstarch, sifted
1 tablespoon brandy
Pinch of ground cinnamon
Pinch of ground cloves
Pinch of salt
Herbed Biscuits dough made without the herbs (page 382)
1. Preheat the oven to 375°F.
2. Place the berries in a medium-size bowl. In a small bowl, mix together ¼ cup sugar with the cornstarch, brandy, cinnamon, cloves, and salt. Add the sugar mixture to the berries and toss to coat. Transfer the berries to an 8-inch square baking dish.
3. Roll out the biscuit dough on a lightly floured work surface until it’s an even ¾ inch thick. Cut out rounds using a floured 2-inch cookie cutter, placing the rounds gently over the berries as they’re cut. Gather up the excess dough, roll it out again ¾ inch thick, and cut out more rounds to make a total of eight. Lightly sprinkle the tops of the rounds with sugar.
4. Bake the cobbler until the dough has risen and is lightly browned and the filling is hot and bubbly, 35 minutes. If the dough isn’t browned, increase the oven temperature to 400°F and bake for 5 minutes more. Let the cobbler rest for a few minutes before serving.
the berry sweetness test
Before preparing a cobbler, be sure to taste a berry or two, then use your judgment to determine how much thickener and sugar should be used. It all depends on how sweet and juicy the berries are. I generally use just enough sifted cornstarch to dust them very lightly. If you’re at all unsure, it’s better to err on the side of less cornstarch than more. A runny cobbler is preferable to an overthickened, gummy one if your guess was off.

When berries are in season, they naturally become an important part of the restaurant menu. Not surprisingly, they’re a favorite with the staff as well, and we keep plenty around. Fresh summer berries don’t really need help to taste terrific, but these shortcakes, with their double hit of ginger, are so easy to bake, so aromatic, and so right for a layer of berries that we treat ourselves to a batch when the mood strikes.
To serve, we set out a platter of warm shortcakes, a bowl of berries, and a bowl of whipped cream, and everyone prepares the dessert to their own liking. Some split the shortcakes, others like them whole. Some dollop on the cream, others prefer just spooning on the berries. Easy to adapt to personal preferences, this makes a very happy summer dessert. MAKES 8 TO 10 SHORTCAKES
2 cups all-purpose flour
1 tablespoon peeled, grated fresh ginger
1 tablespoon ground ginger
1 teaspoon ground cloves
1 teaspoon ground cinnamon
1 tablespoon baking powder
2 tablespoons granulated sugar
2 tablespoons dark brown sugar
½ teaspoon salt
8 tablespoons (1 stick) unsalted butter, cut into pieces, chilled
½ cup buttermilk
1 large egg yolk, whisked
1. Place the flour, fresh ginger, ground ginger, cloves, cinnamon, baking powder, granulated sugar, brown sugar, and salt in a bowl and stir to mix. Drop in the butter pieces and rub them into the dry ingredients using your fingers or a fork. Work quickly, rubbing until the mixture resembles coarse meal. Add the buttermilk, stirring with a wooden spoon until the dough just comes together. Cover the bowl and refrigerate the dough for 1 hour.
2. Preheat the oven to 375°F. Line a baking sheet with parchment paper.
3. Roll out the dough on a lightly floured work surface until it’s an even 1 inch thick. Cut out rounds using a floured 2-inch cookie cutter, placing the rounds as they’re cut onto the prepared baking sheet, about 2 inches apart. Gather up the excess dough, roll it out again 1 inch thick, and cut out more rounds to make a total of eight to ten.
4. Brush the top of the rounds with egg yolk and bake until golden, about 30 minutes. Remove the shortcakes to a cooling rack. The shortcakes can be eaten warm or at room temperature.
strawberries for the shortcakes
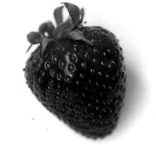
June is strawberry month, and when local juicy, ripe, fresh berries hit the market, you can be sure it heralds shortcake-baking season at the restaurant. Strawberries are favorites for our Summertime Ginger Shortcakes (previous page).
To have enough for the short-cakes, set out 2 pints (4 cups) of fresh berries that have been rinsed, hulled, and drained. Before adding any sugar to the berries, taste one. Sweet berries need very little sugar; tart berries need a bit more. If the berries are very large, cut them into thick slices. If small, just halve them. Set the berries aside while making the shortcakes; by the time these are baked and cooled, the sugar will have drawn out some of the juices from the berries to make a light syrup that nicely moistens the shortcakes.
Puddings and crisps are the kinds of family desserts that work their way into our staff meals from time to time. They add that just-right, sweet finish that makes us feel a bit pampered without feeling too full.
Bread pudding has always been a favorite of mine, and this one—flavored with brandy—separates itself from the usual nursery food style. Although it can be made with a good-quality white sandwich bread or French bread, I think a sweeter egg-enriched one, such as challah or brioche, tastes best. It’s a perfect way to use up bread that’s gone too stale for serving at the table. For extra texture, I sometimes add raisins or chopped nuts. The bread pudding is delicious with or without, so I’ve made them optional here.
When you want to go all out, top the pudding with Crème Anglaise, a lovely custard sauce that adds a very impressive final touch. SERVES 4 TO 6
Unsalted butter, for the pan
5 slices (½ inch thick) challah
1½ cups whole milk
⅔ cup sugar, plus more for sprinkling
2 large eggs
3 large egg yolks
¼ cup raisins (optional)
¼ cup chopped nuts, such as pecans or walnuts (optional)
¼ cup brandy
Pinch of ground cinnamon
Few gratings of fresh nutmeg
Crème Anglaise (optional; recipe follows)
1. Preheat the oven to 350°F. Lightly butter a shallow 5- or 6-cup casserole or baking dish.
2. Place the challah in the casserole, overlapping the slices and cutting them as necessary to cover the surface.
3. Place the milk, ⅔ cup sugar, the eggs, egg yolks, raisins (if desired), nuts (if desired), brandy, cinnamon, and nutmeg in a bowl and whisk well to combine. Pour the custard over the challah, making sure it’s completely covered. Sprinkle the top lightly with sugar.
4. Bake until the custard is set and the pudding has puffed a bit and is lightly browned, about 30 minutes. Serve hot or at room temperature with a bowl of crème anglaise, if desired.
Crème anglaise, a French classic, is an uncomplicated and very useful vanilla custard sauce that has the power to make any dish seem special. It’s a sensual topping for a wide range of desserts, including cakes, soufflés, poached fruit or fruit compotes, puddings, and sweet crêpes. Make it as suggested below or create subtly flavored variations, replacing the brandy with grated orange zest or rum, cognac, or orange liqueur. Espresso-flavored crème anglaise is particularly nice drizzled over a slice of Fallen Chocolate Soufflé Cake (page 413). Dissolve 3 tablespoons instant espresso in 3 tablespoons boiling water and add it when you add the vanilla. MAKES ABOUT 3 CUPS
1 cup whole milk
1 cup heavy (or whipping) cream
½ cup sugar
1 vanilla bean
6 large egg yolks
1 tablespoon brandy
1 teaspoon pure vanilla extract
1. Place the milk, cream, sugar, and vanilla bean in a small saucepan and bring to a gentle simmer over low heat. Let simmer until the sugar is dissolved, about 1 minute.
2. While the milk mixture is heating, place the egg yolks in a medium-size bowl and whisk until pale yellow, about 5 minutes.
3. Remove the milk mixture from the heat; remove the vanilla bean and set it aside (see Note). To temper the eggs, slowly whisk in a small amount of the simmered milk mixture. When the eggs are warmed, slowly whisk in the remaining milk mixture. When thoroughly blended, pour the custard into the saucepan and place over low heat. Cook, stirring constantly with a wooden spoon, being sure to scrape the sides and bottom of the pan, until the custard is slightly thickened, 5 to 8 minutes. Remove the pan from the heat and continue stirring for 1 minute more.
4. Strain the crème anglaise through a strainer and let it cool, stirring occasionally to prevent a skin from forming. When it has cooled to room temperature, stir in the brandy and vanilla. Refrigerate, covered, to chill before serving.
Note: Rather than throwing out the used vanilla bean, rinse if off and let it dry. When it’s thoroughly dry, place it in your sugar canister. The bean will add to the sugar a mild vanilla flavor that’s particularly nice in baking as well as in a cup of coffee.

These graceful, paper-thin cookies are a French classic, named for the curved roof tiles called tuiles, which they resemble. You won’t find a prettier, more elegantly understated cookie. Since tuile making can’t be rushed, we rarely get to indulge in our passion for them at staff meals. However, our pastry chef bakes them regularly to serve alongside Chanterelle’s special ice creams and sorbets. Needless to say, it’s impossible not to raid the pastry kitchen.
After the tuile batter is mixed, it rests in the refrigerator for at least an hour (overnight is even better) so the gluten in the flour relaxes and the cookies bake up tender. Once baked, the delicate, still-hot wafers must be draped very quickly over a rolling pin or wine bottle to create their curved shape. (For other shapes, see page 428.) Although tuiles aren’t difficult to make, the process requires a little patience and practice at first. It’s worth it. MAKES ABOUT 3 DOZEN 3-INCH TUILES
2 large egg whites
⅔ cup confectioners’ sugar
½ teaspoon salt
1 teaspoon vanilla extract
⅓ cup all-purpose flour
5 tablespoons unsalted butter, melted and cooled to room temperature (see Note)
Blanched sliced almonds or toasted shredded coconut, for garnish (optional)
1. Place the egg whites, sugar, salt, and vanilla in a medium-size bowl and whisk until light and frothy, 5 minutes. Slowly add the flour, whisking until the batter is smooth, 2 to 3 minutes. Whisk in the butter until well blended, 1 minute. Cover the bowl and refrigerate for at least 1 hour and as long as overnight.
2. Preheat the oven to 350°F. Line baking sheets with parchment paper.
3. Drop teaspoonfuls of the batter onto the prepared baking sheet about 3 inches apart, then gently spread them out with the back of a spoon to form ovals. The batter should be spread very thin. Place almond slices on the tuiles or sprinkle with coconut, if desired.
4. Bake until the edges of the tuiles are browned and the center is set, about 8 minutes.
5. While the cookies are still hot, remove them from the parchment, form them over rolling pins and wine bottles, and let them cool. When set, they will have taken on their classic curved shape. Carefully remove the tuiles and stack them upside down, one on top of the other. The tuiles can be stored in airtight containers and will keep for up to 2 days. If the weather is particularly humid, it’s best to eat the cookies the day they’re made.
Note: If you allow the butter to brown slightly, it will give the tuiles an even nicer flavor. Just be careful not to burn the butter. As soon as it takes on color, remove it from the burner.
tuile shapes
In addition to the classic curved shape, baked tuile batter can also be rolled into “cigarettes” or molded into single-serving-size cups or baskets called tulipes, which are nice filled with mousse, ice cream, or sherbet. For another simple and pretty presentation, brush the basket interiors with melted chocolate, fill with whipped cream, and garnish with fresh berries.
To make cigarettes, quickly wrap a warm, pliable cookie around the handle of a wooden spoon, rolling the cookie over itself. (There should be room to form two at a time on one handle.) Leave in place until cooled and set, 30 seconds or so, then carefully slide off.
To make cups, set out several shallow teacups. Working swiftly, set a warm, pliable cookie over the outside of each cup, gently pressing it into place around the cup; the edges of the cookie should ruffle a little. Let the tuiles cool completely before removing them.

It’s probably beyond clichéd to say that for many of us no food more than peanut butter brings out an almost aching kidlike passion. Well, if you love peanut butter, these are the cookies for you. They’re rich and crumbly, bake up in no time, and rate about as high as you can go on the peanut-butter-flavor scale. Just make sure the milk that goes with them is icy cold. MAKES ABOUT 3 DOZEN 2-INCH COOKIES
1 cup (2 sticks) unsalted butter, at room temperature
1 cup (firmly packed) light brown sugar
¾ cup granulated sugar
1 teaspoon salt
1 teaspoon baking soda
2 large eggs
1 jar (18 ounces) creamy peanut butter
3 cups all-purpose flour
1. Preheat the oven to 375°F. Lightly butter two baking sheets.
2. Place the butter, brown sugar, and granulated sugar in a large bowl and cream them together until light and fluffy. Add the salt and baking soda and mix well to combine. Add the eggs and mix well to combine. Add the peanut butter and mix well, scraping down the sides of the bowl until it’s thoroughly incorporated.
3. Add the flour, 1 cup at a time, mixing to thoroughly incorporate it before adding more. You’ll have a very thick dough.
4. Place a bowl of warm water next to your work surface. Use your fingers to roll the cookie dough into 1-inch balls. Place them on the prepared baking sheets, leaving 2 inches between cookies. Use the tines of a fork to slightly flatten each cookie, pressing gently to make a cross-hatch pattern. Lightly dip the fork into the warm water between cookies to prevent it from sticking to the cookie dough.
5. Bake until the cookies just begin to brown, about 12 minutes. Let them cool for a few minutes before removing them to a cooling rack.

No one outgrows chocolate chip cookies. It is the kid classic, the love of which extends way beyond childhood. This somewhat chewy, buttery version, a creation of our pastry chef, Kate, is well studded with chips, making for a satisfying chocolate experience. The oats give the cookies good texture, and the pine nuts are a nice change from pecans. MAKES 4 DOZEN COOKIES
1 cup (2 sticks) unsalted butter, at room temperature
1 cup (firmly packed) light brown sugar
¾ cup granulated sugar
1 teaspoon salt
1 teaspoon baking soda
2 large eggs
2 cups all-purpose flour
2 cups old-fashioned rolled oats (do not use instant oatmeal)
2 cups mini chocolate chips
2 cups whole pine nuts or coarsely chopped pecans (optional)
1. Preheat the oven to 375°F. Lightly butter two baking sheets.
2. Place the butter, brown sugar, and granulated sugar in a large bowl and cream them together until light and fluffy. Add the salt and baking soda and mix well to combine. Add the eggs and mix well to combine. Add the flour, 1 cup at a time, mixing to thoroughly incorporate it before adding more.
3. Scrape down the sides of the mixing bowl, then add the oats 1 cup at a time, mixing to thoroughly incorporate them before adding more.
4. Scrape down the sides of the bowl again and add the chips all at once, mixing until incorporated. Add the nuts, if desired, and stir until well mixed. You will have a very thick dough.
5. Drop rounded tablespoonfuls of the cookie dough onto the prepared baking sheets, leaving 2 inches between cookies.
6. Bake until the cookies just begin to brown, about 12 minutes. Let them cool for a few minutes before removing them to a cooling rack.
cookies on command
Most unbaked cookie doughs will keep nicely in the refrigerator for about 3 days, and in the freezer for around 2 to 3 months. The easiest thing to do is form the dough into a log, wrap it tightly in plastic wrap, and freeze until hard. Then, to ensure that it’s airtight, transfer the frozen dough to a freezer-weight plastic bag or wrap several layers of foil around it, and return to the freezer. When it’s cookie-baking time, defrost the dough by letting it set for an hour or two in the refrigerator or about half an hour out on the counter. It should only soften enough to enable you to scoop and form it into the desired shape.

Rounding out the trio of American classics is this recipe for hearty oatmeal cookies. And behind the creation of this recipe is a classic Chanterelle story. Years ago one of our chefs served up deliciously comforting bowls of oatmeal for lunch. It seemed like a good idea because many staff members arrived for lunch service fairly early, with nothing in their stomachs. So why not a comforting midmorning bowl of rustic oatmeal to start the day? The lunch staff actually loved it, and in the exuberance of the moment, we bought a case of oats for what then became a regular oatmeal lunch.
As you might expect, it wasn’t long before the oatmeal lunches took on the feeling of something out of Oliver Twist. And the buzz from the staff went from quiet mutterings to loud vocal complaints. Faced with a rebellious staff—and a whole case of oats—we quickly took oatmeal off the menu and put oatmeal cookies on. They disappeared in minutes. The staff approved, and when the staff approves, I know I have a winner. MAKES 3 DOZEN 2-INCH COOKIES
1 cup (2 sticks) unsalted butter, at room temperature
2 cups (firmly packed) light brown sugar
1 teaspoon baking soda
1 teaspoon warm water
½ teaspoon salt
½ teaspoon ground cinnamon
2 large eggs
1 teaspoon pure vanilla extract
2½ cups all-purpose flour
2 cups old-fashioned rolled oats (do not use instant oatmeal)
1. Preheat the oven to 375°F. Lightly butter two baking sheets.
2. Place the butter and brown sugar in a large bowl and cream them together until light and fluffy.
3. Dissolve the baking soda in the warm water and add it and the salt and cinnamon to the butter mixture. Mix well to combine. Add the eggs and vanilla and mix well to combine. Add the flour 1 cup at a time, mixing to thoroughly incorporate it before adding more.
4. Scrape down the sides of the bowl and add the oats 1 cup at a time, mixing to thoroughly incorporate them before adding more. Scrape down the sides of the bowl again.
5. Drop rounded tablespoonfuls of the cookie dough onto the prepared baking sheets, leaving 2 inches between cookies.
6. Bake the cookies until they just begin to brown, about 12 minutes. Let them cool for a few minutes before removing them to a cooling rack.