Although my personal preferences in breakfast food are a bit untraditional—I’ll opt for a meat loaf sandwich or cold noodles with sesame sauce rather than oatmeal or bacon and eggs anytime—at home on weekends Karen and the kids and I occasionally like to linger over a family brunch. I usually make simple but tasty versions of classics like buttermilk pancakes or French toast with challah. Some of the recipes here are old favorites that were served at Chanterelle back in the early 1990s when we briefly experimented with serving breakfast at the restaurant. Brunch recipes should be uncomplicated and not too time-consuming so the cook has plenty of time to enjoy everyone’s company and catch up on their recent adventures.
The baskets of bread and other baked goods served at those early Chanterelle breakfasts were bountiful, and we still make some of those recipes for staff meals. They work as well later in the day as they do early. And since we lean toward one-pot meals for staff dining, there’s always a lot of delicious sauce or gravy that needs sopping up with less sweet baked goods such as biscuits, cornbread, focaccia, and garlic bread.
During the brief interlude in which we served breakfast at Chanterelle, these pleasant-tasting, not-too-sweet muffins were part of the bread-basket assortment for each table. Orange zest complements the flavor of the cornmeal, and buttermilk ensures a tender crumb. The secret to great muffins is to avoid overmixing the wet and dry ingredients; they should be stirred, gently, until just combined. MAKES 12 MUFFINS
1½ cups all-purpose flour
1 cup cornmeal
½ cup sugar
2½ teaspoons baking powder
1 teaspoon baking soda
Good pinch of coarse (kosher) salt
Grated zest of 1 orange
2 large eggs
1½ cups buttermilk
4 tablespoons (½ stick) unsalted butter, melted and cooled
¼ cup canola or other vegetable oil
1 teaspoon vanilla extract
1. Preheat the oven to 350°F. Lightly butter a 12-cup muffin tin.
2. Combine the flour, cornmeal, sugar, baking powder, baking soda, salt, and orange zest in a large bowl and whisk thoroughly to mix.
3. Using the whisk, beat the eggs in a medium-size bowl, then add the buttermilk, melted butter, oil, and vanilla and whisk well to blend. Pour the mixture into the flour mixture and whisk just until the dry ingredients are moistened; do not overmix.
4. Spoon the batter into the prepared muffin cups, filling each almost to the top. Bake until risen and very lightly browned, 15 to 20 minutes; a toothpick inserted into the center of a muffin will come out clean.
5. Serve warm or at room temperature.
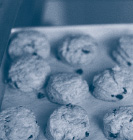
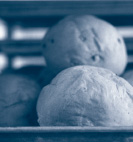
Back in the old days when Chanterelle was open for breakfast, and Nina Fraas was our morning chef, these scones were a big hit. Warm from the oven, they were ready to eat as is, in need of no butter or jam. Breakfasts at the restaurant are a thing of the past, but we still bake these scones (and Nina’s waffles, see box, page 390) for the early-morning-staff members. It’s one way to ensure that everyone shows up on time.
These scones are prepared with vanilla sugar. It’s certainly easy to make, and we keep plenty of it around for flavoring desserts. MAKES 16 TO 20 SMALL SCONES
⅔ cup heavy (or whipping) cream
1 large egg
¼ cup vanilla sugar, plus more for sprinkling on the scones (see box)
2½ cups all-purpose flour
1 tablespoon baking powder
½ teaspoon salt
¼ teaspoon baking soda
8 tablespoons (1 stick) unsalted butter, cut into 8 pieces, chilled
½ cup dried currants
4 tablespoons (½ stick) unsalted butter, melted
1. Preheat the oven to 400°F.
2. Place the cream, egg, and ¼ cup vanilla sugar in a medium-size bowl and whisk until fluffy and well blended.
3. Place the flour, baking powder, salt, and baking soda in a food processor and pulse to combine. Add the chilled butter, then pulse again until fairly well blended. Then add the cream mixture and pulse until the dough just holds together.
4. Transfer the dough to a lightly floured work surface. Sprinkle the currants over the dough and knead for 30 seconds, making sure the currants are well distributed throughout the dough. Pat the dough into a round about ½ inch thick.
5. Cut out the scones using a floured 2-inch round cookie cutter. Gather up the extra dough, pat it out again, and continue cutting out the scones. You should have sixteen to twenty.
6. Place the scones on an ungreased baking sheet. Brush the tops with the melted butter and sprinkle them with vanilla sugar. Bake in the oven until golden brown, 15 to 18 minutes. Remove them from the oven, place in a cloth-lined bread basket, and eat immediately.
making vanilla sugar
Place a fresh, fragrant vanilla bean into your sugar canister and let it stay there. The sugar will take on a pleasant vanilla smell and flavor. Use it in baking, on fruits, even in your coffee. Replace the vanilla bean every few months for the best results.
This recipe makes a biscuit that’s not too moist and therefore good for sopping up the sauce from stews, such as the Chicken Gumbo on page 184. I like to place the biscuit right in the bowl with the gumbo. For an attractive glazed look, you can brush the tops of the biscuits with beaten egg before baking. MAKES 12 BISCUITS
1½ cups all-purpose flour
1½ cups yellow cornmeal
2 tablespoons baking powder
1½ teaspoons salt
3 tablespoons unsalted butter, cut into small bits, chilled
¼ cup minced onion
2 large eggs
1½ cups half-and-half
2 tablespoons unsalted butter, melted
2 scant tablespoons honey
1. Preheat the oven to 375°F. Lightly butter a baking sheet.
2. Place the flour, cornmeal, baking powder, and salt in a large bowl and whisk thoroughly to mix. Add the cold butter and rub it in quickly with your fingers until it’s fairly well blended; the texture should be mealy, but it’s okay to leave a few larger lumps. Stir in the onion.
3. Using a whisk or fork, beat the eggs in a medium-size bowl, then add the half-and-half, melted butter, and honey and beat thoroughly to blend. Pour the egg mixture into the flour mixture all at once and stir with a wooden spoon until the flour is just moistened and a dough forms; do not overmix.
4. Transfer the dough to a lightly floured work surface and knead briefly, just to rid it of excess stickiness. Divide the dough into twelve pieces and, using floured hands, pat each piece into a flat, round biscuit. Place the biscuits as they are formed on the prepared baking sheet.
5. Bake until lightly browned, 15 to 20 minutes. Serve the biscuits warm from the oven or at room temperature.
Cornbread may well be the ultimate quick bread. Easy to make, this moist and light version is always a pleasing addition to our staff and family meals, especially when soup or stew is the main dish. I use regular yellow cornmeal from the supermarket, adding a little honey to complement the natural sweetness of corn. Mix the batter with a light hand—just a few strokes is sufficient to combine the ingredients—or the bread will be flat and dense. MAKES ONE 9-INCH ROUND CORNBREAD
1¼ cups all-purpose flour
¾ cup yellow cornmeal
1 tablespoon baking powder
½ teaspoon salt
2 large eggs
1 cup whole milk
5 tablespoons unsalted butter, melted and cooled
2 tablespoons honey
1. Preheat the oven to 425°F. Lightly butter a 9-inch round pie pan.
2. Place the flour, cornmeal, baking powder, and salt in a large bowl and whisk to combine.
3. Using the whisk, beat the eggs in a medium-size bowl, then add the milk, melted butter, and honey and beat thoroughly to blend. Pour the egg mixture into the flour mixture all at once and stir with a wooden spoon until the dry ingredients are moistened; do not overmix.
4. Pour the batter into the prepared pan and bake until the top is lightly browned and a toothpick inserted in the center comes out clean, about 20 minutes. Cut into wedges and serve warm or at room temperature.
skillet cornbread
For crisp-crusted cornbread, cut 2 strips of bacon into small bits and brown in a well-seasoned, heavy cast-iron skillet, then pour Cornbread batter over it and pop into a hot oven (425°F) until browned, 20 minutes. When the cornbread is inverted onto a plate, it will have a nice crusty top dotted with flavorful bacon bits.

If our pastry chef has finished the preparation of her exquisite desserts and petits-fours in plenty of time and she’s feeling benevolent, we’re sometimes treated to these homey biscuits at our staff meal. We’re very partial to this herbed version (it can also be used as the crust for Chicken Potpie and I Don’t Care, page 154), but you could omit the herbs and make plain biscuits or substitute other flavorings like a teaspoon of coarsely ground black pepper for a change of pace. The secret to tasty biscuits is being sure to leave a few pieces of butter in the dough that seem a little bigger than you think they should be.
These biscuits are best eaten hot out of the oven. Of course, it’s hard to imagine that anybody would turn down a few warmed leftover ones the next morning, especially if they were accompanied by plenty of butter and honey. MAKES ABOUT 8 BISCUITS
4 teaspoons baking powder
1 teaspoon salt
8 tablespoons (1 stick) unsalted butter, cut into ½-inch-thick pieces, chilled
3 tablespoons minced fresh herbs, such as tarragon, flat-leaf parsley, chives, and dill leaves
¾ cup buttermilk
1. Preheat the oven to 400°F. Lightly butter a baking sheet.
2. Place the flour, baking powder, and salt in a large bowl and whisk thoroughly to combine. Add the butter and rub it in quickly with your fingers until fairly well blended; the texture should resemble coarse meal, but it’s okay to leave a few larger lumps. Add the herbs and toss to combine (see Notes). Add the buttermilk all at once and stir with a wooden spoon until the flour is just moistened and a dough forms; do not overmix.
3. Transfer the dough to a lightly floured work surface and knead briefly, just to rid it of excess stickiness. Using a lightly floured rolling pin, roll out the dough ½ inch thick. Cut it into round biscuits using a floured 3-inch biscuit cutter, or cut into 3-inch squares with a knife (see Notes).
4. Place the biscuits on the prepared baking sheet and bake until lightly browned, 15 to 20 minutes. Serve the biscuits warm from the oven or at room temperature.
Notes: If you’ll be using these biscuits as a dessert topping (see Blackberry Cobbler, page 420), don’t add any herbs. Just continue with the remaining recipe as written.
If you’re using a biscuit cutter, gather up the dough scraps, reroll them, and cut them into more biscuits.
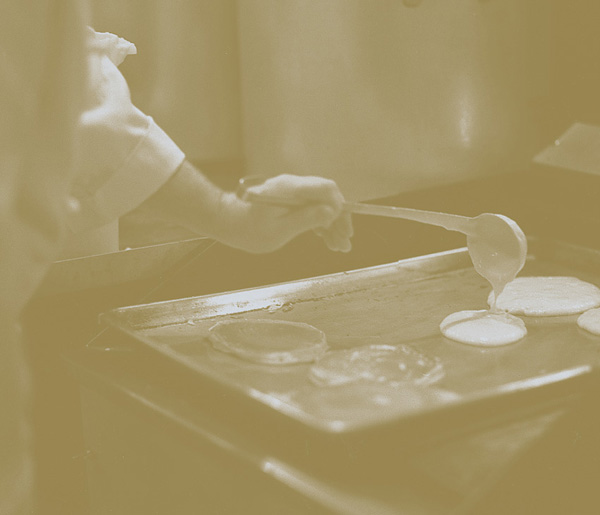
When we served breakfast at Chanterelle, challah French toast quickly became a favorite of the morning crew. We still enjoy it now and then, mainly when there’s a special party at the restaurant and the staff arrives early in the morning, usually hungry. A huge full-size sheet pan is called into action to help ready the vast quantity of French toast (or pancakes, if they are on the menu, as well). Set on the grill, it assures us that we’ll all be able to sit down together, with no one stuck watching the stove. Although I make my French toast with thick, rustic slices of eggy challah, any bread you have on hand can be used. I give the bread just a quick dip in the egg mixture so it doesn’t get soggy, but you might prefer a longer dunk, which results in softer toast. For breakfast or brunch, I like to serve this with a little pitcher of Spiced Maple Syrup. SERVES 4
3 large eggs
¼ cup milk
2 tablespoons sugar
1 tablespoon brandy
⅛ teaspoon ground cinnamon
Dash of freshly grated nutmeg
A few grinds of black pepper
Pinch of coarse (kosher) salt
2 to 4 tablespoons (¼ to ½ stick) unsalted butter, plus additional for serving (optional)
4 slices challah (each about 1 inch thick)
Spiced Maple Syrup (optional; recipe follows)
1. Combine the eggs, milk, sugar, brandy, cinnamon, nutmeg, pepper, and salt in a wide, shallow bowl and whisk thoroughly to blend.
2. Melt 2 tablespoons of the butter in a large, heavy skillet over medium heat. When the foam subsides, soak (but not too long) each slice of bread in the egg mixture to coat both sides, holding it over the bowl to let the excess drain off, then place it in the hot butter. Sauté the bread slices until golden brown on both sides, 2 to 3 minutes per side. Add more butter, if necessary.
3. Serve immediately, accompanied, if desired, by additional butter and spiced maple syrup.
When pure maple syrup is embellished with just a few spices, it becomes an even more ambrosial topping for pancakes, waffles, and French toast. Once you’ve tasted this syrup, scores of other uses will spring to mind. Try brushing a little on baked squash, or adding a splash to hot apple cider served with a cinnamon stick. Tightly covered, the syrup will keep for 3 to 4 weeks in the refrigerator. MAKES 2 CUPS
2 cups pure maple syrup
1½ sticks cinnamon (3-inch whole sticks)
6 black peppercorns
2 whole allspice
1- to 2-inch piece of orange zest
1. Combine the syrup, cinnamon, peppercorns, allspice, and orange zest in a small, heavy saucepan and set over medium heat. When the syrup begins to simmer, reduce the heat to very low and cook, uncovered, below a simmer until the flavors are blended, about 15 minutes.
2. Remove the pan from the heat and let cool to room temperature. You can leave the spices in the syrup for a longer time if you wish a more heavily spiced flavor, but strain them out and discard before serving.

Crêpes, which seem to go in and out of favor every decade or so, are underrated. In my experience they are always a hit with children, not to mention the staff at the restaurant, and as a consequence we enjoy them fairly often. Inexpensive, versatile, and inherently elegant, they’re a very civilized way to use up leftovers. Once you’ve developed the knack of crêpe making—a batch or two is all it takes—your imagination will suggest plenty of fillings. For our staff meal, I generally make this recipe with leftover baked ham, but slices of good-quality deli ham work nicely, too. Napped with a rich, easy-to-make cream sauce, the crêpes are good at brunch with a lightly dressed salad of mixed baby greens or accompanied by steamed vegetables at dinnertime. SERVES 4
8 Herbed Crêpes (page 389)
16 small, thin slices baked ham or good-quality deli ham (about 8 ounces)
8 thin slices Emmenthaler cheese (about 4 ounces)
2 cups heavy (or whipping) cream
A few gratings of nutmeg
Coarse (kosher) salt and freshly ground black pepper, to taste
Squeeze of lemon juice
1 teaspoon chopped fresh tarragon leaves
1. Preheat the oven to 350°F.
2. Arrange the crêpes, less-browned-side up, in a single layer on your work surface. Place 2 slices of ham and a slice of cheese on each and roll up.
3. Lightly oil a small baking dish and arrange the crêpes in it, seam-side down. Cover loosely with aluminum foil and bake until heated through and the cheese has melted, about 10 minutes.
4. Meanwhile, prepare the sauce: Combine the cream, nutmeg, salt, pepper, and lemon juice in a small, nonreactive skillet or wide, shallow saucepan and bring to a boil over medium-high heat. Reduce the heat to medium and cook, uncovered, until the cream is reduced by half, about 10 minutes. Remove the skillet from the heat and set aside, stirring occasionally, until the crêpes are ready.
5. Remove the crêpes from the oven and divide them among four serving plates. Taste the sauce for seasoning, adjusting as necessary. Stir in the tarragon, then spoon the sauce attractively over the crêpes and serve immediately.
cooking crêpes
Crêpe making takes a little practice initially, but once the technique is mastered you’ll probably find yourself making them regularly. Luckily, the ingredients are inexpensive, so there should be no guilt about practice batches that turn out less than perfect.
The correct pan is of utmost importance. I prefer a well-seasoned French-style steel crêpe pan with a handle that slants slightly upward (to make swirling the batter easier) and angled sides that facilitate crêpe flipping. Steel is especially responsive to medium-high and high heat, but a nonstick or stainless-steel pan will also work well. The pan should be the same size as the crêpes so they’ll be uniform in size; I use a 6-inch pan. Nine times out of ten the first crêpe will stick no matter how careful you are. Don’t worry—just throw it out and consider it an offering to the crêpe god. If you have chronic sticking problems with a pan that doesn’t have a nonstick coating, try rubbing it with a handful of kosher salt to smooth and polish the surface. Then rinse thoroughly, dry, and begin anew.
The correct temperature is also important. The pan should be hot enough to cook the crêpe within 20 seconds or so, but not so hot that it scrambles the batter. As you make crêpe after crêpe, the heat usually requires some adjusting.
With the bowl of batter conveniently near the stove, set the pan over medium-high heat. Drizzle some olive oil or clarified butter onto a folded paper towel and thoroughly rub the pan with it, taking care not to use too much. The pan is ready when the oil is hot enough for a drop of water to sizzle.
With a small ladle, scoop up enough batter for one crêpe—about 2 tablespoons per 6-inch crêpe. Remove the pan from the heat and, holding it at a 45-degree angle, quickly pour the batter into the pan at the top edge. Using your wrist, swiftly rotate the pan with a circular motion to spread a thin, even layer of batter over the bottom of the pan; do not use the ladle to spread it.
Return the pan to the heat and cook the crêpe until the surface looks almost cooked and the bottom is lightly speckled with brown, 20 to 30 seconds. Gently loosening the crêpe with a spatula, turn it over; or you can flip it by hand, grasping the edge of the crêpe with your thumb and forefinger. Cook for about 10 seconds, until the second side is lightly speckled with brown as well, then slide the crêpe out of the pan onto a plate. Repeat until the batter is used up, stacking the crêpes as they’re removed from the pan.
Layered between sheets of waxed paper and covered tightly with plastic wrap, crêpes can be refrigerated for a day or two or frozen for up to 3 months.
This crêpe batter, seasoned with a sprinkling of fresh herbs, is meant to be used for savory main dishes. For sweet dessert crêpes, substitute canola oil for olive oil and eliminate the herbs and salt and pepper. Allowing the batter to rest in the refrigerator for at least an hour before using it ensures tender results. MAKES ABOUT EIGHT 6-INCH CRÊPES
2 large eggs
⅔ cup water
2 tablespoons extra-virgin olive oil
Dash of brandy
Coarse (kosher) salt and freshly ground black pepper, to taste
⅓ cup all-purpose flour
2 teaspoons chopped mixed fresh herbs, such as chives, chervil, flat-leaf parsley, and tarragon leaves
1. Place the eggs, water, oil, brandy, salt, and pepper in a medium-size bowl and whisk thoroughly to blend. Add the flour and whisk to mix, but don’t worry if there are a few lumps. Let the batter rest, covered, in the refrigerator for at least 1 hour and up to 12—the longer, the better.
2. When you’re ready to make the crêpes, stir the batter and then judge its consistency. It should be relatively thin; if it has thickened upon standing, add water, a tablespoon at a time, until the batter is just about the consistency of heavy cream or slightly thicker.
3. Cook the crêpes according to the instructions in the box starting on page 387, using about 2 tablespoons batter per crêpe.


It’s wonderful when friends from childhood turn up again—and that’s just what happened with my wife, Karen, and Nina Fraas. After years of being out of touch, Karen and Nina ran into each other and picked up the friendship as if there had been no separation. Nina, it turned out, had grown up to be a terrific chef and fortuitously reappeared when we were looking for the right person to chef our breakfasts.
Every morning at four o’clock, or maybe five, Nina would fire up the ovens and create just the kind of dishes that made getting out of bed seem like a reasonable idea. Her waffles were particularly memorable, and I offer them here. The waffles are light and bake up crisp and delicate, perfect for housing little pockets of butter and syrup. The batter is partially made the night before and develops structure and a rich flavor as it rests. Making the waffles the next morning is a breeze. Thanks, Nina. MAKES 6 TO 8 WAFFLES, DEPENDING ON THE SIZE OF THE WAFFLE IRON
1 package active dry yeast
1 tablespoon sugar
½ cup water, at room temperature
1¾ cups whole milk, at room temperature
2 cups all-purpose flour
1 teaspoon salt
6 tablespoons (¾ stick) unsalted butter, melted
2 large eggs
½ teaspoon baking soda
Vegetable oil spray, for the waffle iron
Unsalted butter, for serving
Spiced Maple Syrup (page 385), for serving
1. The night before you’ll be serving the waffles, sprinkle the yeast and sugar over the water in a medium-size bowl. Let stand until the yeast starts to get foamy, about 5 minutes. Add the milk, flour, and salt, mix well to blend, then stir in the melted butter. Cover and refrigerate overnight (see Note).
2. Preheat the oven to its lowest setting.
3. When you’re ready to make the waffles, beat the eggs and baking soda in a small bowl, then mix them into the batter.
4. Heat the waffle iron and bake your waffles according to the iron manufacturer’s directions. If your iron is nonstick, a light spray of oil for the first waffle is all that’s needed. If it isn’t, you may need to spray before making each waffle. Usually each waffle uses about ⅓ to ½ cup batter. Pour it into the center of the waffle iron, spreading it out to the edges. Close the top of the iron and bake until done, about 2 minutes.
5. Place the waffles as they are baked on a platter in the oven. They can sit briefly as you prepare the others but are best eaten as soon as they finish baking. Serve the waffles with butter and maple syrup alongside.
Note: If you’re making the waffles for an evening meal—say, as a dessert topped with whipped cream or ice cream and fruit—you can prepare the batter through step 1 earlier in the day. It will keep at room temperature for up to 6 hours. Do not add the eggs and baking soda until right before baking.
how to clarify butter
Clarifying butter removes milk solids and water, and allows the butter to be used at high temperatures—for sautéing, for example—without burning or scorching. One cup (2 sticks) butter will yield about ¾ cup clarified.
Cut unsalted butter into 1-inch pieces, place in a heavy saucepan, and melt over medium-low heat. Remove the pan from the heat and let the butter cool for 5 to 10 minutes, then skim the froth from the surface and discard it. Carefully pour or ladle off the clear yellow butterfat into a storage container, leaving behind any milky residue or liquid whey at the bottom of the pan. Cover and chill. Clarified butter will keep for at least 1 week stored in the refrigerator.
After a long search for the perfect pancake, my friend Leonard Lopate told me that he found this recipe in Cook’s magazine a few years ago. At least he thinks it’s the recipe he saw, because he promptly misplaced the magazine, and after changing it here and there, has no idea whether what he does now bears any similarity to the original. It was important for me to find a good recipe for pancakes, because my young son is a picky eater and pancakes are among the foods he has consistently eaten. He took to this version immediately and now will eat no other (as we discovered when we ordered pancakes for him in a restaurant).
Karen, Sara, and I enjoy these remarkably fluffy, soulful pancakes as much as he does. Serve the pancakes with Spiced Maple Syrup (page 385). MAKES EIGHT 3½-INCH-WIDE PANCAKES
1¼ cups all-purpose flour
1 tablespoon sugar
1 teaspoon salt
½ teaspoon baking soda
¼ teaspoon baking powder
5 tablespoons unsalted butter, melted and cooled
1 large egg, separated
⅔ cup buttermilk
⅓ cup milk
Canola or other vegetable oil, for greasing the griddle
Spiced Maple Syrup, for serving (optional; page 385)
1. Place the flour, sugar, salt, baking soda, and baking powder in a medium-size mixing bowl and stir to combine.
2. Place the melted butter and the egg yolk in a small bowl and whisk to blend. Add the buttermilk, milk, and egg white and whisk thoroughly to combine.
3. Pour the egg mixture into the dry ingredients and mix until combined, but do not overwork. The batter should be quite thick and very lumpy.
4. Heat a griddle over high heat until very hot (a drop of water should sizzle on contact). Lightly grease the griddle with a small amount of oil, then lower the heat to medium. Using a ¼-cup measure, pour the batter onto the griddle. Don’t crowd the pancakes; you want the batter to spread comfortably, leaving enough room between cakes to be able to turn them easily.
5. Cook the pancakes until they begin to firm up and bubbles appear on the surface (watch closely; sometimes the cakes firm up before the bubbles show up), 2 to 3 minutes. Use a spatula to lift a pancake to check its bottom side; if it’s nicely browned, slide the spatula all the way under and flip the cake. Check all pancakes before flipping.
6. Continue cooking the pancakes until the second side is nicely browned, about 1 minute more.
7. Serve the pancakes immediately with the syrup, if desired.

The ground oats in these pancakes give them a rustic, slightly earthy flavor, yet they’re still light and fluffy. Like Challah French Toast (page 384), they’re delicious served with warmed Spiced Maple Syrup (page 385). MAKES SIX TO EIGHT 4-INCH PANCAKES
1 cup old-fashioned rolled oats (do not use instant oatmeal)
1½ cups all-purpose flour
1 tablespoon sugar
1 tablespoon baking powder
Pinch of ground cinnamon
Pinch of coarse (kosher) salt
3 large eggs
2 cups milk
4 tablespoons (½ stick) unsalted butter, melted and cooled, plus additional for the griddle
Spiced Maple Syrup (optional; page 385)
1. Preheat the oven to its lowest setting.
2. Place the oats in a blender or food processor and process until reduced to a fine flour. Combine in a large bowl with the flour, sugar, baking powder, cinnamon, and salt and whisk thoroughly to mix.
3. Using the whisk, beat the eggs in a medium-size bowl, then add the milk and 4 tablespoons melted butter and whisk well to blend. Pour the mixture into the oat mixture and whisk just until the dry ingredients are moistened and a medium-thick batter forms; it will be lumpy.
4. Set a pancake griddle or large, heavy skillet over medium heat and brush generously with more melted butter. When it’s hot enough to sizzle a drop of batter, ladle the batter onto the griddle to form as many 4-inch pancakes as will fit (probably no more than three or four); make sure the edges don’t touch. When the top of each pancake is full of little burst bubbles and the underside is lightly golden brown, 2 to 3 minutes (see Note), turn over carefully and cook until golden brown on the second side, another 2 to 3 minutes.
5. Transfer the pancakes to a platter and keep warm in the oven while you cook the remaining pancakes. Serve accompanied, if desired, by spiced maple syrup.
Note: Adjust the heat so the pancakes brown nicely but do not burn before bubbles form and burst on the surface.

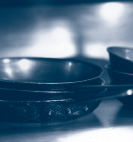
This lovely baked-egg dish feels very special. Shirred eggs has an old-fashioned ring from the time of dining room sideboards laden with an expansive number of breakfast dishes prepared by the below-stairs kitchen staff. Those days may be long gone, but the romance attached isn’t. Shirred eggs are ready made for an anniversary or Valentine’s Day or Mother’s Day brunch. Prepared and served in individual gratin dishes, the yolks finish elegantly runny, and the whites are firm but not dry. Smithfield ham is the best of our cured hams. Prosciutto makes a fine substitute.
Although the recipe makes enough to serve only one, the ingredients multiply easily to suit as many portions as are needed. Because shirred eggs should be presented with the yolks intact, break the eggs one at a time into a cup, then slide them into the baking dish. That way if one of the yolks breaks when you’re cracking the egg, you won’t have to try to figure out how to get it out of the gratin dish. SERVES 1
1 teaspoon unsalted butter
1 thin slice (approximately ½ ounce) Smithfield ham
1½ teaspoons marinara-type tomato sauce, preferably homemade
½ teaspoon fresh tarragon leaves, coarsely chopped
2 large eggs
Coarse (kosher) salt and freshly ground black pepper, to taste
1 tablespoon heavy (or whipping) cream
2. Place the butter in a single-serving, ovenproof baking dish that easily holds the eggs (a 4-inch gratin dish is perfect). Place the dish in the oven to melt the butter.
3. Place the ham on the melted butter, folding it or trimming the edges so that it fits easily in the baking dish. Spread the tomato sauce over the ham and sprinkle it with the tarragon.
4. Carefully break an egg into a small cup, then pour it into the gratin dish. Repeat this with the second egg. If a yolk breaks, save that egg for another use. Sprinkle lightly with salt and pepper, then drizzle the cream on top.
5. Bake the eggs until the whites are set and the yolks are warm but still runny, about 12 minutes. If the whites still need some firming up, run the eggs under the broiler for a few seconds. You don’t want to overcook them. Serve immediately.
karen’s resuscitating white wine spritzers
In the summertime, when kitchen temperatures soar mercilessly, personalities begin to kick in as the heat gets to us. It’s a stage when we start wondering how we’re going to get through the day. That’s when my wife, Karen, has a way of miraculously appearing in the kitchen doorway bearing a silver tray of frosted, oversize snifters filled with iced white wine spritzers. They are always quintessentially thirst quenching. And it has to be Karen who makes them—no one else quite gets them right. Here is her recipe.
For each spritzer, fill a large goblet or snifter with ice, all the way to the top. Take 3 generous lemon twists, twist them up really well, then run them around the rim and inside top of the glass and slip them in among the ice cubes. Pour in enough white wine to come halfway up the ice, then top off with sparkling water (San Pellegrino only; accept no substitutes). Stir and serve to cranky, overheated people and watch them revive.

For nearly two decades, Derby Day has been cause for great celebration among the Chanterelle staff. A week or two beforehand one of us suddenly realizes that the special day is fast approaching, and preparations are immediately launched. One of us nabs a bottle of Wild Turkey from the liquor room, bringing it to the kitchen carefully tucked under a long white apron. We open the bottle, and then, using the same butcher’s twine we use for trussing chickens, we bind together the stems of a few large sprigs of mint. The bundle of mint is slid carefully inside the bottle, leaving a length of the string hanging out to ensure easy retrieval later, then the bottle is recapped. Finally, the infusion is placed, with reverence, in one of our refrigerators.
Sometime late in the evening of Derby Day, the first Saturday in May, our thoughts turn to that special bottle of Wild Turkey. If there are still diners in the restaurant, we hum our official theme song, “A Mint Julep,” quietly under our breaths as we get on stealthily with the preparations; if it’s just us, we put the Clovers version on full blast. Ice is fetched by one of the wait staff, who crushes it, ritualistically, in a linen napkin. Meanwhile, one of the cooks uses a silver spoon to crush several sprigs of mint in the bottom of the first of many 10-ounce rock-crystal glasses, then rubs a mint leaf around the rim. The glass is filled with crushed ice, about 4 ounces of mint-infused bourbon is added, and the whole thing is topped off with sparkling water—not too much, about 2 ounces—and, in a final festive fillip, garnished with another sprig of mint. Yes, a Chanterelle mint julep is surely refreshing. To say the least.
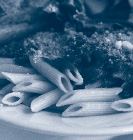
This is a very satisfying brunch, luncheon, or light supper dish. For dinner, serve with a big salad of fresh greens. The delicate, neutral flavor of polenta makes it a fine vehicle for the spicy sauce. Any good brand of cornmeal from the supermarket works fine here, and it makes no difference whether or not it’s stone ground. For an extra bit of zip, remove and crumble the filling from several hot Italian sausages, sauté over high heat, drain, and add to the sauce.
Well wrapped and refrigerated, the unsauced polenta will keep for up to 3 days. SERVES 6
2 cups whole milk
2 cups water
1 tablespoon unsalted butter
Coarse (kosher) salt and freshly ground black pepper, to taste
1 cup cornmeal
Olive oil, for the baking dish
2 tablespoons freshly grated Parmesan
3 cups Tasty Basic Tomato Sauce (page 271)
1 teaspoon hot red pepper flakes
Dash of distilled white vinegar
6 large eggs
1. Combine the milk, water, butter, salt, and pepper in a medium-size, heavy saucepan and bring to a boil over medium-high heat. Reduce the heat to medium low and add the cornmeal in a slow, steady stream, whisking constantly. Continue whisking the mixture until it thickens and begins to pull away from the sides of the pan, 3 to 5 minutes.
2. Oil well a 10 × 8-inch baking dish or 9- or 10-inch glass pie plate. Remove the polenta from the heat and transfer it to the prepared dish, smoothing the top with a rubber spatula. Sprinkle it with the grated Parmesan and let cool until firm, about 15 minutes.
3. While the polenta is firming up, place the tomato sauce in a small, heavy saucepan and stir in the pepper flakes. Bring to a simmer over medium heat, then reduce the heat to low and cook, uncovered, until the sauce is slightly reduced and its flavors are developed, about 15 minutes.
4. Meanwhile, preheat the oven to 400°F. Oil a baking sheet.
5. Cut the polenta into six squares or wedges and arrange them on the prepared baking sheet. Bake until they’re heated through and the Parmesan begins to brown, about 10 minutes. Remove the baking sheet from the oven and cover loosely with aluminum foil to keep warm while you poach the eggs.
6. Bring 4 cups of water to a boil in a small, heavy saucepan over medium-high heat. Add the vinegar and a pinch of salt, then reduce the heat to maintain a steady simmer. Very carefully, break an egg into a small cup, making sure the yolk doesn’t break as well. Make a whirlpool in the water with a spoon and slide the egg from the cup into the center of the whirlpool. As it poaches, repeat the procedure with a second egg; you should be able to poach 2 or 3 eggs at a time. Poach the eggs for 2 to 3 minutes each for a slightly runny yolk, or to your desired doneness.
7. Using a slotted spoon, remove the eggs carefully to a plate. Cover loosely with plastic wrap to keep warm while you poach the remaining eggs.
8. When all the eggs are poached, use a kitchen scissors to trim them of any ragged edges, if desired. Place a piece of polenta on each of six serving plates, then spoon the sauce over the polenta and top with a poached egg. Serve immediately.
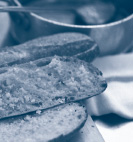
This simple-to-make Italian flatbread is always good and can easily be flavored in any way that suits you. This combination—fresh thyme and sage with garlic—is a favorite, but you could easily use other fresh herbs, olives, hot red pepper flakes, and a variety of spices and seeds including cumin, coriander, and even curry powder. Crisp on the outside, light and chewy inside, this focaccia is a good match for roasted or grilled lamb or fish and virtually any type or pasta or cheese. Split in half, it can also be used to create delicious, hearty sandwiches. MAKES ONE 15 × 12 × 1-INCH BREAD
FOR THE BREAD:
1 package active dry yeast
2 cups lukewarm water
Pinch of sugar
1 tablespoon olive oil, plus additional for the bowl
¾ teaspoon coarse (kosher) salt
4 cups all-purpose flour, plus additional for kneading
FOR THE TOPPING:
1 bunch fresh thyme
6 fresh sage leaves
2 cloves garlic, peeled
¾ cup olive oil, plus additional for the pan
Coarse (kosher) salt and freshly ground black pepper, to taste
1. First, prepare the bread: Sprinkle the yeast over the water in a large bowl. Add the sugar and stir to mix. Let the mixture stand until the yeast starts to get foamy, about 5 minutes.
2. Stir in the oil and salt, then add 1 cup of the flour and stir thoroughly to mix. Gradually stir in 3 cups of the flour to form a soft but workable dough. Transfer the dough to a lightly floured work surface and knead until smooth and elastic, about 10 minutes, adding just enough additional flour to keep the dough from sticking.
3. Clean out the bowl, then lightly oil the inside. Form the dough into a ball and place it in the bowl, turning it to coat on all sides with oil. Cover the bowl with a dampened kitchen towel and place in a warm, draft-free spot. Let the dough rise until doubled in bulk, about 1½ hours.
4. Punch down the dough and let it rise again, covered, until doubled in bulk, about another 1¼ hours.
5. Meanwhile, prepare the topping: Strip the thyme leaves from their stems and place in a blender. Add the sage leaves, garlic cloves, and ¾ cup oil and process until the herbs and garlic are coarsely chopped. Set aside.
6. Preheat the oven to 425°F. Generously oil a 15 × 12 × 1-inch jelly-roll pan.
7. Press the dough into the prepared pan, cover with the towel, and let rise until the indentation stays when the dough is pressed with a finger, about 35 minutes.
8. Using all your fingertips, make rows of dimples in the dough. Spread the herb, garlic, and oil mixture over the dough to cover it completely, then sprinkle generously with salt and pepper.
9. Bake until the focaccia is golden brown, puffed, and fragrant, about 15 minutes. Serve hot from the oven or at room temperature.

Piping-hot garlic bread takes no time at all to prepare and is always a welcome addition to staff and family meals. Of course, we like ours so assertively garlicky that the second everyone’s finished eating, members of the wait staff go dashing into the kitchen, grabbing sprigs of breath-freshening parsley to chew on so they won’t overwhelm the unsuspecting public with garlic fumes. SERVES 8
2 baguettes, each about 24 inches long
¾ cup good-quality olive oil
1 medium head garlic (about 16 cloves), separated into cloves, peeled, and minced (about ½ cup)
2 tablespoons chopped fresh flat-leaf parsley leaves
Coarse (kosher) salt and freshly ground black pepper, to taste
1. Preheat the oven to 400°F.
2. Cut each baguette lengthwise in half and place all four halves on your work surface, cut-side up. Drizzle about 3 tablespoons of the oil over each half, then sprinkle with the garlic (about 2 tablespoons per half), parsley, salt, and pepper. Place the baguette tops on the bottoms to re-form the loaves, then wrap the loaves separately in aluminum foil. Bake until fragrant and heated through, about 10 minutes.
3. Remove the garlic bread from the oven and turn the broiler to high. When the broiler is hot enough, unwrap the loaves, separate again into halves, and place, cut-side up, under the broiler. Broil until lightly toasted, about 30 seconds.
4. Remove the garlic bread from the broiler, cut into serving-size pieces, and serve immediately.
A sprinkling of freshly grated, nutty-tasting Parmigiano-Reggiano (see page 267) enhances the minced garlic topping here. These lightly toasted slices are perfect with pasta and a big green salad, or served as a crunchy snack with cold beer. SERVES 8
2 baguettes, each about 24 inches long
¾ cup good-quality olive oil
8 large cloves garlic, minced (about 2 tablespoons)
Coarse (kosher) salt and freshly ground black pepper, to taste
1 cup freshly grated Parmesan (about 4 ounces)
2 tablespoons chopped fresh flat-leaf parsley leaves
1. Preheat the oven to 400°F.
2. Cut each baguette lengthwise in half and place all four halves on your work surface, cut-side up. Drizzle about 3 tablespoons of the oil over each half, then sprinkle with the garlic (about 1½ teaspoons per half) and salt and pepper. Top each half with a sprinkling of the grated Parmesan (¼ cup per half) and some parsley.
3. Arrange the baguette halves on a large baking sheet and bake until the bread is lightly toasted and fragrant and the cheese is melted, about 10 minutes.
4. Remove the Parmesan bread from the oven, cut into serving-size pieces, and serve immediately.
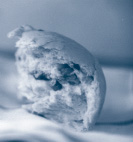
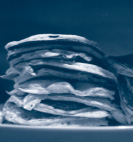
Chapati is a basic Indian flatbread that’s easy to make and a great scooper-upper of curries and other fragrant, stewy dishes. It takes practically no time at all to turn out a stack to serve piping hot for dipping into sauces (the Tamarind Dipping Sauce on page 372 is a natural), for mopping up flavorful gravies (try them with Venison Chili with Red Beans, page 77, or Lamb Shanks with Tomato and Rosemary, page 90), or as a sandwich wrap filled with Cheddar cheese and a dollop of mango chutney.
If you have an Indian grocery story nearby, look for bags of chapati flour. This delicious, almost sweet whole-grain flour yields lighter results than our whole-wheat flour, but if it’s unavailable a commercial whole-wheat flour, such as Gold Medal (rather than a rustic stone-ground variety), will make a good substitute. MAKES 10 CHAPATI
3 cups chapati flour or whole-wheat flour (see Note)
1 cup all-purpose flour, plus more for dusting
1 teaspoon salt
Small pinch of cayenne pepper
⅛ teaspoon ground cumin
Small pinch of chili powder
Canola or other vegetable oil
1½ cups cold water
1. Place the chapati flour, 1 cup all-purpose flour, the salt, cayenne, cumin, and chili powder in a medium-size mixing bowl and whisk to combine.
2. Drizzle 2 teaspoons of the oil over the flour mixture and use your hands to rub it in.
3. Add the water to the flour mixture and use your hands to mix it together into a soft dough. Transfer the dough to a work surface lightly dusted with all-purpose flour and knead just to make sure the dough is uniformly blended and not sticky, 30 seconds. Leave the dough on the board, cover it lightly with plastic wrap, and let it rest for 15 minutes.
4. Divide the dough into ten equal portions, each approximately the size of a lime. With your palms, roll each portion into a ball. Place the balls of dough in a row at the top of your work surface and cover them lightly with plastic wrap. Working with one ball of dough at a time, lightly dust the work surface again with all-purpose flour and roll each ball into a round about 8 inches wide and ⅛ inch thick. Place the chapati on a dinner plate, cover with a piece of waxed paper, and repeat with the remaining balls of dough until you have a stack of rolled chapati.
5. Heat a griddle or medium-size skillet over medium heat. When it’s hot (a drop of water will sizzle on contact), pour about 1 tablespoon oil onto the griddle and spread it to coat. Carefully place one chapati onto the griddle. Fry until the chapati is slightly blistered and lightly browned, 1 to 2 minutes. Using tongs, turn the chapati and fry the second side until lightly browned, about 1 minute more. Remove the chapati from the pan, place it on a serving platter, and cover it with a clean cloth napkin while you fry the rest. If the pan gets too dry, add a bit more oil. Serve immediately.
Note: If you can’t find chapati flour, use 1½ cups whole-wheat flour and increase the all-purpose flour to 2½ cups.