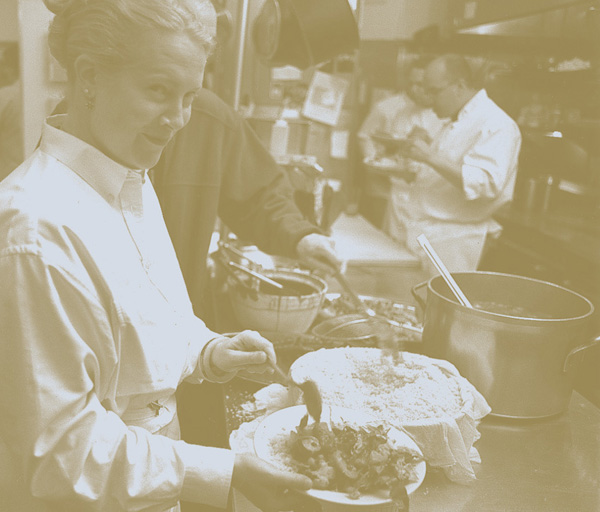
In this chapter you’ll find the one-pot meat dishes that I cook at home for family and friends and at Chanterelle for the staff meals that lift our spirits and give us the stamina to face the evening rush. Like many American families, we eat red meat less often than in the past, but in cold weather we often seek the comfort of a slow-simmered stew, and there are still plenty of times, regardless of the season, when we unapologetically crave a good juicy hamburger.
For the most part, these are thrifty dishes created from less expensive cuts of beef, lamb, or veal, many tenderized through the use of flavorful marinades or leisurely braising, and all liberally seasoned. Beef, however, does lend itself to spectacular celebratory dishes as well, and while they don’t work as everyday fare, they do have a place at the occasional staff meal—and, of course, at the family table, too. For that reason, I have included a few front-of-the-house recipes that require a bit more effort in preparation, but they result in dishes that I believe will make welcome changes to your special-occasion repertoire.
Whether the meal calls for a wine-infused bistro version of Mom’s Braised Brisket with Carrots (page 55), a succulent Lamb Tagine with Prunes and Honey (page 96), or a platter of Beef Fillets with Star Anise (page 52), you’ll find that these are melt-in-your-mouth main dishes filled with character and good flavor. When paired with a green salad or vegetable and a piping-hot gratin, a steaming bowl of white rice, some mashed potatoes, or a side of orzo, there’s no resisting pulling up a chair to the table and sitting down with friends or family.

“Roast Beef, Medium, is not only a food. It is a Philosophy.”
—Edna Ferber, Roast Beef, Medium
Every so often we just have to indulge in a delicious roast beef dinner, complete with all our favorite side dishes and plenty of piquant homemade Horseradish Sauce (page 369). Roasting a hefty-size piece of meat such as top round is a good way to serve a large family—or a restaurant staff! It’s also a convenient excuse to consume unseemly quantities of mashed potatoes. If you can, plan to cook a roast that’s larger than you’ll need for one dinner so you’ll have plenty of leftovers for sandwiches or hash the next day. SERVES 6 TO 8
FOR THE ROAST:
1 boneless top round beef roast (about 6 pounds), trimmed, rolled, and tied
Extra-virgin olive oil
Coarse (kosher) salt and freshly ground black pepper, to taste
2 large cloves garlic, minced
FOR THE ACCOMPANIMENTS:
Everyday Mashed Potatoes (page 334)
Fried Zucchini Coins (page 345)
Yummy Onions (page 325)
Horseradish Sauce (page 369)
1. Preheat the oven to 400°F.
2. Rub the roast all over with oil and season on all sides with salt and pepper. Place in a roasting pan and roast for 15 minutes, then reduce the oven temperature to 350°F and roast for 20 minutes more.
3. Remove the pan with the roast from the oven, leaving the oven on. Let the roast cool briefly, then rub it all over with the garlic, using either your fingertips (carefully) or a rubber spatula. Return the pan to the oven and finish roasting to the desired doneness, about 30 minutes more for rare to medium rare (120° to 130°F on an instant-read meat thermometer).
4. Transfer the roast to a platter and let stand, covered loosely with aluminum foil, in a warm place for at least 10 minutes before carving. Cut it into thin slices to serve, surrounded by bowls of the accompaniments.
roasting wisdom
The perfect roast requires just the right cut of beef. Top round, bottom round, rump roast, and eye round are all good choices and will make fine roasts. The cooking time and temperature for roast beef will depend a great deal on the cut of meat you’ve chosen, how it was butchered, and the oven temperature when it first goes into the oven. For the Roast Beef Dinner (page 45), I use a rump roast that’s about 6 inches high at its thickest point and 10 inches long. With a starting oven temperature of 400°F, lowered after 15 minutes to 350°F, it takes a bit more than an hour for the roast to reach medium rare, the ideal degree of doneness for flavor and ease of slicing.
Since I trust my lips better than some inanimate thermometer, I judge doneness using a method that I don’t necessarily recommend you try at home. I insert a metal skewer into the thickest part of the roast and leave it there for a few seconds. Then I remove the skewer and touch it to my lips; when it’s quite warm but not really hot, the roast is ready to remove from the oven. A less daring—and more traditional—method would be to use a meat thermometer inserted in the thickest part of the roast, it should read around 120° to 130°F. Regardless of how you like your meat cooked, before slicing the roast, let it rest for 15 to 20 minutes after removing it from the oven. This gives the meat time to relax so the wonderful juices redistribute themselves. Doing so also ensures that the meat will be evenly rosy and fewer juices will be lost when it’s carved.

Flank steak is an easy cut of beef to prepare, and the price is right. The grilled or broiled meat slices up nice and tender when cooked just to the right juicy redness. Cut at an angle against the grain, slices come out pleasantly wide and are especially good served hot over a room-temperature salad like the Cucumber Salad with Red Onion and Chinese Sausage (page 314). If you’re in the mood for a simpler, yet satisfying, side dish, plain rice certainly fills the bill. A few sprigs of cilantro make a nice garnish. SERVES 4
3 cloves garlic, finely minced
¼ cup Thai fish sauce (nam pla)
¼ cup good-quality soy sauce, such as Kikkoman
Juice of 5 limes
¼ cup sugar
½ cup water
1 tablespoon hot red pepper flakes
1 beef flank steak (about 2 pounds), trimmed of fat
1. Place all the ingredients except the steak in a bowl and whisk to blend. Place the flank steak in a wide, shallow bowl and pour the marinade over it. Turn the meat, making sure it is completely coated with the marinade. Refrigerate, covered, for at least 4 hours and up to 24. Turn the meat occasionally as it marinates.
2. Preheat the grill to very high or preheat the broiler.
3. Remove the flank steak from the marinade and pat dry. Oil the grill rack, place the meat on the rack, and grill, making sure to watch the heat carefully; the sugar and soy sauce tend to cause the meat to blacken quickly. Flank steak is tender when cooked no more than medium rare, about 4 minutes per side.
4. Let the meat rest for 2 minutes, then slice thinly against the grain and serve.

My version of this Szechuan stir-fry favorite uses a frying technique that’s somewhat unorthodox but creates a dish as delicious as the original. Unlike a traditional stir-fry, the slightly spicy, sweet-yet-tangy orange sauce and the beef are prepared separately. The sauce can be made up to a week in advance and refrigerated. The flank steak (partially frozen first so it’s easier to cut into thin, even slices) marinates overnight in a soy-sauce-based mixture. The marinated beef is then fried until it’s browned and crispy, tossed with warmed orange sauce, and served immediately. To expand the number of servings for unexpected guests, quickly stir-fry green vegetables such as snow peas, zucchini, or asparagus and add them at the last minute. Crispy orange beef is so full of flavor that it needs nothing more than a big bowl of plain rice as an accompaniment. SERVES 6 TO 8
FOR THE BEEF AND MARINADE:
1 beef flank steak (2 pounds), trimmed of fat and partially frozen to facilitate slicing
¼ cup good-quality soy sauce, such as Kikkoman
1 tablespoon Chinese black vinegar or balsamic vinegar (see box, page 49)
1 tablespoon Asian sesame oil
1 tablespoon dry sherry
1 tablespoon sugar
FOR THE SAUCE:
2 tablespoons canola or other vegetable oil
2 large cloves garlic, minced
4 teaspoons grated fresh ginger
4 cups orange juice
½ cup rice vinegar, or more to taste
2 tablespoons orange-flavored liqueur, such as Grand Marnier or Triple Sec
1 tablespoon dry sherry
4 large pieces dried orange or tangerine peel, softened (see box, page 51)
4 cups Chicken Stock (page 39) or canned low-sodium chicken broth
¼ cup sugar
3 tablespoons good-quality soy sauce, such as Kikkoman
2 tablespoons cornstarch
3 tablespoons cold water
Coarse (kosher) salt and freshly ground black pepper, to taste
2 tablespoons canola or other vegetable oil, plus additional for deep-frying
6 whole dried red chiles, halved and seeded
Zest of 4 oranges, coarsely chopped or grated
2 ounces dried wood ear mushrooms, soaked as directed on page 8, drained, then trimmed of any hard parts and cut into ½-inch strips
½ cup all-purpose flour
½ cup cornstarch

1. Marinate the steak: Using a large, very sharp knife, slice the flank steak against the grain into ⅛-inch-thick slices. Cut each slice crosswise into two or three pieces and place in a large bowl. Prepare a marinade by combining the soy sauce, vinegar, sesame oil, sherry, and sugar, whisking until blended and the sugar is dissolved. Pour the marinade over the beef in the bowl and toss thoroughly to coat. Refrigerate, covered, for at least 6 hours and up to 12.
2. Meanwhile, prepare the sauce: Heat the oil in a small saucepan over medium heat. Add the garlic and ginger (they should sizzle on contact) and stir-fry until fragrant but not browned, about 45 seconds. Add the orange juice, ½ cup rice vinegar, liqueur, and sherry and bring to a boil over high heat. Reduce the heat to medium and cook until the liquid is reduced by half, 5 to 10 minutes.
3. Drain the dried orange peel well, then cut it into ½-inch pieces and add it to the reduced liquid in the saucepan along with the chicken stock, sugar, and soy sauce. Increase the heat to high and bring to a boil, then reduce the heat to medium and reduce the liquid again by half, about 10 minutes.
4. Whisk the cornstarch into the water to blend. When smooth, whisk it into the reduced liquid in the saucepan. Reduce the heat to low and cook, whisking occasionally, until the mixture is thickened, another 1 to 2 minutes (see Note). Remove the pan from the heat and season with salt, pepper, and a little additional vinegar, if desired. Strain the sauce and set aside.
5. When you’re ready to serve, heat 2 tablespoons oil in a large skillet over high heat. Add the chiles and stir-fry quickly until aromatic and slightly blackened. Add the coarsely chopped orange zest and stir quickly for a few seconds, then add the reserved sauce and bring to a boil. Add the wood ear mushrooms and simmer to develop the flavors, about 5 minutes. Remove the skillet from the heat and set aside, covered, to keep warm.
6. Preheat the oven to its lowest setting.
7. Pour oil into a deep, heavy skillet to a depth of 4 inches and heat over medium-high heat to 375°F. Line a baking sheet with paper towels. Combine the flour and cornstarch in a shallow dish. Drain the beef from the marinade and dip, a few pieces at a time, in the flour mixture to coat on all sides, shaking off any excess. Add the coated beef to the hot oil in batches and fry until browned and quite crisp, about 5 minutes, turning as necessary with tongs; do not crowd the skillet. As the beef is done, transfer it with tongs to the prepared baking sheet and keep it warm in the oven.
8. When all the beef is cooked, place it in a large serving bowl and pour the heated sauce over it. Toss to coat and serve immediately.
Note: If you’re not planning to use the sauce immediately, refrigerate it, tightly covered, for up to 1 week, omitting the thickening part of step 4. When you’re ready to resume the recipe, reheat the sauce, thicken as directed in step 4, season, and strain, then proceed with step 5.
chinese black vinegar
This dark vinegar, made from rice, wheat, millet, or sorghum, is mild yet deeply flavorful, with a slight hint of sweetness. In the north of China it’s often used in the preparation of braised dishes and as a dipping sauce or table condiment. Since the darkest, richest-tasting examples are made in the province of Chiekiang, it is sometimes known as Chiekiang vinegar, and the labels of the best brands will include this geographical designation in various dialects (Chiekiang, Chinkiang, Chenkong, Chen-jung). Good brands to look for include Narcissus Yongchun Loagu, Tientsin Yongchun Loagu, and Gold-Plum Chinkiang Vinegar. In a pinch you can use a good balsamic vinegar as a substitute for black vinegar, although it’s slightly sweeter.
drying citrus peel
Although dried orange or tangerine peel is readily available at Asian markets, it’s very easy to make your own. Choose oranges, tangerines, clementines, or mandarin oranges with fragrant, unblemished skins, avoiding any with a dull or dry-looking surface. Wash and dry the fruit well. Using a sharp paring knife, score the peel into quarters or eighths and remove it neatly. Place the pieces, outer-side down, on a cutting surface and scrape away all of the white pith with the paring knife (an old-fashioned serrated grapefruit spoon also works nicely) until the peel is translucent and you can see the little pores or oil sacs of the skin through it.
Arrange the peel, pith-side up, on a wire rack set in a warm, dry spot. Depending on the humidity, it will take the peel anywhere from 1 to 4 or 5 days to dry out. The dried pieces should be curled and slightly flexible and will have turned dark brown. Stored in a glass jar with a screw-top lid, the peel will last indefinitely. In fact, the older it gets, the more intense the flavor becomes.
Before using, soften the dried peel in warm water to cover for 10 minutes.

This is the summer special-occasion dish to beat all special-occasion dishes. I say “summer” because the best way to prepare these well-marinated steaks is on the grill, and for many of us that means summer. And as for the “special-occasion” part, anytime beef of this quality and amount is involved, it usually means something special is being celebrated.
Admittedly, this is not a staff-meal dish, but it’s one I wanted very much to include because it’s a favorite of mine. Actually, the real star here is the sauce, based on Chinese flavors. It marries beautifully with the tender beef, especially after the beef has been marinated in a compatibly flavored mixture just long enough so that its outer layer is permeated. Although the flavors are more exaggerated than they would be in a traditional Chinese dish, they infuse without overwhelming. Freshly steamed rice would accompany the steaks nicely. SERVES 8
FOR THE BEEF AND MARINADE:
2 cups good-quality soy sauce, such as Kikkoman
¼ cup balsamic vinegar
½ cup honey
2 tablespoons Chinese five-spice powder
2 tablespoons Asian sesame oil
1 tablespoon grated fresh ginger
8 beef fillet steaks (1½ inches thick; 8 to10 ounces each)
FOR THE SAUCE:
¼ cup canola or other vegetable oil
1 large onion, unpeeled, roughly cut into chunks
3 medium carrots, unpeeled, roughly cut into chunks
3 heads garlic, cut in half through the cloves
1 piece (2 inches) fresh ginger, unpeeled, cut into ¼-inch slices
1 cup dry white wine
¾ cup dark soy sauce
4 ounces Chinese rock sugar or ½ cup (firmly packed) light brown sugar
4 large pieces dried orange or tangerine peel, softened (see page 51)
6 ounces whole star anise (about 2 cups; see box, page 54)
1 cinnamon stick (3 inches), broken in half
4 quarts Chicken Stock (page 39; see Note)
3 tablespoons beurre manié (see page 62)
1. Prepare the marinade: Place the soy sauce, vinegar, honey, five-spice powder, sesame oil, and ginger in a bowl and whisk until blended. Place the beef in a large roasting pan and pour the marinade over it. Turn the beef so that it’s coated all over with the marinade. Refrigerate, covered, for 12 hours, turning the beef several times as it marinates.
2. Prepare the sauce: Heat the oil in a large stockpot over medium-high heat. Add the onion, carrots, garlic, and ginger and cook, stirring occasionally, until the vegetables are well browned, about 15 minutes.
3. Add the wine and soy sauce, increase the heat to high, and cook until the mixture is reduced by half, about 5 to 8 minutes. Add the rock sugar, orange peel, star anise, cinnamon stick, and chicken stock and bring to a boil. Reduce the heat and simmer the liquid for 1 hour.
4. Pour the sauce into a colander set over a second large pot, pushing down on the vegetables and spices to extract as much liquid as possible. Bring to a boil, then reduce the heat to medium high and boil until the liquid starts to thicken (it should be reduced by half and become more saucelike), about 30 minutes.
5. Meanwhile, preheat a grill to high or preheat the broiler.
6. Taste the sauce; it should be mildly sweet, salty, and redolent with the flavor of anise. Reduce the heat to medium, whisk in the beurre manié, and continue cooking the sauce, whisking frequently, until it has thickened enough to lightly coat the back of a spoon, 5 minutes. Remove the sauce from the heat and set aside, covered to keep warm, while you grill the steaks.
7. Remove the steaks from the marinade and pat dry. Oil the grill rack, place the steaks on the rack, and grill, making sure you watch the heat carefully; the sugar and soy sauce tend to cause the meat to blacken quickly. If you like your steak rare, figure 4 to 6 minutes per side; for medium, 6 to 8 minutes per side.
8. Transfer the steaks to a platter or individual plates. Spoon the sauce over the steaks and serve immediately.
Note: This sauce calls for homemade stock only. You can get away with canned substitutes in other recipes, but for this one, please bring out the best from scratch.
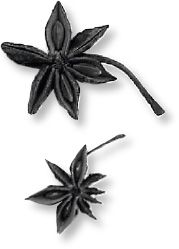
two asian spices
Chinese five-spice powder is a strong-flavored mixture that contains—despite the name—anywhere from five to seven ground spices. It’s used sparingly but to great effect in Chinese cooking, particularly in vegetable stir-fries, roasted or braised meats, and marinades for duck. Most versions contain cinnamon, Szechuan pepper, fennel seeds, ginger, cloves, and star anise (the flavor that generally comes through the most strongly). Just a pinch will do in most instances. I like to add it in place of cinnamon to blueberry muffins, apple pies or crisps, and rice pudding.
Fragrant and prettily shaped star anise, which looks like a reddish brown star, is a key ingredient in Chinese five-spice powder. On its own it’s one of the few spices widely used in Chinese cooking, most often added whole to pork, duck, and poultry dishes. Star anise is the fruit of a small evergreen tree that grows in southern China and northern Vietnam. Its taste and fragrance are strong and licoricelike, with a hint of sweetness. Each eight-pointed pod contains a smaller, less intensely flavored seed. Look for star anise at Asian markets (a bulk bag costs around $1) and large supermarkets.

This recipe is a combination of the braised brisket my mother, Jeanette, made and a version I enjoyed at a Paris bistro years ago. The difference between my mom’s Jewish-style version and the French one is that my mother wouldn’t dream of putting pig’s feet in anything! But for this dish you want to create a bold, rich sauce that will practically make your lips stick together with each bite; here the extra flavor and gelatinous quality of the pig’s feet make sure of that. Since I like pig’s feet, I serve them right along with the brisket, carrots, and sauce. If that doesn’t suit you, however, simply discard them. The prodigious amount of red wine I use is essential, but it needn’t cost the earth. There are many good red wines available these days for less than $10, some even in the $5 range. Serve alongside buttered noodles or boiled potatoes to sop up the lovely sauce. SERVES 8
1 whole beef brisket (about 6 pounds)
3 pig’s feet, split and chopped into large chunks
3 bottles (750 ml each) red wine (see Note)
½ cup brandy
7 tablespoons canola or other vegetable oil
3 large onions, coarsely chopped
3 large cloves garlic, minced
½ cup all-purpose flour
3 quarts Chicken Stock (page 39) or canned low-sodium chicken broth
5 bay leaves
2 tablespoons crushed dried mushrooms, such as shiitakes
1 teaspoon dried thyme leaves
12 medium-size carrots, peeled and cut into 2-inch lengths
Coarse (kosher) salt and freshly ground black pepper, to taste
1. Using a boning knife, divide the brisket in half horizontally, separating it along the natural division. Place the meat in a large, nonreactive roasting pan along with the pig’s feet. Pour the wine and brandy over the meat, cover with plastic wrap, and marinate, in the refrigerator, for at least 8 hours and up to 24, turning the meat occasionally in the marinade.
2. When you’re ready to proceed, heat 4 tablespoons of the oil in a large, nonreactive stockpot over medium heat. Add the onions and garlic and sauté, stirring occasionally, until lightly browned, about 15 minutes. Add the flour and cook, stirring constantly, until well incorporated into the onions and garlic and lightly browned, 8 to 10 minutes.
3. Remove the brisket from the marinade, pat dry with paper towels, and set aside on a platter. Add the marinade, with the pig’s feet, to the stockpot. Increase the heat to medium and bring to a boil, stirring frequently.
4. Meanwhile, pour the remaining 3 tablespoons oil into a large skillet over high heat. Add the brisket and brown well on all sides, about 5 minutes per side.
5. Add the browned brisket to the stockpot along with the chicken stock, bay leaves, dried mushrooms, and thyme. Cover and bring to a boil over high heat, then reduce the heat to low and simmer, partially covered, until the meats are tender, about 2 to 2½ hours.
6. Remove the pot from the heat and transfer the brisket to a cutting board. When it’s cool enough to handle, cut the brisket against the grain into ¼-inch slices and return them to the pot. Add the carrots, season with salt and pepper, and simmer, partially covered, until the carrots are tender, about another 20 minutes.
7. Remove the pot from the heat and discard the bay leaves. Arrange the brisket slices on a serving platter and spoon the carrots, pig’s feet (if desired), and sauce over the meat to serve.
Note: Please don’t overspend on the wine for this dish. What you want is one reminiscent of unsweetened grape juice. An inexpensive ($6 or so per bottle) Merlot from California or Chile is fine. Do not use a Cabernet. The long cooking will exaggerate its tannic flavor, and the resulting sauce will be too brown, not the deep luscious red it should be.

Braising is the ideal method for transforming inexpensive, not-so-tender cuts of meat such as oxtails, tripe, short ribs, and veal, beef, or lamb shanks into meltingly tender ones. The process is quite simple, and best of all it requires very little of a cook’s time, since there’s no fiddling with the food once all the ingredients are combined in the pot. The meat is patted dry with a paper towel, then nicely browned on all sides, and finally simmered slowly in a small amount of well-seasoned braising liquid in a good, heavy pot with a tight-fitting lid. The moist heat created inside the pot works wonders on the tough connective tissues of the meat, softening and tenderizing them. In addition, the meat’s own delicious juices unite with the braising liquid to add greater depth of flavor. It’s important that the heat be evenly conducted, so use the heaviest pot in your kitchen, one that will just accommodate the ingredients without a lot of space to spare. A cast-iron pot, enameled or not, is a good choice, as would be a pricey, thick-sided one made of copper, if you’re lucky enough to own one.
Braised dishes taste terrific served the same day they’re made, but they’re even better if allowed to rest for a day or two in the refrigerator so the flavors have time to mellow. Chilling also makes it easier to remove the fat from the surface before the dish is reheated.
Short ribs have enjoyed something of a revival in the past few years for two very good reasons—their succulent, wonderfully beefy flavor and reasonable cost. This dish is a variation on carbonnades à la flamande, a traditional Belgian specialty in which chunks of beef stew meat are tenderized to the melting point by slow-cooking in a generous amount of Belgium’s famous beer. Here short ribs receive a similarly transformational braising in a good dark beer, preferably one that’s neither too bitter nor too sweet. I generally choose Brooklyn Brown Ale, but a strong Belgian beer, such as a robust Rodenbach red ale or Ichtegem’s brown ale, or even a domestic one, such as Samuel Adams, would work just as well. By the time the ribs have finished cooking, the combination of thinly sliced, nearly caramelized onions, beer, and stock has created a mellow, flavorful, thick sauce with subtle hints of bitterness and sweetness. As you might expect, potatoes—mashed, or plain boiled—would be an ideal accompaniment. And there should be plenty of good crusty bread for mopping up every last speck of delicious sauce. SERVES 6 TO 8
¾ cup canola or other vegetable oil
5 to 6 pounds beef short ribs, trimmed of fat
4 large onions, halved lengthwise and cut crosswise into thin slices
2 tablespoons sugar
2 tablespoons all-purpose flour
4 bottles (12 ounces each) dark ale or beer
8 cups Chicken Stock (page 39) or canned low-sodium chicken broth
4 bay leaves
Coarse (kosher) salt and coarsely ground black pepper, to taste
1. Heat ½ cup of the oil in a very large, heavy, flameproof casserole or Dutch oven over medium-high heat. Add only enough of the short ribs to fit into the casserole without crowding and brown well on all sides, 4 to 5 minutes per side. As the ribs are browned, transfer them to a platter and continue browning the remaining ribs in batches.
2. When all the ribs are browned and removed from the casserole, discard the oil from the casserole, but do not wash it (you want to keep those flavorful brown bits). Return the casserole to the stove. Add the remaining ¼ cup oil and the onions and cook slowly, covered, over low heat until the onions are very soft but not browned, about 20 minutes.
3. Uncover the casserole and sprinkle the sugar over the onions. Cook, uncovered, stirring occasionally, until the onions have caramelized slightly and are just light brown in color, about 5 minutes. Sprinkle the flour over the onions and continue cooking, stirring frequently, until the flour turns light brown, 3 to 4 minutes. Add 1 bottle of the beer and increase the heat to medium high. Bring to a boil, scraping the bottom of the casserole with a wooden spoon to loosen any browned bits.
4. Return the ribs to the casserole along with the stock, remaining beer, and bay leaves. Bring to a boil, skimming the top occasionally, then reduce the heat to low and cook, tightly covered, until the meat is very tender, 1½ to 2 hours; you should be able to pull the bones from the meat with ease. Using tongs, transfer the ribs to a platter and let cool.
5. While the ribs cool, check the liquid in the casserole. If it’s thick enough to coat the back of a spoon, it’s ready to use as a sauce. If not, increase the heat to medium and reduce the liquid until it reaches the proper thickness. This may take up to an additional 15 minutes. Taste; the sauce should be slightly bitter, with a subtle, balancing touch of sweetness from the caramelized onions. Season with salt and pepper; remove and discard the bay leaves.
6. When the ribs are cool enough to handle, remove the meat from the bones. Discard the bones and return the meat to the casserole. Simmer until heated through, about 5 minutes. If you’ll be serving immediately, skim the fat from the surface of the sauce; otherwise, refrigerate overnight and remove the hardened fat before reheating.
On a cold winter day a good homemade stew is the culinary equivalent of a down parka. The depth of flavor in this one comes from just the right combination of compatible ingredients. The gelatin from the bacon rind adds texture to the silky sauce, the full-bodied red wine tenderizes and enriches all of the ingredients, and a healthy shot of brandy helps round out the flavors. You don’t often find cauliflower in stew recipes, but I happen to love it, which is why it’s used here, along with green beans. Both are added toward the end of the cooking time to impart a bit of crunch and more textural interest to the stew. SERVES 6 TO 8
4 thick slices (4 ounces) slab bacon, rind removed, cut crosswise into ½-inch pieces
1 medium onion, diced
5 cloves garlic, minced
3 to 6 tablespoons canola or other vegetable oil
3½ pounds boneless beef chuck, trimmed of fat and cut into 1-inch cubes
1 bottle (750 ml) hearty, full-bodied red wine, such as Côtes-du-Rhône, a Spanish blend, or California Cabernet
½ cup brandy
7 cups Beefed-Up Veal Stock (page 38) or canned low-sodium beef broth
1 piece (3 inches square) bacon rind (optional)
3 bay leaves
1 teaspoon dried thyme leaves
1 to 2 tablespoons beurre manié (optional; see page 62)
4 large carrots, peeled and cut into ½-inch-thick rounds
2 large waxy potatoes, such as Yukon Gold, peeled and cut into 1-inch cubes
10 ounces fresh cultivated white mushrooms, halved or quartered if large
Coarse (kosher) salt and freshly ground black pepper, to taste
1½ cups cauliflower florets
4 ounces green beans, ends trimmed
1. Place the bacon in a large, heavy, flameproof casserole or Dutch oven and sauté over medium-low heat, stirring occasionally, until crisp, about 10 minutes. Add the onion and garlic; if there doesn’t seem to be enough fat rendered from the bacon to sauté them, add a tablespoon of the oil as well. Sauté the onion and garlic until softened but not browned, about 5 minutes, stirring occasionally.
2. Meanwhile, heat 3 tablespoons of the oil in a large, heavy skillet over medium-high heat. Add only enough of the beef cubes to fit into the skillet without crowding and brown well on all sides, 4 to 5 minutes per side. As the beef browns, transfer it to the casserole with the bacon, onion, and garlic. Brown the remaining beef, in batches, adding more oil to the pan as necessary; don’t let the bottom of the skillet burn.
3. When all the beef is browned and removed from the skillet, add 1 cup of the wine to the skillet and bring to a boil, scraping up the browned bits in the bottom of the pan. Pour the contents of the skillet into the casserole with the beef, along with the brandy and 2 cups of the wine. Increase the heat to high and reduce the liquid by two thirds, 15 to 20 minutes; watch carefully, because it may ignite.
4. Add the veal stock, bacon rind (if desired), bay leaves, and thyme and bring to a boil, then reduce the heat to very low. Cook the beef very gently, partially covered, for 1½ hours. If the liquid doesn’t appear to be thickening at this point, whisk in some beurre manié.
5. Add the carrots, potatoes, and mushrooms and season with salt and pepper. Continue simmering until the meat and vegetables are tender, 30 minutes more.
6. Add the cauliflower and green beans and cook until crisp-tender, 6 to 8 minutes. Add the remaining wine (about ½ cup) and cook for 30 seconds more.
7. Remove the casserole from the heat, discarding the bay leaves and the bacon rind, if using. Adjust the seasoning with salt and pepper and serve.

choosing stew meat
Tender, richly flavorful, and juicy, beef chuck is an ideal choice for stew making. Any cut of chuck will be good, but if you have a choice opt for chuck-eye roast. And always avoid buying precut packaged stew meat at the supermarket; you’ll get tastier results buying a large piece of chuck and taking the few extra minutes to cut it into pieces yourself.
beurre manié
Beurre manié (kneaded butter) is a mixture of equal parts softened unsalted butter and all-purpose flour that is thoroughly worked together to form a paste. It is used as a thickener for a variety of sauces and stews and, in particular, to slightly thicken the simmering gravies of braised meat dishes if they appear to be a bit too thin. It should be whisked quickly into the liquid, which then should be allowed to simmer until the flour loses its raw, starchy taste, at least 15 minutes more.

Pot-au-feu (translation: “pot on fire”) is as much a generous statement of hospitality and sharing as it is a satisfying French cold-weather classic. It’s a whole abundant meal from a single pot—a flavorful broth (given a bit of extra color and flavor from blackened onion), a delicious array of slow-simmered meats and poultry, and some nourishing vegetables.
Some people like to present the broth first, then serve the meat and vegetables as a separate course. But that seems too formal to me. First I ladle the delicious golden brown liquid from a tureen into the large, shallow bowl at each person’s place, then I add a selection of sliced meats and vegetables to the broth. Potatoes boiled in their skins are a perfect accompaniment. Just before serving the pot-au-feu, set out a pepper grinder and small bowls of condiments such as coarse sea salt, cornichons, Dijon mustard, and Green Sauce (page 364). And don’t forget a bottle of a simple red wine, preferably Beaujolais or Côtes-du-Rhône. SERVES 8 TO 10
6 quarts Chicken Stock (page 39) or canned low-sodium chicken broth
4 bay leaves
2 tablespoons black peppercorns
1 large onion, halved and blackened (see Note)
2½ pounds boneless beef sirloin tip, rump roast, or fresh brisket, trimmed of fat
1 veal shank (about 4 pounds), trimmed of fat
1 whole chicken (3½ to 4 pounds)
2 pounds garlic sausage, homemade (page 132) or store bought
8 large carrots, peeled and cut crosswise in half
10 medium leeks, white part only, split almost to the root and thoroughly rinsed
Coarse (kosher) salt, to taste
1. Bring the chicken stock to a boil in a very large stockpot over high heat. Wrap the bay leaves, peppercorns, and blackened onion in a doubled square of dampened cheesecloth and knot the ends together to secure. Add it to the simmering stock along with the beef. Lower the heat and simmer, partially covered, for 20 minutes. Add the veal shank and continue simmering, partially covered, for 1¼ hours.
2. Rinse the chicken, inside and out, under cold running water, removing any excess fat. Then add the chicken to the pot and simmer for 45 minutes more, checking all the meats for doneness as you go; the beef and veal should be tender (easily pierced with a fork) but not falling apart, and the chicken is just done when the juices run clear when pierced at the thigh. Remove the meats as they are done to a platter and cover to keep them warm.
3. Add the sausages and carrots to the pot and simmer, partially covered, for 10 minutes. Add the leeks and cook until the sausage is cooked through and the vegetables are tender, about 10 minutes more.
4. Remove the pot from the heat and discard the cheesecloth bag. Slice the meats and carve the chicken, then arrange these on a large serving platter. Using a slotted spoon, remove the vegetables and sausages from the broth in the pot and arrange them on the platter with the meats and chicken. Strain the broth, season with salt, and ladle a little over the contents of the platter. Serve the meats immediately, accompanied by the remaining broth in bowls.
Note: To blacken the onion, preheat the broiler. Place the onion, cut-side up, on the rack of a broiler pan and broil until it’s tender and its outside is blackened, about 15 minutes.
pot-au-feu for a party
Pot-au-feu is a homey, yet sophisticated choice to serve a crowd at a party, particularly during the festive winter holidays. You’ll need a really huge pot, of course, and the basic ingredients will have to be scaled up. Pot-au-feu should always include beef and chicken, but instead of increasing the quantities, it’s much nicer to introduce a wider variety of ingredients. Among the possibilities: beef short ribs, duck confit, marrow bones, a 1-pound chunk of mildly smoked ham, a beef shin, smoked pork chops, or pork ribs (cut in half).

Red-cooking is a Chinese method of braising foods slowly in a dark, intensely flavorful soy-based cooking liquid seasoned with wine, star anise, Szechuan peppercorns, and other flavorful ingredients. Once cooked, the beef marinates for a minimum of 2 days in the same liquid in which it was braised, so plan ahead when you’re preparing this recipe.
Red-cooking broth also works well with oxtails, pork shoulder, duck (page 200), chicken (page 148), squab, and even shiitake mushrooms. The broth, which is sometimes referred to in Chinese cooking as a master sauce, has an exquisite aroma and markedly exotic anise-intensive flavor. (If you’re wary of so much anise, you could use ½ cup less, but the flavor will not be as good.)
There is really no good substitute for the shin of beef here. It has a tremendous amount of connective tissue, which is transformed into gelatin during the braising. Look for beef shin at a meat market or specialty food store, although you may be able to get the cut at a large supermarket with a meat department that handles special requests. When cooked correctly, beef shin is tender but chewy. It’s not the type of cut that melts in your mouth. It fights back a little, and that’s what it’s supposed to do.
Traditionally served at Chinese banquets as part of an array of appetizers, this dish is terrific served as part of a buffet that might also include Soba Salad (page 337), Thai Seafood Salad (page 233), Honeyed-Hoisin Grilled Chicken Wings (page 189), and cold meats. Accompany it with an assortment of such condiments as Dijon mustard and several types of Chinese hot sauce. SERVES 10 TO 12 AS PART OF A BUFFET
Broth for Red-Cooking (recipe follows)
1 shin of beef (4 to 5 pounds), boned, trimmed, and cut into 2 or 3 large pieces
Asian sesame oil, for brushing
Fresh cilantro leaves, for garnish
1. Place the unstrained broth in a large stockpot and bring to a boil over high heat. Add the beef shin and return the broth to a boil. Reduce the heat to low and simmer, partially covered, until the meat is cooked through and tender but not falling apart, about 1½ hours.
2. Remove the pot from the heat and let the beef cool in the liquid, then refrigerate the beef—still in the liquid—for at least 48 hours and up to 72.
3. To serve, remove and discard the hardened layer of fat from on top of the cold broth. Remove the beef from the broth and scrape off whatever spices and bits of jellied broth are clinging to it (see Note). Cut only as much beef as you are likely to need into very thin slices across the grain, and arrange them on a platter. Once sliced, the meat has a tendency to dry out if it’s left out too long; the unsliced portion will keep, tightly wrapped, in the refrigerator for up to 3 days.
4. Just before serving, brush the meat lightly with sesame oil (don’t fail to do this, because the oil tempers the anise flavor) and garnish with cilantro.
Note: Transfer the unstrained broth to a container with a tight cover and refrigerate for up to 1 week, bringing it to a boil every couple of days. If you don’t think you’ll be using it again for a while, it’s best to freeze the broth. When frozen, it will keep for up to 6 months.
a memorable sandwich
If you’re lucky enough to have leftover Chilled Red-Cooked Beef, it can be transformed into a terrific sandwich. Add a tablespoon of finely chopped fresh cilantro leaves to a cup of Basic Mayonnaise (page 360) or a good-quality commercial mayonnaise. Slather a split baguette with the mayo, add thin slices of beef shin, and top with some coleslaw.

Use this exotic broth to cook chicken (page 148) and duck (page 200) as well as beef. It improves with age, becoming richer and tastier, and can be used over and over again, supplemented with additional stock, water, or seasonings as needed. You need only refrigerate the broth if you use it often; freeze it if you plan to use it less frequently. MAKES 4 QUARTS
4 quarts Chicken Stock (page 39), canned low-sodium chicken broth, or a combination of stock or broth and water
2½ cups good-quality soy sauce, such as Kikkoman
½ cup black soy sauce or mushroom soy sauce
¼ cup dry sherry
1 pound Chinese rock sugar or 2¼ cups (firmly packed) light brown sugar
2 bunches scallions, white and green parts, trimmed and cut into 3-inch lengths
8 ounces whole star anise (about 2 cups; see page 54)
12 dried shiitake mushrooms
6 to 8 large pieces dried orange peel, softened (see box, page 51), or zest of 3 oranges, removed with a vegetable peeler
1 piece (4 inches) unpeeled fresh ginger, rinsed and cut into ¼-inch slices
2 tablespoons Szechuan peppercorns
2 cinnamon sticks (3 inches each)
1. Combine the chicken stock, soy sauces, sherry, rock sugar, scallions, star anise, mushrooms, orange peel, ginger, peppercorns, and cinnamon sticks in a large stockpot and bring to a boil over high heat. Reduce the heat to low and simmer, uncovered, for 45 minutes.
2. The broth is now ready to red-cook the desired meat. If you won’t be using it immediately, transfer the broth to a storage container and refrigerate, covered, until you’re ready. It will keep for up to 1 week in the refrigerator; bring it to a boil every couple of days. Frozen, it will keep for up to 6 months.

When it comes to roast beef, there’s only one rule of thumb that counts—always cook a larger roast than you think you’ll need. As much as my family and our staff always anticipate a good roast beef dinner, there’s no question that we look forward almost as much to eating the leftovers. Remember to toss a few extra potatoes into the oven alongside the beef as it roasts and you’ll be able to enjoy hash the next day.
There’s nothing remotely haute about this hash, which is one of its virtues. Humble, economical, and satisfying, it comes out of the skillet with a wonderful golden brown crust. And the recipe can easily be doubled or tripled. Serve the hash unadorned, or topped with poached or fried eggs, and accompanied by a batch of hot homemade biscuits. Good for breakfast, lunch, or dinner! SERVES 2
1 to 2 tablespoons olive oil
1 tablespoon unsalted butter
1 small onion, diced
1 clove garlic, minced
2 cups diced cooked waxy potatoes, such as Yukon Gold
2 cups diced cooked roast beef
¼ teaspoon dried thyme leaves
A few dashes of Tabasco sauce
Coarse (kosher) salt and freshly ground black pepper, to taste
1. Heat 1 tablespoon of the olive oil and the butter in a 10-inch nonstick or well-seasoned cast-iron skillet over medium heat. When the butter stops foaming, add the onion and sauté, stirring occasionally, until softened and browned, about 10 minutes.
2. Add the garlic, potatoes, beef, thyme, Tabasco, salt, and pepper and toss well to mix.
3. Using a metal spatula, firmly press the hash into a cake and cook until it’s browned and crusty on the bottom, about 15 minutes (see Note). If the pan looks too dry, add the remaining 1 tablespoon oil. Using one or two wide spatulas, turn the hash over carefully and brown the other side, about 5 minutes.
4. Slide the hash carefully onto a platter or scoop onto individual plates and serve.
Note: Sometimes a brown crust simply won’t form, in which case you can just eat the hash loose. It will still be tasty.
Meatballs are really just miniature meat loaves with the added benefit of a shorter cooking time. Fast and easy to prepare, they’re convenient to have in the freezer as emergency rations for busy days when time or energy levels are running short and the family meal can’t wait. Use them for impromptu sandwiches or slice them to top a pizza.
As an alternative to roasting the browned meatballs in the oven, you could simmer them in 8 cups of tomato sauce for 20 minutes instead. MAKES 2 DOZEN MEATBALLS
½ cup fine dry bread crumbs (see page 279)
½ cup milk
1½ pounds lean ground beef (or an equal mixture of ground beef, ground pork, and ground veal)
1 large egg
½ cup chopped onion
1 large clove garlic, minced
¼ cup freshly grated Parmesan
1 tablespoon tomato sauce
1 teaspoon dried oregano leaves
Coarse (kosher) salt and freshly ground black pepper, to taste
Canola or other vegetable oil, for frying
1. Combine the bread crumbs with the milk in a large bowl and let soak for 5 minutes to soften.
2. To the softened crumbs add the ground beef, egg, onion, garlic, grated Parmesan, tomato sauce, oregano, salt, and pepper. Using your hands or a wooden spoon (hands work best), mix very well. Divide the mixture into twenty-four equal portions and shape each into a ball (each will be about 1½ inches in diameter).
3. Preheat the oven to 375°F.
4. Pour oil to a depth of ¼ inch into a large skillet and heat over medium-high heat. Add only enough meatballs to the skillet to fit without crowding and brown well on all sides, using tongs to turn them, 8 to 10 minutes total. Transfer to paper towels to drain briefly, then place in a roasting pan and set aside while you brown the remaining meatballs in batches, as necessary.
5. When all the meatballs have been browned and added to the roasting pan, place them in the oven and roast until they’re cooked through, about 10 minutes.

The thing about meat loaf is that some people like it for lunch or dinner—but others, those of us who really love it, eat meat loaf in the morning, too. Although I have nothing against breakfast, I don’t care much for traditional morning foods, so I often begin the day with a meat loaf sandwich and some coleslaw.
This herby version of meat loaf, flecked with savory bits of prosciutto, is quick and easy to throw together. Half of the tomato sauce is blended with the meat and seasonings; the rest is poured over the top. As the meat loaf bakes, the sauce becomes concentrated and develops a wonderful, slightly sweet, roasted flavor. You can also serve this Parmesan-style by arranging a few medium-thick slices of mozzarella on top of the sauce halfway through the cooking time of the meat loaf. Serve with zucchini sautéed in olive oil and garlic. SERVES 4 TO 6
1 cup fine dry bread crumbs (see box, page 279)
¾ cup dry white wine
2½ pounds lean ground beef (or an equal mixture of ground beef, ground pork, and ground veal)
4 ounces prosciutto, cut into ¼-inch dice
1 cup Tasty Basic Tomato Sauce (page 271) or good-quality commercial tomato sauce
2 large eggs
1 medium onion, cut into ¼-inch dice
5 cloves garlic, minced
1 tablespoon dried oregano leaves
1 tablespoon dried basil leaves
2 teaspoons dried thyme leaves
Coarse (kosher) salt and freshly ground black pepper, to taste
1. Preheat the oven to 350°F.
2. Combine the bread crumbs and wine in a small bowl and let soak until the crumbs are soft, about 10 minutes.
3. Combine the ground beef, prosciutto, ½ cup of the tomato sauce, the eggs, onion, garlic, oregano, basil, thyme, salt, and pepper in a large bowl. Add the bread crumbs and any remaining wine. Using your hands or a wooden spoon (hands work best), mix very well to combine.
4. Shape the mixture into a loaf and place in a roasting pan or fill a glass loaf pan with it. Pour the remaining ½ cup tomato sauce over the meat loaf and bake until nicely browned and a metal skewer inserted into the center comes out hot, 1 to 1½ hours. Transfer the meat loaf to a platter and let it rest for 5 minutes before cutting it into thick slices and serving.
maximizing dried herbs
Always be sure to use the freshest possible dried herbs (preferably ones that have been in your kitchen cupboard no longer than a few months), and always crumble them between your fingertips before using to activate their flavor. As the dried oregano, basil, and thyme are crumbled into the recipe, the air becomes delightfully suffused with their aroma. Close your eyes and sniff. It’s a preview of how the dish will taste.
Most chefs enjoy a really good burger. I certainly do. This is the method I use at home and for our staff meals to produce a straightforward hamburger with a very crisp exterior and a tender, juicy interior. It requires a cast-iron skillet, a piece of equipment every home cook should own. If you don’t have one, use this recipe (and your love of a great burger) as an excuse to get one.
Try not to overhandle the beef in the course of forming the patties. The meat should be relatively loose, not tamped down and compact, so that it remains juicy as it cooks. Although most people think it’s important to create a patty that fits a bun, mine are usually a bit more free-form and hang out over the bun’s edges. Dusting the patties with flour ensures a crisp crust, as does cooking them in a well-seasoned cast-iron pan. How long the burgers are cooked is a matter of personal preference. My staff wryly describes the way I like mine as “burnt, but raw.” But if you’re like the rest of our family and staff, you’ll probably want them cooked somewhat longer than the recipe specifies.
Topping a burger is a personal matter. Fans of mayo and mustard are certainly welcome to spoon them on. And if you’ve got some time, do prepare Yummy Onions (page 325) or Hot Dog Onions (page 324) to serve alongside. SERVES 6
3 pounds excellent-quality lean ground beef
¾ cup all-purpose flour, for dusting
Canola or other vegetable oil, for frying
Coarse (kosher) salt and freshly ground black pepper, to taste
6 hamburger buns, toasted
Lettuce, ripe tomato slices, and pickle slices, for serving (optional)
Ketchup, for serving
1. Divide the meat into six equal portions. Without using much pressure, gently and quickly form each portion into a thick patty. Spread the flour on a plate, then dip each burger in the flour to coat on both sides, shaking off any excess.
2. Pour oil to a depth of ¼ inch into a large cast-iron skillet. Heat over medium-high heat and, when the oil is almost smoking, add the burgers (see Note). Sprinkle one side of each burger with salt and pepper and fry that side until very brown and crusty, 3 to 4 minutes. Salt and pepper the top sides, turn the burgers over carefully, and fry until the other sides are also very brown, another 3 minutes. Do not press the burgers down with a spatula; this will only express juices and encourage them to stick. If you want the burgers cooked more than rare, lower the heat and cook for another few minutes on each side.
3. Remove the skillet from the heat and transfer each burger to a bun. If desired, top each with lettuce, a slice of tomato, and a few slices of pickle. Serve immediately, and pass the ketchup.
Note: Add the burgers to the hot oil carefully. Hot oil can spatter, so slip the burgers gently into the skillet and keep your face averted.
a slightly fancier burger
To add a bit of extra flavor to hamburgers, I sometimes place a small slice of seasoned butter in the center of each portion of ground meat and form the patty around it. To make seasoned butter, mix 4 tablespoons (½ stick) room-temperature butter with ½ teaspoon Dijon mustard, 1 chopped clove garlic, 1 tablespoon minced fresh flat-leaf parsley leaves, and a sprinkling of coarse (kosher) salt and freshly ground black pepper. Form into a log on a piece of plastic wrap, wrap tightly, and refrigerate until hardened.

After schlepping plate after luxurious plate of foie gras and truffles to our customers, we love to dig into plates heaped with this unsophisticated, pleasingly stodgy dish. Cottage pie originated in England as a tasty and thrifty way to use up leftover roast beef from Sunday’s main meal. (Its cousin, shepherd’s pie, was made with leftover lamb.) Dusted with grated Parmesan, the potato “crust” of this ground beef version turns a beautiful golden brown in the oven.
Although this isn’t a fancy dish by nature, if you’re feeling energetic and inspired it can be fancied up by something as simple as scoring the potato topping with a fork to create wavy patterns, or by adding a little extra warmed milk to the potatoes and piping them decoratively atop the pie. Heavy cream adds richness to the filling, while a little ketchup adds a subtle hint of sweetness. The ketchup bottle itself also makes an appearance at the table, ketchup being euphemistically referred to by family and staff as the “secret sauce” or “tomato-vinegar coulis.” SERVES 4 TO 6
4 large Idaho potatoes of uniform size (about 8 ounces each), peeled
1 tablespoon canola or other vegetable oil
2½ pounds lean ground beef
¼ cup ketchup, plus additional for serving
½ teaspoon sweet Hungarian paprika
Coarse (kosher) salt and freshly ground black pepper, to taste
3 tablespoons unsalted butter
½ cup milk, warmed
½ cup frozen peas
½ cup frozen corn kernels
1 cup heavy (or whipping) cream
¼ cup freshly grated Parmesan
1. Place the potatoes in a large saucepan of cold salted water and bring to a boil over high heat. Reduce the heat to medium and cook, uncovered, until the potatoes are tender, about 30 minutes; a knife or fork inserted into a potato will easily pierce the flesh.
2. Meanwhile, heat the oil in a large skillet over medium heat. Add the ground beef, breaking it up well with a spoon, and cook until the meat has lost its raw color and is beginning to brown, about 15 minutes, stirring frequently to break up any clumps.
3. Remove the skillet from the heat and pour off and discard any juices and fat that have accumulated. Season the beef with the ketchup, paprika, salt, and pepper, then transfer to a 13 × 9-inch baking dish, spreading the meat in an even layer. Set aside. Wipe out the skillet and set it aside.
4. Preheat the oven to 400°F.
5. When the potatoes are done, drain them in a colander, then let them sit for a moment so that some of the moisture can evaporate. Transfer the potatoes while they’re still hot to a large bowl; immediately add the butter, a bit of the milk, the salt, and pepper. Using a potato masher or an electric mixer at medium speed, mash the potatoes well but without overworking them, gradually adding the rest of the milk as you mash. Taste and adjust the seasoning, then cover and set aside.
6. Add the peas, corn, and cream to the skillet and bring to a boil over high heat. Cook until the cream is reduced and thickened, 3 to 5 minutes. Pour the mixture over the meat in the baking dish.
7. Spread the potatoes over the vegetables and sprinkle with the grated Parmesan. Bake until heated through and the potatoes are nicely browned, about 45 minutes. Serve immediately, with plenty of extra ketchup.

The name says it all. Neatness doesn’t count here, but ketchup certainly does. In fact, sloppy Joes are pretty much a defining moment for ketchup—how many other recipes can you think of that call for 2 cups of it? At our staff meals we’re not unaware of the culinary irony represented by sloppy Joes. After all, they’re the polar opposite of the refined, sophisticated dishes for which Chanterelle is so well known. With a whisper of chili powder, some garlic powder, a few hot red pepper flakes, and a dash of red wine vinegar to unite the flavors, this mildly seasoned version makes both children and adults happy. You’ll probably cringe about the inclusion of garlic powder or granulated garlic, but it’s a must in this recipe. Of course, for a more sophisticated flavor you might add several dashes of Tabasco sauce. MAKES 8 TO 10 SANDWICHES, DEPENDING ON HOW SLOPPY YOU ARE
1 tablespoon canola or other vegetable oil
1 small onion, cut into ½-inch dice
2 pounds lean ground beef
2 cups ketchup, or more as needed
½ teaspoon chili powder
½ teaspoon garlic powder or granulated garlic
⅛ teaspoon hot red pepper flakes
Coarse (kosher) salt, to taste
Red wine vinegar, to taste
8 to 10 hamburger buns, toasted
1. Heat the oil in a large skillet over medium heat. Add the onion and sauté, stirring frequently, until softened and translucent, about 3 minutes.
2. Add the ground beef to the skillet, breaking it up well with a spoon, and cook until the meat has lost its raw color, about 10 minutes, stirring frequently to break up any clumps.
3. Pour off and discard any juices and fat that have accumulated in the skillet. Add 2 cups ketchup, the chili powder, garlic powder, pepper flakes, and salt and stir well to mix. Cook, uncovered, until the meat is cooked through and the flavors are blended, about 20 minutes, stirring frequently. The mixture should be loose, with enough sauce to bind the meat. If it gets too dry, add more ketchup or a bit of water and cover the skillet during the last 5 minutes of cooking. Stir in a splash of vinegar, then remove the skillet from the heat.
4. Taste and adjust the seasoning, then spoon onto hamburger buns and serve.
Since virtually no ingredient goes to waste in a well-run restaurant kitchen, the instant we introduce each new monthly menu for our Chanterelle clients, the staff can tell which of our favorite dishes will soon make an appearance at our behind-the-scenes meal. When Roast Saddle of Venison with Sauce Poivrade or Sautéed Noisettes of Venison with Red Wine Braised Cèpes is on the “real people” menu, it’s a sign we’ll soon be setting aside venison trimmings to make this spicy but not-too-hot chili. Many chili aficionados prefer venison to beef because it has a stronger and more distinctive taste, as well as being leaner and lower in fat and cholesterol. In the past few years domestic free-range and farm- or ranch-raised venison have become relatively easy to find at meat markets and specialty food stores, as has Cervena, which is grass-fed venison imported from New Zealand.
The vibrant homemade chile pepper seasoning used in this dish is what makes it so good. It’s a simple combination of spices and powdered dried chile peppers that’s light-years more flavorful than any supermarket chili powder (see page 79). Garnish the chili with dollops of sour cream and serve with Cider Vinegar Slaw (page 310) and plain white rice, a stack of warmed flour tortillas, or Cornbread (page 381). SERVES 6 TO 8
Canola or other vegetable oil, for sautéing
3 pounds venison stew meat, cut into ½-inch cubes (see Note)
1 medium onion, diced
2 large cloves garlic, minced
1 tablespoon good-quality chile powder
1 tablespoon ground cumin
1 teaspoon ground cinnamon
1 teaspoon cayenne pepper
½ teaspoon freshly ground black pepper
½ teaspoon dried thyme leaves
½ teaspoon dried oregano leaves
½ teaspoon unsweetened cocoa powder
2 bay leaves
4 cups Chicken Stock (page 39) or canned low-sodium chicken broth
½ cup canned tomato purée
Coarse (kosher) salt, to taste
1 can (19 ounces) red kidney beans, rinsed and drained
Hot cooked rice, warm tortillas, and sour cream, for serving
1. Pour vegetable oil to a depth of ⅛ inch into a large, heavy skillet and set over medium-high heat. When the oil is just beginning to smoke, add only enough of the venison pieces to fit into the skillet without crowding. Brown the meat well on all sides, 3 to 4 minutes per side, turning the pieces with tongs. As the meat is browned, transfer it to a bowl and continue browning the remaining venison in batches.
2. Heat 3 tablespoons oil in a large, heavy, nonreactive, flameproof casserole or Dutch oven over medium-low heat. Add the onion and garlic and sweat until soft and translucent but not browned, about 5 minutes.
3. Add the browned venison to the casserole, along with any juices that have accumulated, then add the chile powder, cumin, cinnamon, cayenne, black pepper, thyme, oregano, cocoa powder, and bay leaves. Stir well to coat the meat, then add the chicken stock, tomato purée, and salt to taste and bring to a boil over high heat. Reduce the heat to low and simmer, uncovered, until the venison is tender, 2 to 2½ hours, stirring occasionally. Stir in the beans and continue cooking until they’re heated through, 5 minutes more. Taste and adjust the salt, if desired.
4. Remove the chili from the heat and serve over hot cooked rice, accompanied by warm tortillas and sour cream.
Note: Farm-raised or free-range venison cooks far more quickly than its wild counterpart. If you’re lucky enough to have access to some true wild venison, you may need to add up to 2 hours to the overall cooking time.

homemade chili seasoning
Commercial chili powders are just blends of spices and seasonings—usually cinnamon or allspice, garlic, onion, cumin, and/or oregano—combined with a miscellaneous mixture of powdered dried chile peppers. They’re pretty blah and powdery tasting and lack fresh, clear flavor. But it takes only a few minutes, and very little effort, to create your own terrifically
aromatic version by combining a good-quality, pure chile powder made from one type of dried chiles with seasonings already on hand in the spice rack. The most important ingredient is pure chile powder, which is simply finely ground dried chile peppers. Look for the powder at specialty food stores. The mixture I use in my venison chili features red New Mexico chile peppers, which are mild and full of flavor, with just a hint of heat. For more heat, you could substitute ground serranos; for a wonderfully complex smoky flavor, use chipotle powder made from smoke-dried

Our staff meals often feature economical cuts of meat that don’t make it on our front-of-the-house menu. Oxtails, a special favorite of mine, are a good example. I would rather have them for dinner than filet mignon any time. Truly. They’re a prime example of an inexpensive cut that is transformed by long, slow braising into an appealingly full-flavored, meltingly tender main course. Precut oxtails are often available at supermarkets, but if you have trouble finding meaty ones, buy the oxtails at a butcher shop and have them cut into 2-inch sections. The addition of Greek Kalamata olives and olive paste contributes a wonderful, full flavor that balances the oxtails’ rich beefiness. Sucking the juices from the bones is pleasurable but messy, so set out plenty of paper napkins. Serve with Potato Gratin (see page 329), buttered orzo, or polenta. SERVES 6
2 tablespoons olive oil
3 medium onions, sliced
1 piece (4 ounces) slab bacon (with rind), cut into ¼-inch dice
2 large cloves garlic, minced
6 pounds meaty oxtails, trimmed of fat and cut into 2-inch sections
5 cups Beefed-Up Veal Stock (page 38) or canned low-sodium beef broth
4 cups canned whole tomatoes, with liquid
3 cups dry white wine
6 bay leaves
½ teaspoon dried thyme leaves
½ teaspoon dried oregano leaves
2 tablespoons olive paste (see box)
2 cups Kalamata olives, pitted
Coarse (kosher) salt and freshly ground black pepper, to taste
Dash of red wine vinegar
1. Heat the oil in a large stockpot over medium-low heat. Add the onions, bacon, and garlic and cook, stirring occasionally, until the onions are softened and lightly browned, about 10 minutes.
2. Add the oxtails, beef stock, tomatoes, wine, bay leaves, thyme, and oregano and bring to a boil over high heat. Reduce the heat to low and simmer, partially covered, for 2 hours, skimming frequently.
3. At this point stir in the olive paste and continue simmering until the oxtails are quite tender and the meat comes away from the bone with little prompting, about 1 hour more.
4. Add the olives and cook until heated through, about 2 minutes.
5. Remove the pot from the heat and discard the bay leaves. Season with salt and pepper and a splash of red wine vinegar, then serve.
olive paste
Although there are several flavorful dressed black olive pastes available on the market (France’s tapenade and Italy’s olivada come to mind), the olive paste I call for here is simply olives puréed with a little olive oil. It’s easy enough to make your own using oil-cured Moroccan olives.
To pit the olives, spread out a handful on a work surface. Position the flat side of a heavy chef’s knife on the olives and press down hard on the knife. This will split the olives open, allowing you to remove the pits. Purée the olives along with about 1 tablespoon extra-virgin olive oil per ½ cup olives in a food processor or blender to form a thick paste.

Although I’m very fond of tripe, I have to admit it’s in no danger of becoming one of the most popular dishes at staff meals. Those who share my passion eat it with gusto; the others concentrate on sides and salads. In this recipe, the strips of tripe are braised in a mixture of chicken stock, wine, tomato purée, and herbs, absorbing each flavor, and creating an earthy dish that’s as distinctively chewy or gelatinous as you choose it to be. The vegetables and butter lend remarkable sweetness to the braising liquid. Serve with a side of orzo and a salad of mixed greens. SERVES 4
¼ cup olive oil
2 medium onions, sliced
3 large cloves garlic, minced
4 cups Chicken Stock (page 39) or canned low-sodium chicken broth
3 cups canned tomato purée
1 cup dry white wine
4 bay leaves
¼ teaspoon dried oregano leaves
¼ teaspoon dried thyme leaves
Pinch of cayenne pepper
Pinch of sugar
2 pounds tripe, rinsed, patted dry, and cut into ½-inch strips
3 medium leeks, white part only, rinsed well, drained, and cut into 1 × ¼-inch strips
3 small zucchini, cut into 1 × ¼-inch strips
2 medium carrots, peeled and cut into 1 × ¼-inch strips
8 tablespoons (1 stick) unsalted butter, cut into pieces
Coarse (kosher) salt and freshly ground black pepper, to taste
Fresh lemon juice, to taste
Freshly grated Parmesan, for serving
1. Heat the oil in a large, flameproof casserole or Dutch oven over medium-low heat. Add the onions and garlic and cook, covered, until softened but not browned, about 10 minutes, uncovering occasionally to stir.
2. Add the chicken stock, tomato purée, and wine and increase the heat to high. Bring to a simmer and stir in the bay leaves, oregano, thyme, cayenne, and sugar. Lower the heat and simmer, uncovered, to develop the flavors, 10 minutes.
3. Add the tripe to the casserole and return to a simmer. Reduce the heat to low and cook, covered, until the tripe is as tender as you want it, 1½ to 2 hours. (see Note).
4. Add the leeks, zucchini, and carrots to the simmering mixture and cook, covered, until tender, about 5 minutes. Uncover and add the butter a few pieces at a time, stirring until it’s completely melted and incorporated.
5. Remove the casserole from the heat and season with salt and pepper and a squeeze of fresh lemon juice. Serve accompanied by grated Parmesan.
Note: The stew can be prepared through step 3 up to 2 days ahead. Refrigerate, covered, until you’re ready to finish the dish. Bring to a simmer before adding the vegetables and completing the recipe.
buying and cooking tripe
Tripe is the muscular lining of two of the four stomach chambers of ruminant (cud-chewing) animals such as sheep, pigs, and cows. Thick, subtly flavored honeycomb beef tripe (named for its appearance) is the most delicate and desirable type, although, like all tripe, it’s bland, chewy, and spongy, and its primary virtue is its ability to absorb other flavors. Readily available at supermarkets and butcher shops, honeycomb tripe should be ivory colored, with a fresh smell. Virtually all the fresh tripe sold in the United States has already been cleaned and parboiled and is ready to cook. Simply rinse it in cold water and pat it dry before cooking.
Determining when tripe has cooked long enough is strictly a matter of personal preference. I prefer it on the chewy side, with a slightly resilient texture that is achieved after 1 to 1½ hours of cooking. For softer, gummier tripe, a longer cooking time is necessary.
Although veal chops are a bit too pricey for our down-to-earth staff meals, they’re very nice indeed for a more intimate special family meal, particularly if you’re having guests. The combination of Dijon mustard and heavy cream enhanced with brandy could not be simpler, yet it makes an elegant, wonderfully flavorful sauce that tastes far more complex than the few ingredients would lead you to expect. A handful of sautéed mushrooms or a few additional herbs such as dill, basil, or thyme can be added if you wish. This recipe is also quite good made with pork chops, in which case you’ll want slightly thicker chops, around about 1½ inches thick.
Either version is good served with steamed spinach and some roasted potatoes. Good crusty bread, of course, is needed to enjoy the sauce to the fullest. SERVES 4
3 tablespoons olive oil
4 veal chops (1 inch thick; about 10 ounces each)
2 tablespoons unsalted butter
2 tablespoons chopped shallots
1 small clove garlic, minced
2 tablespoons brandy
1 cup heavy (or whipping) cream
¼ cup Dijon mustard
Squeeze of fresh lemon juice
Coarse (kosher) salt and freshly ground black pepper, to taste
2 teaspoons mixed chopped fresh herbs, such as chives, flat-leaf parsley, tarragon, and/or chervil leaves
1. In a skillet large enough to hold the veal chops in a single layer, heat the oil over medium-high heat until it just begins to smoke. Add the chops and sauté until well browned on each side, 4 to 5 minutes per side. Transfer to a platter and cover to keep warm.
2. Discard the oil in the skillet, then wipe out the skillet with a paper towel. Set over medium heat and add the butter. When it’s melted, add the shallots and garlic and sauté until aromatic but not browned, about 1 minute.
3. Remove the skillet from the heat and add the brandy; be careful here, because the brandy may ignite. Add the cream and mustard to the skillet and return the skillet to the heat, increasing the heat to high. Bring the mixture to a boil, then reduce the heat to low. Return the veal chops to the skillet, along with any accumulated juices, and simmer until the sauce has reduced enough to coat the back of a spoon and the chops are just cooked through (a hint of pink will remain when you pierce a chop with a sharp knife), 4 to 5 minutes. Turn the chops in the sauce once as they cook.
4. Remove the skillet from the heat and season the chops with lemon juice and salt and pepper. Transfer the chops to a serving platter, spoon the sauce over them, and serve immediately, sprinkled with the chopped fresh herbs.
In general veal is one of the priciest meats, but veal shanks are luxurious tasting and inexpensive. Choosing the most effective cooking method makes all the difference. Roasting turns this mild-flavored, chewy cut into a tender silk-textured treat napped with a rich and delicious sauce. Present the whole shank on a small platter like a roast, removing the meat from the bone and carving it at the table. Serve with Creamed Spinach (page 340) and roasted potatoes. SERVES 2
1 veal shank (3½ to 4 pounds), trimmed of fat
4 cloves garlic, 2 thinly sliced and 2 minced
Coarse (kosher) salt and freshly ground black pepper, to taste
3 tablespoons olive oil
1 cup dry white wine
2 cups Chicken Stock (page 39) or canned low-sodium chicken broth
3 tablespoons unsalted butter
½ teaspoon chopped fresh thyme leaves or ¼ teaspoon dried
2 tablespoons coarsely chopped fresh flat-leaf parsley leaves
1. Preheat the oven to 500°F.
2. Using a small, sharp knife, make deep slits in the flesh all over the veal shank, spacing them about 1 inch apart. Insert a garlic slice into each slit, then season the meat with salt and pepper and rub it with the oil.
3. Place the shank in a flameproof roasting pan or casserole just large enough to fit it and roast, turning occasionally, until well browned and cooked through, about 45 minutes. If the meat seems to be getting too brown too quickly, reduce the oven temperature to 400°F.
4. Transfer the shank to a serving platter and set it aside, covered loosely with aluminum foil, while you prepare the sauce.
5. Pour off the fat from the roasting pan and set the pan over medium-high heat. Carefully add the wine and bring to a boil, scraping up the browned bits from the bottom of the pan. Add the chicken stock and return to a boil; cook until the liquid is reduced to about 1 cup, 10 minutes. Reduce the heat to medium and stir in the butter, minced garlic, and thyme. Cook, stirring frequently, until the butter is melted and the sauce is approximately the consistency of heavy cream and coats the back of a spoon, about 5 minutes.
6. Remove the sauce from the heat and season with salt and pepper. Stir in the parsley and pour over the veal shank to serve.
Leg of lamb is easiest to prepare and cooks the fastest when it’s boned, butterflied, and grilled over a charcoal fire. Marinating the lamb overnight in an herb-infused olive oil mixture tenderizes it and ensures terrific flavor. If you don’t have a grill, sear the meat in a little canola oil in a very hot ovenproof skillet until it’s quite brown and crusty, then drain off all the fat and finish it in a 450° to 475°F oven for about 15 minutes to cook it a bit more and create an even crustier exterior. Slice the meat, arrange on a warmed platter, and garnish with lemon wedges or a sprinkling of fresh cilantro leaves. Serve with orzo, rice, or Couscous (page 94) and steamed green beans. SERVES 8 TO 10
1 cup extra-virgin olive oil
½ cup fresh lemon juice
2 large cloves garlic, minced
1 tablespoon dried thyme leaves
1 tablespoon dried oregano leaves
1 teaspoon coarse (kosher) salt
¼ teaspoon ground cumin
Pinch of cayenne pepper
1 leg of lamb (about 5 or 6 pounds), butterflied
1. Combine the oil, lemon juice, garlic, thyme, oregano, salt, cumin, and cayenne in a small bowl and whisk thoroughly to blend. Place the lamb in a large, shallow baking dish, pour the mixture over it, and rub in well. Cover and let marinate in the refrigerator for at least 8 hours and up to 24.
2. When you’re ready to cook, preheat a barbecue grill to high.
3. When the grill is ready, oil the grill rack, then place the lamb on the rack and cook until it’s somewhat charred on the outside while remaining nice and medium rare within, about 10 minutes per side. Transfer the lamb to a cutting board and let it rest for 5 minutes before slicing and serving.

Inexpensive and tremendously flavorful, lamb shanks have long been a mainstay on bistro-style restaurant menus in both France and the United States. But curiously enough, few home cooks think of preparing this rustic comfort food in their own kitchens. I hope this recipe will inspire you.
The long simmering time tenderizes the meaty shanks and creates a deep, soulful flavor intriguingly infused with Moroccan spices. Make this dish a day in advance so the flavors have time to meld and the fat solidifies on the top. To serve, remove the fat and reheat the shanks slowly, spooning the flavorful liquid over them gently and often.
At our staff meals this dish is known fondly as “Flintstone food.” A single lamb shank, impressively perched atop a bed of Couscous (page 94), rice, or orzo with its bone pointing ceiling-ward, is certainly a prehistoric sight. SERVES 6
6 lamb shanks (about 1 pound each), trimmed of fat
¼ cup extra-virgin olive oil
2 medium onions, coarsely chopped
3 large cloves garlic, minced
2 tablespoons fresh lemon juice
1 tablespoon coarse (kosher) salt
2 teaspoons ground cumin
1 teaspoon sweet Hungarian paprika
1 teaspoon saffron threads (see page 174)
½ teaspoon ground turmeric
¼ teaspoon ground ginger
1 bottle (750 ml) dry white wine
2 cups Chicken Stock (page 39) or canned low-sodium chicken broth
2 cups canned tomato purée
6 bay leaves
1. Preheat the oven to 500°F.
2. Rub the lamb shanks all over with 2 tablespoons of the oil and place in a roasting pan. Roast, turning shanks occasionally, until well browned, about 40 minutes. Pour off the fat, leaving the shanks in the roasting pan. Set the shanks aside. Reduce the oven temperature to 375°F.
3. Heat the remaining 2 tablespoons oil in a medium-size, heavy, nonreactive saucepan over medium heat. Add the onions and garlic and cook, stirring occasionally, until softened and lightly browned, 6 to 8 minutes.
4. Add the lemon juice, salt, cumin, coriander, paprika, saffron, turmeric, and ginger and stir well to mix, then add the wine, stock, tomato purée, and bay leaves and bring to a boil over high heat. Remove the pan from the heat and pour the mixture over the lamb shanks in the roasting pan. Cover tightly with aluminum foil and bake for 1 hour.
5. Remove the foil, reduce the oven temperature to 350°F, and continue cooking the shanks until they’re quite tender (the meat should almost fall off the bones) and the sauce is reduced and thickened, about 1 hour more (see Note). Turn the shanks in the liquid occasionally as they cook.
6. Transfer the shanks to a serving platter or individual plates. Remove and discard the bay leaves. Skim the fat from the sauce and adjust the seasonings. Spoon the sauce over the shanks and serve.
Note: If the sauce hasn’t thickened enough, pour it into a saucepan, bring it to a boil over high heat, and reduce it until it’s the proper consistency.

The beauty of meats such as lamb shanks, which require braising to expand their flavor is that they practically cook themselves. Once they’ve been nicely browned and popped into a pot along with some wine, stock, and seasonings, you’re free to abandon them to their destiny for several hours of simmering. In fact, there’s very little sense of urgency about this dish on any front, for like all braised meats these shanks taste their best when allowed to rest, tightly covered, in the refrigerator for a day or two to further develop their lovely taste.
Just skim off the fat, reheat, and serve with plenty of plain rice, orzo, or roast potatoes. Be sure to use branches of fresh rosemary here; dried rosemary is simply worthless. It’s a nice touch to use rosemary branches as a garnish atop each serving. SERVES 4
¼ cup canola or other vegetable oil
4 lamb shanks (about 1 pound each), trimmed of fat
2 tablespoons extra-virgin olive oil
1 medium onion, diced
3 large cloves garlic, minced
1 cup full-bodied red wine
7 cups Chicken Stock (page 39) or canned low-sodium chicken broth
1 can (28 ounces) whole tomatoes, drained and very roughly chopped
A few branches of fresh rosemary
3 bay leaves
1 teaspoon dried thyme leaves
Coarse (kosher) salt and freshly ground black pepper, to taste
Splash of red wine vinegar, to taste
1. Heat the canola oil in a large skillet over medium-high heat. When it’s just beginning to smoke, add the lamb shanks carefully and brown well on all sides, 4 to 5 minutes per side.
2. Meanwhile, heat the olive oil in a large, heavy, nonreactive, flameproof casserole or Dutch oven over medium heat. Add the onion and garlic and sauté, stirring occasionally, until softened but not browned, about 3 minutes.
3. When the lamb shanks are nicely browned, add them to the onion and garlic in the casserole. Pour the wine over the shanks, then increase the heat to high and bring to a boil. When the wine is reduced by half, in about 5 minutes, add the chicken stock, tomatoes, rosemary, bay leaves, thyme, salt, and pepper. Return to a boil, then reduce the heat to low and simmer, partially covered, until the shanks are very tender and almost falling off the bone, about 2 hours. Check the lamb occasionally. If the liquid level seems low, add water.
4. Transfer the shanks to a platter. Increase the heat under the casserole to high and bring the cooking liquid to a boil. Reduce the heat to medium, to keep the liquid at a low boil, and cook, uncovered, until it has thickened somewhat, about 20 minutes.
5. Return the shanks to the casserole to reheat, about 5 minutes. Remove the casserole from the heat and discard the bay leaves and rosemary. Taste for seasoning, adding a splash of vinegar and more salt and pepper, if necessary. Serve immediately.
a variation
To add an extra dimension of texture and flavor to this dish, consider adding some complementary vegetables. Cube a couple of medium-size zucchini and cut several medium-size Asian eggplants into ¼-inch-thick rounds. Add them during step 4 in the recipe, after you’ve removed the shanks from the pot.
There are infinite combinations used in preparing couscous, varying the meats and vegetables. I think the lamb shanks, which lend a characteristic flavor to the broth base, should be a constant. You could grill kebabs of lamb or chicken and serve them on the side, using only vegetables in the stew. One tip: Give yourself time to prepare the couscous. The broth should be made the day before you plan on serving the dish. SERVES 8
FOR THE LAMB BROTH:
4 quarts Chicken Stock (page 39), canned low-sodium chicken broth, or water
4 lamb shanks (about 1 pound each), trimmed of fat
2 medium onions, either puréed or grated
6 large cloves garlic, minced
Juice of 1 lemon
1 tablespoon ground cumin
1 tablespoon ground coriander
1 tablespoon ground turmeric
½ teaspoon saffron threads (see page 174)
½ teaspoon sweet Hungarian paprika
4 bay leaves
FOR THE COUSCOUS:
2 pounds boneless lamb leg or shoulder, trimmed of fat and cut into 1½-inch cubes
1 chicken (3½ pounds)
Coarse (kosher) salt and freshly ground black pepper, to taste
4 large white turnips, peeled and cut into large chunks
3 large carrots, peeled and cut into large chunks
1 large butternut squash (2 to 3 pounds), peeled, seeded, and cut into large chunks
4 large or 8 small leeks, split, cut into 1-inch lengths, and thoroughly rinsed and drained
3 medium zucchini, trimmed and cut into large chunks
2 cups cooked chickpeas (if using canned, rinse under cold running water and drain)
1 cup dried currants
FOR SERVING:
Couscous (recipe follows)
Doctored Harissa (page 368)
1. The day before you plan to cook the stew, prepare the broth: Combine the chicken stock, lamb shanks, onions, garlic, lemon juice, cumin, coriander, turmeric, saffron, paprika, and bay leaves in a very large stockpot and bring to a boil over high heat. Skim the surface of foam, then reduce the heat to low and simmer, partially covered, until the lamb is tender and almost but not quite falling off the bone, 1½ hours.
2. Remove the pot from the heat. Transfer the lamb shanks to a platter to cool. Remove and discard the bay leaves and set the broth aside to cool.
3. When the shanks are cool enough to handle, pull the meat from the bones, cut it into large chunks, and refrigerate, covered, until you’re ready to proceed with the recipe. When the broth is cool, transfer it to a storage container and refrigerate it, covered, overnight.
4. When you’re ready to continue, remove and discard the hardened fat from the broth. Transfer the broth to a very large stockpot and bring it to a boil over high heat. Add the cubed boneless lamb leg or shoulder and return to a boil, then reduce the heat to low. Cook, partially covered, until the meat is just tender, about 45 minutes.
5. Rinse the chicken, inside and out, under cold running water, removing any excess fat. Cut the chicken into 10 pieces (see box, page 159). Add the chicken to the pot, return the broth to a boil, then season with salt and pepper and reduce the heat to low and simmer, partially covered, for 10 minutes. Add the turnips, carrots, and squash and simmer for 10 minutes, then add the leeks, zucchini, chickpeas, reserved cooked lamb shank meat, and currants and simmer for 5 minutes more.
6. Remove the pot from the heat and taste and adjust the seasoning. Spoon the stew over the couscous on a large platter and serve, accompanied by the harissa.
It’s traditional to steam couscous in a couscousière, above the simmering stew with which it will be served, but most people don’t own one, and anyway, the couscous will be bathed in the broth from the stew. I also find that steaming the couscous separately allows me to control the timing better.
I enjoy my couscous buttery and have been known to add as much as a full cup. I cut back a bit here without sacrificing too much flavor. You have my permission to add more than the 12 tablespoons suggested, but please don’t use less. MAKES 8 SERVINGS
1½ boxes (16 ounces each; 24 ounces for this recipe) couscous
2½ cups hot water
12 tablespoons (1½ sticks) unsalted butter, room temperature, cut into small pieces
1. Fill a large stockpot half full of water and bring to a simmer over medium heat. Select a metal colander that will fit into the stockpot and line it with several layers of dampened cheesecloth.
2. Place the couscous in a large bowl and add the hot water gradually, stirring to avoid lumps. Let the couscous stand until all the water is absorbed, about 10 minutes, then transfer it to the cheesecloth-lined colander. Cover the couscous with another piece of dampened cheesecloth and set the colander into the stockpot so it rests over, not in, the simmering water. Place a lid or piece of aluminum foil over the colander and steam the couscous for 20 minutes.
3. Remove the colander from the stockpot. Remove the cheesecloth covering the couscous and transfer the couscous to a large bowl. Use the same dampened cheesecloth to line the colander again and set aside. When the couscous is cool enough to handle (after about 5 minutes), mix in the butter, rubbing the couscous gently between your hands to break it up and incorporate the butter. If you’re planning to serve the couscous immediately, return it now to the lined colander, cover it with another piece of dampened cheesecloth, and steam it over the simmering water for 20 minutes more. If you aren’t planning to serve the couscous right away, cover it after you incorporate the butter and set it aside at room temperature (for up to 2 hours) until you’re ready to steam it. When cool, the couscous will take 30 minutes of steaming to reheat.
about couscous
Couscous is the name of Morocco’s stewlike national dish and also of the fine-grained pasta served with it. In Morocco and other areas of North Africa they are traditionally prepared together in a two-tiered pot called a couscousière. As the stew simmers in the bottom, the couscous in the perforated upper section is steamed in two stages by its vapors. Couscous grains are customarily made of semolina flour mixed with water and formed into small granules. The little yellow grains are sold loose by the pound at health food stores and also packaged (usually labeled “instant”) at specialty food stores and many supermarkets. If you can buy couscous in bulk, then I urge you to do so. If you can’t, then boxed is a fine second choice.
Actually, what matters most is the cooking method used; ignore the instructions on the box. You’ll find that my way (page 94) is slightly less trouble than the traditional one, but more involved than the shortcut instructions on couscous boxes. The result will be couscous as it should be—light colored, fluffy, and tender.

Unlike other stews, it’s generally unnecessary to brown the meat in the stews the Moroccans call tagines. But like all stews, once the ingredients of this particular irresistible tagine are ensconced in the pot, it gently simmers away until the lamb is meltingly tender. The sweetness of the honey and the prunes (which thicken as well as flavor the sauce) is complemented by the spices and black pepper, and the whole dish is perfumed with a drop or two of orange flower water (available at Middle Eastern markets and specialty food stores). Serve the almond-garnished tagine over Couscous (page 94) or plain or saffron rice. SERVES 10 TO 12
5 pounds boneless lamb stew meat, trimmed of fat and cut into 1-inch cubes
6 cups Chicken Stock (page 39) or canned low-sodium chicken broth
1 large onion, cut into ½-inch dice
4 teaspoons freshly ground black pepper
2 large cloves garlic, minced
2 teaspoons ground ginger
1 teaspoon saffron threads (see box, page 174)
Coarse (kosher) salt, to taste
12 ounces pitted prunes, coarsely chopped
2 tablespoons honey
1 tablespoon ground cinnamon
3 tablespoons chopped fresh flat-leaf parsley leaves
1 teaspoon orange flower water
Fresh lemon juice, to taste
3 tablespoons sliced almonds, for garnish
1. Place the lamb in a large stockpot along with the chicken stock, onion, pepper, garlic, ginger, saffron, and salt. Bring to a boil over high heat, then reduce the heat to low and simmer the lamb gently, uncovered, for 1½ hours.
2. Add the prunes, honey, and cinnamon to the tagine and stir. Continue cooking, uncovered, until the lamb is very tender, about 30 minutes more.
3. When you’re ready to serve, stir in the parsley, orange flower water, and lemon juice and remove the pot from the heat. Taste and adjust the seasonings. Transfer the tagine to a large, shallow serving bowl or platter and garnish with the sliced almonds to serve.

cooks’ conspiracy
The staff at Chanterelle is no different from any other group of people who work closely together—now and then we can’t resist the urge to tease each other. When certain waiters who love say, the Lamb Tagine, take time off, we cooks, who rarely get an unscheduled day away from the restaurant, pretend that we made their favorite dish for our staff meal—and they missed it! They wander around wistfully, asking if it’s true, and naturally we all say, “Oh, yes, and it was soooo delicious!”