There are many types of edibles that are traditionally grown outdoors, but can be planted inside for fun—more on those in Part Three of the book—but there are also several kinds of “crops” that are ideally suited to an indoor growing environment. Specifically, microgreens, pea shoots, sunflower shoots, sprouted grains, and some herbs can thrive inside much better than they could fare in a garden.
These plants are often harvested at an early stage of a lifecycle, and they tend to be more fragile and delicate than what’s growing outside in the garden. Sprouts, in particular, might do very poorly in outdoor conditions, even on a patio or deck, where sunlight early in the growing process might hinder germination.
For those who are new to indoor growing, the projects in this section are ideal as a starting point, and the quick seed-to-harvest timeframes mean that you won’t be spending months waiting for vegetables to emerge. In fact, some microgreens can be harvested in less than a week, if factors are right.
These projects also help to determine if your indoor space is well suited for growing. Because of short timeframes, you’ll be able to spot problems like airflow and overwatering more easily. For example, too much watering and stagnant air can create a mold situation in sunflower shoots or microgreens within just a few days, prompting the need to tweak your setup.
As with any indoor growing efforts, enjoy the process—especially when those pea shoots or fresh herbs can be thrown into dishes just moments after you harvest them.
 MICROGREENS
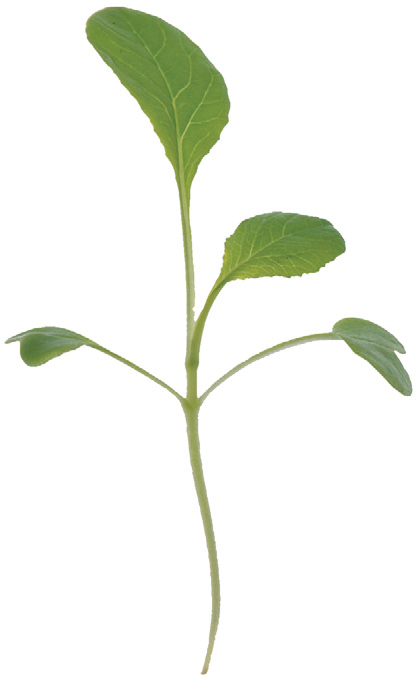
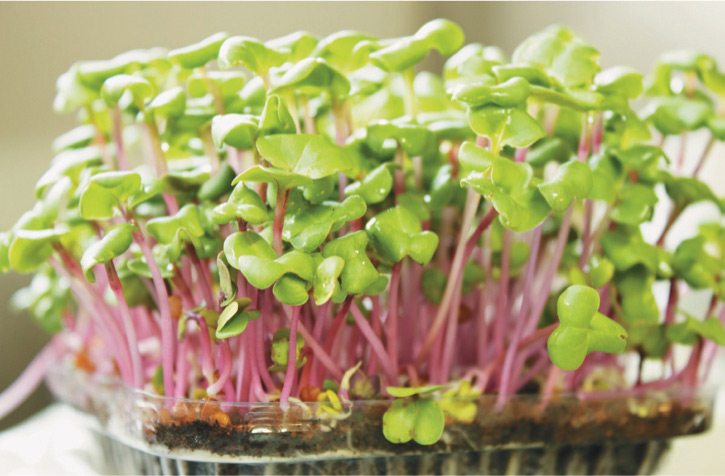
Although some seed companies offer mixes designated as microgreens, there’s no such thing as a “microgreen seed.” They aren’t grown using some special, almost magical seed that will grow a plant that’s only about three inches in height. Instead, microgreens can be grown from nearly any seed, since they represent the first stage of growth of a plant.
Called cotyledons, these initial leaves of a seedling give way eventually to a plant’s “true leaves,” and from there the growth truly begins into vegetable, herb, or fruit. In other words, if you plant seeds in order to get microgreens and then change your mind or leave them for longer than intended, the plant will begin maturing and, most likely, get too large for the pot you’ve chosen. Most micros, by loose definition, are the cotyledon and first true leaves of a plant, although they can also be harvested at only the cotyledon stage.

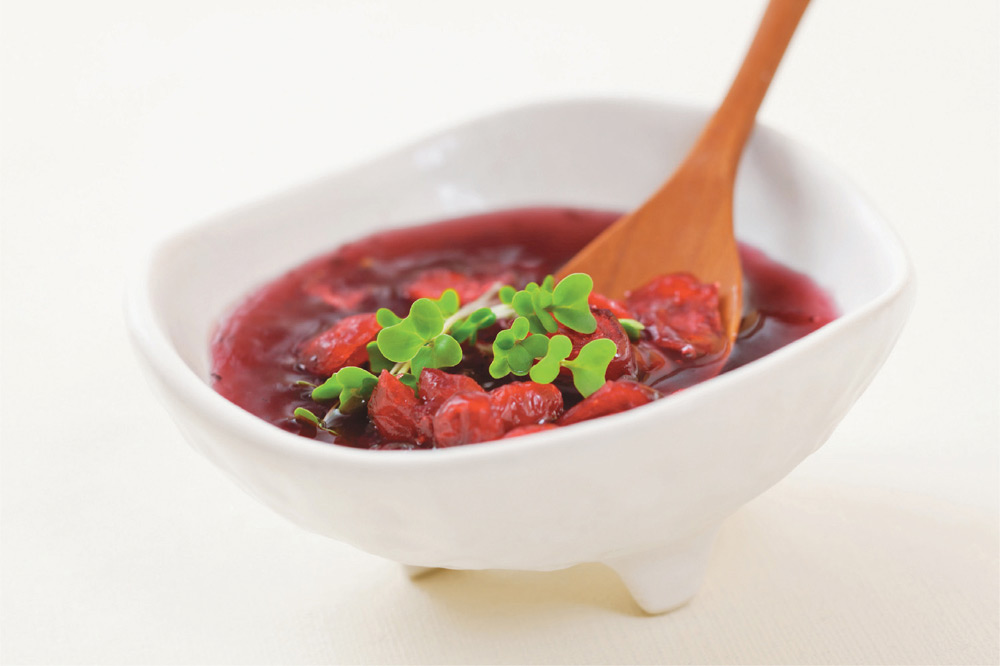
When used as a garnish, microgreens add intense flavor and dense nutrients to savory dishes. This fried pork dish gets a big boost from a sprinkle of mustard microgreens.
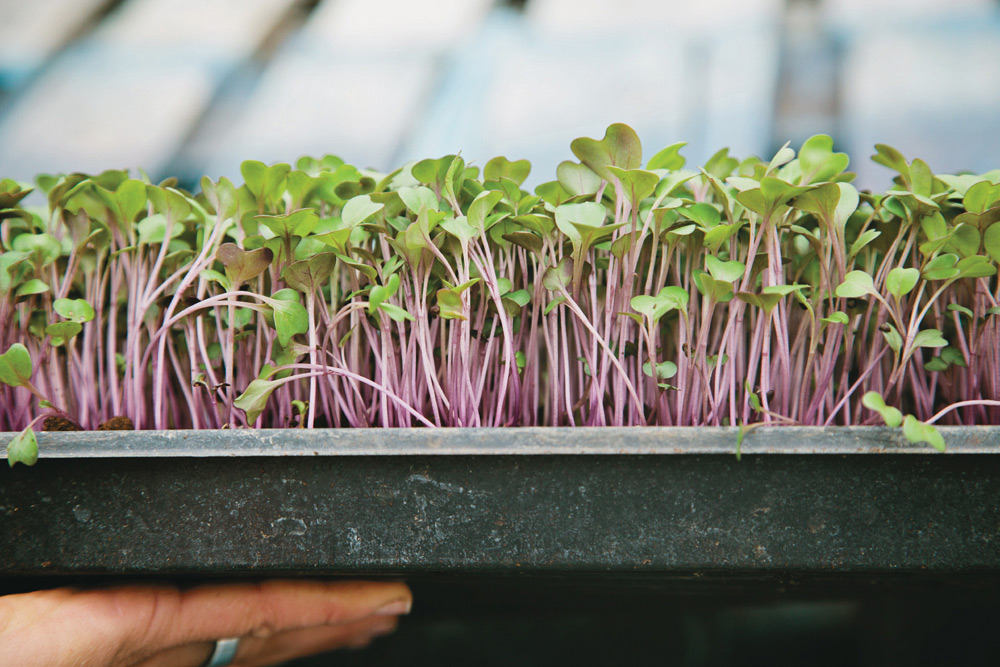
Microgreens look similar to sprouted greens—and some online growing resources put them together in the same category—but unlike sprouts, which are grown in water, microgreens are grown in soil. They do best indoors, since trying to adjust planting density and moisture in outdoor conditions can be tricky.
In terms of arrival on the home garden scene, microgreens are the new kids on the block, but their popularity with chefs, small-scale farmers, and urban growers will likely propel microgreens past the trendy stage. Their cute size, mule-kick-level flavor, and nutritional clout make them a perfect addition to any indoor growing mix.
Although they’re appearing more often on the menus at upscale restaurants, microgeens only started becoming popular in the last few years, and even the word itself is fresh. Mark Mathew Braunstein, author of Sprout Garden and Radical Vegetarianism, has noted that first use of the term “microgreens” was in 1998. By comparison, the first known use of the word “radish” appeared in the fifteenth century.
There’s a reason microgreens are catching on quickly. According to a recent study in the Journal of Agricultural and Food Chemistry, microgreens can have up to forty times more nutrients than mature plants, ounce for ounce. Their nutritional density depends on the type of microgreen, but all seem lush with nutrients. For example, red cabbage microgreens showed very high levels of vitamin C, vitamin K, and vitamin E. Considering how easy it would be to slip some micros into a kid’s meal for an extra nutrient boost, keeping a small tray going in a kitchen garden makes sense.
Not just for garnishes, you can prepare a whole salad of microgreens for an amazing (and amazingly nutritious) taste treat. Radish and soy bean microgreens are being prepared here.
Talk about instant gratification. Most microgreens, including these peashoots, are ready to eat less than weeks after planting.
Most of all, though, there’s the flavor. A single, slender beet microgreen only as long as a fingertip, for example, can taste like a fully grown beet. Mustard and radish microgreens are far spicier than many people might expect, and carrot microgreens carry the fresh, sweet flavor of just-harvested vegetables. They sometimes seem like the gum stolen by Violet in Charlie and the Chocolate Factory, when she tastes an entire dinner in a single stick. (Fortunately, unlike Violet’s experience, there aren’t any nasty side effects.) Also, when kept in glass containers in the refrigerator, micros can last for up to two weeks, and still maintain their punch.
For those who are just getting started with indoor growing, microgreens are an ideal initial project, and even for those who are experienced pros with kitchen gardens, the “crop” offers such endless variety that there’s always something new and zesty to try. So, let’s get growing.
Some seed companies have developed certain varieties that are best for growing microgreens, but in general, you shouldn’t pay more for microgreen seeds since most seeds will grow into the micro stage.
Although most seeds can grow into microgreens, there are some choices that make more sense than others. Melons or squash, for example, produce thick and chewy cotyledons that don’t taste particularly tempting. Daikon radish or purple kohlrabi, though, are both particularly flavorful and provide pretty micros. Here are some guidelines for choosing well:
Personal taste: Those fond of strong, spicy flavors should gravitate to mustards, arugula, radishes, cress, and other zesty greens. If a milder taste is preferred, stick with options like chard, basil, cabbage, or carrot. Imagine the full flavor of a vegetable whittled down to a sliver, and that should determine your choice. When I forgot this rule, I ended up planting a whole tray of scallion micros that overpowered every dish I sprinkled them on, and caused onion breath for three days. Unless you hate your dentist or want to ruin a first date, you may want to make a wiser choice.
Germination time: Some micros mature rapidly, even within a few days, while others might putter along and take ten days to a few weeks. Most people aren’t trying to time micros according to menu planning or farmers’ market selling, so germination time isn’t especially important, unless you’re creating a seed mix. In that case, it’s usually a good idea to put fast-growing varieties with each other to prevent harvesting a tray of half-grown micros.
Some gardeners and farmers enjoy creating a visual layering system, in which micros like beets, radish, and mustard create bands of different colors. Others might mix the seeds together before planting so the micros are somewhat pre-blended before harvest. Some seed companies sell mixes, which can be significantly less expensive than buying individual seeds and blending them. Another advantage to a pre-mixed package is that the varieties will mature at the same rate, making harvest much easier and ensuring a uniform “crop.”
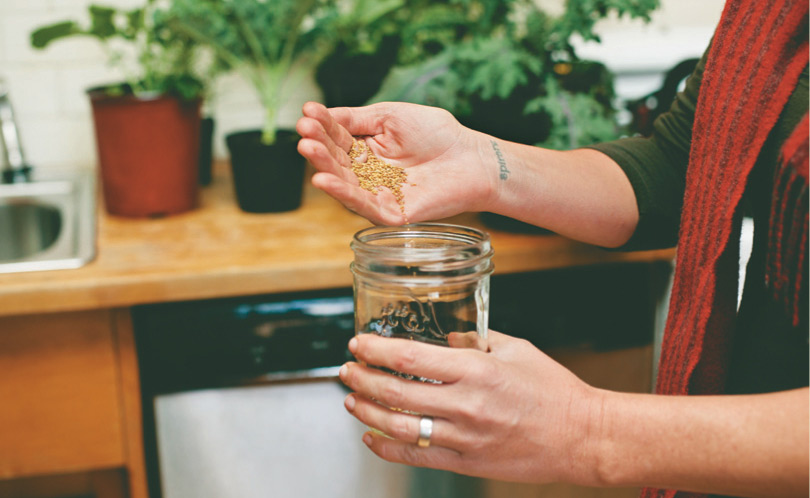
Blending several different types of seeds before planting allows you to harvest your mixed greens directly. Simply add some seeds that go well together, like beets, radish, and mustard, to a small jar and gently stir.
Color and appearance: Plenty of micros boast visual appeal, and planting a variety based on color can yield a tray that pops. Red-veined sorrel is gorgeous, almost cartoonish, in appearance, while red and golden beets sport brightly colored stems that seem almost like neon. For micros grown into the true leaves stage, it’s fun to pick varieties with visual interest like garnet mustard, with a spray of red color against a green background, or mizuna, with its tiny, tree-like leaves.
Price: When choosing seed mixes or other microgreen varieties, keep in mind that anything designated as “microgreen seed” should be the same price as seeds that don’t have that trendy title. If you pay more for beet microgreen seeds than you do for beet seeds from the same vendor, the price difference is probably going toward holiday bonuses for the seed company’s marketing department.
Nearly any microgreen seed variety is well geared for beginning growers, and it can be tough to limit an indoor garden to just a few. To get started, here are some of my favorites (see Resources section at the back of the book for seed purveyors):
 Arugula: Boasting purple stems, arugula is a nice addition to any mix that’s heavy on green colors, and the spicy flavor is distinctive.

Arugula
‘Red Giant’ mustard: Any variety of mustard is fun to throw into a micro blend because the flavors will really come through; with the Red Giant, the leaves have red veins throughout, making them visually appealing.
‘Red Giant’ Mustard
Beets: So pretty as they’re growing, with vibrant stems depending on whether you’ve planted red or golden beets. They take longer to mature, sometimes 3 weeks to nearly a month, so I tend to grow them separately rather than in a mix.
‘Early Wonder Tall Top’ Beet
Cress: These can be very delicate and susceptible to mold if overwatered, but when cared for properly, they grow very quickly, sometimes within just a few days. They’re easy to plant intensively, and have a fresh peppery flavor.
Cress (Cressida)
‘Ruby Red’ chard: With a mild, beet-like flavor, this variety also stands out for its reddish-pink stems, which look awfully pretty in a salad or sprinkled over eggs. Another great chard option is ‘Bright Lights,’ which combines gold, pink, orange, red, white, and purple stems. Think rainbow chard, but in a teeny tiny version.

‘Ruby Red’ Chard
‘Red Russian’ kale: Personally, I love kale, so I tend to grow a lot of it during the year, both in micro and full-form versions. This variety has a nice pop of color thanks to a pinkish out-line around the leaves.

‘Red Russian’ Kale
‘Dark Opal’ basil: Herbs are always a nice addition to a micro blend, and I like a strong basil flavor. This variety also boasts a purple leaf, which is a refreshing contrast to the dominant greens seen in most micros.
‘Dark Opal’ Basil
In addition to nutrient density, flavor, and the ability to impress dinner guests, microgreens are remarkably easy to grow in just about any type of pot or tray. Since they don’t grow to maturity, they boast shallow root systems that make them ideal for planting in an array of containers.
Sometimes, you don’t even need a tray: one summer, half-dazed from a day of planting, I spilled about a quarter cup of seeds on the passenger side of my Volkswagen Beetle convertible. Since the car is awash in mud, dirt, straw, twine, and other farm-related debris, I just wiped the seeds onto the floor mat and planned to vacuum them later, during my annual fit of vehicle cleaning. Because the car gets ample ventilation and sunshine from having the top down, and the floor mats are frequently wet from mud boots and random water bottles, the conditions were ideal for microgreens, and one morning I found a beautiful indoor mat of micro radishes, mizuna, and mustards.
Given my suspicion about the toxins that might be present in automotive mats and carpeting, my little crop went to waste, sadly. But the experience led me to use more shallow trays than I’d been employing, and to increase ventilation for my indoor efforts.
Although drainage is important for larger-scale growing, it’s also fun to play around with fun growing-container options. Why not grow a coffee mug full of herbs?
An array of clever microgreen growing tactics exist, from putting a few seeds and a teaspoon of soil into bottlecaps, to utilizing old Pyrex baking dishes. But for an ideal system, I tend to prefer open-style seedling trays with drainage slots in the bottom. The slots keep the soil from collecting too much moisture, which can quickly lead to mold in a microgreen tray, even with adequate ventilation.
Also, when the microgreens reach a certain stage of growth, about three to four days before harvest, watering them from above can flatten the plants since they’re somewhat delicate and have thin stems. Instead, they can be watered from the bottom (more on this later) thanks to the drainage slots.
You can use practically any leftover plastic container for growing microgreens. The best ones to use, though, are foodsafe containers that are designed for holding produce.
When choosing a pot or tray, keep soil usage in mind. Because of those roots, the micros don’t need the type of soil depth you’d see with plant starts or even indoor herb gardens. Save soil by choosing a smaller container, and make harvest easier with a tray or pot that’s shallow rather than deeper.
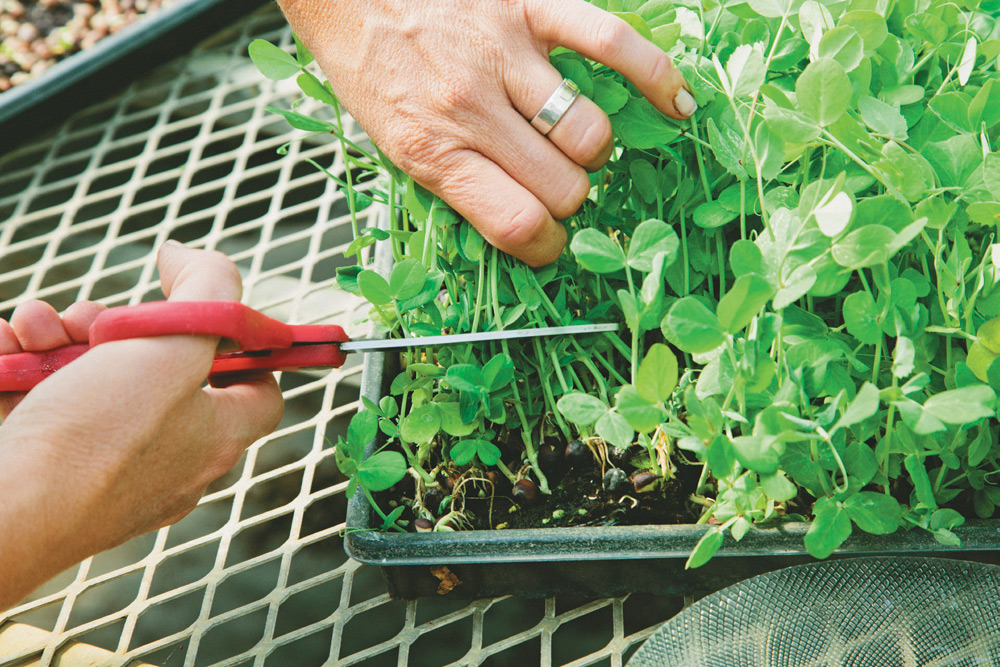
An open tray can be a boon during harvest, too. When I first started planting microgreens, I tried growing different varieties in a tray with separate sections, like you’d use for seed starting. While the sections are perfect for helping vegetables or herbs establish root balls and become hearty for transfer outdoors, it was a miserable choice for micros when it came to harvest. Normally, I cut micros with a scissors, but because each section was so separate from the others, I had to harvest with a tiny pair of embroidery scissors. While this was fun initially—my hands looked gigantic compared to those diminutive shears and miniscule plants—the whimsy wears off fast.
The shallow root systems grown when plants are at the ready-to-eat stage mean that even very shallow containers can be used as vessels for growing micros.
Loose soil that resists compaction is important, and prewatering the soil gives you a jumpstart on growing.
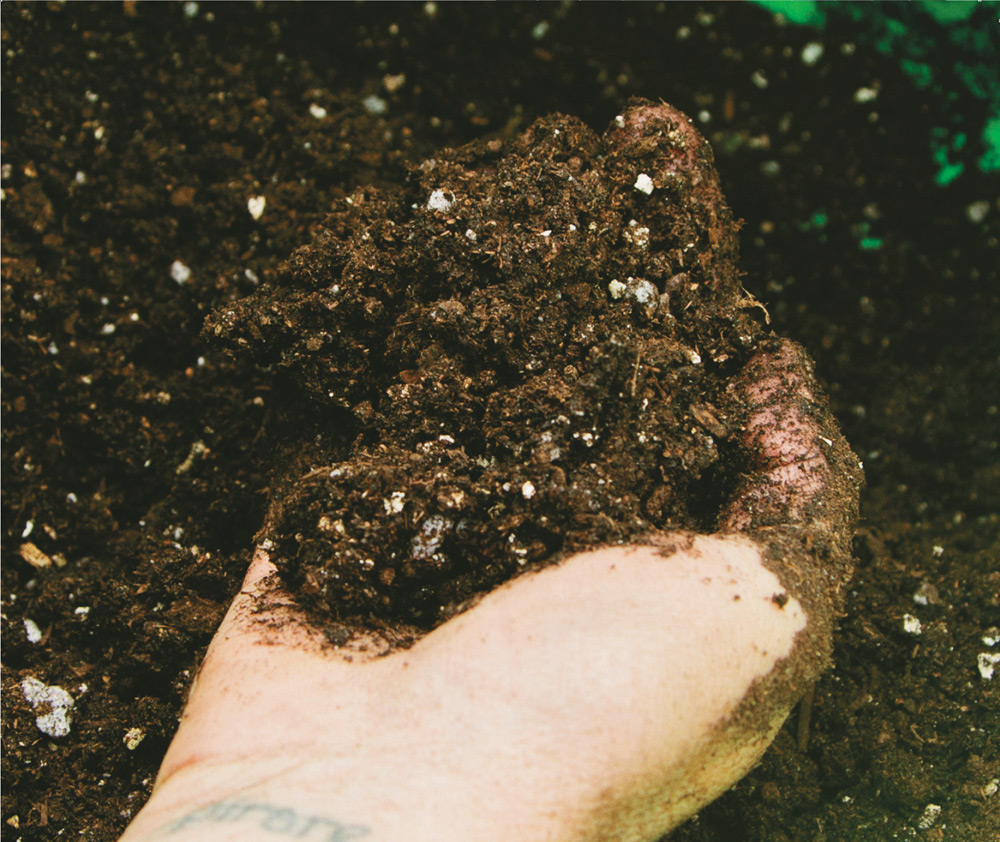
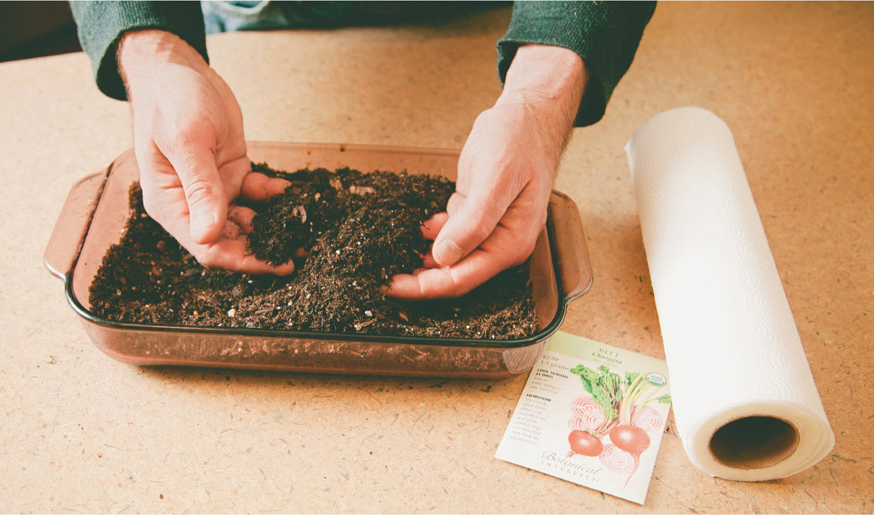
Microgreens do best with very loose soil with good drainage, so I tend to use compost mixed with a little vermiculite. The most important part of soil prep is to add some water to the mix before planting, which helps to hold in moisture during the germination phase. For more on making Bossy E’s Best Blend, go back and reread page 35.
When blending water and compost, go for a consistency that’s like a crumbly brownie mix—then pick up a handful and squeeze. If a few drops of water come out, that’s perfect. If there’s a steady stream of water, it means you’ve made the mixture too wet, and you should add more dry mix.
It’s not mandatory to premoisten the soil this way, and I’ve planted plenty of trays that did fine without it, but I’ve found that it can speed germination time by a few days if you use this method.
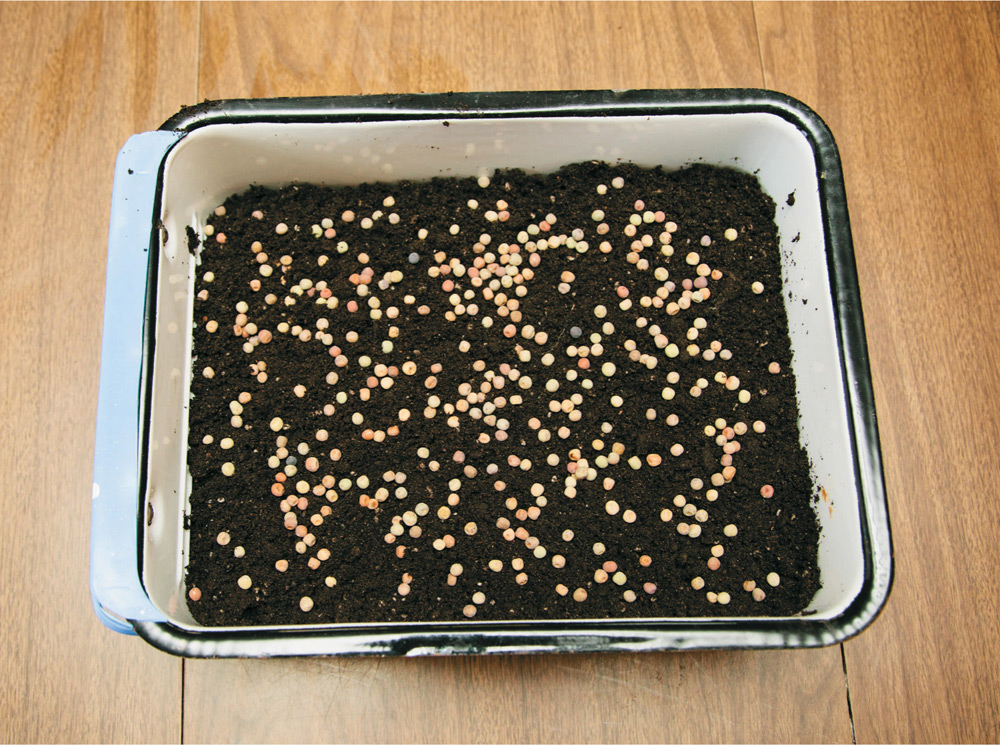
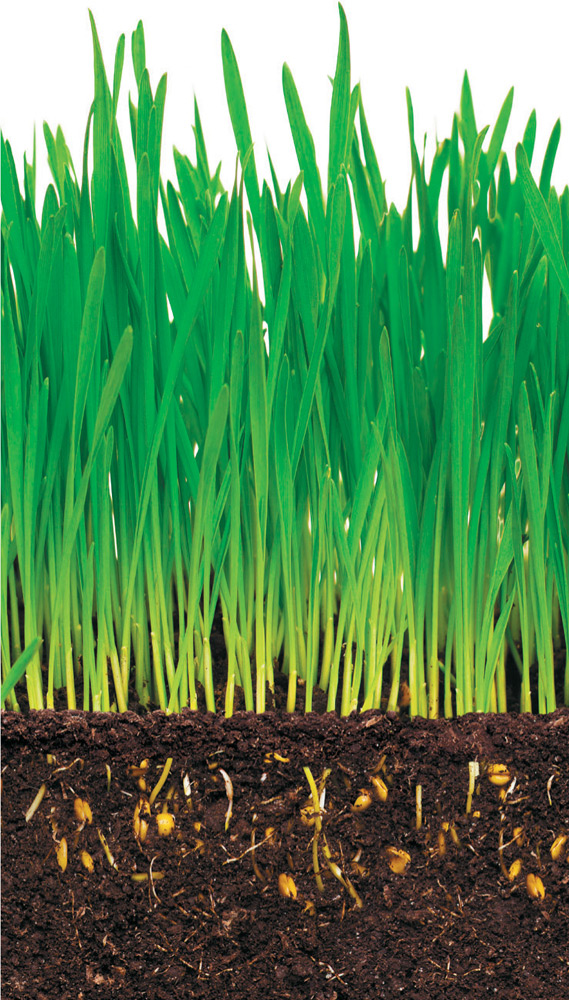
Seeds for growing microgreens are planted much more densely than if you were growing the plants to maturity. These kale seeds will yield a tightly packed crop of micros that is space-efficient and easy to harvest. If you were growing kale to maturity, the seeds would have to be several inches apart at least.
Make sure you start with a clean tray, pot, or other container, and add just a few inches of your soil mix, making sure to “fluff it up” if necessary.
Because the mix is moist, there’s often a temptation to push the soil down as if making a mudpie, but this creates a soil compaction issue that can turn your micro tray into a hardened brick when it’s put under light.
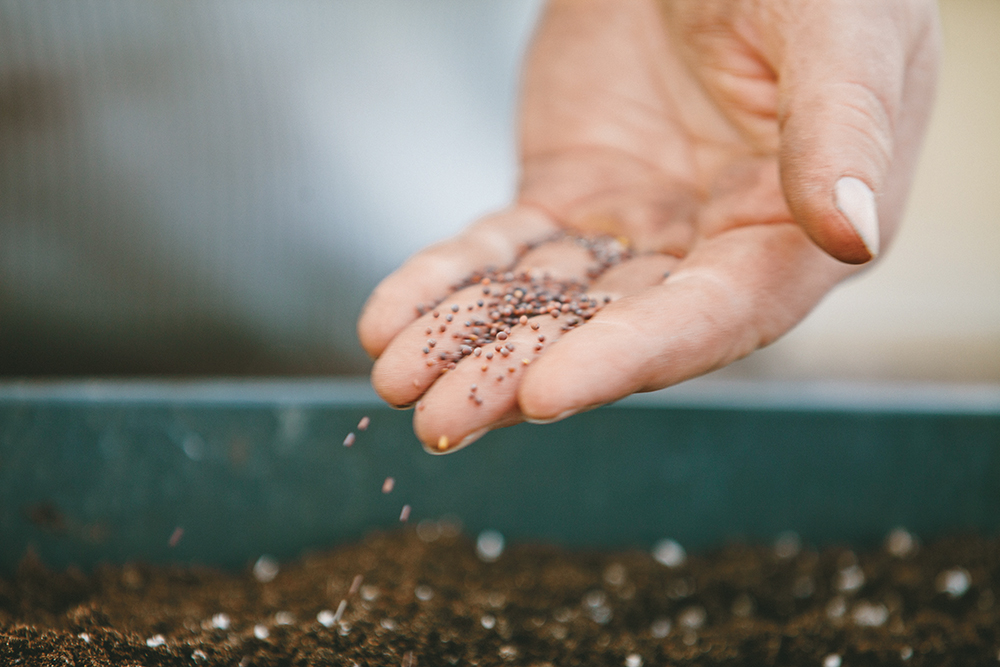
Here’s the tricky part: seed generously. For those who are used to carefully dropping a single seed into a pot, it can take some time to overcome the psychological hurdle that microgreens present. But you need to seed heavily so that you can maximize your container’s space, and also harvest more efficiently.
Granted, I’m guessing that you’re not likely to become a professional microgreen grower, so harvest time is probably not a factor in your gardening strategy. But if you want to dress up a dish with a handful of micros, it will feel surprisingly time consuming to be clipping each one individually.
Here’s an even more challenging part for many gardeners: don’t cover the seeds with soil, vermiculite or anything else. If you do, then they tend to germinate unevenly, which isn’t important if you’re sowing seeds in a field, but is frustrating if your “field” is a small tray on your kitchen counter.
Prepare a blend of Bossy E’s favorite soil (see page 35) and place a layer into your planting dish. If your soil seems too dense, just fluff it up a little.
Water very lightly, and then place a dish towel or empty tray over the top of the micro tray. This will help to keep the soil warm, and blocking the light for a few days helps the seeds to become healthier in general. You can peek inside if you want to see the magic—this isn’t a soufflé—but be sure to replace the cover if the seeds haven’t sprouted yet.
Once they show any sign of growth (about three to four days), remove the cover and water daily. Place under lights for at least six to eight hours per day.

Spread the seeds fairly densely. Don’t cover the seeds with soil, vermiculite, or anything else. If you do, then they tend to germinate unevenly.

After a light watering, a dishtowel or other cover will help to retain heat and boost germination. Once they show any sign of growth (about three to four days), remove the cover and water daily.
Tip: Once the greens have sprouted, do not water them from above. Instead, bottom water by setting the tray into a larger container and letting the growing medium soak up the water. Alternatively (but not as safe), water carefully at the root level or mist.
Once they’ve established, microgreens don’t require much care—that’s one of the major benefits of growing them. But there’s one important maintenance task that, if skipped, can put your micros in jeopardy.
The task is watering them properly. When they’re just in the first stage of growth, before getting their true leaves, it’s fine to water from above, but once they’re looking very microlike, it’s crucial to “bottom water” them so the delicate stems and leaves don’t get flattened.
Simply fill a kitchen sink, bathtub, even another empty tray, with about an inch of water and set the micro tray into it for a few minutes. The plant will take up the water it needs and hydrate the roots that way. This tactic is also useful if micros are looking droopy and need to perk up.
If you don’t have a way to bottom water, then just water carefully at root level, or mist heavily instead of watering.
Some common problems and potential solutions for micros:
This can be a result of improper airflow, overwatering, or too much humidity. If there are unaffected micros in the tray, lift out that section (throw out the moldy part) and relocate into a different tray, letting the soil dry out a little before you water again. Wait a few days before harvesting to see if mold develops on this section as well; if it does, discard and start over.
Fortunately, this isn’t an actual issue, it will just feel that way. This isn’t mold—those little threads are called root hairs, and they’re crucial for plant growth. They’re very common for micros, and their purpose is to collect nutrients and moisture from the soil and deliver them to the entire plant. It’s easy to mistake them for mold, but don’t throw out the micros thinking that you’ve flubbed it—they’re a sign that things are going right.
If the micros are yellowish when you take off the top tray or dish towel, then you don’t have a problem. They only appear that way because they need light to green up, and that should happen within a day or two at the most. If the micros are yellowing at another time, then they might be too far from their light source. Place them within 6 inches of whatever bulb you’re using—unless it’s a grow light that gives off heat (in which case: What are you doing using that? Are you trying to grow lizards?), don’t worry about “burning” the micros, they should get a nice boost from the added photosynthesis.
Most of the time, this happens because seeds are too old or because the tray isn’t getting enough moisture. If it’s the latter, simply water more often. If it’s the former, you can do a germination test by putting a few seeds on a wet paper towel. They should start to germinate within two to four days, and if they don’t, then get some fresh seed and give it another try.
Under good growing conditions, your microgreens should be ready to harvest in one to two weeks. Most types are at their tastiest when they are 1 to 2 inches tall and have spouted a second set of leaves.
Grab a handful and cut. Really, it’s just that easy. In some cases, you’ll see seeds that haven’t germinated because others have blocked their light, so you can keep the tray going and see if you can get a second harvest from it. But in general, clear the tray and then start again.
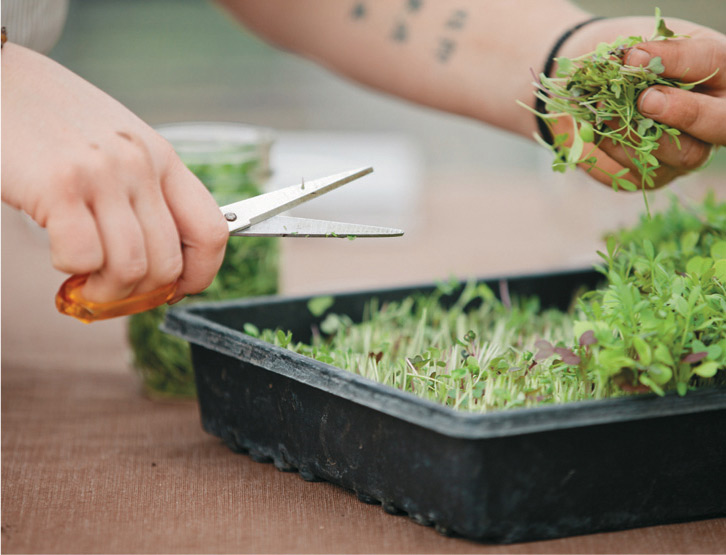
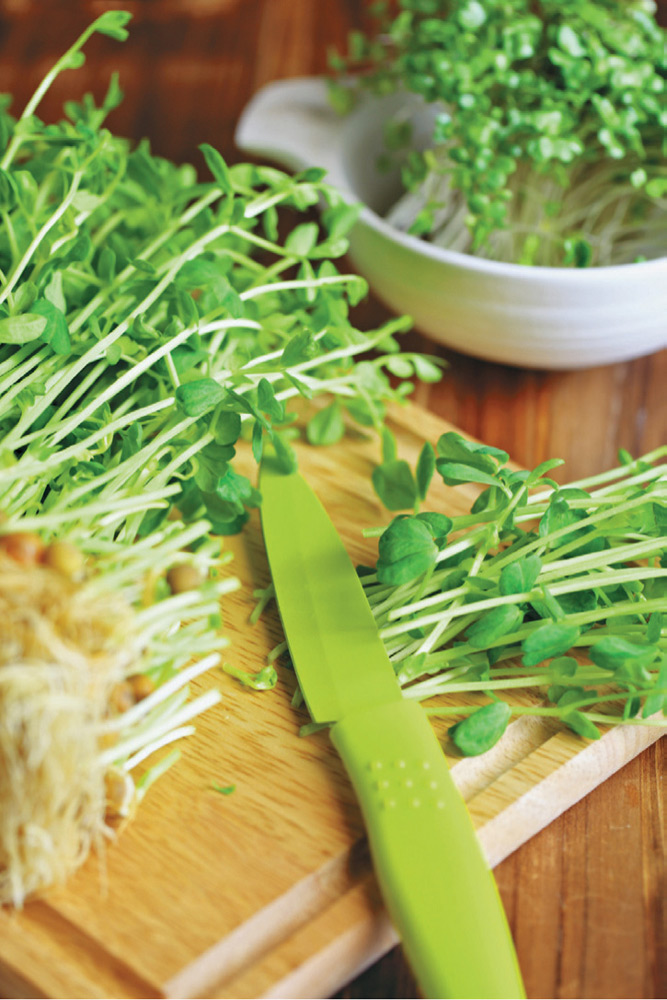
Harvesting micros is easy work, and just takes a few moments with a scissors.
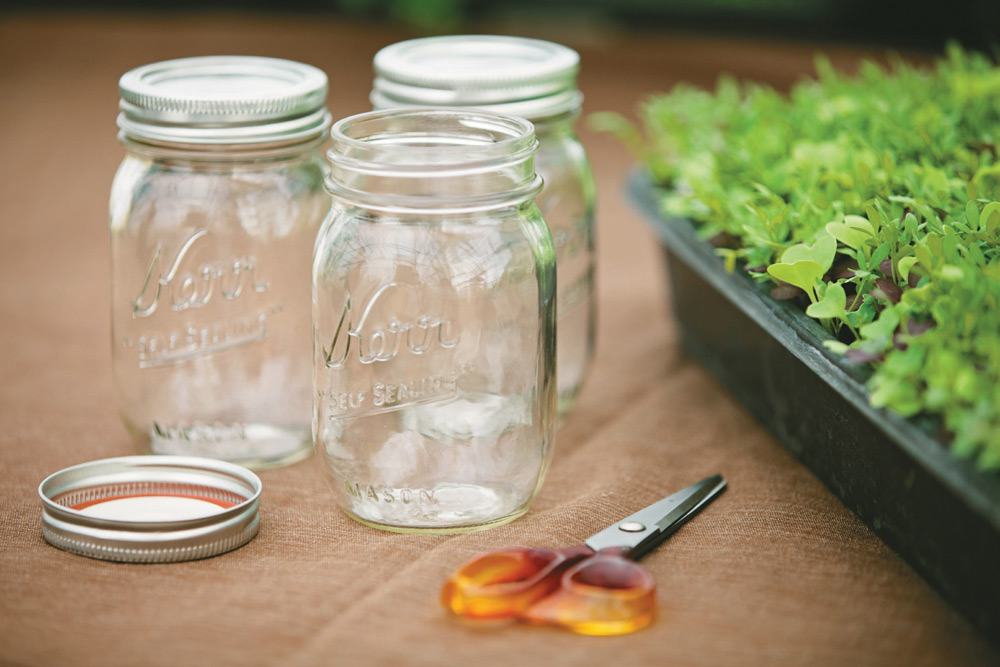
Although many microgreens are sold in plastic containers—at Bossy Acres, we sell them that way at farmers’ markets because it’s easier for transportation and cooling—the best way to keep them fresh is in glass containers. Pop them in a Mason jar or a Pyrex container with a lid, and they’ll keep for a few weeks, sometimes even longer, in your refrigerator.
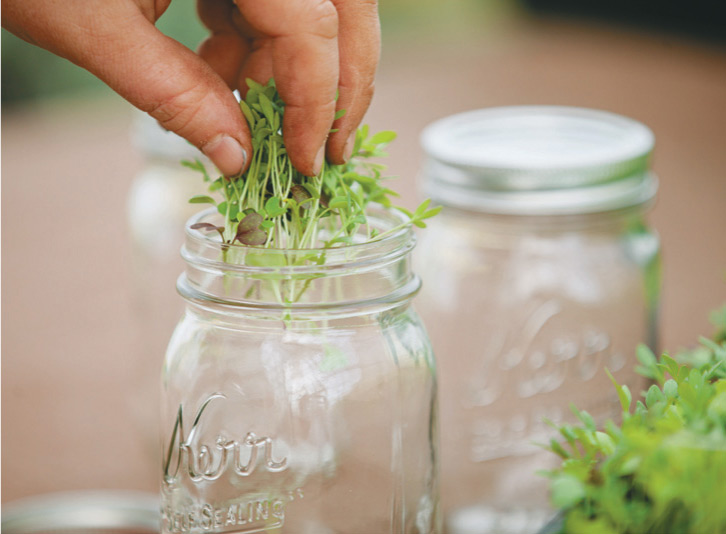
Store freshly harvested microgreens in a glass jar with a lid. Don’t pack them in tightly.

In a sealed glass jar your microgreens will keep for at least a week if refrigerated. But you should always try to eat them when they are at their freshest.
The bad news is that long-term storage of microgreens isn’t possible or realistic, unless you throw them in a pasta sauce that gets frozen or canned. But with the very short timeframe that comes with growing micros, keeping them long-term doesn’t feel as important as it would for some crops.
The last bit of advice I have for micros: use them liberally. For many people (including myself), microgreens can spark creativity in terms of cooking and flavor combinations. Put them over salmon, chicken, tofu, or pork. Top a pizza with zesty arugula micros, or sprinkle some kale micros on a sandwich.
Just when scrambled eggs seem like the most boring dish on the planet, I throw a handful of Bright Lights chard micros on top and boom, I’m an amateur chef. Plus, who doesn’t love a tiny forest of plants that grows within just a few weeks? Microgreens have become an indispensible part of my food landscape, and once you start growing them, I suspect they’ll find a place on many of your plates, too.

Seared Ahi tuna with fruit salsa and microgreens
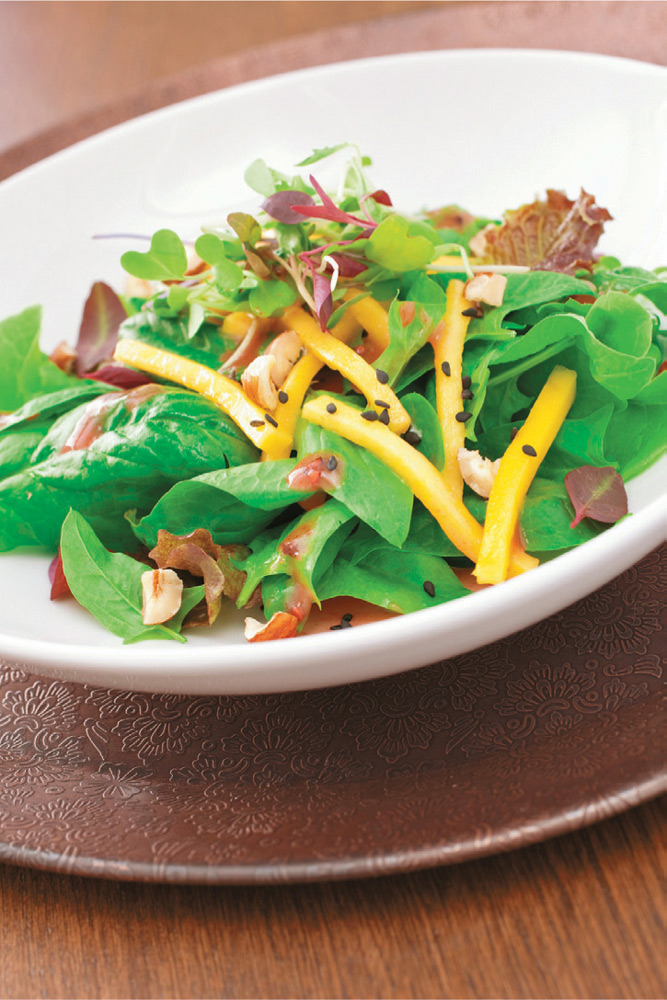
Mixed salad with microgreens, mango, and black sesame seeds.

Hummus on a bed of microgreens with crisp bread.
PEA SHOOTS, SUNFLOWER SHOOTS, AND POPCORN SHOOTSSometime around the middle of February, it always seems to hit: the weariness of filling my shopping basket with fresh vegetables from California, Chile, Mexico, and even Peru or New Zealand.
No offense to the hardworking farmers across the U.S. and around the world, because I truly appreciate the opportunity to eat oranges during a snowstorm. But these products require, by necessity, lengthy shipping times that sap them of flavor and nutrition to some degree. Still, it’s not easy to eat local when you live in a place that requires budgeting 20 minutes every morning for scraping the ice off your windshield. The only way it can be done in even a small way is to either grow what you can indoors, or tap into whatever canning and dehydrating you accomplished the summer before.
Since we tend to run out of our food preservation goodies by March in our house, it prompted us to begin experimenting with easy-to-grow options, and that led right to shoots.

Shoots make a delicious garnish on seafood or meat, or you can simply eat them by the bowlful. A pea shoot salad with lemon and olive oil is a sumptuous side dish.
Unlike sprouts—which are grown in water and require meticulous scheduling for rinsing and care to avoid bacterial issues—shoots are grown in soil, so it’s a snap to be more flexible in terms of timing, resource usage, space, and other major factors. We began growing them just to see what would happen, and now our little farm is becoming a supplier of shoots for local restaurants—one of them has even dubbed a pea-shoot-laden veggie dish the “Bossy Burger.” Who wouldn’t want to eat that?
It’s likely that you won’t begin growing shoots on such a large scale that you have to sell them by the pound to local eateries, but there’s definitely something addictive about seeing those shoots come up so quickly. The pea shoots have a soul-quenching crunch and a delicate flavor that tastes like spring, anytime. Sunflower shoots are nutty and succulent, with a texture that’s surprisingly firm and holds up well in a sauté.
Popcorn shoots, our biggest experiment of all, are delightfully strange in their own right. They look a little like wheatgrass, but taste like very young sweet corn, then hit you with an aftertaste of corn stalk. I tend to blend all the shoots together to deal with that funky aftertaste, but some people have told me they now crave that flavor.
With these three options, shoots are only just a few weeks away from thriving under your own lights, so let’s get started.
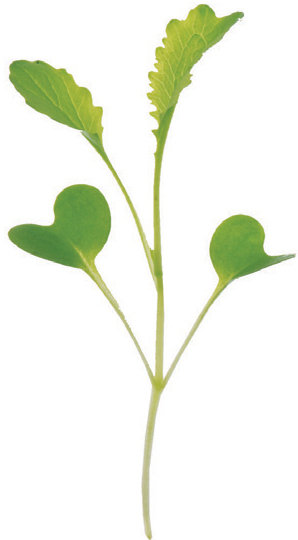
Shoots are sort of a cross between microgreens and sprouts. You plant them in growing medium, but you let them mature until they are roughly the same stage of growth as sprouts. Corn sprouts are seen here.
In general, shoots are really just microgreens of the seeds you’ve chosen. So, if you were to let the peas, sunflowers, and popcorn grow into full maturity, you’d have those plants. But because you harvest them at such a young age, the flavors are more intense, and you can plant them much closer together in a flat tray. With shoots, variety doesn’t tend to matter very much, although I’ve found better results with a specific type of pea seed. Here are some options:
‘Dwarf Grey Sugar’ peas: After much experimentation, we now use only these, both for our farm and for home growing. They’re developed to be shorter peas, so if you want to put some in your garden, you can get pea pods without having to do trellising. For indoor growing, I like them because they’re hearty, easy to grow, and taste really amazing when you turn them into pesto. Nearly any other pea seed can be turned into shoots, however, so if you have some ‘Sugar Snap’ pea seed at home, that will work. I’d avoid varieties designed to be tall and robust, though, such as ‘Oregon Giant.’
‘Dwarf Grey Sugar’ Pea shoots
Sunflower: Although I include a list of resources at the end of the book, I’d planned to avoid mention of specific seed companies in the main body of the book because I don’t want to seem biased. But here I’m going to break my own rule, because there’s one company that provides excellent sunflower seeds for shoots, and they’re even organic. Johnny’s Selected Seeds, a company out of Maine, offers a sunflower seed variety that’s highly dependable and very hearty. When I’ve tried other options, it’s been disappointing, especially when I’ve played around with growing from sunflower seeds that are usually meant for bird feeders (I mentioned gardening is an adventure, right?). Stick with seeds meant for human consumption, and give Johnny’s a try (See Resources, page 221).

Sunflower shoots
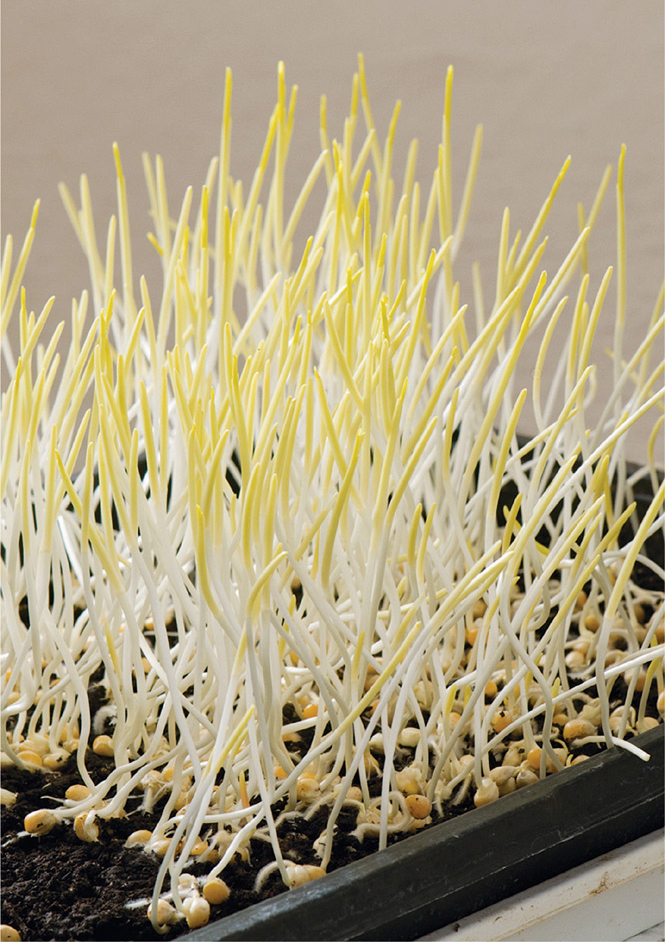
Popcorn: On a whim, we wondered if we could buy organic popcorn from the co-op, sprout it, and then plant it and eat it as shoots. As it turns out, the answer is yes. So, you don’t need to buy “seed” from anywhere as long as you have access to pop-corn kernels that aren’t processed, coated in oil, or salted in any way. Popcorn differs from corn kernels because popcorn is derived from specific strains of corn that were cultivated for the purpose. That means you might be able to sprout corn and get the same effect, but popcorn is more reliable if you’re trying to grow shoots.

Popcorn shoots
Nasturtium: One the most popular edible flowers, nasturtiums also make delicious shoots. As when planting in the garden, nasturtiums can be a little slow to sprout. Try soaking the seeds in water for an hour or longer before spreading them in the media.
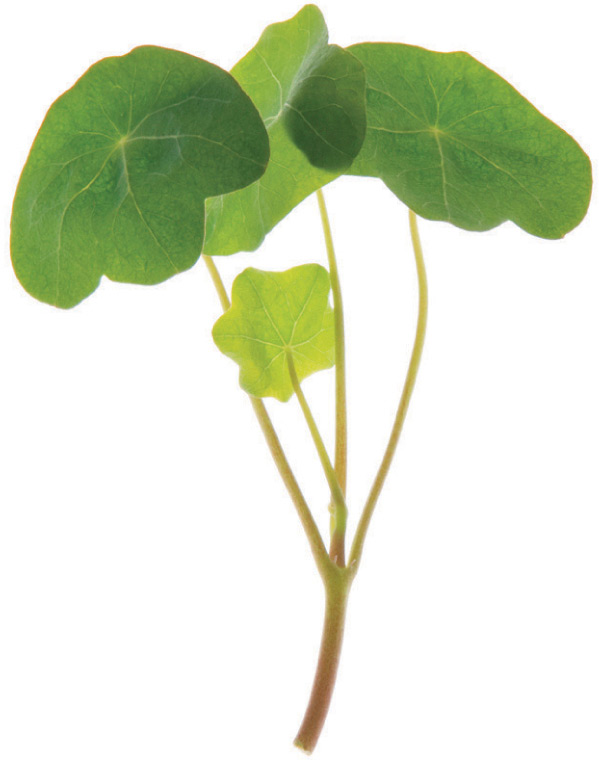
Nasturtium shoots
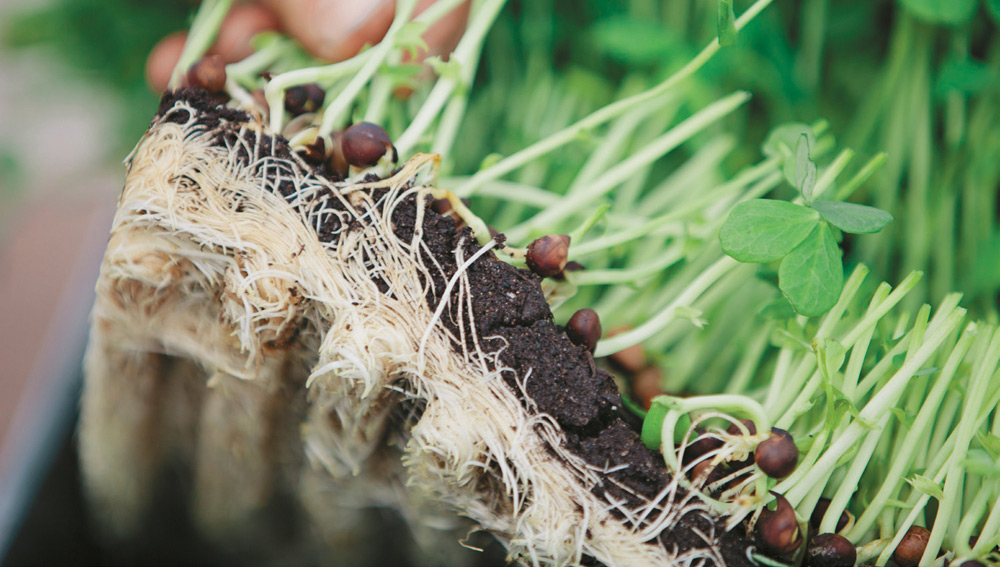
When planted in a shallow tray, shoots quickly develop a thickly knit root mass. It isn’t edible, but it makes great compost.
Much like other types of microgreens, I tend to prefer open-style seedling trays with minimal depth and drainage slots in the bottom. The slots keep the soil from collecting too much moisture, which can quickly lead to mold in a shoots tray, even with adequate ventilation. That’s because the seeds are sown so close to each other that without drainage, root rot can become an issue within just twenty-four hours of planting.
When choosing a pot or tray, keep soil usage in mind. Because of those roots, the shoots don’t need the type of soil depth you’d see with plant starts or even indoor herb gardens. Save soil by choosing a smaller container, and make harvest easier with a tray or pot that’s shallow rather than deeper.
Even though peas, sunflowers, and corn require plenty of space when it comes to root depth, when planted as shoots, a very curious thing happens: the roots begin to curl up into each other, creating a thick mat in the case of pea shoots, and turning your tray into a solid block. I tend to use shallow trays just for this reason, because composting the soil after harvest is easily done, like throwing a very small carpet onto the compost pile. Bonus for homesteaders: chickens love the leftover stems and seeds from shoots trays.
So, you use minimal soil, get maximum use from your tray, and maybe even make your chickens happy.
For shoots, I find that a pure compost mix (see Resources in the back of the book if you don’t have a greenhouse near you) tends to work very well, as long as it’s fairly “fluffy” in consistency. If all you have is indoor potting soil, lighten it up by adding vermiculite to the soil.
The most important part of soil prep is to add some water to the mix before planting, which helps to hold in moisture during the germination phase.
When blending water and compost, go for a consistency that’s like a crumbly brownie mix—then pick up a handful and squeeze. If a few drops of water come out, that’s perfect. If there’s a steady stream of water, it means you’ve made the mixture too wet, and you should add more dry mix.
It’s not mandatory to premoisten the soil this way, and I’ve planted plenty of trays that did fine without it, but I’ve found that it can speed germination time by a few days if you use this method.
For seed prep, there’s a simple way to speed germination time: just soak the seeds for about twenty-four hours before planting. In some cases, especially when the house feels on the colder side, I soak them for a day or two longer so that they begin to sprout before I plant them. This can reduce germination by up to a week in some cases.
These sunflower seeds have just begun to sprout. Soaking the seeds in water for a day before planting them will speed up the shoots.
But be very careful about soaking during hot weather and for too much longer than about seventy-two hours maximum, because once they pass the stage where they’re sprouting, they’ll start to deteriorate and can’t be planted. The worst part of forgetting to plant or putting it off for too long is that rotting, wet shoots seeds give off a stench that will permeate the house. Seriously, it’s one of the worst stinks that you can imagine, like fungus-crusted toejam inside of wet, dirty socks. Just make it a point never to find out if I’m characterizing that aroma accurately.
Make sure you start with a clean tray, pot, or other container, and add just a few inches of your soil mix, making sure to “fluff it up” if necessary. Because the mix is moist, there’s often a temptation to push the soil down, but this creates a compaction issue that can turn your shoots tray into a hardened brick when it’s put under light.
Another consideration when spreading soil is to take a moment to create a level surface, especially along the sides. Unfortunately, it’s easy to let the soil build up on the sides slightly and come to a depression in the middle, but this inadvertent valley-like tray will cause unevenness in your water distribution, allowing some seeds to sit in water for too long while others dry out.
Once your soil mix is ready, seed generously. For shoots, this means you’ll be creating a seed bed where the seeds look far too close together, but aren’t overlapping. There’s no need to poke holes in the soil mix and place seeds inside, they can sit on top of the soil and grow perfectly well that way.
Keep in mind that each seed will grow a shoot vertically, so it’s fine if they’re all just a few fractions of an inch from each other, but you don’t want them competing for the exact same tiny stretch of soil.
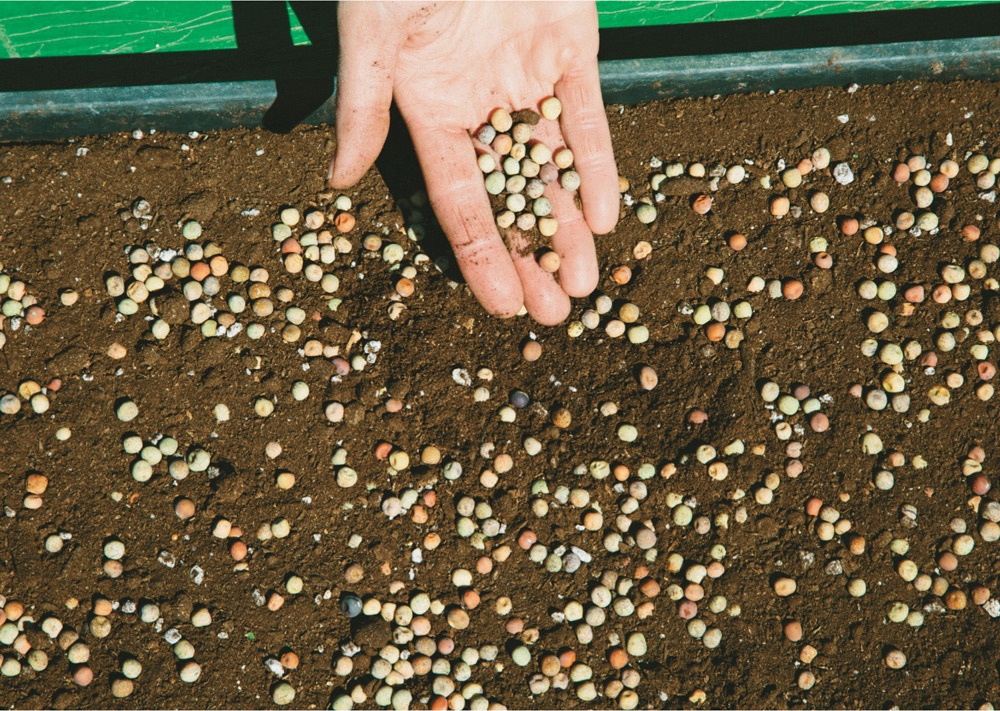
Spread plenty of seeds onto your compost mix.
If you do happen to sow them thicker and they’re touching one another in parts, that’s fine as well, just know that you might get less germination than expected. The good news is that these non-germinating seeds tend to get a second chance after your first harvest.
Water very lightly, and then place an empty black tray over the top of the micro tray. This will help to keep the soil warm, and blocking the light for a few days helps the seeds to become healthier in general. You can peek inside if you want to see the magic, but be sure to replace the cover if the seeds haven’t sprouted yet.
Once they show any sign of growth (about three to four days), remove the cover and water daily. Place under lights for at least eight hours per day. You can give them a blend of artificial light and sunlight if you’re in a season or a geographic area where the sun is strong enough, but keep in mind that the shoots will bend toward the light, so rotate the tray daily if necessary. Otherwise, place the tray directly under your growing lights, about 6 inches from the tops of the plants.
Do not cover the shoot seeds with planting medium. Make sure they have moisture and warmth and they’ll begin shooting in a couple of days.
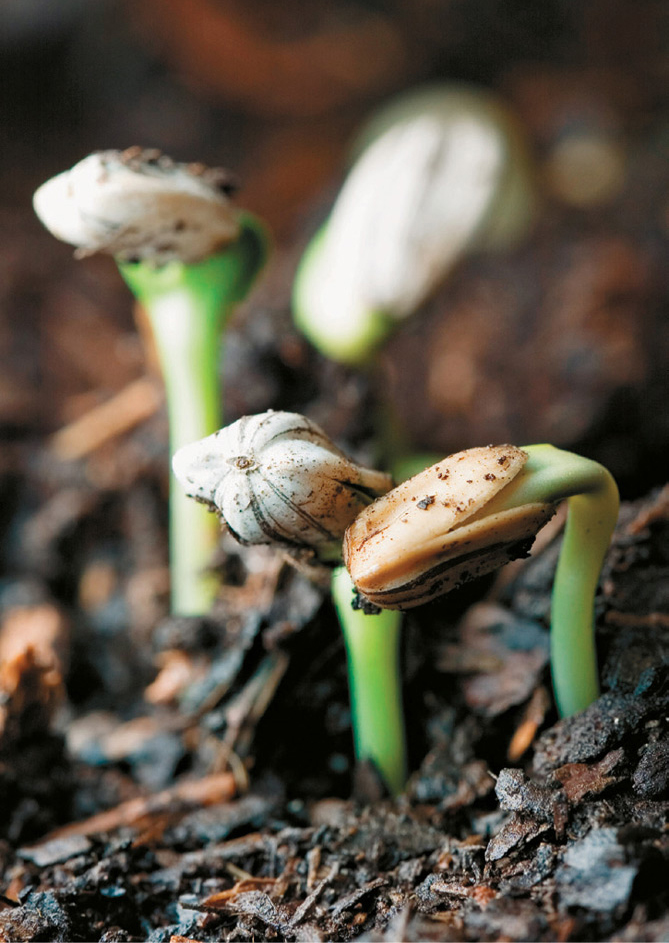
Pea shoots take around two weeks to mature for eating. A) Newly planted; B) 3 days; C) One week; D) Two weeks
Once they’ve established, shoots don’t require much care, which is a plus. But much like microgreens, they benefit greatly from a “bottom watering” strategy.
Simply fill a kitchen sink, bathtub, even another empty tray, with about an inch of water and set the shoots tray into it for a few minutes. The plant will take up the water it needs and hydrate the roots that way. This tactic is also useful if shoots are looking droopy and need to perk up.
If you don’t have a way to bottom water, then just water carefully at root level, or mist heavily instead of watering.
watering shoots from beneath is a good way to hydrate the roots without flattening the tender stalks.
When it’s particularly humid in the house, (summertime in most cases) consider planting and replanting shoots only after the weather has cooled off. At Bossy Acres, we’ve tried to grow shoots year-round, and I’ve attempted the same tactic at home, but there are definitely better seasons than others when it comes to successful growing. Spring and fall are ideal. With heat mats, winter brings slower growth but still plenty of tasty shoots. Summer, however, is brutal for shoots even in a house with central air conditioning. Unless you love playing around with tweaking elements constantly—airflow, more watering, less watering, bottom watering, misting, more airflow, different placement, etc.—I’d suggest saving shoot growing for more temperate seasons rather than summer.
Shoots grow best in the spring and fall, but if you use a heat mat or another suitable heat source you can grow them successfully in winter too. Summer, with its heat and humidity, is a less-than-perfect environment for growing shoots indoors (but that’s usually okay, because summer is a great time for growing edibles outdoors).
Here are some other tactics for keeping your shoots on track:
Continue watering and providing light to the shoots tray after a first harvest. Many times, some seeds germinate later or are delayed because they’re under other seeds. For pea shoots especially, you can get two to three more harvests because of this. These subsequent harvests won’t be as abundant as the first ones, but they’re enough to be worth the effort.
If the air in your house seems especially dry, mist the plants when they’re in an early stage of growth and then put a clear tray on top. These are available at any garden store, and they help to let in light but lock in moisture. I find these invaluable in the winter, especially when the shoots are just out of the germination stage, but not established enough yet. Alternately, you can also use plastic wrap, but just be sure that the shoots aren’t grown enough to bump against the top of the wrap, which can impede growth.
Another good tactic when the air is dry is to mist the plants more often during the day if they seem to be struggling. Be aware that this strategy could cause browning if the plants are close to an artificial light source, so raise the light or lower the plants by 6 inches and mist heavily if this happens.
Provide a little drainage by placing small rocks in the bottom of your planting vessel prior to adding the dirt.

Plant shoot seeds densely. Often, a second crop will pop up from the original seed planting after you harvest the first batch.
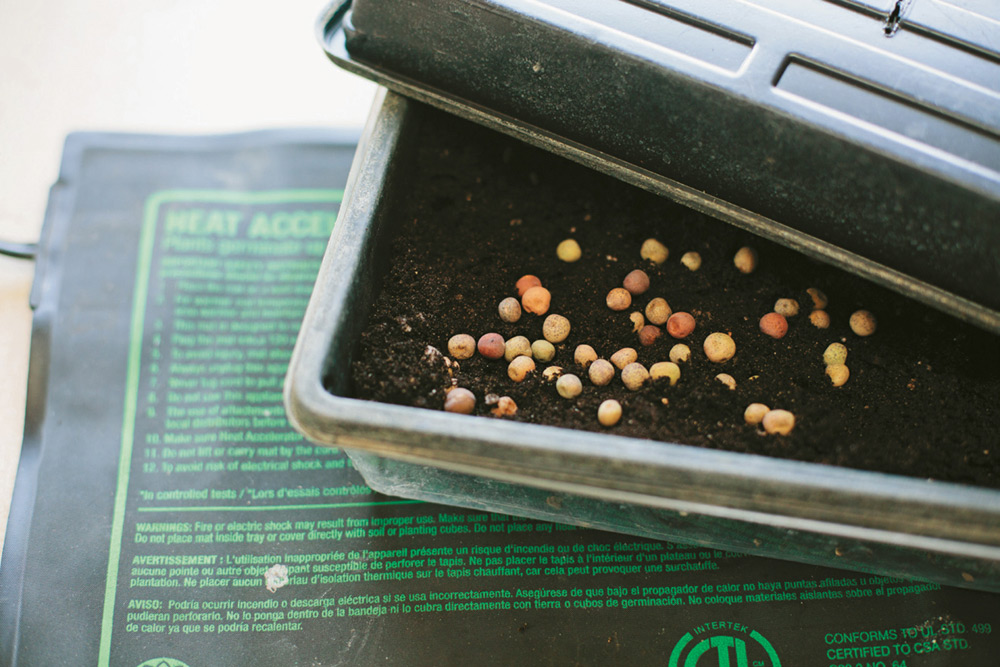
Shoots tend to germinate quickly, so this would be a major issue. Most likely, it’s related to the temperature of the soil. Putting a cover over the tray tends to keep the moisture and warmth inside, but sometimes you need an extra boost, so consider setting the tray on a heat mat (see page 95), which are available at any garden store. These rectangular mats raise the temperature slightly, just enough for the seeds to feel cozy, but not enough to damage them or to scorch your counter. You can leave it plugged in for days if necessary. If it’s been a week and you’re still not seeing germination, check the density of your soil mix and see if it’s too hardened—compaction will often prevent the seeds from establishing.
Moldy clumps can be a result of improper airflow, overwatering, or too much humidity. If there are unaffected shoots in the tray, lift out that section (throw out the moldy part) and relocate into a different tray, letting the soil dry out a little before you water again. Wait a few days before harvesting to see if mold develops on this section as well; if it does, discard and start over. If the problem tends to be too much moisture from the start, which can happen during humid months, sow the seeds into dry soil instead of pre-wetting the soil mix, and do a thorough watering before covering the tray during the germination process.
You have them too close to the light source, so you’re essentially cooking them in the tray. Move them away from the light by another 6 inches, clip off the browned tips, and hopefully the remainder will thrive.
Usually, yellowing means overwatering, so let your soil dry out a little. By contrast, droopy shoots are often caused by underwatering, or by too much humidity. In that case, bottom water the shoots in cold water and see if they perk up after about ten to fifteen minutes. Also, adjust your fans so that shoots are getting some airflow to disperse stagnant, humid air and increase circulation. Keep in mind that plants “breathe,” and they need some airflow to keep oxygen levels high. If your efforts aren’t successful and the shoots remain droopy, you may just want to harvest and eat—they’ll still be tasty and nutritious, just a bit less crisp.
Just like microgreens, shoots do best stored in glass, and can last for weeks in the fridge this way. Pea shoots, though delicate, are remarkably long lasting and keep their crunch up until the end. Sunflower shoots are even tougher, and I’ve kept some for three weeks in the fridge without any discernable change in flavor. Popcorn shoots, though, tend to last for a shorter time and when kept for longer, that odd aftertaste gets stronger. So for those, I would harvest and eat the same day.
Shoots and microgreens packaged for sale will last quite awhile in the refrigerator.
For each variety of shoots, there is an ideal time for harvest:
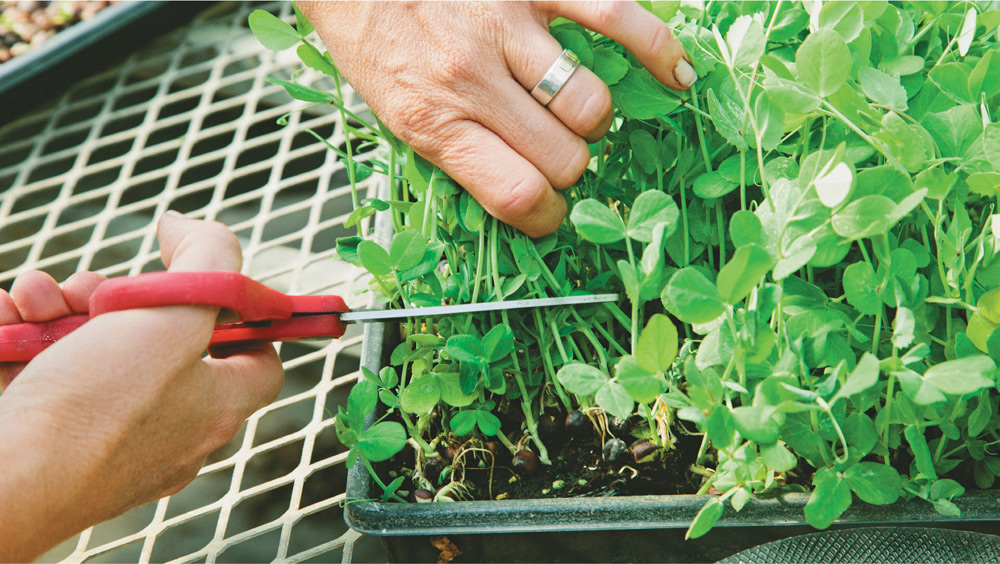
Pea shoots: These will grow long and look unruly, and I tend to harvest them when they’re about 8 to 10 inches. If you want sweeter and more uniform shoots, harvest at around 4 inches when they’re just beginning to unfurl their leaves. If you want a super abundant harvest, and a less pea-sweet taste, let them go until 12 inches. Longer than that, though, and they start to get too long and heavy for the tray, so they start flattening. Also, the taller they get, the more woody the flavor.
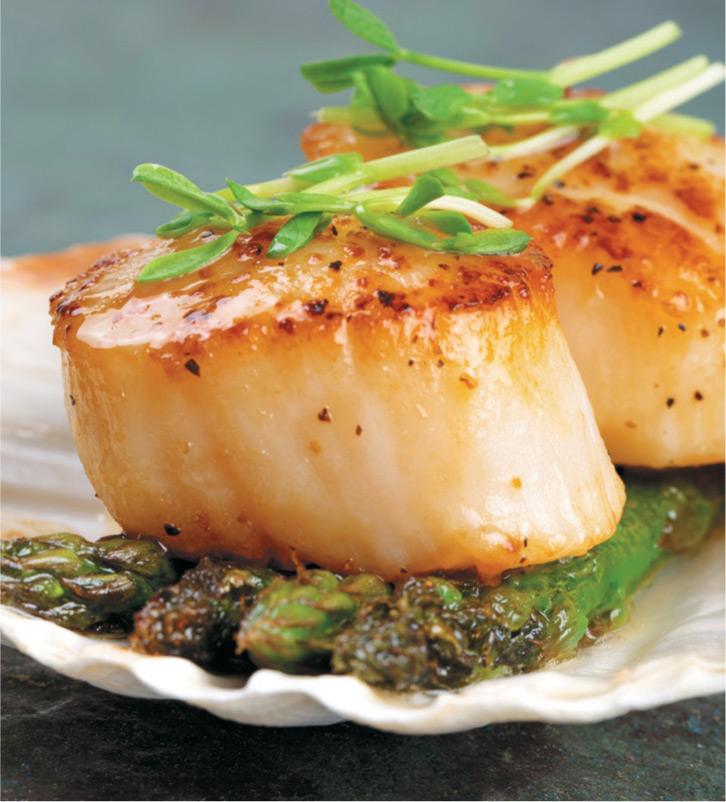
Pea shoots make a tasty and visually appealing garnish for most seafoods, including these seared scallops.
You can harvest pea shoots at any stage, but they tend to be best at 8 to 10 inches, before they get unruly. Younger pea shoots, like the ones seen here are just a few inches tall, but they can taste sweeter and have a more uniform size.
Sunflower shoots: These taste best when you get them before the sunflowers develop their first true leaves. At the shoot stage, you’ll have just two petals that are nicely crunchy. When the first true leaves begin sprouting, they come up between these petals and have a scratchy texture that I don’t enjoy even though they’re perfectly edible. If you let the shoots go for too long and the leaves start coming up, you can still enjoy the shoots-only taste and look by plucking off the true leaves and discarding them. In terms of what to harvest, I clip all the way down to the soil, because the stems are just as tasty as the leaves.
Popcorn shoots: These are best at about 6 inches, and be sure to include some of the white-and-pink bottoms, where the most intense flavor resides. Once the shoots get taller, they’re fun to have in the windowsill because they look so vibrant, but the taste becomes more and more grassy as they grow. At about 10 inches, the shoots have all the flavor and appeal of fresh lawn clippings.
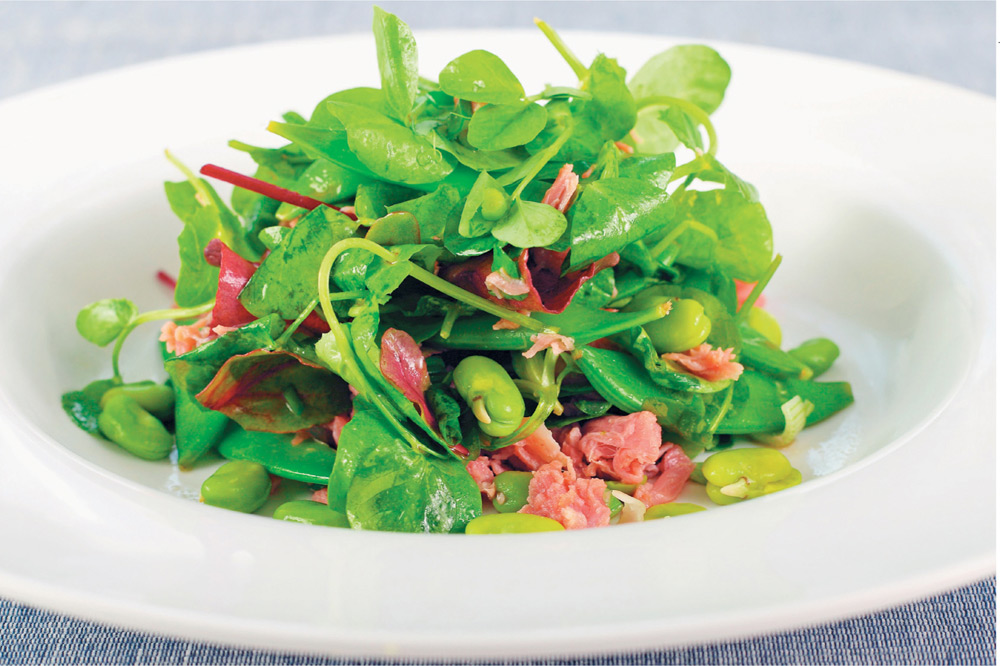
Pea shoots can be a chief ingredient in a fresh green salad, with the strong flavor needed to stand up to savory meat like the ham hock above.
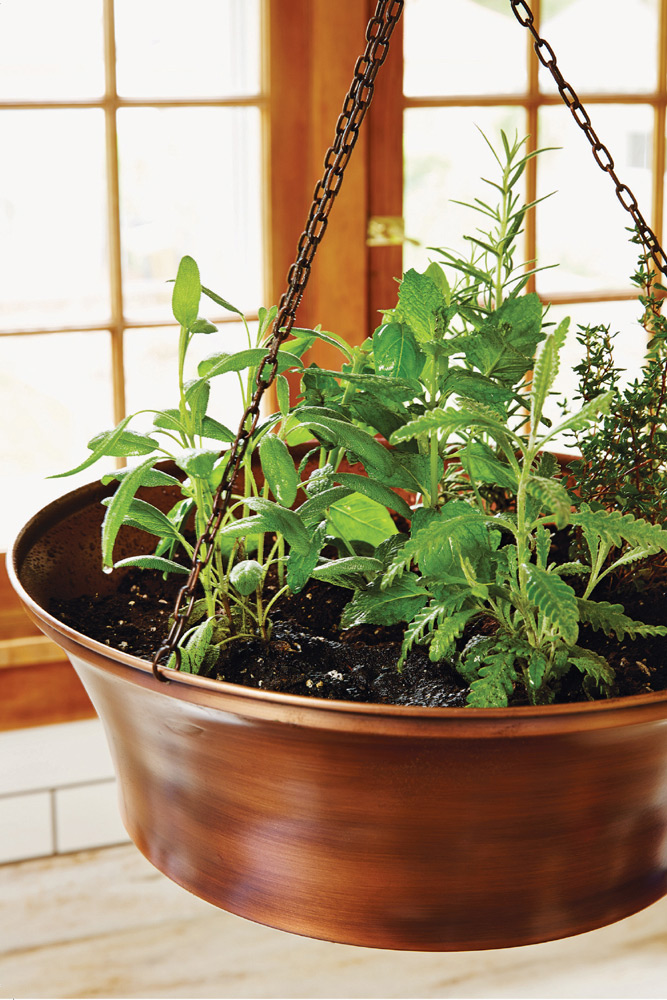
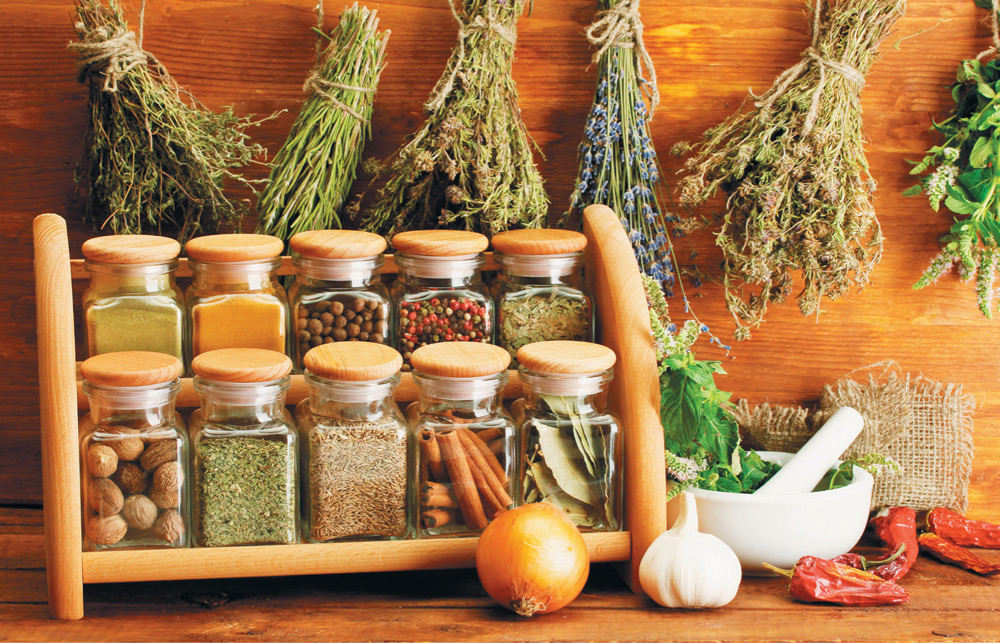
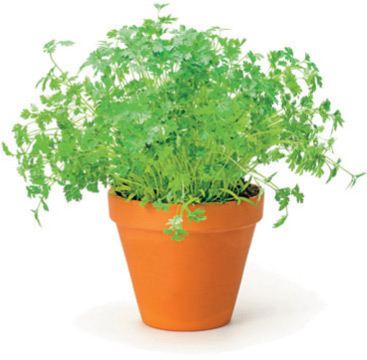
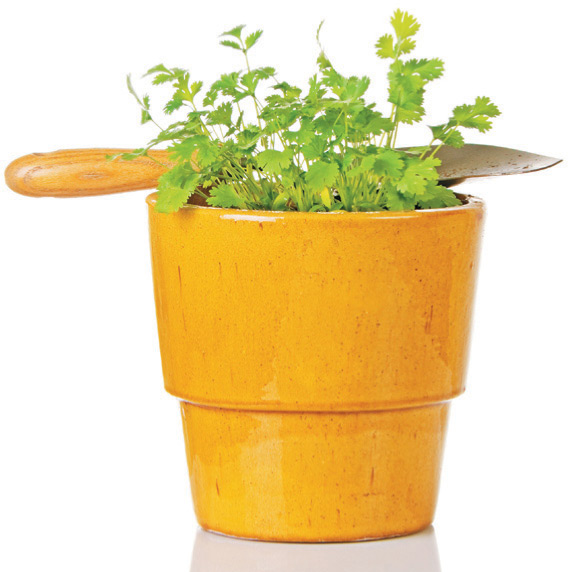
HERBSOne of the most satisfying projects for any kitchen gardener is an herb pot, brimming over with favorites like sage or cilantro, or ripe with a medley of different mints.
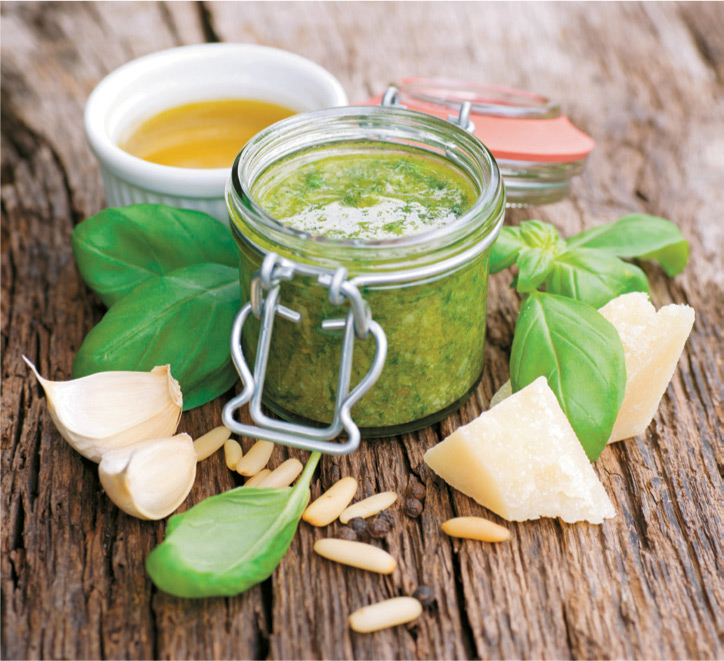
I’ve seen some great combinations put together—like creating a “pasta sauce herb garden” with oregano, thyme, and basil—and because most herbs thrive from frequent harvest, they’re perfect for a kitchen space since you can just snip what you need for a particular dish.
For my kitchen space, I like to put herbs in separate pots so that I can isolate them in case of insect issues or mold problems. But I often create combinations when giving herb pots as gifts, and I always love the aromas that blend as a result of letting them tangle up together.
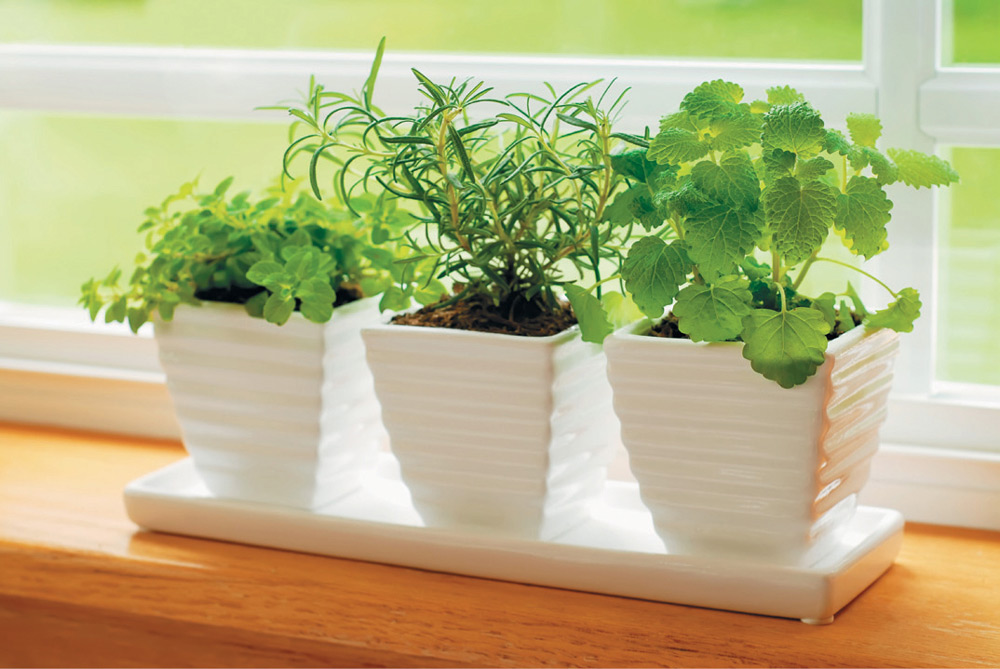
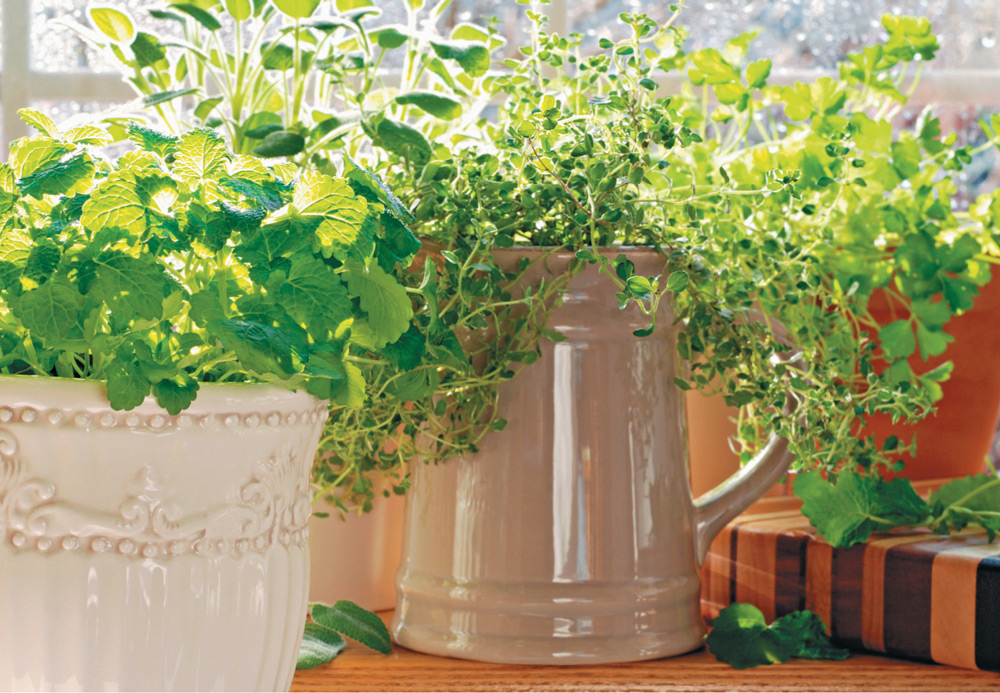
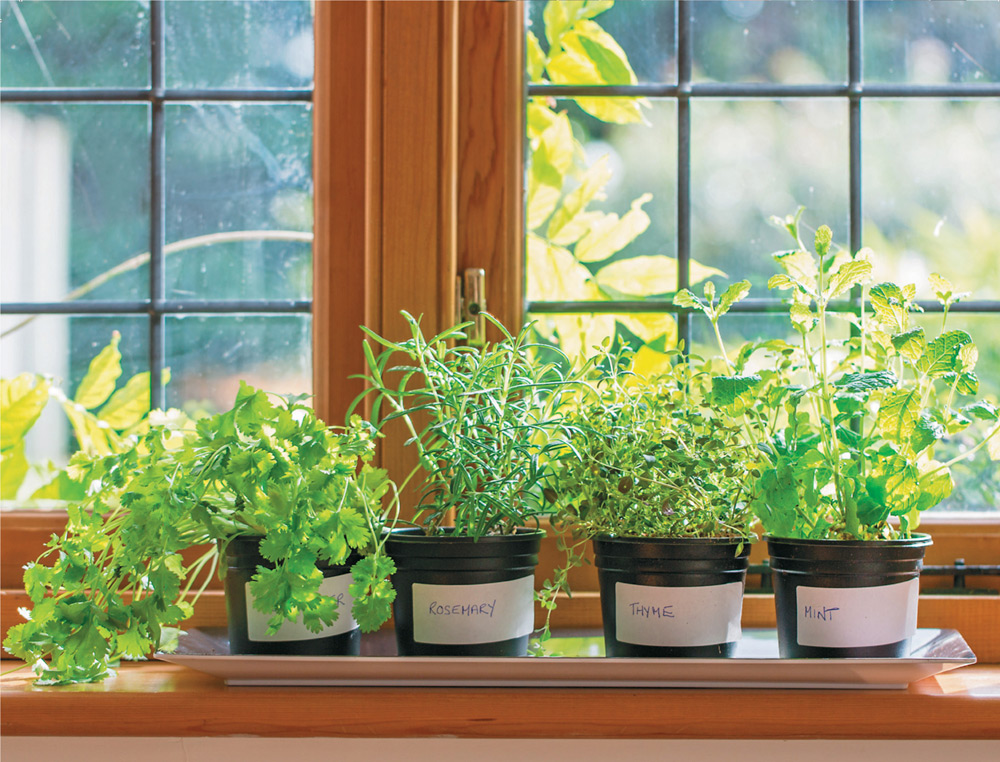
A windowsill herb garden is a welcome addition to any kitchen. This one, with its matching porcelain pots, features marjoram, rosemary, and lemon balm.
For a very small investment you can turn a sunny windowsill into a mini herb farm. One great thing about growing herbs is that you don’t need much at one time, so a few mature plants can keep you well supplied with herbs.
In general, many herbs are well-geared toward indoor growing, and several of the gardeners I know repot their outdoor garden herbs as the weather here gets crisp, so that they can extend the growing season indoors.
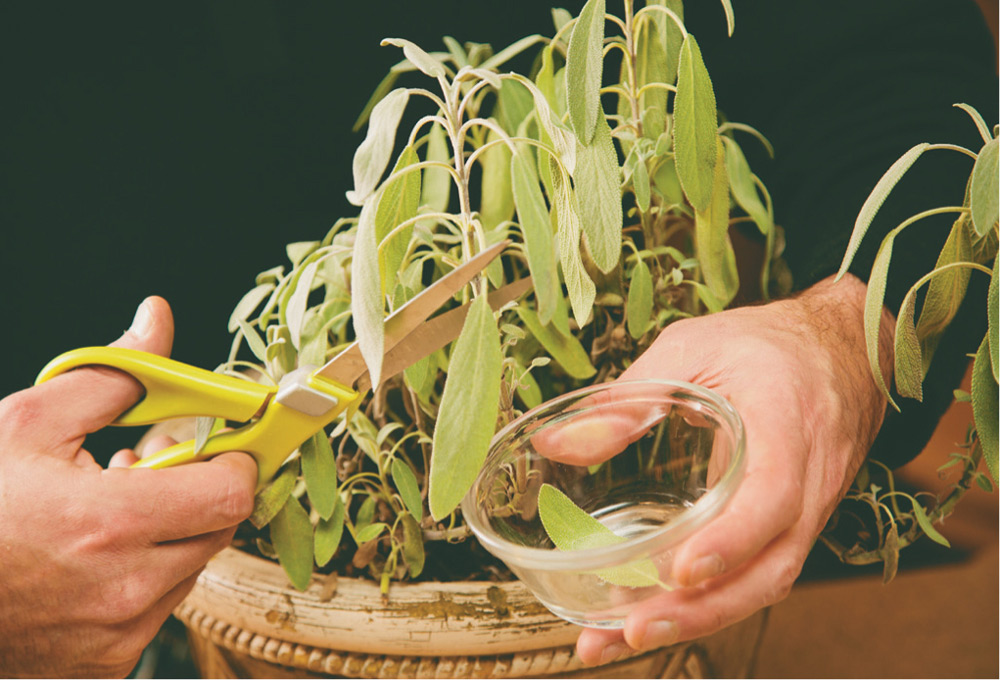
Some herbs, such as rosemary, oregano, thyme, and sage, propagate well if you take a cutting from an existing outdoor or indoor plant and prepare it for growth inside. If that’s your strategy, simply cut a 4-inch section (measured from the tip of the stem/leaf toward the soil) and strip off about an inch or so of the lower leaves. Put the stem into a potting mix, such as vermiculite, and keep the mix somewhat moist as the plant establishes.
These plants like humidity, so cover with clear plastic or glass—letting light in, but trapping moisture—but don’t let them get too hot from direct sunlight. Also, remove their covers occasionally or put them on a porch or “transitional” space to give them some air.
This technique also works well for transplants purchased at a greenhouse, which should already be “hardened” to temperature variations. In my experience, there are times when I just can’t seem to grow certain herbs from seed (I’m looking at you, basil) and I need the jumpstart that a transplant can provide. When I began my indoor growing adventures, I relied on transplants almost entirely because I appreciated being able to skip that first big leap in germination. These days, however, I actually enjoy the planting process, and tend to choose herbs that thrive best in my kitchen.
So, for this section, we’ll take a closer look at how to go from seed to harvest, so you can get a feel for growing herbs entirely indoors. If you do go the transplant or herb-cutting route, though, much of the information still applies, particularly when it comes to issues like soil drainage and temperatures.
Although many herbs do beautifully in an indoor growth space, some varieties can be surprisingly fickle if you’re trying to grow them from seed. Here are some options, broken down by level of difficulty:
Some herbs can be started from seed indoors; others can be propagated from cuttings you take from your outdoor plants.
Peppermint and spearmint: Hearty and wide-ranging, mint likes to invade the territory of other plants, so once you’ve got it, stay on top of harvesting it. If you want a strong mint taste without growing a bunch of it, opt for peppermint, since it has a more intense flavor.
Lemongrass: You don’t even plant this one from seed; just buy a stalk of lemongrass from a grocery store or farmers’ market, trim the top, and put the stalk in a few inches of water. The stalk will produce roots on its own and dozens of new shoots, and you can harvest from these.
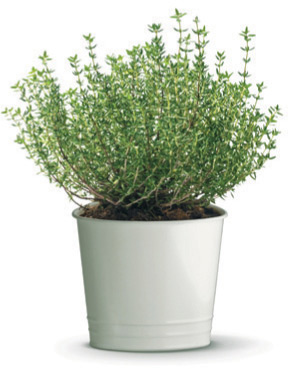
Thyme: This herb also requires more light, so I often put oregano and thyme in the same space or place them next to each other in a south-facing window.
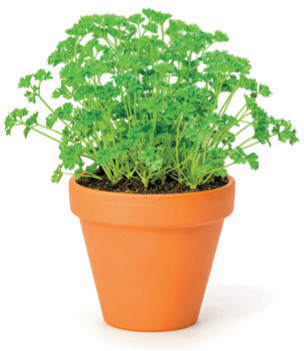
Parsley: Usually fairly easy to grow, but germination can be hit and miss. Usually, you’ll begin to see growth about two weeks after planting, and it tends to grow slower than other herbs in general.
Oregano: The trick with oregano is giving the plant enough light every day; it may require placing the pot under a separate bulb that’s on for a few hours more than the other herbs. Usually, about eight hours of light is best.

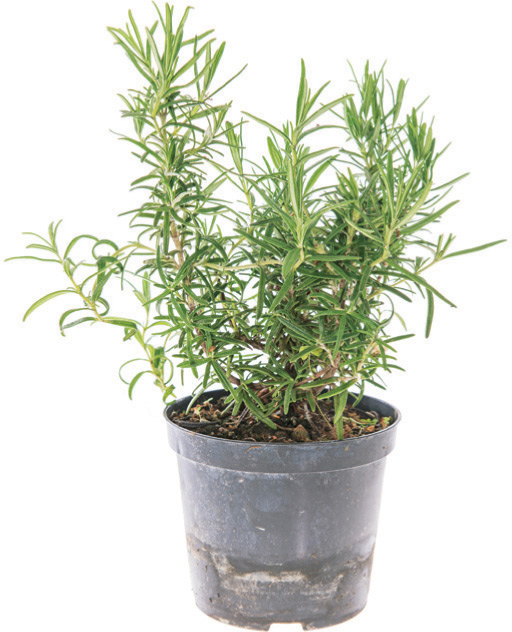
Rosemary: I’ve found that my best indoor rosemary comes from cuttings off rosemary in my garden, but it’s also somewhat easy to grow by seed. Watch out for overwatering, since rosemary tends to prefer drier soil, and be sure to choose a variety that does well with indoor growing, like ‘Blue Spire.’
Chervil: Fairly uncommon, but quite delicious, chervil is related to parsley and has a subtle flavor. The herb does well in low-light areas, making it a nice choice for kitchen corners and out-of-the-way spots, but keep in mind that it doesn’t do well when temperatures begin to rise beyond 70 degrees, so gauge your house’s temp before planting.
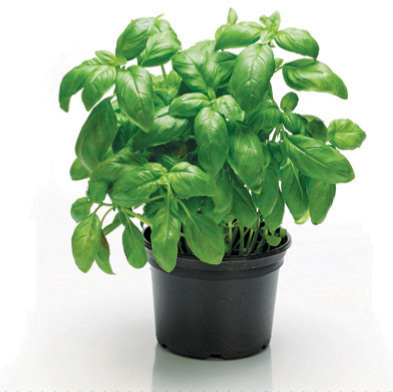
Basil: It’s so ubiquitous in cooking, you’d think basil would be a snap to grow in your kitchen garden. But no. Notoriously difficult to grow indoors from seed, basil tends to work best as a plant start from a greenhouse. Also, those lush Italian basil leaves may not be as wide and pretty as you find in a garden. Instead, I lean toward varieties with smaller leaves like ‘Dark Opal’ or Thai basil.
Cilantro: Here’s another one that grows remarkably well outside but requires a higher level of care indoors. First of all, it doesn’t transplant well, so it needs to be grown from seeds or starter plants. Also, it requires plenty of drainage and yet needs more nutrients, making it tough to keep the soil nourished. It tends to do fine once it’s established, but until then, plan on giving the herb fertilizer biweekly, which will be twice as much as your other herbs. Also, water only when the soil seems very dry.
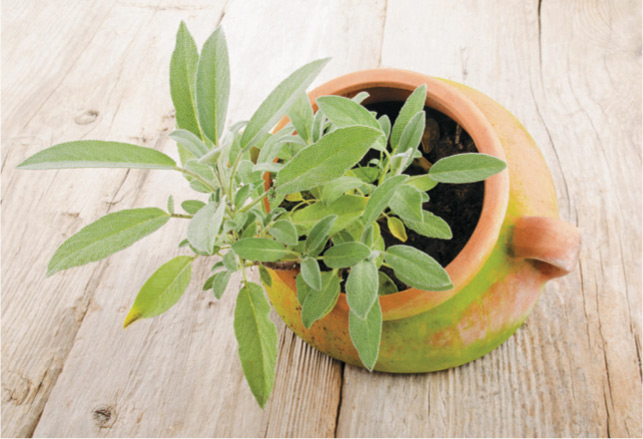
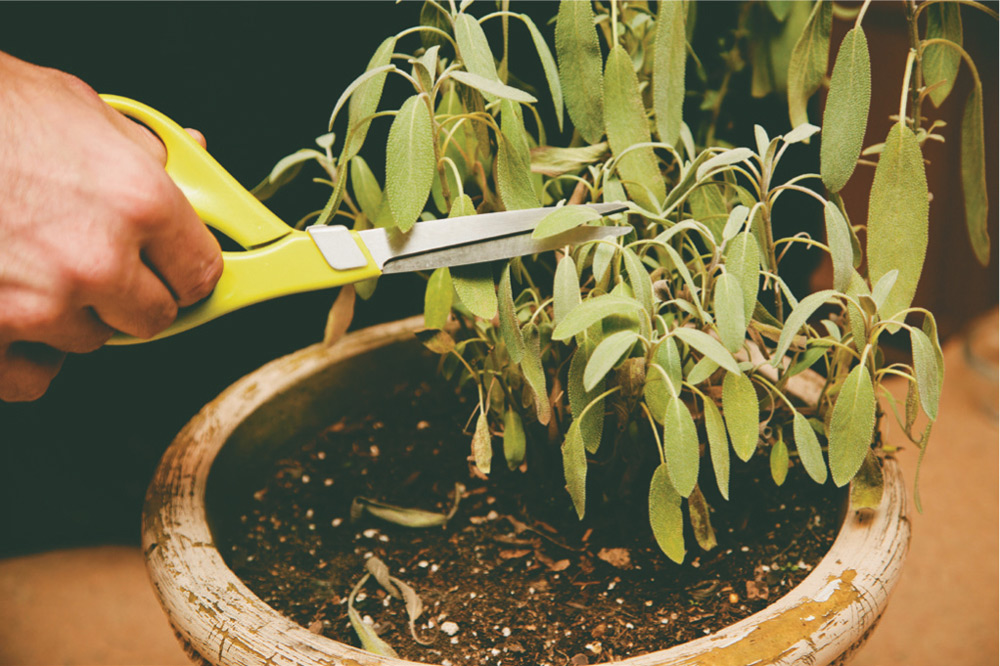
Sage: It isn’t too difficult to get sage started indoors, but it’s prone to death by overwatering. There have been many times where I see those tough leaves and think the plant looks dry, and then I end up killing it because it’s already well watered. Also, many experts advise waiting a long time before harvesting while the plant gets established—up to a year in some cases. For me, the space in my kitchen growing area is too limited to nurse a plant that takes months before I can use it, but I do like to have a small pot going because the herb dries so well after harvest.
Herbs are quite finicky when it comes to drainage. Common gardener wisdom is that they “don’t like wet feet,” which means that if their roots get too soggy, rot will result. Every plant type covered in this book (except sprouts) relies on proper drainage to some degree, but for herbs, it’s particularly crucial because they tend to like a more humid environment, making them susceptible to root rot.
Simply using a pot with holes in the bottom isn’t enough, and if you buy a standard type of pot with a dish that catches water, you’ll be in even more trouble. This often leads to an herb sitting in water, which is almost always a terrible situation for the plant.
There are a number of strategies that can be helpful for increasing drainage. Some gardeners use a system designed for growing cactus, because these specialty mixes are designed to drain quickly, but I find that simply mixing sand and vermiculite (in a one-to-four parts ratio) together tends to make a happy blend.
If you are planting herbs from seed, make sure the soil is not too densely packed. If need be, cultivate it by loosening the soil with your fingers.
If you’re transplanting from outside, do as much as you can to remove the existing garden soil by gently shaking or tapping the roots. You won’t be able to eliminate all of the soil, but if you can get most of it, you’ll significantly reduce your expose to garden pests and diseases.
Whatever you use, a good strategy to prevent compaction is to cultivate within the pot every month or so. You can simply take a fork and gently loosen the soil within the container, taking care to stay mostly on the periphery so you don’t damage the roots.
At the risk of harping too much on drainage, I’m going to emphasize the importance of drainage again. I can even put it in italics if it helps: drainage. Herbs just don’t do well at all in any situation where they’re sitting in water, so choose a container or pot that allows for ample flow.
Sure, you can try growing cilantro in your middle school lunchbox or parsley in that repurposed desk drawer or whatever other funky container appeals to you, but if you want to keep the herbs going for a nice long time, drill some holes and maybe even throw some pebbles in the bottom. Your herbs will thank you.
Beyond that, any material works, but I tend to shy away from terra cotta pots because they make the herbs dry out faster, and that throws off my estimation of how much watering they need.
Because of limited space, I gravitate toward smaller pots, but if the herbs begin to spread too far over the edges, or I want to encourage them to get bigger, I’ll repot into a larger container.
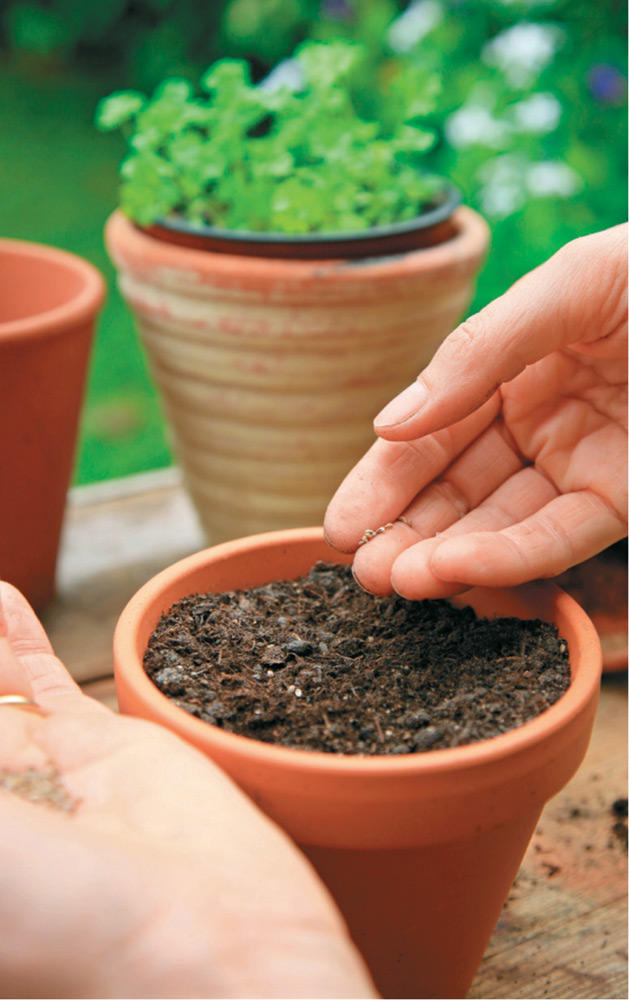
Get your container and soil mix ready (see pages 27 to 35), and give the mix some water so it’s slightly damp. This will keep your seeds from shifting when you first water them.
Sow the seeds about one to three times deeper than the size of the seed. This is a general rule, and what it usually means for me is that if it’s a teensy little seed, I’ll barely press it into the soil, and then I’ll cover it with just a sprinkling of vermiculite. If the seeds are larger, I might press about half an inch and then cover it.
Water lightly, and then cover the pot or container with plastic kitchen wrap. This will keep the soil mix and seed warm, to encourage germination. Put the pot or container in a sunny area or under a light, and when the seedlings emerge, remove the plastic wrap.
Some herbs require specialized care, but in general, most can benefit from these tips for keeping herbs going strong:
Fertilize every 10 days or so with diluted fish fertilizer, found at any garden store. In a pinch, I’ve also soaked seaweed in hot water for a few hours, let it cool, and then sprayed that on the plants. But for this to be an “in a pinch” tactic, you’d have to be one of those people who happens to have dried seaweed in the cupboard.
Herb seeds don’t need to be planted too deep, just press them gently into the soil with your finger.
Herbs like humidity, but it’s not always easy to tweak this condition, especially in the winter. One good tactic is to create a tray of small rocks or pebbles and fill the tray with water, leaving about 1/4 inch of the top dry. Put the pots on top of the trays—making sure they don’t touch the water—and the evaporation process will help to keep the air at a nice humidity level.
Give herbs a regular “bath” by misting every few days. Not only does this help to keep the hydrated, but it also cuts down on insect issues since weakened plants are more susceptible to pests like aphids and spider mites.
Water from the base of the herb, not the leaves. This will help the plant get hydrated, without subjecting it to “flattening out” from too much water hitting the leaves.

Fish fertilizer is available from any garden store, and when diluted, can provide a nice boost for any type of plant.
Potentially, this could be a light issue. Herbs need at least five hours of light per day to stay healthy, and full-on sunshine (provided the area isn’t too hot) is ideal. But in the winter, even a south-facing window might not be enough. If you’re seeing sluggish growth, try extending the time that the herbs are under light, up to fourteen hours if necessary.
If your herbs are under a light source, they may be too close to the bulb. Basically, you’re burning them. Herbs should be at least 6 to 8 inches away from the light source, and that distance is measured from bulb to the top of the plant.

Some herbs, like sage, are prone to browning or yellowing of the leaves. Often, it is caused by overexposure to heat.
This might be natural seed germination, but it could also be mold. Check that you’re not overwatering—if you put your finger into the soil mix and feel moisture immediately, then this could be the issue. Let the plant “dry out” and isolate it from the other plants in the meantime. Remove the moldy areas, but be aware that you may need to start over with this one.
This may be another incidence of overwatering. Stems tend to feel too soft when root rot is occurring. Another big indication of problems is a foul smell mixed in with the pleasant herb scents.
It’s so disheartening to lean over a pot of herbs, ready to snip off a few selections for dinner, and see that something else is ahead of you in the buffet line. If this happens, isolate the plant and try a soap spray—this can be a mix of mild liquid soap (like Dr. Bronner’s) and water. Spray in the evening, since application when the plant is in full sunlight can cause drying.
Each herb is harvested in its own way, but in general, go for the “older” leaves that are full. Look for new growth, usually near the center of the plant, and avoid clipping near that area since you don’t want to shorten the lifespan of the herb.
If a plant begins to flower, snap off the flowering part as soon as you can to prolong the herb’s timeframe—like many plants, herbs begin flowering as a signal that they’re done growing (it’s a process called “bolting”). By removing the flowers, you can essentially trick the plant into sticking around for longer.
When harvesting, keep in mind that stems tend to have abundant flavor as well. For example, cilantro stems are just as intensely flavored as the leaves.
CORRECT: Cut older, mature leaves on the outer area of the plant.
INCORRECT: Do not harvest the new, inner growth of the herb plant.
Due to a recent homesteading kick, I’ve been experimenting with various ways to preserve just about everything, from canned cabbage to dehydrated celery. Compared to trying to preserve artichokes, herbs are a snap.
There are so many ways to make sure that your herbs can last for months. The quickest method is through drying—simple create a bundle, strip off about an inch of leaves to expose only stems, tie with twine or a rubber band, and hang up in a cool, dry area. There’s a section of my basement that smells pretty amazing at this point, thanks to multiple herb bundles. The advantage of drying is that you can leave the bundles hanging for quite a while, or just crumble them when they’re completely dry and put them into glass jars.
Another storage option is preservation in olive oil. Make sure the glass jar is very dry, and then fill it with herbs like basil, thyme, and oregano, as well as other ingredients like garlic. Fill the jar with olive oil, making sure the oil completely covers the herbs, and in about six weeks, the oil will be infused with flavor. After that, you can strain out the herbs and drizzle the new creation over whatever you like.
Similarly, you can finely chop herbs, put them in a glass jar, and cover completely with honey. In six weeks, the flavor will infuse the honey, and in this case, I don’t try to strain out the herbs. This blend can be used in place of jam on toast, or some people simply eat a spoonful when they’re feeling energy depleted, especially if more medicinal herbs are used.
Overall, herbs are a stellar addition to any kitchen garden, and incorporating even just a few favorites can help boost the flavors of your dishes. At this point, I’m irritatingly snobby when it comes to “fresh” herbs that I see at the grocery store, since they look so tired and depleted. Knowing that my herbs are harvested only about ten minutes before I enjoy them makes me feel spoiled, especially in the winter when that level of freshness would be so difficult to achieve otherwise.
You have to make a significant commitment of indoor real estate to grow enough basil to keep your kitchen stocked in pesto. But if you love fresh pesto you’ll find the space.

Herbs are built for garnishing; and not parsley alone. A sprig of thyme gives life to any egg dish, and also blends with this savory carrot soup.
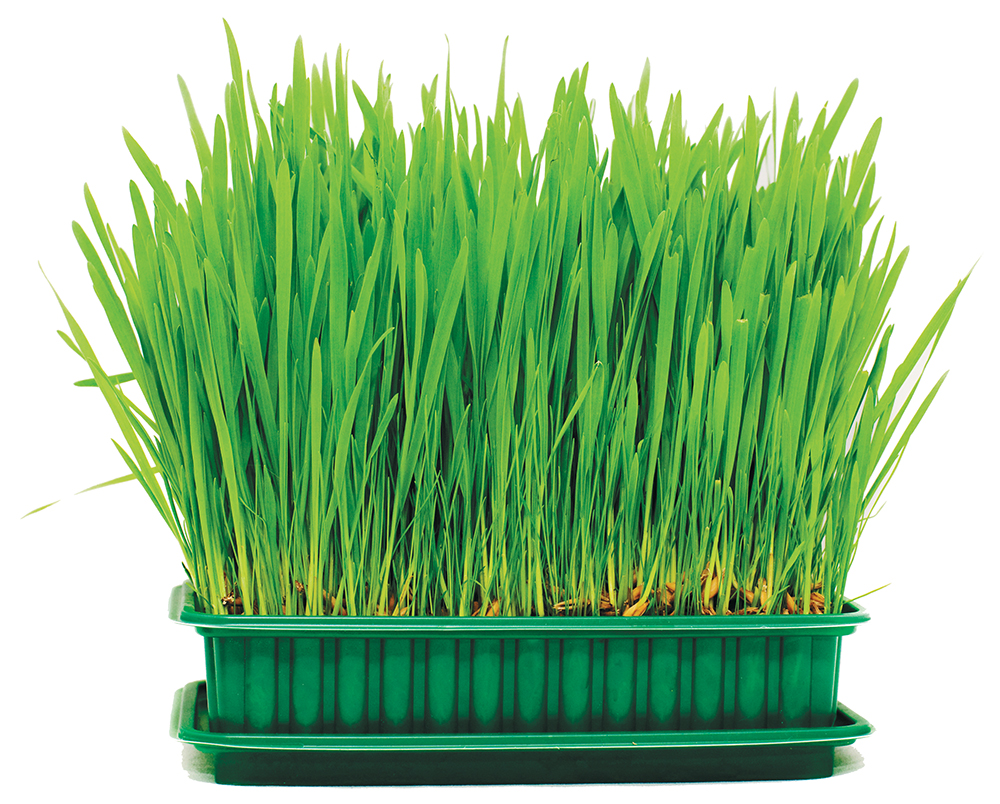
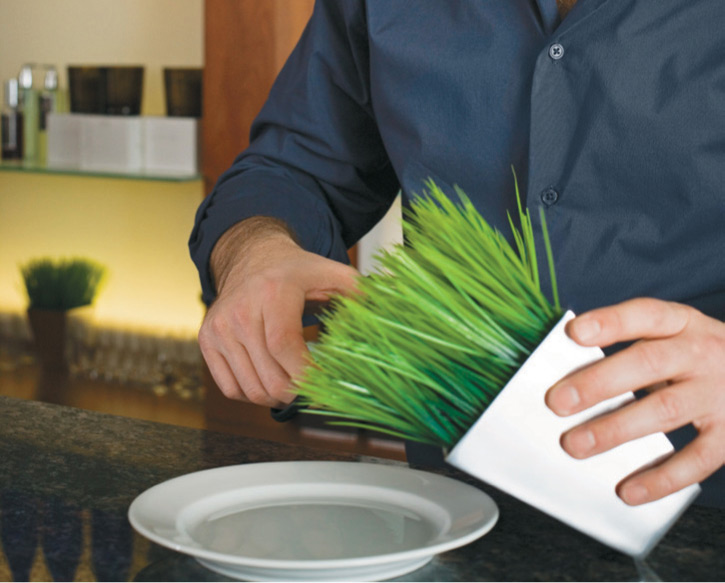
WHEATGRASS & PET GRASSBefore I began growing wheatgrass myself, I considered the plant to be something of a 1970s throwback, making me think of hemp burgers, bell bottoms, and paisley. Since I’ve seen all three of those on a recent shopping trip through Target, maybe it’s safe to say that retro is the future.
For those of us who’ve become fans of wheatgrass, it’s very fortunate that it’s not relegated to the hippie era, or even to the 1980s-esque power generation of juicing and shoulder pads. Instead, wheatgrass seems to hang on through the decades, and that’s for good reason.
All kinds of claims have been made trumpeting wheatgrass’ benefits, from curing cancer to prolonging a youthful glow without plastic surgery. But despite the hyperbole, some of the more impressive claims actually have scientific backing. According to the Mayo Clinic, a leading healthcare and research institution, wheatgrass is nutrient dense, and provides a concentrated amount of iron, calcium, magnesium, amino acids, chlorophyll, and vitamins A, C, and E. The Mayo notes that there are no significant research studies to support health claims, but does acknowledge anecdotal evidence that wheatgrass can boost immunity, rid your body of waste, and kill harmful bacteria in your digestive system.

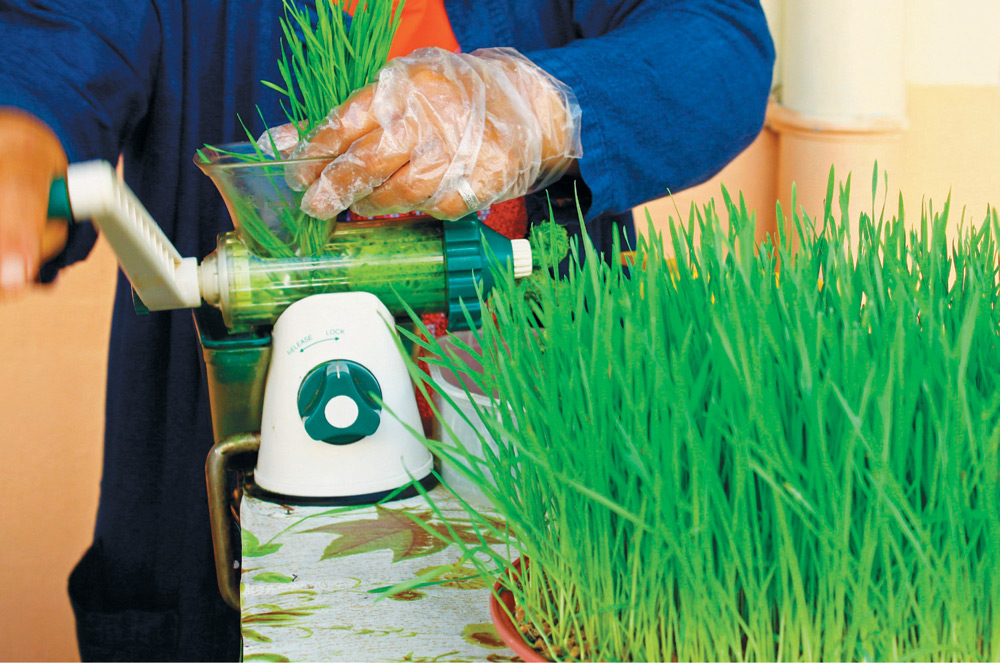
Smoothies and juice are the most common forms in which to consume wheatgrass, although many who believe in its health benefits simply blend it up and take a wheatgrass shot like the one above.
In terms of taste, that’s another matter. Not surprisingly, I find it strongly grassy, and feel a bit like a goat whenever I have a wheatgrass shot, but I can’t deny that I feel an energy jolt about ten minutes later. Also, if you’re juicing or making green smoothies, wheatgrass is incredibly easy to add into the mix without making the whole concoction taste like you’re gnawing on sod.
Best of all, it’s simple to grow. Before we get into the specifics, I also included pet grass in this section because you can grow it using the same tactics, and it’s purported to have the same type of benefits for pets that wheatgrass does for humans. I’ve heard from several gardeners who grow pet grass rather than catnip because it’s a good digestive aid that doesn’t make their cats race around the house looking for trouble. Pet grass also makes for nice critter control if you put some in front of other plants—cats will nibble on the grass and hopefully lose interest in the other options.

Cat grass is good for your pet’s digestive system, especially if your cat is an indoors-only pet. If you place the plants strategically, you may be able to distract the cat from nibbling on the other edibles you’re growing.
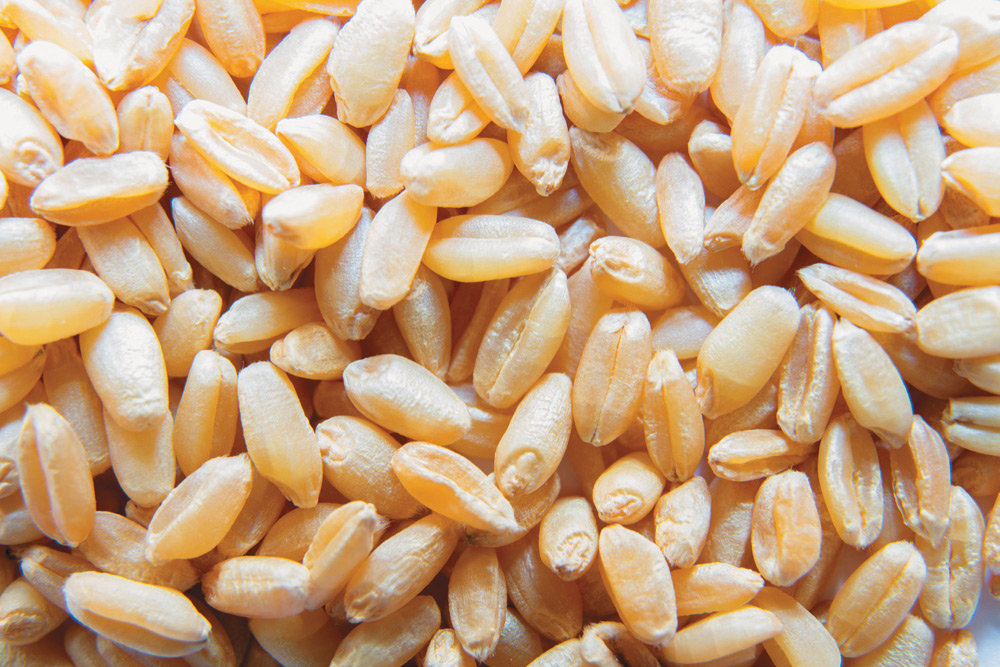
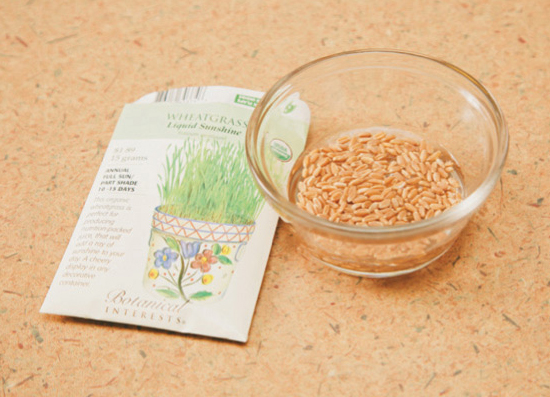
Wheatgrass seeds are also known as wheat berries or hard winter wheat seed. Some of these types of seeds are sold as cover crops for farmers and may be pretreated with pesticides, so please source carefully. Check out the Resources page in the back of the book for options (I’m only including reputable purveyors with plenty of organic and sustainable choices), and if you’re buying locally, you can sometimes find good wheatgrass seeds at co-ops and health food stores, or garden stores that sell organic seeds.
Pet grass, also called cat grass or catgrass, is a cereal grass as well. Although it may be the same as wheatgrass, it could also be grown from buck-oat grass seeds. They provide cats with added roughage in their diets and help to remove hairballs.
In other words, pet grass and wheatgrass can be the same thing, but it’s often nice to grow two different types in order to keep a feline from seeing your entire wheatgrass tray as her domain.
Pet grass (also called cat grass) can be grown using the same seed as wheatgrass, or it may be grown with buck oat grass seed.
Since wheatgrass and pet grass grow very evenly, I like to use a flat tray with drainage holes in the bottom, to maximize the space. But you can also grow on a smaller scale by repurposing the type of clear plastic pint containers used for selling berries, for example.
These containers are ideal for this purpose because they already have holes in the bottom, can be easily shifted to different spaces, and the clear plastic lets you see the roots growing inside—a surefire way to get kids more interested in gardening, but also quite cool for adults. That might be my garden geek side talking, though.

This may not be the safest container, but there is no reason you can’t grow wheatgrass in recyclable cans.
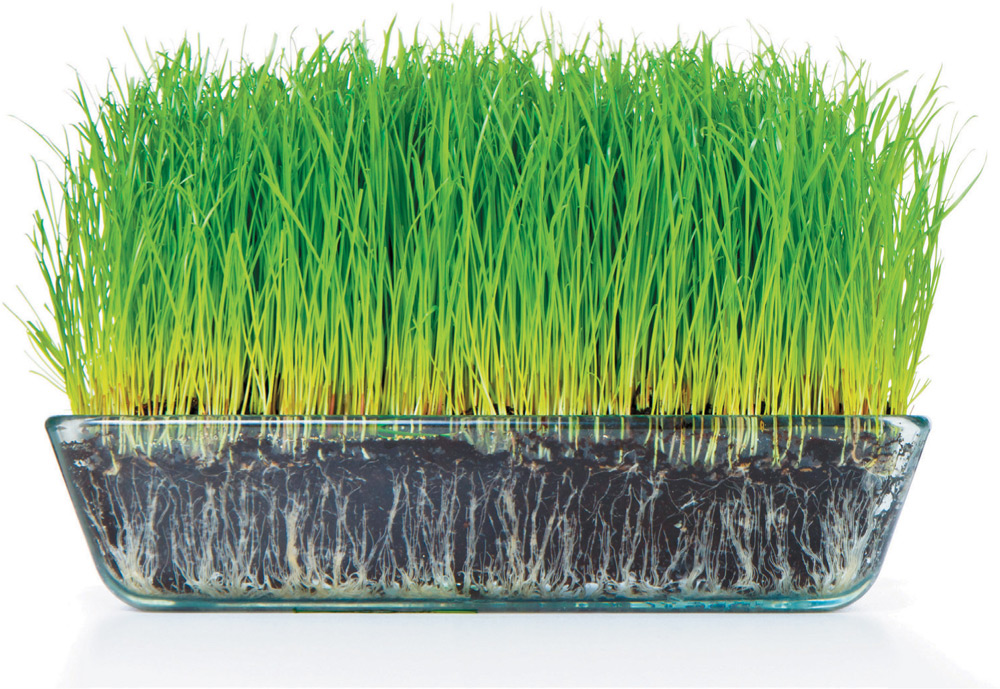
Wheatgrass grows very densely and can be planted in shallow plastic trays. Some wheatgrass growers prefer to plant in clear containers so they can see the impressive roots system develop.
Although drainage is important, you can use just about any flat vessel you like to plant wheatgrass. If the conditions are right it grows so quickly that many of the afflictions caused by poor drainage don’t have the opportunity to take hold.
Whatever you choose, adequate drainage ensures the best growth, but this is one time that I’m not going to drone on about how it’s mandatory. I’ve seen plenty of examples of gardeners who use old cake pans or Pyrex dishes (again, to show off the root system) for their wheatgrass and they do just fine. That’s because wheatgrass, once it’s established, is pretty hearty and grows quickly, which means there’s less risk that you’ll be watering it for months and risking root rot.
Wheatgrass tends to do best when it’s soaked prior to planting, after first giving the seeds an initial rinse.
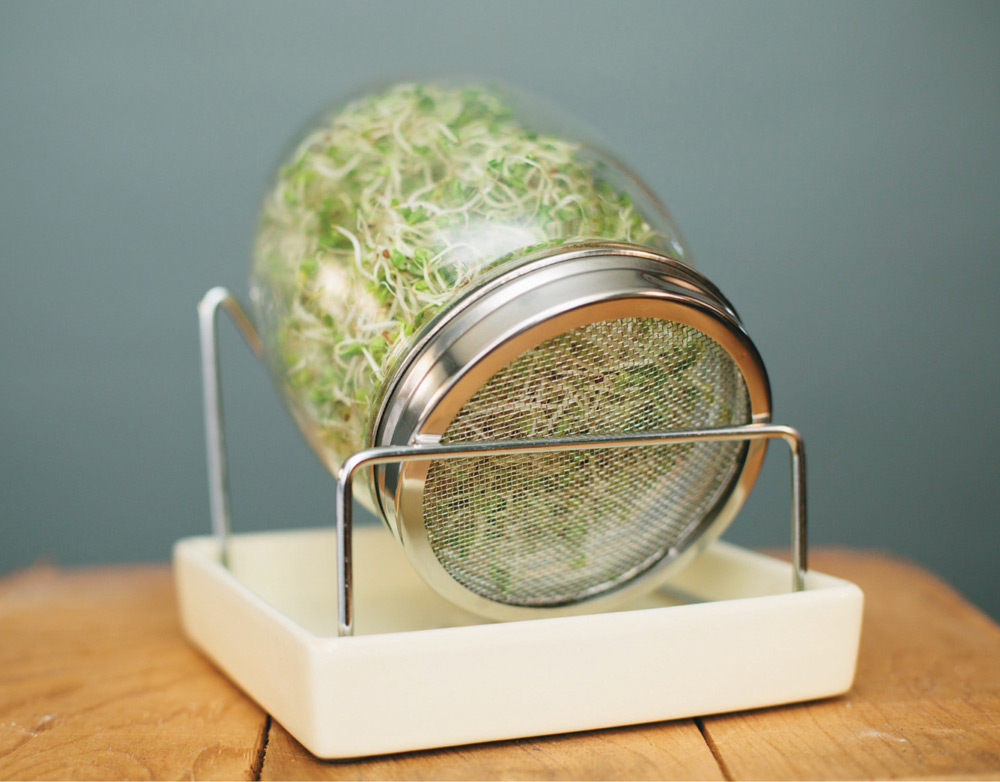
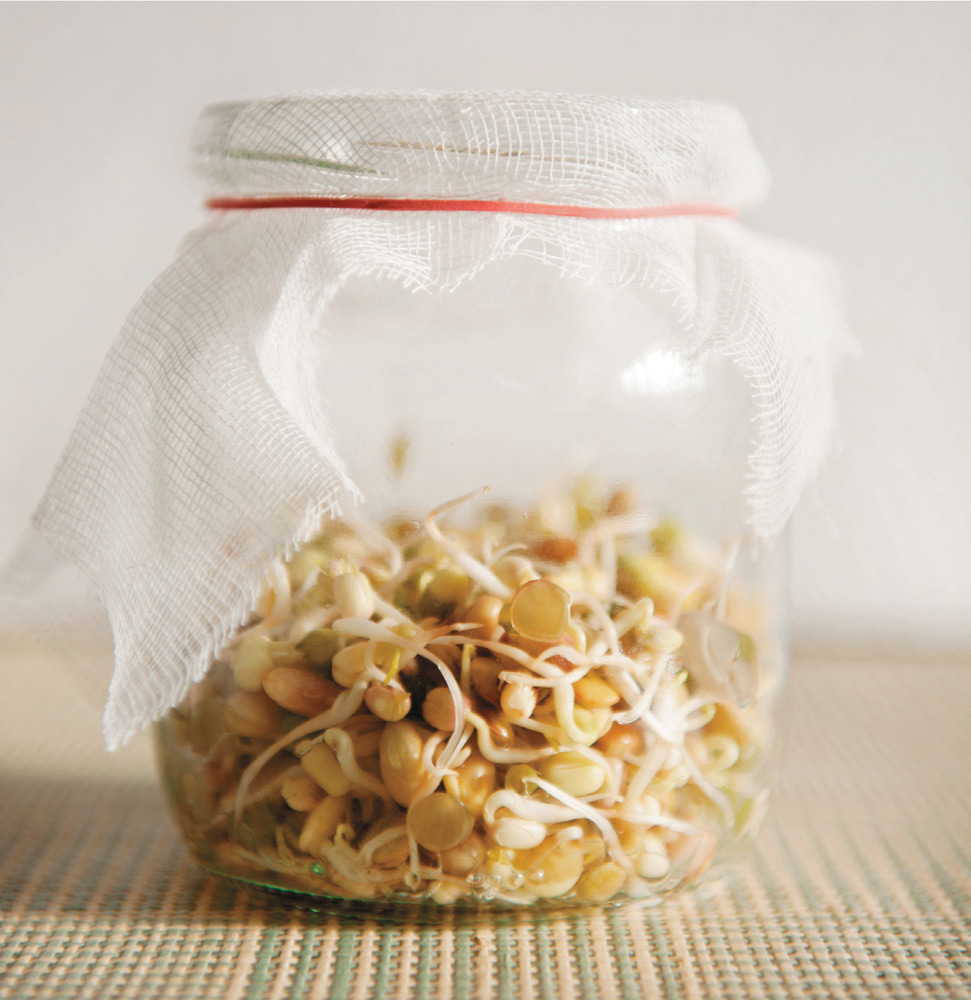
If you want to get deeper into eating sprouted greens (like alfalfa, broccoli, bean sprouts, etc.) then it might make sense to purchase a sprouting device, usually called a sprouter. There are some automatic sprouters available, but the most affordable options are often the manual devices that you can get for under $20. Some feature multiple trays for drainage, and you can even grow microgreens in them without a growing medium. A very simple option is the Easy Sprout, which looks like a plastic drinking cup and features a small seed insert and a base that catches excess rinse water.
Since I prefer to grow wheatgrass in vermiculite with a little compost mixed in, I just let my seeds soak in a bowl rather than utilizing a sprouter. There are several steps to the process:
Soaking wheatgrass seeds helps them to germinate quickly.
When preparing the seeds for soaking, add around three times as much water as you have seeds, since the seeds will absorb some of the water; filtered water tends to work best.
Cover the bowl with a dishtowel or plastic wrap and let it soak for about eight hours or overnight.
Drain the water, rinse the seeds until the water runs clear, and re-fill the bowl with another round of filtered water, letting it soak again for eight hours or overnight.
Drain once more, rinse once more, and you guessed it: one more round of soaking, because for some reason, the third time is the charm.
After that third night of soaking, drain the water and give it one more rinse; the seeds should have fine, wispy, hair-like roots jutting out from the seed.
For soil mix prep, it’s sometimes useful to premoisten the soil, especially if your house tends to be dry.
When blending water and soil mix, go for a consistency that’s like a crumbly brownie mix—then pick up a handful and squeeze. If a few drops of water come out, that’s perfect. If there’s a steady stream of water, it means you’ve made the mixture too wet, and you should add more dry mix. You’ll only need a thin layer of this mix for the wheatgrass, and you can add vermiculite to encourage drainage.
If you’re using a tray or pot with drainage holes, put a paper towel in the bottom first before adding soil. This ensures that the roots won’t extend through the holes and attempt to take hold of whatever surface is below the tray. This seems to happen whenever I’ve forgotten the paper towels, and since I sometimes set my plants on a metal grid, like an old cooling rack used for baking, I always end up having to pry wheatgrass roots out of the rack.
On top of the paper towel, spread about 2 inches of your soil mix, making sure that’s even but not pressed down firmly, which causes compaction.
Spread the seeds evenly across the top of the soil mix, and sow them heavily. Like microgreens and shoots, the seeds can be thickly sown to make harvest easier and growing more efficient. Press the seeds gently into the soil, but don’t press them down to the point that they go beneath the soil’s surface. Water the tray lightly—I usually do a heavy mist to make sure I’m not introducing too much water.
To protect the seedlings, cover the tray with another tray, a plastic dome lid, or some wet newspaper with small holes poked in it to allow for airflow. Wheatgrass responds well to the wet newspaper strategy, which I only utilize for growing that little crop, because I find it too messy otherwise.

If you are growing in a tray with drainage holes, line the tray with paper toweling first to keep the roots from growing out of the container.
For the first few days, make sure to mist at least twice per day, keeping the soil moist but not soaked. Also give the newspaper a good spritz so that it doesn’t dry out. If the growth is pushing up against the newspaper sheet, then switch to a taller cover, like an inverted tray or dome lid.
About three to five days after planting you should see significant sprouting, to the point that it pushes up the inverted tray, and the grass is about 2 inches tall. It may be yellowish at this stage, but don’t worry, it will green up quickly with some light.
At this stage, move the tray to an area with indirect sunlight. Direct sun often “burns” the wheatgrass, so a shady spot is ideal.
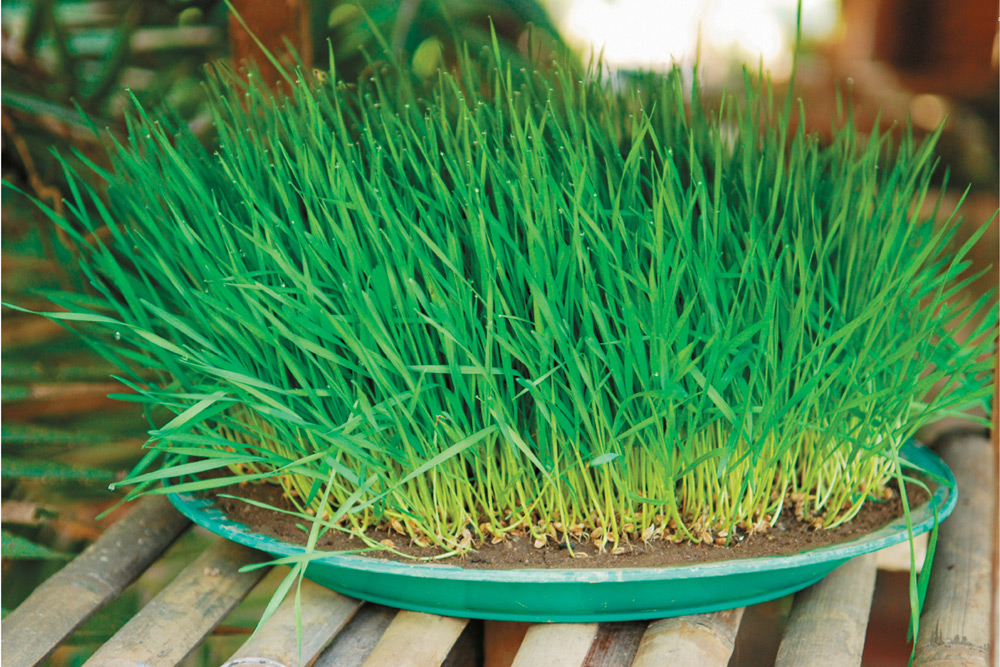
The grass will grow steadily upright, and look like a very thick, very green shag carpet, and you can harvest in only about five to ten days after planting, depending on the stage you choose.
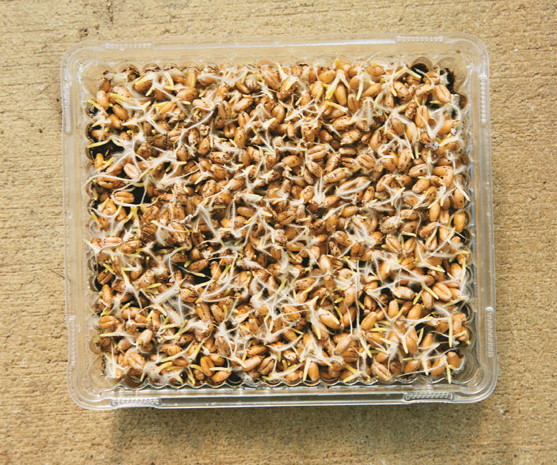
If you’ve triple-rinsed the wheatgrass seeds and prepared the growing medium properly you should have sprouts within three to five days.
One of the best aspects of wheatgrass is that it’s a very low maintenance plant. You can spray some kelp fertilizer on the greens or in the soil if it seems like it could use a boost, but otherwise, just make sure to keep the soil mix moist with a heavy mist once per day.
Here are some other tips on getting the most out of your growing adventure:
Always have several trays going in different stages of growth. In order to juice wheatgrass, you need a lot of shoots. Some people use an entire tray for just one juicing session, and it doesn’t make very much, compared to vegetables like carrots or beets. For that reason, it’s a good idea to time your harvest and growing cycles to get in the rhythm of having another tray growing while you harvest from your first one, and also a bowl of seeds soaking so you can plant more before that second tray reaches maturity.
If you plan on storing your wheatgrass in the fridge rather than juicing or blending it immediately (see “Storage Considerations” on page 81 for more info), refrain from misting or watering for at least twelve hours before harvest. If the grass seems dry, you can water the soil, just make sure that the grass itself isn’t moist, because even a small amount of moisture can affect storage times and make your harvest a quickly deteriorating mess in the fridge.
Keep airflow steady, especially during humid months. The biggest challenge that crops up with wheatgrass is mold, and this can happen when the air is humid, the tray is overwatered, and there’s no air circulation in the room. Putting fans in strategic locations can help enormously. The easiest way to tell if you already have a mold issue is to check the base of the grass blades—mold will appear as white tufts. If this is happening, remove all diseased grasses and refrain from eating the wheatgrass until you’ve determined that mold isn’t present in the rest of the tray. Since you won’t be cooking the wheatgrass, it’s especially important to make sure that mold isn’t present in anything you’re consuming.
During the initial soaking and sprouting process, it’s important to give the seeds some room to sprout. They don’t require a vast amount, but they should get some space. Usually when only some of the seeds are sprouting, it’s because I’ve tried using too much seed for one bowl, so they end up too dense and it stunts their germination. Another issue may be age of the seeds. Like so many things, seeds are cheaper when bought in bulk, and considering the amount of wheatgrass seed needed to create a lush bed, buying in larger quantities often makes sense. But when projects get put on hold and seeds age, sometimes germination can be affected.
This often happens when I get lazy about rinsing the seeds during the soaking process. It’s a crucial step, because otherwise your seeds are subject to rot. Essentially, if you don’t rinse until the water runs clear, and you don’t change the water consistently, you’re starting to ferment your seeds, and that will severely stunt growth if you manage to get any growth at all.
The nice thing about wheatgrass is that it’s meant to be speedy in terms of growth, so if you’re waiting and waiting for the magic to happen, it usually means something has gone awry. Check the soil to make sure that it’s well watered but not soaked, and that the tray is positioned in indirect light. If those factors are in place, then it might be because you’ve seeded too heavily, the room is too cold, or you lack air circulation. Try using a heat mat under the tray if room temperature is the culprit, and place a fan so that it’s blowing near—but not directly on—the wheatgrass. If growth is still impacted, then it’s probably heavy seeding, and you can keep this in mind when doing your next round.
There’s indirect light and then there’s deep shade—when the grasses stay yellow, it’s likely that you have the tray too far from a light source, so they can’t take advantage of the photosynthesis process to “green up.” They would still be edible, but weakened and not as nutrient-dense. Simply move the tray to a location where there’s more indirect light, such as to the side of a window, or near a fluorescent light but not under it.
The opposite problem of yellowing is browning, and it’s also related to light. In this case, it’s likely that the tray is receiving too much direct light either by being put under a fluorescent or in a window space that receives direct sunlight. Essentially, you’re cooking the plant in either case. I’ve found that this often happens when people place the tray in indirect sunlight in the morning, and then leave for work—because they’re not home in the middle of the day, they don’t know the light pattern shifts for that particular area, and by the time they get back, the plant is once again in indirect light. But it’s possible that it could be getting full sun for a few hours per day, which will start the browning process. Some direct sun is fine, and can actually help green up some trays, but too much is a detriment.
Although we’ve covered this briefly in the previous section, it’s worth putting more strategies in place to prevent and deal with mold, since it can be hellaciously prevalent in some growing systems. Here are some more tips on dealing with the issue:
Soak your seeds for a shorter amount of time; if your house is humid, you may want to soak for only about six hours.
If the problem seems chronic through multiple rounds of growing, try adding grapefruit seed extract or citrus seed extract to your soak water—about 10 drops should suffice.
Move the growing trays to a cooler location, like a basement; be sure to put lights and fans in place for the new grow space.
Consider waiting for cooler weather to continue growing; if all else fails, aim for spring or fall for planting to avoid humidity issues. You can always grow a massive amount of wheatgrass during these times and then freeze the juice (see Storage Considerations section) for consumption during the summer.
You can harvest the grass at any point in its lifecycle, and you may want to experiment with taste, to see if you prefer younger wheatgrass when it’s only about 3 or 4 inches tall, or if you like the mature stage at around 6 inches tall.
Once they reach the mature stage, the grassy shoots will “split,” which means that a second blade of grass starts growing out of the initial blade of grass. This is the most common time for harvesting, because when it gets longer than this, the taste becomes woody and you risk yellowing of the stems, which is an indication of nutrient loss.
To harvest, grasp a small section by the top and then clip the grass just above the root level. You can harvest only as much as you need, and spread out the harvest time over a few days if desired.
Just be sure to keep watering the wheatgrass that’s remaining, as well as the areas where you’ve harvested. Often, you can get a “second crop” that sprouts from seeds late in germinating. In some cases, you might see a third rotation of growth, but taste these sprouts before using them—they can sometimes have significantly more grassy flavor than the first harvest round. If you’re throwing them in a green smoothie or juicing with other fruits and vegetables, this may not be important to you, but if you’re hooked on wheatgrass shots, it could be a major difference from the taste you prefer.
Wheatgrass or pet grass is ready to harvest when the plants are 3” or 4” high—just cut the grass near the roots with scissors.
Wheatgrass itself isn’t usually an ingredient in dishes, and is used instead in juicing or in making smoothies. Because of that, the best way to prepare it is to cut it fresh, throw it in your blender or juicer (you may need a special attachment for the grass, depending on model) and drink it immediately.
When you cut it and then try to store it, there tends to be a loss in nutrient density, which is why you’re growing it in the first place, so just make it easy on yourself and only have it fresh. That said, maybe a whole tray is mature and you want to catch it before it gets too grassy—in that case, dry out grasses by refraining from misting for twelve hours, harvest, then put in a glass container or plastic bag and keep in the crisper drawer of your fridge.
Cut wheatgrass can simply be pureed in a blender to create juice, or you can use a hand-operated or power juicer. Whichever way you choose, be sure to juice the grass as soon as possible after picking it.
Another good tactic is to use a produce storage bag, which I utilize often when I know that I need to keep vegetables fresh for longer periods of time. These bags, found at co-ops and other stores, look like tiny laundry bags, with a thin mesh and a drawstring. Because they allow the vegetables, shoots, and sprouts to “breathe” while in the fridge, they prolong freshness.
You can also employ a very easy storage method by blending or juicing wheatgrass by itself, then putting the juice into ice cube trays. When they’re frozen, pop them out and put them into a plastic freezer bag. These are great when blending up green smoothies, because they give you the fresh wheatgrass nutrition and flavor, and thicken up the smoothie, too.
SPROUTSWhen you’re short on space and resources, sprouts make an easy indoor growing project. Basically, you just need seeds, a glass jar (more on that soon), some cheesecloth or a thin dishtowel and voila! You’re on your way to becoming a sprout expert.
Nutritionally, sprouts are also packed with enzymes, fiber, amino acids, vitamins, and other goodies that help boost your immune system and keep your health on track. Plus, they’re delicious and quite simple to grow on a continual basis.
I tend to take on a sprout growing session in the depths of winter, when other plants might be slowing in their progress. In a Minnesota February, even microgreens will take longer to turn from seed into lush green carpet, so sprouts help me to get a nutritional charge while I’m waiting. Not all sprouts appeal to me in terms of taste, though, and it’s likely that you’ll make the same discovery—for me, I like sprouts with a kick like mustard or radish, but those with a more earthy taste (like alfalfa) just aren’t my groove. And that’s okay, because there are plenty of options when it comes to choosing what type of sprouts to grow, and finding out what you like is part of the sprouting adventure.
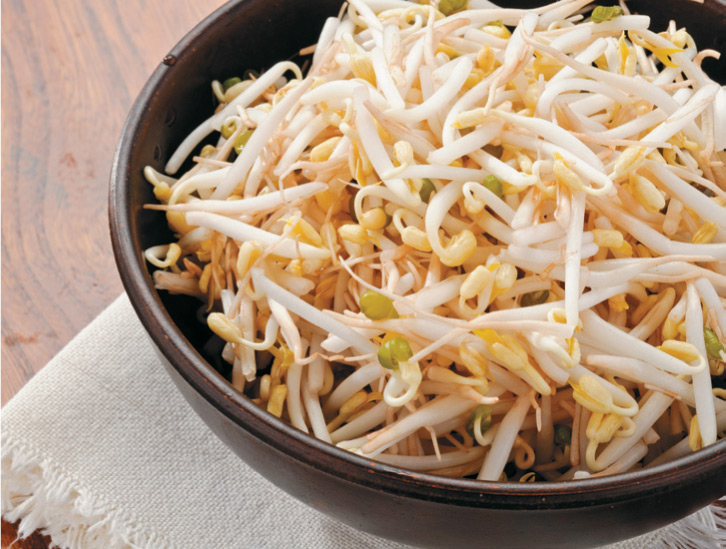
Sprouted soy beans are one of the most popular (and easy to grow) types of sprouts. They are good for garnishes but also good by the bowlful.
There are many choices when it comes to sprouting, and much like microgreens, they encompass a sizeable chunk of the vegetable kingdom. You can sprout dill seeds, fenugreek, chives, peas, wheat, and tons of others. As you get more confident in your sprout setup, you can play around with different options, but in terms of getting started, these are some popular choices:
Alfalfa: This one is the classic sprout, with a mild and nutty flavor, and it makes a nice starting point for sprouting.
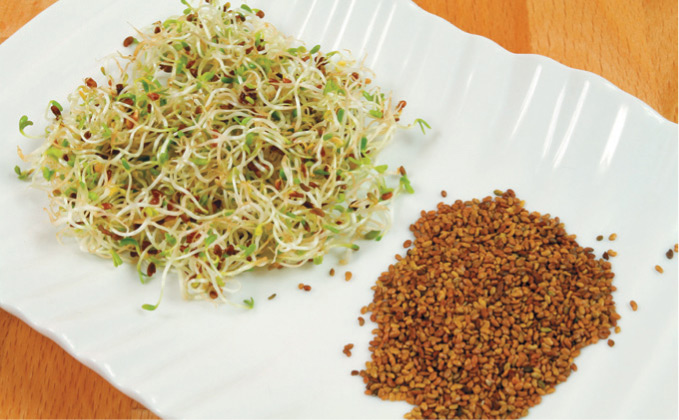
Before and after: Alfalfa seeds and sprouts
Broccoli: Research from Johns Hopkins University noted that broccoli sprouts present an “exceptionally rich source of inducers of enzymes that protect against chemical carcinogens.” Plus: tasty.

Sprouted broccoli seeds
Mung bean: Many types of beans can be sprouted, and this is one of the most sprouted. Personally, I’m not a fan of the taste, but I’ve talked to people who eat them every day and find them rich and flavorful.
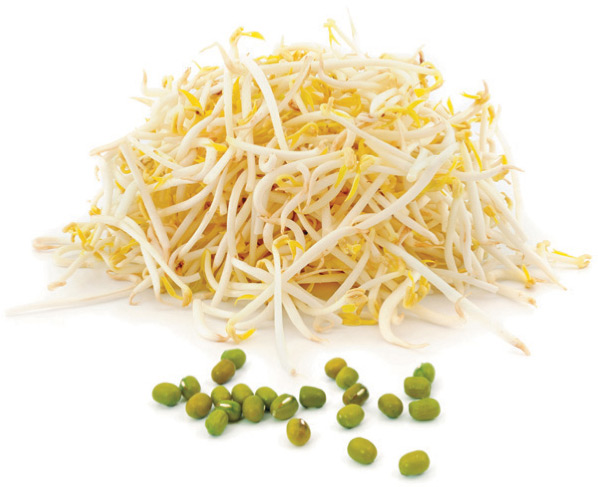
Before and after: Mung beans and sprouts
Blends: If you look online for sprouts at locations like Sprout-people.com, you’ll find a number of mixes with multiple types of seeds, and this is always a nice option. For example, an “Italian Blend” will pair clover, garlic, and cress, or a grain mix might include wheat, rye, oats, kamut, and quinoa. These are usually a very cost-effective way to get multiple types of seeds without buying them individually.
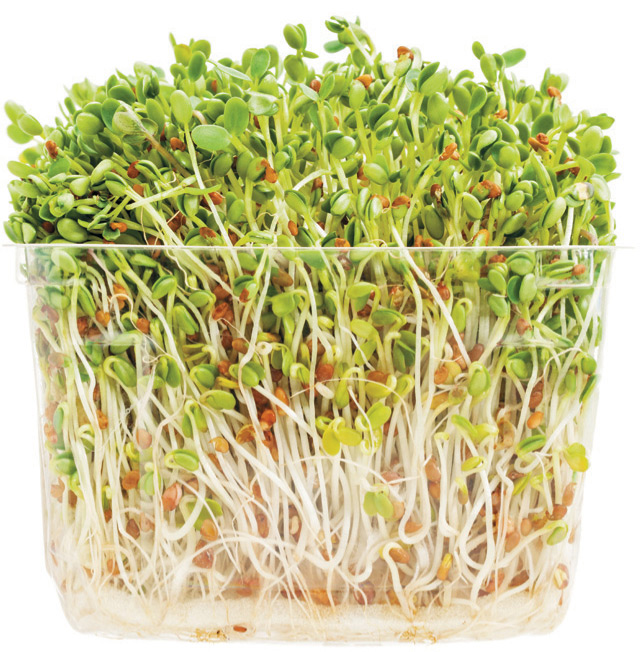
Clover and radish sprouts
Others: In theory, you can sprout any seed you wish. In practice, of course, some just taste better than others. In addition to the other sprouts on this page sprout seed catalogs and retailers sell some of the following: fenugreek, daikon radish, edamame beans, kale, sunflower, buckwheat, and onions.
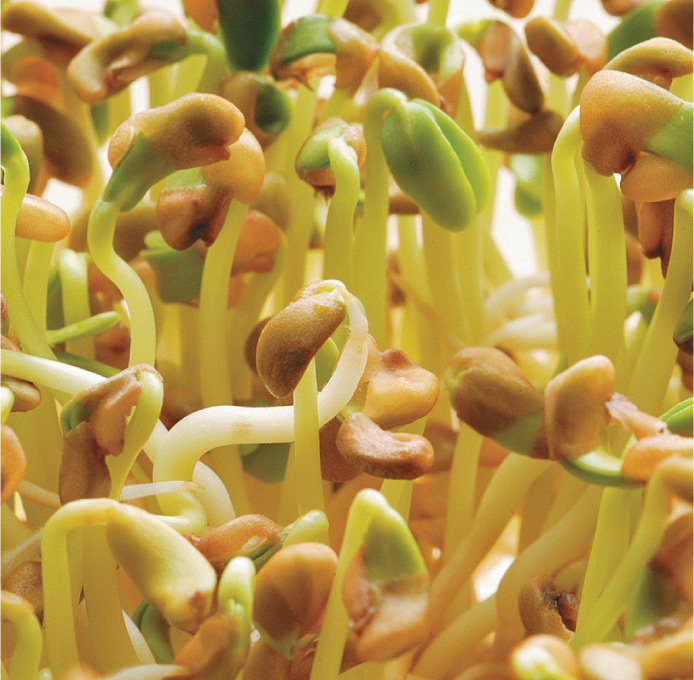
Fenugreek
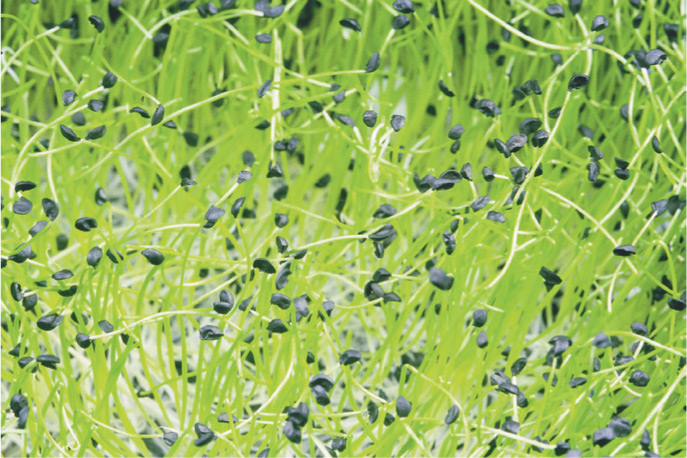
Onion
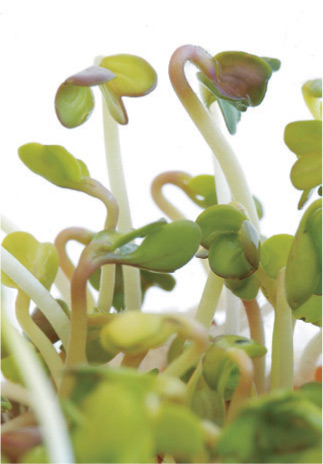
Daikon radish
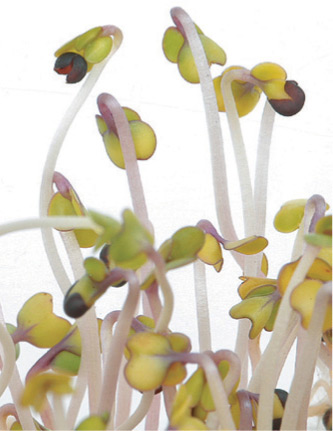
‘Red Russian’ kale
There are plenty of options when it comes to abundant sprout growth, and check out the Resources page in the back of the book for some good sites to peruse for supplies.
If you plan on growing sprouts often, consider getting a sprouter. These devices range from a small, cup-like container that’s usually around $10 to a multitray sprouter that lets you grow numerous types of sprouts simultaneously.
These larger sprouters can be fun, creating little sprout skyscrapers in your kitchen, but keep in mind that you’ll need to really stay on top of the process if you have multiple sprout types growing on different timeframes. Sprouts aren’t difficult to grow, but they do require specific care done at regular intervals, so unlike shoots or even microgreens, you can’t start them and then go away for a few days. But if you’re turning into a sprout enthusiast and your counter is taken up by too many jars and containers, a multitray sprouter may be just what you need.
However, if you’re just getting started and you want to experiment with just one sprout variety at a time, then simplify your setup by utilizing only a glass jar (I use a quart-sized Mason or Ball jar) and some cheesecloth or a thin dishtowel for placing over the top. The sprouting seeds will need some air circulation but will be sensitive to dust, so refrain from using a heavier lid, since it will trap moisture.
For small-scale sprouting, and a kickstart to your sprouting efforts, a sprouter can be helpful. There are many types of sprouters for sale today. The one above is European and features three small round sprouting trays.
An assortment of seeds sold and packaged specifically for sprouting.
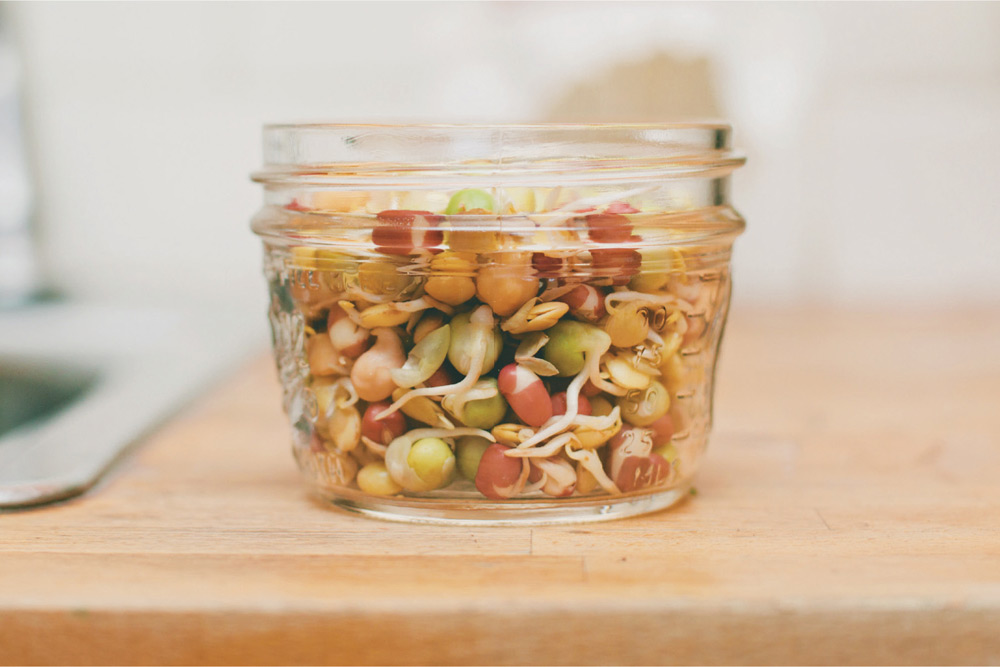
Any small jar can be used for making sprouts just as effectively as special sprouters. Cleaning and rinsing can be more time consuming than when using a sprouter, however.
First, make sure your jar or sprouter is clean. And I mean clean. Sprouts are already susceptible to mold issues, so don’t take a chance by thinking that a few dried flecks of food or some dust won’t be a big deal. You don’t need to bleach the container, but take a few moments to examine it thoroughly after washing and make sure that it’s ready. When prepping containers for sprouting, I prefer hand-washing them to using my dishwasher because I feel that they get a better scrub that way.
Put about a tablespoon of seeds in your jar or container and cover them with several inches of warm water. I tend to use filtered water since I find I get better results that way, but sometimes use tap water if I’m in a rush. Here are steps from there:
Let the seeds soak overnight, or up to twenty-four hours if you’re sprouting larger seeds like beans.
In the morning, or after the soak period, drain all of the water, preferably though the cheesecloth so it acts as a filter.
Fill the jar with a few more inches of fresh water, and immediately drain again through the filter.
Place in an area with indirect light.
Put in fresh water again, and this time place the jar back on your counter.

Put just a tablespoon of seeds or beans into a jar and cover with several inches of warm (not hot) water.
Repeat this process—drain, refill to rinse, drain again, fill with fresh water—every morning and evening (every twelve hours, roughly) for the next four to six days, until the sprouts have grown to a stage where you’re ready to harvest them.
Before eating, give the sprouts one last rinse, and get as much water out of them as you can. Then you can simply place the jar in the refrigerator.
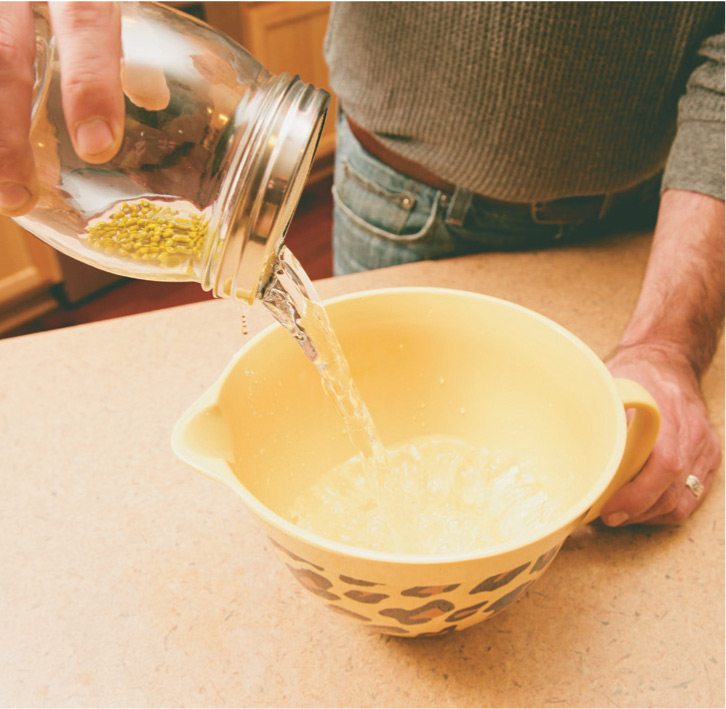
Drain the seeds by pouring water out through the mesh sprouter lid. Or, a cheesecloth cover on a glass jar helps airflow, and also makes a handy strainer when draining and rinsing your seeds.
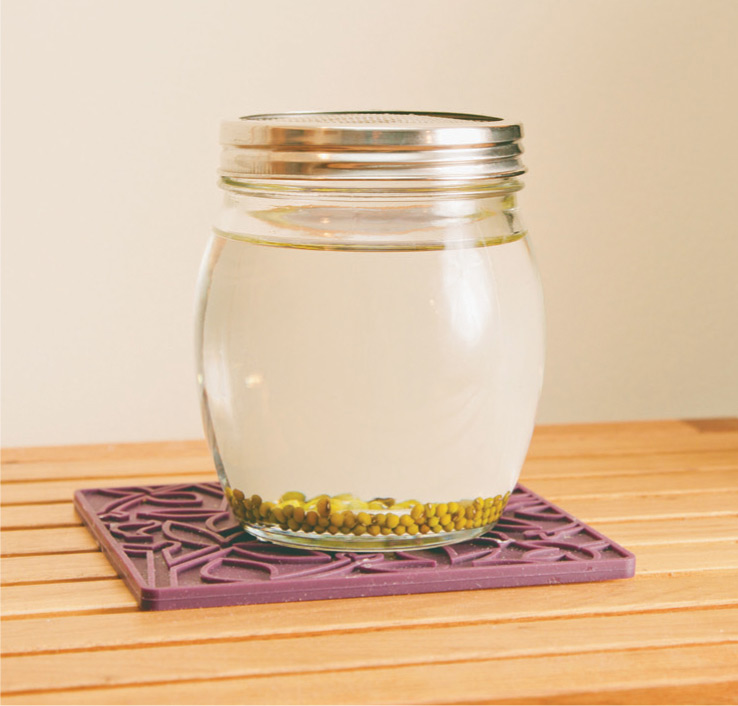
Always keep sprouts in indirect light when first growing them, so they don’t “burn” in the sunlight.

Rinsing sprouting seeds is a vital part of the process—otherwise, you can introduce bacteria that will wipe out your efforts.
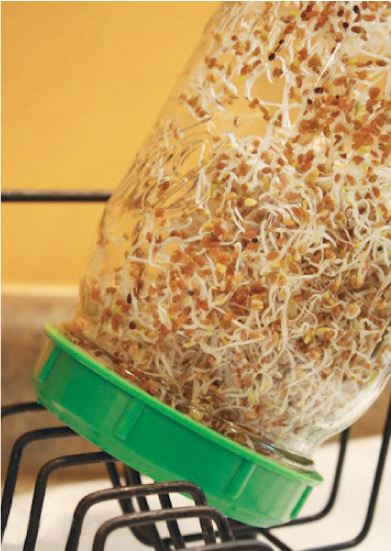
Give sprouts a final rinse and let them drain before you eat them up.
Of all the problems with sprouts, this is the largest. You really have to stay on top of the rinsing schedule, because otherwise, you’ll end up with a mushy, moldy mess and will have to start over. If that happens, throw out the sprouts (even if they have a very small mold patch) and start again, being sure to sterilize the jar before you do. If the problem keeps happening, consider using a different container for your sprouting, such as a sprouter or a tray.
If you’re living in a colder climate, sprouts can take a little longer to reach maturity. You can speed up the process by first soaking the seeds overnight before placing them in a sprouter or jar. This will help the seeds to germinate faster. Also, you can choose a sprout type that will be on a faster schedule, like beans. This category includes kidney beans, adzuki beans, cowpeas, garbanzos, and lentils. Beans often take only about two to four days from sprout to maturity.
Although sprouts are fine in an area with indirect light, sometimes they need a boost of photosynthesis. If your sprouts are not getting green, move the container to a location with better light, or near a window. Just make sure it’s not in direct sunlight, since that can dry out the sprouts. Also, keep in mind that not all sprouts will be green. For example, mung beans are a pretty, translucent white when fully sprouted, with a yellowed tip that results from the seed husk.
When you “harvest” sprouts, it just means you pull them out of the glass container and eat them. What could be easier? Just make sure that they pass the smell test—even if I’ve eaten from a jar of sprouts at breakfast, I’ll smell them before putting them on my salad at dinner.
That’s because there are often warnings about sprouts being associated with outbreaks of Salmonella and E. coli, which can happen if the sprouts are allowed to sit in water for too long. When that occurs, bacteria can form and the tender sprouts are vulnerable.
You can store your sprouts in the same jar you sprouted them in as long as you refrigerate them. But don’t wait more than a day or two to eat them.
I’ve found that smelling the sprouts before eating prevents issues. If they are off in any way, the aroma is detectable, in my experience. When in doubt, always throw it out.
Sprouts don’t store well, and even when you put the jar in the refrigerator, the longest shelf life you’re going to get is about a week. Even then, that might be pushing it. The sprouts will begin to show deterioration by getting a little mushy, and before long mold will form. The best tactic with sprouts is to eat them within a day or two after they’re fully grown.
MUSHROOMSFor me, mushrooms always have a little bit of mystery to them. Maybe it’s because I grew up eating only the slimy, canned mushrooms that came already sliced, thrown into a casserole. The only other mushroom encounters I had as a kid were the occasional fleck in a can of cream of mushroom soup—and believe me, if you live in the Midwest, you’re likely to consume your weight in cream of mushroom soup, since it forms the base of about 75 percent of potluck dishes (the rest is Jell-O).
So, when I finally ate “real” mushrooms as an adult, it was a revelation. These days, I seek out exotic mushrooms and befriend people who forage for them. Also, when you’re standing at the co-op and looking at the astronomical price of morels, you probably say, “Who would pay that much for mushrooms?” The answer is: me.
It seems logical that I’d be keen to grow them indoors, and I’ve made many attempts to keep a wide range of mushrooms, but to be honest, there are only a few varieties that really work well (see the varieties section for more info) in my space. I’ve tried to keep logs inoculated with shiitake spawn in my basement, but it can be very tricky to keep humidity and airflow levels perfect if you’re trying to grow from logs indoors. Let’s take a few easier routes instead.
When choosing which type of mushroom you want to grow, it’s important to select spawn (which is what mushroom “starter” is called) that works well with whatever medium you’ve chosen. For example, oyster mushrooms grow best in straw, while wine caps do well in sawdust. So when making a choice, pick your medium first, and then find out what mushrooms grow well in it. Here’s a quick cheat sheet:
Oyster mushrooms
Sawdust: The benefit of using sawdust is that it’s economical and you can usually purchase small bags of it at a garden store. Be sure to get the fine-grained sawdust as opposed to the material that’s closer to woodchips. The mushrooms that do well in this medium are shiitake and wine cap.
Straw: Because it holds moisture well but also allows for a nice amount of airflow, straw is a nice medium for mushrooms, and oyster mushrooms grow particularly well in straw. There are several types of straw, but wheat straw tends to be the best for growing.
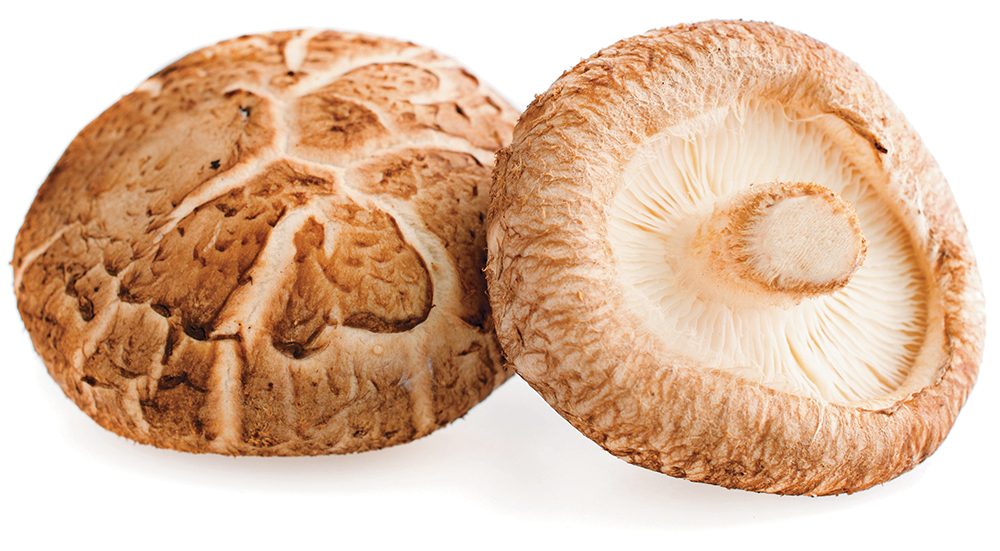
Shiitake mushroom
Hardwood block: One great option for first-time growers is a “table top farm,” which comes as a portion of an inoculated log, or contained in a hardwood sawdust block. You simply need to water, adjust humidity levels as instructed, and enjoy. These blocks have limited fruiting times, unlike some of the spawn grown in straw or sawdust, but they also tend to have better success rates. You purchase preinoculated logs for around $30-$40: these will yield a dozen or so shiitakes every three weeks once the fruiting begins. Or, you can inoculate your own log or logs with shiitake spawn.
One thing to keep in mind when ordering is that many mushroom spawn providers will only ship during certain times of the year. For example, major supplier Field & Forest will ship mushroom kits only from November until May, although it does ship certain types of spawn year round.

Other systems for growing mushrooms include kits such as this. To grow oyster mushrooms with this, you simply cut open the book, add moisture, and the mushrooms will appear in a week or two.
Also, be sure to buy spawn instead of spores. It’s possible to use spores (which are like seeds) for indoor growing, as opposed to spawn, which is more like buying transplants with roots already formed, but it takes quite a bit of experience, patience, and time to grow from spores.
If you’re using straw as a mushroom medium, here’s where it’s going to get a little weird. To reduce the chance of disease issues, it’s best to pasteurize the straw, and for that, you need to cook it. I’m not kidding.
Put a large pot of water on the stove, and let it boil for around twenty minutes while you’re chopping the straw down to a more manageable size, generally about 1 to 3 inches. I usually just grab a handful of straw, hold it over a bowl, and then cut it with a scissors so I get 2-inch strands. Some people use a blender or food processor, but I’ve found the cleanup from that procedure to be too time consuming.
When the water’s been boiling for a while, lower the temperature to just under a boil, and use a meat thermometer to check the water temp, which should be between 160 and 170 degrees Fahrenheit. Then, add the straw to the water, and force any floating straw (there will be plenty) under the water with a slotted spoon. Ideally, all the straw should remain under the water, so if you can, weight the straw with a small grate, Pyrex dish, or other heat-resistant item.
Keep checking the temperature of the water to make sure it stays within range, and “cook” the straw for about 45 minutes. Then, turn off the stove, let the straw cool down for about 10 minutes, and then drain the water from the pot. Don’t throw away the water—you can use it as “straw juice” for your mushrooms later, giving them a nutritional kick. Remove the straw from the pot, and let it come to room temperature before spawning. It will begin to dry, but it’s helpful to have the straw still be somewhat wet when introducing the spawn.
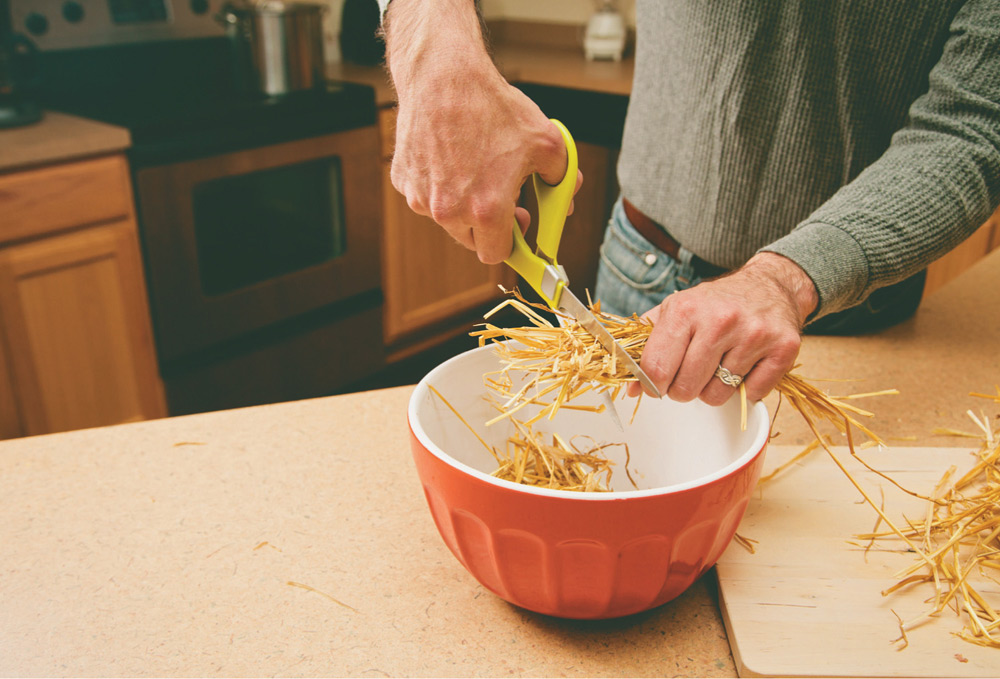
1. Chop straw into small strips to make handling easier.
You can also buy pasteurized straw, but where’s the fun in that? This way, your kitchen can smell “farmy” for at least a day or two.
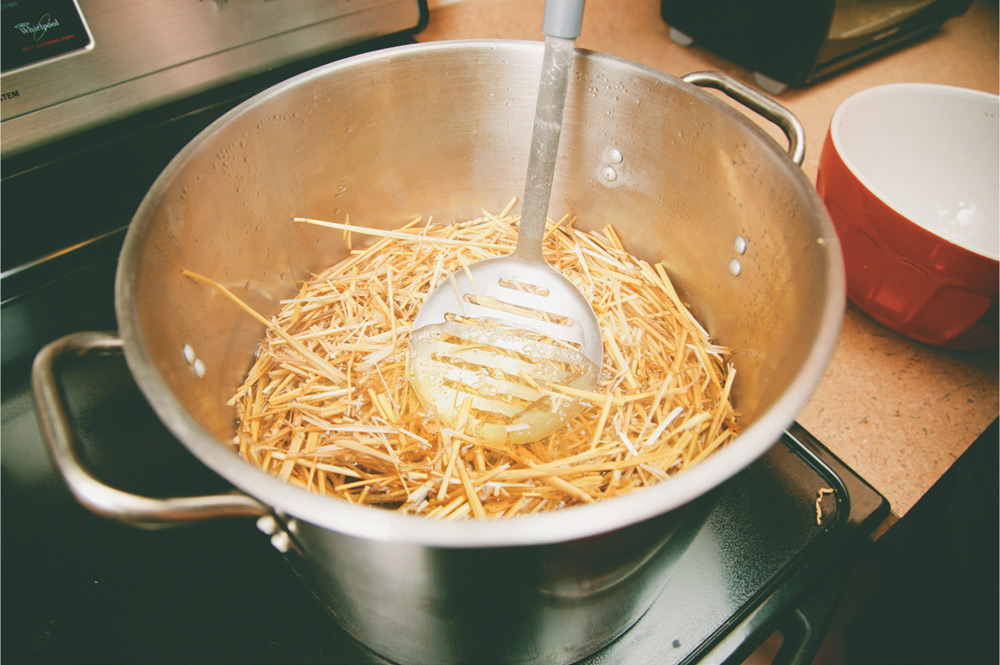
2. Put chopped-up straw into the boiling water.
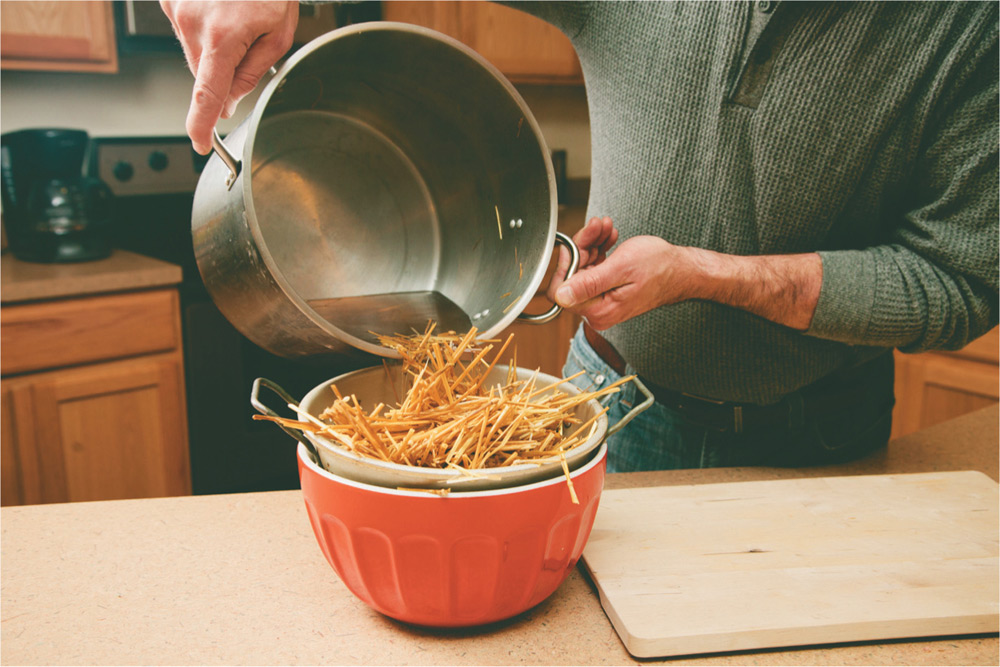
3. Drain water from the pot of straw, and be sure to keep the straw water so you can use it later—it can add a nutritional boost to your mushrooms.
Wash your hands and prep area thoroughly. Mushroom spawn is susceptible to disease, and having a clean environment is particularly important.
Shred your straw or evenly spread your sawdust in your container, and then mix in some used coffee grounds. If you’re a tea drinker, it’s worth it to pop into a nearby coffee shop and ask for a small bucket of grounds—they usually throw them away anyway, and many shops near urban gardening efforts are used to those type of requests.
The coffee grounds are packed with nutrients that provide a major boost to your mushroom spawn, and they also help to reduce the number of microorganisms that could compete with your spawn.
Your spawn will usually look like a block of very old cheese. Break this up into very small crumbles and integrate with the straw or sawdust. In some cases, the spawn will already be in sawdust, so you just have to add it to another, thicker layer of the stuff.
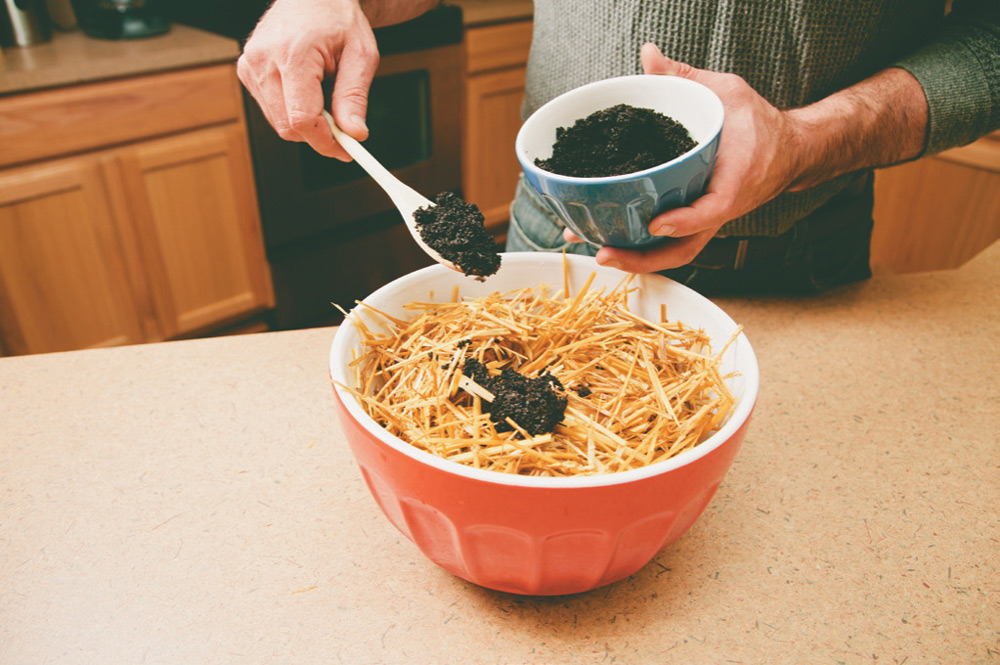
4. Coffee grounds are a great way to get more nutrition to your mushrooms, without much expense.
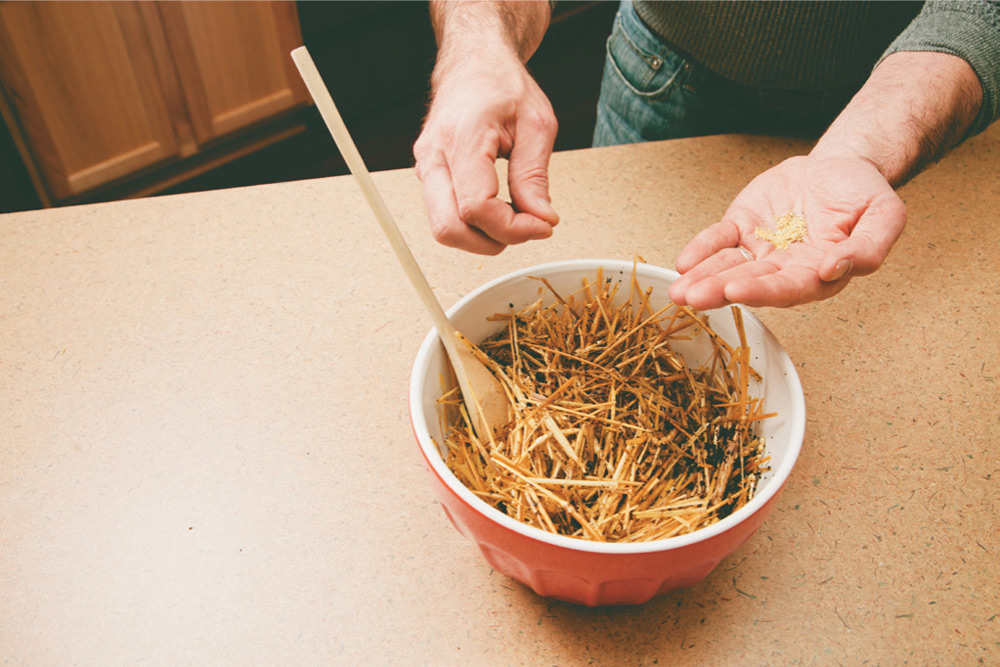
5. Crumble the spawn if it arrives in a block.
In terms of a container, you can use a variety of containers, but one of the most popular methods is to pack a plastic bag with the medium and spawn, and then poke holes into it every three inches or so. This will allow airflow, while still keeping the whole bundle warm and moistened.
Alternately, you can use a tray or baking pan and spread the mixture evenly, which gives the mushrooms more room to grow. Sprinkle some potting soil over the top, and then mist thoroughly. Place the pan or bag in a cool, dark spot, such as a basement. You can also use a garage as long as the temperature is around 50 degrees Fahrenheit.
Mist the mixture periodically if it looks like it’s starting to get dry. You may begin to see a whitish fuzz develop—don’t worry, it’s not mold. For mushrooms, mold is most likely to be black, pink, yellow, or bluish green.
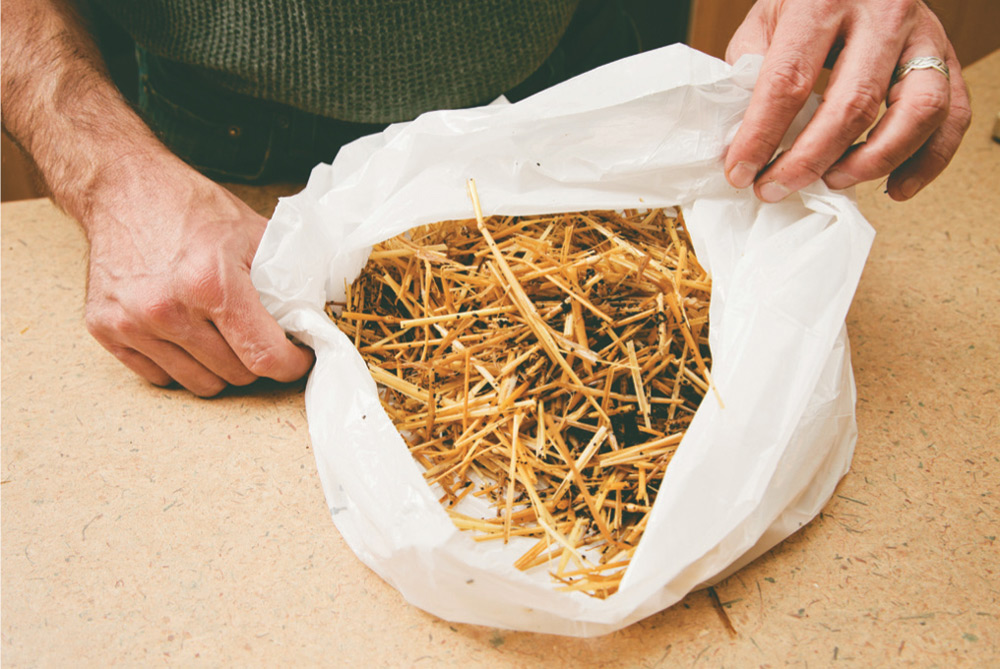
6. Poking holes in a plastic bag containing spawn helps airflow, while still keeping the medium moist and warm.
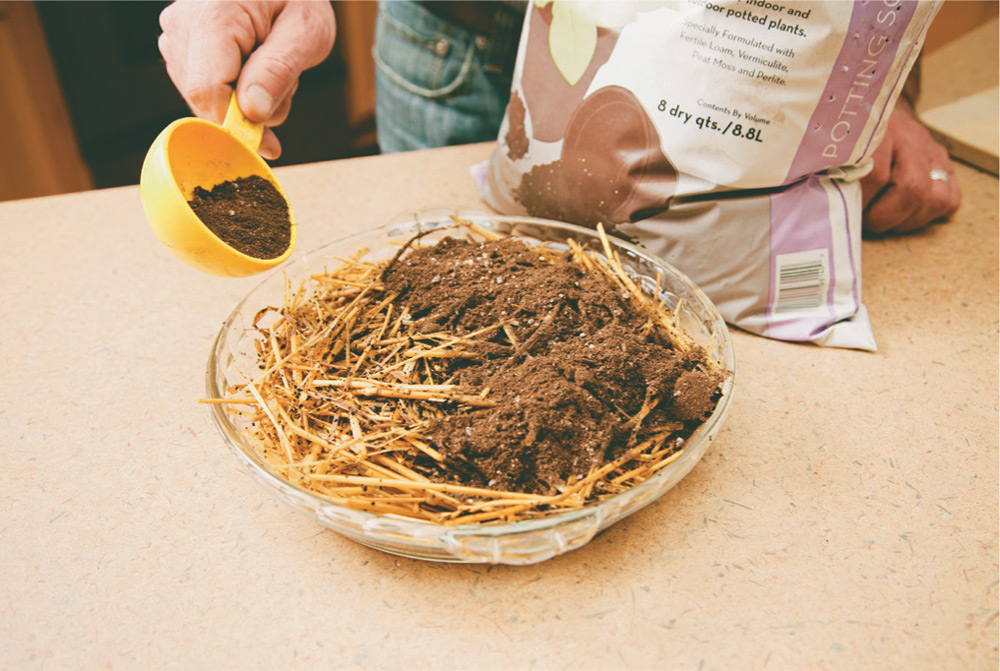
Option: Instead of a bag you can add your straw mixture to a pan or plate and top it off with a layer of potting soil after the spawn has been introduced.
This can happen when an area is too cool or you don’t have enough moisture. If you’ve been misting the mushrooms on a regular basis, try putting a germination mat under your container. If the problem is moisture, try placing a damp towel over the container for a few days so that moisture can be contained more efficiently. Don’t leave it on for too long, though, since the mushrooms need some fresh air to prevent carbon dioxide buildup.
Maybe you’ve tried both straw and sawdust, you’ve changed your containers, tried different rooms in the house and corners of the basement, maybe even sung to the spawn. And still, you’re getting nothing. Unfortunately, this can happen even with temperature and moisture control. In this case, you may want to invest in an indoor mushroom kit. I promise, this isn’t cheating. These kits are very well designed for growing, and often put together by mycologists (mushroom experts) who are super savvy about creating options for indoor environments. Choose a kit that’s either one of the “table top farm” varieties, or just a simple bag filled with spawn and sawdust (sometimes with coffee thrown in) that only needs to be watered at regular intervals.
Depending on the variety, mushrooms should be ready for some harvesting at about three weeks. Usually, the best sign of maturity is that the caps will separate from the stems. At that stage, just pick them by hand.
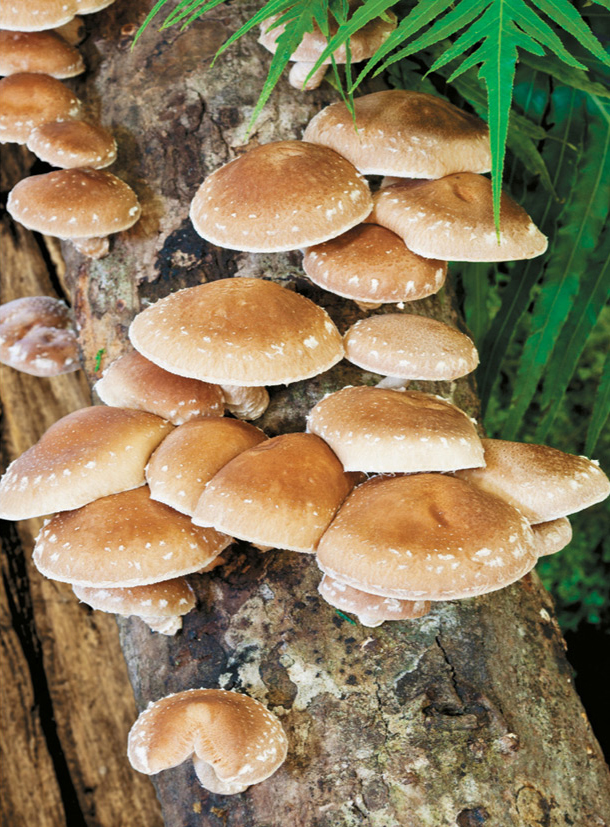
Shiitake mushrooms grow in clusters once the inoculated mushroom log is activated.
Don’t wash the mushrooms until you’re ready to prepare them for a meal—this will allow them to last longer. Place them in a brown paper bag (never in a plastic one), and store in the refrigerator. A plastic container will trap moisture, whereas the paper bag absorbs any excess moisture coming off the mushrooms. If you need to store mushrooms for longer, consider dehydrating them or cook them and then freeze them.