
10
DESSERT
I have always struggled with dessert pastas. They usually taste as if they were made for the surprise factor and not for the pasta itself. There have been one or two rare occasions when I came across something interesting that worked, but on the whole, dessert pasta has just never tasted right in my mouth. So when I thought about making dessert pizza, my initial thought was, “Don’t mess with it.”
Then came Nutella.
My first experience with dessert pizza was one of those earth-shattering, life-changing moments. It was 1997, and I was working at Bella Blu in New York City. We had a stuffed pizza on the menu made with robiola cheese and truffle oil (see this page). One day, the chef, Matteo Pupillo, made the same pizza but stuffed it with Nutella. He put two dough balls together, stretched them out to the usual size, and docked the dough with a docker (see this page). He baked it in the wood oven until it was a little underdone, and then he pulled it out, cut it horizontally through the side, and scraped out the uncooked dough on the inside. Then he spread on some Nutella, put it back together, and put it back in the oven to crisp up.
I was completely mesmerized but still skeptical. When he removed the pizza from the oven, you could smell the charred hazelnut. He cut the pizza, dusted the top with confectioners’ sugar, and gestured with his hand for me to taste it. I can’t describe the feeling when I put it in my mouth.
From there, my openness to dessert pizza just snowballed. Compared to pasta, pizza is a little closer to bread. And sweet bread has a long history, so it makes more sense to me. In fact, some of Italy’s earliest yeast breads like schiacciata were flat breads topped with sweet toppings. Why not play around with pizza dough and have some fun? In this chapter, we revisit some of the pizza shapes from previous chapters that really work well, but this time they come with a sweet twist. The ice technique shows up on a Naples-style pie, but here it becomes crème brulee pizza, one of my favorite new discoveries. We also make a big pizza al metro and put fresh berries and mascarpone whipped cream on it. It’s the perfect ending to a big pizza party. And then there’s some fried dough tossed in fennel lemon sugar and a rotolo made like a sticky bun with caramel and pecans. The one new shape here is pizzette, which are small dough rounds pressed into little pans and filled with caramelized apples and a crumbly oat topping like mini–apple pies. As with the other recipes in this book, that one is a great template to work from. Fill your pizzette with whatever you want, from pudding to pie fillings. Make it how you like it. For that matter, experiment with all the dessert ideas here. The important thing is not to be creative for the sake of creativity but to be creative for the sake of deliciousness.
A few marshmallows make this now-classic dessert even more gooey. I love it when some of the marshmallow melts through the crust and burns a little. It’s like the best s’more ever!
MAKES ONE 12-INCH (30 CM) ROUND STUFFED PIZZA
2 dough balls, preferably Roman Dough at 67% Hydration (this page), about 500 grams/17.6 ounces each
6 tablespoons (111 g) Nutella or other chocolate-hazelnut spread
8 large (or 1 cup mini) marshmallows, optional
Confectioners’ sugar, for dusting
Flour, for dusting
Let the dough warm up at room temperature for at least 1 hour or up to 4 hours. As it warms up, the dough will relax and become easier to shape.
Place a baking steel or stone on the upper rack of the oven 4 to 6 inches (10 to 15 cm) beneath the broiler for an electric oven or 6 to 8 inches (15 to 20 cm) beneath the broiler for a gas oven. Preheat the oven to its highest setting (usually 500° to 550°F/260° to 288°C) for 45 minutes.
Have your fillings ready to go.
When the oven is preheated and you are ready to bake pizza, open the oven door for 10 seconds if you have an electric oven. This step lets some heat escape to make sure the electric broiler will actually turn on even though the oven has reached its maximum temperature. Reset the oven to broil and preheat the broiler for 5 to 10 minutes. The next steps of shaping and filling the pizza should take only 5 to 10 minutes if your fillings are ready to go.
TO SHAPE THE DOUGH: The goal is to combine the dough balls and stretch the dough to a 12-inch (30 cm) circle with an even thickness across the middle with no rim around the edge. There are lots of ways. For 67% hydration dough, you’ll need a bit more flour and a gentler hand, since the dough is softer. It’s best to shape it completely on your work surface. If you try to pick it up, it may tear a hole. Generously flour a work surface and a wooden pizza peel. Use a dough scraper to scrape the dough balls from the tray to the floured surface. Stack one dough ball on top of the other and press them together into one bigger disk of dough. Gently poke your fingers about ¼ inch (0.6 cm) from the edge of the dough ball all around it. The center should look thicker like a hat. Press your fingers and palm gently into the center of the hat, moving your fingers and thumb outward to begin stretching the dough away from the center (see the photos on this page). At this point, you should have a disk of dough 4 to 5 inches (10 to 12 cm) in diameter. Slip one hand under the disk and quickly flip it over. Repeat the poking and pressing process on the other side, poking your fingers around the edge first, and then placing your palm on the center and gently stretching your fingers and thumb outward to stretch the dough from the center outward. As you work, gradually rotate the dough on the flour to keep it round. The dough should be soft enough to continue this process until it is stretched to a 12-inch (30 cm) circle with an even thickness across the middle with almost no rim. It should be about ½ inch (1.3 cm) thick. If the dough tears a hole, patch it by pulling a little dough from one side of the hole and pressing it over the hole with your thumb.
Lay the stretched dough onto the floured peel. The easiest way is to simply drape it over the peel and then remove your hands from beneath the dough. Reshape the dough round as necessary. Dock the dough by poking holes all over it with a fork or a dough docker, which helps prevent it from puffing up too much in the oven. Give the peel a quick shake to make sure the dough can slide easily.
TO BAKE THE PIZZA: At this point, your oven should be on broil. Slide and shake the pizza from the peel onto the cooking surface. Cook until the dough is slightly puffed and very light brown on top, 3 to 4 minutes total. Check the dough during cooking and as it begins to puff up, use a long metal spatula or half-sheet pan to press down on the dough to keep any one bubble from puffing up and browning too much. Ideally, you want an evenly puffy and lightly browned disk of dough. Use your hands or a long spatula to rotate the dough as necessary for even cooking.
Remove the pizza from the oven to a wire rack to cool for a minute or so, just to keep the steam from making the crust soggy. Transfer the pizza to a cutting board and use a long serrated knife to cut the cooked dough in half through the side to make two thinner dough rounds (see the photos on this page). Cut all the way around the outside edge first, gradually working the knife toward the middle until the dough is cleaved in two. Keep the knife perfectly flat at all times to avoid cutting a hole in the top or bottom crust.
Separate the two halves and open them like a book. Use a spoon or your fingers to scrape away any soft, undercooked dough from both halves. You want to scrape away and discard most of the undercooked dough. Smear the Nutella evenly across the bottom half of the dough, leaving about a ¼-inch (0.6 cm) border around the edges. Arrange the marshmallows, if using, over the Nutella. Put on the top half and return to the oven just until the Nutella and marshmallows start to melt, about 2 minutes (another minute if using marshmallows).
Remove the pizza to a cutting board and let cool slightly to firm up the filling. If you will be baking another pizza, reset the oven to its maximum temperature. Cut the stuffed pizza into 6 wedges and finish it with the confectioners’ sugar.


Some dessert pizzas seem forced, but there’s nothing forced about fresh seasonal berries and whipped cream! If you have a large baking stone or steel, this dessert is a crowd pleaser for a big dinner party. For a smaller pizza, just cut the recipe in half and roll a single dough ball into a smaller oval to fit your baking stone.
MAKES 1 LARGE RECTANGULAR PIZZA, ABOUT 21 INCHES LONG BY 10 INCHES WIDE (53 BY 25 CM)
2 dough balls, preferably Roman Dough at 57% Hydration (this page), about 460 grams/1 pound total
½ cup (116 g) cold mascarpone cheese
¼ cup (30 g) confectioners’ sugar, plus some for dusting
¼ cup (50 ml) cold heavy cream
1 teaspoon (5 ml) vanilla extract
Flour, for dusting
3 cups (454 g) mixed fresh berries such as blueberries, blackberries, and halved strawberries
2 tablespoons (25 g) sugar
Finely grated zest of ½ orange, optional
12 fresh mint leaves
Let the dough warm up at room temperature for at least 1 hour or up to 4 hours. As it warms up, the dough will relax and become easier to shape.
Chill a medium metal bowl and the whip attachment for an electric mixer in the freezer for about 10 minutes. Combine the mascarpone, confectioners’ sugar, cream, and vanilla in the cold bowl and beat with the whip attachment on medium speed until thickened and smooth, 2 to 4 minutes. Spoon the whipped mascarpone cream into a piping bag fitted with a star tip (or into a zipper-lock bag and cut off one corner of the bag so you can pipe the cream). Refrigerate until ready to use. This mixture can be made up to 4 hours ahead of time.
Place a large baking steel or stone (at least 22 inches long and 11 inches wide/56 by 28 cm) on the upper rack of the oven 4 to 6 inches (10 to 15 cm) beneath the broiler for an electric oven or 6 to 8 inches (15 to 20 cm) beneath the broiler for a gas oven. Preheat the oven to its highest setting (usually 500° to 550°F/260° to 288°C) for 45 minutes.
TO SHAPE THE DOUGH: The goal is to stretch the dough to a large rectangle, about 21 inches long by 10 inches wide (53 by 25 cm) with an even thickness across the middle and a thicker rim around the edge. There are lots of ways. Here’s how I usually do it for a pizza al metro. Lightly flour a large work surface and a large wooden pizza peel or cutting board (a board big enough to fit the stretched-out dough). Use a dough scraper to scrape the dough balls from the tray to the floured surface. Position the dough balls end to end and press the ends together, pinching them and reshaping the dough balls to make one larger piece of dough in a rough rectangular shape. Gently poke your fingers about ½ inch (1.3 cm) from the edge of the dough all around it to begin forming the rim. The center should look thicker at this point. Leave the rim alone and press your fingers and palms gently around the center portion to begin stretching the dough away from the center. At this point, you should have a rectangle of dough about 12 inches long by 4 inches wide (30 by 10 cm). Slip one hand under the rectangle and quickly flip it over. Repeat the poking and pressing process on the other side, poking your fingers around the edge first to make the rim, and then placing your palms on the center and gently stretching your fingers and thumb outward to stretch the dough from the center outward into a large rectangle about 21 inches long by 10 inches wide (53 by 25 cm). Use both hands to stretch the dough and as you work, keep the rim thick. If the dough is difficult to stretch, let it relax for 5 minutes or so and then stretch it again. If the dough tears a hole, patch it by pulling a little dough from one side of the hole and pressing it over the hole with your thumb.
Lay the stretched dough onto the floured peel or cutting board. The easiest way is to slide it onto the peel or board, one end at a time, removing your hands from beneath the dough each time. Reshape the rectangle as necessary on the peel or board and then give the peel or board a quick shake to make sure the dough can slide easily.
Arrange the berries evenly over the pizza all the way to the rim. Sprinkle the sugar over the top. Give the peel or board another quick shake to make sure the dough slides easily.
TO BAKE THE PIZZA: At this point, your oven should be on broil. Slide and shake the pizza from the peel or board onto the cooking surface. Cook until the rim is puffed, the dough blisters and chars in spots, and the bottom is crisp, 6 to 8 minutes. Use your hands or a long spatula to rotate the dough as necessary for even cooking.
Remove the pizza from the oven to a large cutting board to cool for a minute or two before slicing. For this pizza, I like to cut the entire pizza in half lengthwise, then make 5 crosswise cuts to make rectangles. Slice and then pipe a dollop of whipped mascarpone cream on each slice. Sprinkle the orange zest, if using, over the top. Finish with the mint leaves and a dusting of confectioners’ sugar.
When I was playing around with the ice technique on pizza (see this page), my mind started wandering. The pizza started looking less like a pizza and more like a tart shell. It could be filled with almost anything! But I like to keep it simple. A creamy custard of crème brûlée is all you need, plus a kitchen torch. You can make this dessert in a home oven, too (see “Option,” this page).
MAKES ONE 10-INCH (25 CM) ROUND PIZZA
1 dough ball, preferably Naples Dough at 60% Hydration (this page), about 250 grams/8.8 ounces
Flour, for dusting
½ cup (70 g) coarsely crushed ice
1 egg
3 egg yolks
1 cup (237 ml) heavy cream
½ cup (100 g) sugar, plus some for sprinkling
Fresh mint leaves, optional
Confectioners’ sugar, optional
Light a wood fire on the oven floor directly where you will be cooking the pizza (for details on starting a fire, see this page). Feed the fire until the ambient temperature in the oven is around 700°F (371°C), 1 to 2 hours. Quickly rake the fire to one side of the oven, containing it in a neat pile near the edge. Brush the cooking surface clean.
Let the dough warm up at room temperature for at least 1 hour or up to 4 hours. As it warms up, the dough will relax and become easier to shape.
TO SHAPE THE DOUGH: The goal is to stretch the dough to a 10-inch (25 cm) circle with an even thickness across the middle and a thick rim around the edge, at least ½ inch (1.3 cm) high. You want a thick rim for this pizza because it will have to contain the ice as it melts to water on the pizza shell. Here’s how I usually do it. Lightly flour a work surface and a wooden pizza peel. Use a dough scraper to scrape the dough ball from the tray to the floured surface. Gently poke your fingers about ½ inch (1.3 cm) from the edge of the dough ball all around it to begin forming the rim. The center should look thicker like a hat. Leave the rim alone and press your fingers and palm gently into the center of the hat, moving your fingers and thumb outward to begin stretching the dough away from the center (see the photos on this page). As you work, gradually rotate the dough and keep your thumb against the rim to make the rim thick and round. As the dough round stretches and gets wider, you can begin to use both hands instead of just one. The dough should be soft enough to continue this process completely on your work surface until it is stretched to a 10-inch (25 cm) circle with an even thickness across the middle and a rim about ½ inch (1.3 cm) thick. If the dough tears a hole, patch it by pulling a little dough from one side of the hole and pressing it over the hole with your thumb.
Lay the stretched dough onto the floured peel. The easiest way is to simply drape it over the peel and then remove your hands from beneath the dough. Reshape the dough round as necessary, making sure the rim is nice and thick, at least ½ inch (1.3 cm) high. Give the peel a quick shake to make sure the dough can slide easily.
TO TOP AND BAKE: Spread the ice evenly across the dough.
Slide and shake the pizza from the peel onto the cooking surface. Cook until the rim is puffed and charred in spots and the bottom is crisp, 1 to 2 minutes. The ice will melt and almost completely evaporate. Pop any large bubbles that form in the center of the pizza. Essentially, you are creating a pizza shell or tart shell. Use a metal pizza peel to rotate the dough as necessary for even cooking. If the rim is done before all the water melts, use a pastry brush to brush excess water over the rim; this will shine it up a bit.
Remove the pizza from the oven to a wire rack to cool.
Meanwhile, make the custard filling. Set up a large bowl of ice. Whisk the egg in a metal bowl that will fit over a saucepan of simmering water (to make a double boiler). Whisk the egg until the whites and yolks are fully blended and no streaks of white remain. Whisk in the yolks, cream, and sugar and then place the bowl over the saucepan of simmering water. Cook gently, whisking almost constantly, until the mixture thickens enough to thickly coat the back of a spoon, 10 to 15 minutes. You should see some trails in the custard as you whisk, and its temperature should be around 182°F (83°C). When thickened, set the bowl or saucepan of custard in the bowl of ice and whisk until the custard cools and thickens a bit more, 4 to 6 minutes. When cooled, you should see deeper trails in the custard as you whisk, and its temperature should be around 95°F (35°C).
Pour the cooled custard into the pizza shell. It should be thick enough to pour in a wide ribbon. Chill the pizza, uncovered, until firm, about 1 hour or up to 3 hours. When chilled, you can refrigerate the pizza for up to 24 hours before finishing it.
Before serving, sprinkle a thin layer of sugar over the top of the custard and quickly brûlée (broil) it by waving a kitchen torch back and forth over the sugar until it melts and caramelizes to a nice amber brown, 2 to 3 minutes. A few burnt spots on the custard are okay, but try to point the torch toward the center of the pizza to avoid scorching the crust. Return the brûléed pizza to the refrigerator just long enough to firm up the custard so it doesn’t run when you cut the pizza. As the caramelized sugar cools off, it will harden into a top crust that is crackingly crisp. Remove the pizza to a cutting board, and slice it into 6 pieces. Finish it with some fresh mint and powdered sugar, if you like.

HOME OVEN CRÈME BRÛLÉE PIZZA: Place a baking steel or stone on the upper rack of the oven 4 to 6 inches (10 to 15 cm) beneath the broiler for an electric oven or 6 to 8 inches (15 to 20 cm) beneath the broiler for a gas oven. Preheat the oven to its highest setting (usually 500° to 550°F/260° to 288°C) for 45 minutes. When the oven is preheated and you are ready to bake the pizza, open the oven door for 10 seconds if you have an electric oven. This step lets some heat escape to make sure the electric broiler will actually turn on even though the oven has reached its maximum temperature. Reset the oven to broil and preheat the broiler for 5 to 10 minutes. Shape the dough as described in the recipe and top it with the ice. Bake the pizza on the hot steel or stone beneath the broiler until the rim is puffed and charred in spots, the bottom crust is crisp, and the ice melts and almost completely evaporates, 1 to 2 minutes. Remove the cooked pizza shell to a wire rack to cool and then proceed with the rest of the recipe.

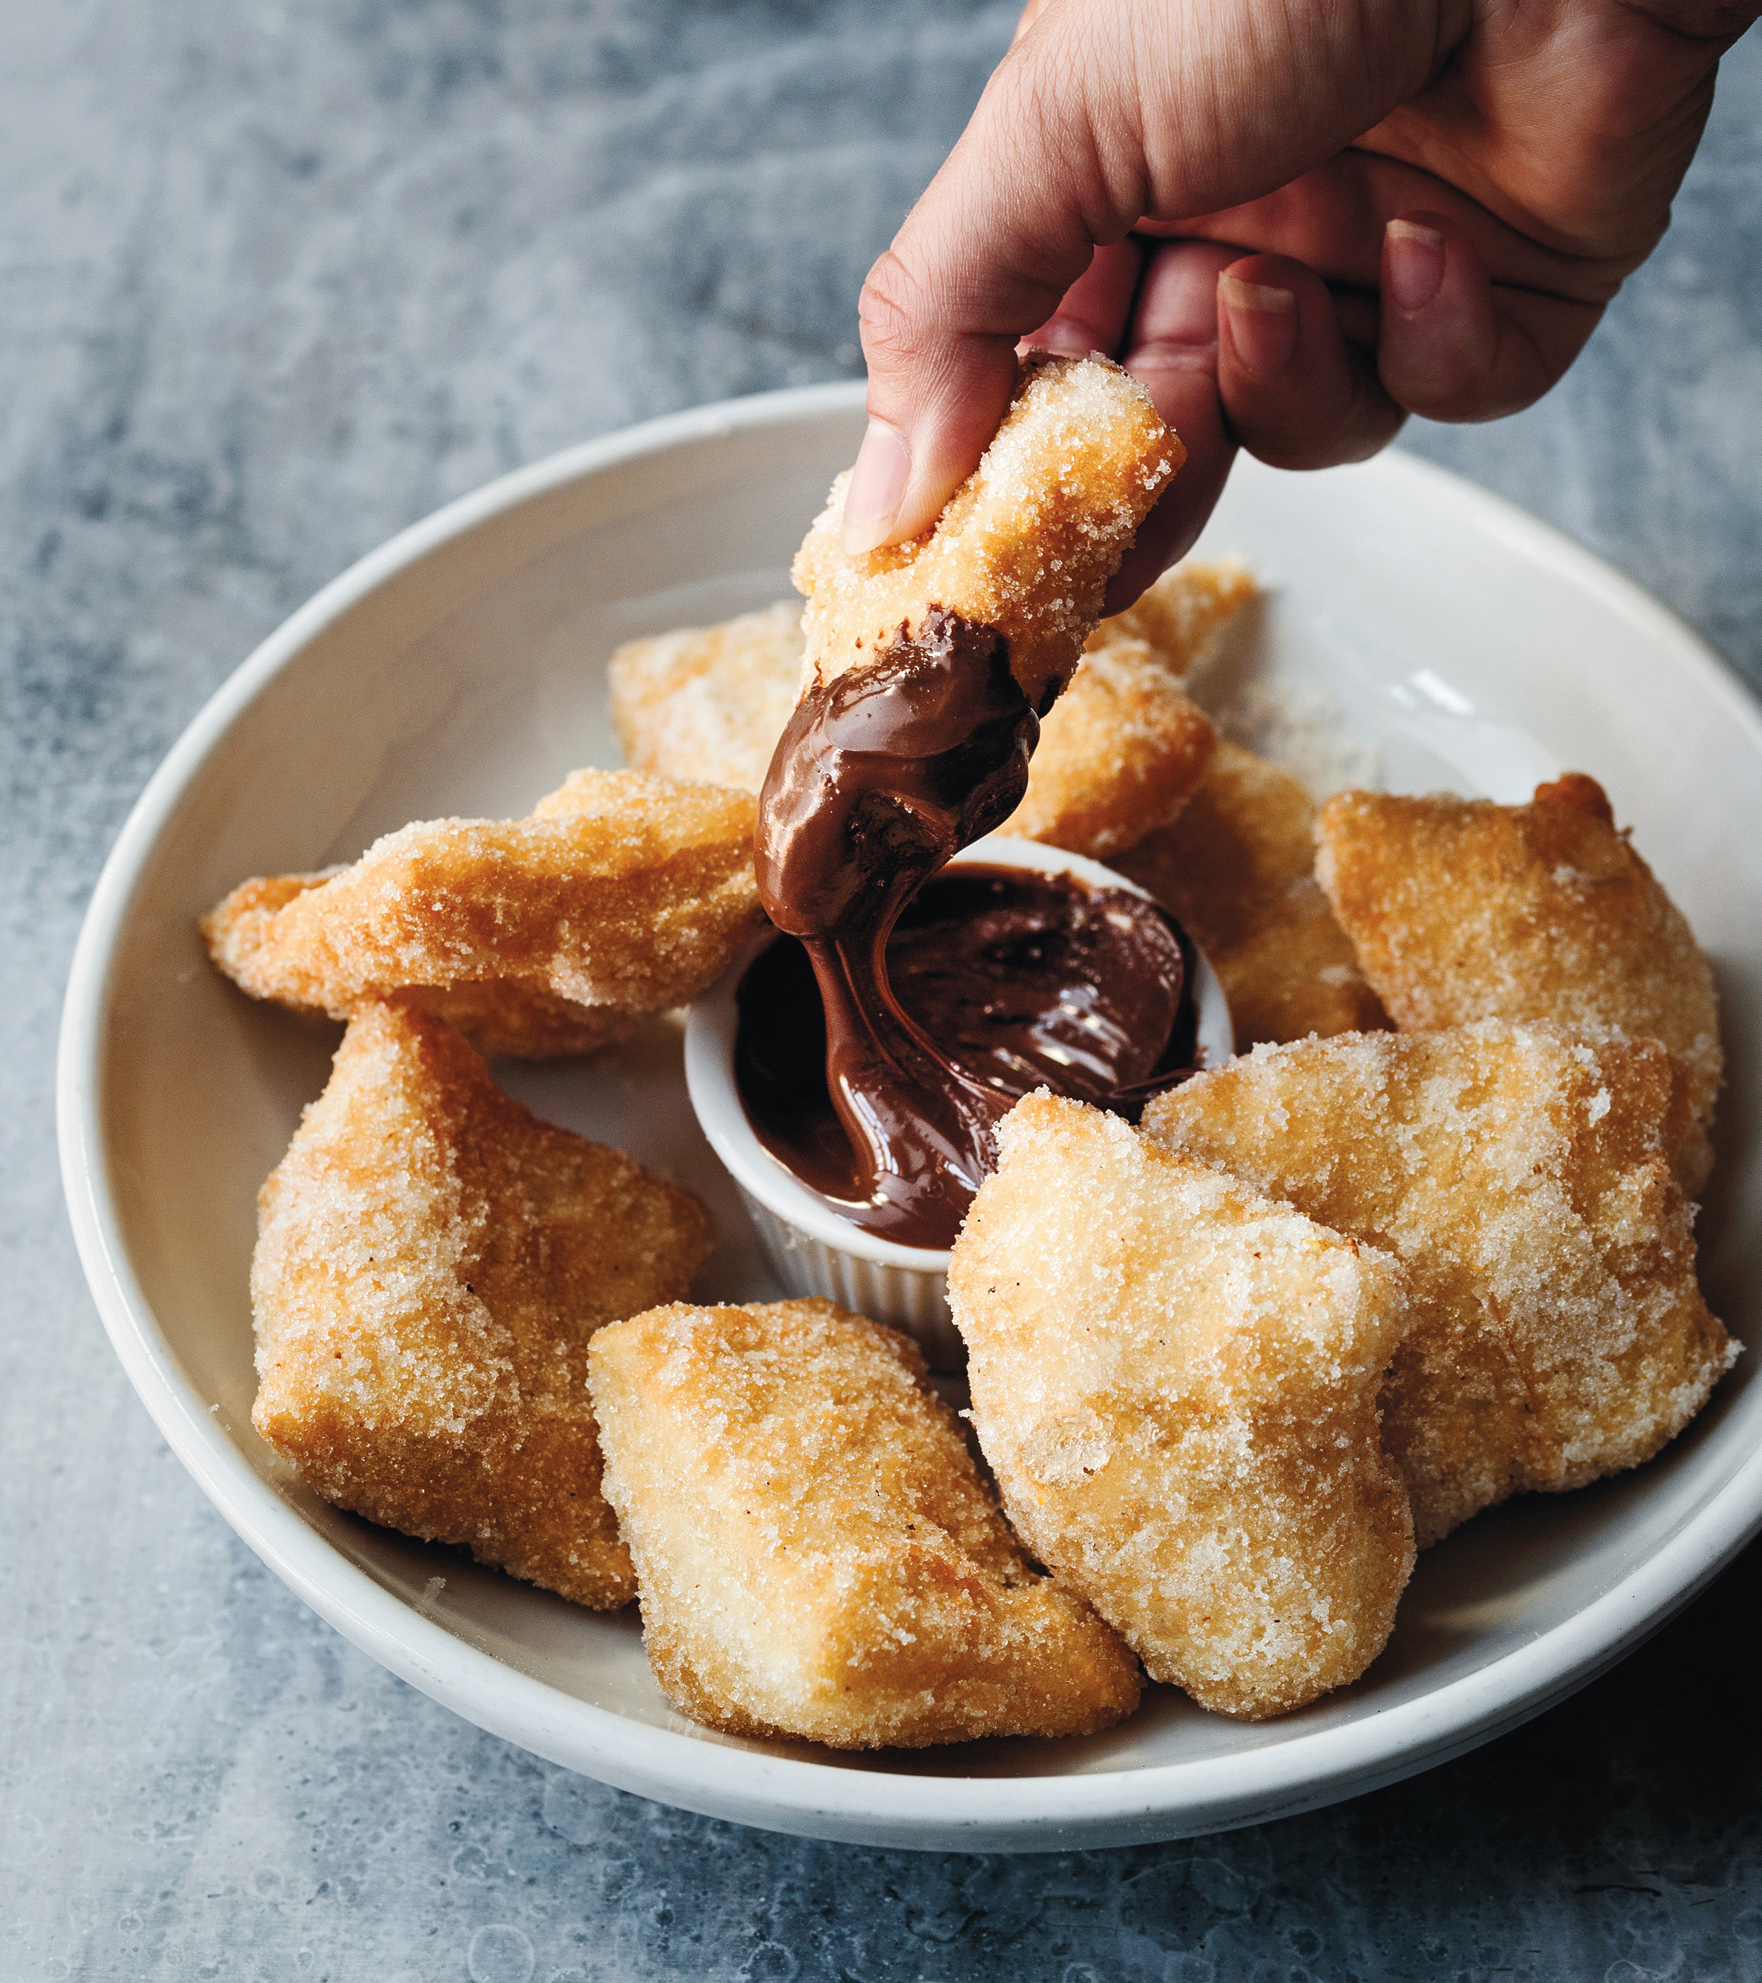
You can fry anything, and it will taste good. These little nuggets, coated in sugar with lemon zest and ground fennel, go right past good to great. The perfect ending on pizza night!
MAKES 9 PIECES
1 dough ball, preferably Roman Dough at 57% Hydration (this page), about 230 grams/8.1 ounces
Finely grated zest of ½ lemon
½ cup (100 g) sugar
½ teaspoon (1 g) fennel seeds, finely ground
Vegetable oil, for frying
Flour, for dusting
Warm Nutella, for dipping
Let the dough sit out at room temperature for 1 hour to take the chill off.
Put the zest in a bowl and place the bowl in a warm spot to let the zest dry out. We do it on top of our wood ovens at the pizzeria. You could also put it on your stovetop while your oven heats up for pizza or on top of a warm radiator. About 90°F (32°C) is the temperature you’re after. Within an hour or two, the zest should be nice and dry. Don’t leave it too long, or it will get brittle.
Mix the dried zest, sugar, and fennel seeds together in a medium bowl. (By the way, you can grind the fennel seeds in a clean coffee grinder or a spice mill. A good mortar and pestle works, too.)
Heat the oil in a deep fryer to 400°F (204°C). At least 2 inches (5 cm) of oil is a good depth, and a large deep pan like a wok will let you fry a bunch of these at once without crowding them.
TO SHAPE AND CUT THE DOUGH: When you’re ready to fry, lightly flour a work surface and use a dough scraper to scrape the dough ball from the tray to the floured surface. Lightly flour the top of the dough and then shape and pat the dough ball into a nice, thick 8-inch (20-cm) square. Use a bench knife to cut the square like a tic-tac-toe board into 9 square pieces.
TO FRY THE DOUGH: Fry the dough squares in batches. Don’t crowd the fryer or the dough will get greasy. Adjust the heat to keep the oil at a constant temperature of 400°F (204°C). Fry until the pieces are golden brown, about 2 minutes, turning with tongs as necessary. Remove from the oil with tongs or a spider strainer, let drip dry, and immediately toss the pieces in the fennel lemon sugar, coating every nook and cranny. Serve hot with Nutella for dipping.

A few years after Brad Spence, the chef at our Philadelphia trattoria Amis, came up with the Mortadella and Pistachio Rotolo (this page), we revisited the whole idea of rotolo. That mortadella rotolo had been inspired by cinnamon buns, so we thought, why not make a sweet version? Even better, let’s make it into sticky buns with pecans!
MAKES TWELVE 3- TO 4-INCH (7 TO 10 CM) ROTOLOS
DOUGH AND FILLING
3 dough balls, preferably Naples Dough at 60% Hydration (this page), about 750 grams/26.5 ounces total
14 ounces (400 g) ricotta impastata
6½ tablespoons (80 g) sugar
2¾ tablespoons (41 ml) heavy cream
1 teaspoon (2.6 g) ground cinnamon
Flour, for dusting
TOPPING
½ cup (112.5 g) packed light brown sugar
⅔ cup (158 ml) heavy cream
2¾ tablespoons (37.5 g) unsalted butter
¾ cup (82 g) pecans, toasted and chopped
FOR THE DOUGH AND FILLING: Let the dough warm up at room temperature for at least 1 hour or up to 4 hours. As it warms up, the dough will relax and become easier to shape.
Meanwhile, mix together the ricotta, sugar, cream, and cinnamon in a medium bowl. Cover and refrigerate until ready to use, up to 6 hours.
TO SHAPE THE DOUGH: The goal is to stretch the dough to a rectangle about 18 inches long by 13 inches wide (45 by 33 cm) with an even thickness across the middle and no rim at the edge. Flour a work surface and lay the dough balls end to end in a horizontal line in front of you. Gently flatten and pinch the ends of the dough together to make 1 bigger piece of dough. Dust the top with flour and then press the dough with your palms and fingers, stretching outward to shape the dough into a large rectangle that roughly matches the dimensions of a half-sheet pan (18 by 13 inches/45 by 33 cm). If the dough is stiff, you can also pick up the edges of the dough to stretch it outward, or use a rolling pin. As you work, loosen the dough from the work surface with a bench knife and reflour the work surface as necessary. You don’t want the dough to stick. When the dough is an even thickness of about ½ inch (1.3 cm), square up the edges with your hands to make a nice rectangle.
Spread the ricotta filling in an even layer all the way to the edges of the dough. Fold the short sides of the dough rectangle over the filling, about ½ inch (1.3 cm). Then starting at the long side (nearest you), begin rolling the dough over the filling into a tight roll, enclosing the filling in a spiral. The sides will want to spread as you roll. Try to keep the roll tight. When fully rolled, compress gently around the roll with your palms to make it nice and compact. Cut the roll crosswise into 12 pieces, each 1½ to 2 inches (3 to 5 cm) wide.
Lightly oil a half-sheet pan (18 by 13 inches/45 by 33 cm). Place the rotolos, cut sides up, on the baking sheet, reshaping them as necessary so each is a nice, stable spiral. Cover and let stand at room temperature until puffy and almost doubled in size, about 1 hour.
Preheat the oven to 450°F (232°C) and place a baking stone or steel on the middle rack. Let the oven preheat for at least 45 minutes.
TO BAKE THE ROTOLOS: Bake the rotolos until puffed and golden brown, 15 to 20 minutes, rotating the pan once or twice for even cooking. Remove the entire pan from the oven, let cool for a minute, and then use a metal spatula to transfer the rotolos to a platter or plates. These rotolos may spread a bit, which is fine. Each one will have its own unique character.
FOR THE TOPPING: While the rotolos bake, combine the brown sugar, cream, and butter in a small saucepan. Heat over low heat until everything is melted and smooth, stirring occasionally, 10 to 15 minutes. Spoon the sauce over the rotolos and top with the pecans.
To make these ahead of time, proof the filled and cut rotolos in the fridge instead of at room temperature. Cover and let them ferment in the fridge for 2 to 6 hours.
If you don’t have ricotta impastata, which is creamy and not grainy in texture, use regular ricotta and blend it in a blender along with the cream, sugar, and cinnamon until everything is creamy.
MINI–DOLCI ROTOLOS: After rolling out the dough, cut the rectangle of dough in half lengthwise to make 2 smaller rectangles. Top, roll, cut, proof, and bake as directed. Each rotolo will come out a little smaller.

These pizzette are like mini–apple pies made with pizza dough. In the fall, I make them with my kids, and they’re usually all gone before they cool off. Don’t forget the vanilla ice cream!
MAKES SIX 3-INCH (7 CM) ROUND TARTLETS
DOUGH AND FILLING
1 dough ball, preferably Roman Dough at 57% Hydration (this page), about 230 grams/8.1 ounces
Spray oil, for pans
1 tablespoon (14 g) unsalted butter, melted
2⅓ cups (262 g) apples, peeled and sliced into half-moons ¼ inch (0.6 cm) thick
¼ cup (50 g) sugar
2 tablespoons (16 g) cornstarch
Heaping ¼ teaspoon (0.75 g) ground cinnamon or nutmeg or a combination of both
6 tablespoons (89 ml) apple cider
1⅛ teaspoons (6 ml) fresh lemon juice
TOPPING
1 cup plus 1 teaspoon (131 g) all-purpose flour, plus some for dusting
7 tablespoons (87 g) sugar
1 cup plus 1 tablespoon (55 g) old-fashioned rolled oats
6 tablespoons (85 g) cold unsalted butter, cut in small pieces
FOR THE DOUGH AND FILLING: Let the dough sit out at room temperature for 1 hour to take the chill off.
Heat the oven to 500°F (260°C). Coat six tartlet pans (3-inch/7-cm diameter by ¾ inch/2 cm high) with spray oil. You can also bake these tartlets in a jumbo muffin tin or individual 3-inch (7 cm) diameter shallow carbon steel frying pans or other small frying pans.
Melt the butter in a medium saucepan over medium heat. Add the sliced apples and toss to coat. Whisk together the sugar, cornstarch, cinnamon, and nutmeg in a medium bowl. Then whisk the cider and lemon juice into the cornstarch mixture until evenly moistened. Pour the mixture over the apples in the saucepan and bring everything to a simmer, stirring until thickened, about 5 minutes. Remove from the heat and let cool slightly in the pan.
FOR THE TOPPING: Mix together the flour, sugar, and oats in a medium bowl. Use your fingers to rub the butter into the dry ingredients until crumbly, walnut-size pieces form in the bowl.
Lightly flour a work surface. Use a dough scraper to scrape the dough ball from the tray to the floured surface and then use the scraper or a bench knife to cut the dough into 6 pieces. Press a piece of dough into each prepared pan, filling the pan completely and evening the tops to make a tartlet shell about ¼ inch (0.6 cm) thick.
TO BAKE THE PIZZETTE: Divide the cooled filling evenly among the tartlet shells. Sprinkle the crumb topping evenly over the filling and bake until the pizzette are golden brown and bubbly, 10 to 12 minutes.
