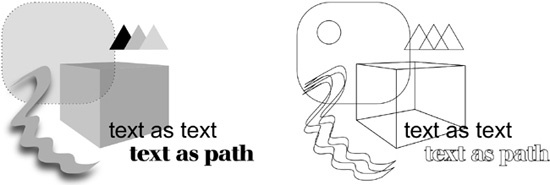
By default, Inkscape strives to render each document as close as possible to the way it should be rendered according to the SVG standard. However, sometimes you need to work with the document, not just look at it, and such complete rendering may then be an obstacle. This is when you switch to Outline view mode. In Outline mode, there are no fills, no transparency, no color, no gradients, no blurring, or any other filters. Any object is shown as a thin outline whose width (1 screen pixel) does not depend on zoom:
The quick keyboard shortcut to toggle from Normal to Outline mode and back is to press  with
with  on the numeric keypad.
The most common reason to switch to Outline mode is to make working with complex slow-rendering documents faster. Also, in Outline mode it’s much easier to find and access invisible objects (those that are completely transparent or hidden underneath other objects). In this mode, everything is visible, and you can select any object by clicking its outline.
Outline mode does use colors other than black, but they do not reflect the fill or stroke colors of objects. Instead, colors are used to differentiate object types. Regular paths and shapes use black outlines, bitmap objects (Chapter 18) are shown as red-outline rectangles with two diagonals, clipping paths (18.4 Clipping and Masking) are green, and masks (18.4 Clipping and Masking) are blue. Text objects are the only kind of objects that are not outlined (they are shown with black fill).
Note
Outline mode is not remembered in global or per-document properties; every time you need it, you must switch to it. However, if you really need it, you can force Inkscape to always start in outline mode. For that, you need to edit your preferences.xml file (see 3.1 Preferences) by finding the element with id="startmode" and changing its outline attribute to 1.
