This treatment is easier to do than others because it’s mostly automatic. The only tricky part is creating the tessellation itself—that is, a pattern of complex interlocked tiles that cover the entire plane without holes or overlapping.
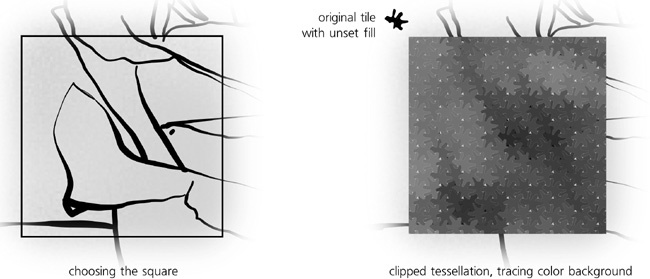
Draw a shape—any shape!—and create a pattern of tiled clones from it (Edit ▸ Clone ▸ Create Tiled Clones, 16.6 Tiling Clones) with any nontrivial symmetry group; in this example I used P3. At first, the clones do not form any kind of tessellation; it is your task to reshape the source shape—with its clones already in place— until the clones meet and smoothly interlock. It is much easier than it might seem; the fact that the clones immediately reflect any change in the source shape makes it almost trivial. Just add nodes and move them to grow appendages in your shape. Each of the clones will grow similar appendages. Simply keep adjusting them until the shapes meet all the way around and cover the plane:

Next, we want the pattern to reflect the colors of the background—so that the rose drawing shows through. Once you set it up, the process is mostly automatic. Make sure the Use saved size and position of the tile checkbox is on, delete the existing tiling (Remove button), and set the Width and Height so that the pattern covers all of the area you need covered. Unset the fill color of the original shape (right-click the Fill: swatch in the status bar and choose Unset). Then, go to the Trace tab, enable Trace the drawing under the tiles, pick Color, and apply the picked value to the clones’ Color as well:
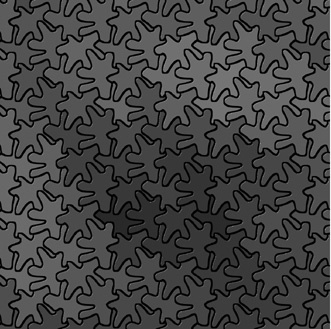
The final touch is adding slight glossy highlights to the tiles using filters (Chapter 17). One problem with this is that the gloss filter is not symmetric—it has one special direction from which the light is cast. However, if we apply such a filter to rotated clones in the pattern, the filter will be rotated together with the clones and all highlights will appear as if lit from different directions. To work around this, simply group all tiled clones ( ) and apply the Jigsaw Piece filter from Filters ▸ Bevels to the group, as shown in Figure 24-11.