Woolen Drafting
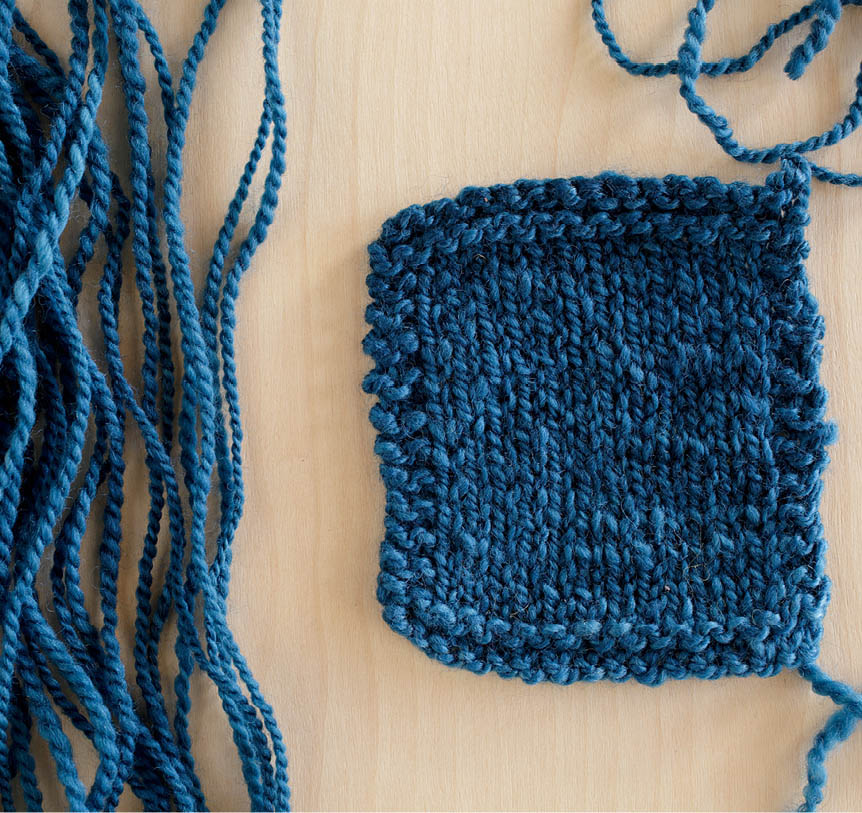
Woolen yarns are light and fluffy — or as light and fluffy as their fiber allows them to be. They bloom when they are finished after spinning, achieving their loftiest state. They are elastic and hold warmth. On the other hand, they are not as consistent as worsted yarns, and it’s easy for noils (small pieces of loose fiber — think the tweedy bits in tweed yarn) and neps (small tangles of fiber) to get drafted into woolen yarn. Woolen-spun yarns, especially when you use short-stapled fiber, are prone to pilling.
Woolen yarns make warm, lightweight sweaters and socks, but because these yarns abrade easily, you can use extra plies, higher ply twist, and/or a fiber blend that includes silk or nylon to help offset (though not eliminate) pilling. Woolen yarns are excellent for felted knitwear.
Woolen drafting takes a little confidence and willingness to let go: confidence that the twist is going to do what it’s supposed to, and literal letting go, allowing the twist to enter the drafting triangle. There are many more styles of drafting woolen, including forward, backward, long draw, sliding long draw, supported long draw, and double drafting, to name a few.
When drafting woolen, twist enters the fiber before and during drafting. As twist enters the fiber, it swirls the fiber like a tornado. This swirl traps air as the fiber is spun, creating the ubiquitous loft of woolen-spun yarn. Most woolen-style drafters pull backward, long or short, which is what’s described here.
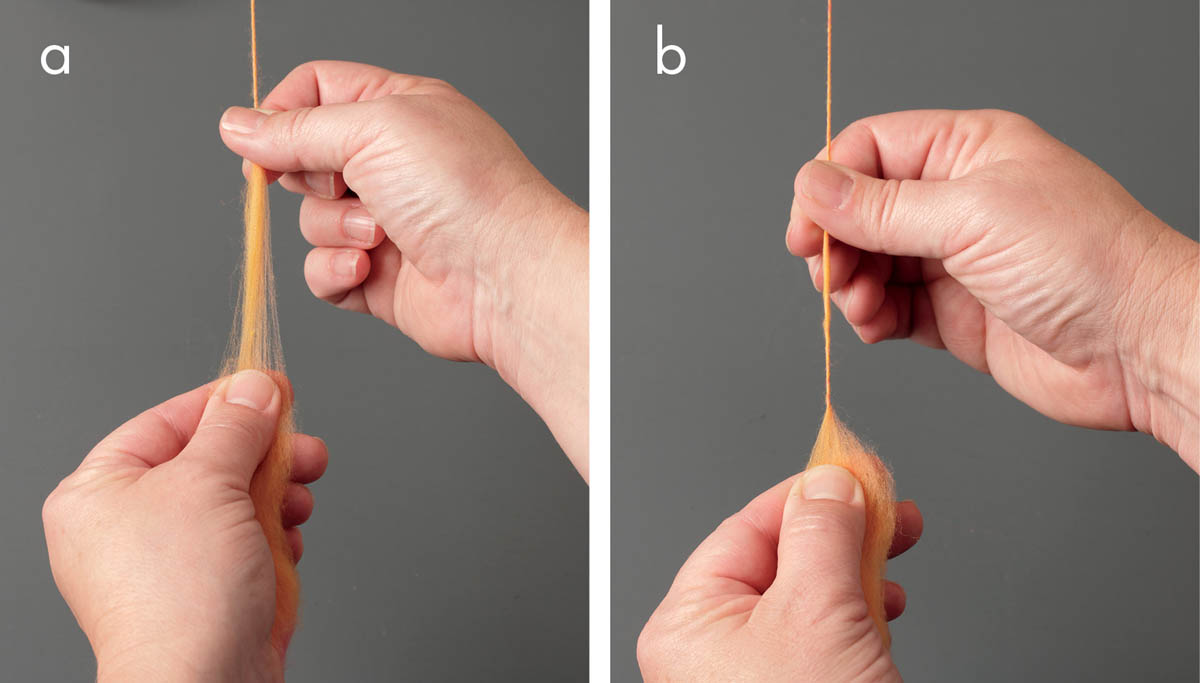
Drafting Woolen-Style
Drafting woolen-style. While your fiber hand pulls the fiber backward, your front hand opens and closes in a pinching motion (a). This pinching action supplies the bit of extra tension needed to draft against, while also allowing the twist to run into the drafting triangle (b). Using the front hand in this manner makes this method more like a supported woolen draft; for the long-draw method, a front hand is used less frequently.
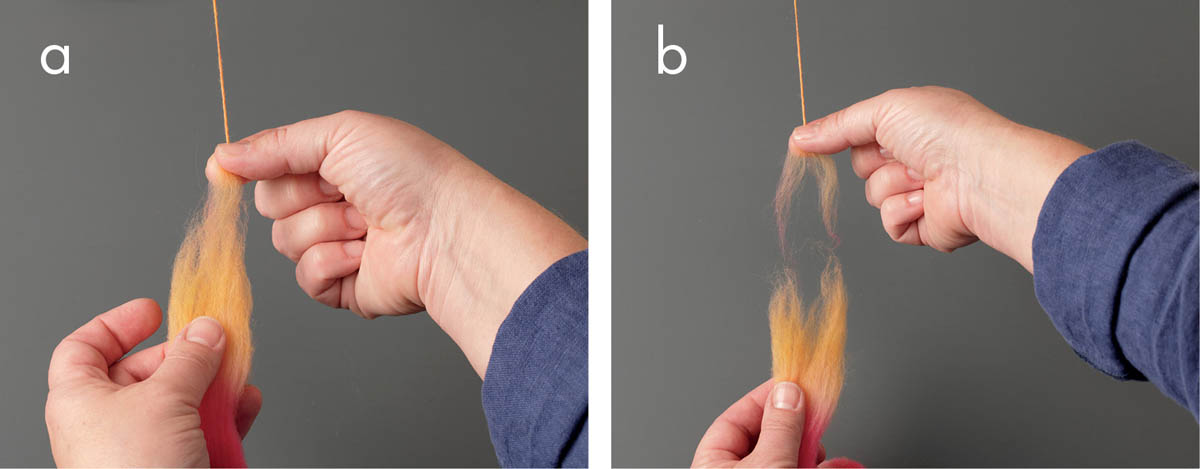
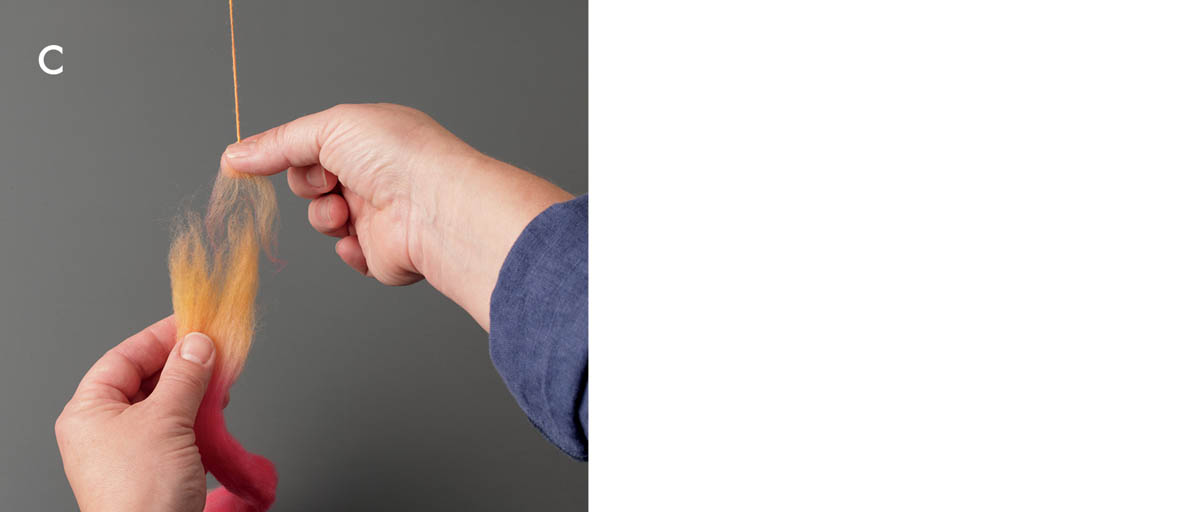
Joining for Woolen-Style
Joining. The best type of join for woolen drafting is a mattress or a sandwich join. Either lay the new fiber on top of the old (like lying on a mattress) (a), or split the existing fiber (b) and insert the new fiber in between (c). Let the twist travel from the old to the new fiber.
It’s a Matter of Trust
Many new woolen spinners worry and let the twist run all the way into their fiber supply. The most common reason for this (and I’ve been guilty of it myself) is that they don’t trust the twist. If I don’t trust that the twist I have set up between the wheel and my treadling rhythm will flow in my fiber to create a happy woolen yarn, I treadle faster, creating more twist. Everything else about my draft is set up for the original amount of twist to work, and when I let this new, more energetic twist zip down my fiber, it bursts right through my drafting zone and into my fiber supply, locking it up. Trust the twist, and trust your spin. Spend an evening just practicing, not to make a particular yarn but to watch the twist and control it.
Drafting against Type:What Happens
Top is the most popular commercially available fiber preparation, but what if you want to spin it woolen? Do it! You won’t get as lofty a yarn as you would with a woolen preparation like roving or a batt, but it will add air and spring.
The same is true for a woolen preparation. Using a worsted draft for a fiber prepared woolen smooths and aligns the fibers under drafting, squeezing out the air and creating a yarn that, if not sleek, is compact and sturdy. In the photo below, roving is being spun with a worsted draft. Though the yarn won’t be perfectly smooth and lustrous, it will be a more controlled and consistent yarn with better stitch definition when knitting.
Drafting Fiber Blends: Dealing with Mismatched Staple Lengths
With so many commercially prepared fiber blends on the market, how do you choose how to draft a blend with wildly different staple lengths, especially if keeping your hands close to a staple length apart is part of the draft? For example, I love silk mixed with anything. But I will admit to some frustration when spinning silk, which is a long fiber, blended with something soft, sexy, and short like Merino, Polwarth, or cashmere. Here are a few tips about spinning fiber blends with different staple lengths.
- Plan for drafting. Rarely do the staple lengths match in a blended or combined fiber. When spinning blended fibers of different staple lengths, take the time to get your hand positioning right. If you sit down with a Merino/silk blend and try to draft with your hands spaced closely for Merino, you might find it hard to draft because of the silk in the mix. Spacing your hands for silk would be too far apart for the Merino, so finding that sweet spot between the two is worth taking the time to discover.
- Be ready to go. Make sure your fiber is ready to draft — in other words, that the fibers slide by each other easily. If they don’t, shake out your fiber or predraft in another way, fluffing or attenuating slightly.
- Prepare manageable-size pieces. Work with fiber pieces that you feel comfortable with sizewise. A full top’s width of fiber isn’t always easy to control, and adding varied staple lengths makes it even harder. If a piece of fiber feels too big or unmanageable, split it lengthwise and try again to spin it. I know that when I start fretting about spinning a particular fiber, my hands start to sweat, which makes the fiber even harder to draft.
- Keep a goal in mind. Know what you want from your fiber. Do you want the silk literally to shine? In that case, spin your fiber worsted. If you’re going for a loftier yarn with silk that glints, spin woolen.
- Spin from the fold. If spinning from the tip doesn’t work, try spinning from the fold. Spinning from the fold can help control uneven stapled fiber blends or slippery fibers. (For information about spinning from the fold, see A Good Tool in Your Spinning Arsenal.)
A Bit about Staple Length
Staple length is the length of a fiber. Staple lengths range from the super short (11⁄2"–21⁄2") for cashmere, 2"–5" for Merino, and 3"–6" for Corriedale, to the really long 12"–15" for Teeswater. Knowing the staple length before you start spinning is helpful because it's easier to draft if you keep your hands close to a staple length apart.
A Good Tool in Your Spinning Arsenal
Spinning from the fold is a good way to feel in control of drafting rambunctious fibers, slippery fibers, and fibers with mismatched staple lengths in a blend. Spinning from the fold can also add elasticity to long fibers.
- 1. Pull out a length of fiber (a) and fold it in half over your finger (b).
- 2. Draft either from the tip off the end of your finger (a), or from the flat off the top of your finger (b).
Thick or Thin:Controlling Yarn Size while Drafting
Drafting is one way to control the size of your yarn. I hear spinners say, “The more I spin, the thinner my yarn gets, and I can’t go back.” It’s not magic, however, and once you get the thick-and-thin facts down, it’s pretty easy to go back and forth between thick and thin. It gets down to the amount of fiber and the amount of twist. That’s it. Your wheel, hands, and feet adjust to help make it happen, but fiber and twist are the heart of it.
Another thing to keep in mind is the relationship between twist and yarn size. Although you can make a yarn finer by adding more twist, more twist squeezes all the air out and compresses the fiber into a smaller space. If you use this method for making a smaller yarn, your yarn will be denser and heavier, and you are thus changing the yards-per-pound measurement (the grist of the yarn; for information, see Grist).
To Spin Fine Yarn
For spinning fine, you need less fiber and more twist. It makes sense, doesn’t it? It would be hard to make a laceweight yarn by twisting an inch-wide strip of fiber. And if you have four individual fibers you’d like to spin into thread, it’s going to take more than two twists per inch to hold it together.
- Your wheel. Use a smaller whorl, and use less takeup. A smaller whorl makes your bobbin or flyer spin more times for each revolution of your drive wheel. Less takeup allows your yarn to wind on more slowly, gathering more twist before it winds onto the bobbin.
- Your hands. Slow down the drafting speed of your hands; by letting the yarn hang out before you let it go through the orifice, it gathers more twist. When you draft, whether woolen or worsted, draft fewer fibers, and watch the drafting triangle while you’re finding your rhythm so that you can see how much fiber you’re drafting. Keep the amount of fiber and the distance you draft out consistent, and your yarn will be more consistent, too.
- Your feet. Treadle faster.
Remember: Less fiber, more twist, fast feet, and slow hands = Fine yarn.
To Spin Thick Yarn
To spin thick yarn, do the opposite. You need more fiber and less twist. A fat chunk of fiber doesn’t need much twist to hold it together, and using lots of twist with a wide piece of fiber makes a dense, heavy yarn.
- Your wheel. Use a bigger whorl and use more takeup. A bigger whorl makes your bobbin or flyer spin more slowly, putting less twist into your fiber. More takeup winds your yarn onto the bobbin faster, zipping it onto the bobbin before too much twist can gather in the yarn.
- Your hands. Speed up your hands. You’ll get less twist by getting the yarn onto the bobbin faster, rather than hanging out gathering twist. When you draft, take bigger bites of fiber, and again watch the drafting triangle. Keep your fiber grab and drafting distance consistent.
- Your feet. Treadle slower.
Remember: More fiber, less twist, slow feet, and fast hands = Thick yarn.
Don’t Fight It! Your Wheel Is Your Friend:Work Together
I’ve seen lots of spinners in my classes fighting their wheel. In extreme cases, it looks like the spinner is deep-sea fishing and has hooked a particularly feisty marlin. Usually they have their takeup (how quickly the yarn winds onto the bobbin) turned as high as it will go. They are treadling out of control to keep up with the takeup, trying to draft yarn before the wheel rips it from their hands. When I ask why they set their takeup so high, I get one of two answers, and sometimes both: “I like a lot of takeup” and “It makes me spin faster.” They may like a lot of takeup, but it probably doesn’t make them spin faster, and it can hurt their body. You only want as much takeup as your yarn needs. Don’t set yourself up to have your yarn ripped from your hands — just like in kindergarten, that’s not friendly!
Bad things can happen when you wrestle with your wheel. When you have your wheel pulling hard and you’re treadling like crazy, and drafting your yarn is more about pushing and pulling in a less-than-smooth motion, there’s a lot of extra tension and stress on your fiber, yarn, and wheel, as well as on your body. You can develop pain from your fingers and hands to your neck, spine, and elbows. Your yarn isn’t too happy with all of that extra tension either. Fighting with your wheel and fiber leads to an uneven yarn, lots of breaks, and a less controlled yarn overall. You aren’t really spinning faster, because you are expending lots of energy fighting your wheel and yarn and, in the end, probably not getting the yarn you want.
Predrafting
I’ve noticed that a big area of contention among spinners and spinning teachers centers around predrafting. Predrafting includes stripping, fluffing, or attenuating commercially prepared fiber to spin just a regular yarn, not a textured, fancy, or art yarn. When it comes to predrafting, most of the time the sides line up as either “always” or “never.” My thoughts lie somewhere in between with “it depends.”
I spin mostly commercially prepared fibers that are dyed by fiber artists in small batches. There’s nothing I love more than spinning a fluffy, “just-shake-and-spin” roving or top. Shake-and-spin fibers are ones where I can do just that: pull them out of their braid or bag, give them a shake, and spin away without a hitch or a clump. I would say 30 to 40 percent of the fibers I spin are shake-and-spin worthy. Many factors go into the fluffiness of a roving or top, including the quality of the roving or top before it’s dyed, how the fiber is handled when it’s dyed and dried, how the dyer stores it, and how long it sits around as stash. Other features come into play as well: sometimes fiber gets compacted, sometimes the fiber seems just too big, sometimes I want to alter the color, sometimes I just want to touch it before I spin it. Depending on the fiber, the yarn I want, and my mood, I almost always fluff, usually strip, and occasionally attenuate. I want my spinning to be easy, if not effortless, and, if my fiber isn’t loose enough to draft, it can make spinning miserable, so I predraft in one of several ways.
Fluffing
I love to fluff my fiber. Fluffing is pulling the top or roving horizontally, just a little, enough to tease it open. I fluff fiber when it seems closed, perhaps because it sat squashed in my stash. I also fluff to get to know my fiber. As I fluff along the top or roving, I notice any lumps, bumps, or vegetable matter (VM) in the fiber and remove them as I go. I also study the color changes and decide if I want to strip the fiber.
Stripping
Stripping is the process of dividing the top or roving fiber lengthwise. First, let me say that I never strip my fiber to the size I want my yarn. Yes, I said “never.” If I were to strip to size, there would be no time or space to draft my fiber. If you strip to size, the only thing you can do with the fiber is to add twist. Drafting is what makes my yarn what I want it to be. I have to draft it forward to get the smoothness of worsted and draft it back to trap the air for woolen. I couldn’t do either if I stripped fiber to the size I wanted my yarn.
On the other hand, I do usually strip my fiber to control bulk or color. I may reduce the bulk simply because I don’t want to hold the whole roving or top in my hand. Sometimes it just feels unwieldy; sometimes it makes my hands sweat. So I divide the fiber in half lengthwise and carry on.
Another reason I might strip a top or roving is if it’s variegated. I can control color by stripping (or not stripping) in a couple of ways. If I want long color runs, I don’t strip, and I do my best to draft the fiber back and forth across the tip of the fiber, like typing along the carriage of an old-fashioned typewriter. If I want shorter runs of color, I divide the fiber at least in half lengthwise, and sometimes into more lengths. (For more about this technique, see Size Matters.)
I also like to combine colored tops and rovings by drafting two or three (or more) together at one time. To do this without losing my grip (or mind), I strip each top or roving thin enough so the whole fiber bundle is one or two fingers wide.
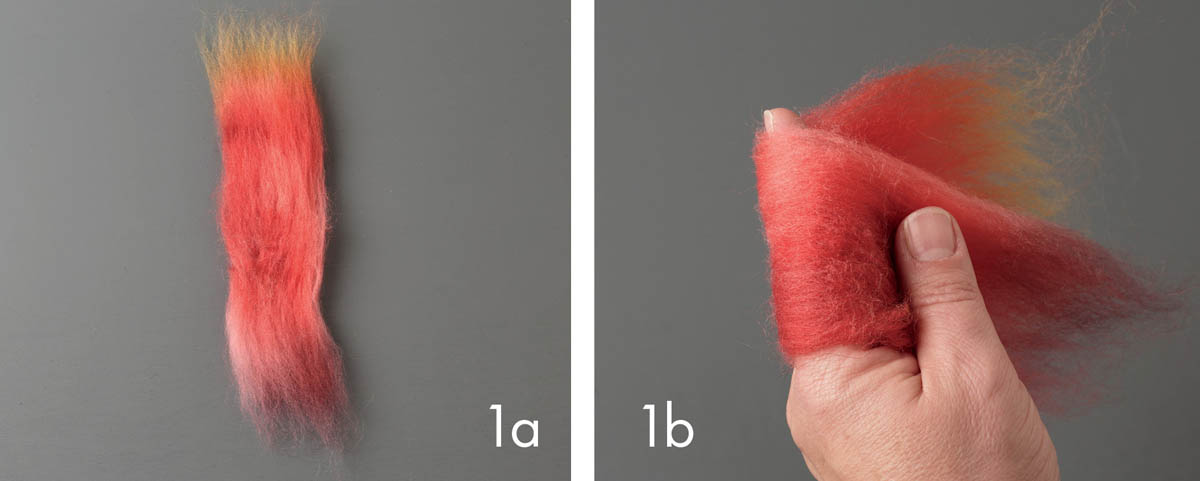
Attenuating
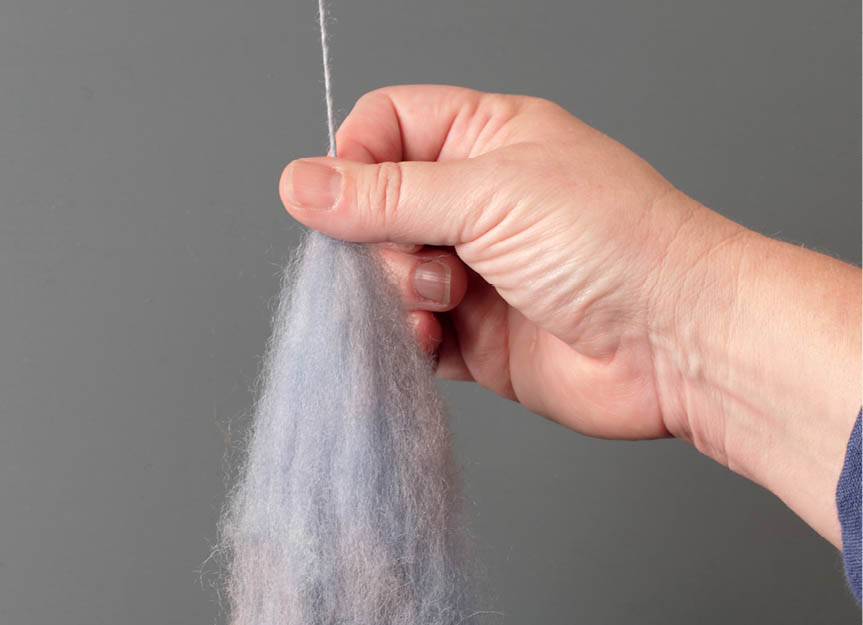
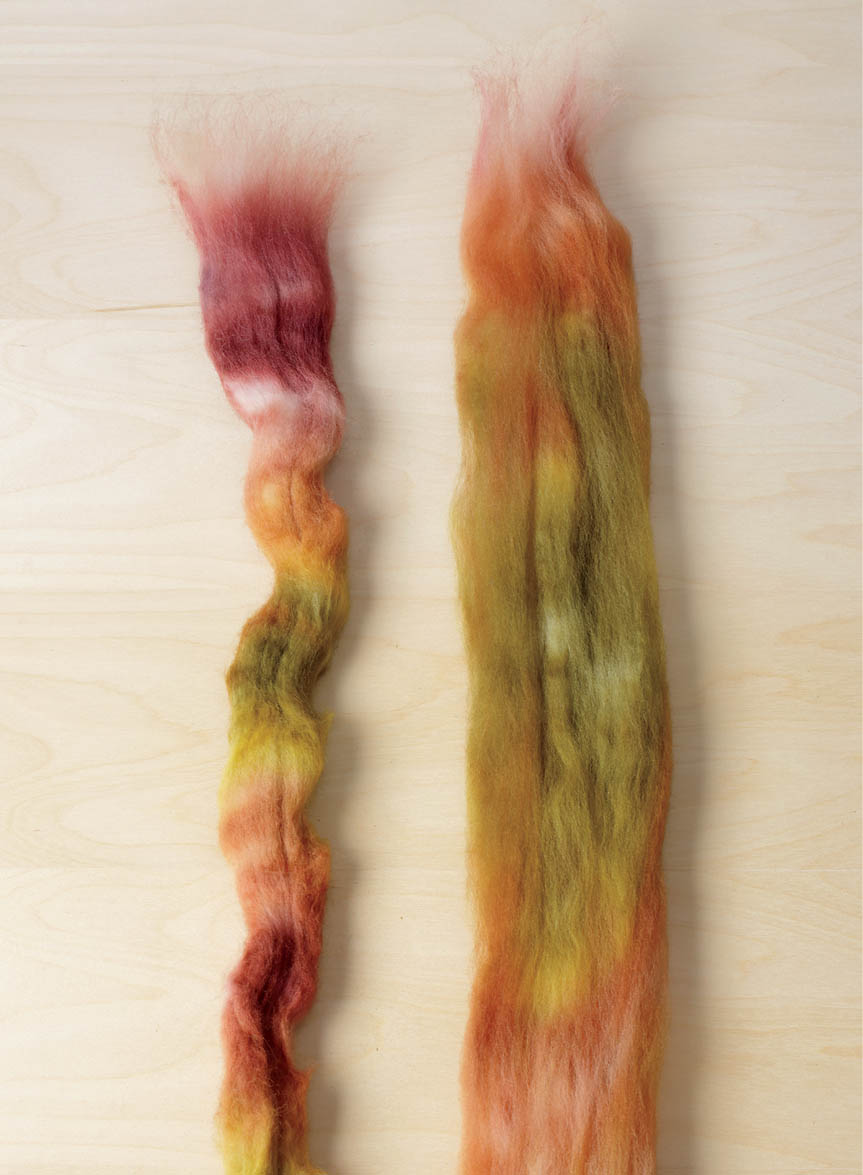
I don’t attenuate often. I do this only when a fiber is compacted and fluffing alone won’t turn it into a lovely, lofty fiber. For me, attenuating top or roving is a lot like stripping to finished yarn size; it removes the space for drafting. But when a fiber is compacted, it can make the difference between fighting the fiber and happily spinning.
The photo (below) shows a before and after. On the left is the “before” fiber. If I had tried to spin this fiber as is, I would have said a lot of words, none of them nice. The fiber isn’t felted, but it’s compacted, and there would have been pushing and pulling and overtwisting while I tried to spin it. The fiber on the right has been fluffed and attenuated slightly. It looks like it’s taken a big breath of air. The predrafted top is fluffy and smooth, a dream to spin, and rescued from the wrath of a frustrated spinner.
Treadling Is Not like Driving a Car
When I was a new spinner, I made a mistake regarding twist and takeup — one that I still make many years later when I’m in a hurry or not relaxed when I spin. The mistake is to think that treadling faster makes you spin faster. I learned to spin after I learned to drive a car. Deep in my brain I think that if I push those treadles, which look like huge accelerators to me, the yarn will get on the wheel faster. Treadling faster does not make you spin faster, however; treadling affects twist more than it affects pull (see It’s a Matter of Trust).
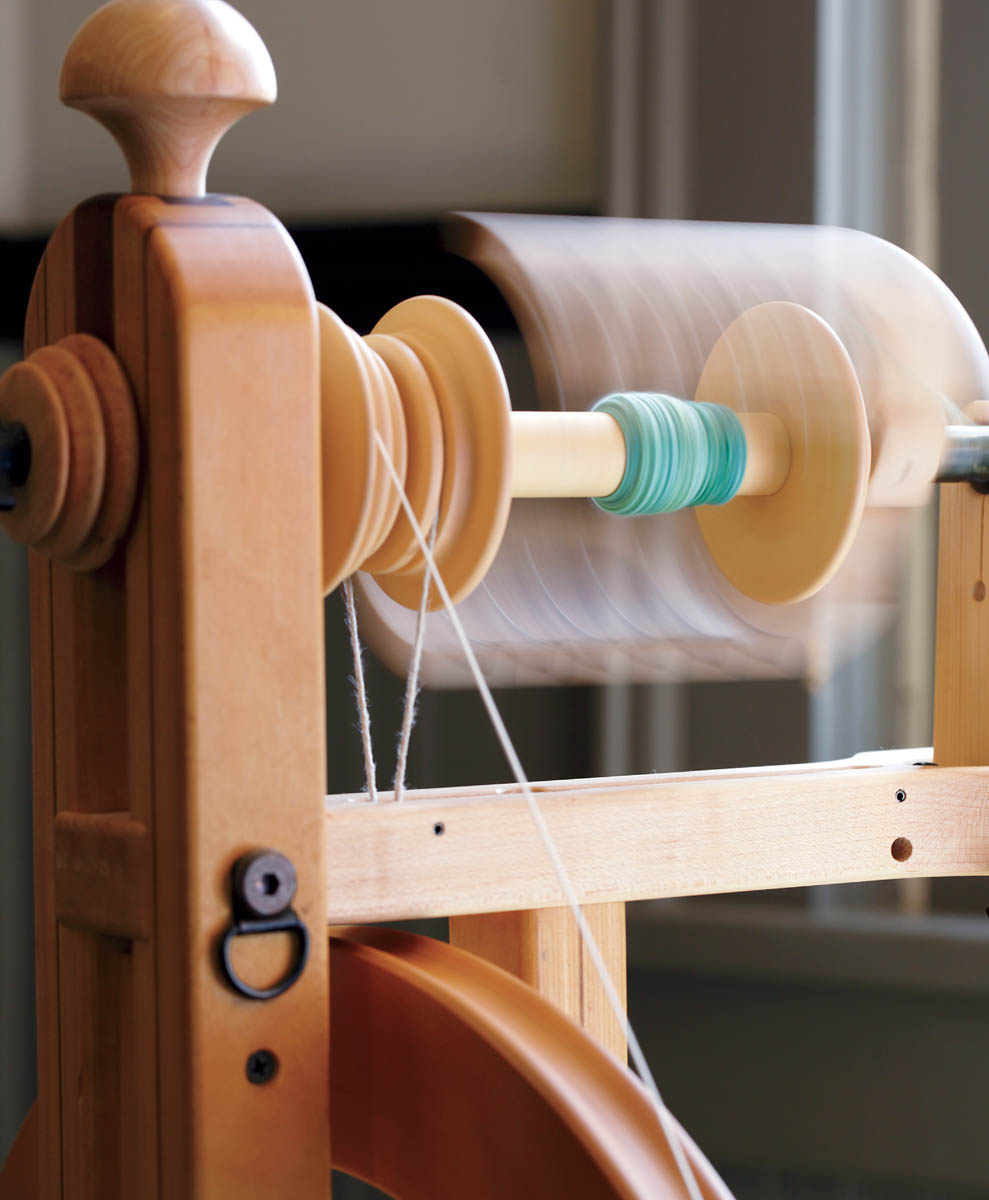
Ratios and Whorls (Pulleys):The Basics
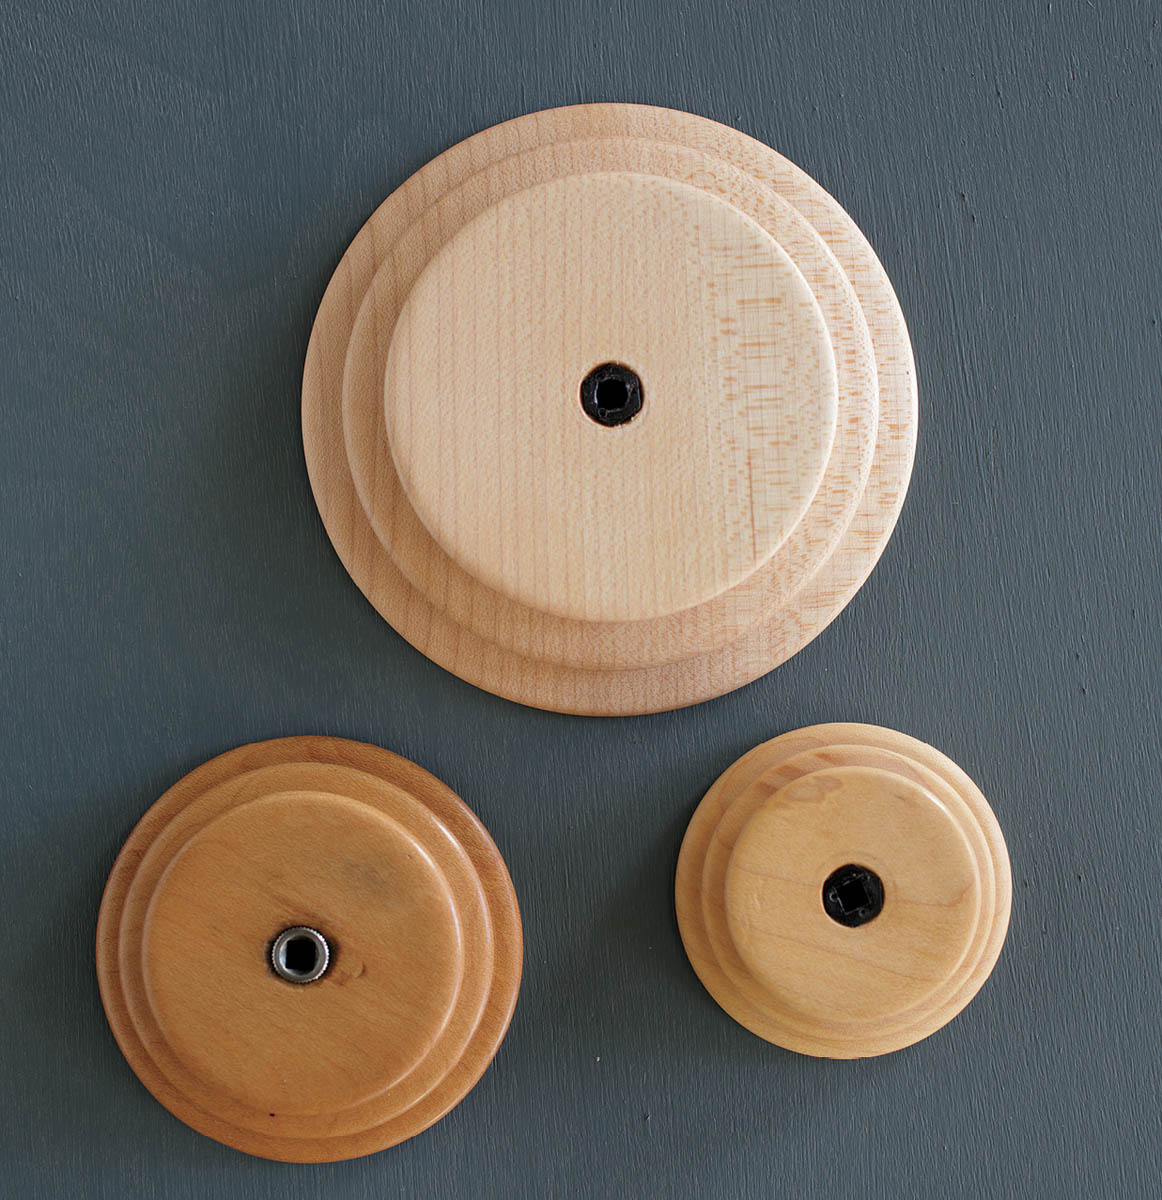
I admit that when I first read a description in a spinning magazine that threw around numbers, like 10:1, I kind of freaked out. I don’t do much math, and I don’t feel comfortable with math things. But really, all those numbers are doing is describing the whorls (also called pulleys) available for your wheel. Here’s the thing: you don’t have to live by the numbers if you don’t want to. Whorls (pulleys) impart twist into your yarn. The smaller they are, the more twist goes into your yarn each time you treadle. That’s it. To make yarn, you need fiber, twist, and pull, so I say, “Yay, twist!”
The numbers in a ratio refer to how many times the flyer (or bobbin) spins with one rotation of the drive wheel. So 10:1 means that every time the drive wheel goes around once, the flyer spins 10 times. Ratios for wheels have a big range. For example, the range of standard whorls for a Schacht Matchless is 9:1 to 15:1, and extra whorls are available, taking the range from 4:1 to 21:1. The second number is always 1, referring to the single rotation of the drive wheel. The larger the first number, the smaller the whorl and the more twist you get in your yarn.
Why should you care, or even want, to change your ratios when spinning? Because they make spinning easier. They let you adjust the amount of twist in your yarn while treadling at the same rate you always do. I know I can change how slow or fast I treadle when I start making a yarn, but I almost always fall back into my standard treadling rhythm unless I am 100 percent focused on what I’m doing. So instead of having laserlike focus while spinning a bobbin of fat yarn, I think to myself that fat yarn needs less twist, so I use a lower ratio, like 6:1. When I want to spin fine, fine yarn, I need more twist, so I move to a higher ratio of 15:1. Some wheels have different whorls or pulleys to change out, whereas other wheels have multiple ratios built in; some, such as electric spinners, just have a knob to twist.
Ratio Recognition
Don’t know your ratio numbers and want to? Here’s a quick way to figure it out. Mark your drive wheel with a piece of tape. Mark one arm of your flyer with a piece of tape. Start with the tape on the drive wheel and flyer at 12 o’clock. Rotate the drive wheel and count how many times the flyer rotates during one rotation of the drive wheel. If you are trying to determine a very high ratio, you could record it with a video camera or your phone and slow the recording down to count the rotations. Do this with all of your whorls and you’ll know all of the ratios possible with your wheel.
If you don’t mind writing on your equipment, write the ratio on each of your whorls with a fine-point permanent marker.
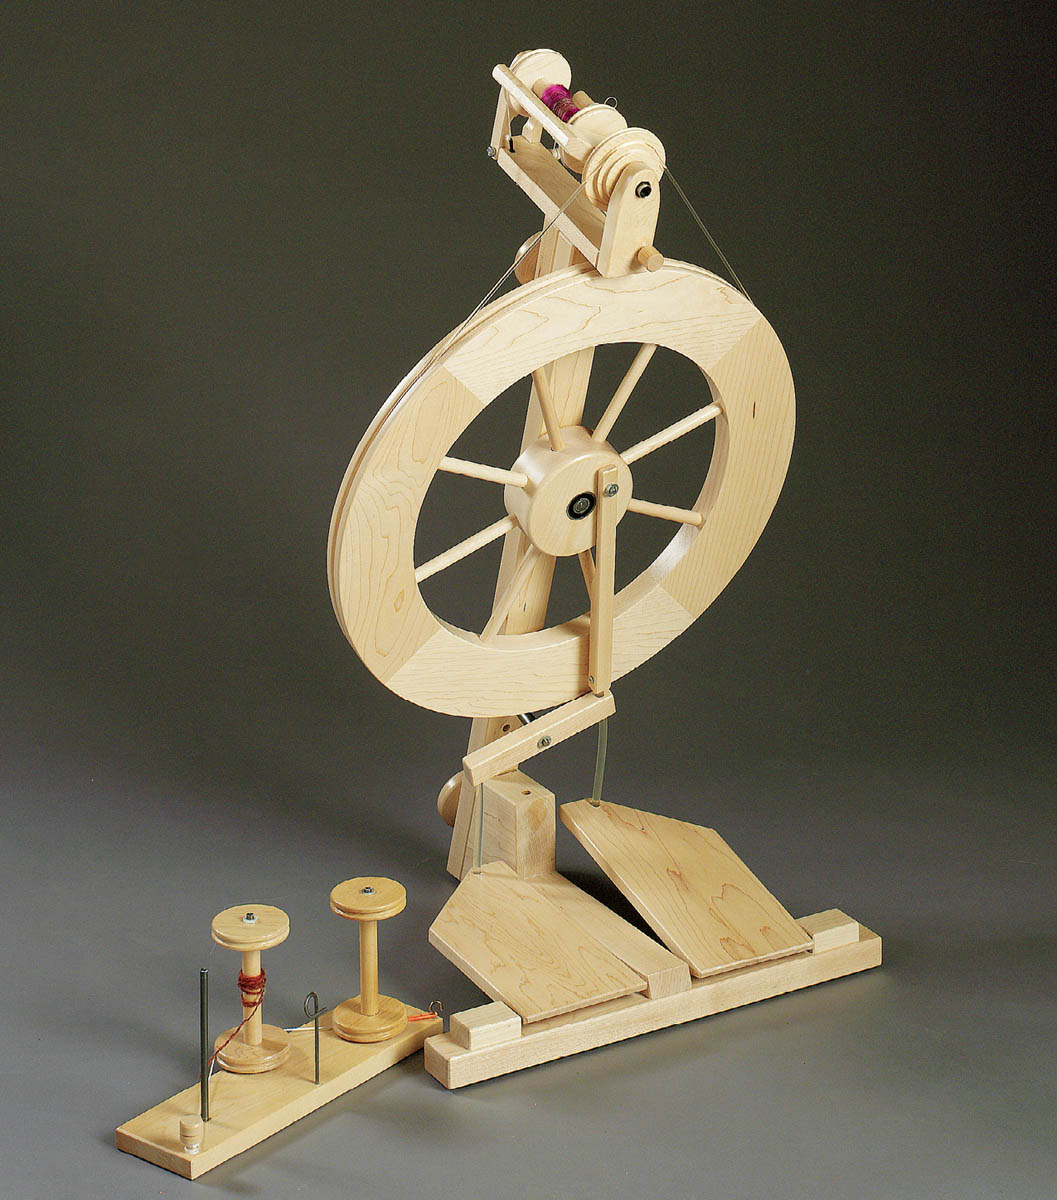
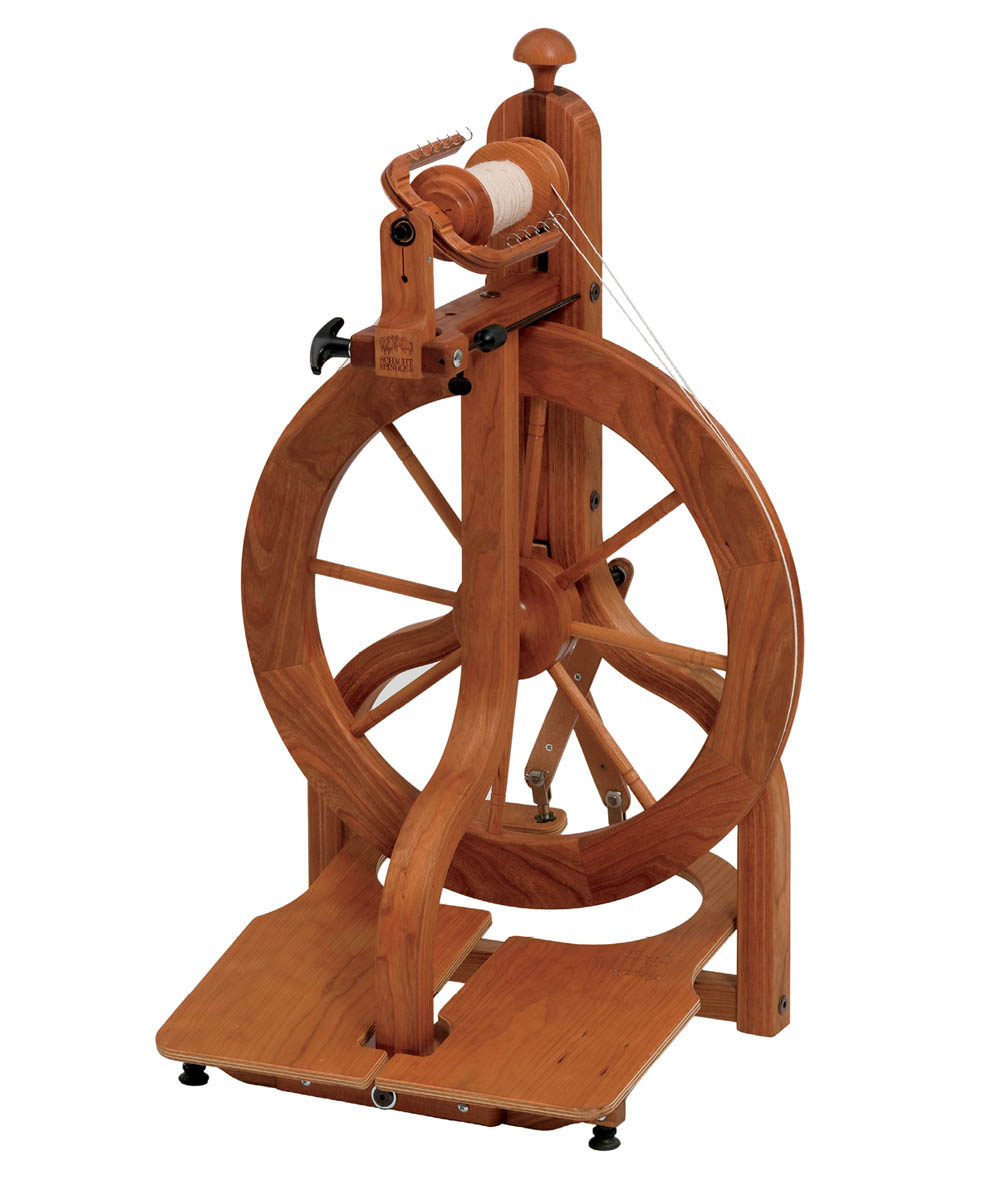
Drive Systems: They Can Make Spinning Easier
If you are having trouble drafting the type of yarn at the size you want, even after you have adjusted your wheel as much as you can, the issue may be your wheel’s drive system. Wheels are tools; they are machines, and like most machines, some are better at some things and some are just better than others. You wouldn’t use a chain saw to fine-cut a piece of wood to make a violin. It’s the same with wheels. Generally, a particular kind of drive system makes spinning a certain type of yarn easier. It’s not that it can’t be done with another drive system; any spinner can learn the skills to make almost any yarn on almost any wheel. Depending on the wheel, it may have only one drive system or it may be able to be converted to any of the three.
A double-drive system uses one long drive band that goes around the drive-wheel flyer and bobbin. There is no fine-tuning between flyer and brake; they are adjusted with a single knob within the same range. The flyer and bobbin spin at different rates to allow twist and wind-on, because the bobbin and whorl are different sizes. The bobbin is smaller, so the bobbin spins faster than the flyer. Double drive is good for medium to fine yarns and high-twist yarns.
Scotch tension is flyer led with a single-drive setup. The drive band is on the flyer, and a separate brake band is on the bobbin. When yarn winds onto the bobbin, the bobbin slows and the flyer keeps spinning for the windon. The most adjustable drive system, Scotch tension can be very finely tuned. The brake band is controlled by a tension peg. The looser the brake band, the lighter the takeup, which means more twist in your yarn before it winds on. The tighter the brake band, the stronger the takeup, which mean less twist before it winds on. Scotch tension is a great all-around drive system. With it, I find I have the most control between twist and wind-on, so I especially like it when I have a yarn that needs manipulation — like a bouclé or when I’m learning a new technique or trying a new fiber or fiber blend. Electric spinners have Scotch tension.
Irish tension is bobbin led, also with a single-drive wheel. The drive band is on the bobbin, and the brake band is on the flyer. When yarn winds onto the bobbin, the flyer stops and the bobbin keeps spinning to wind on the yarn. This tensioning system has a strong pull and is great for big yarns, low-twist yarns, textured yarns, and plying; in other words, it’s good for any type of yarn that needs to get onto the bobbin quickly. As the bobbin fills, its weight may slow down the bobbin so that it fills more slowly. To compensate, turn up the brake tension slightly and you’ll be back to your regular pull. You’ll notice that the treadles will be a little harder to push as the brake band is tightened.
Counting Treadles
Counting treadles is a technique that some spinners use all the time and some never use. I use it to help keep my singles and plied yarns consistent. Here’s how I do it:
The treadle part. I count with one foot (my right foot, even when I use a double-treadle wheel). Every time I push down with my right foot, I count up from one.
The hand part. Hold them still — that’s it. While you count, an amount of twist is gathering in a length of fiber. If your hand moves, that changes, thus changing the consistency.
Putting it all together. I start counting right after I wind on my last length. My feet never stop treadling at the same rate. My pull back is usually 1, then I keep counting for the number I’ve set, say 2 or 3, then I wind on for another 3 or 4. Then I start again with 1 as I pull back. I repeat this two or three times before I do a ply-back test to see if my singles or ply is where I want it twistwise. If my yarn needs more twist, I add treadles; if it needs less, I treadle less, then check with a ply-back test again.
When I have my magic treadle number, and I’ve written it down, I use it until I feel like I have the rhythm. I then stop counting and just spin with the rhythm. Some spinners count the whole time they’re spinning. If I get up from my wheel for any length of time, when I return to spinning, I count for a minute or two to find my rhythm again.
How to Draft Consistently
My best advice for drafting consistency is to find your groove. Do sampling with some different wheel adjustments. Try different treadle counts, different lengths of draft, different amounts of twist and fiber. Play with purpose for a bit and find what it takes to make the yarn you want to spin. Make sure to write down your experiments, or at least the ones you decide to use to spin. Remember, the goal is flow, constant relaxed motion. If you feel like you’re fighting your wheel to get the yarn you want, something isn’t right.
The key to consistency is to do the same thing the same way every time, or as close to every time as you can. Pinch the same amount of fiber, while drafting the same distance, while treadling the same amount, with your wheel set up the same way for all the yarn for a particular project. That’s it. It’s as easy or complicated as you want to make it. Check your yarn every so often with a ply-back sample (see How to Make a Ply-Back Sample, below) or another way of measuring. You can stress the minutiae, or you can find your groove and flow.
Semi-Worsted and Semi-Woolen Throwdown! Or, a Plea for Sanity
What do semi-worsted and semi-woolen mean? I hear these terms used all the time, and I always ask the spinner to explain what he or she means. Yes, even if it’s in an article or a book, I look for a detailed explanation. I’ve decided that they mean something different to every spinner. Both start out with the spinner drafting in a style different from the preparation; for example, taking top, which is a worsted preparation, and drafting it woolen-style by letting twist into the drafting triangle. Is this semi-woolen or semi-worsted? I’ve heard it emphatically called both. Similarly, taking a woolen preparation, such as a roving or batt, and drafting it worsted, with no twist in the drafting triangle, may be called either semi-woolen or semi-worsted.
My advice is to just say what you’re doing, and don’t confuse the issue. For instance, say, “I’m spinning top woolen” or “I’m spinning roving worsted.” Then there is no confusion — none.
I have a dastardly plan to confuse things even more by making up abbreviations like WLN/WST (a woolen draft on a worsted prep) and WST/WLN (a worsted draft on a woolen prep). No? More confusing, or is it genius?
How to Make a Ply-Back Sample
A ply-back sample is an easy way to spot-check that your spinning is consistent. Simply put, it’s a length of fresh yarn pulled from the active bobbin that is allowed to twist (ply) back on itself. Here’s how to do it:
After spinning for two or three minutes, stop and pull about 12 inches of yarn off the bobbin, double it, and let it twist on itself. This little length of yarn approximates what the singles you are spinning would look like as a balanced 2-ply. Do you like it? If yes, break off your sample, knot the two loose ends together, and save it. You can hang it on an easy-to-access knob on your wheel, or attach it to your wheel on a piece of card stock or index card.
Get back to your spinning, and then, two or three times while you’re spinning a bobbin full of yarn, check your singles by doing a ply-back sample (without breaking it off) against the plyback sample you’ve saved. If you don’t want to break off your original sample, you can measure the bumps per inch (see here) and instead jot down that information to check against later.
If you don’t like the bit of yarn your ply-back sample makes, first check what it would look like with both more and less ply twist, by manually adding or subtracting twist to the sample in your hand. Still don’t like it? Spin more yarn with a different amount of twist, and try the ply-back sample again, until you have a sample you like.